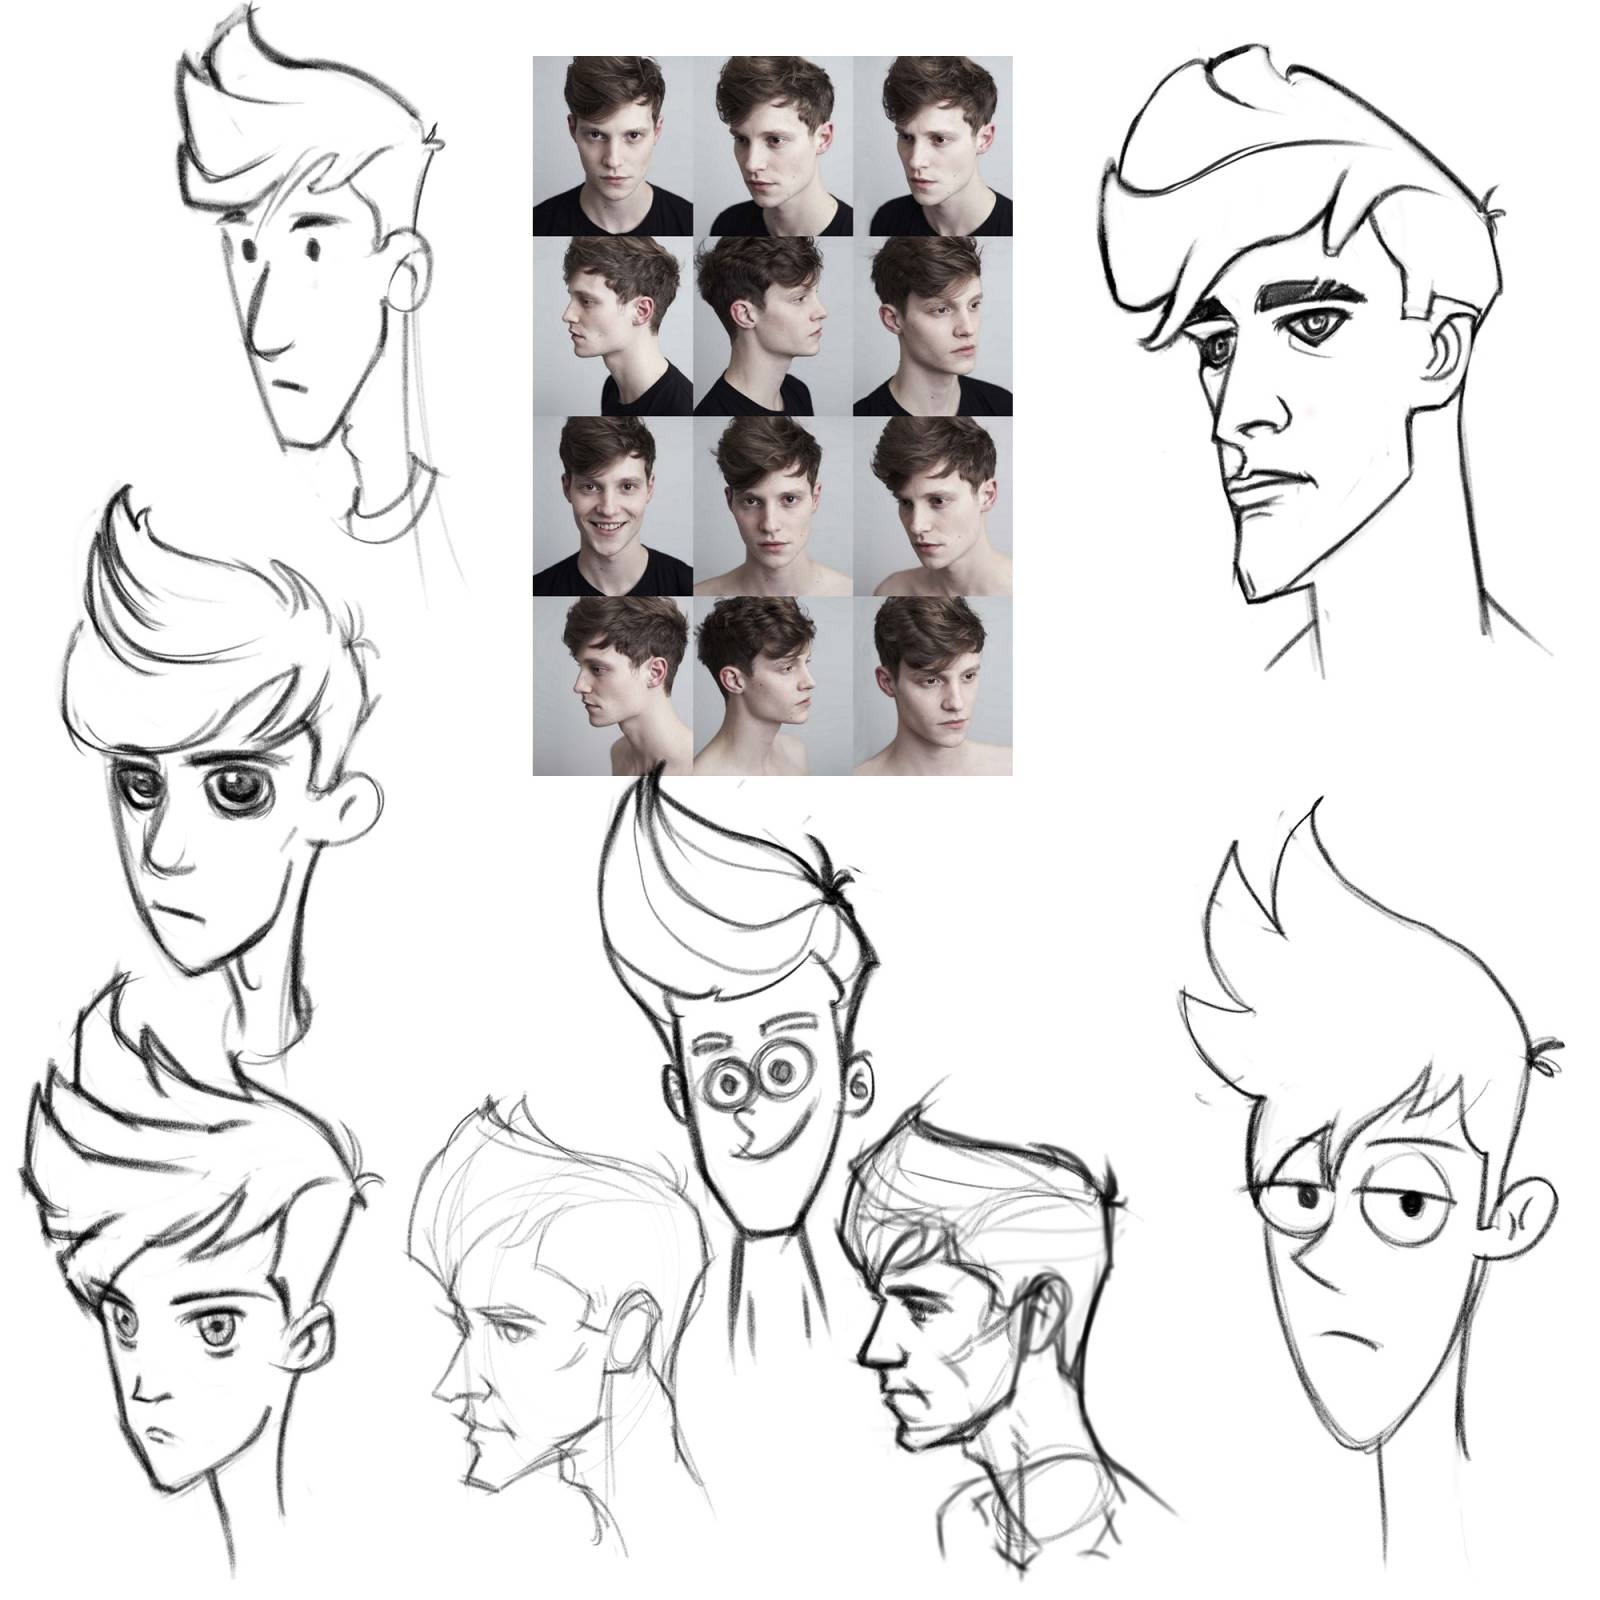
Likeness is a marker that we hope to achieve great success with quickly in art school. It is the gauge for which we judge the academic basics and how to course correct them for each individual. During this time of training, while we do not really have life drawing at our disposal, we will have to mostly rely upon photography to help us with our training.
One of the biggest luxuries of life drawing training is the ability to move anywhere at any time around the model in the viewing perimeter to resolve shape and form issues that cannot be easily interpreted from the view the artist has taken.
One misunderstanding for so many is thinking that the features are what constitute the likeness of someone when that is a secondary, possibly tertiary element of importance.
The primary shapes that help us are boundary shapes, bony landmarks, and hair growth patterns, or more shapes. We recognize someone we might know from far away; we do not need these minute details to recognize who they are.
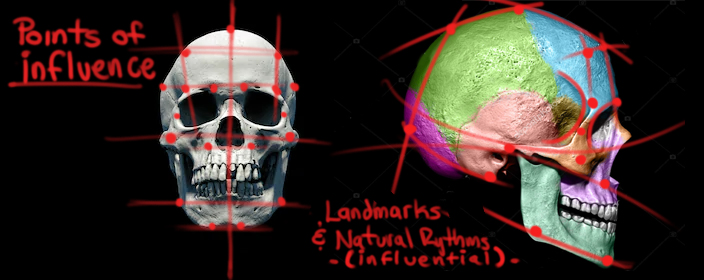
The next set of shapes are structural, designed into the skeletal system, in this case, the internal structure of the skeleton. Instead of just the outer boundary, the forward protruding skeletal structure is the next contained set of shapes we visually identify with.
The final set of shapes we place in the image are the boundaries for the features. They are much easier to place because the perspective of the skull has been secured and firmly established through the articulation of the landmarks throughout the skull shape.
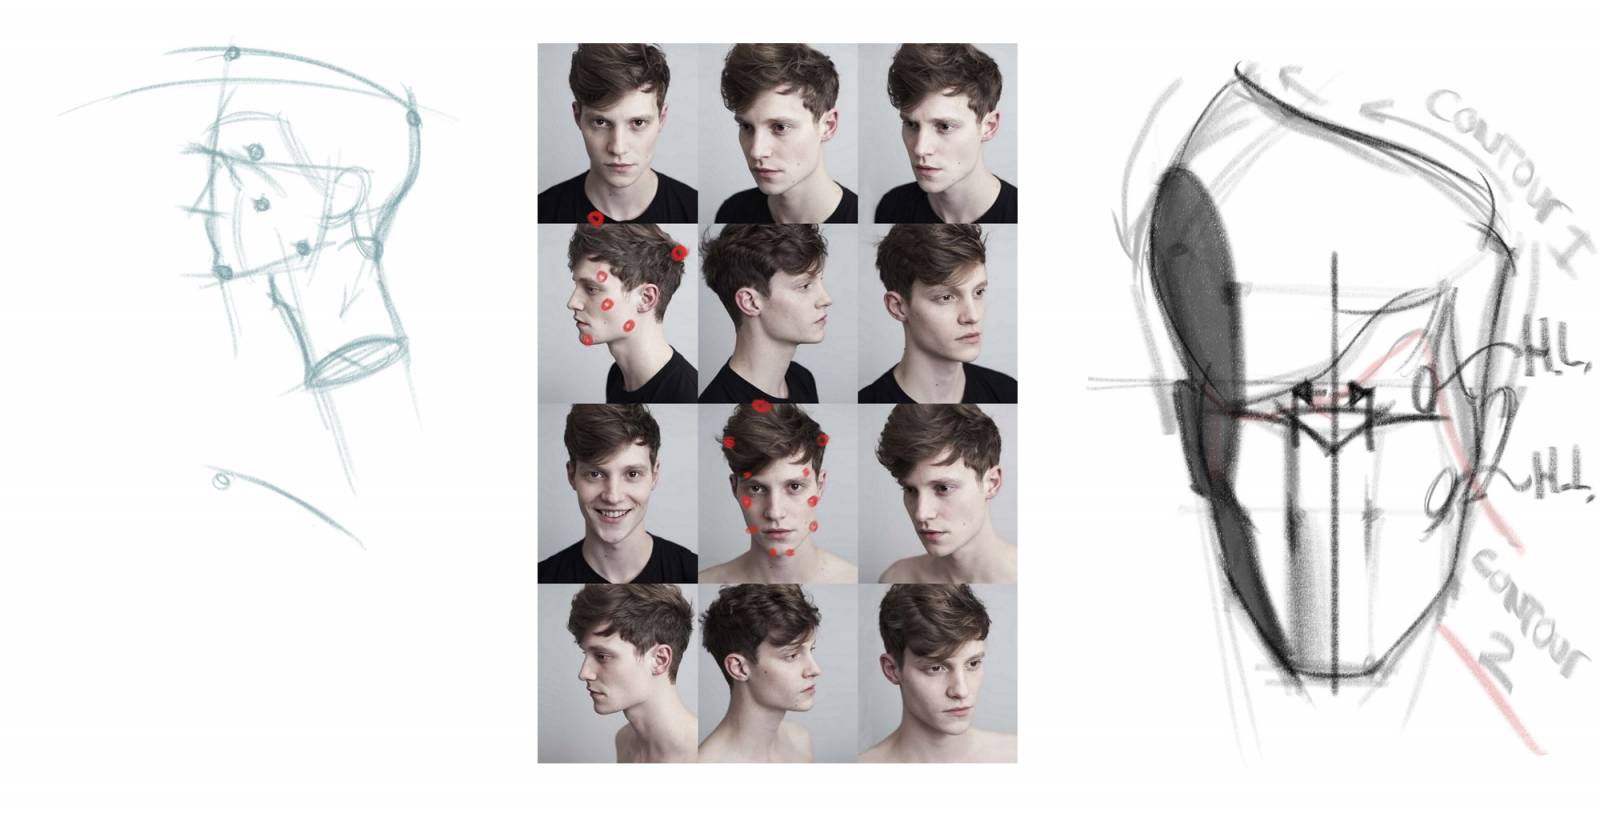
The features are important as well, but not the most important of all the shapes we are in search of, the landmarks of the skull are more concerning. They are the foundation and containers for the features and without them the features float within the head-shape. Here is a page of examples of the vector points representing peaks on the skull in the various head tilts. There are the obvious line connections between the points, the logical boundaries, but there are also the various angles that each point is relative to the other points within the contained space, a quick triangulation between abstract points is never a bad idea to minutely adjust the landmarks relative to each other.
While the features are important, it is more important to have the volumes established so that when the features are drawn, they have a built in contour indicative of the volumes they sit on top (nose, ears, lips) of or sit within (eyes in sockets, teeth and tongue within the mouth cavity).
Because you are working from photos and might not have the luxury of any other angle, like the example above, you will then have to include the hair shape in your design. To do this, we think of the skull as having two contours, the outer and inner contour. The inner contour separates the hair mass from the face mass and carves out the distinct edge boundaries we each have for a hairline.
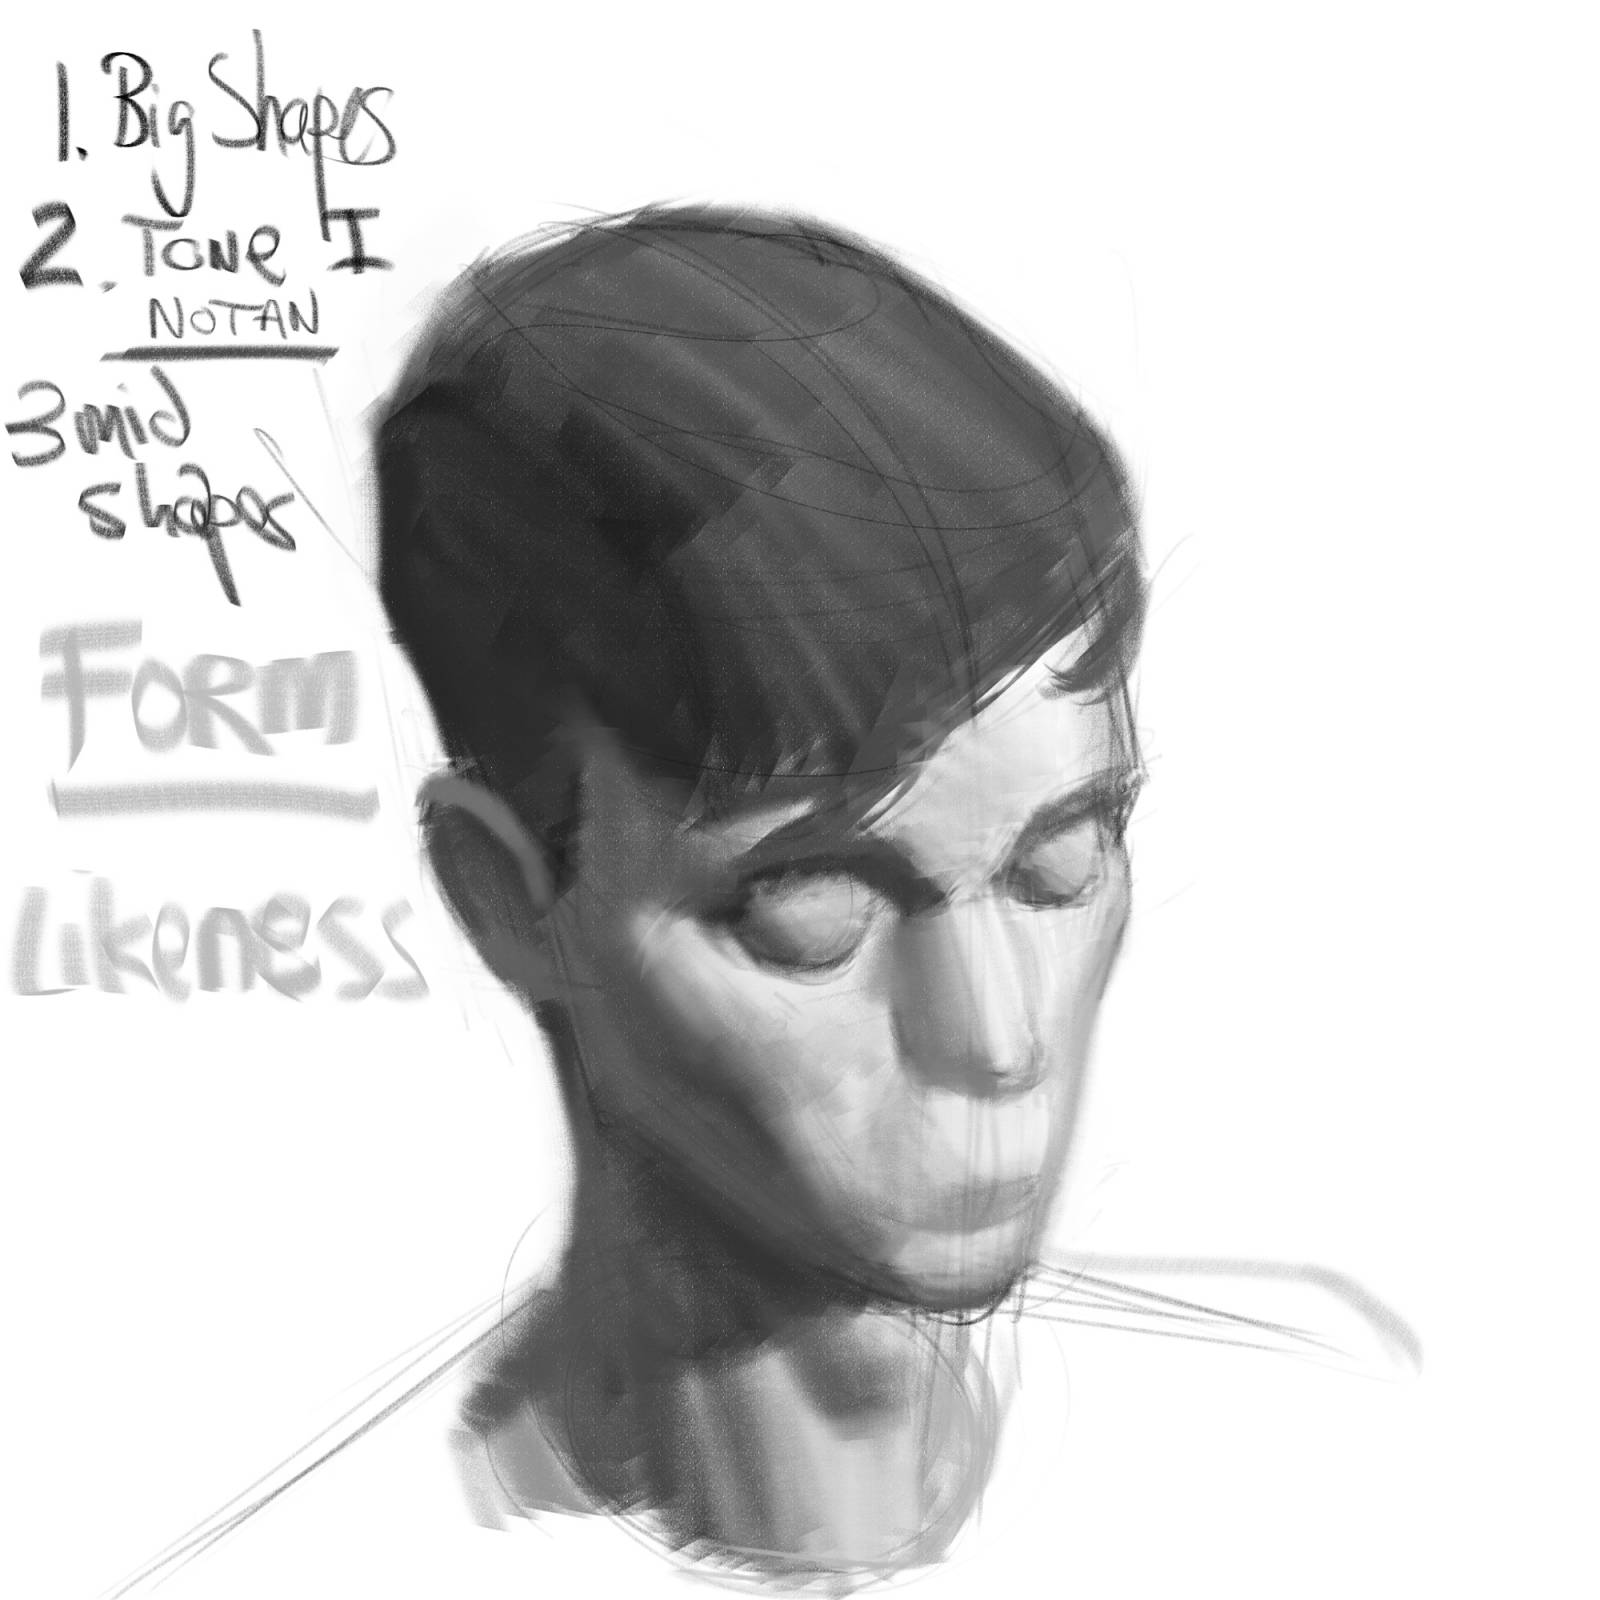
Good practice is to spend just enough time to map out the skull and hair masses, then shade them with the lighting conditions relative to the image you are copying from. Gradate the terminator according to the intensity of the light source and the edge forms the terminator sits upon. These bigger forms will immediately read like the sitter without the need for the features to be delineated. This is good. When the features are placed, they will adhere quite well if all the lines in the design regard the forms previously indicated.
If we memorize these larger bony and hair shape landmarks, and their relative distance from one another, we can draw the skull from various angles without difficulty. The most difficult aspect of figure invention is knowing the range of flexibility the individual has to create the correct emotional distortions they would have in their personal expressions. But, in a sequential situation, time is a factor, and these subtle nuances, unless previously recorded for playback are going to be overlooked and possibly mishandled, and to be expected.
The big shapes first, their form design, then the smaller shapes within and then their form design, and finally the smallest shapes within those shapes, and their form design relative to their containers.
Likeness reminds us just how important shape and form drawing, perspective, and anatomy is, how they relate to one another, and without one the others are a high-minded guessing game until we hope we place them in correctly, or default to a trick or style choice to finish it up, usually wrong but looks cool anyway.
Fear not, likeness is not difficult to achieve if you study these many different things together at once. Do not treat them as separate subjects and learn how they relate, use the limited tools needed to accomplish the lessons, and fine tune in isolation to work out technical problems that are making it difficult to accomplish the immediate goals.
Study the skull for its design, then look for the landmarks within different people, and ignore the features for this exercise. Get in the habit of looking past the features to the forms they sit upon, which enhances or plays them down the way we see them and know the person to be.
When you finish your studies, try some invented drawings of the same individual using the landmark system to set up the larger shapes. Control the skull before adding the details and the rest is not difficult to do.
More about the smaller shapes in another installment. Stay safe and elevate the skills.
If you memorize the larger shapes, it can be applied to any kind of portrait, regardless of what dialect you draw in.


Wicked video! And the exercises look really helpful as well. Half the time I feel like I get by on luck or tricks. So this comes at a good time as I try learning to break things down into forms and shapes.
Thank you Francesco, post up those exercises some time so we can see what came of them. 🙂
Thank you so much as always for taking the time to give us such a wealth of information Mr.Lemon! I also love the guide at the end of how much to practice this.
I’ve always been a bit jealous of artists who when i see their speed up process it seems they never take a wrong turn. They have a great image throughout and the video is them adding more gorgeous detail on top. Compared to my process where I have an ok start, slowly descend to a mess and then I limp through trail and error to an unstable finish. Your surgically precise procedure is just what the doctor ordered. I was doing ink drawings JUST yesterday and I struggled like crazy to get a likeness of French Stewart.
I have 2 questions:
As someone who’s end goal is to make stylized characters for comics like the ones shown in the bottom (but also putting likenesses on animals and adding realistic shading on top), could this procedure also be done in reverse to study others stylized proportions? If so how different would the procedure be if at all?
What mediums would you recommend to get the most of this?
Thank you so much again, and stay awesome.
Hey there Zach, thank you for writing. The reverse process is a little bit different but is not difficult to do. Reverse engineering another dialect is a matter of studying the design principles used by the artist, looking at a large body of work by them and breaking it down to the relevant points they make in each design, and how they compare. This will give you a fairly descent understanding of their work and how they would make artistic decisions.
The mediums to use would be comparable to what they used. Figure that out if it isn’t already stated, or out there in some interview, if it isn’t too difficult to figure out looking at the work. But it is always easier to digest design with just a simple pen or pencil, as you are learning about boundaries, perimeters, shape spaces, and these are easy to accomplish with a drawing tool.
Thank you for the advice Ron! I really love how you break it down to actionable, achievable steps! Its makes me energized to go in and practice it. I’ve already done a few exercises from photos, though I still have a lot to learn, I’m amazed by how quickly I was able to achieve a likeness with this process. I can email them to you if you’d like but completely understand if your busy. You’ve made me passionate about figure drawing again. 🙂 Thank you so much!
ron.lemen@gmail.com I look forward to what you have made.