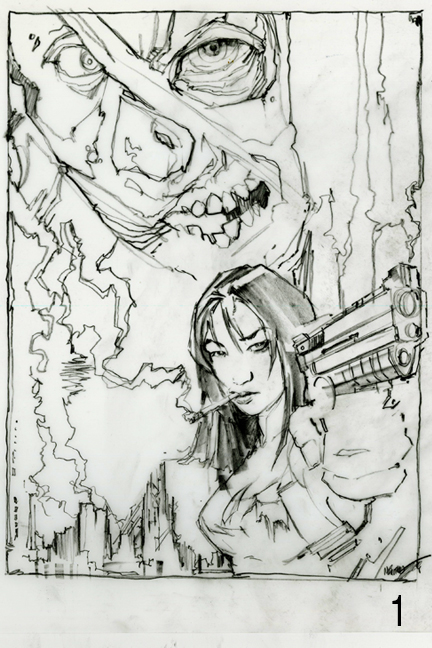
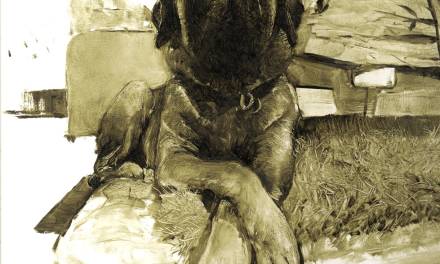
On this project I started on a Crescent cold pressed illustration board that I prepared with a mid value mixture of paynes grey and gesso. I applied the mixture using a 2 inch nylon brush. Once the ground dried thoroughly I projected my drawing using a black prisma pencil for everything except for the girls face and hand. I used a red prisma pencil for those to keep her features softer. At this point I use my sketch as a guide making adjustments on the board as I need to.
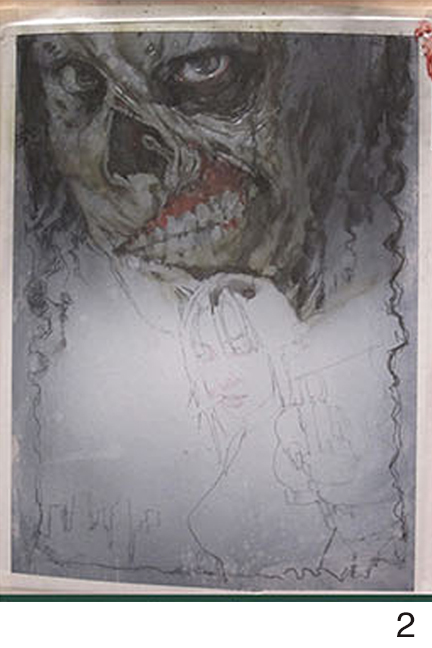
At this stage, I make sure to keep the painting very transparent. That means using a lot of water in your acrylic pigment. The key is not to lose your drawing. The opaque paint should be reserved for the highlights. The colors I started to lay down with both brush and airbrush are blue greys and reddish tints. A medium sized round white nylon brush will do if you don’t have an airbrush, just be sure to keep the paint transparent.
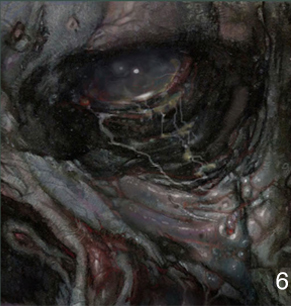
For texture I splatter the zombie with reds, blues, and greens with an old toothbrush. This tool works great for this.
After laying in a little color and texture I start to define the shapes using transparent flesh tone washes with nylon brushes. A blow dryer always comes in handy to dry the layers quickly as you start to build them up.
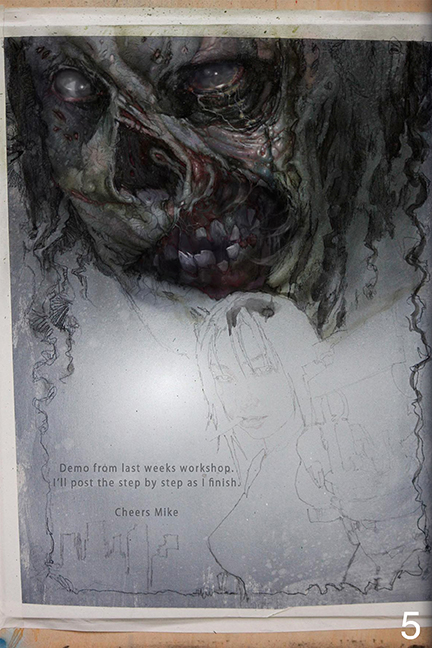
Once I have enough transparent layers of paint down, I follow up by drawing back on top with more prisma pencils. They work great on top of the acrylic washes. To create some of the translucent washes I mix gesso with acrylic to give it that creepy wet look.
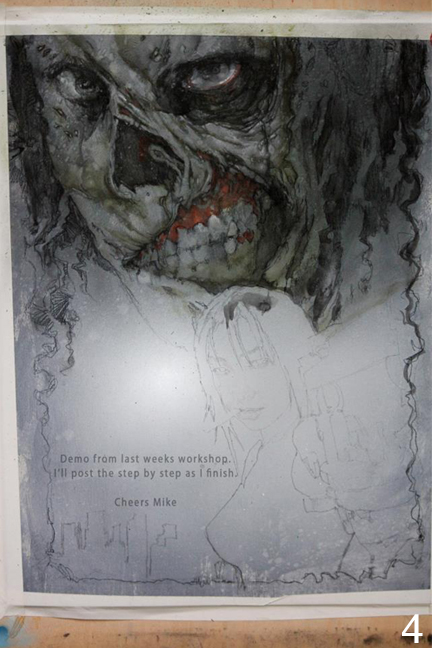
Finally, I add the finishing details with small nylon brushes and well pointed prisma pencils. For opaque highlights you can use white gouache or acrylic. Hope that helps!


Wow that gooy mess of an eye is amazing. Great rendering!
I agree w/ Kari – that eye is wicked cool and I absolutely love the creepy flesh effect. Thanks!
Hey thanks guys!!!
the details are amazing Mike. Do you have a lot of reference for the textures or a lot experience, or both? lol
Thank you CK, just experience and a lot of creepy dreams…………
cheers
Mike
please post this when u finish! looks amazing
Wicked! I can't wait to see more!
You goy it!
cheers
Mike
HI Mike THanks for taking the time out to share your process.
I was wondering what paint you were using to thin/ keep transparent when you were painting traditionally? I.e. to work it like an airbrush? It is a fluid acrylic? THanks.
That skin texture looks fantastic. can't wait to see how you finish it up.