I had a lot of requests for this tutorial, so let’s go…
First, you have to know there’s no magic trick; just time, patience and very small brushes. As always, organization is more important than anything else. It’s not complicated, it’s just long and it’s not the same thing.
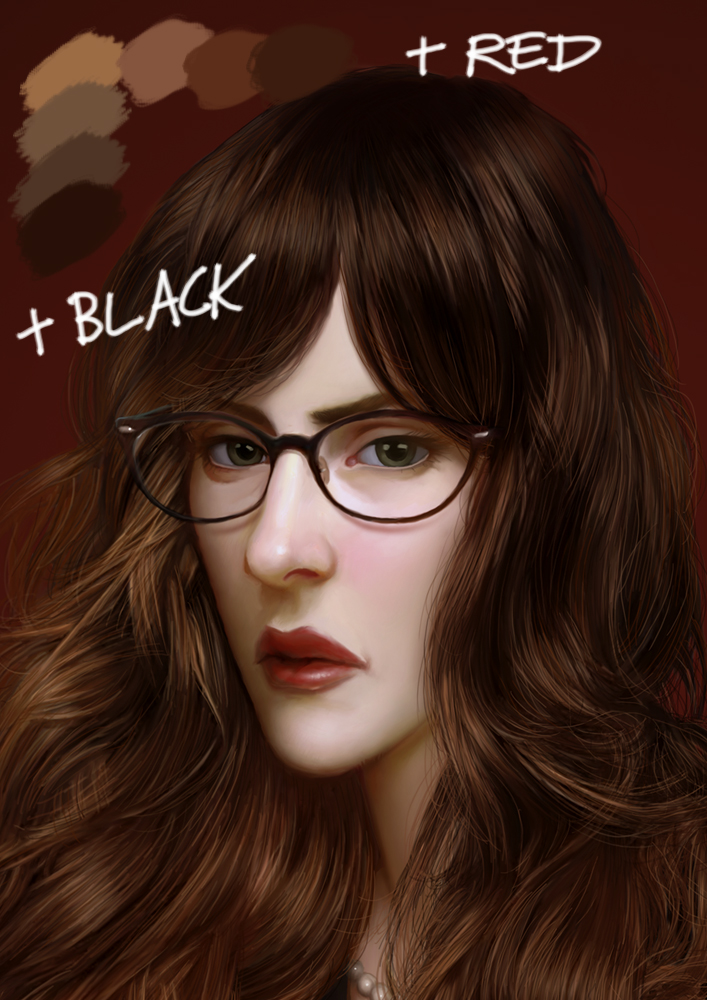
If you’re not familiar with realistic hair, use photo references. This one is a little bit difficult because of the curls and the light, so try with straight and dark hair first.
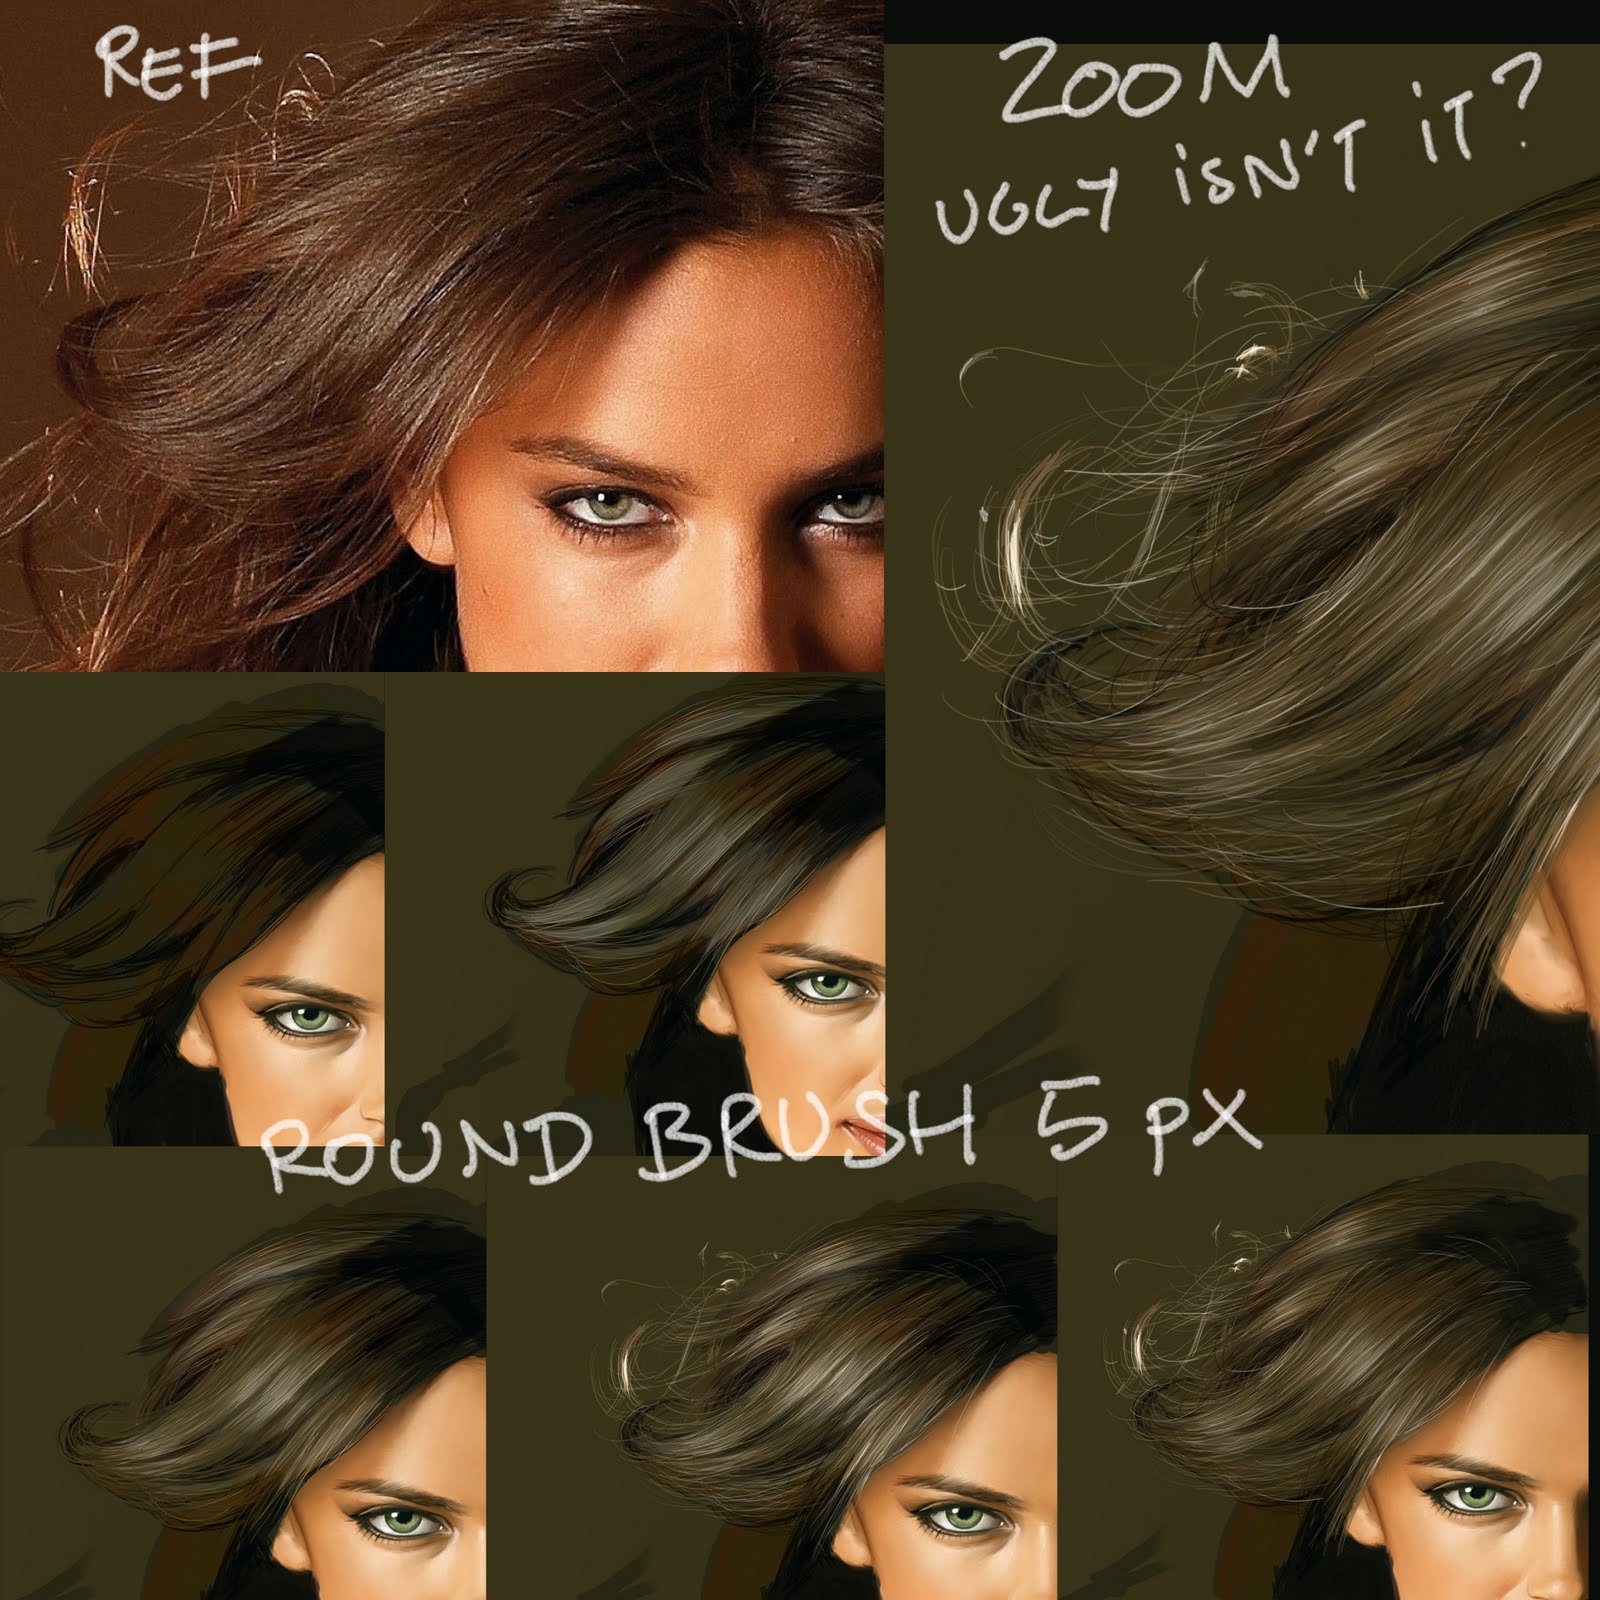
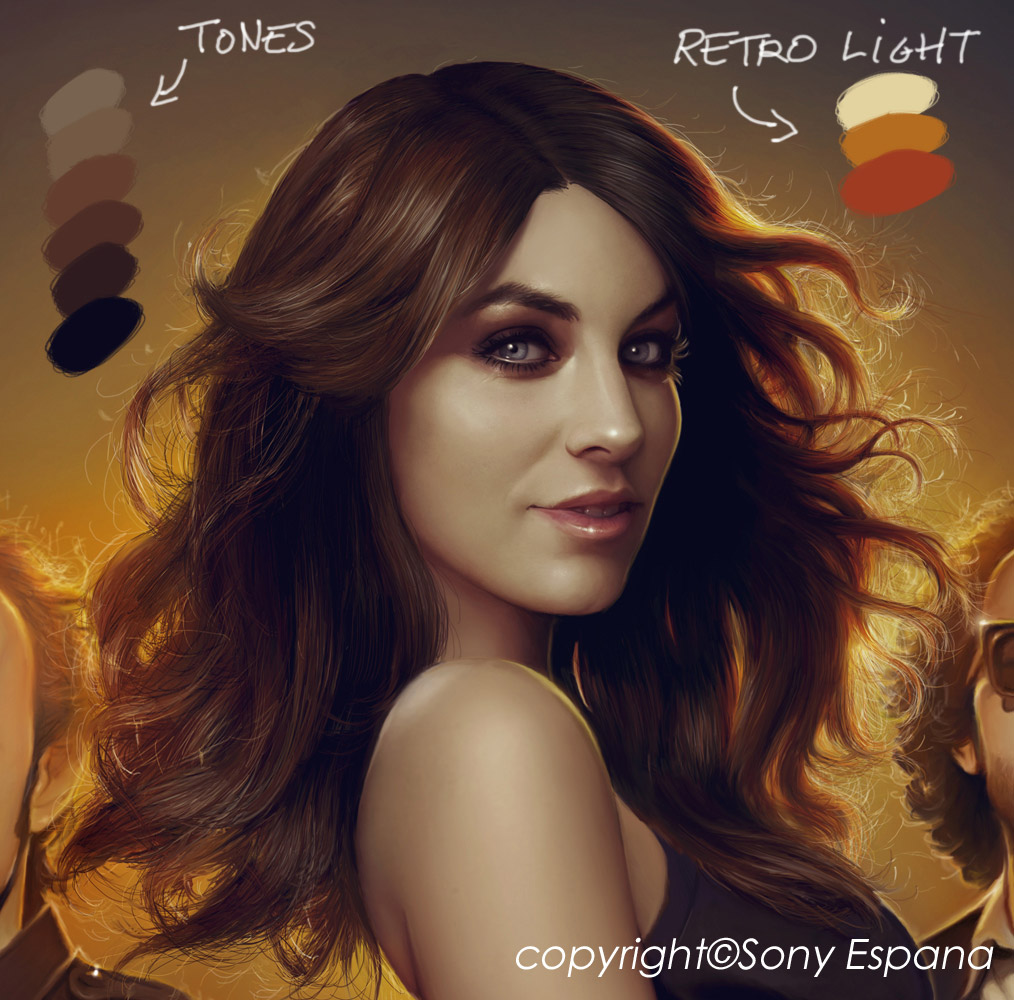
Here’s my method … I try to do separated locks of hair, then I do a flat tint of color, then I do the hair one by one, with a basic soft or hard round brush (alaways use the same size of brush) with low opacity. The colors depend on the type of hair. Keep in mind your palette has to be influenced by all the lights, so you will probably need to do several ones.
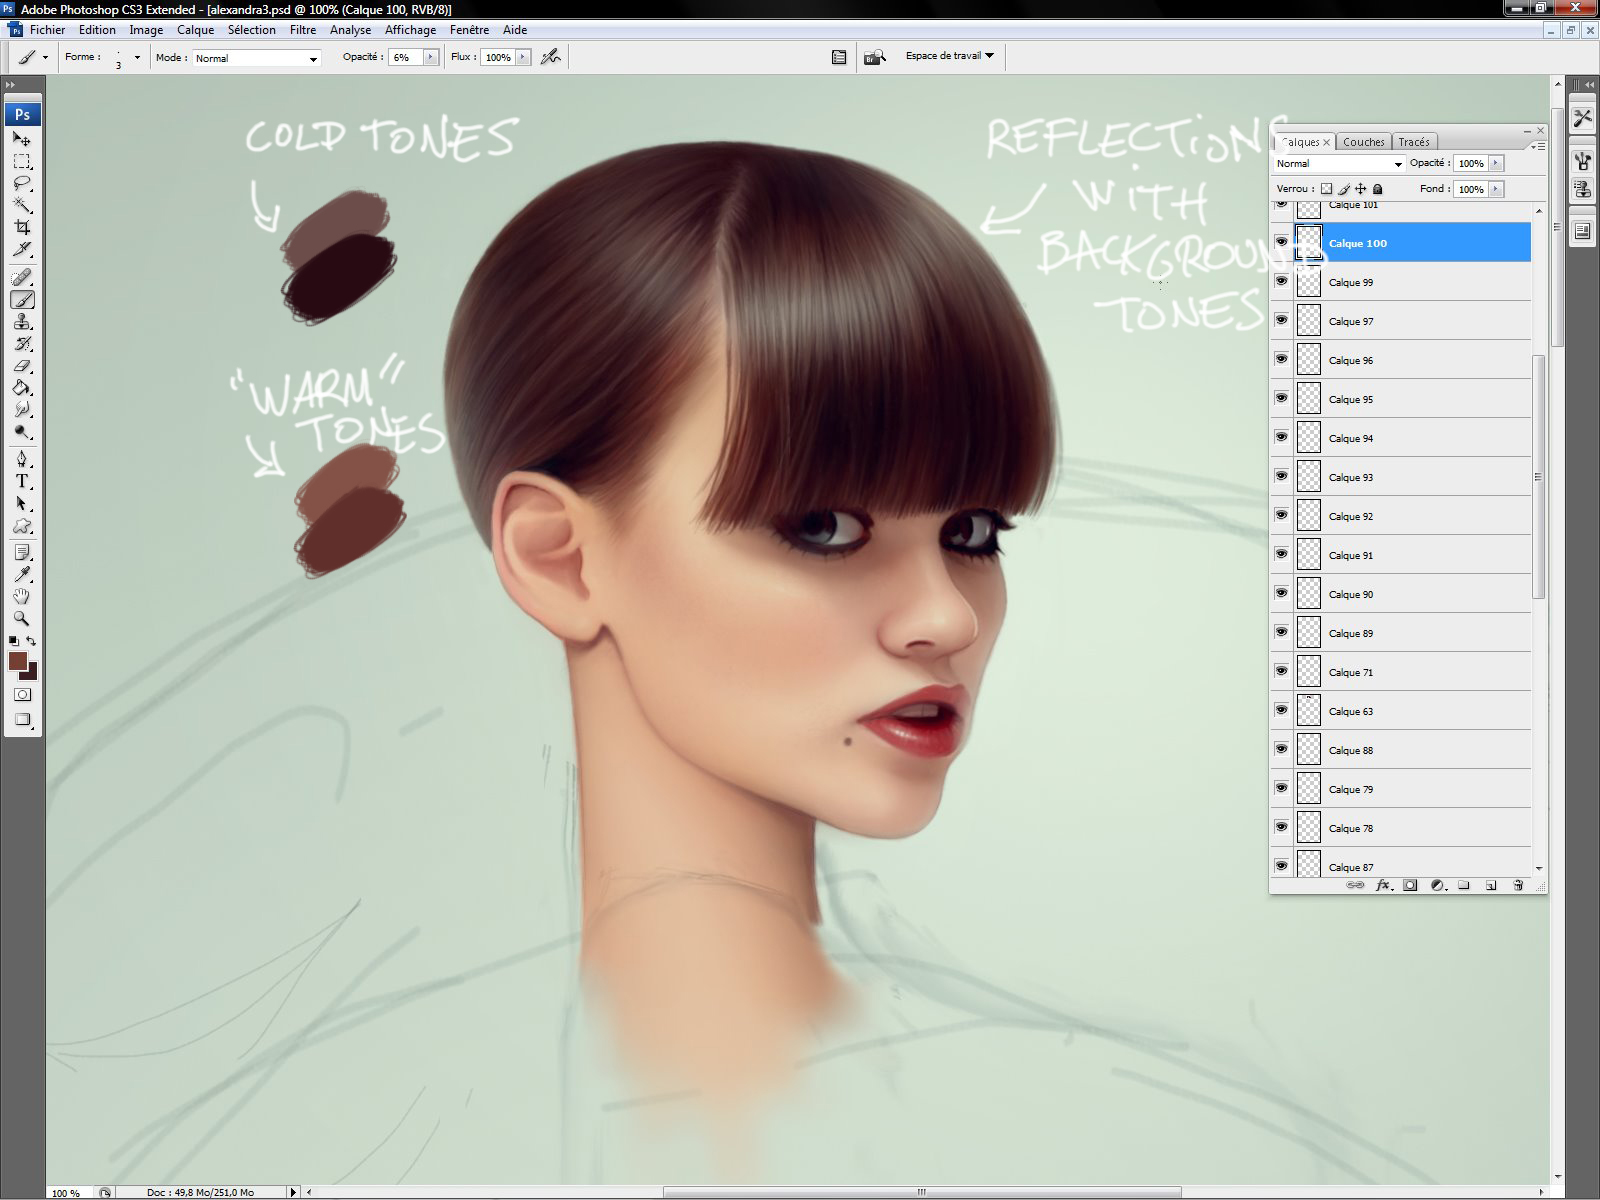
As I said, very dark hair is quicker to paint. You just have to do a very dark area than add the reflections. Use your ambiant light and your dirst light colors. Start with big locks then paint all the hair on the edge.
Add the reflections on another layer. I use to work on a lot of layers, one for each color. Don’t forget that hair cast shadows too, the separation beetween the hair and the other parts is sometimes hard to paint.
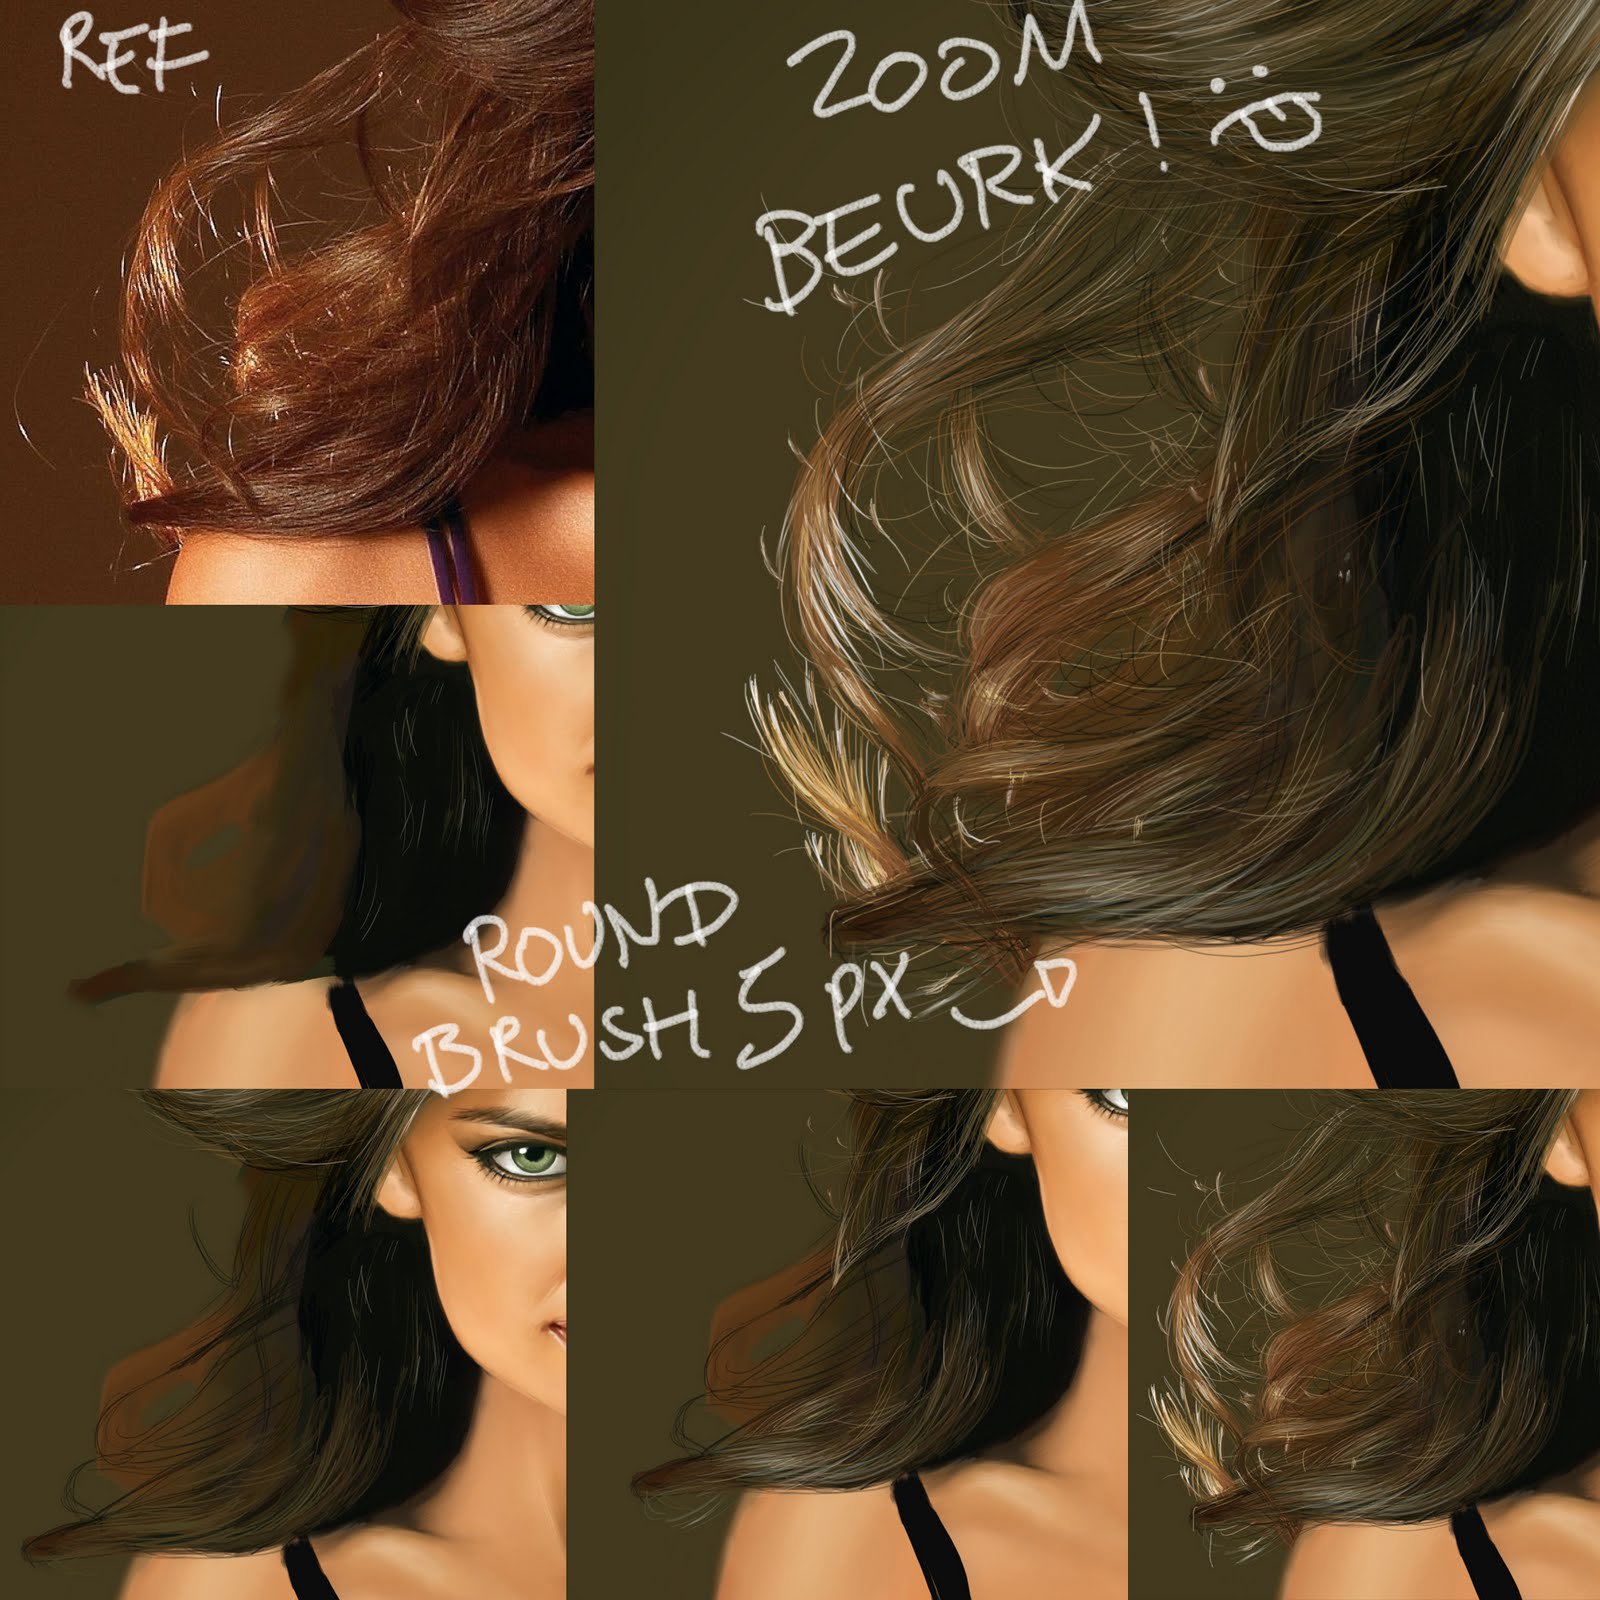
Very straight hair is quite easy to do. As a flat surface is more reflective, your reflections have to be stronger. On this one, I did several strokes with the soft round brush (with very low opacity, about 5%). I used the background color on the edge and white on the front (ambient and direct light).
The hair very close to the skin are more saturated so I did two different palette. You can emulate this transparency with an overlay type layer with the skin color.
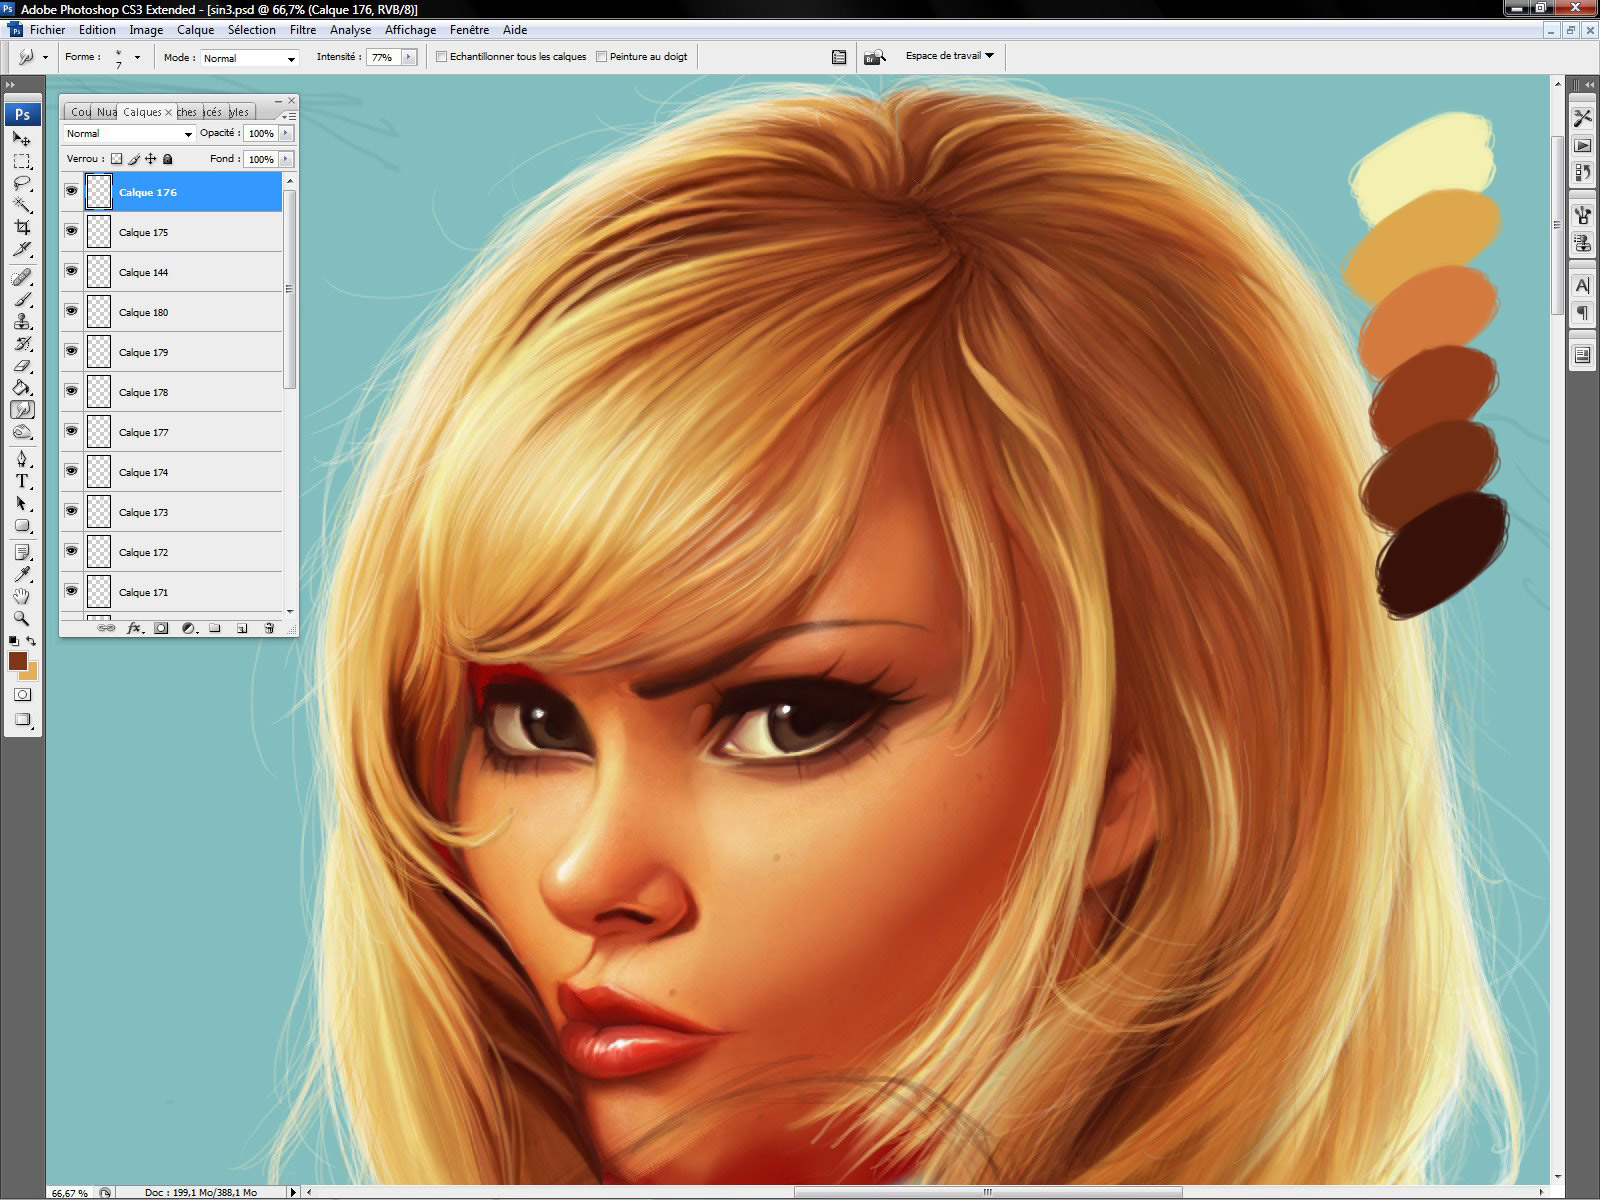
Blond haircuts are usually a real nightmare, because it’s more difficult to cheat. Think about your palette and your contrast first. The method is exactly the same but it usually takes more time. On this one, the hair was straight… Hopefully.
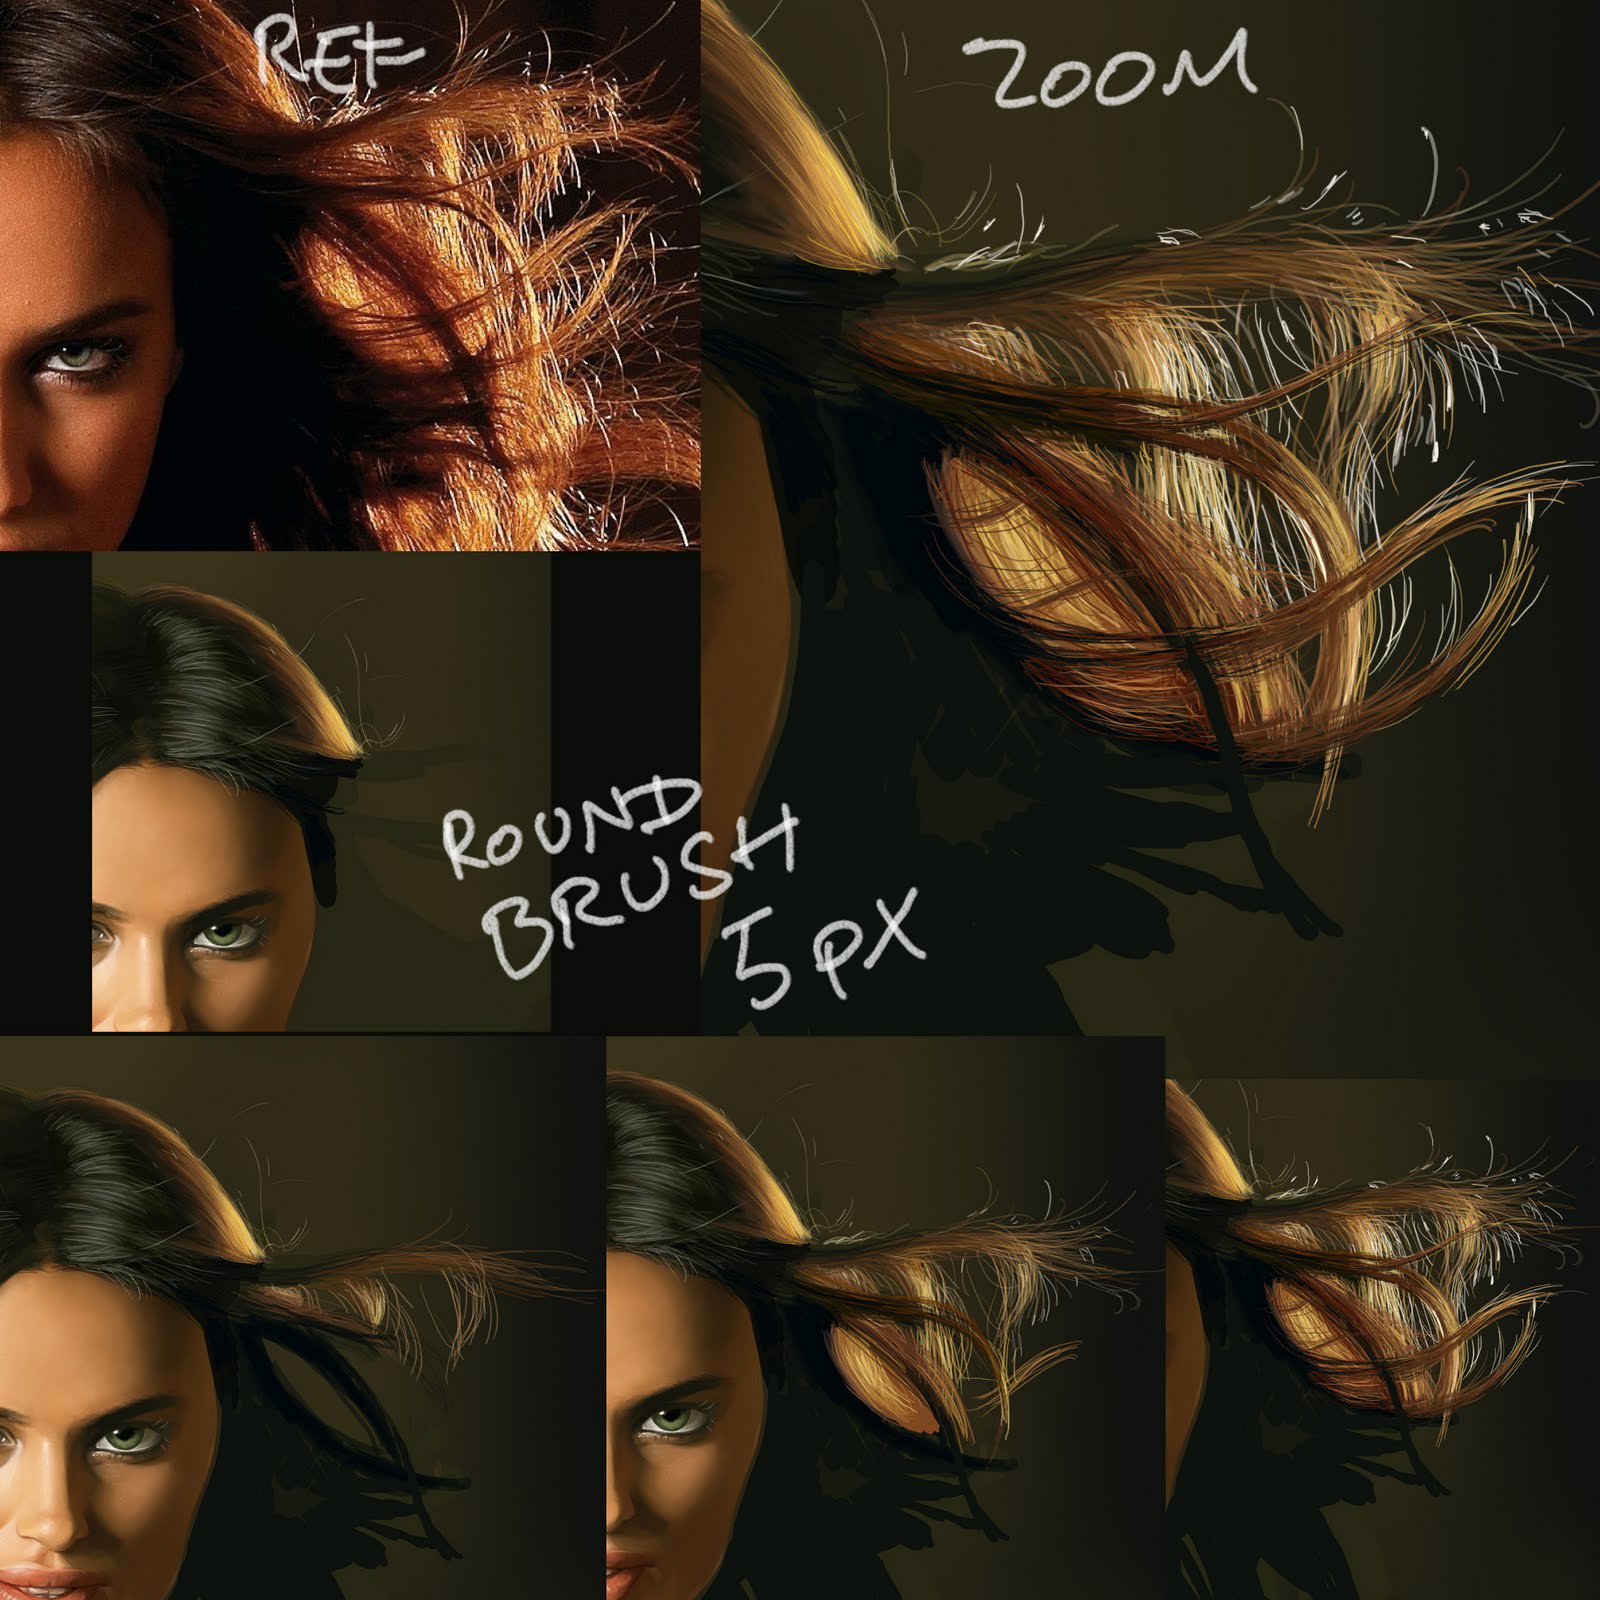
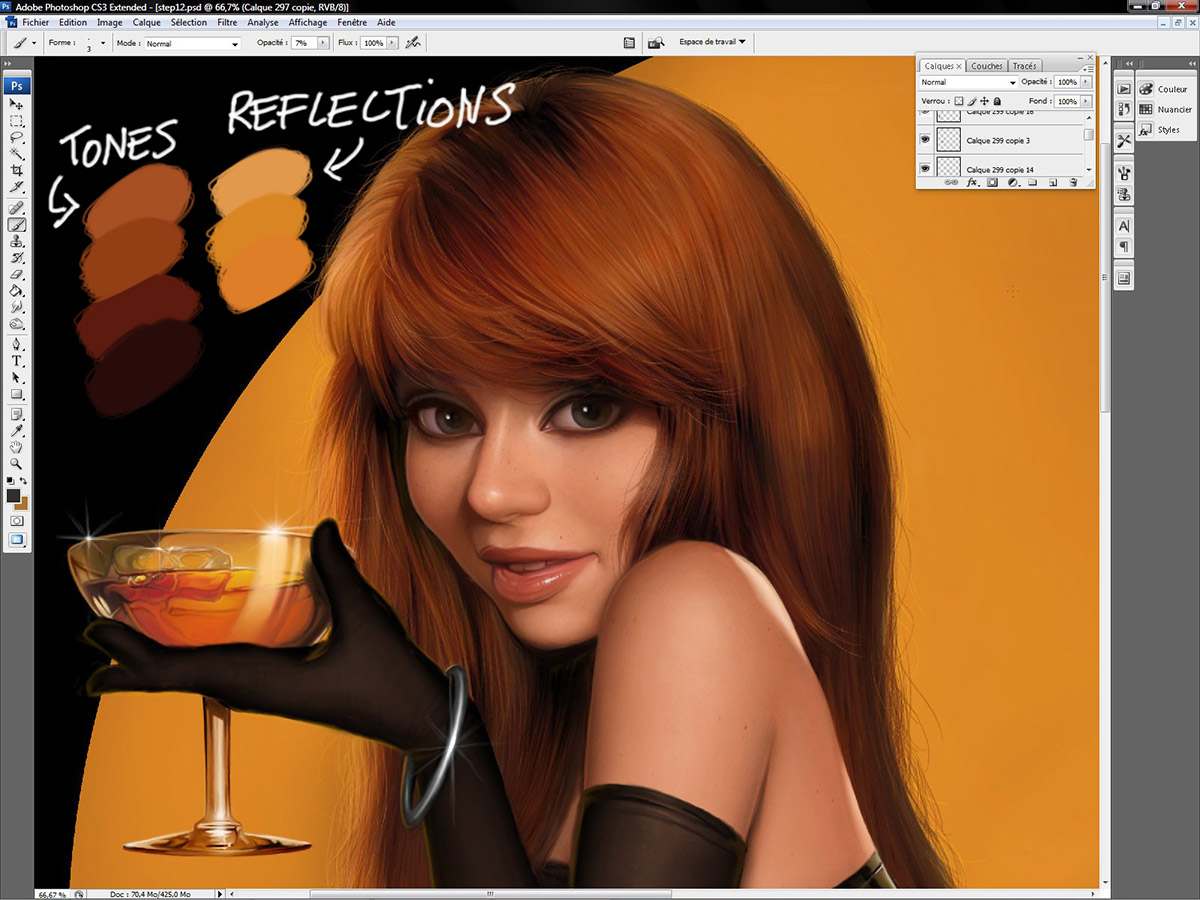
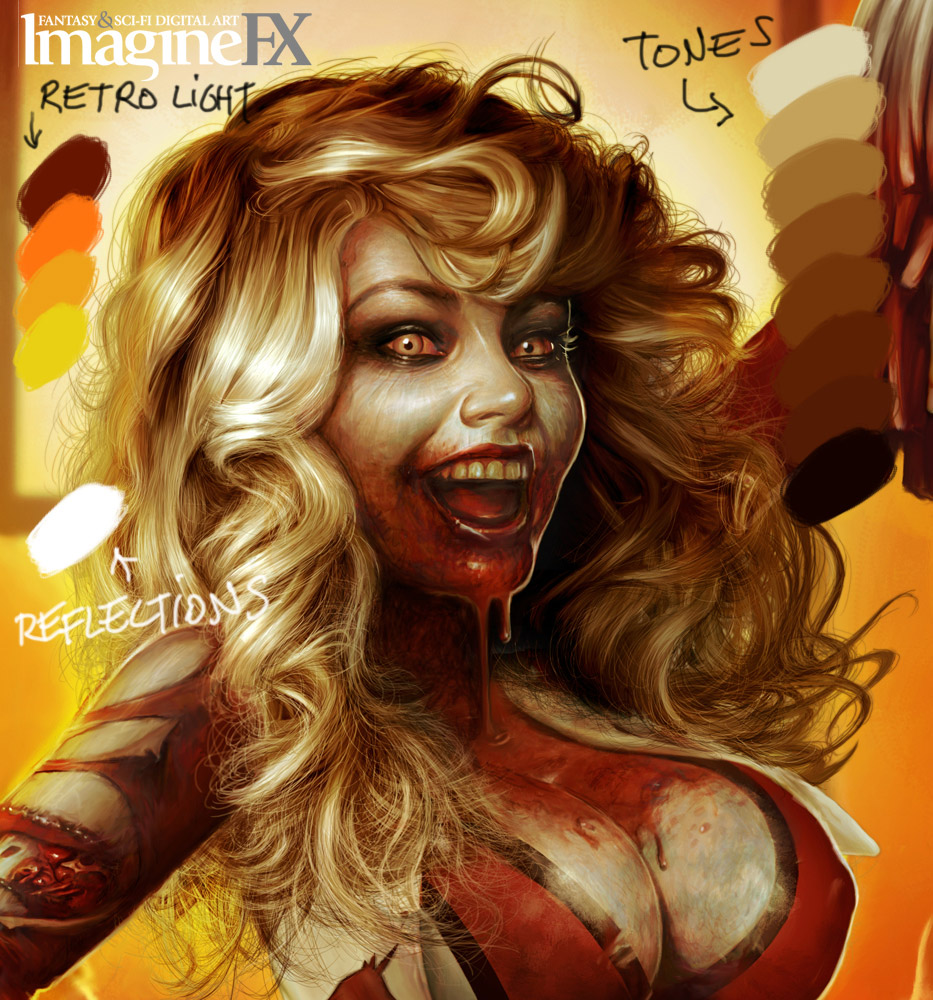
Dark red hair works like black one. Of course, you have to add more color to your palette. For bright red hair, I use to start with a flat area of middle tone, usually orange; I add the darkest and the brightest tones later. On the second one, I have another light on the left side but the palette and the gradients are still logical, from yellow to red/brown.
If you want to add some retro lights, you have to paint very saturated hair on the edge. Depending on the color of the light and the color of the hair, of course. Don’t use overlay layers on the edge, it’s not a good idea, you would need to merge those layers with the background.
If you really want to to impossible stuff, try curly blond hair with a strong light a retro light. It’s just hell.
It’s not the only way to paint hair but it’s mine. I use to paint very detailed pictures so I have to paint hair accordingly. If you’re looking for good references, try hairdressers websites or try to define the haircut’s style you want to paint (retro, dark, long, curly, …) and use google.
If you want to do more painty look like hair, a lot of pre-raphaelite did very convincing hair and could influence you. The idea is the same : Think about your palette first then add the light, think about the locks and the volumes, think about the reflections.
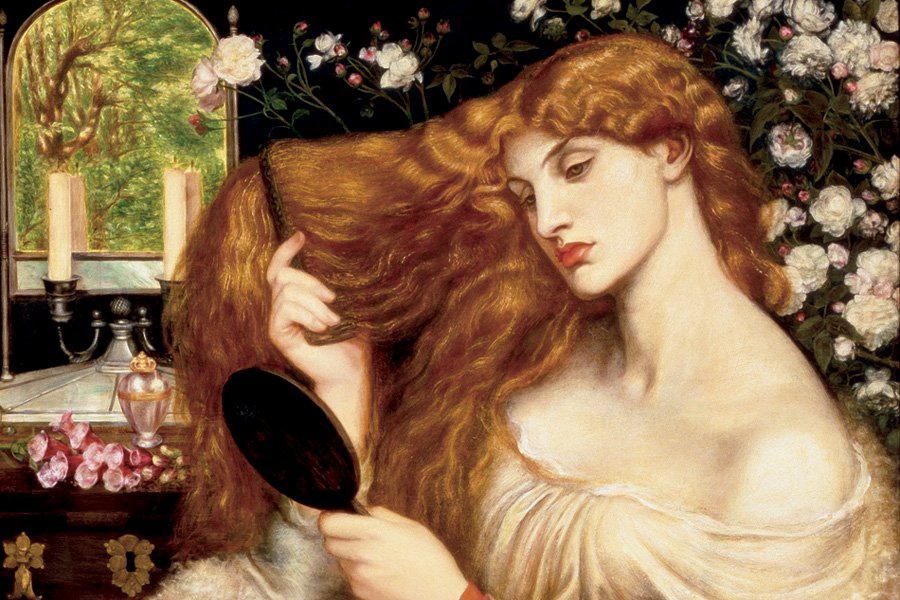 |
| Dante Gabriel Rossetti |
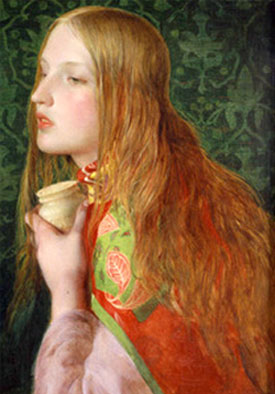 |
| Frederick Sandys |
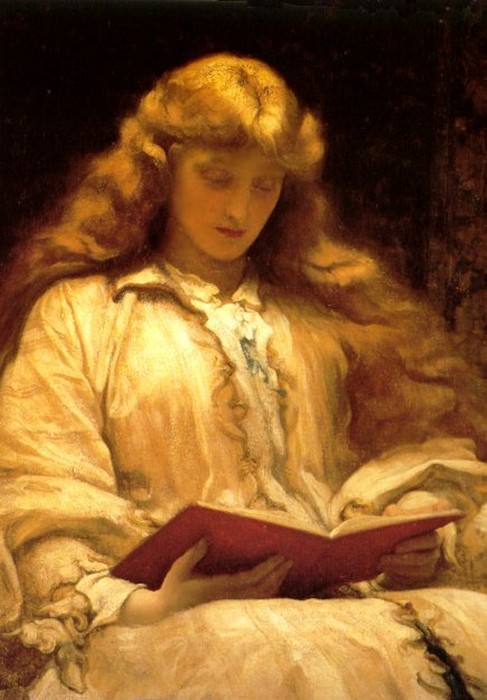 |
| Frederic Leighton |
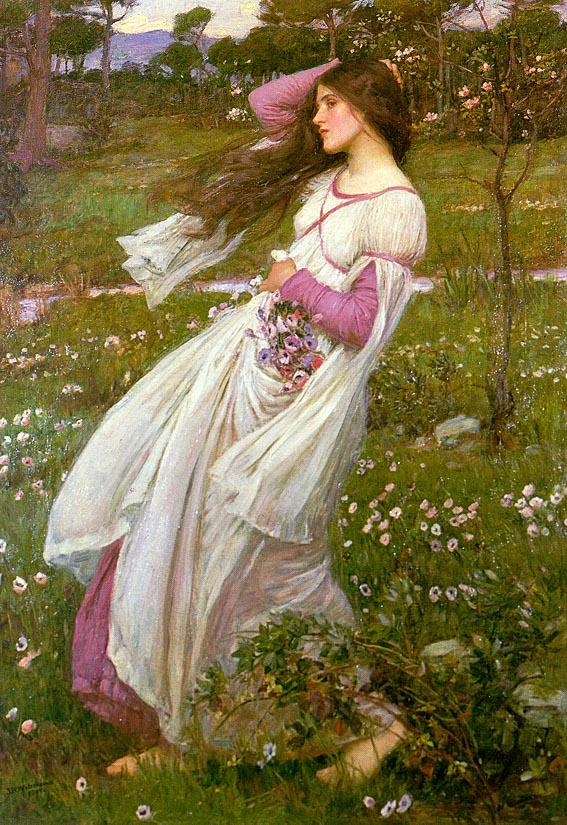 |
| John William Waterhouse |







can we see you doing all that in livestream or something? will be awesome :B
Thanks for this article
Just what I needed this morning
Always a great one, now I gotta search to see if there is a realistic eye/nose/mouth tutorial(s) here. 🙂 Thanks for this!!
Thanks for your instruction, Serge. I have a question for you that I have been wanting to ask. Do you use Cintiq or tablet? Or both? Let me know. Thanks.
If you read his mini-bio in 2D Artist it shows Serge's studio. He uses an Intuous tablet. He's tried the Cintiq at a show and wasn't a big fan of it. He uses a rather old PC and draws in 8 bit with an older version of Photoshop. That's from what I've gathered from his various articles and what he's posted on Facebook. Proving that a great artist will find a way to do incredible work with what little they have. I'm using a Cintiq with a 12 core Mac Pro, 64 GB RAM and a 500 GB 6GB/sec transfer SSD as my main and Photoshop is very, very fast. You can paint 20k or even 50k resolution paintings with hardly any noticeable loads.
Thanks a lot for the info. That's a great machine by the way.
I like this hair colour, will try on my wife , Thanks
thanks so much for taking the time to do this. what a great read!
No problem. I do storyboard art at Pixar. So we get all the cool gadgets to work with. Photoshop CS6 is really a great app. Though, for more painterly pics, Corel Painter 12 does the job. Still, 99% of the work I do is in PS.
Serge; I love it when you say there is no trick. Ass-in-chair-time and patience. But boy you must have cut your share of masking film back in the airbrush days to have that kind of patience. Great guide, and fantastic work. Thanks for showing and telling it so straight.
Thanks again for another info! You got an awesome job! I really dislike Corel Painter. It's really buggy and the latency of its is just awful plus it crashes all the time etc… I was going to give up the Painter. I guess I need to give more chance to it since I have one more year for the school. Thanks.
Well, to be honest, Painter 12's only useful if you want true oil painting or watercolor effects. I find you just can't emulate them in Photoshop, even though those brushes are offered. Corel has that authentic painterly look down. Two great artists that I recall have had great success with Painter: Anry Nemo from Russian and the South Korean games' artist, Hyung Tae-Kim. My choice app will always be Photoshop – it's fast and you can designate your scratch drives and how much RAM it can use. Plus, it's really fluid with the Cintiq and it's side buttons. Especially using the color picker tool and quickly changing brush sizes.
@Ejsing: Ha, a fellow artist that remembers FRISKET-smile. But, onto why I am here, simply, love your work Serge.
Thanks for sharing nice information regarding hair styling. It is great job. I love it. Hair courses melbourne
Girls fashion and their age are always inversely proportional. You have fantastic stuff on this blog that keep the girls young and beautiful with you fashion tips. Being a fashion artist I really appreciate your efforts and work.
Love from Royal Lady