Mixed Media Demonstration by Lisa L. Cyr for Studio Bridge, a subdivision of Visual Arts Passage
Exploring experimental mixed-media painting and surface treatment techniques can be a wonderful way to change up your working process and approach. When you change your tools, media and surface, you add to your visual vocabulary in intriguing ways. I would like to share with you the process behind a recent piece I did as a live step-by-step demonstration for Studio Bridge through Visual Arts Passage, exploring experimental mixed-media techniques onto a multidimensional surface.
Creating a Multidimensional Surface Using Collage
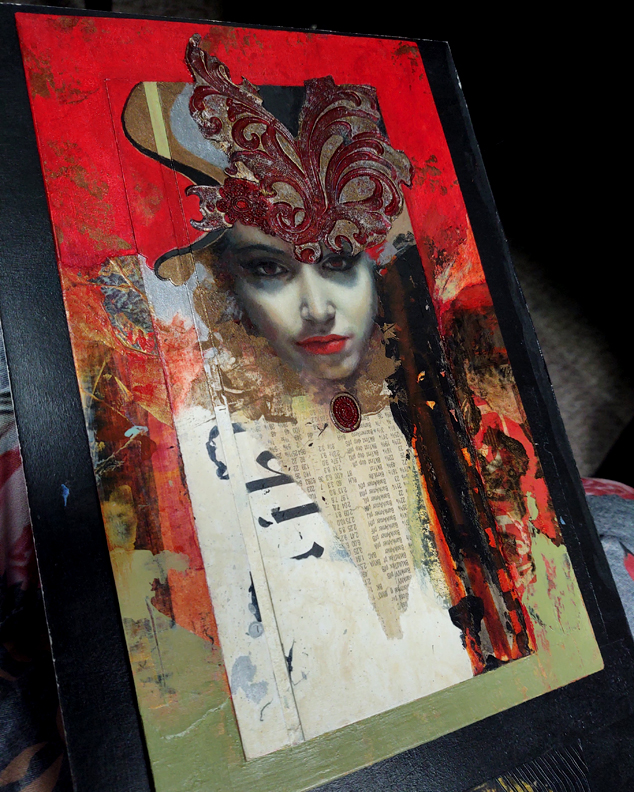
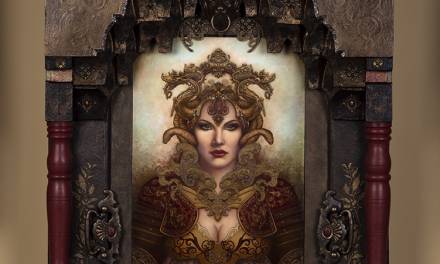
When I am working, I often begin by creating a unique surface in which to work. In my mixed-media painting entitled Bela, I employed collage techniques using various papers to build a multi-dimensional surface. Every paper has a different weight, thickness, color, opacity and surface texture. Each of those characteristics provide a different surface quality when paint and other materials are applied on top. When they are used in combination, interesting painted passages across the surface begin to happen.
For Bela, I used a paper selection that ranged from text to cover weight, including newsprint, drawing paper, toned paper, watercolor paper and printmaking paper. Each of the surfaces boasted a different treatment. Some were ripped while others were cut or punched. Changing an edge or cutting into a working surface can add unique design elements throughout the composition. To further add a strong graphic element, I cut into the entire surface with an X-Acto knife and pulled out a recessed inlay on the left side. Once the entire collage was complete, I sealed the surface with acrylic matte medium, priming it for acrylic painting.
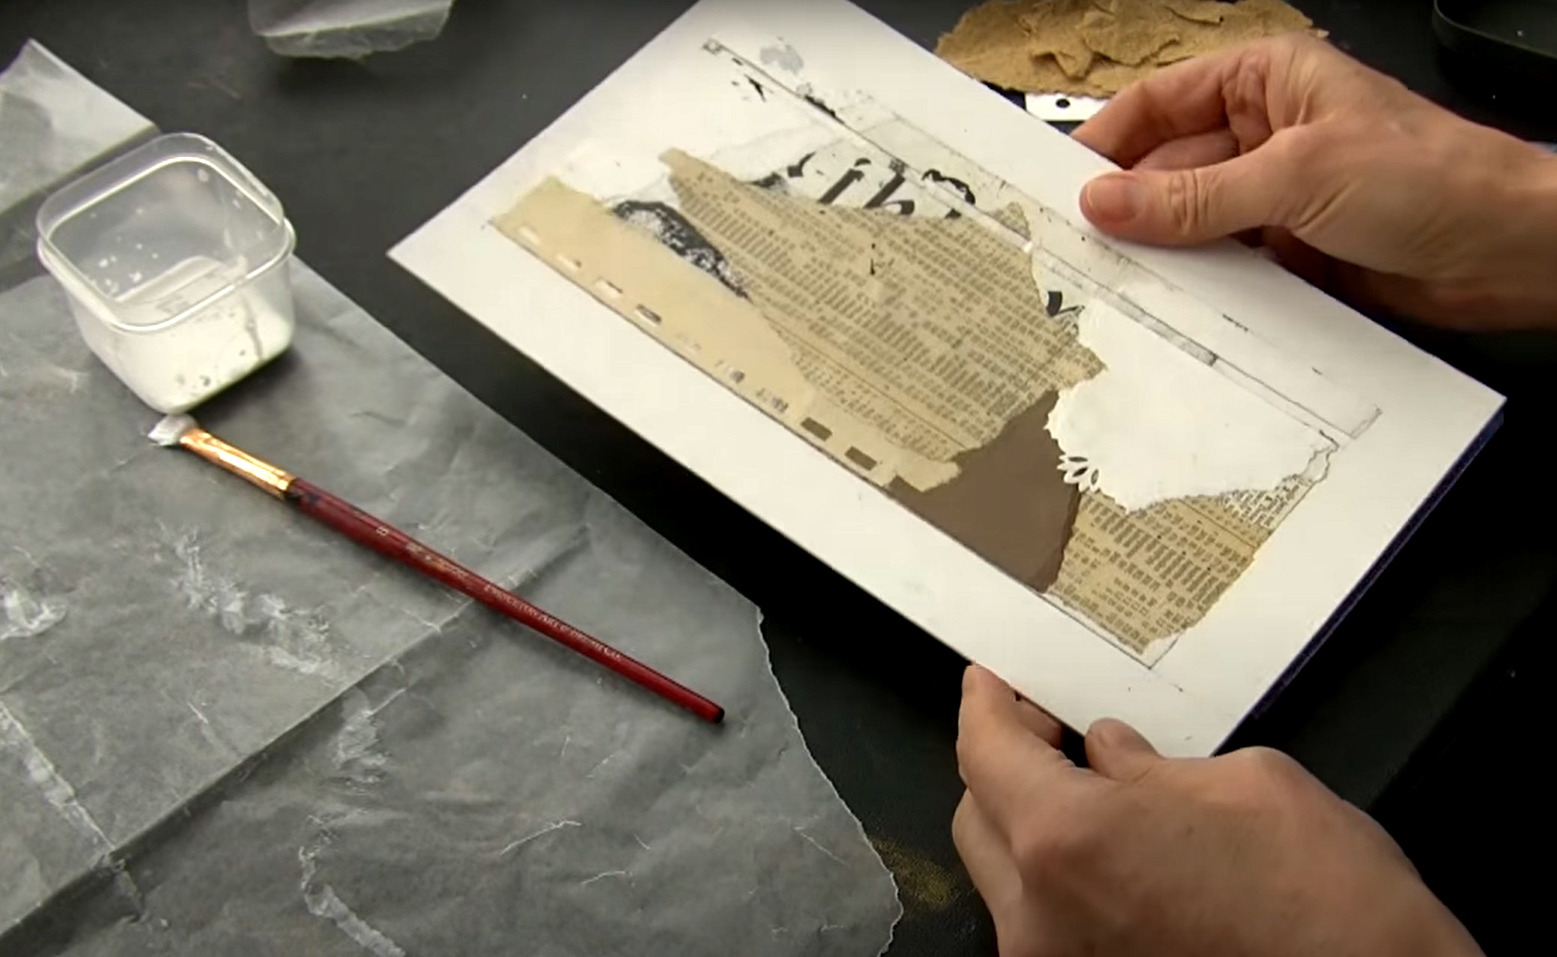
Several papers were adhered using bookbinders ph-neutral glue onto illustration board to create the multi-dimensional working surface. Many of the papers were cut, ripped and punched to add visual interest throughout the composition.
Adding the Subject
To properly position my subject in a way that would work in tandem with my background design, I used graphite pencils and a blending stump, establishing where I was going to put my figurative character. Once I had an idea about the look and feel of the figure, I used a photo reference of my daughter with the right lighting and head position I was looking for. Because my design had its own visual linguistics, I altered the original reference while I was drawing. This is important because you always want to incorporate the figure with the existing visual language that is already present in your background. In regards to the structure of the figure as it relates to the reference, I made slight changes in the shape of the eyes, I changed up the nose a bit and of course the headpiece is completely different. Photography is great but, for me, it’s only something to refer to. I typically will use black-and-white over color reference because I love to invent my own color schemes.
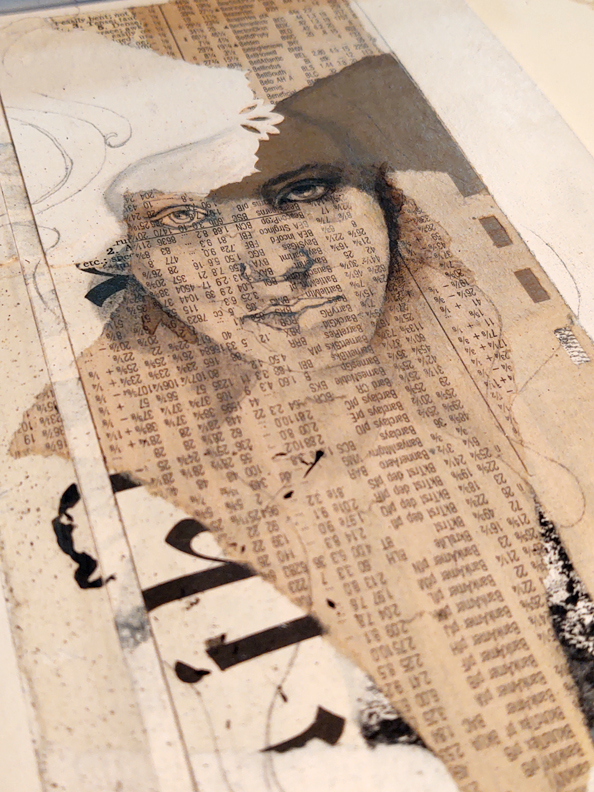
Graphite pencils and blending stumps are used to establish the subject in the overall composition. Shown is the transition from line drawing to tonal drawing.
Establishing the Underpainting
Once I had a basic sketch of where I was going with the figure, I sealed the drawing with matte medium and began to paint with acrylics to establish an underpainting. Since there is an existing color scheme within the multidimensional collage environment, I needed to incorporate that with my choices. When I am establishing an underpainting, I often use white gesso to bring back the lights and an acrylic ivory black mixture to establish the darkest darks. From there, I am thinking about warm and cool tones.
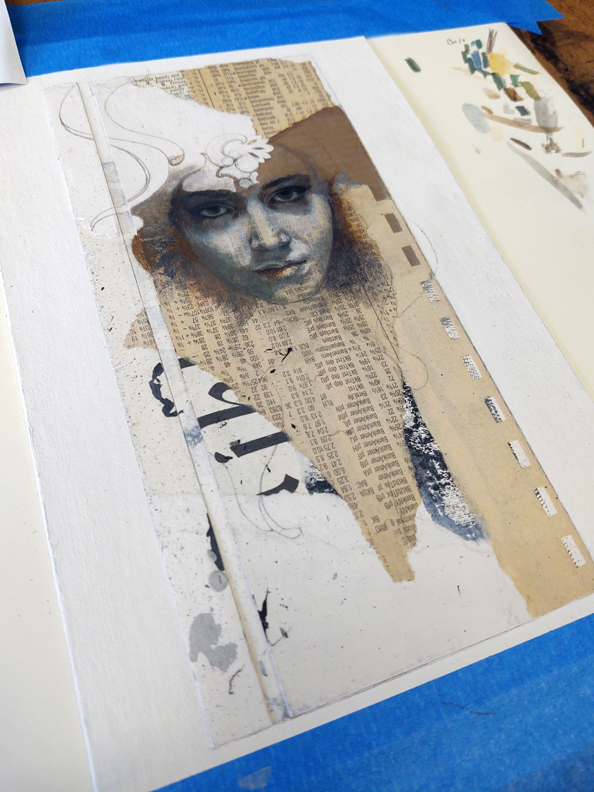
Using gesso and acrylics, an underpainting is established.
Experimental Painting Techniques
Once the underpainting painting tonal range has been established, I began to employ various pops of color and metallics. I love using surface shine and iridescence as a unique quality that an original work has over a reproduction. I always use them even though they are very hard to paint volume with and photograph just right. I began the painting process using brushes and sponges to establish the hot red in the background. Gesso was applied with a painting knife in the lower areas to create texture. I used various acrylic colors mixed to simulate the palette of the collage-based environment. When painting, I will often put on heavier strokes and use blotting materials like paper towels to create visual texture. A wide painting knife was used to apply black down the right side. Once that was dry, an eyedropper was employed to drip paint down on top of the dark environment. Palette knife painting was also used around the headpiece and neckline of the figure.
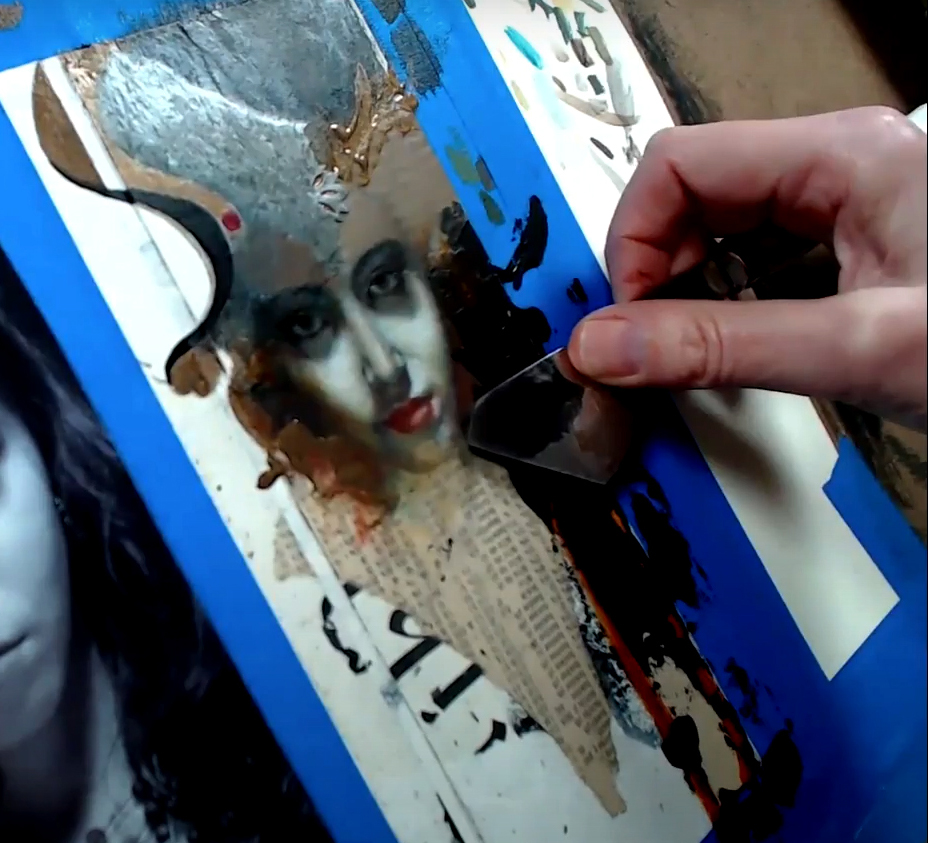
Adding texture and movement using a painting knife and acrylic paint. The heavy marks help to blend the different transitional areas of collage. Painter’s tape is used to protect the edges while painting with bold mark-making tools.
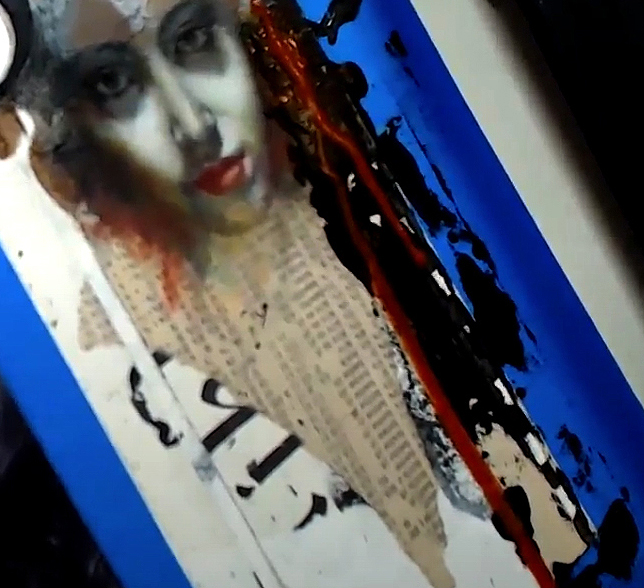
A dropper is used to drip burnt sienna acrylic that was mixed with water down the surface.
Check out a video compilation from my live step-by-step demonstration of Bela that I did for Studio Bridge. a subdivision of Visual Arts Passage. It shows my painting process, where I use brushes, painting knife, eyedropper, sponges and the like to create my mixed-media work entitled Bela. The full version of the video is two hours long and covers my process from ideation and design, collage and gluing strategies to mixed-media painting.
You can see the full version of my process along with 6 additional hours of live video content, ranging from lectures on working in an exploratory process to step-by-step demonstrations in mixed-media here at Studio Bridge. I was a presenter for the month of April 2021, where I lectured and demonstrated every Monday for the entire month. Studio Bridge invites members to step inside the studios of industry leaders from every corner of the visual arts industry. From artist spotlights to getting fast-paced feedback on your artwork from working pros, Studio Bridge offers artists a space to grow, learn, and connect with a community of passionate and focused professionals.
Adding Relief Details
Using acrylic matte gel medium, I designed a decorative headpiece for the figure. The surface was built up and then debossed to create an interesting pattern. It was dry-brushed and sponged using acrylics to create a unique patina. In addition, I added a decorative accent along the neckline to suggest a costuming element. Throughout the process, I continued to add color and texture to unite the figure with the environment. For those of you who are interested in in Working in Relief, I have a video series that will show you with all the basic techniques. To read more on my exploratory process mixed media check out this article called Exploring Mixed Media Painting Techniques!
Acrylic matte gel medium is applied in layers to create the headpiece and collar accent.
WANT TO LEARN MORE?
Explore the dynamic world of mixed-media art during an exciting 5-week workshop entitled EXPERIMENTAL MIXED-MEDIA TECHNIQUES at Visual Arts Passage. Transform your illustration work with experimental mixed-media techniques! Throughout the mini course, many exciting in-depth demonstrations will be shown, providing an extensive array of visually-stimulating possibilities for artists to explore. Both two-dimensional and three-dimensional experimental mixed-media techniques will be covered, including alternative approaches to drawing, transparent and opaque painting techniques in acrylic media, utilizing alternative and custom tools to produce signature mark-making, employing various surface treatments to create tactile environments, using collage to create multidimensional illustrations and so much more. Discussions on artistic growth and development, nurturing the creative spirit and developing personal content will also be included as a way to assist students on their own creative path. The workshop is for artists and illustrators of all levels who are interested in knowing how the power of mixed-media can add that magical, transforming element to their work!
Week One
EXPRESSIVE DRAWING TECHNIQUES
In this class, students will learn how to create a drawing using alternative forms of graphite: kneadable graphite putty, oil-based graphite, graphite crayons, sticks and pencils, water-soluble graphite, powdered graphite and handmade graphite paint. To create intriguing effects, erasure techniques, relief etching applications, monoprinting techniques, mixed-media painting and so much more will be explored.
Week Two
TECHNIQUES IN ACRYLIC MEDIA USING ALTERNATIVE TOOLS
In this class, students will learn how to create engaging and dynamic environments from which to pull out a subject. Using fluid and opaque painting techniques, lushly painted backgrounds will be created in acrylic paint using alternative tools and techniques. Blotting, resists, pouring, spattering, sponging, imprinting, dripping are just some of the techniques to be explored. Discussions on acrylic paint viscosities (heavy-body, soft body, fluid and ink) as well as polymer gels and mediums (ultra-matte, matte, gloss, iridescent, pouring, etc.) will help each student how to effectively use acrylic media in their work.
Week Three
SURFACE TREATMENTS + TACTILE ENVIRONMENTS
In this class, students will learn how to create alternative surface treatments, using gesso, matte medium, gel medium and molding paste. By changing the working surface, artists can alter the look of their work in exciting ways. Debossing and bas-relief techniques will be shown.
Week Four
MIXED-MEDIA COLLAGE TECHNIQUES
In this class, students will learn how to create multidimensional illustrations using mixed-media collage techniques. Paper stretching, scoring, cutting, punching, tearing, peeling, burning, embossing, debossing, weaving, stitching, embellishing, sealing and layering as well as gluing strategies of paper-based surfaces will be explored.
Week Five
MIXED-MEDIA MINDSET
In this class, we will discuss artistic growth and development, nurturing the creative spirit and developing personal content as a way to assist students on their own creative path. Discussion on artistic experimentation, keeping a mixed-media sketchbook and working from a multidisciplinary mindset will be explored.

Awesome article Lisa!
It’s very cool to see how many layers go into your paintings as well as the mixed media pieces you are using! 🙂
Brian thanks so much…I love the layers!
Wow, great post Lisa! I always admire people who are so brave facing new techniques and experimenting.
Thank you! Experimenting keeps things fun, challenging and never boring for me!