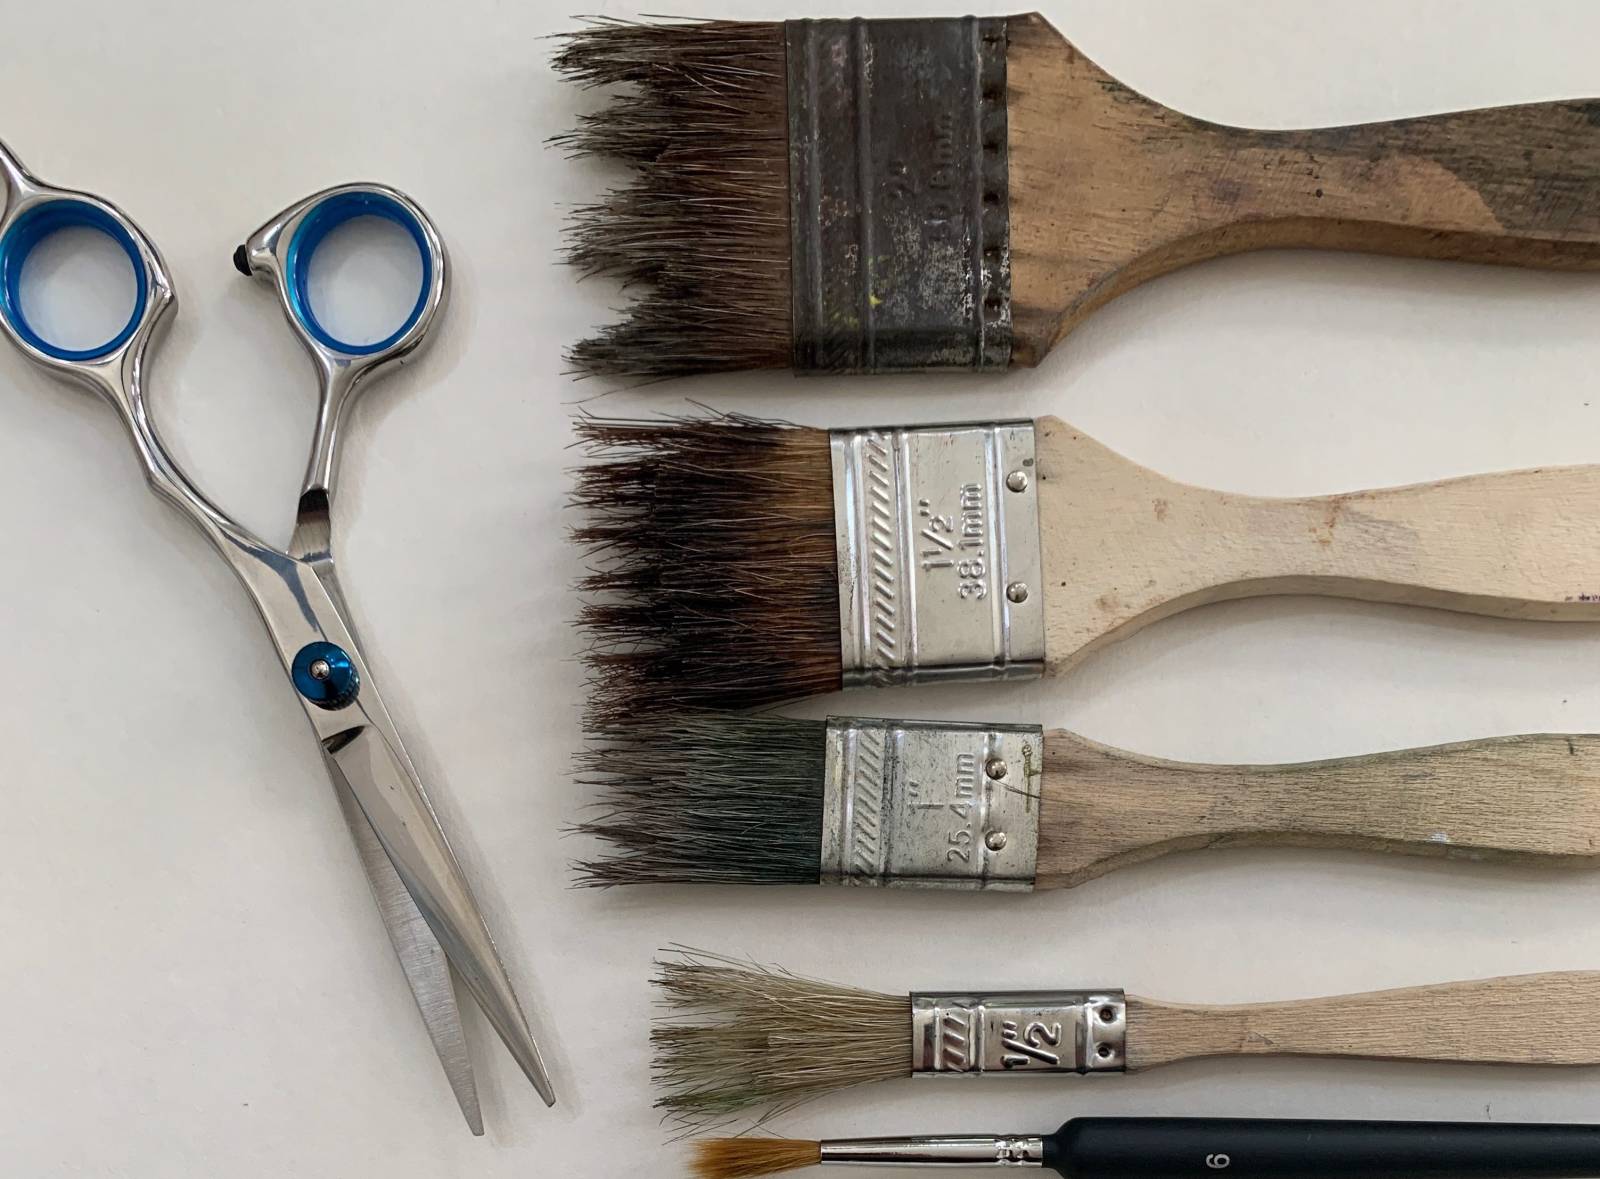
Some folks have asked me about some of the marks I make and what brushes make those marks. I use all sorts of brushes and have shared quite a bit about that in previous articles I’ve posted here on Muddy Colors. For this post, I put together a couple quick videos to show how I’ve modified a few of my brushes. I cut them with scissors. You can do this with any brush and any scissors. It doesn’t have to be fancy. I tend to favor a more raw, organic or natural look and feel to the marks they can produce, so I opt for shaping them with that in mind. Hope you enjoy watching!
DIY Modified Brushes for Painting and Mark-Making
This video shows how I cut a few of my brushes and how the various marks that are made with them appear. Then I make a few looser marks, moving the brush in different directions using various amounts of pressure and tilt/turn. The last few marks were made on yupo paper, and you can see how the water stays on the surface longer and doesn’t absorb as fast as it does on the sketch paper I used earlier in the video. Using various types of surfaces allows for some really wonderful different sorts of marks as well. See video below for a quicksketch ink wash using one of these brushes.
Tools used:
All sorts of brushes, bristle and sable
Scissors
Black ink
Water
Sketch paper
yupo paper
___________________
Ink Wash QuickSketch in my Sketchbook
This shows a quick sketch I painted using ink and a few different small brushes. One of the brushes used is a modified brush that I had cut with scissors (as in the first video) to create a different sort of loose corrugated mark. The other brushes used in this video are are Royal and Langnickel zen series sables.
Tools used:
Brushes
Black ink
Water
Sketchbook (sketch paper)
There are some brushes you can get that are premade with this sort of look and feel. They’re usually called Grainers or Grain Stripers, and are made my several different brands.
The marks I make with these modified brushes are similar to the marks I make with the silicone rakes/combs/grain striping tools I use for pick-out. I’ve shared a bit about the silicone pick-out tools in previous articles here on Muddy Colors. You can see a couple of those articles by clicking here and here. I will post more videos in the future with some of those tools as well.
Hope you found this helpful and fun. Happy painting and enjoy the exploration!


Thank you for all the articles here at Muddy Colors and your videos. I joined the Muddy Colors Patreon and just wanted to tell you how much I loved your sharing of the Book of Kelly’s! Beautiful paintings and I love the poems you created. What a treasure.
Your art is beautiful but also has special meaning to me as a survivor of abuse and growing up in a family that devalued women. I see in your paintings of women the exact opposite of what I was told I could be. I see women of strength, intelligence, spiritual, powerful, capable, and with depth. I am grateful for your art. It uplifts and heals me in ways words cannot. When I look at your art it awakens a strength in me I was not allowed to express. But I can now.
Listening to you talk about the Book of Kells, was so magical. Your art is beautiful but so are you. You are a beautiful soul.
Darn autocorrect! Book of K e l l s Haha
hi Pamela- Thank you for such an amazing message. It truly means so much to me that my art has played a part in helping you feel this way. I appreciate you sharing your experience as you have here too. It’s so heartening to hear that a strength has been awakened in you, and.I’ve no doubt that strength and awakening will continue to be a deep well of expression for you. That inspires me to keep creating and expressing, and digging deeper and sharing too. Thank you!