I thought I might share with you my process for the graphite wash technique that I get asked about quite often. All these pieces are done with powdered graphite and pencil, some have very thin oil washes on their surface.
 Imperfection 7, 8 x 10″
I’ve been pushing this technique for about 2 years now and I can say with conviction that its not the easiest process to work with, or the fastest by far. It will fight you through almost every step until you get used to it, and then it gets a bit harder, hah.
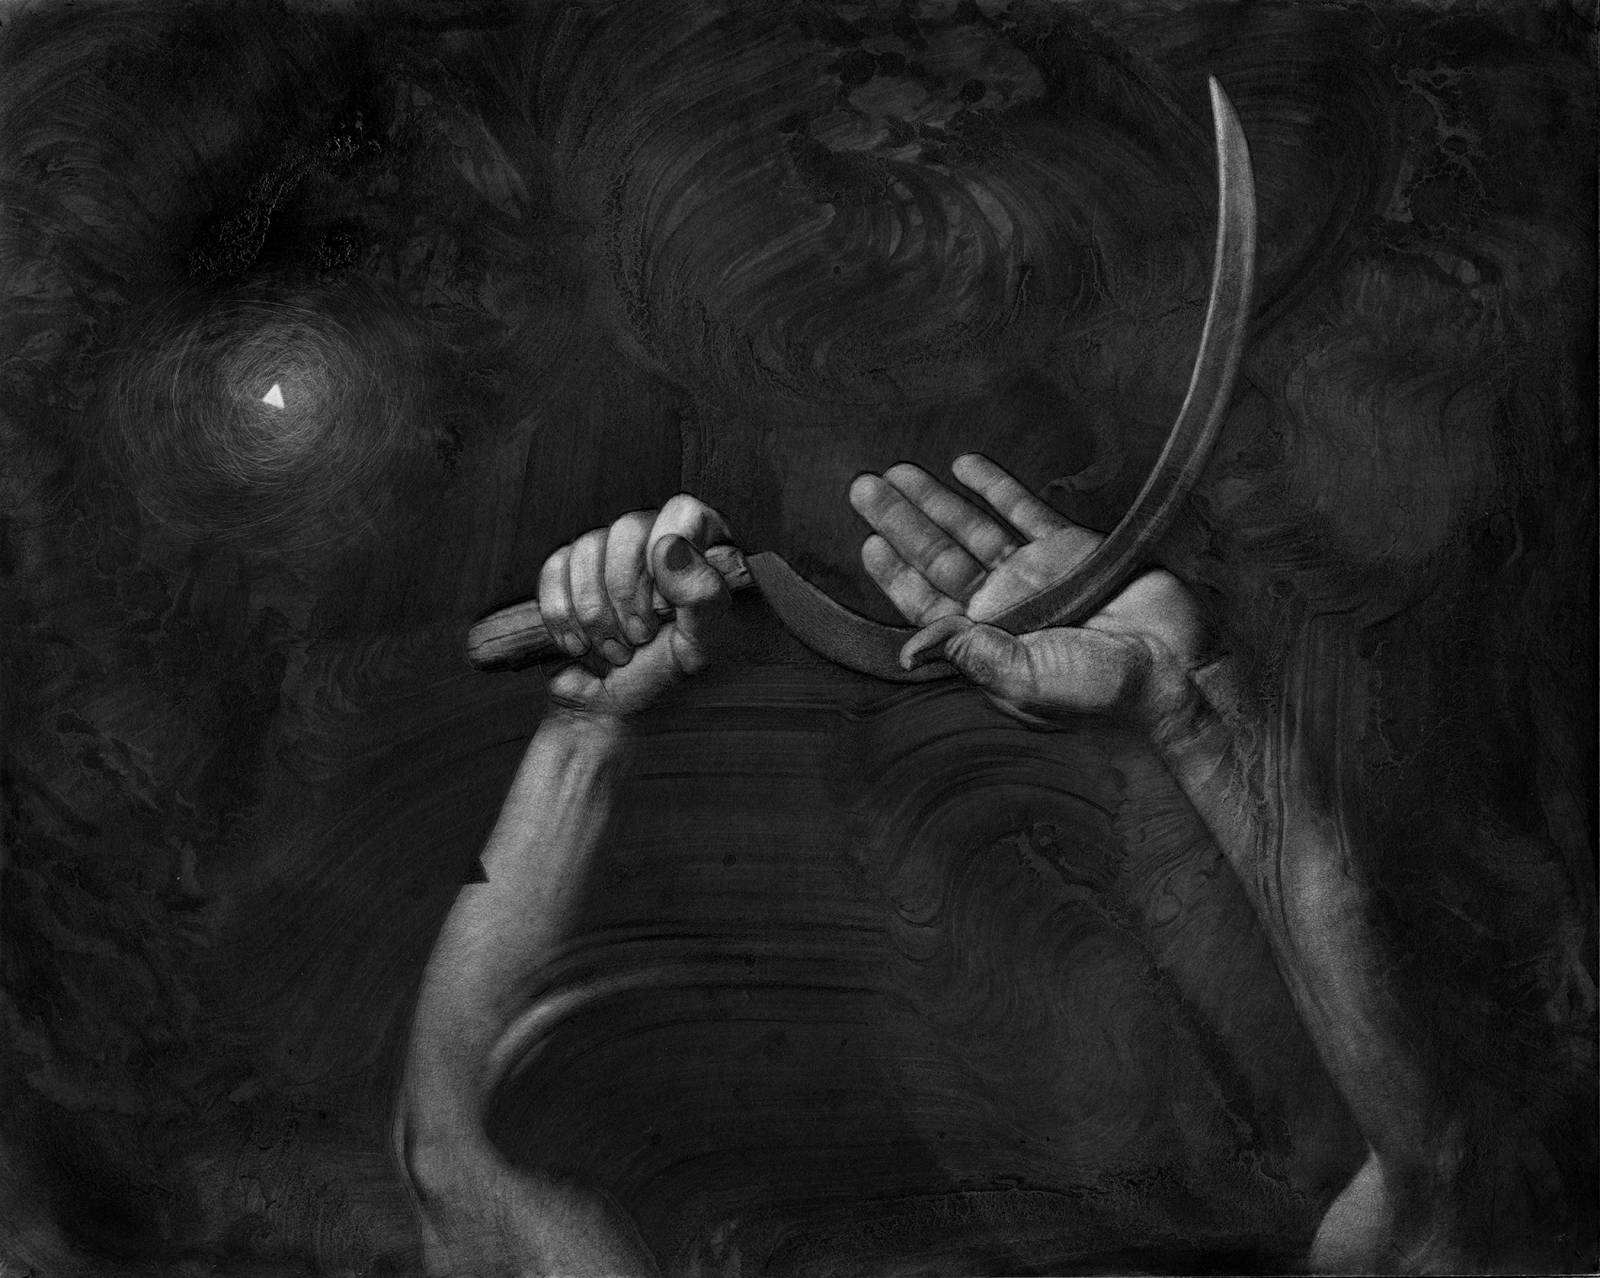
 Magus, 8 x 10″
It all starts with the preliminary process that I use to generate the backgrounds. I begin on the Ampersand Claybord and use a mixture of Cretacolor and General’s Powdered Graphite applying it with water and brushes, sponges, cloth or anything I like that will get me the texture I want or eventually see on the board. It is never the same thing twice. Oh and a heat gun or hair dryer to quicken the drying process a little.
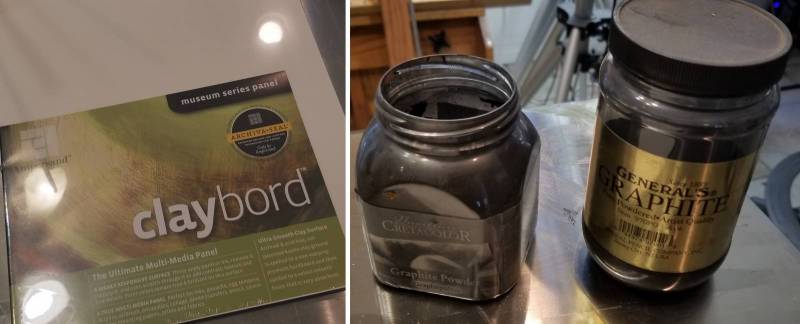 Ampersand Claybord and Cretacolor and General’s Powdered Graphite
In general I don’t favor one powdered graphite over the other, one day I just happened to throw them both into a box I had for easier access with the brushes and sponges and I now work with that mixture.
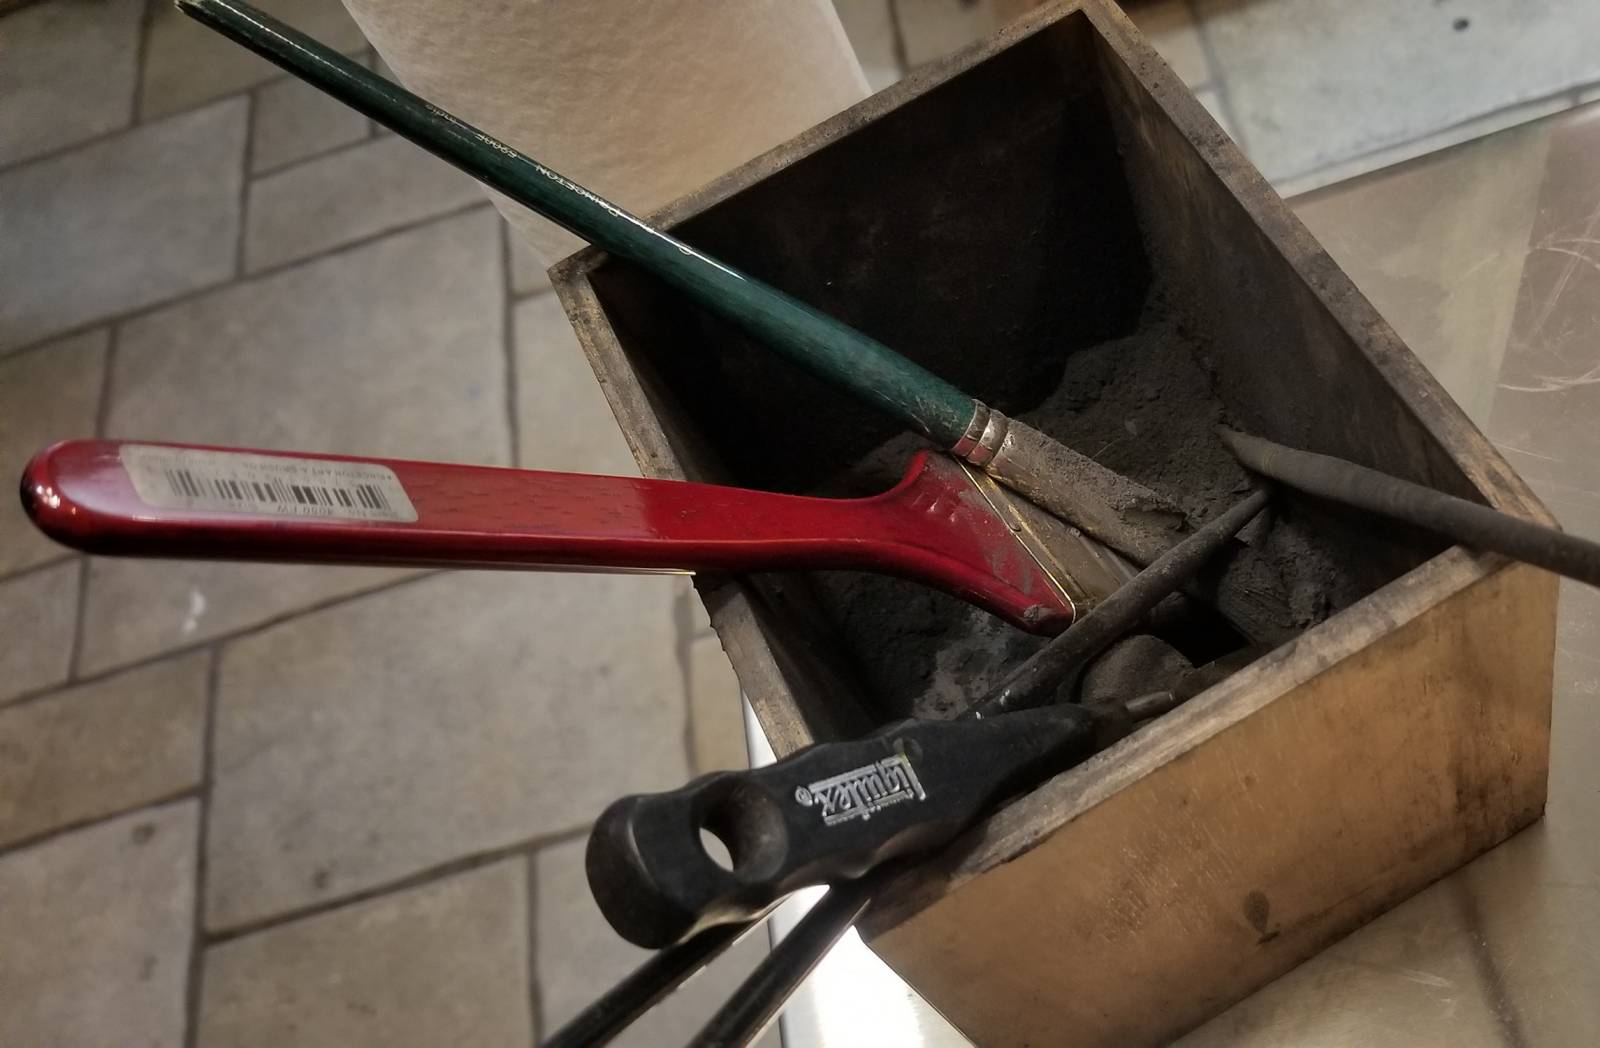 Various brushes, sponges and palette knives
 Dried “Landscape Surface” on Ampersand Claybord used later for the background of a piece
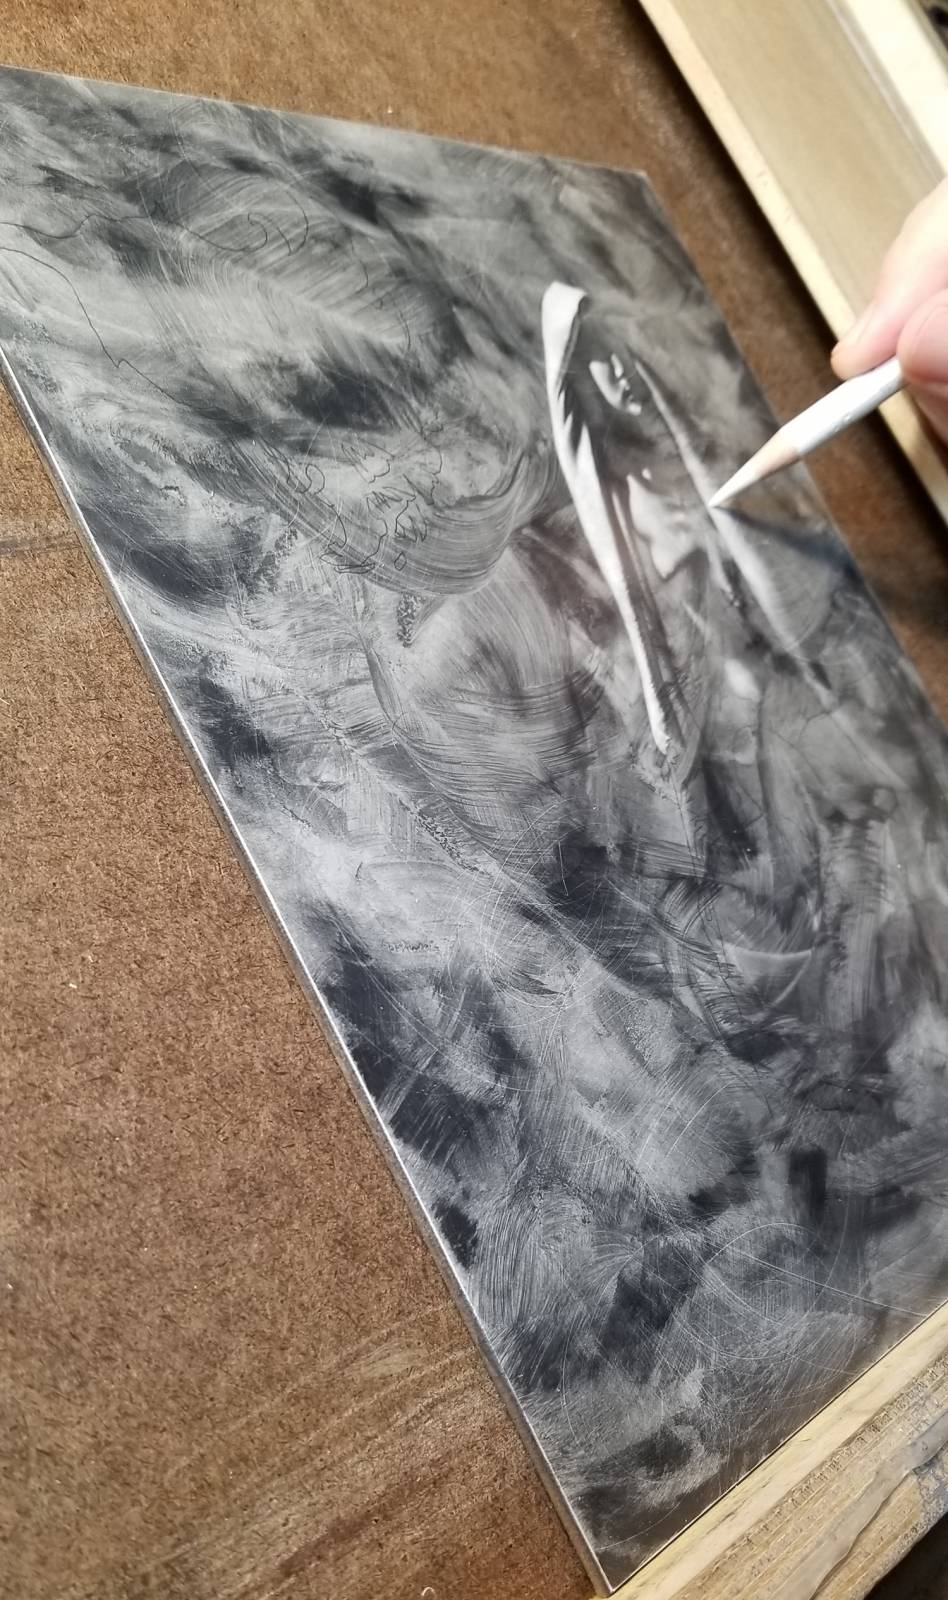
After I like the landscape or background I have created I brush the excess graphite off the piece with a wide very soft brush and/or burnish the board with a soft cotton cloth. I may lose some contrast but I can bring it all back out with the pencils.
This is a very subtractive technique in the beginning and then it is a push/pull between erasers and pencils to achieve the image I have playing in my head. I will use kneaded erasers, Faber-Castell Perfection 7058 Abrasive Erasers, Mr Clean Magic Erasers and my Sakura electric eraser, even steel wool and Exact-o blades for pinpoint highlight work.
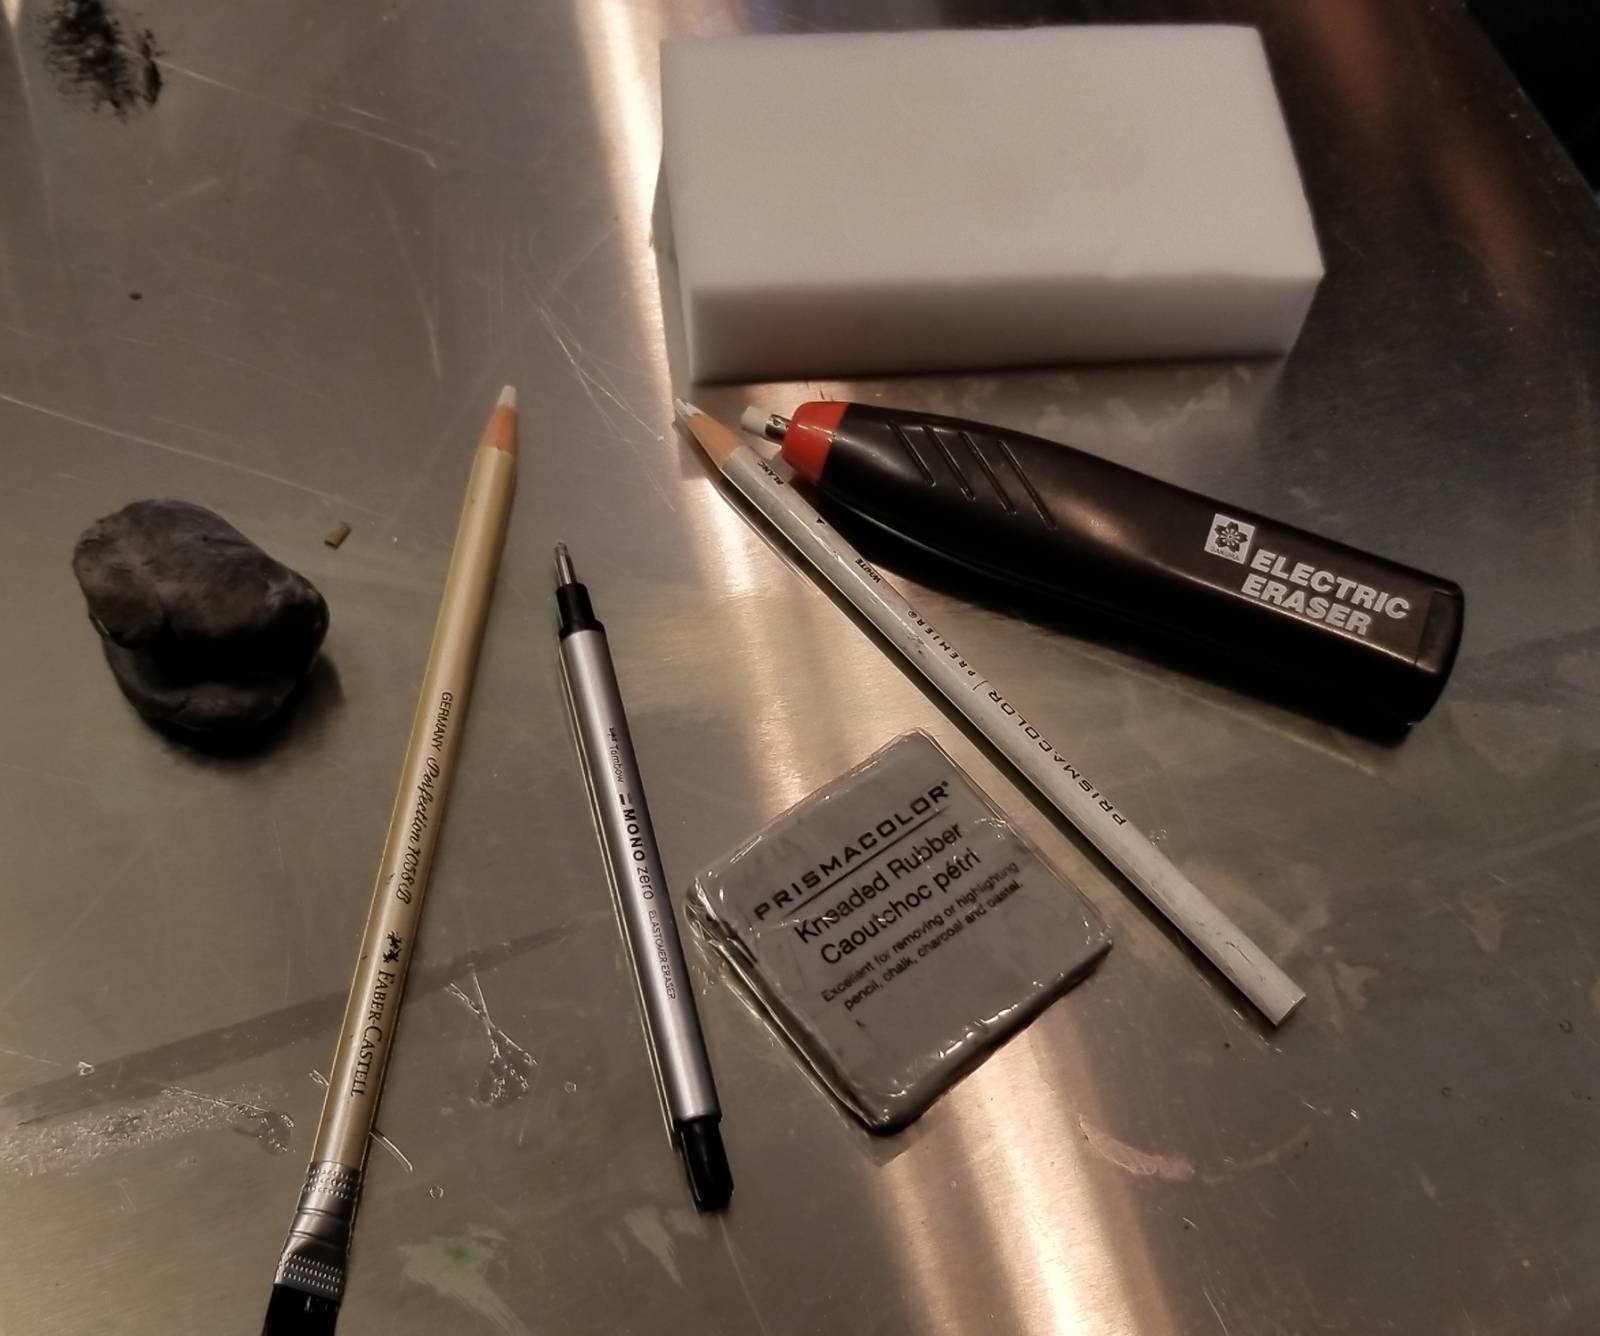
If you want to try this make sure you purchase the regular Mr Clean Magic Eraser WITHOUT the ridging on it or cleaners in it. The other kind just makes a mess of everything.
 Faber-Castell Perfection 7058 eraser used at the beginnings of Nightbloom
It is at this point that I have to stare at the board for hours, a day, a week maybe, I usually have a few boards in process waiting for me. I transfer the image I have decided to use onto the board either by transfer paper or projector. These are the lines you see on the image above.
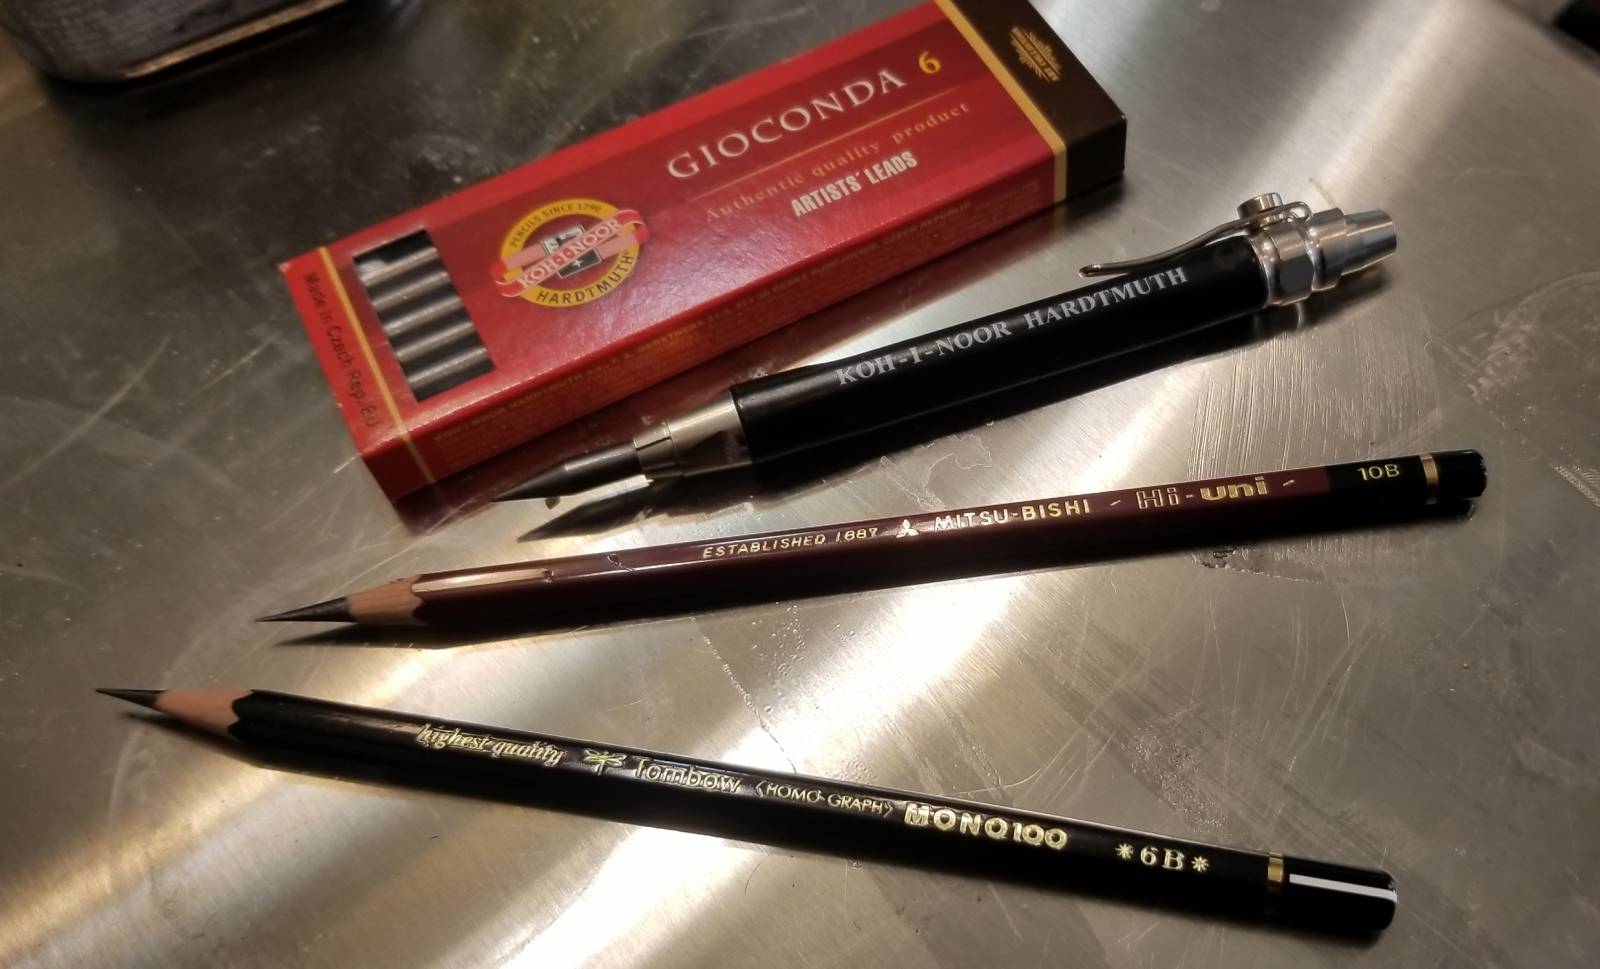
As for pencils, the softer leads work best on the clay surface. I like the Tombow Mono100 4 and 6B and the Mitsubishi HiUni 10Bs. The Mitsubishi feels like drawing with oils, almost like butter.
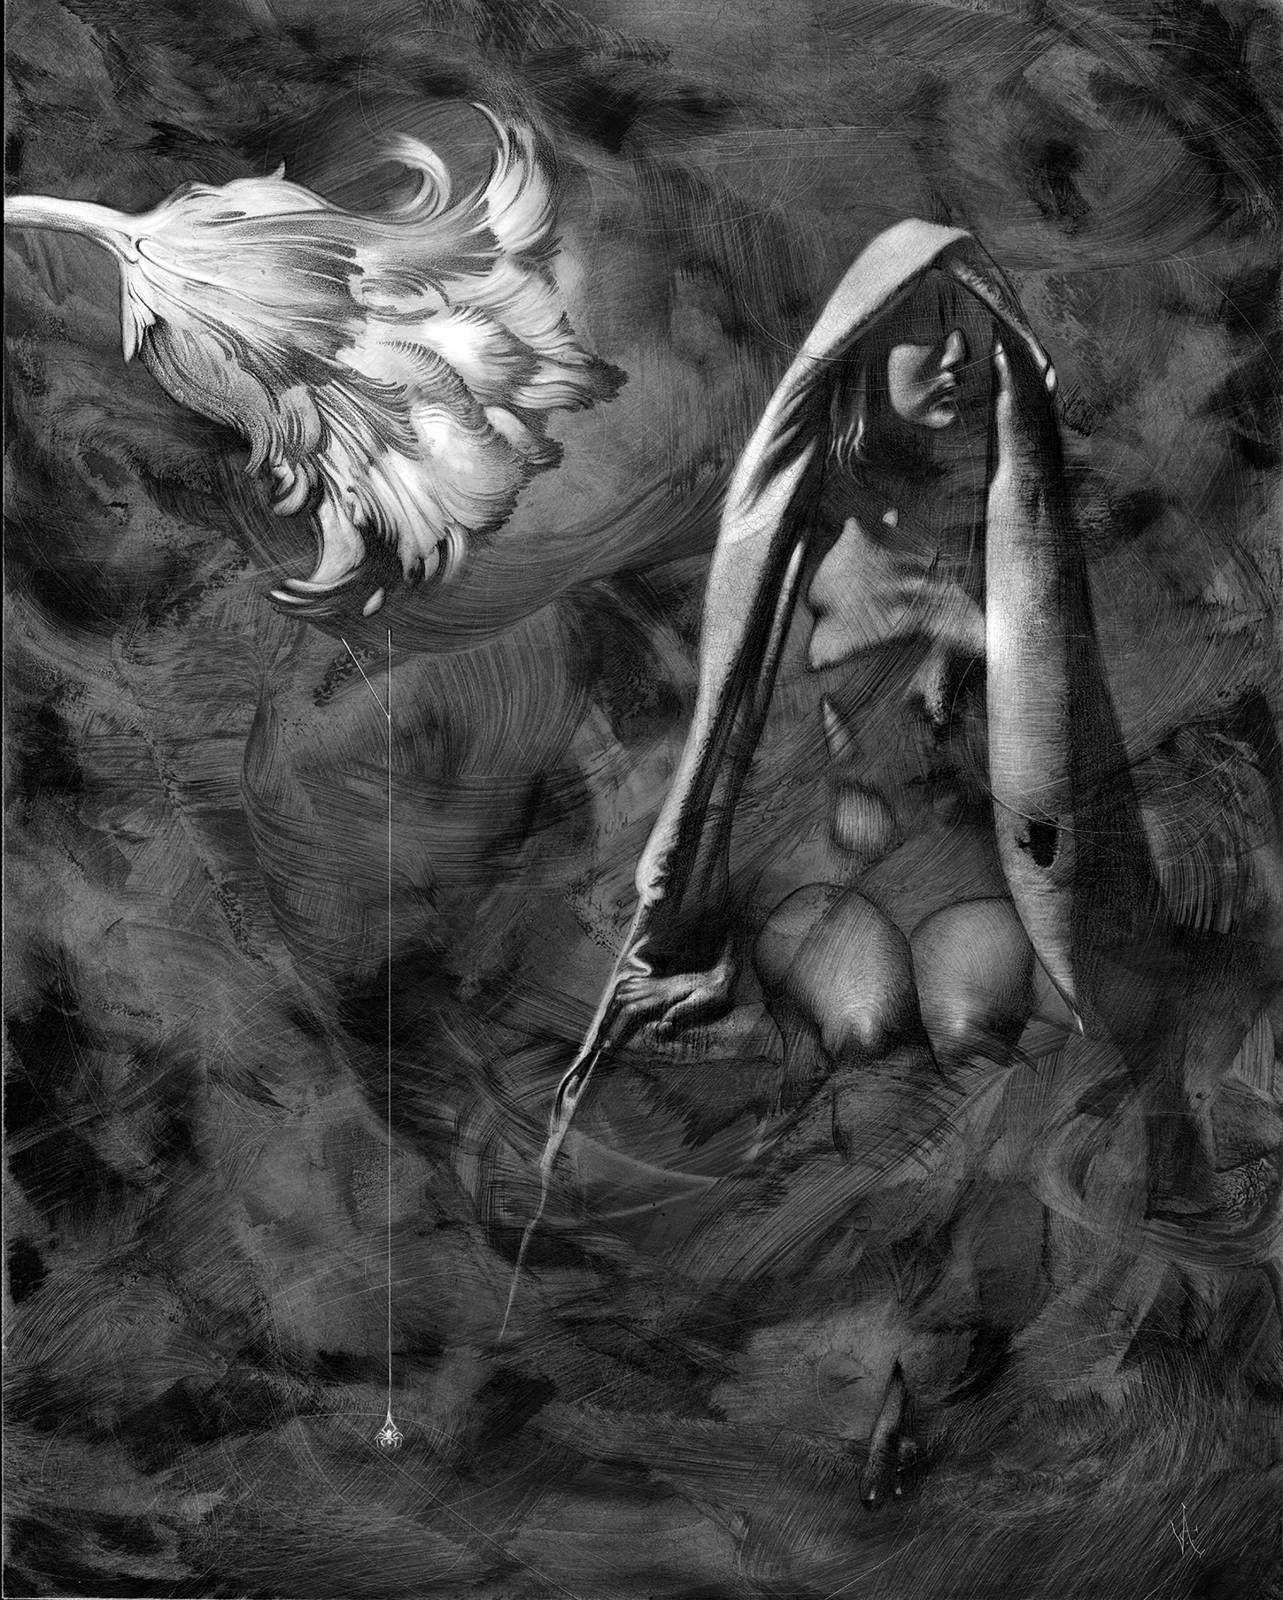 Nightbloom, 8 x 10″
The “glow” from the pieces is me working back to the white of the board, not any additional white added. It is all about managing your values in the piece and this graphite technique gives me a middle grey to start.
It does get more manageable with practice… it is my philosophy that practice does two things: Makes you better at doing the thing and it makes you get accustomed to how hard it is to do that thing. That second part may be the real value of repetitive practice…
that you get so used to the effort, that you forget that it’s hard…. sometimes.
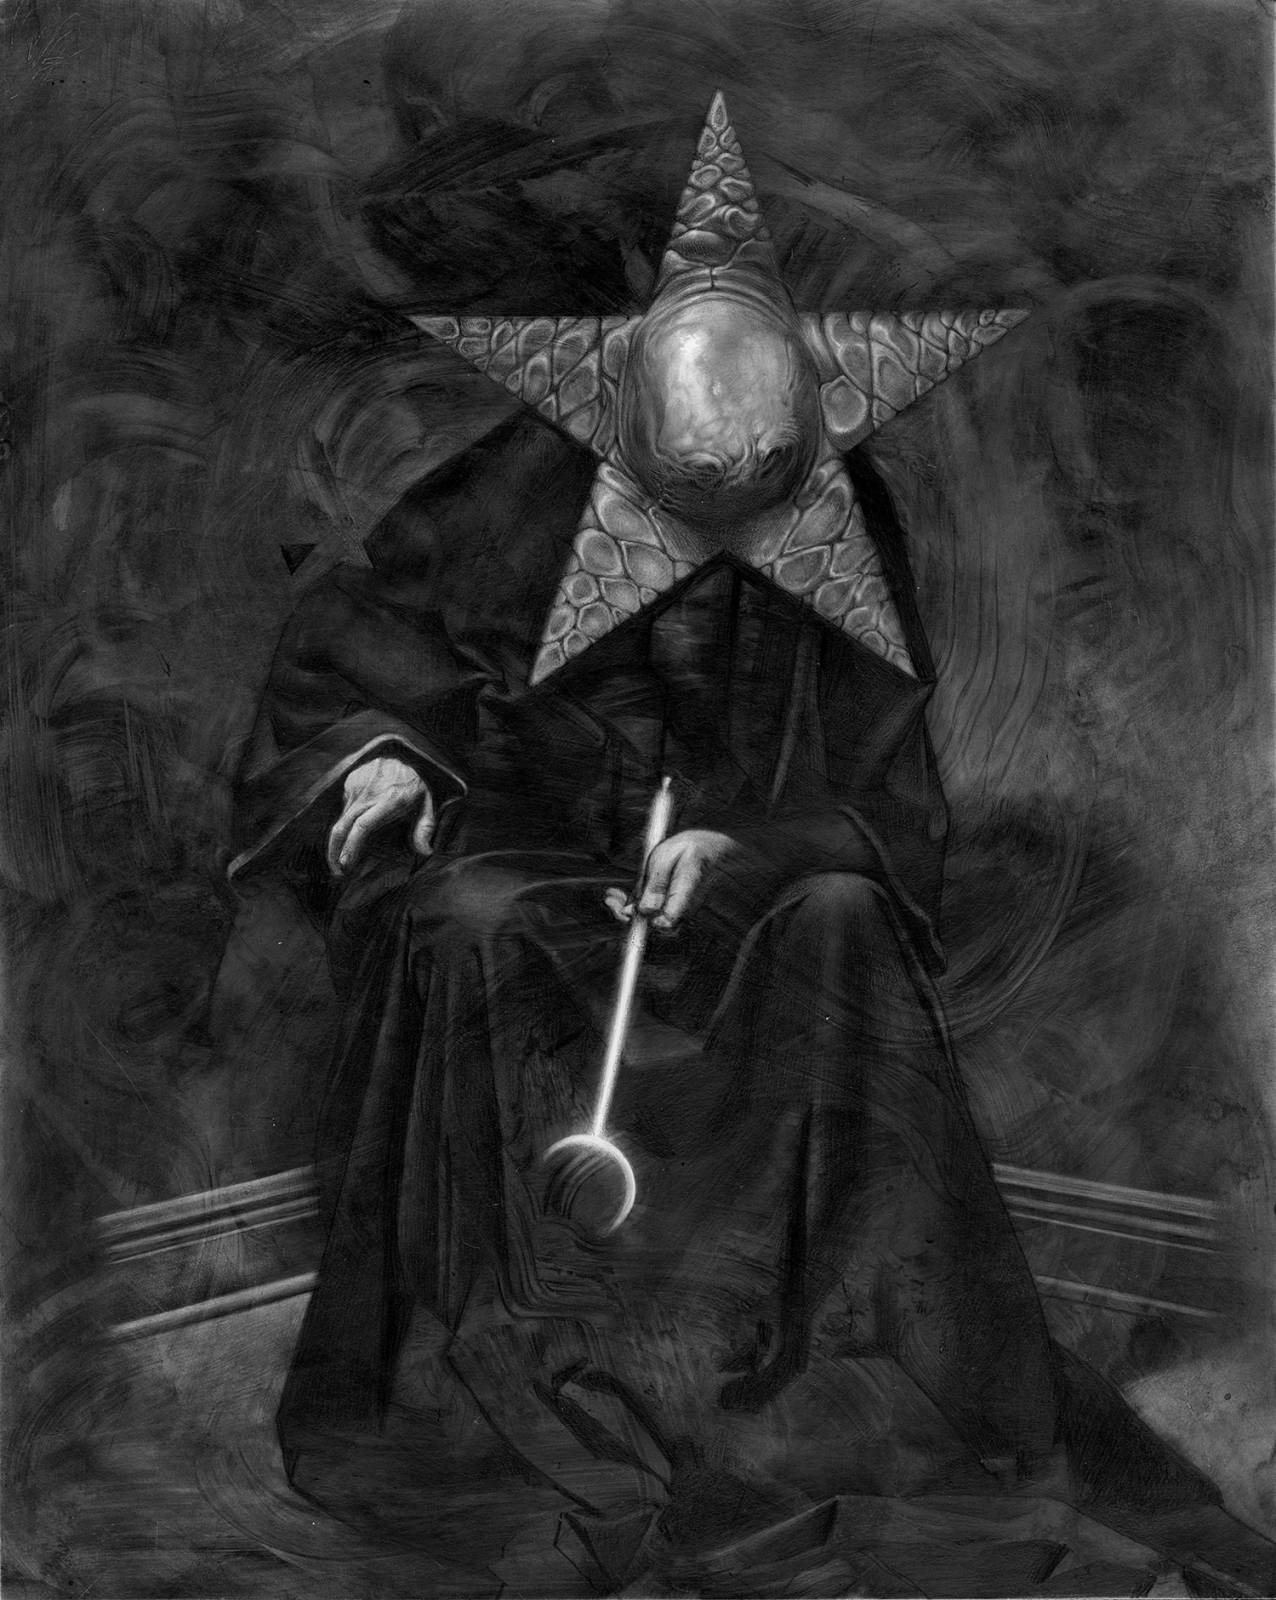
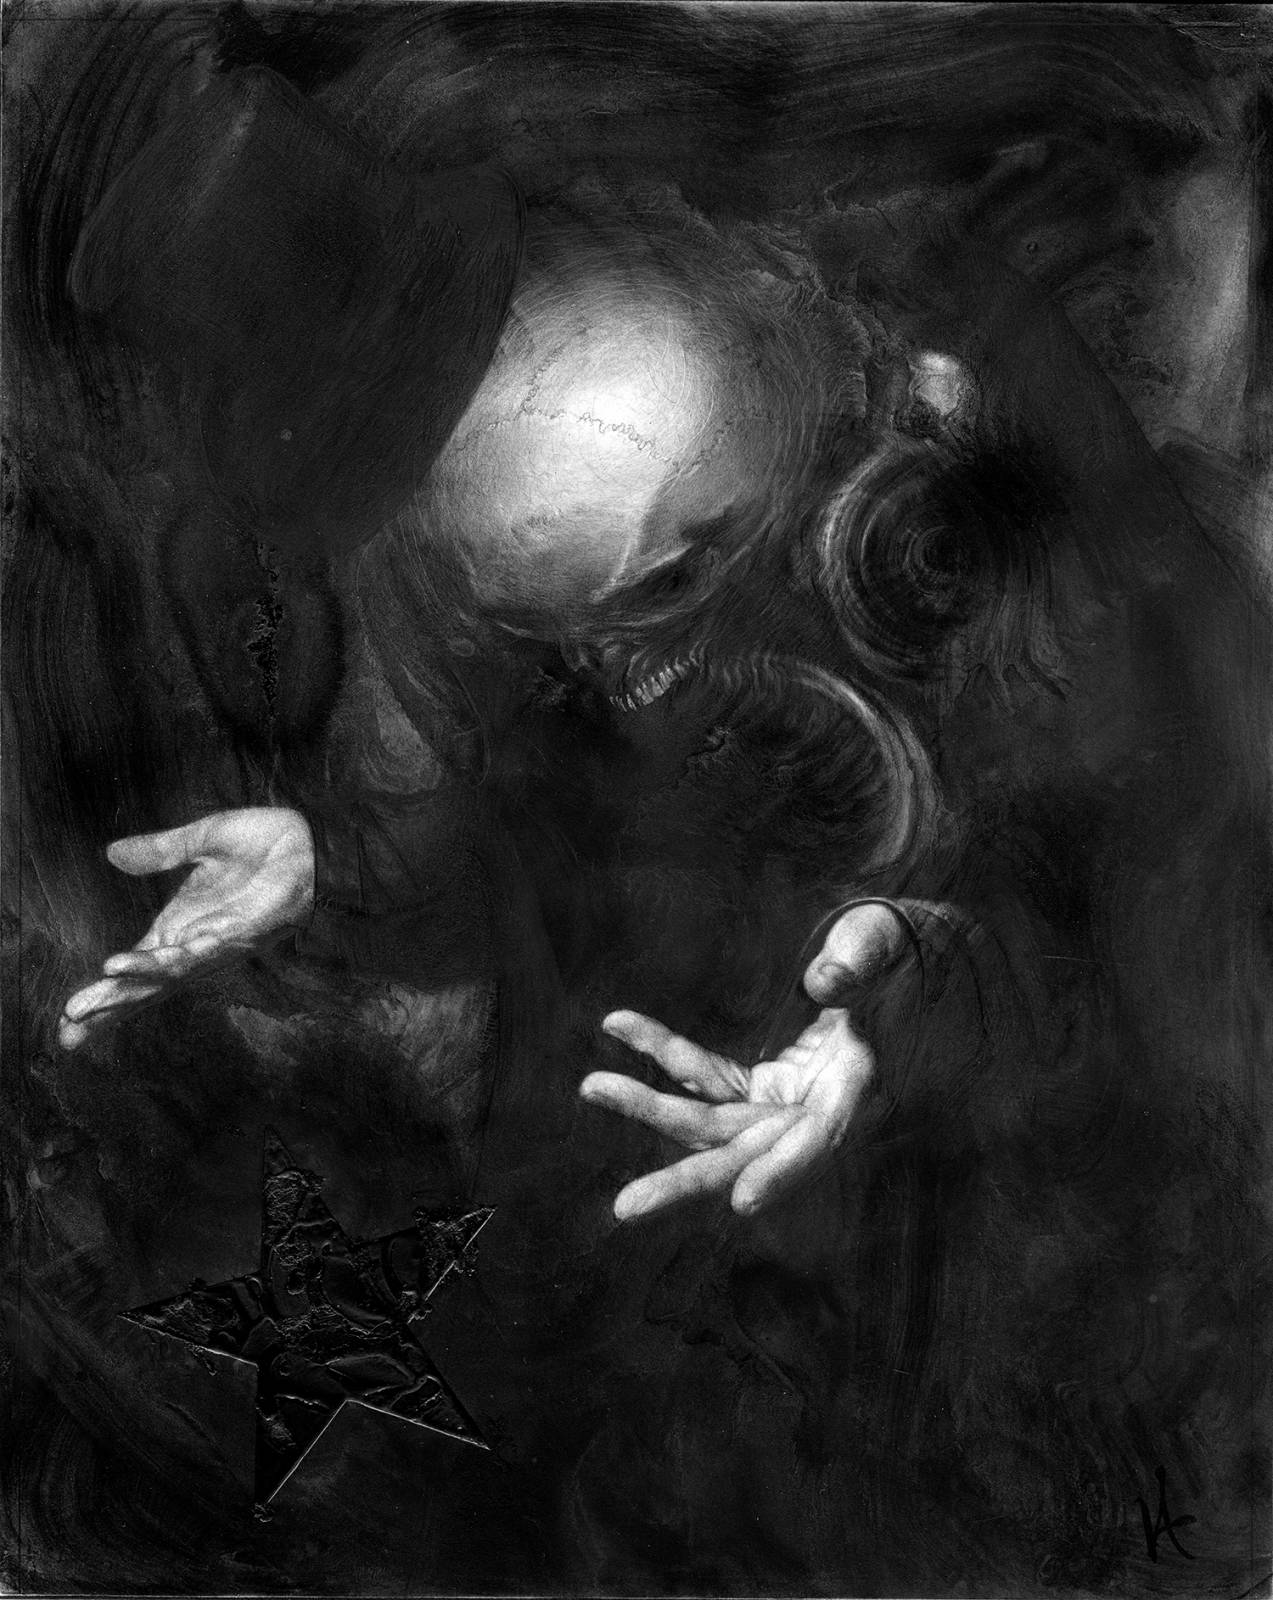 Mr. Kind, 8 x 10″
If there are any questions feel free to speak up in the comments.
I would like some suggestions about what you may want to see from me on MC. Input is always welcome. One of the topics I plan on addressing is content and (personal) narrative.
…and of course I’ll also write about my sharpeners…I have a few 😉

These are so amazing! i just love the texture you create using this technique, very lovely. thanks for sharing!
You are very welcome and thank you!
Great stuff Allen! That Magus piece is just fantastic. I chatted with you a bit at Spectrum Live a couple years ago and one of the things i added to my arsenal is the Mr.Clean eraser. You and Vanessa Lemen are Texture Gods! All the Best to you and Vicki.
Cheers-
Thank you so very much!…and best to you as well!
Is the ‘star’ shape in ‘Mr. Kind’ created by carving into the clayboard or is that just pencil technique?
Actually I made a stencil and used some acrylic to make the shape and texture…I polished the black with graphite powder….thanks for asking
Your art is amazing.
Thanks for sharing your work and techniques! Definetly going to try the powdered graphite, it looks awesome!
How do you keep it in place once the image is finished?
Hope to see more posts soon.
Thanks! Once I’m totally finished with a piece I usually spray a gloss acrylic or clear coat acrylic on top to keep it in place and unify the surface reflection.
Thanks!
Which fixative do you use to finish?
Hi Roni! For these pieces Allen uses Krylon Crystal Clear Acrylic spray as a top coat. These protect the surface and keep the graphite from moving. Vicki~
Thanks for answering!
Anytime Roni! Vicki~
Hey Allen,
You work incredibly beautiful! Thank you for sharing your process here.
I wanted to know if you could do an article about your thought process and inspirations behind your work.
I have seen in some of your Instagram live videos that you have a Pinterest page open for reference images, so I wanted to know if you have an idea first then you search for references ? Or you allow yourself to soak up several reference images which allow you to curate beautifully interesting designs in your mind?
Would love to know about this 🙂
-Ayan
Hi Ayan,
Thank you so much for the compliment. And thank you for the idea for a future Muddy Colors article. I will make sure Allen sees this, I have copied it over to our drive to share with him. Its a very good question. He actually works both ways, but that is just the very short answer. 😉 I will get this question to him to be able to explain more.
Thanks Ayan!
Vicki~
Hey, this is Allen, Vicki is completely correct. I work both ways depending on my particular needs at the time. I’ll certainly add this question into an article and give you a more detailed breakdown. I have a inspiration article planned and I can incorporate it into that!
Thanks
Welcome to muddycolors.
I love to learn new medias, thanks for sharing.
Looking so much forward to see more from you:)
Thank you Rasmus, I appreciate that.
Beautiful artworks and interesting technique. Graphite powder and water — what an unlikely combo! The effect seems somewhat similar to charcoal powder & acetone.
How do you photograph or scan your work?
Thanks for sharing! I’d be interested in seeing a bit more about your early creative process…the initial sketching or means by which you get ideas on paper.
Very interesting style.
I’ve never used clapboard so I have a couple of questions about it:
-How does it hold up over time (is it fragile or durable)?
-Have you found any other substrates to work about as well?
Love your work, and I’ve tuned into your IG live streams, which are fascinating.
Every so often I get a glimpse of your reference, and I’d love to see more about that. You build some amazing forms and sculptures, I think.
Thank you for such an insightful article about how you create your incredible works!
Your vision in these pieces is awe-inspiring, with even a single artwork you manage to give a glimpse into a dimension that is so dark on the one hand but so primordial and raw that the good/evil aspect almost falls away. More about the basics of existence than the vanity of individuality. Sorry for the babbling but I love art that pulls these strings.
Thanks again!
I really really would love to know about your sharpeners! that’s one thing that makes pencils and charcoals a pain for me.
Thanks for your great articles!
I’m amazed that the initial clay board surface actually holds the powdered graphite. It is usually super smooth and lacks any “tooth”.
Always one of my fav posts. It really pushes my imagination in new directions.