Plein air painting is one of those things I’ve been interested in but truthfully never really tried.
The reality is, for me, painting is enough of a challenge without the whole natural world getting involved. I’m envious of those artists who can set up shop seemingly anywhere and pull together a painting!
Bill Robinson and I go way back (we first met in 2009 when I was curating a Maurice Sendak tribute art blog called Terrible Yellow Eyes). He has a decorated career in children’s books and animation and currently works as a visual development artist at Sony.
I thought I’d invite Bill over to share a little of his experience and expertise with plein air painting.
Enjoy!
How and when did you get started plein air painting?
A little over a year ago I moved to Los Angeles and was working at my first job in feature animation with some very talented painters. When I started nosing around and asking them how they got so good, they mentioned that they go plein air painting as often as possible. I had seen plein air and even done a couple of workshops years ago, but the practice never really cemented for me. Lucky for me, we formed a little group of people who would go painting every day at lunch, setting up on the streets of Santa Monica near our office. Being able to see the gear, subjects, handling of paint…and doing it every day finally got me over the feeling of, “I have no idea what I’m doing” and made the whole process much more enjoyable.
What makes a good location for plein air painting? Do you decide where to go and then choose a spot or is there something in a particular landscape or place that you set out to find first?
I find myself more attracted to nature than architecture or cityscapes, which for me comes down to where I like to paint and what I like to spend hours staring at. I would usually rather be out on a sunny trail or near a stream than in a busy industrial area, though there is plenty of beauty to be found in factories, train yards, etc. and I think it’s a good idea to mix it up every now and then. When I head to to my general location, the first thing I look for is the lighting. If there’s a really beautiful shadow pattern or the light catches my eye and holds it, I will stop and consider that place for a painting. Subject matter itself doesn’t matter all that much, I’ve found that a tree or a rock or a flower or a mountain can all be painted in beautiful ways. When I’ve been to an area enough times I start to keep a mental log of spots I want to paint, which makes it easy the next time I’m there.
What sort of materials do you take with you on locations?
I’ve found that everyone has a different plein air setup, but the main thing for me is finding stuff that is lightweight and very portable. Here’s a look at my current setup:

-
Paper Towels, Spray Bottle, Artists Tape – These seems like add-ons, but they are essential! Paper towels especially, for getting the right consistency when mixing gouache. Too much water on your brush and you’ll be struggling. Spray bottle is good for keeping your palette wet.
-
Brushes – I mostly use 2-3 brushes on a painting. Mainly a 1” flat and then maybe a ¼” flat for details. Once in awhile I use a round for smaller details. I love my cylindrical brush carrier, which keeps them from getting bent bristles in my backpack.
-
Palette – I use a Sta-Wet palette for and it changed my life. I used to hate working with gouache because it dries out so quickly, especially in heat or direct sunlight. The Sta-Wet palette has a wet sponge and a special palette paper that keep your paints full of moisture, even days later. I also use a small spray bottle of water to refresh the paint if necessary.
-
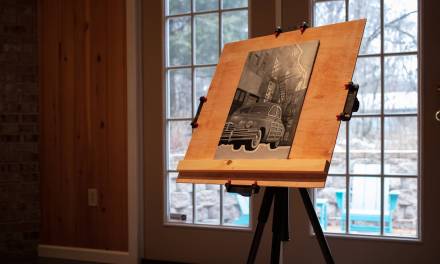
Paper/Pencils/Eraser – I work on a variety of surfaces, but mostly either cold press watercolor paper or hot press illustration board. I have started to prefer illustration board, mostly because you don’t have to worry about buckling or warping. I’ve always got a pencil and kneaded eraser in my kit for laying in quick sketches. The boards in the photo are from Cottonwood Arts.
-
Water – I use an old pill bottle with a screw on cap to hold my water. It’s tiny, lightweight, and watertight.
-
Masonite board – If you are using a small painting surface, it’s good to have a board to tape it down to.
-
Pochade Box – I bit the bullet and bought a fancy STRADA easel. It’s lightweight, strong, super portable, and easy to use. No complaints. There are definitely cheaper options (including many homemade ones) for people just getting started.
-
Tripod – I’m using a cheap old tripod I had lying around the house, but it would probably be a good idea to use something a little more sturdy. Just be careful of how heavy it might make your pack.
-
Travel Toiletry Hanger/Paint – I had this old toiletry carrier and found that it is perfect for holding my supplies. It has a hanger hook up top, which I can hang on to my easel for easy access. I use gouache for my plein air paintings, mostly because it’s waterbased, opaque, and dries quickly. Also, the tubes are very small and easy to transport! I am fond of Holbein and Winsor & Newton, though there are other good brands out there.
-
Backpack – This Kelty Redwing bag is huge, with tons of zippers and pockets for all your supplies. It’s a serious backpacking kit, so you trade off a little more weight to use it. Sometimes I switch this out for a lightweight gym knapsack if I don’t need all the gear.
Current setup in action:
Walk us through your process.
Step 1: Once I’ve selected a subject/area to paint, I take a few minutes to think about composition. This will depend on the format of my painting surface (sometimes it’s square, or wide, or tall, etc) but I tend to work rather small. This particular painting is about 5″ x 7”. Once I’ve got a composition in mind (considering the rule of thirds, focal point, etc) I will do a very quick sketch. This is going to get covered by paint in a moment, so I keep it rough. I just want the key things like the telephone pole, the house, and the wall at the bottom in their basic positions.

Step 2: Basic Block-In. I do this as quickly as possible, mostly working wet-in-wet. Don’t expect this phase to look good – if it does, you’re probably getting bogged down in detail. Sometimes I will work on white, other time I will ground my canvas with burnt sienna or something similar. In this case I kept it white for the sky. The thing about gouache (and watercolor) is that you will never get a paint as white as the original paper…so be careful with preserving it when you need to!
Step 3: Tightening Up – Here I’ve got my colors blocked in and am paying more attention to local color. I want the greens to have the right temperature and the browns and yellows to feel like they are in either light or shadow. It still looks very rough.
Step 4: Values: Now I’m starting to pay more attention to value. I lay in some of the darkest darks and try to get more key details locked down. I pay more attention to color variation, like adding in some purples to the dirt trail and some blues to the sides of the house.
Step 5: Finished! Here I’ve added the fine details, the lines on the bricks, the fence posts, the telephone wires, small leaves and flowers. It’s amazing how much these little details bring a painting to life, but they would not work if the rest of the foundation had not been laid down.
I’m curious, do you find that people want to see what you’re up to or do they give you space?
I have gotten pretty mixed reactions, depending on where I am set up. Most people are very friendly and just excited to see what you’re working on. I’ve painted in big cities, where people have made jokes about how they wish they could spend their day painting instead of working. (Reconsider your life choices!) I’ve painted at Disneyland, where kids get super excited to see an artist doing something. Mostly I paint out on nature trails where I get to meet dogs and chat with their owners!
Thanks so much for sharing your expertise with us, Bill! Where can people find you online?
My pleasure! I share my plein air paintings and a lot of my process shots on my Instagram:
Also, I understand that you have a show coming up as well, where can people find that?
Yes! I am very excited to announce that I will be having my first solo show of my pleinair artwork at the Light Grey Art Lab in Minneapolis. It opens April 21 and goes through May 20. The artwork will also be available online after the show opens.


I have always wanted to try plein air but I just find it very, very hard to settle down and focus, and by the time I get comfortable enough to draw coherently, well, time's up.
Very cool. Thank you for sharing. I like to focus on all the colors I see and spend those first few minutes mixing colors and setting up my palette. But while I'm mixing I start focusing on design and composition. Having a good palette really helps me out. Would love to hear your thoughts on that
Great post, nice to get some inspiration.
How long time do a painting like this take?
Hello! I've been following Muddy Colors for some time, it's actually my main page when I open a web browser and I find so amazing that all posts are exactly what I need to read in that particular moment! I've been painting in digital media for some years and recently I find myself very interested in watercolor. I want to go out there to paint and study the city and nature through my own vision. However, I get so intimidating by people coming and seeing what you are doing. Thank you for those tips, this post really inspired to try and just be focus on my own work 🙂
Hi Rasmus, I usually spend between 1-2 hours on a painting, depending on how complex the subject is.