
Thought I’d take you folks on a little quest for subtlety.
If you caught my last Duralar demo for Muddy Colors, you may remember me doing some painting on the back of the Duralar with a make-up sponge. The act was really just to get a middle value on the reverse of the material with a few smooth transitions. But it looked kinda interesting in and of itself, and we pondered doing more with it.
I’ve been wanting to have things ’emerge out of the fog’ a bit more in some paintings. More lost edges. More blurriness. But retaining some honest to goodness SNAP just where I want you to look.
You can only be so accurate with a sponge, so my theory was if I stayed with the tool as long as I could before I went for the brush, I could sneak up on it. I think the more accurate the tool, the quicker we are to resolve everything. When sometimes a slow evolve would be better.
So here we go, step by step.
You can get a sense of the whole thing start-to-finish in this vid. Then scroll below for the blow-by-blow explanation.
[youtube https://www.youtube.com/watch?v=rFpGFIlh7vY]

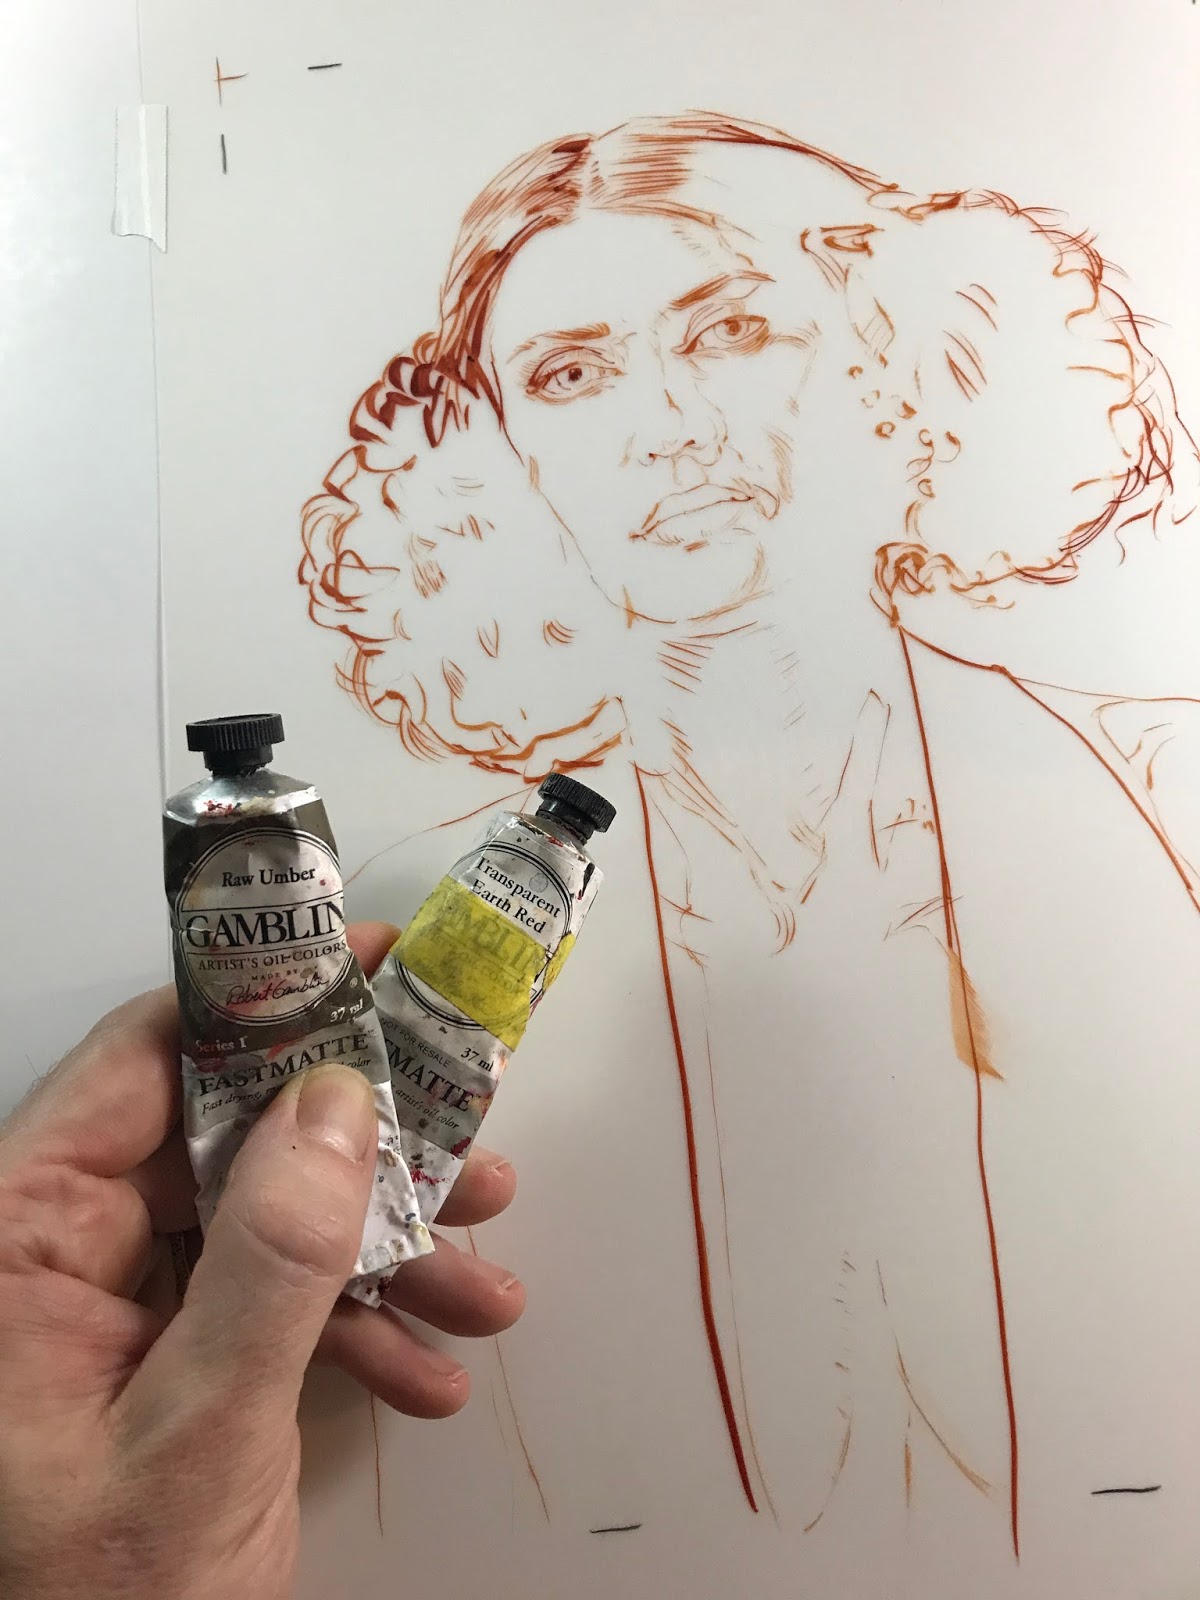
I did a quick road-map for what is to come in FW acrylic ink. In case I got lost I wanted to get back to my drawing with a wipe of a cloth. These are pretty standard make-up sponges. I am using Gamblin Fast Matte oil paint here which I think is a big factor in the success, because as its name indicates, it is pretty matte stuff. Especially if you don’t use medium (that comes later) so it doesn’t move around much once it is down. We are working on Stabilene, which is an old school Duralar. In this case we are ONLY working on the front of the surface.
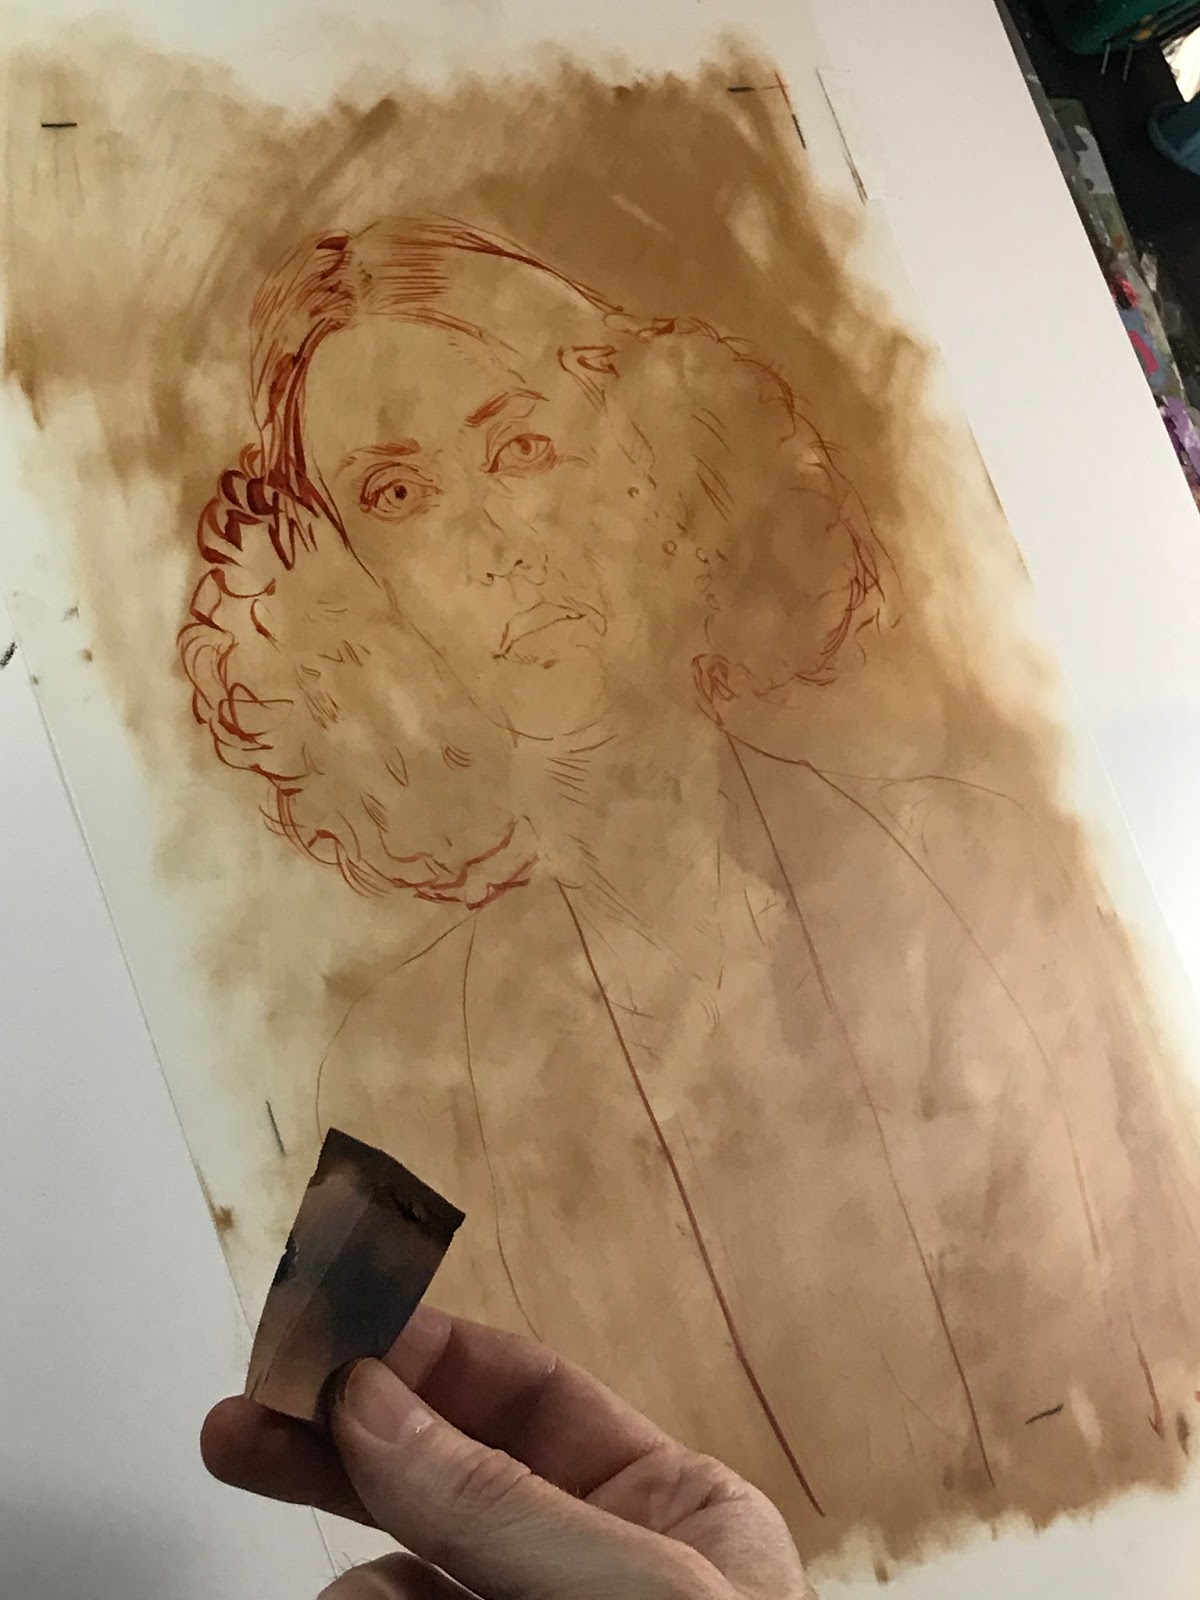
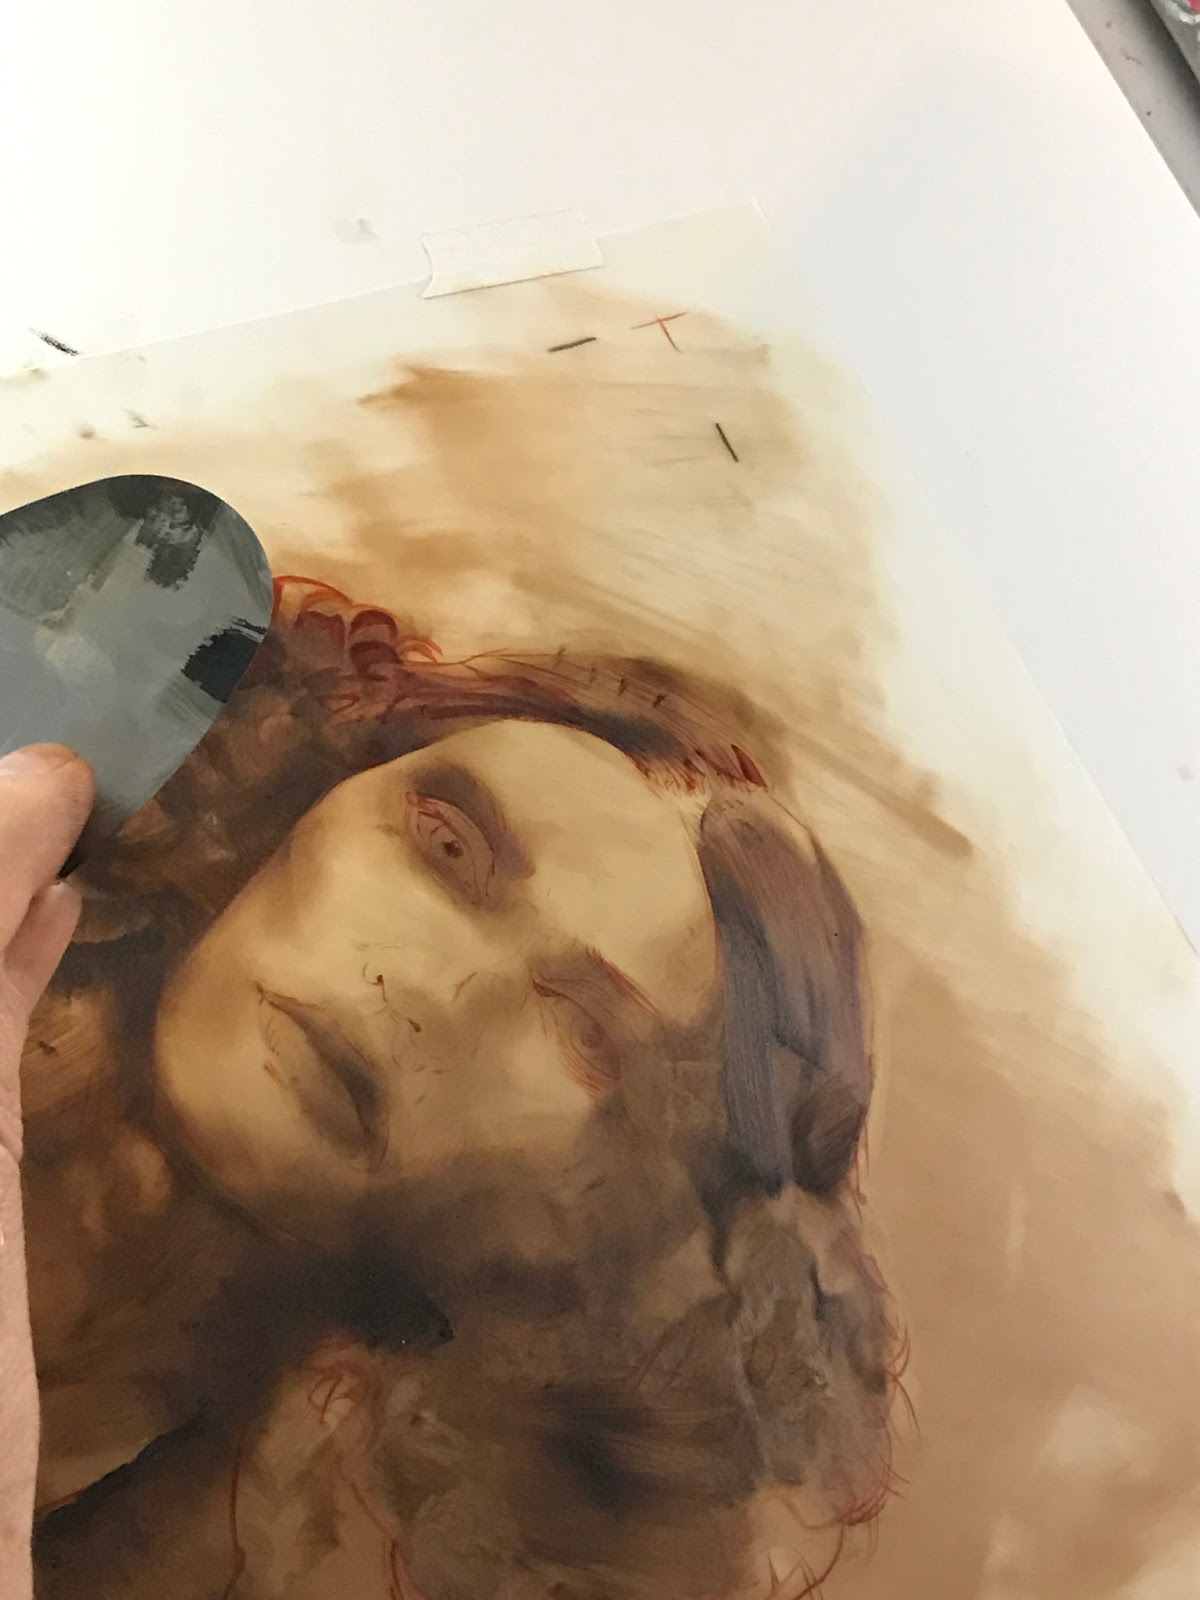
Though a am surprised how accurate you can get with just the sponge, by pinching it, stamping it, sliding it- I wanted a bit more edge control. To do that I use sculpting scrapers and torn paper as a mask, protecting areas I don’t want to get paint on. Again because Fast Matte oil paint is so stout, it doesn’t rub off as effortlessly as oil paint would.

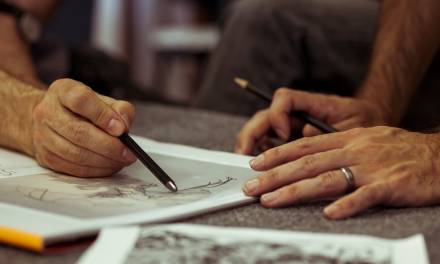
All right, time to choose some more accurate weapons. First a Robert Simmons White Sable filbert. I chose the filbert because the tapered edge lets you feather the paint much more than my usual flats. And this is all about some feathering. Trying to resolve a bit more, but not too much too soon. Remember I want to sneak up on this.
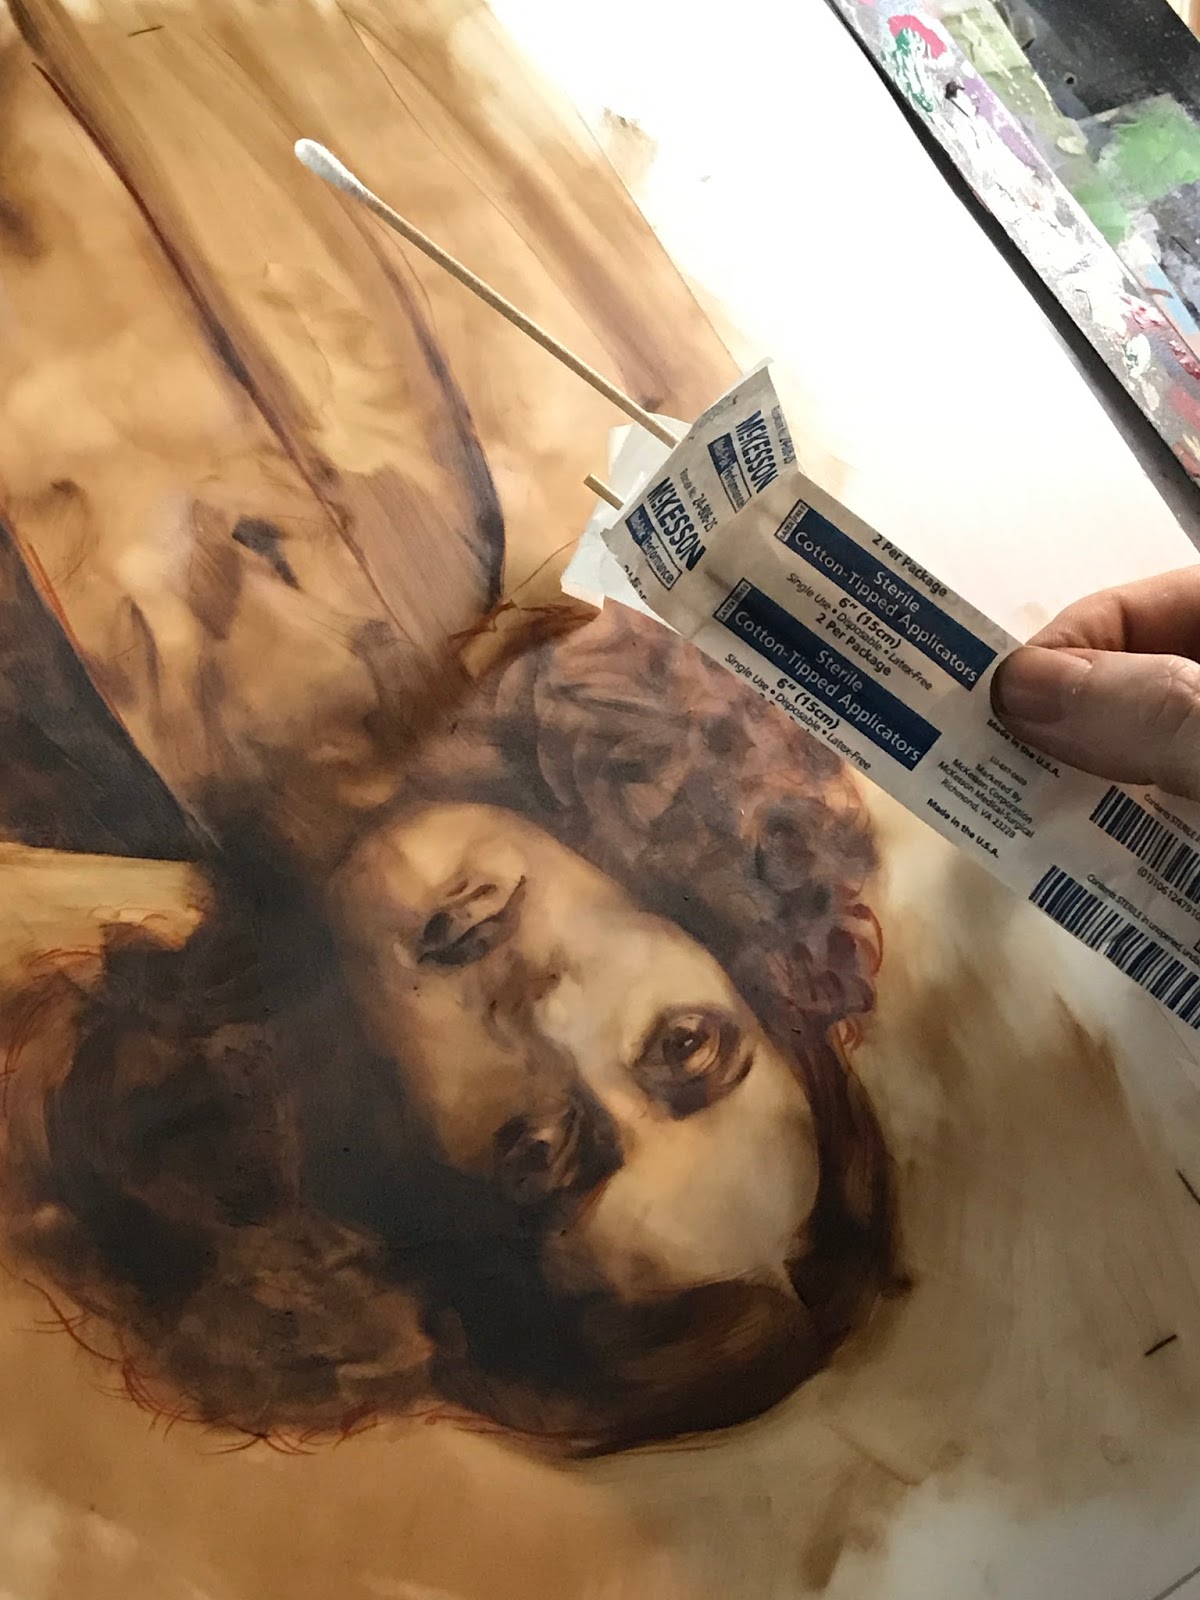
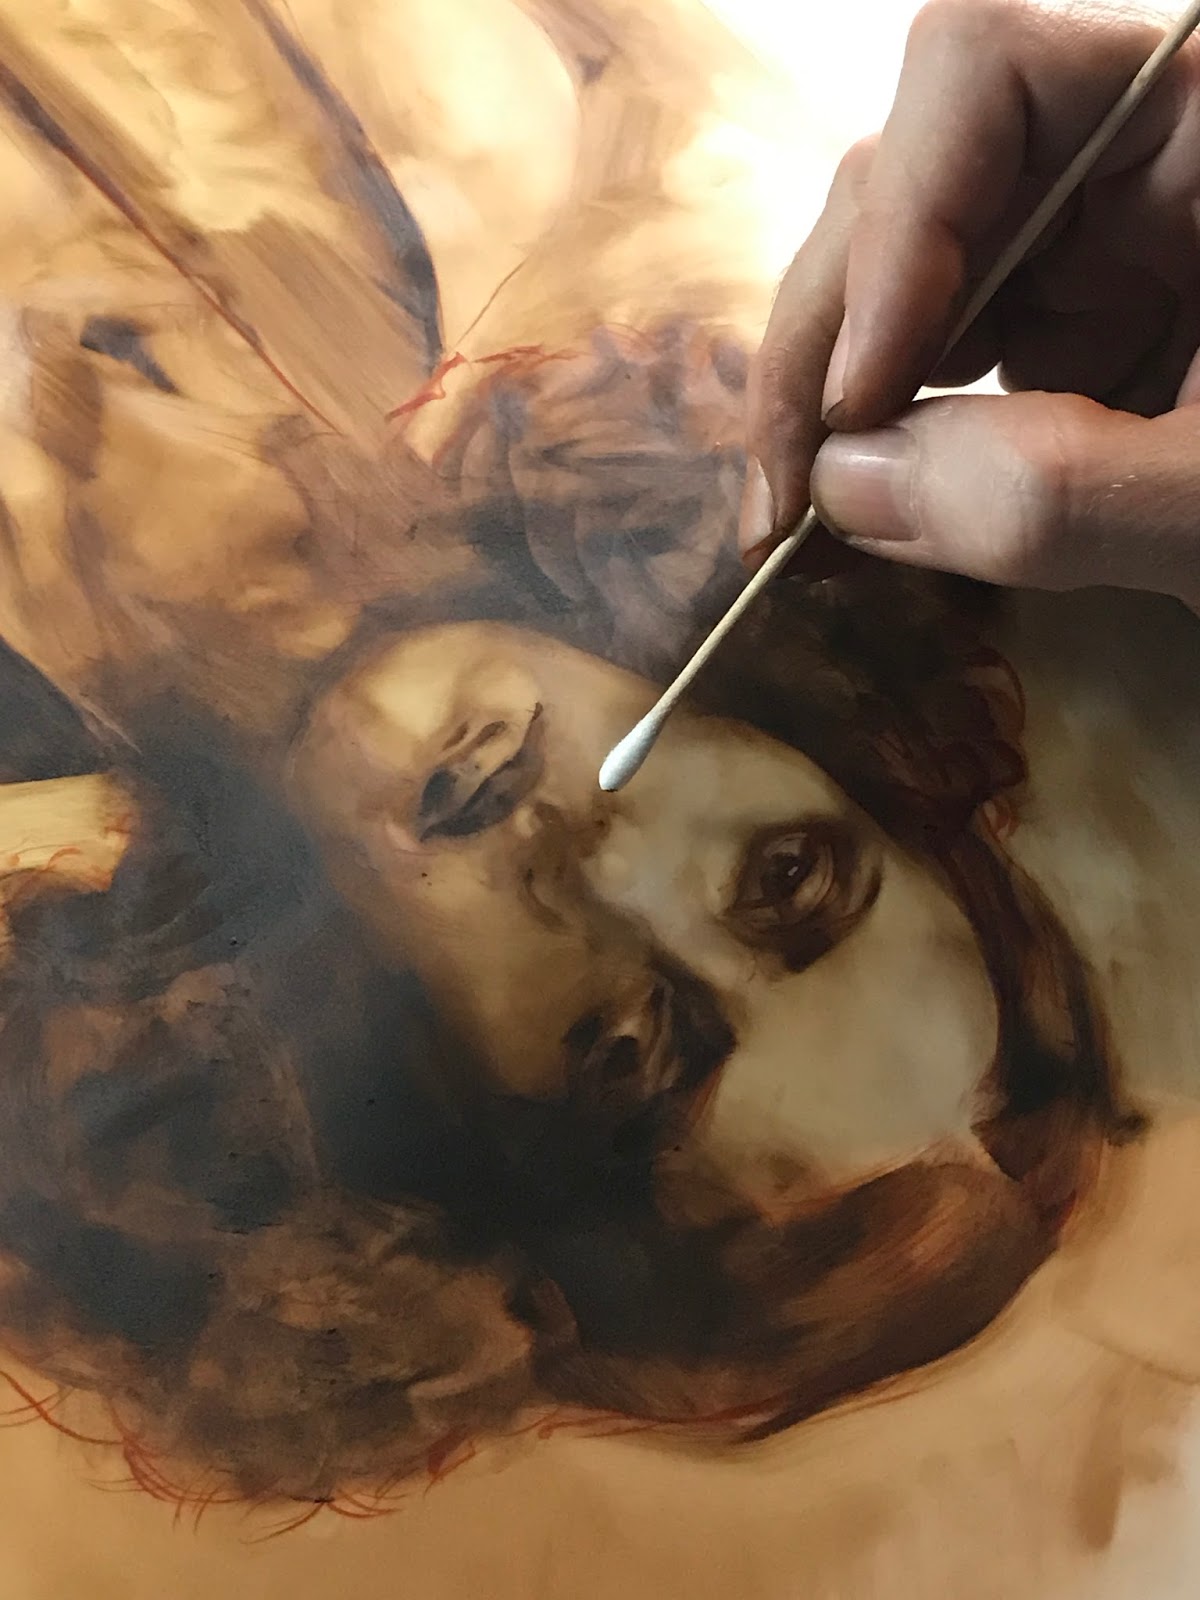
A q-tip (or in this case a far superior, medical cotton tipped applicator, which is much firmer.) is another fine choice for sneaking up on something. Not only can I lift up the oil with a wipe-out technique, you can also apply paint in fuzzy strokes.
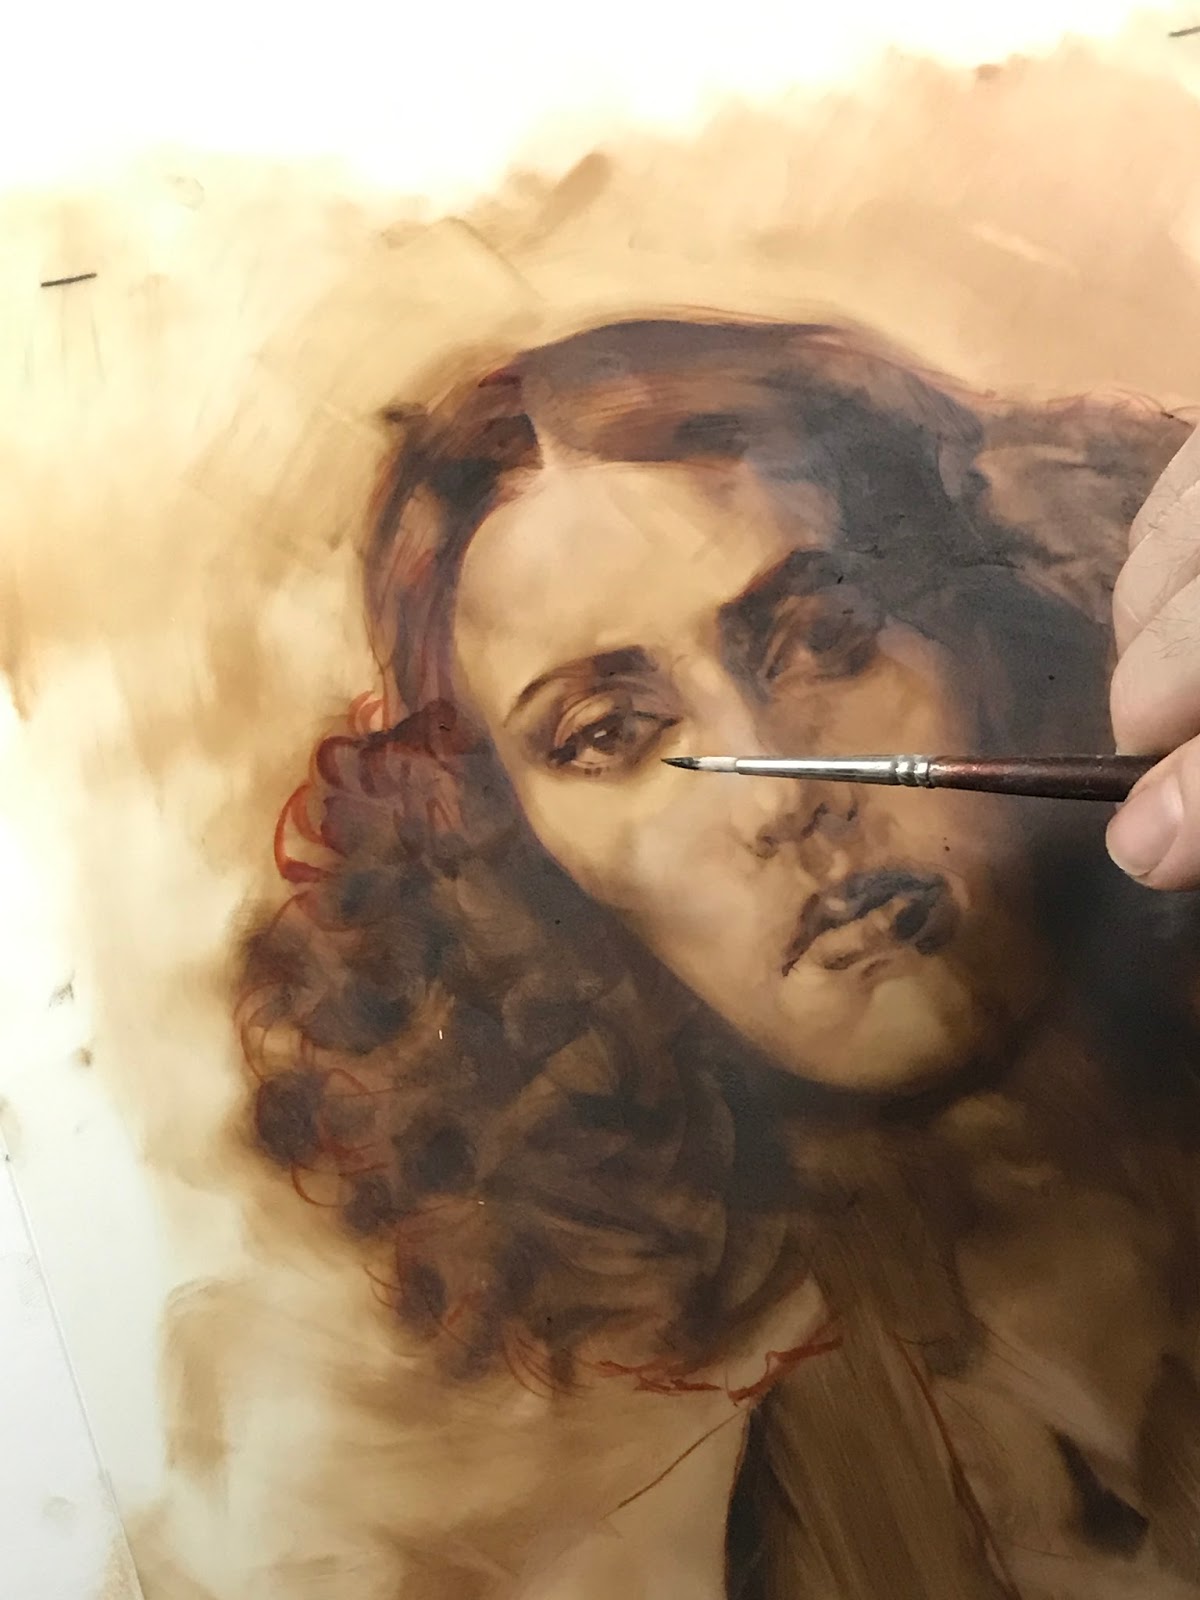

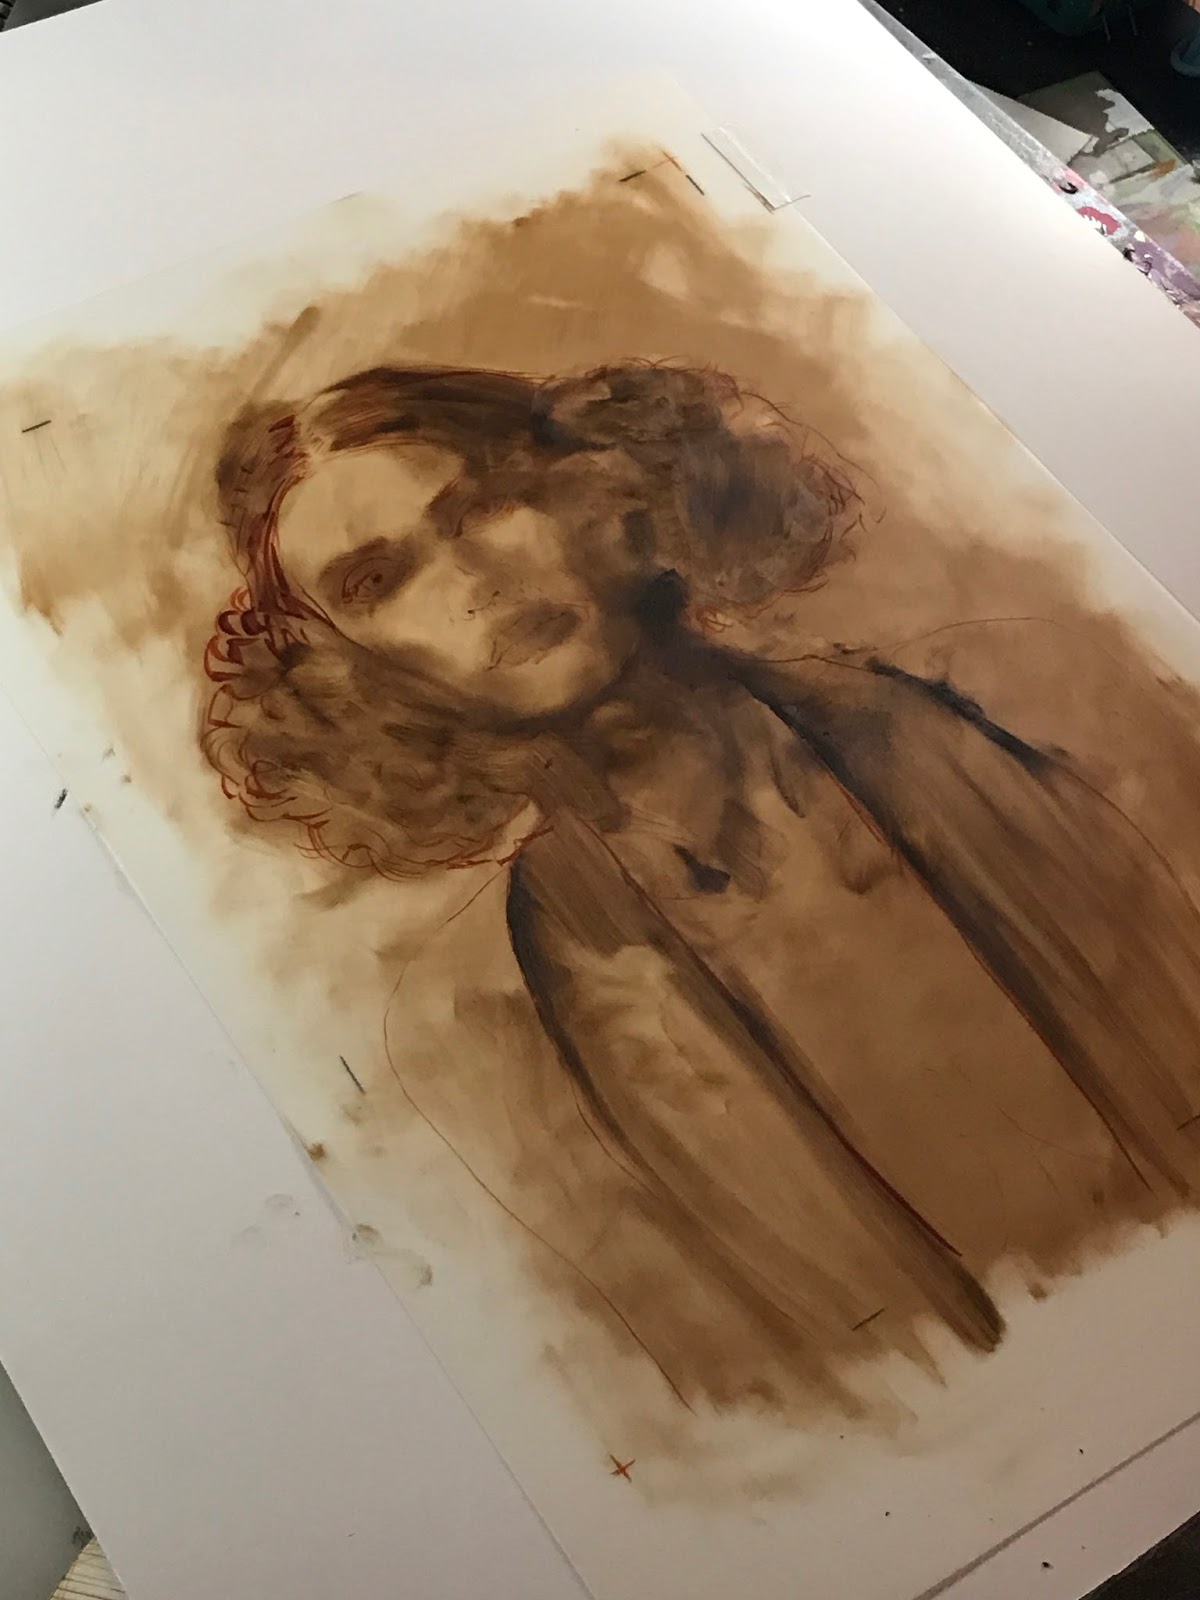
Pretty big jump here, but you can see the tools have gotten smaller cause we are firming things up in the upper values. (By just adding titanium white to the slurry.) We are keeping things in the fog in the shadows, which was my whole challenge in this piece. I wanted those transitions to shadow to get totally lost in areas like the eye on the right.
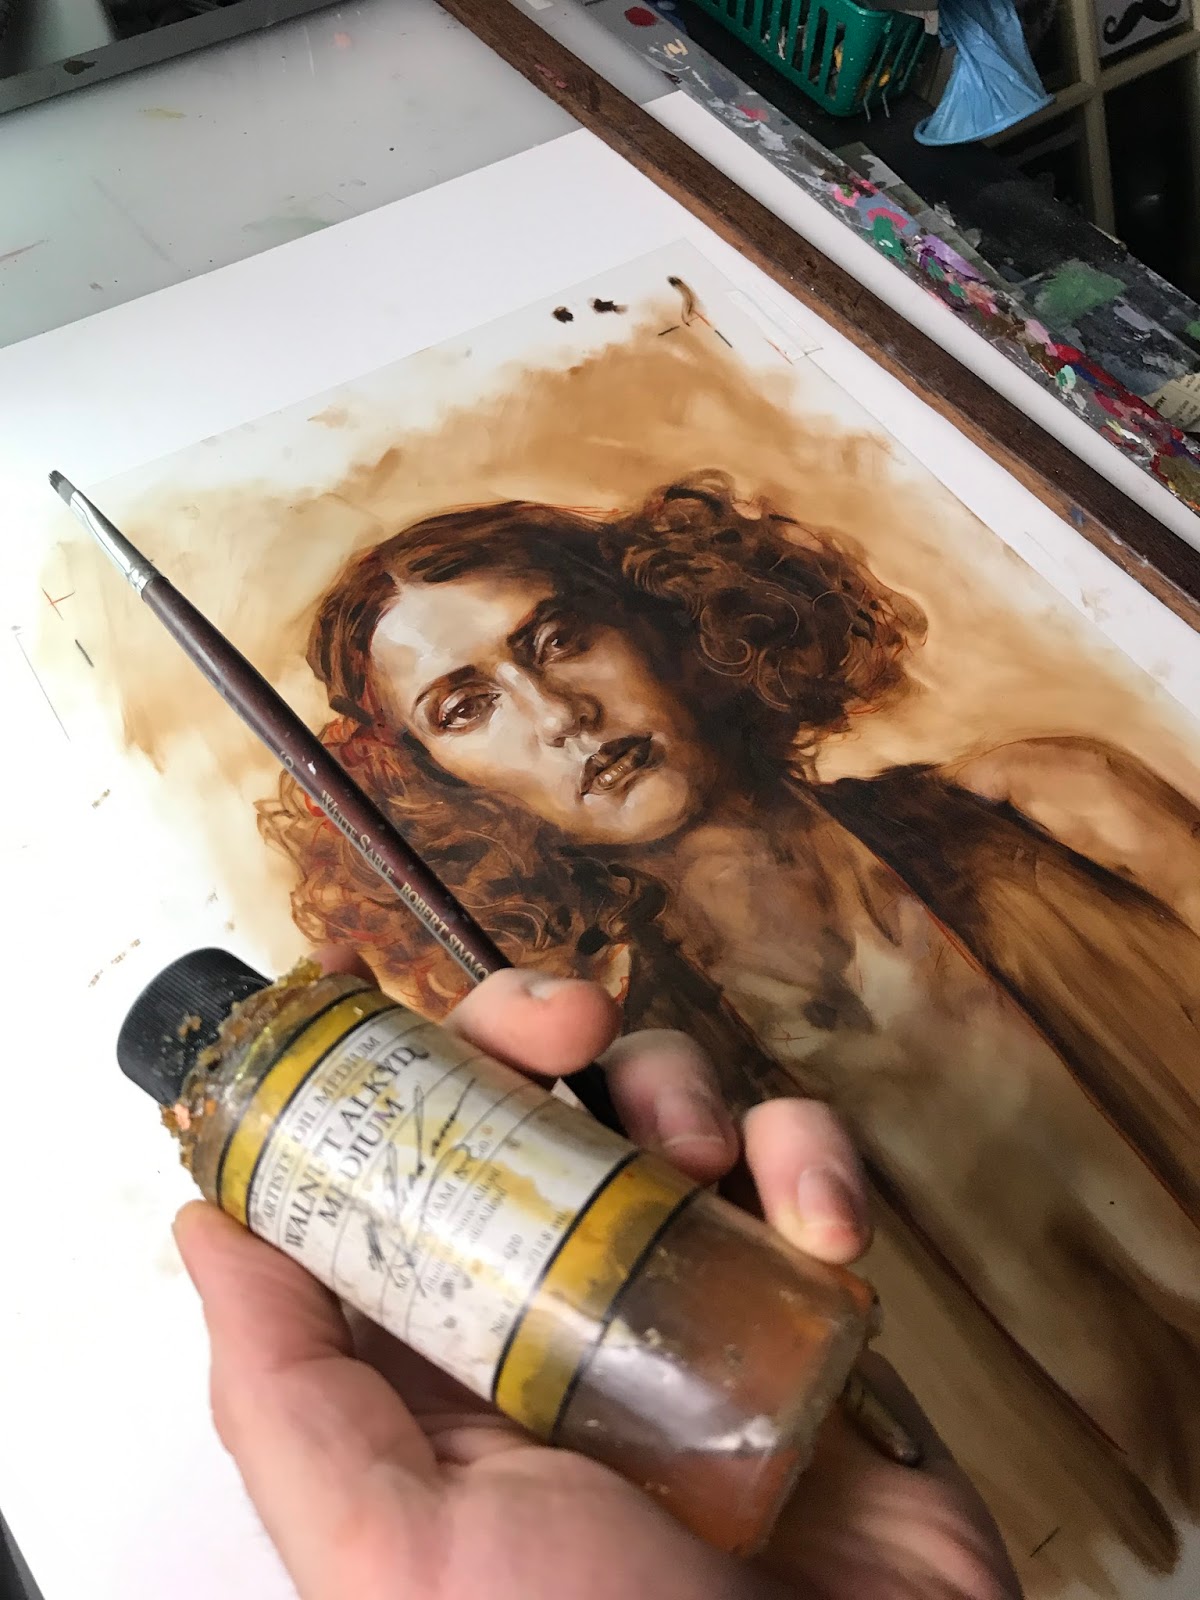
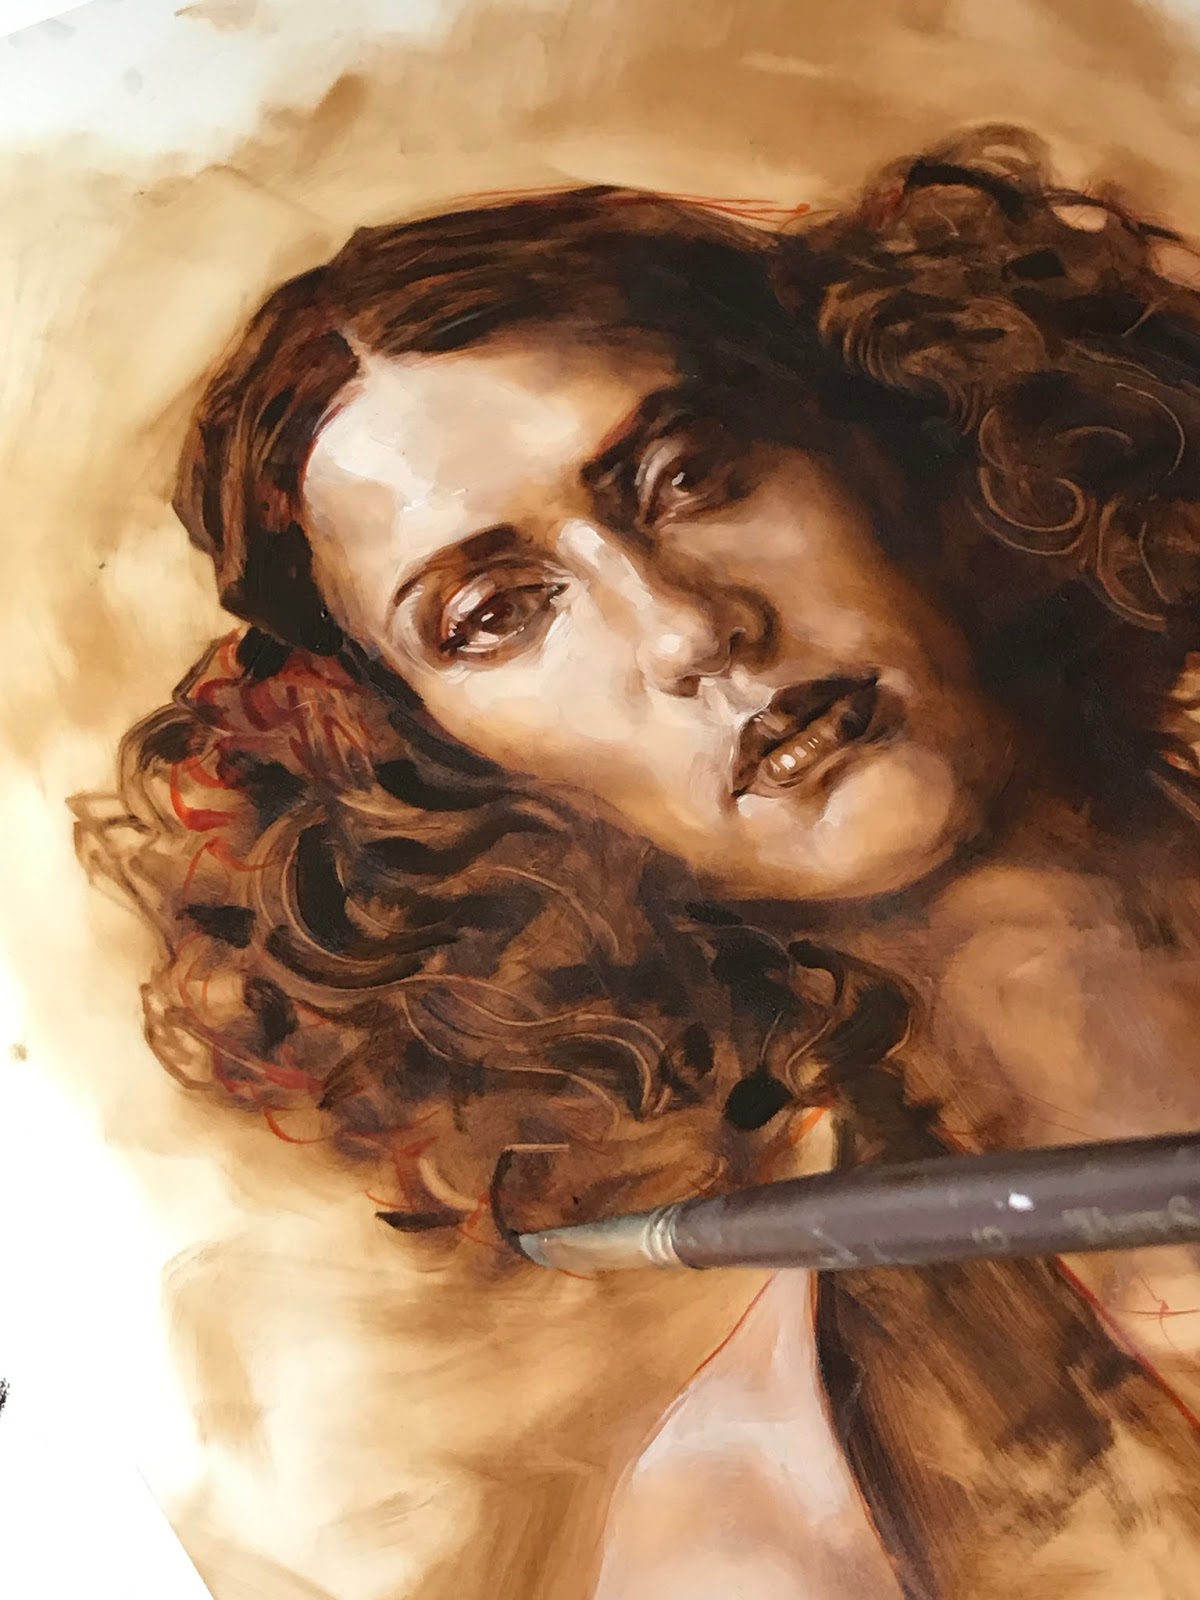
Only now do we add some medium to the paint. I want to be able to hammer some accent marks. I don’t want to be subtle here. I want to bring the snap back over the fog. Again one of the pluses of Gamblin Fast Matte paint it that it doesn’t move around much when down. So if you fat up that paint with some medium, it tends to sit nicely on top of the lean underpinnings without lifting much with your stroke.
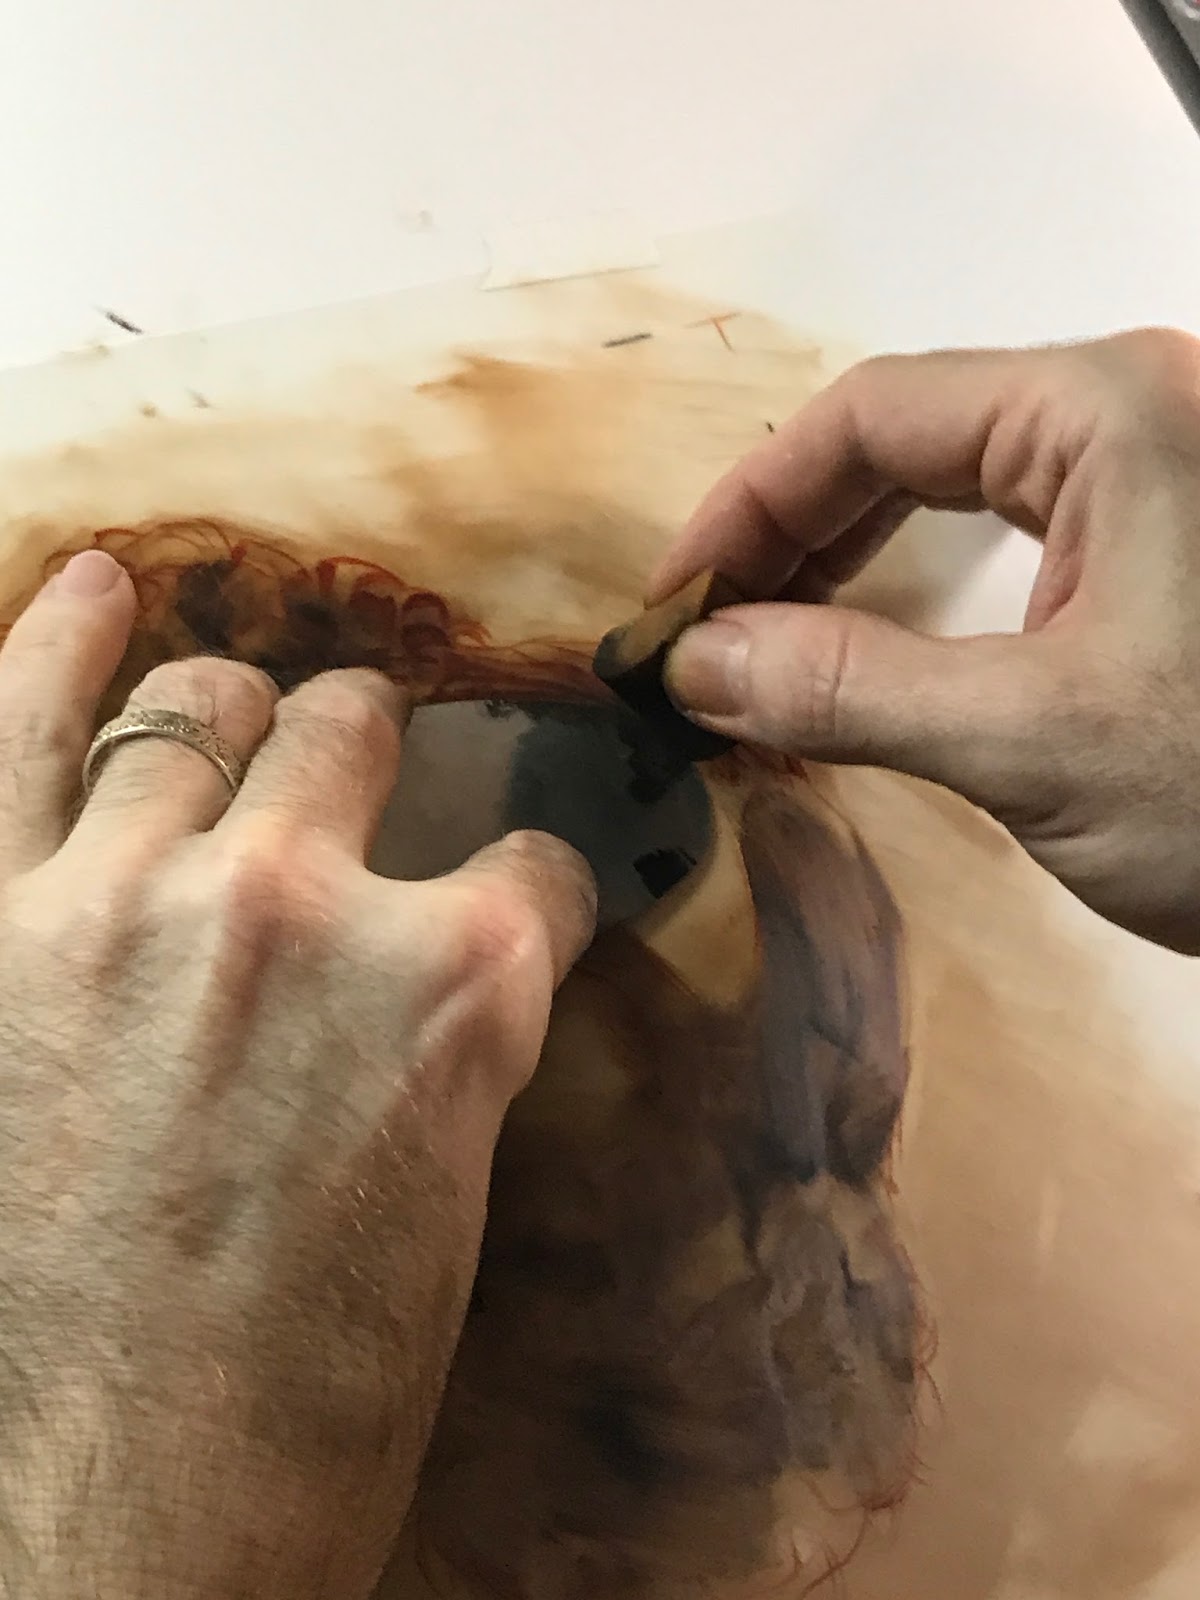
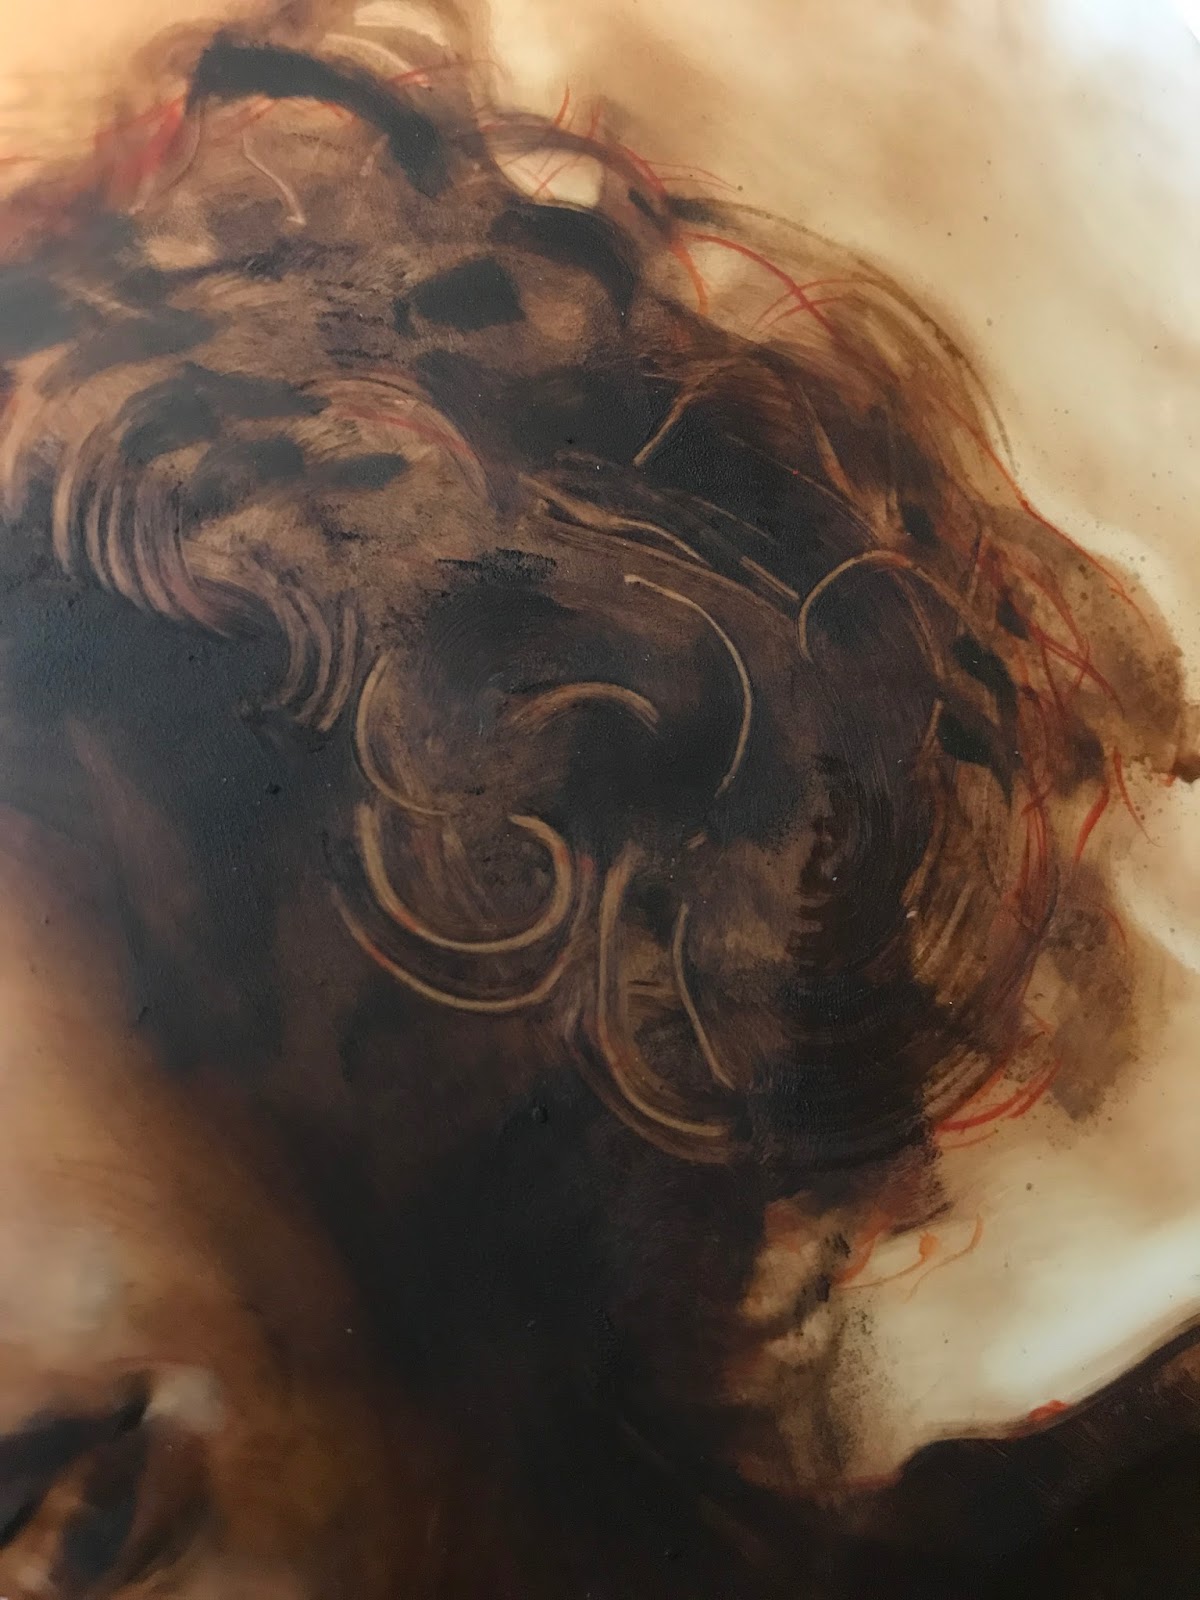
(You can also see above where I carved some cool lines into the hair mass with the medical q-tip, and drew some of the straggly hair around the edges with the same implement.)

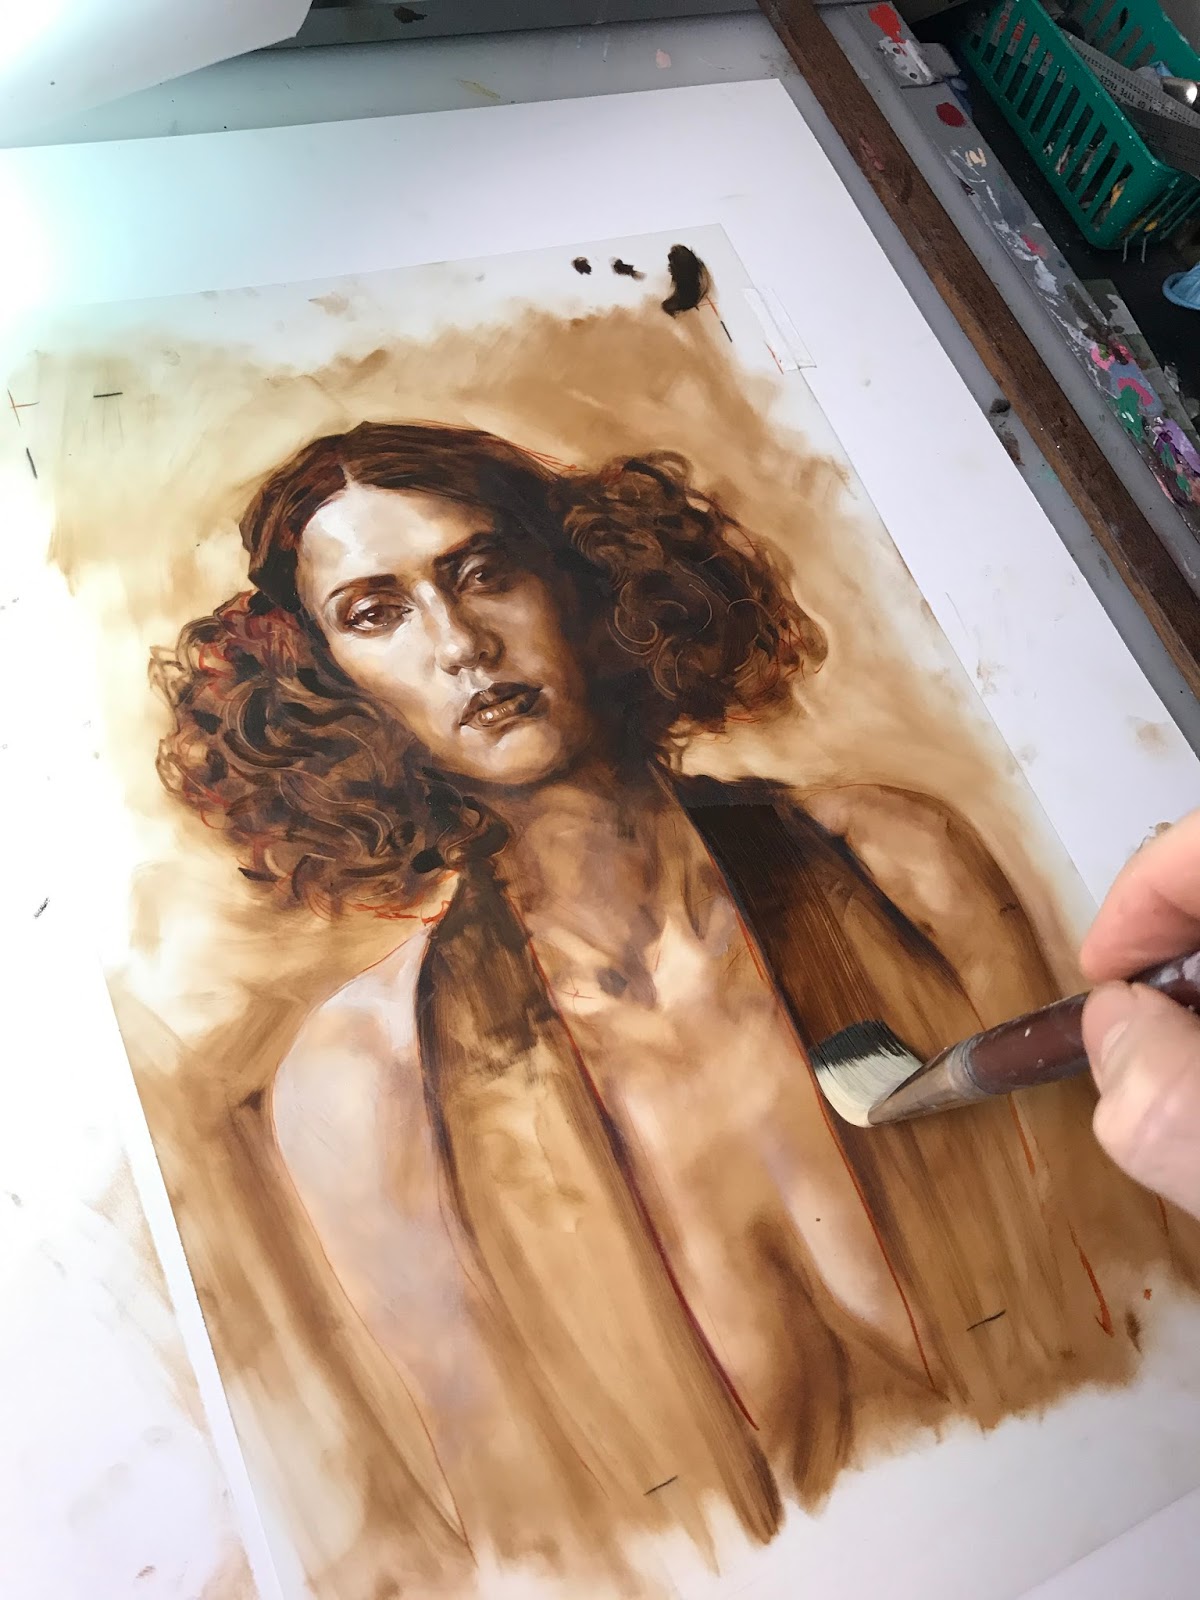
Cool, now time to lose some of that accuracy again. I used a dry, fat 1″ white sable and hit some of the harsher edges to blur them out. I also brought back the sponge to do the same thing.
But while we had the big boy out, we dipped it into the medium soaked pigment and knocked in the fabric. We also used the separated bristles to make drag marks in the hair and other places.
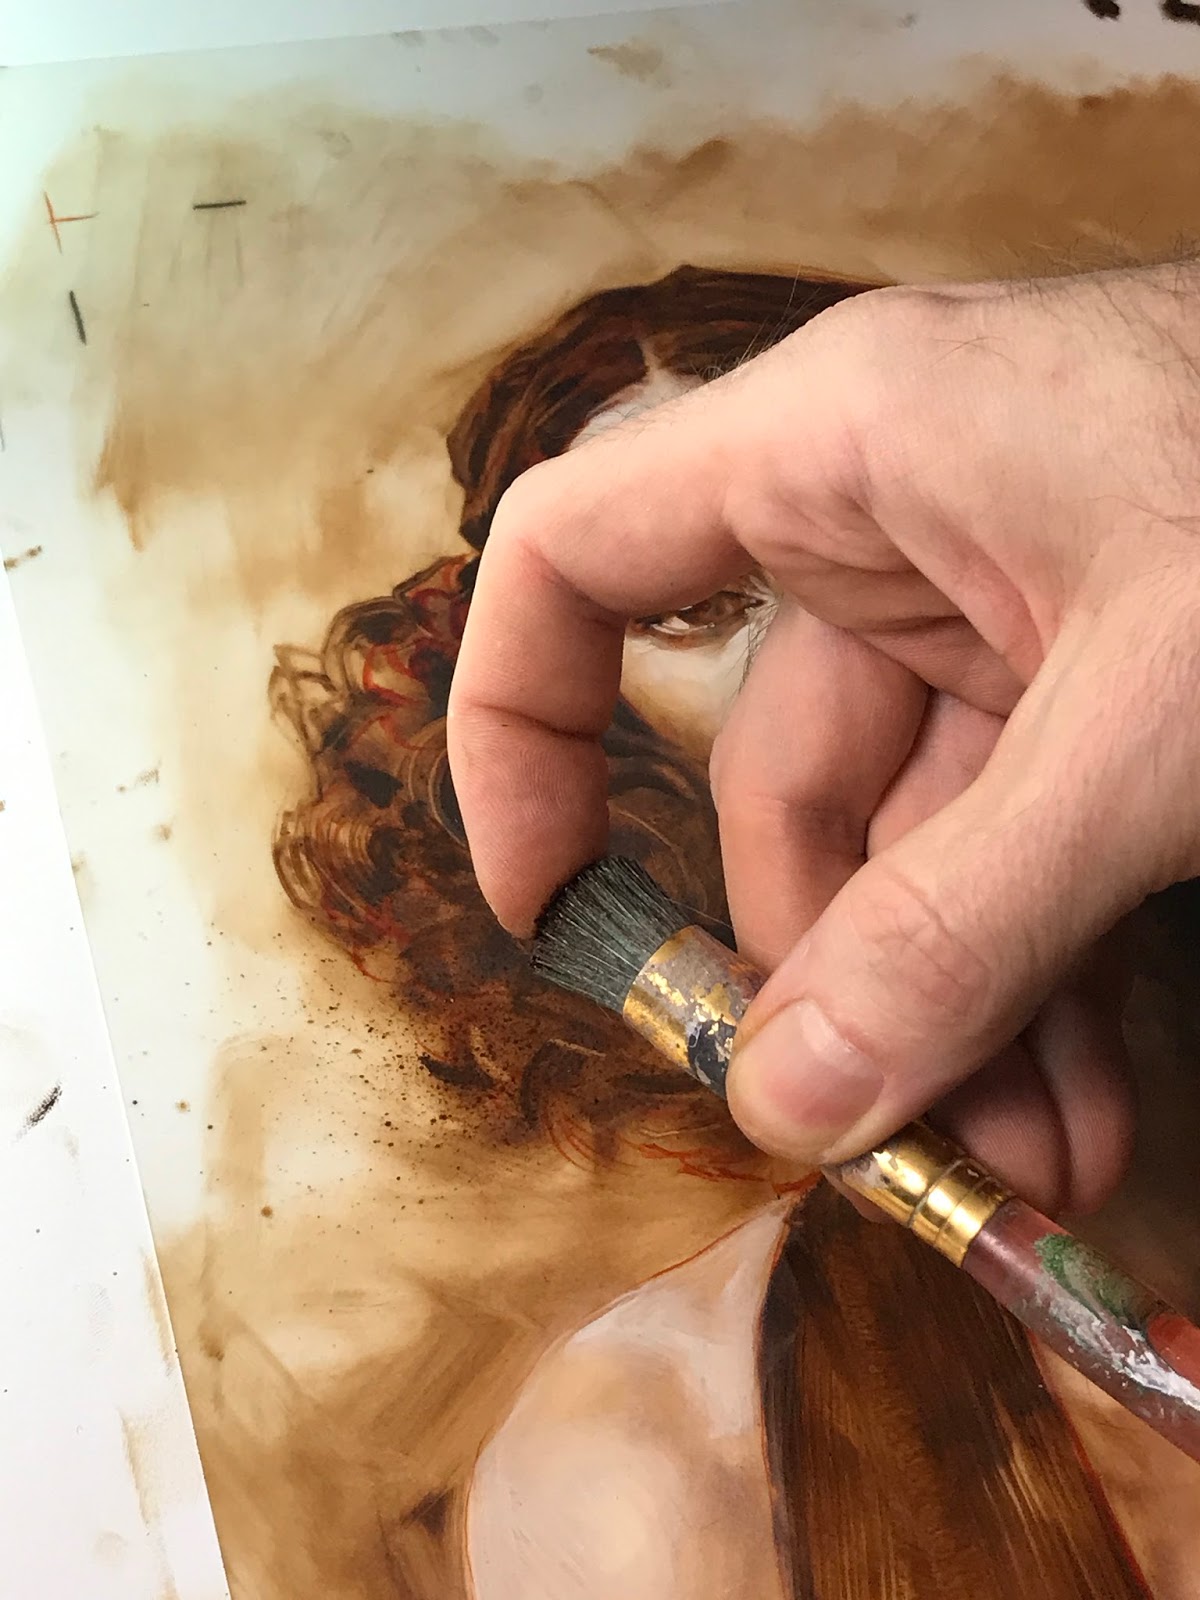
Spatter time! I use a cheap stencil brush to spatter paint into the hair, contributing to that fog I want.
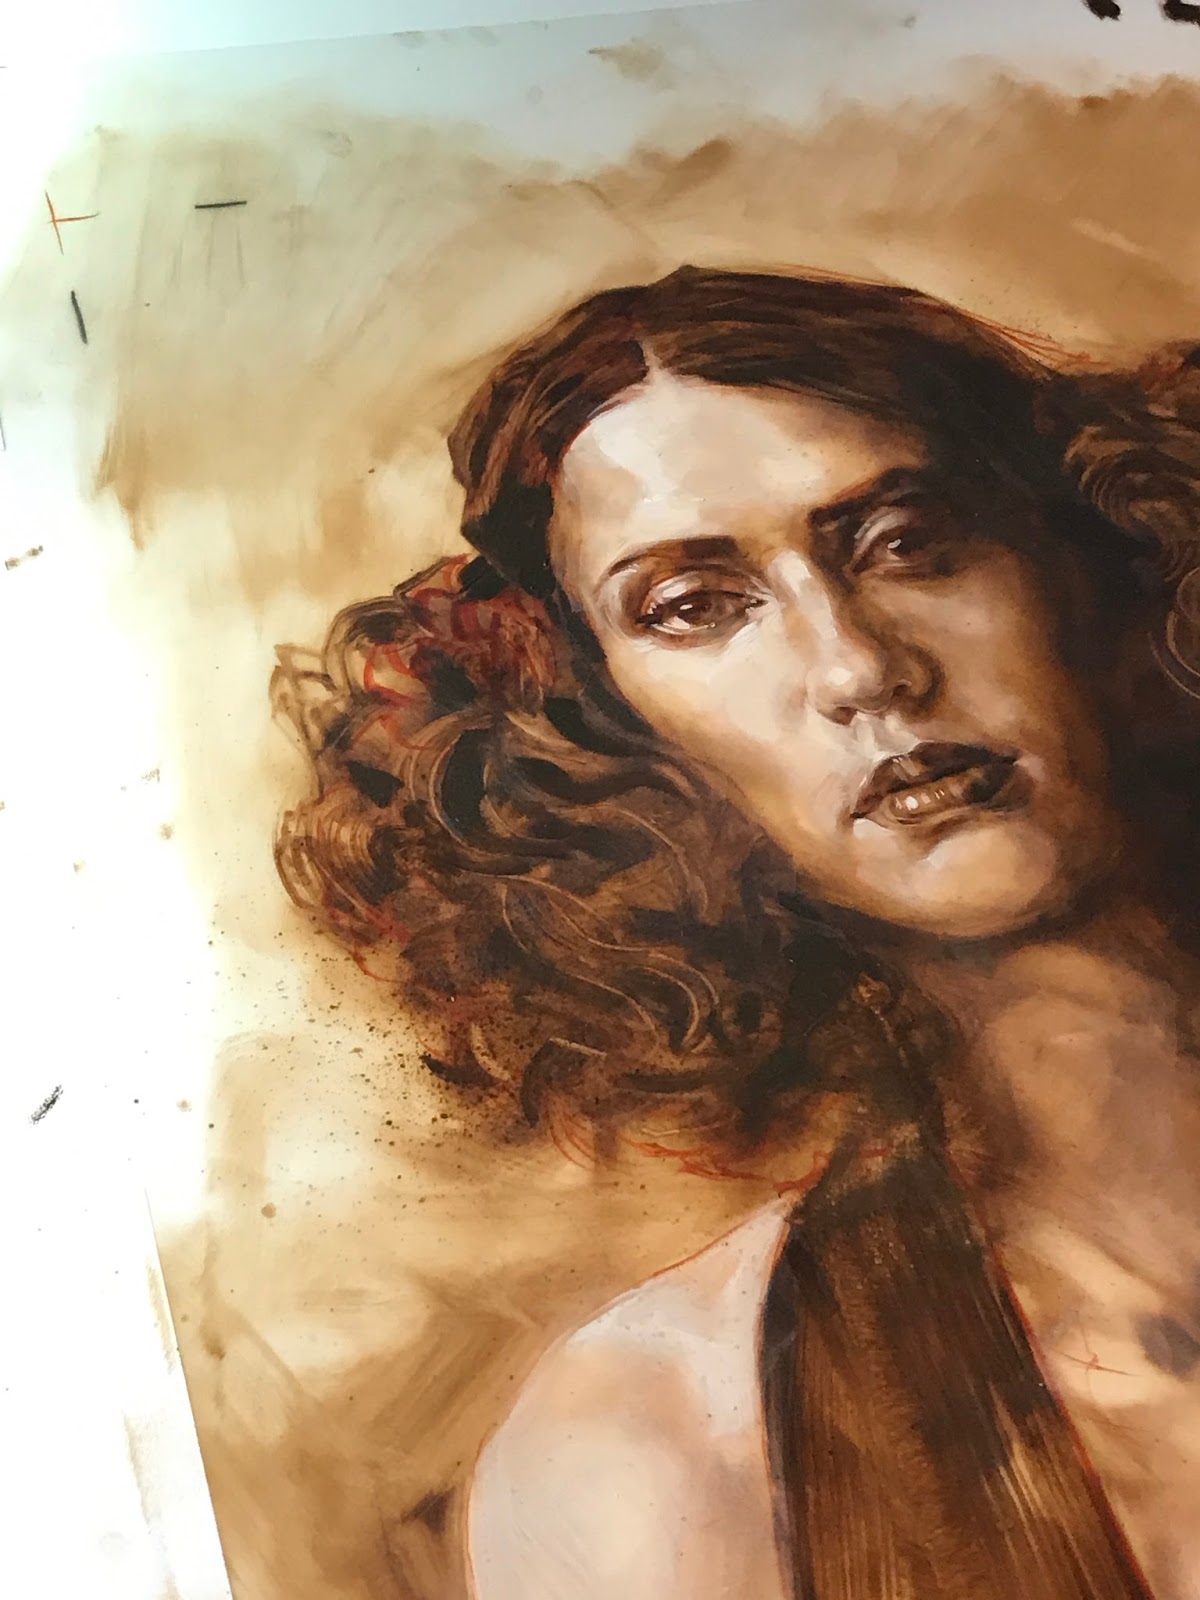
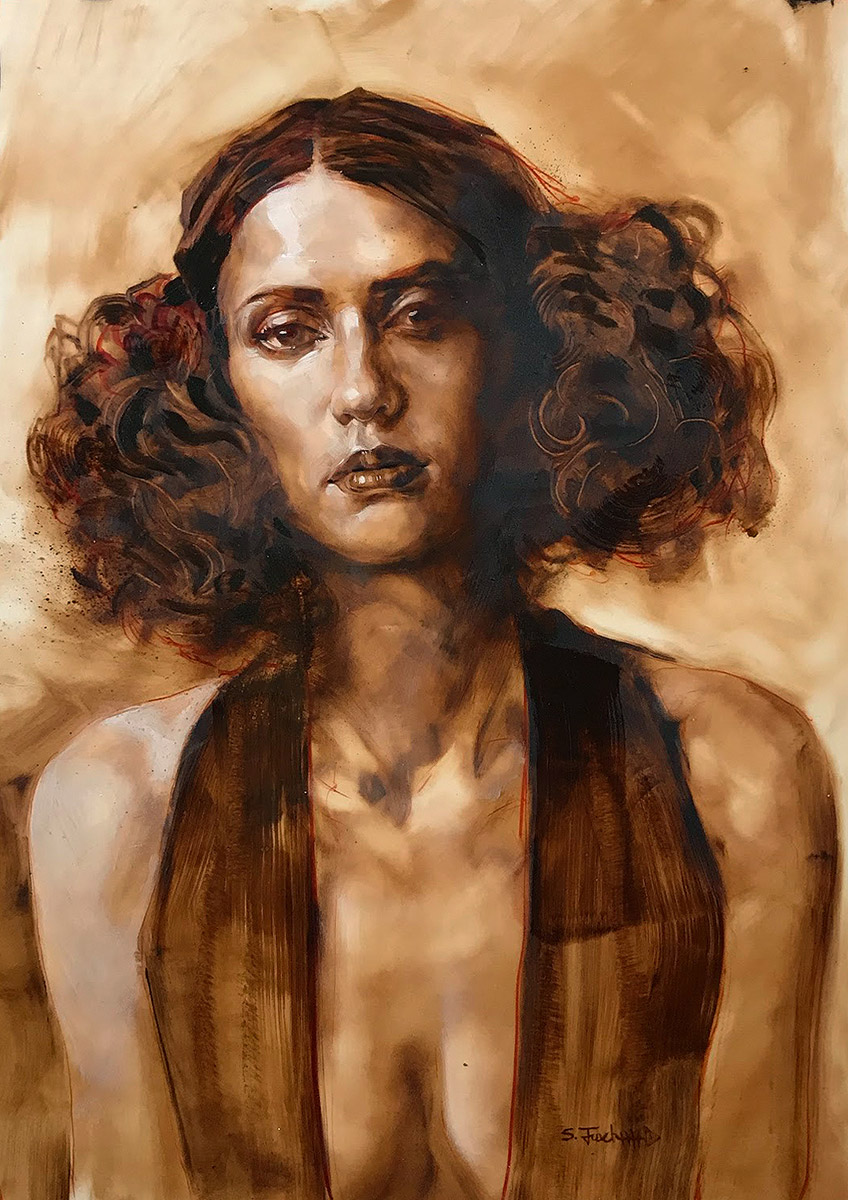
And that is all she wrote folks! Some parting detail shots.

I absolutely love the versatility that duralar and stabilene can provide.
Thanks so much! I am in love with this kind of style
Great post! So inspiring.