Many illustrators are also teachers. During the pandemic most of us have had to convert our previously in-person teaching to an online format. There are many complications to consider when trying to build a virtual experience for the students which cab be as valuable to them as the in-person education they had been expecting until a few months ago. We are all learning to adapt.
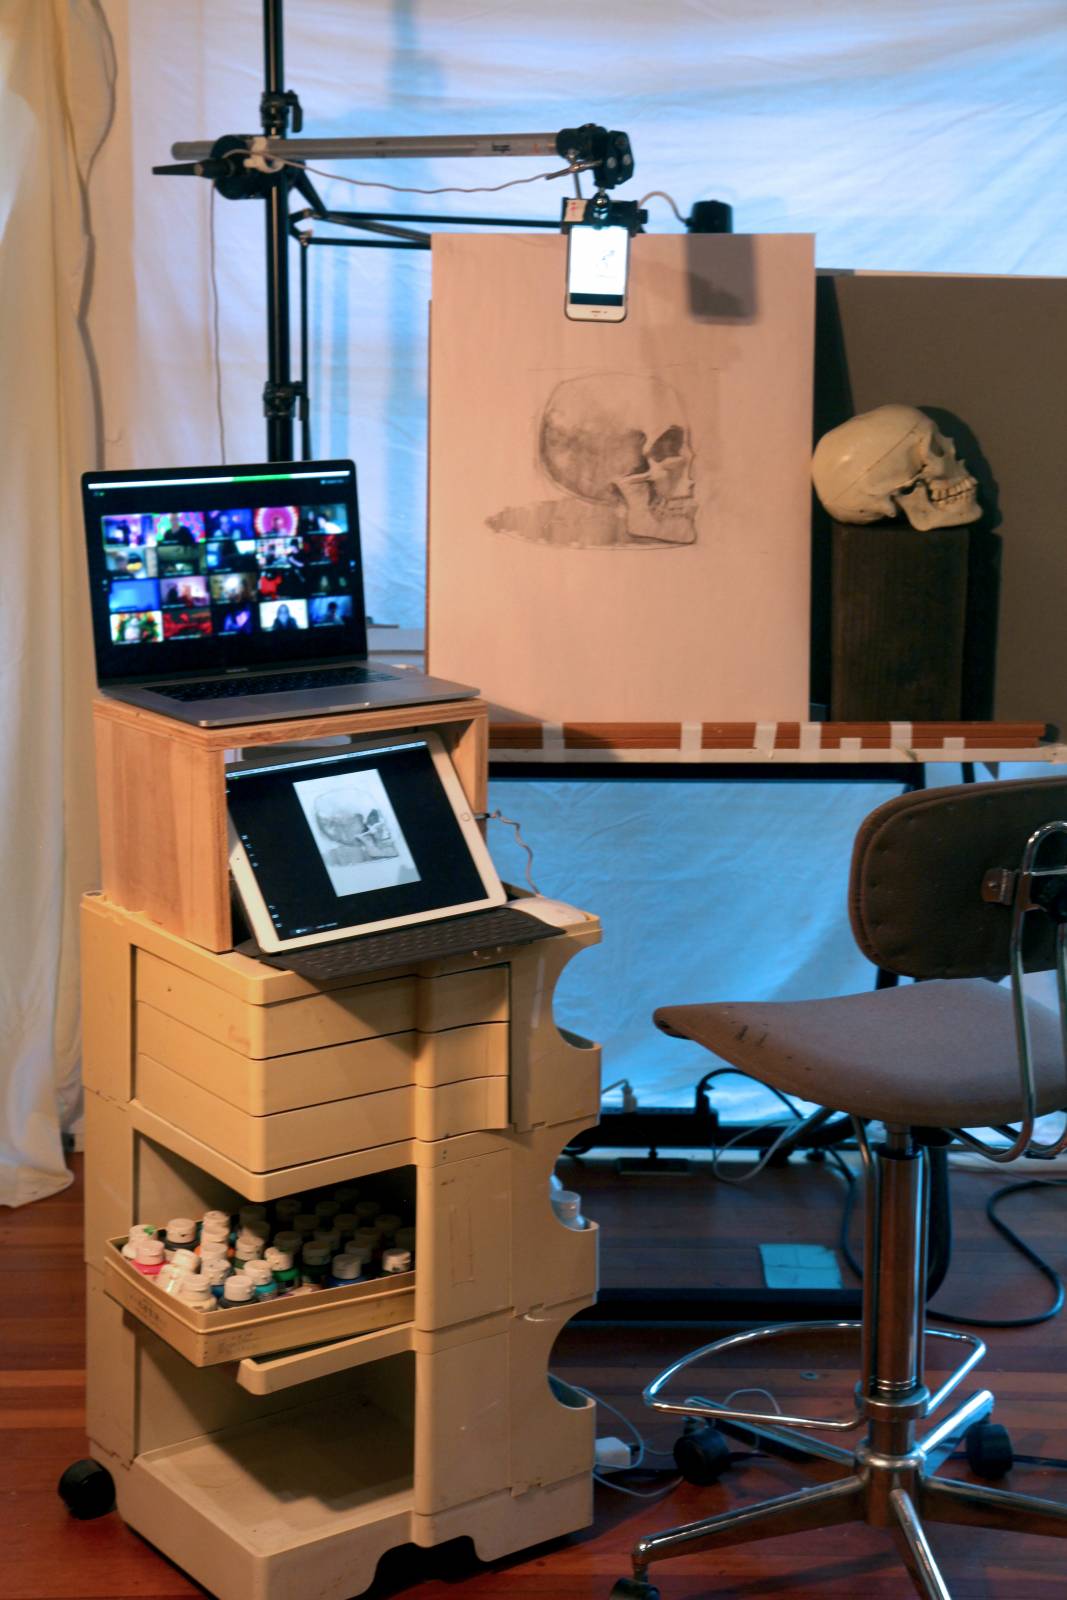
An important part of making the whole thing work is spending as little class time – the student’s time – fiddling around with hardware, software, cameras etc. This led me to make two somewhat flexible “work stations” where I can interact with students, do demos etc. online with as little fuss as possible and still uiuse the space for other work when not teaching. This month I thought I would share my current setup with the Muddy colors’ readers. It’s definitely a work in progress.
I have always tried to keep the computers a distance away from where I do most of my artwork, in a different part of the studio. That doesn’t work with online teaching. The first thing I tried was move my “trashcan” Mac Pro and monitors over by my drawing table. Having all that stuff there just did not work for me- It just felt wrong- It felt too claustrophobic. My studio was starting to look (and feel ) like a television studio.
After a lot of experimentation, I settled upon two different setups, both using a moveable computer station for the technology that I can roll over to whichever station I am using.

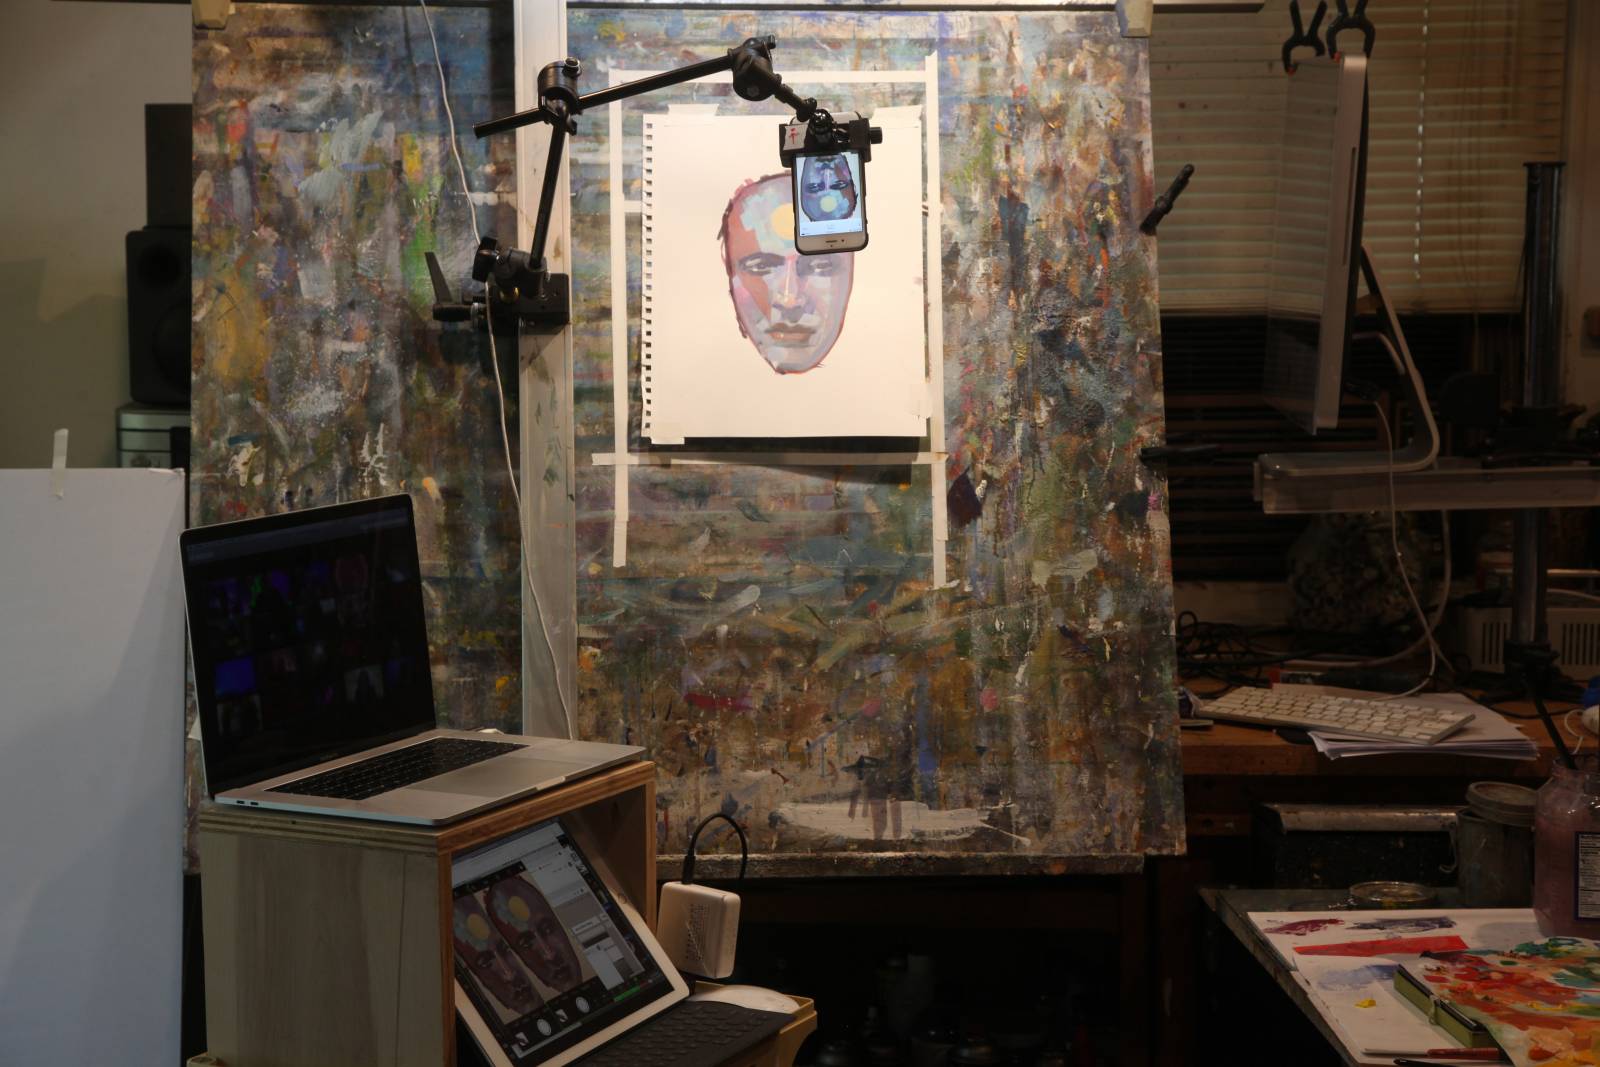
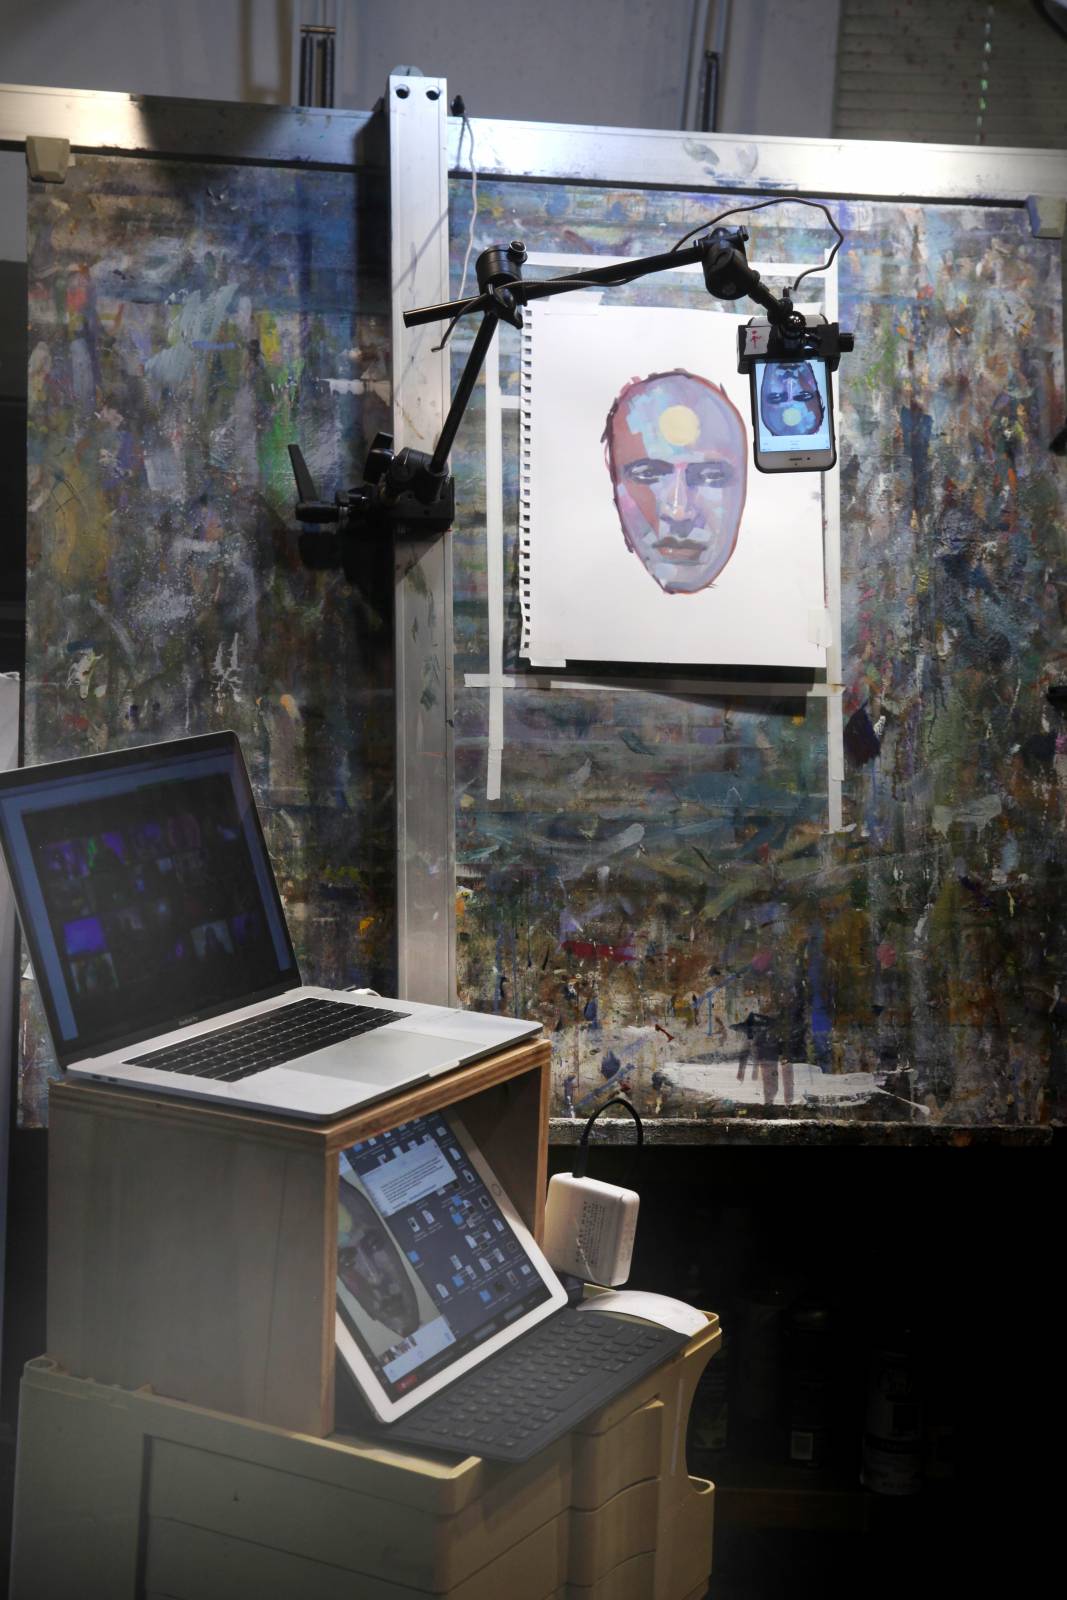
I hav an old 1980s Bieffe taboret on top of which I built a removeable box. My laptop sits on top of the enclosure, and inside the box is an iPad pro connected to the laptop wirelessly with by Sidecar. I can leave the iPad on the cart or take it out and move it anywhere in the studio and it stays connected. The box shades the screen from glare.
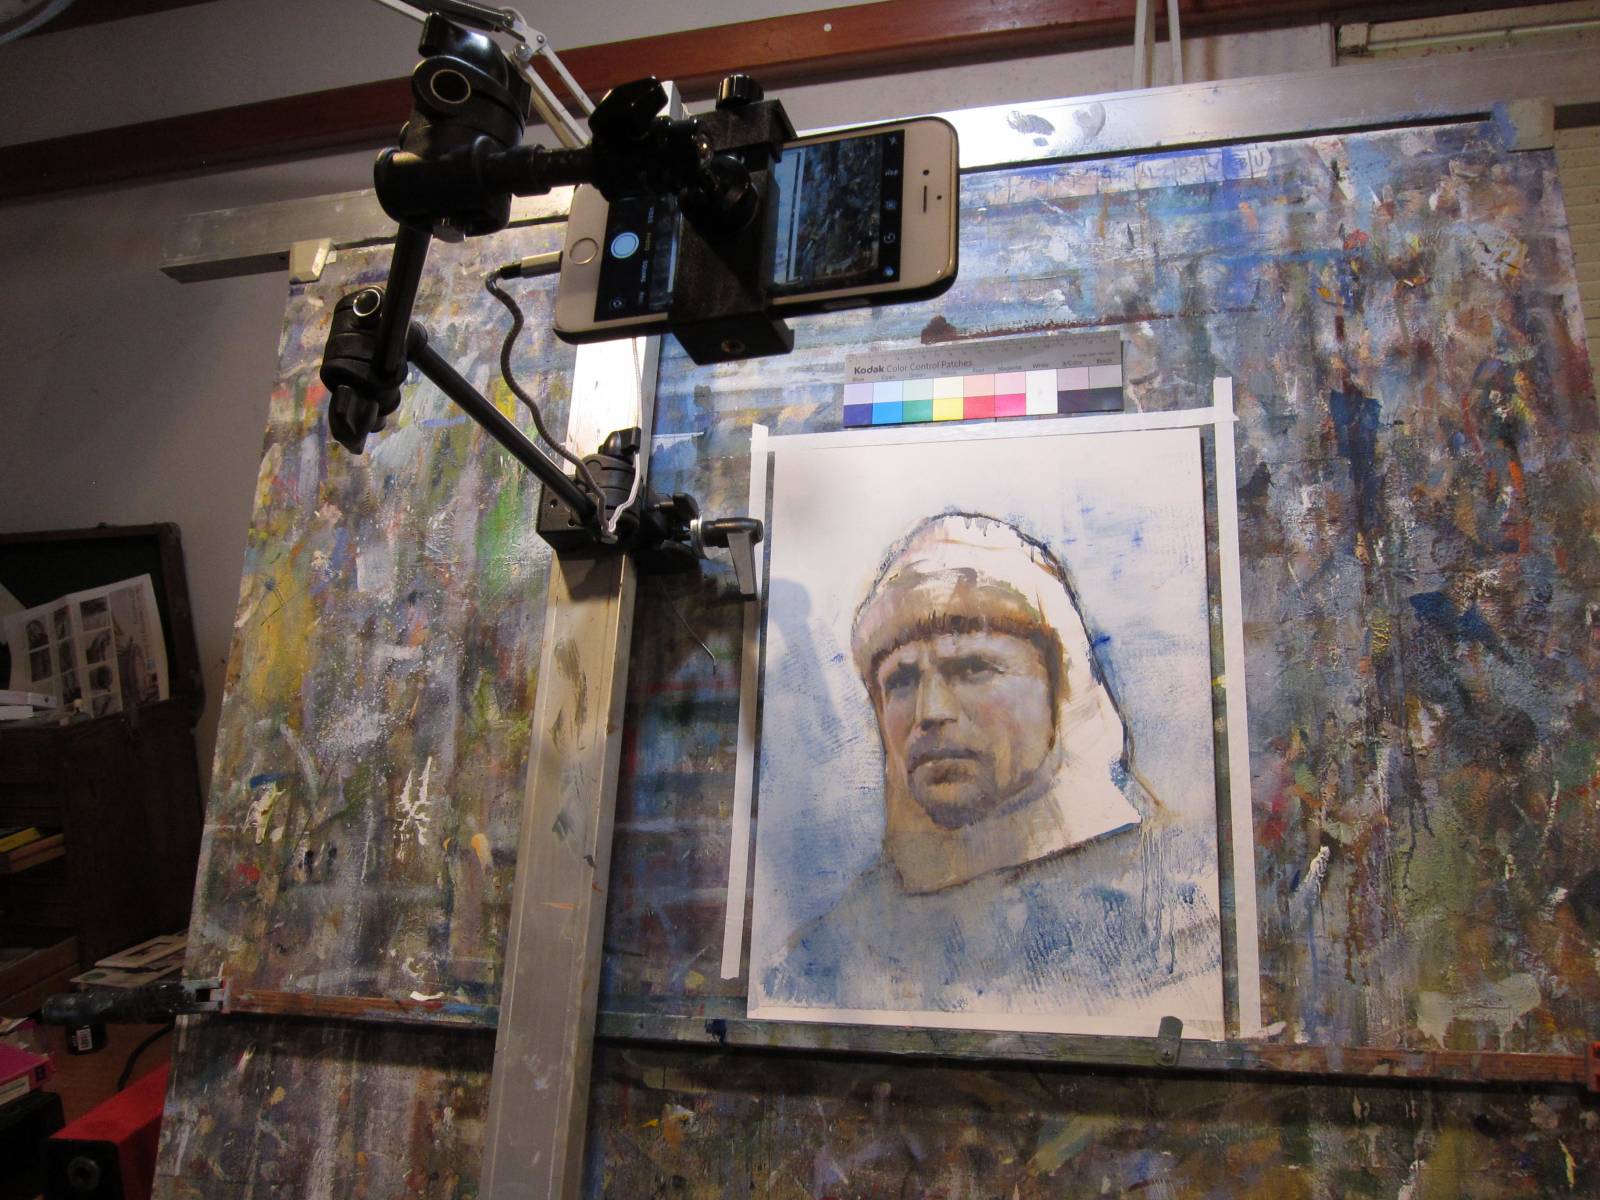
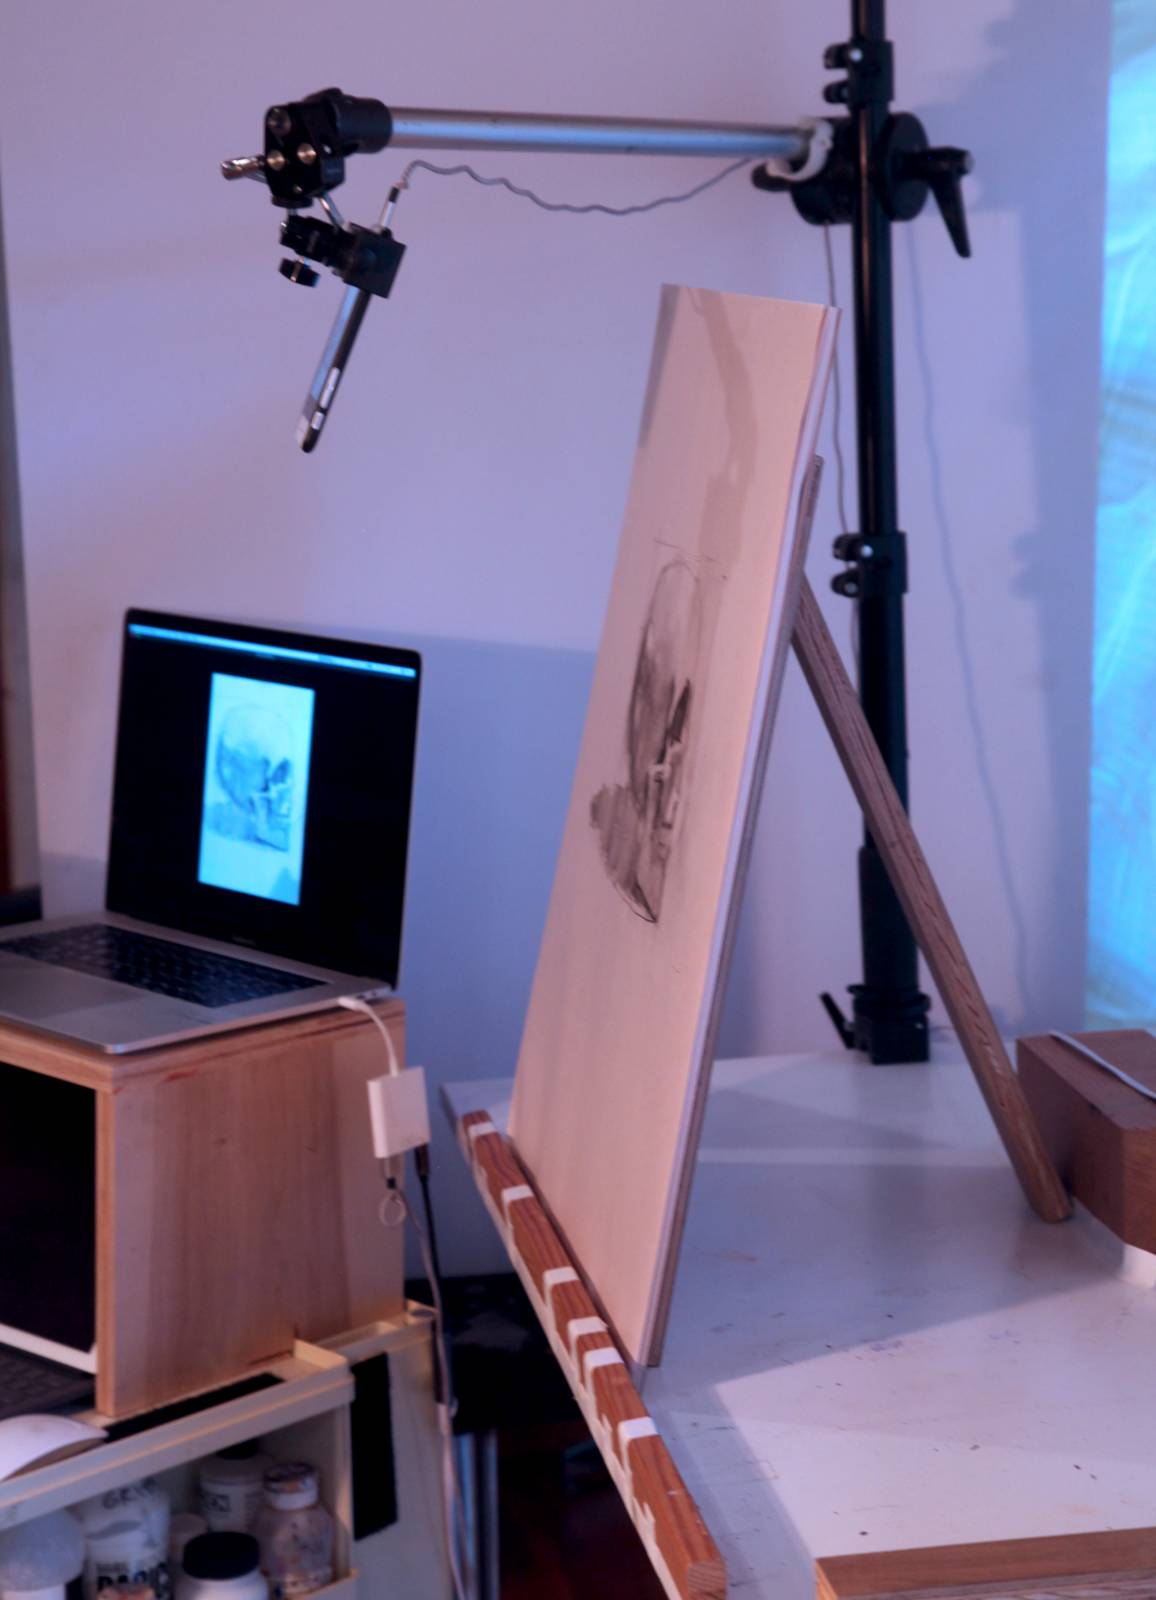
I attached the tracks and rails from a vintage drafting machine that I got on eBay to my old drawing table. The table can be tilted to a completely vertical position, which is how I generally have it, because I always work while standing.
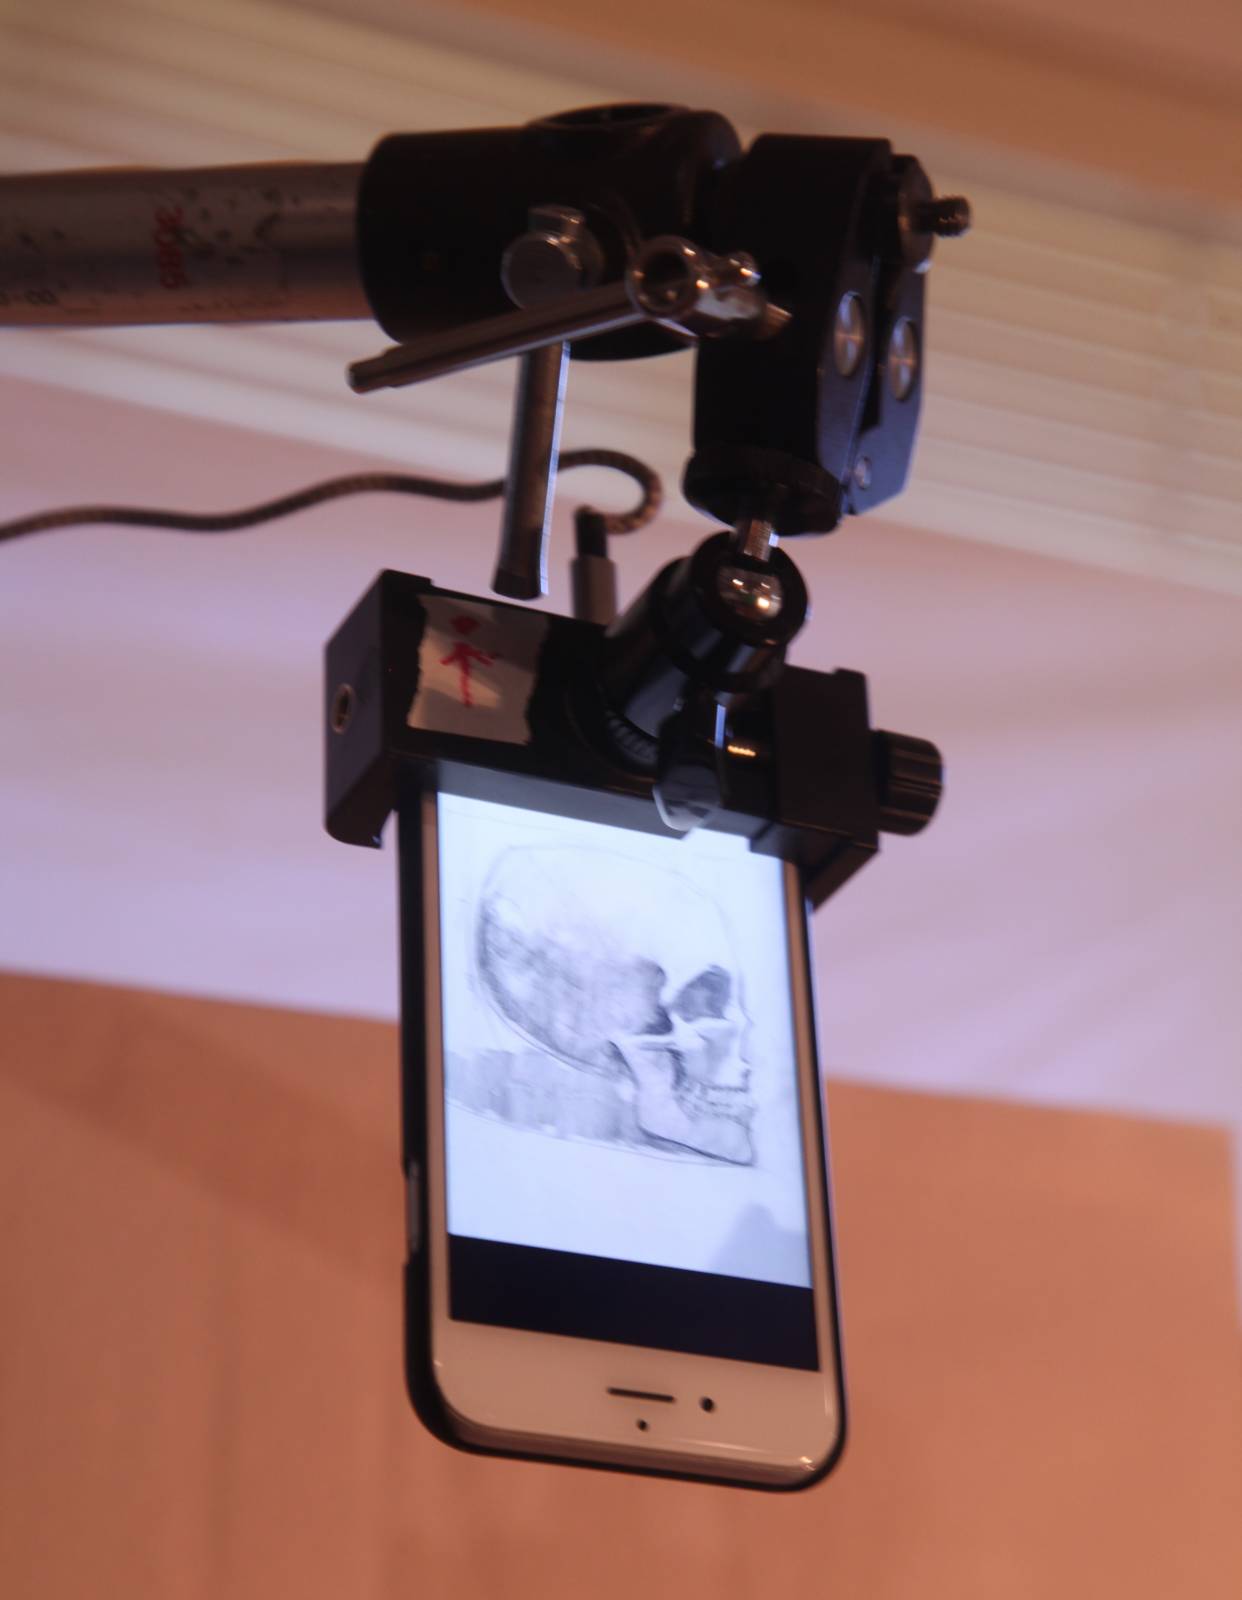
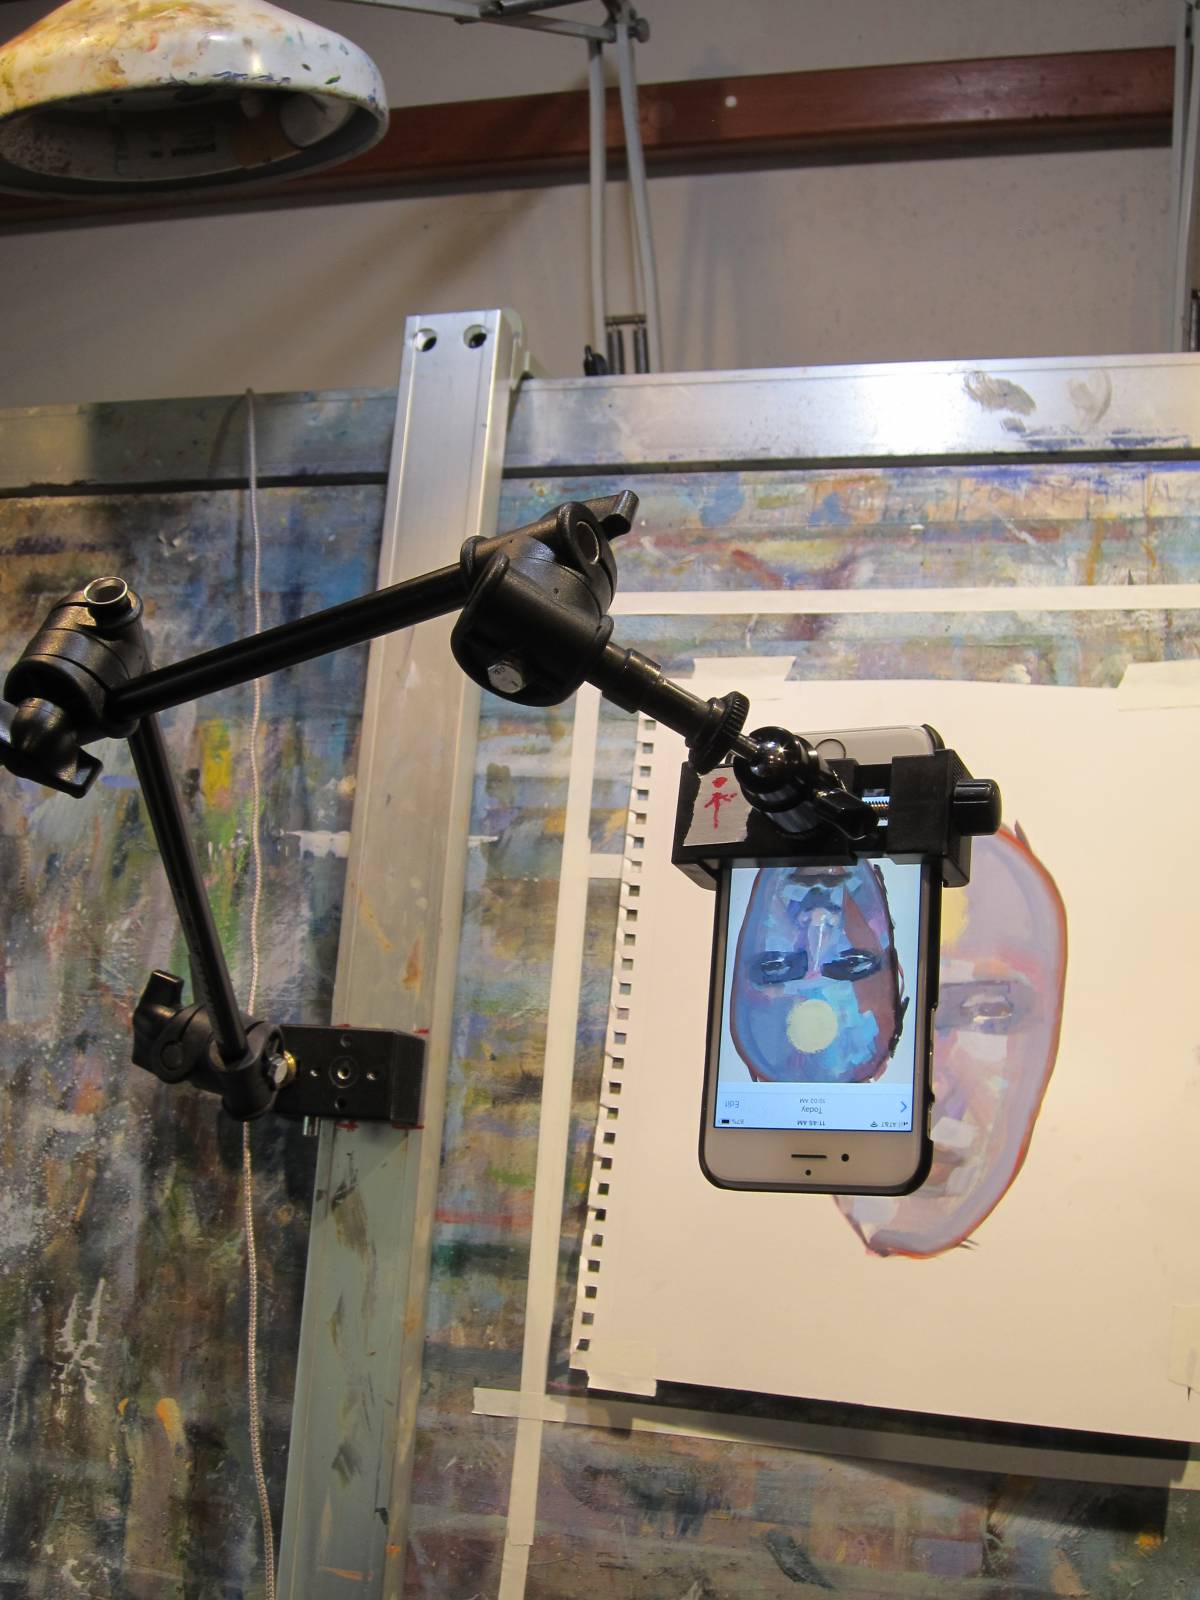
I have an articulating arm attached to the vertical bar of the drafting machine using a clamp.
On the end of the articulating arm, I have a mini-ball head and phone clamp. I put my phone in the holder with the lens down (upside down) and flip the screen so I can monitor the image from the back. Having the camera upside down means the lens is at the bottom, so the camera can be more out of the way when working and still over the art without too much distortion. This combination allows me to move a camera anywhere over the area I am painting.
It’s a good idea to make a rectangular target on the drawing board to help you compose the shot and correct perspective etc.
I tether the iPhone to the MacBook using a long usb cable and open QuickTime player and select the phone for new movie recording (there is a trick, you need to select the camera using the little pulldown menu next to the red dot on the QuickTime window).
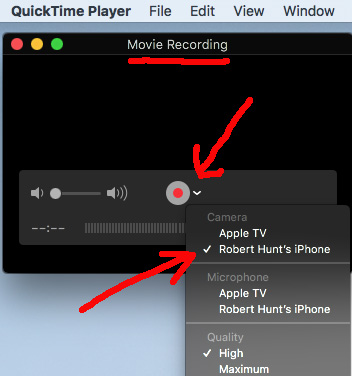
I don’t actually record the video with QuickTime, in fact I just set the camera to still image and then the camera acts as a monitor- but unlike the iphone video I can still zoom in and out while shooting. When I am teaching my class , I have the class on Zoom, and if I’m doing a demo, I screen-share the quick-time window, which shows what the camera is seeing. (you can also screen share the camera directly in zoom, but the connection seems more laggy). If I record the Zoom meeting, the screen share is also recorded – as a movie.
the camera is upside down because the lens is at the bottom.
Having two monitors attached wirelessly to each other has been a real godsend for me.
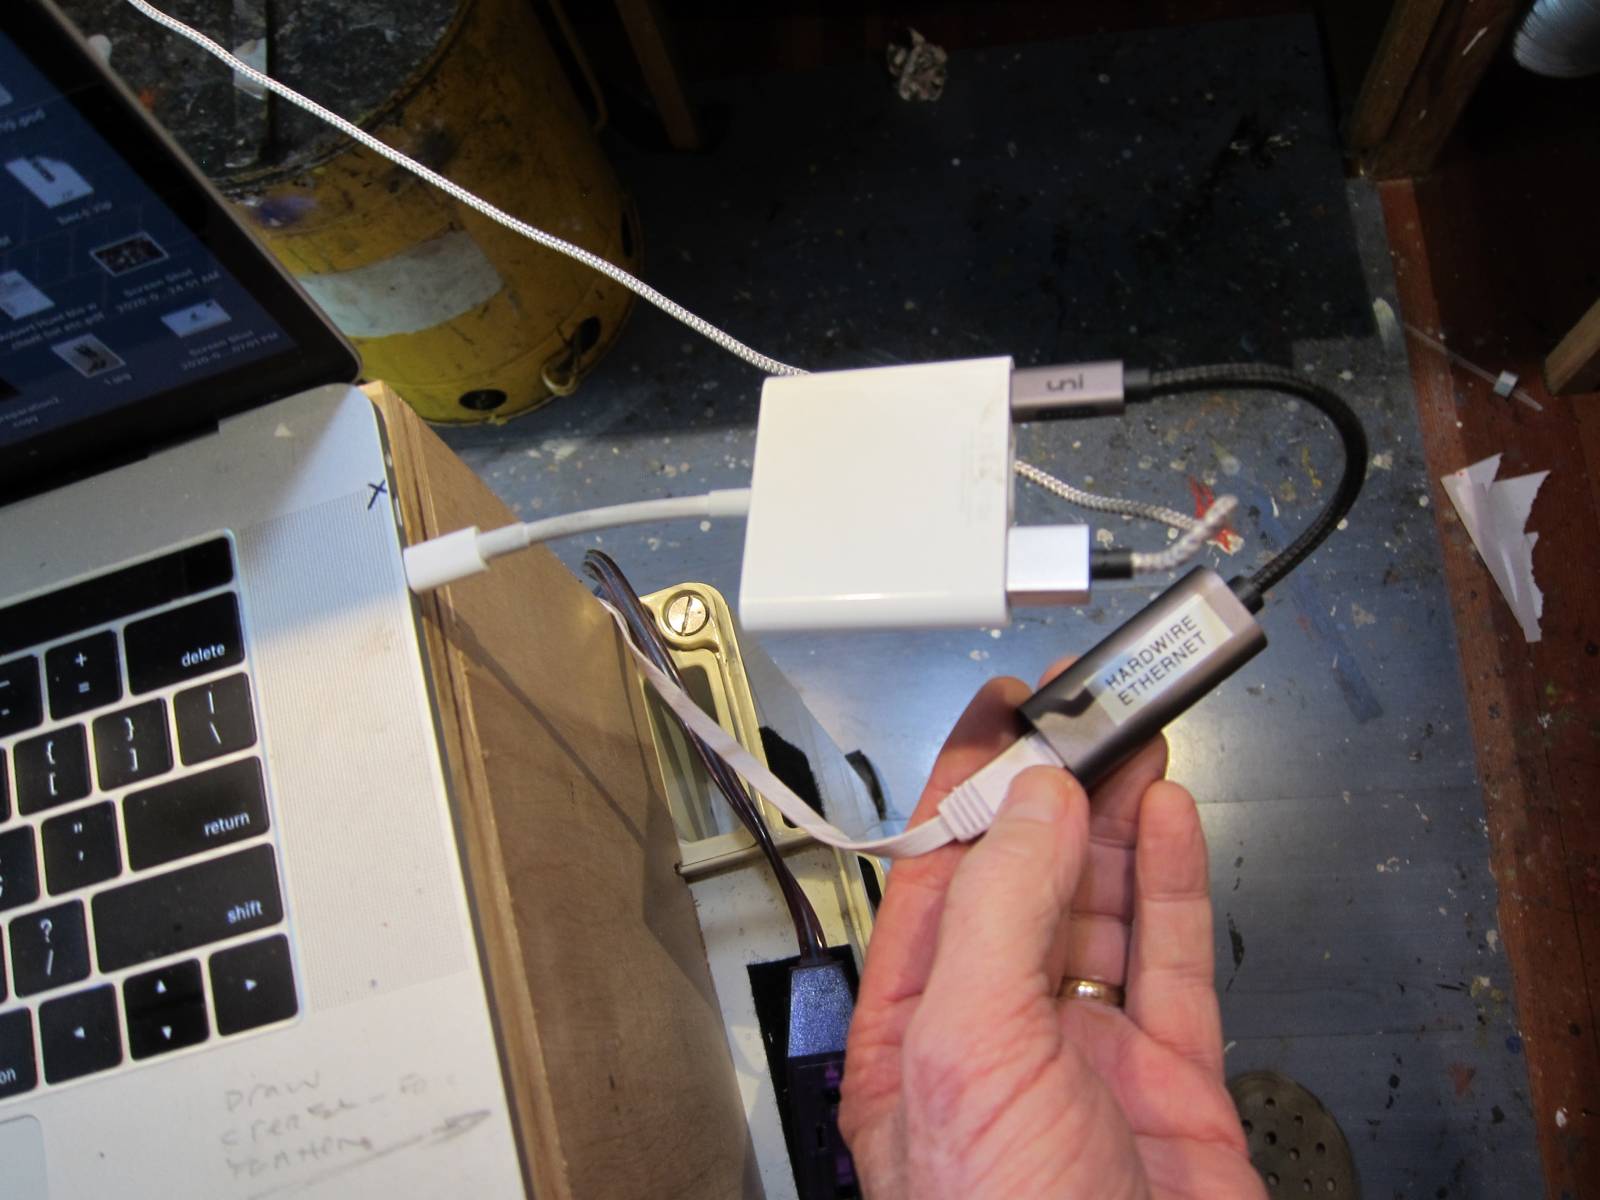
If possible, the internet connection will be a lot more stable if you can connect to your router with ethernet rather than wifi.
For doing life drawing or water-based painting, I have a second setup, I move the cart to a different table where I have a setup for drawing or painting on the flat table.

This is the setup I use for Heads and Hands drawing class.
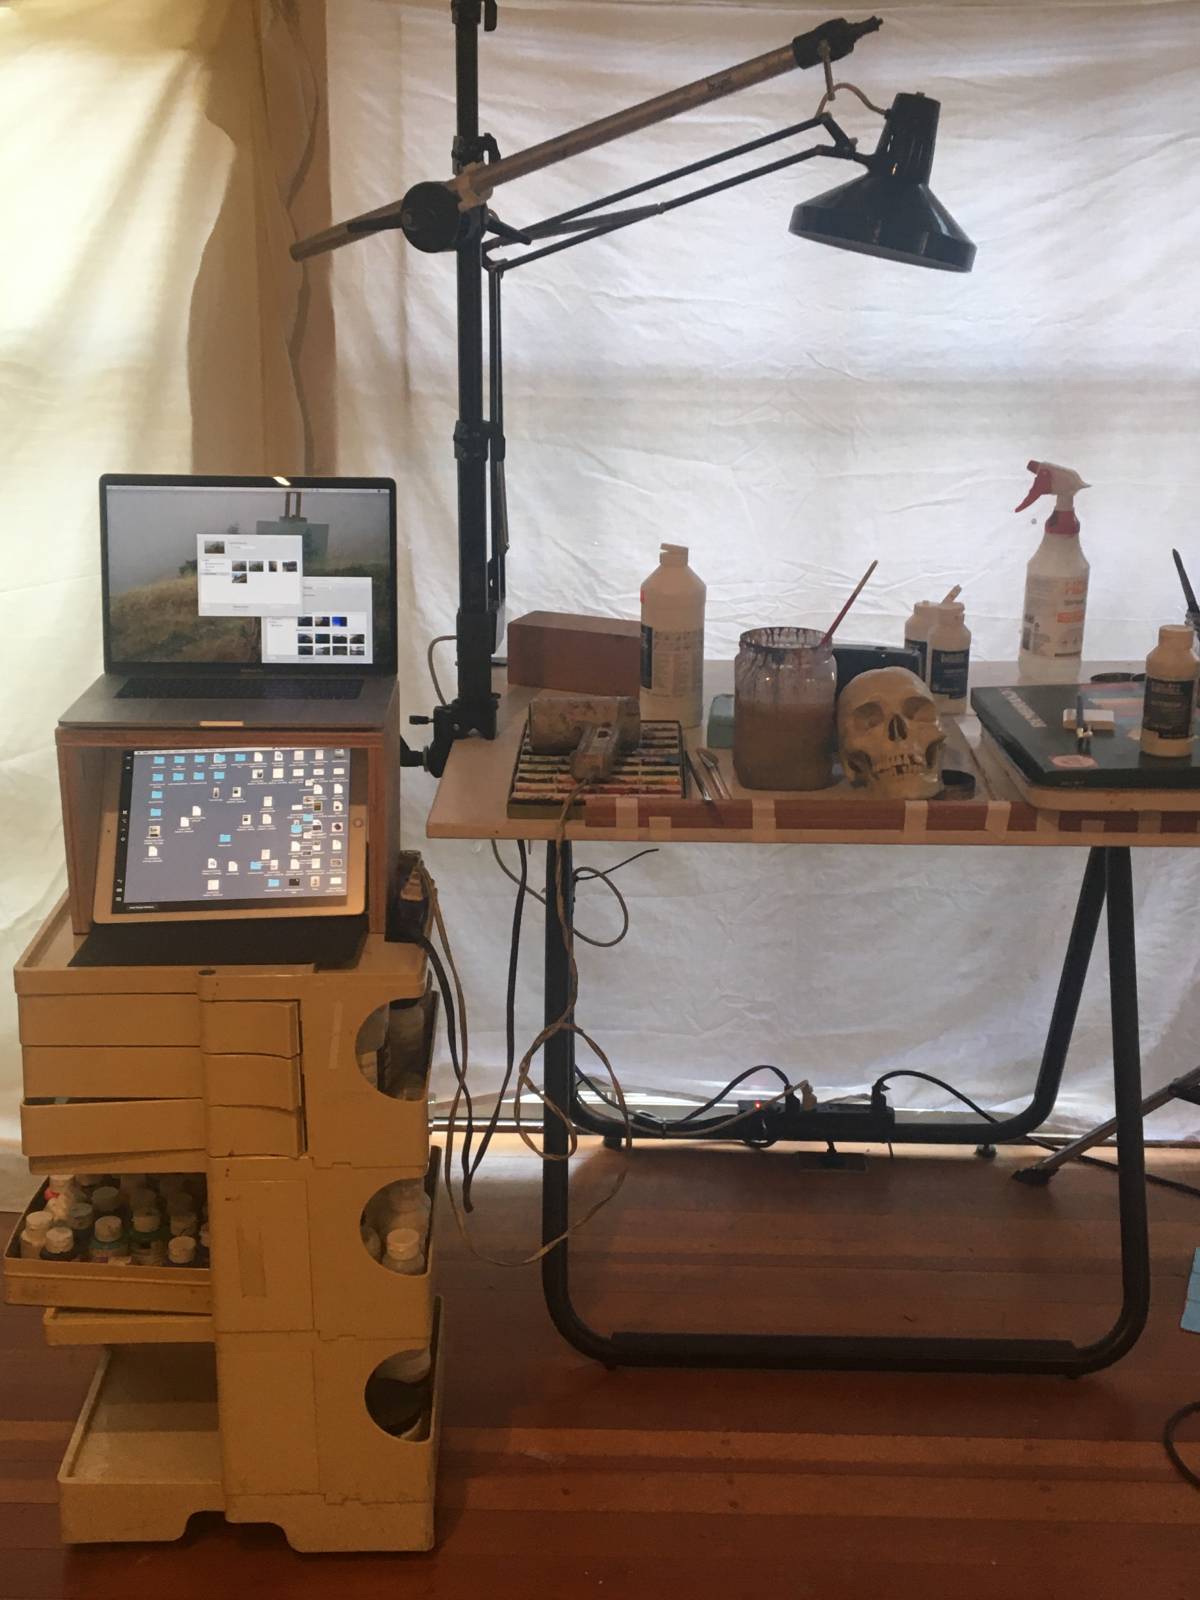
…or if I am doing water-based demos
This also doubled as an example to my students of how to convert their desk into an upright drawing board.
I hope some of this helps some of you who are teachers – or students- get through a few of the challenges that many of us are facing these days.


Thanks for sharing this Robert, it certainly has been a challenge making the switch from in-person teaching to remote. I especially like your idea of using the iPhone camera as the monitor as it can then be broadcast onto the zoom platform.
Cheers!
Vic
Awesome drawing table. Would you care to share the specs of the tilting mechanism? Wouldn’t mind building one of my own.