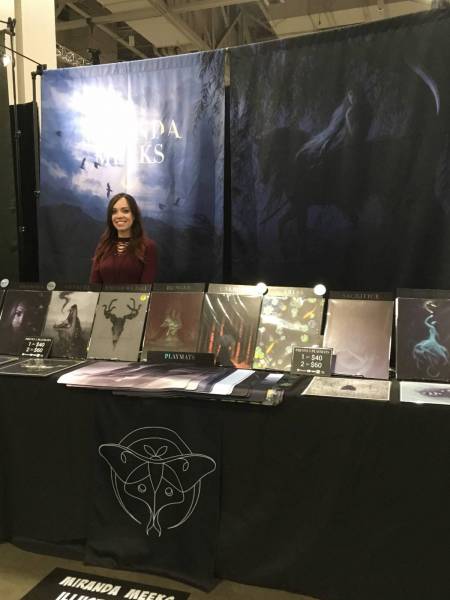
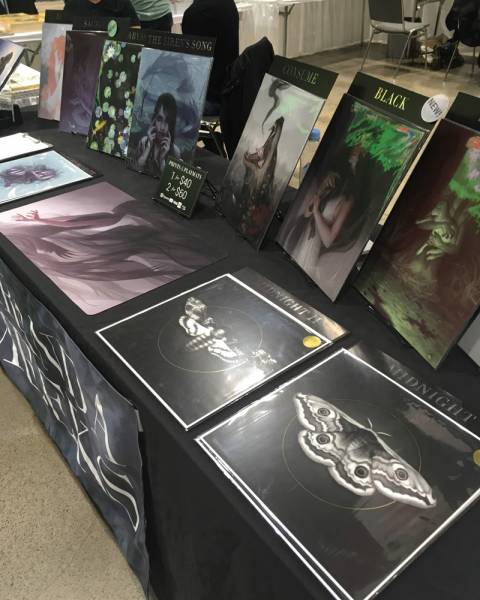
 My table at FanX in Salt Lake City, 2019
Are you an artist who has tabled at a convention before?
If you have, you’re probably familiar with the whirlwind of emotions that come with convention territory. It’s amazing and exhausting all at once. You can’t wait to go one minute, and you’re dreading it the next. Once a weekend is over, I’ve never regretted the experience, and I’m simultaneously glad it’s over, haha.
Although I am not the most prolific convention artist, since I’ve been going to my local comic con since 2017, I’ve learned a few things along the way. These things have made a big difference in sales, and in my presentation overall. I encourage you to really try these things (as scary as it might feel!) and see how it goes for you.
1. Offer one size of prints
This is a big thing I see with a lot of artists at conventions. We worry that people want different sizes of prints, and if we don’t provide that choice, they won’t buy a piece.
The truth is that people fall in love with the artwork, not with the size. I’ve had maybe two people ask if I offer my images smaller, ever, and they ended up buying the artwork anyway.
When you provide artwork at a decent size, not only can you charge a little more for them, but it also helps immensely when it comes to packaging your artwork. You only have to buy one size backing board, one size sleeve, etc. It simplifies the process for everyone involved. I’ve chosen to offer my convention prints at the 11×14 size, which is a common frame size, and big enough to be substantial in your hands but small enough that it’s easy for the customer to transport back to their house, hotel, etc. as well as carry it around at the convention.
Another thing to remember is that generally, people *tend* to buy the image at the smaller size when there is the option to do so. Since they’re buying the print for the image, why not save money and get a smaller version of it? Same thing applies for providing postcard-sized prints available for purchase. If you only have one size available, when someone really loves the image, they will just get it.
There are some cases when artwork looks better at a smaller size than it would at a larger size, or when it might be preferable to offer multiple sizes. I think these cases are further and fewer in between than we assume. Try it for yourself and see how it goes! If it doesn’t work out, you can always offer multiple/smaller sizes the next time.
2. Display big images
Instead of putting a bunch of your artwork behind you, create a visual focal point instead by focusing on a single large image.
My table at my very first convention in 2017, at Salt Lake FanX
At my first convention, I tried to combine both ideas by creating a banner with a large image and surrounding it with available prints. The result was that the majority of people didn’t even look at the prints I had behind me; I think maybe one or two people bought a print that was on my banner? Instead, almost everyone viewed the work I had at the table first.
In a sea of images, you want your booth to be eye-catching, and a visual “break” from the chaos everywhere. People will be drawn to your table because of it.
3. Experiment with “deals”
Knowing how to price your artwork is a scary feeling, especially when you haven’t tried it before. You imagine people balking at your prices by throwing the print at your face in disgust. The good news is that hasn’t happened to me (yet!), haha. It’s also important to remember that art is a luxury, and people will view your work at a higher value than you might yourself.
Here’s how my pricing structure has evolved over the years:
2017
1 print for $25
2 prints for $40
3 prints for $55
2018
1 print for $25
2 prints for $40
(no mention of the 3 prints price)
2019
1 print for $40
2 prints for $60
(I let people know the price applies if they bought 3+ prints, so essentially $20 per print after the first one)
2021
1 print for $40
Buy 2 Get 1 Free
I actually noticed a big difference in how many people bought 3 prints once I implemented the B2G1 deal. It works out to be the same price-wise, but compared to previous years, a lot of people opted for the deal. Because of this, the average transaction amount per customer was higher than in previous years.
4. Try backing boards
There are a ton of different ways you can package your prints, not only to protect them from wear and tear but to make them look good as well. Most artists package the prints they sell with a protective plastic sleeve (please do this if you aren’t already!). As for the backing board behind the print, some artists opt out of using one altogether, which is an option of course, but you can also choose between regular chipboard (a great option for weight reasons, especially if you’re traveling to cons across the country) and a heavier backing board.
I’ve chosen to pack my prints with the heavier backing board for 3 reasons:
- It does a better job at protecting the prints
- It gives a heavier feel to the print, therefore making it seem more valuable to the customer.
- It looks good! I love how it makes the prints look sleek and cohesive.
There are a few cons to opting for backing board:
- They are heavier so more difficult to travel with. The weight is less of an issue for me, since I don’t travel for cons much.
- More expensive than chipboard
Here is a link to the backing boards I use currently: https://www.clearbags.com/11-x-14-clearbags-4-ply-black-backing-board-25-pieces-baci11.html
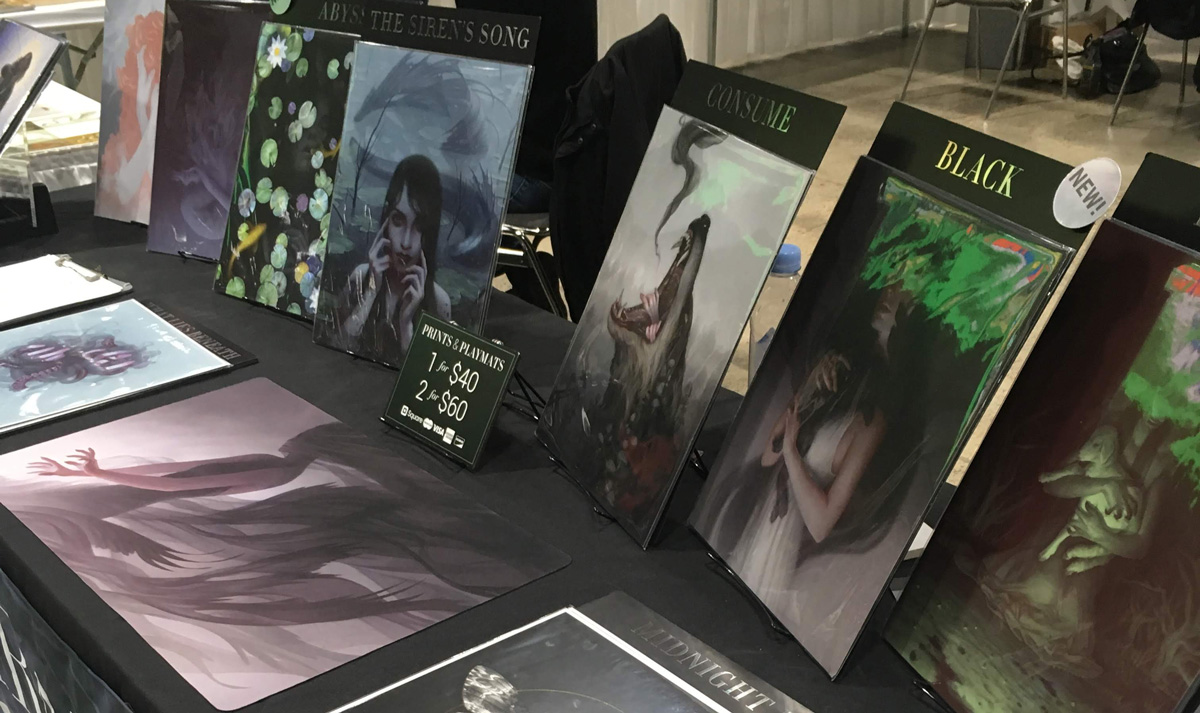
5. Display titles with the prints
This is a seemingly small tip that can make a big difference. As people are browsing through your prints, they appreciate a little bit of context, which is what the title provides for them. It also makes your table look professional.
I use a slightly larger version of my regular backing board behind my prints to provide the base of the title board. For the title itself, I order foil prints of the titles and then use a spray adhesive to attach them to the title board. You could also use labels, stickers, or even print directly onto a backing board. I’ve also used foam core board in the past and it’s worked very well since it’s both strong and lightweight.
 You can see the title boards behind my prints here. This was my table at Planet ComicCon in 2019.
6. Include a “lifestyle” item
In addition to offering artwork in the form of prints, look into “lifestyle” items that you can sell. Things like this include playmats, mugs, blankets, bags, mousepads, etc. It will take some experimenting to figure out which items sell and which ones don’t. I personally provide playmats and people seem to really enjoy having them as an option. I include it in my regular pricing structure, so people can mix and match as they like.
7. Experiment!
This is probably the most important tip of all! Try new things each time you do a show. If you’ve never had a booth before, don’t splurge on what you *think* will sell; instead, learn from your experiences and keep track of what’s working and what isn’t. Overtime, you’ll find the best pricing point for your work, the best display options, and the best inventory style.
Bonus Tip: Bring Carrying Bags
This isn’t a necessary item, especially if you’re traveling far distance, but customers always appreciate being able to carry their prints in a nice bag with handles. I opt for clear bags as it creates an advertising element (albeit subtle), so other people see the prints while the customer is walking around the show.
I get mine here (make sure it’s large enough to fit your largest print):
https://www.clearbags.com/15-x-18-clear-handle-bag-2-25-mil-20-recycled-content-100-pieces-h1518cl1r.html
Thanks for reading!
– Miranda


What an excellent post! THANK You!
On the buying side, I bring a large Itoya Profolio that I leave in the hotel, so when I get a chance to wander the floor and look for other’s work, I can place my haul in a nice protective and flat carrier. I have an expanding poster tube for the larger prints that aren’t in sleeves with backing boards, but those go straight into the ProFolio when back to the room.
Thanks for your fantastic suggestions! And I think the “lifestyle” item is excellent. Very often I’ll pick something like that as a gift for friends or family. My mom always liked getting those kinds of things.
Very helpful Miranda! Thank you for the tips 🙂
Excellent points. I’ve been doing the backing boards for prints since the beginning. Besides being better protection for the prints, it allows me to put my stories and contact info on the backing board. This way, when they buy the print and send them out as gifts, my brand (ShadowMyths), website, and framing size is on there.
One other thing that I do for print pricing (I agree to only have one size but I’ve seen people use multiple sizes effectively) is that I offer my larger prints for a smaller price. So, on my website, I offer 11 x 14’s at $20 and 11 x 17’s at $40. So, at a show, I sell the 11 x 17’s at $20. The reason is that people will pay the $20 as an impulse buy.
This allows two situations:
1) They always ask if there is a deal and I mention that the price is already 50% off. So, buying two prints at a show will cost you $40 versus $95 online ($40 for each print plus shipping plus tax). They almost always buy 2 – 5 prints.
2) Since they are buying as an impulse buy, when they get home, they’ll want to purchase more prints (I always mention, at a show, that what they see is a SMALL fraction of what I have. In my store, I have around 110 prints and I’m only showing you 30 prints). When they go online, they’ll pay the higher price because they want the accompanying prints to match in size. This way, it increases my online sales.
Another point is, if you can, have lights. I have my original oil paintings on canvas walls behind me and a row of prints. The lights shining on my paintings makes me stand out compared to every other booth in the area. This is even true if the lights in the convention center is fully on.
Dougie