
Along with the underside of feet, hair is one of my absolute favorite things to sculpt. By its very nature, there is so much variety in texture, volume, shape and movement. Add in the ability to style and embellish and *poof!* a cornucopia of possibilities! Different hairstyles can lead viewers to imagine eras, ages and worlds, dramatically enhancing the narrative qualities of a piece.
My primary medium is water-based clay. It is wonderfully tactile, smooth and protean – able to be transformed into just about anything that can be imagined. This characteristic offers a flexibility in options that can be almost overwhelming when it comes to choosing what kind of hair to put on a sculpture (unless you’re working on a portrait, of course). So today, I’ll share an overview of the process I use and the things I consider in creating a sculpted hairstyle from my imagination. At the end, I’ve included many pictures of sculptures I’ve done that incorporate various hair ideas and embellishments.
Braids are a design element I use frequently. I enjoy how the repeated pattern breaks up larger masses and the ubiquity of their presence in hairstyles through the eons lends a certain timelessness to the sculpture. Most of us had grade school experiences with clay, “rolling snakes” to build an object with coils, and this may seem like the most obvious way to accomplish the task: roll three coils of clay, braid them and stick it on the sculpture. Voila! Done, lickety-split, right? The problem with this method is just that – it looks like a method. The rest of the piece looks sculpted and the braids stand out as, well…kind of like grade school. But, hey – we’ve all had bad hair days, so… let’s take a look at some ideas on how to sculpt a braided hairstyle that fits with the rest of the sculpture.
Braided Hairstyle Process, Step 1
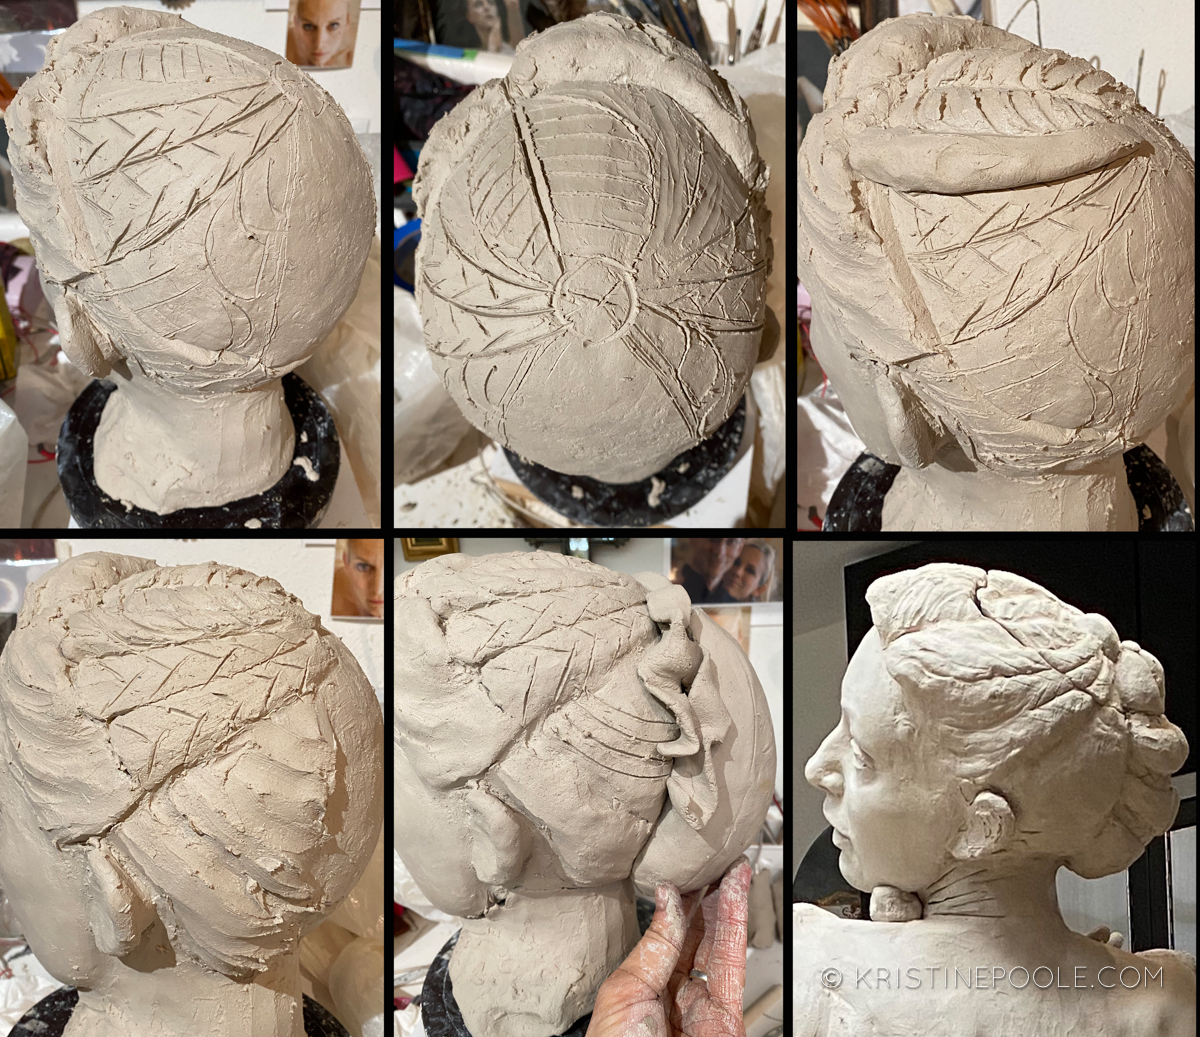 Once the basic shape and size of the cranium is established and I have the features roughed in, I usually begin by massing some clay around the face to get a sense of how the volumes will frame the features. Then I sketch the idea for the rest of the hairstyle on the back part of the head. 1) In this design, I planned a double braid with a twist above it. 2) I establish where the hair part will be and the direction of the hair as it coincides with the twist. 3) I begin to add volumes of clay over top of the sketched lines, being sure to score, slip and attach well. 4) I redraw the lines indicating what will be happening in each volume and add mass to indicate the bunching of hair under the braids. 5) Initially, I thought she would have a bun, so here I’m trying the rough shape for size. You can see that at this point, I also have some extra “strands” of hair – FPOs as I was considering adding curls on the sides of the bun. 6) The bun looked a bit too massive a shape, so I separated it into smaller sections. Having all the volumes roughed in, I attach the head to the torso before making my final decisions.
Braided Hairstyle Process, Step 2
 1) I didn’t like how the bun looked truncated on the figure and also seemed a bit too severe, so I cut off the bottom and placed some rough masses to feel out another alternative. 2) I liked the flow of the hair, but 3) from the front view, found the masses a bit clunky and non-directional looking (it is always important to look at all sides when making decisions in sculpture), so 4) I changed the masses to give them a bit more movement, 5) adding a third section to give it a bit more volume. 6) A small change perhaps, but I preferred the direction of the flow of the hair from the front. I feel it gives a bit more invitation to the viewer to walk around the sculpture to see the back side.
Braided Hairstyle Process, Step 3
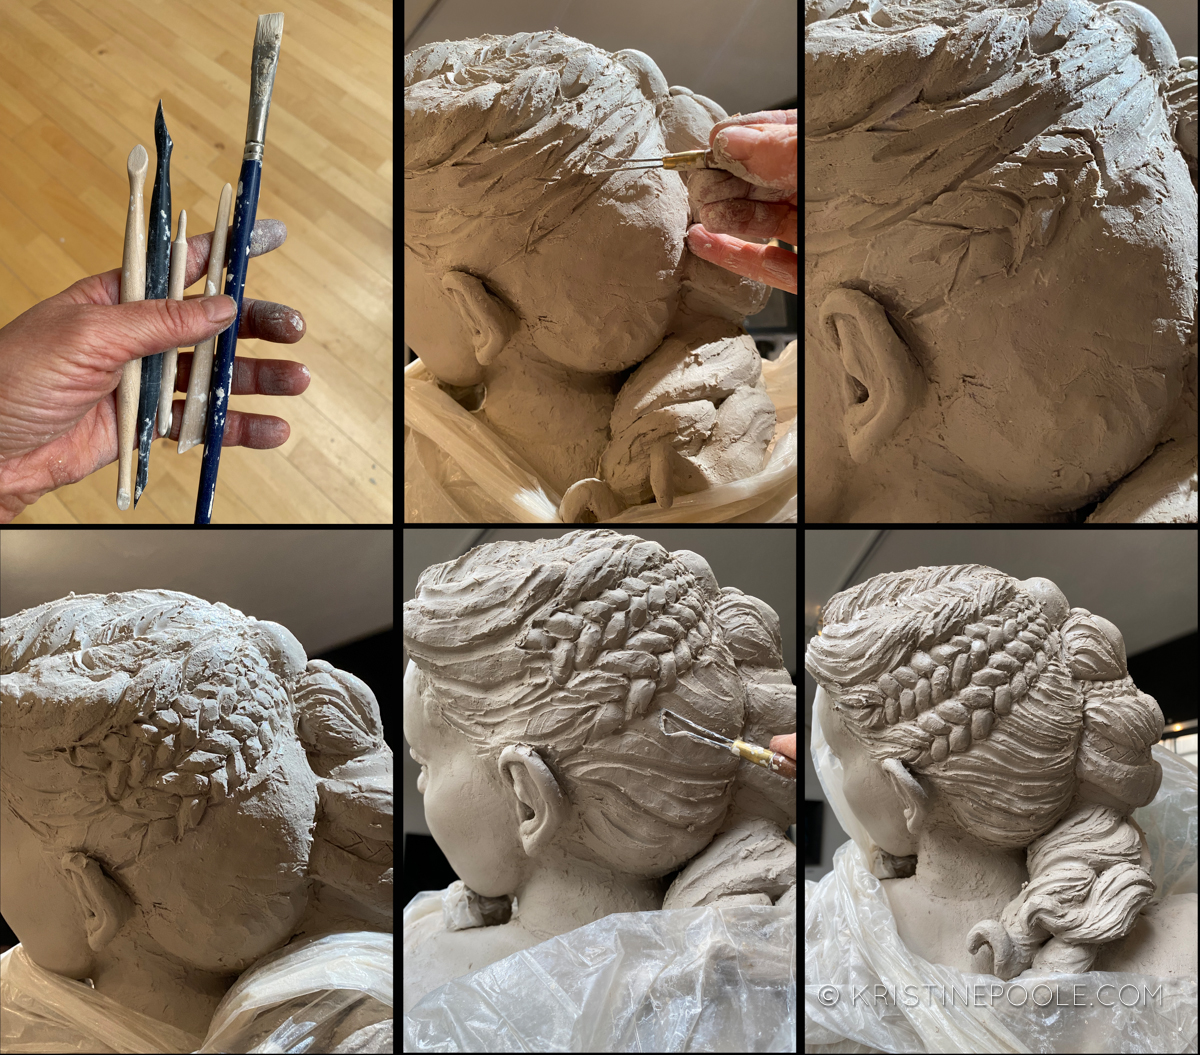 1) For detailing the hair, I use a selection of tools with a variety of sizes, edges and shapes. The primary tool I use is a Philippe Faraut “eye tool.” This is the one on the left. It is no longer available, so if you ever come across one for sale, it’s worth picking up. Any tool with a slightly spooned sort of shape would work as well. The black spoon tool is the new Faraut eye tool and it has much sharper edges. I use it for the details in the final steps. I use Colin’s expired painting brushes – this one has synthetic bristles that somewhat mimic hog’s hair natural bristles, but leave less aggressive brush marks. It’s firm enough to move the clay as I smooth it, but soft enough to not disrupt all the lines I put in. 2) Here, I have indicated the forms of the twist on top of the braids. I often use a loop tool to remove a small v-shaped trough in the center of the braid. It seems to make it easier for the sections to “weave” underneath each other in the center. 3) Using the eye tool, I begin forming the masses of the braid, paying attention to the pattern and which piece wraps under the other (if this is confusing, you can use reference to help you keep track of where you are in the pattern). 4) Both braids roughed in. 5) Using a loop tool, I begin to divide the mass of hair under the braids. I try to vary the line thickness and length, thinking of the hair as “clumping” together in smaller volumes, even though it is one continuous mass. Running a bunch of parallel lines the entire length of hair will end up looking mechanical and unnatural. 6) Here, I have most of the major lines roughed in. I don’t worry if they look a bit too harsh or deep as they will be softened in the next step.
Braided Hairstyle Process, Step 4
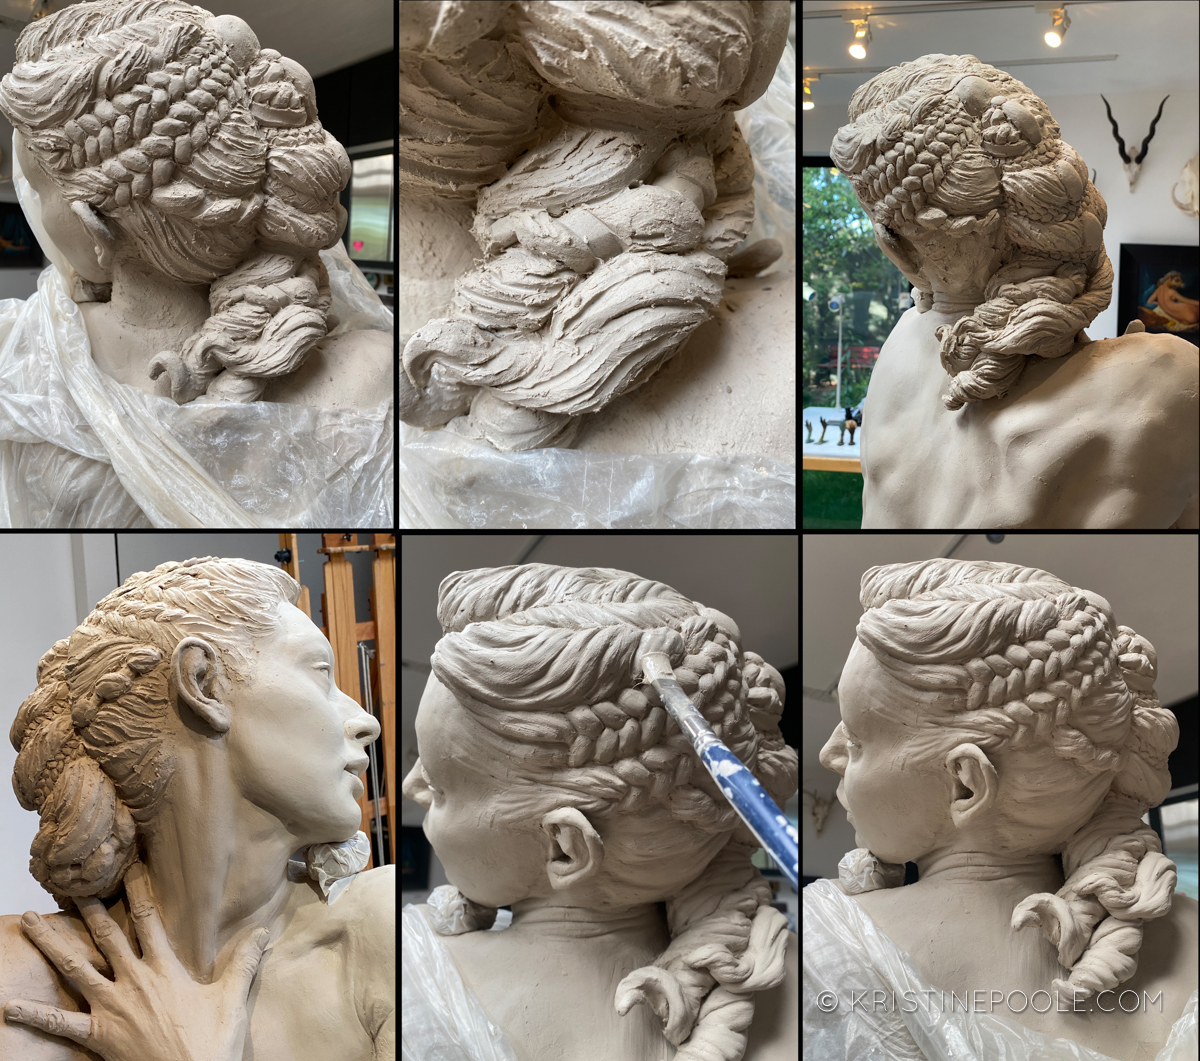 1) I decided to break up the large volume of hair under the braids, so added a twist with a shape indicating a ribbon wrapped through it. 2, 3, 4) For continuity, I added similar shapes in the pony tail portion and on the opposite side of the head. Here, I’ve completed the rough initial hair texturing. 5, 6) I use the brush with water to smooth and where needed, re-sculpt and blend the forms. I use gentle pressure so as to not remove all the texture I’ve added.
Braided Hairstyle Process, Step 5
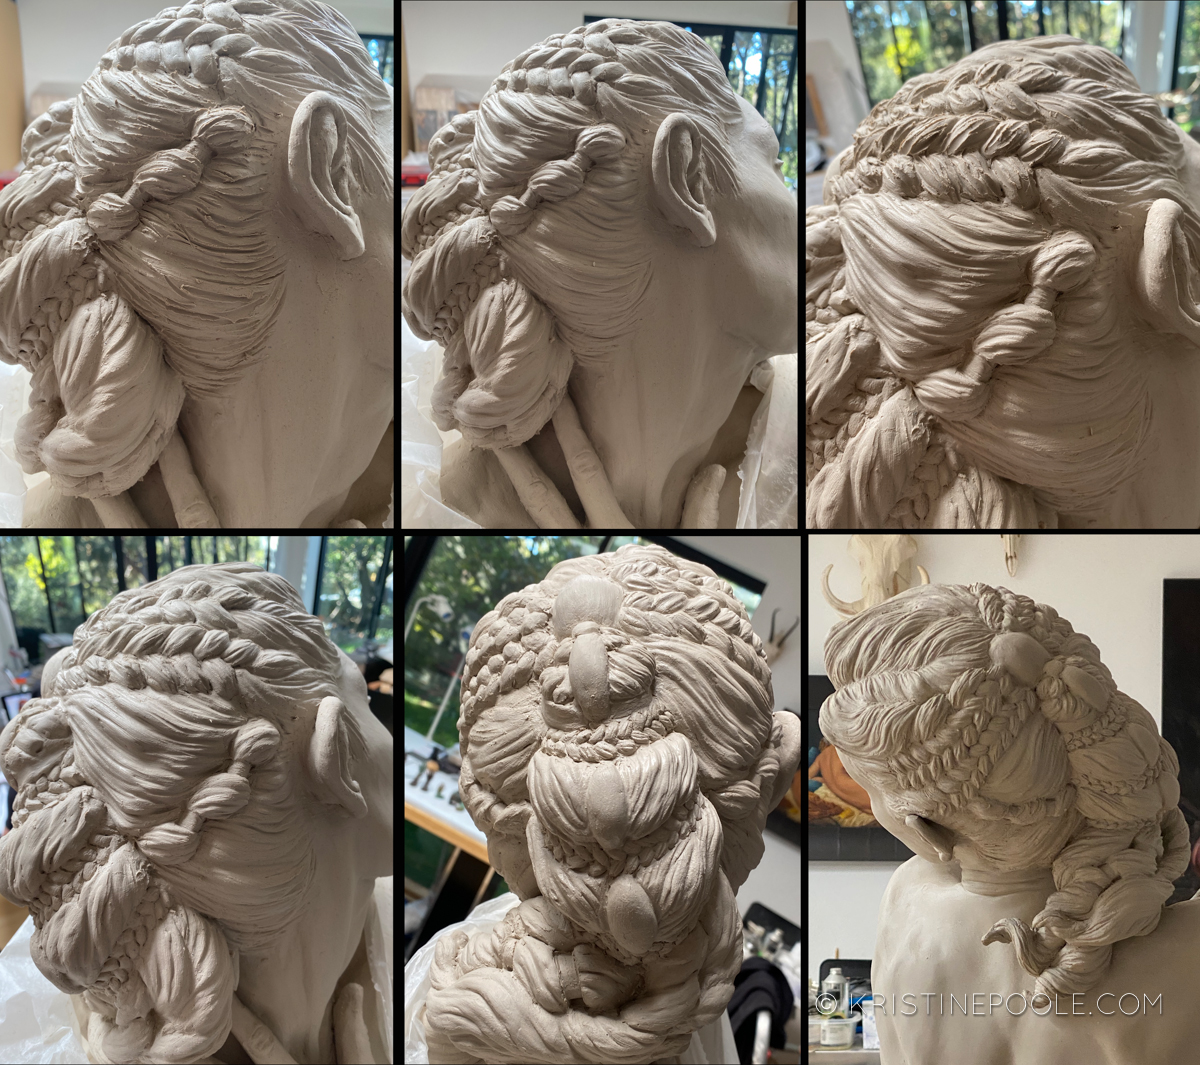 After letting the hair sit overnight (the water often makes the surface too soft for the next step), I use various tools to add finer lines, again separating the forms into smaller masses. I vary the thickness and length and keep in mind the flow of the hair. Brush again, repeat again until a believable pattern has been established. In pictures 5 and 6, you can see the plain vertical shapes between the masses of hair. These could be stones, wood or jewelry and serve as an area of visual rest between all the line patterns of the hair.
Braided Hairstyle Process, Option 2
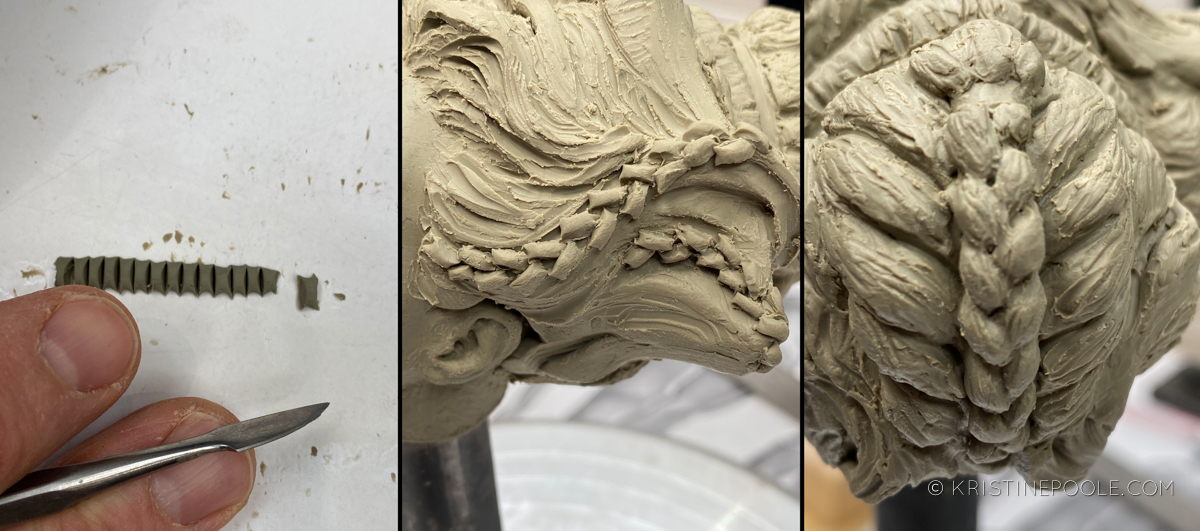 The previous process works well on larger sculptures, but what about itsy-bitsy braids? Another technique we use with smaller, oil-based clay sculptures is to roll a coil, cut it into small, same-sized pieces and lay them on in the braid pattern to create the masses. Then use an itsy-bitsy tool to sculpt those shapes into a braid form. It still creates the look of a sculpted pattern.
Hair Examples and Ideas
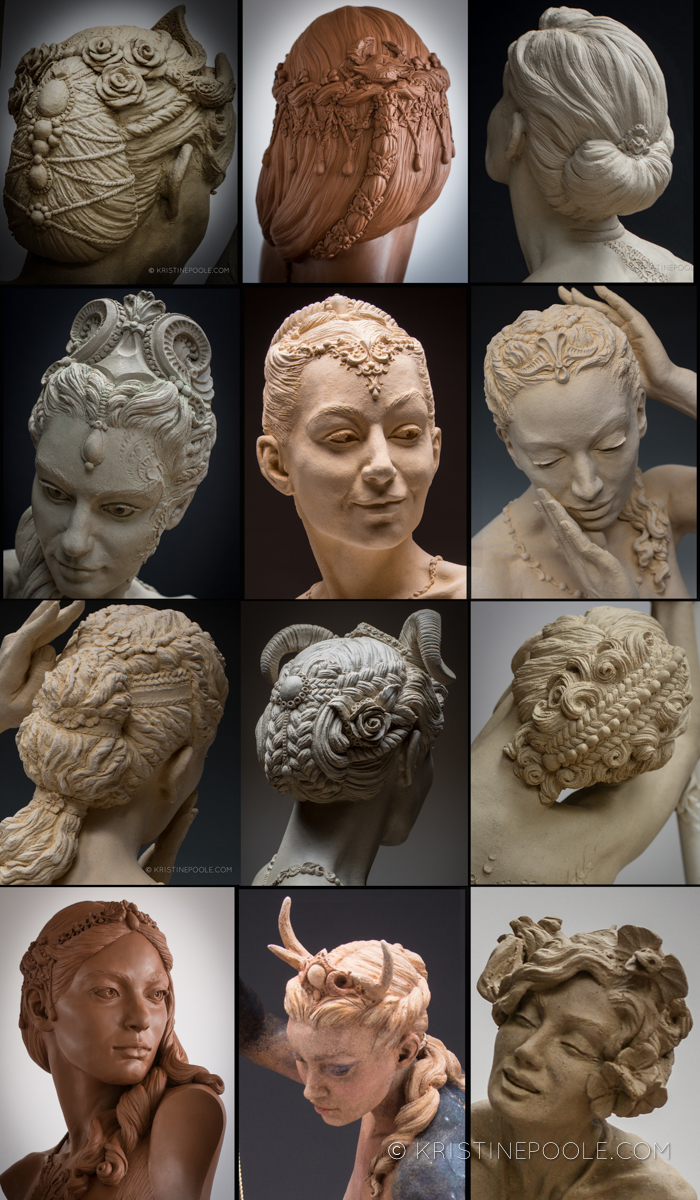
1) A Bevy of Braids: Here are several examples of different ways I’ve integrated braids into the volumes of hair:
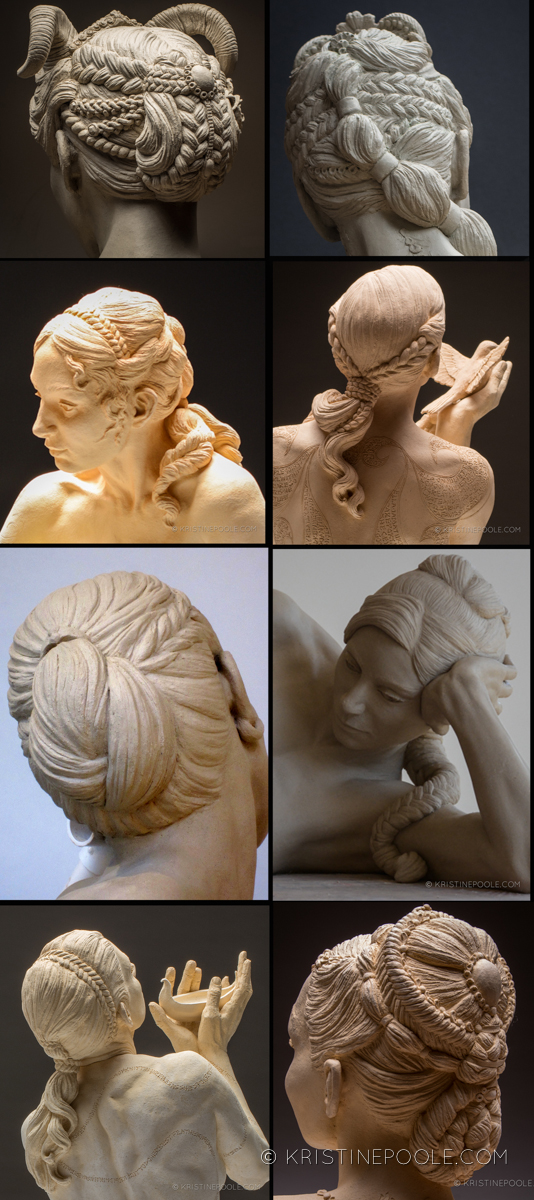
2) Twisty-turny: I also often use twists in the same way as braids. They just create a different sort of pattern and texture.
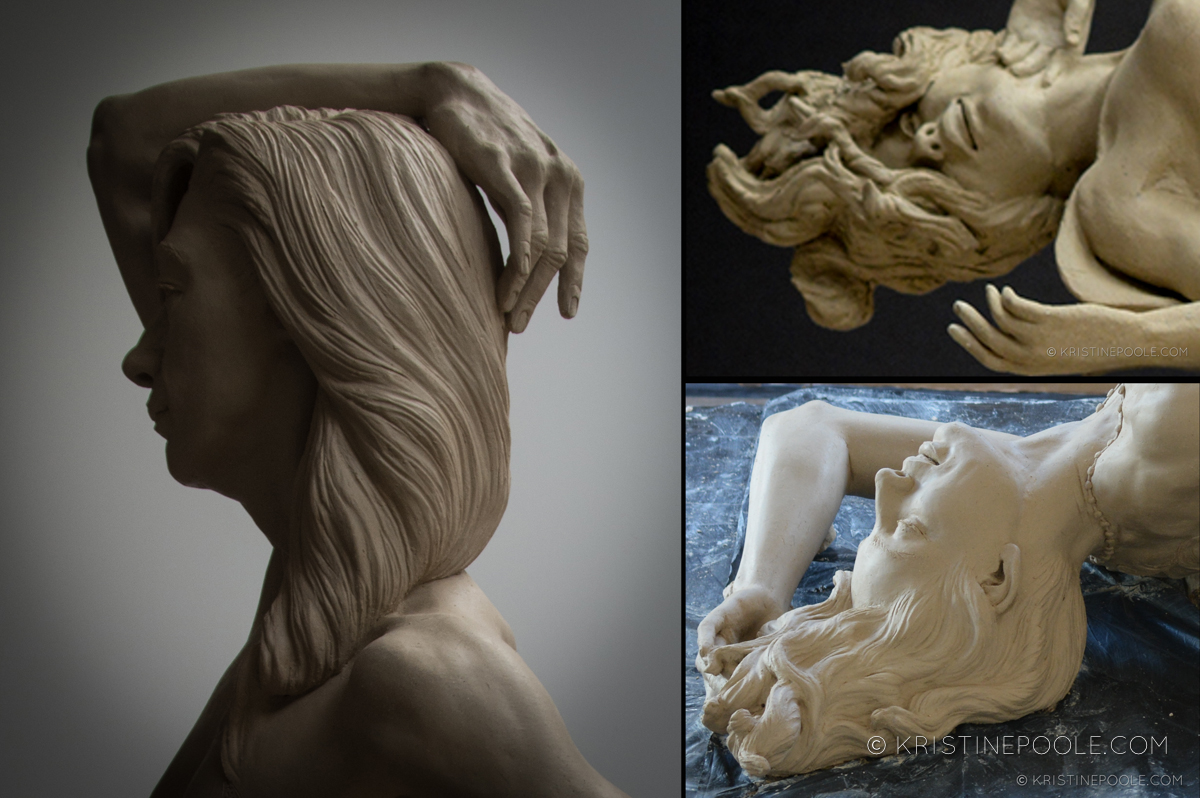
3) Flowing Hair: While my inclinations tend toward hairstyles that keep most of the hair “contained” so it doesn’t cover too much of the anatomy or face, when I’m approaching hair that is loose or flowing, I follow the same process: rough in volumes, divide masses, further divide and texture. For long, straight-ish hair, I pay particular attention to not drawing too many long parallel lines. Leaving some lines incomplete lets the viewer’s eye fill in the detail and makes the hair more believable.
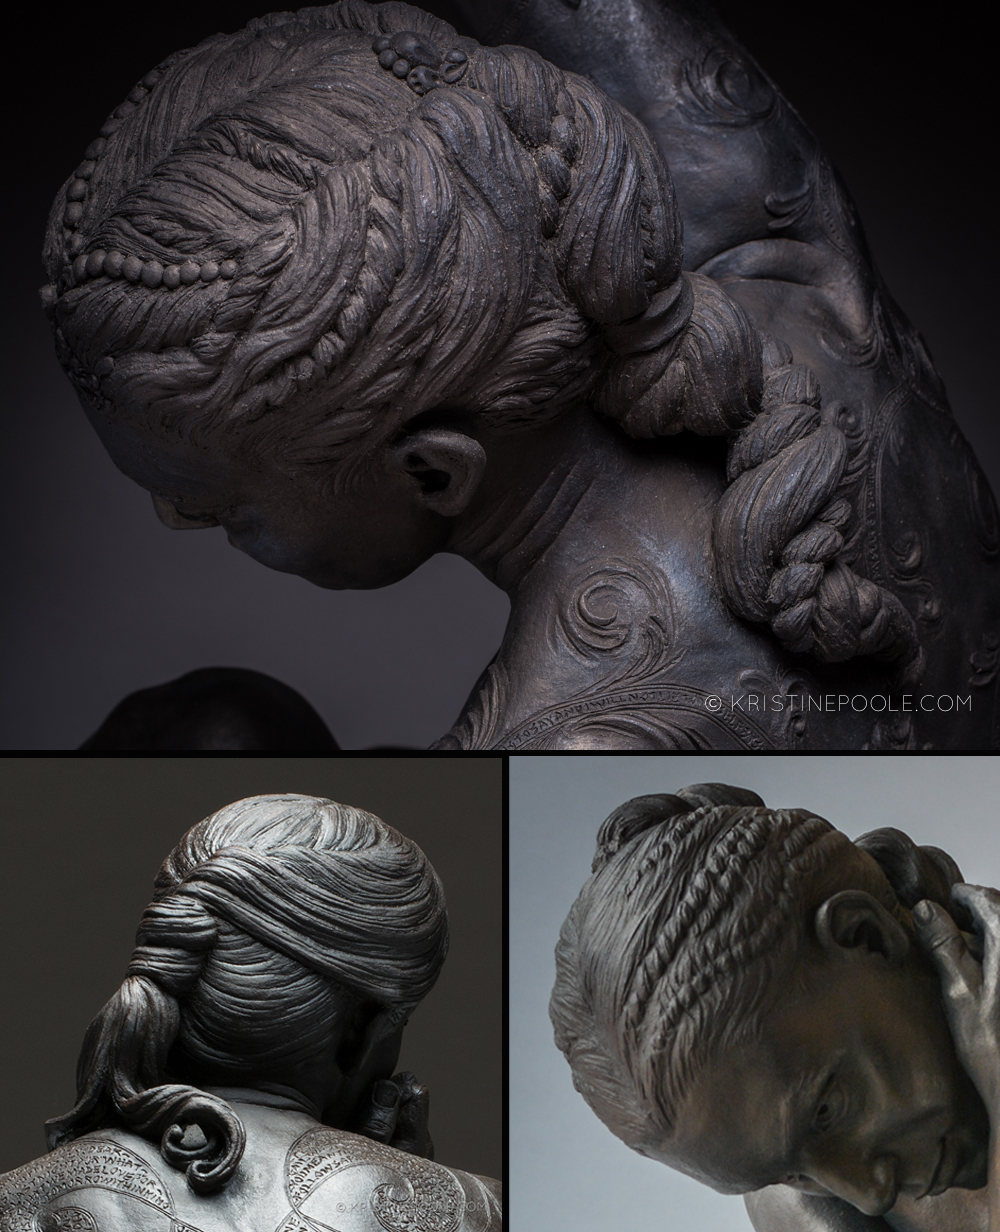
4) Hair with Texture: Hair with more wave, curl, mass or unusual texture can be even more interesting to sculpt. I sometimes leave the sculpting marks a bit more aggressive to emphasize the designs the curls make. Again, I try to keep the patterns and lines having something of a random quality, not manufactured.

5) A couple samples that emphasize the textures and flow.
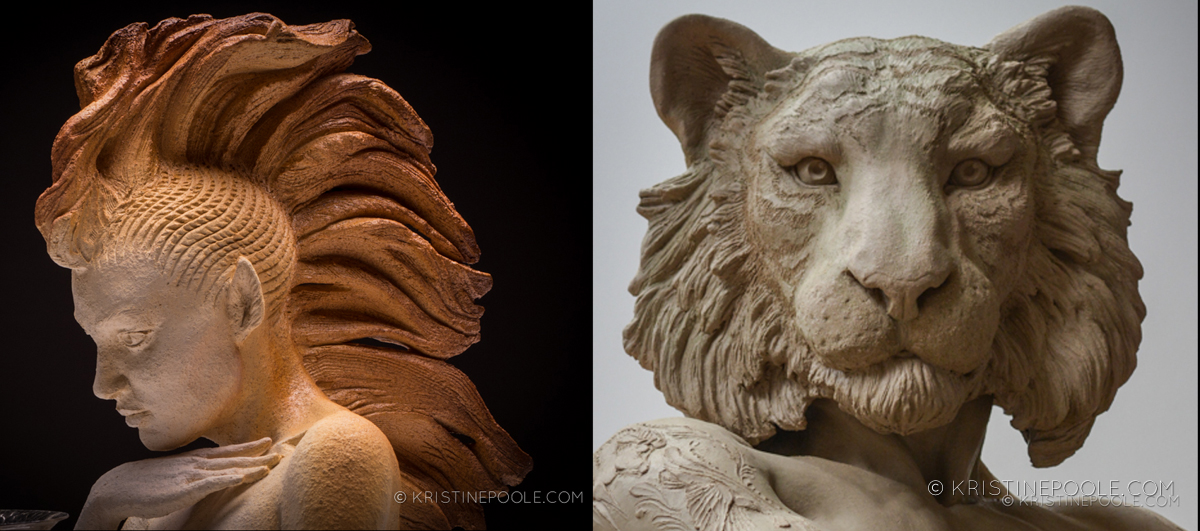
6) Now we get to the really fun stuff! What about adding embellishments: jewelry, tiaras, horns, headdresses, flowers… and maybe a random crab or frilled lizard? Here’s where the imagination can play!
Hope this inspires some experimentation the next time you’re faced with the eternal question: “what should I do with my hair today?”
Recent Comments