I’m always interested in process. There’s something hypnotic in watching things get made and I love seeing the structure and logic of a creative workflow. That said, sometimes complex and ambitious endeavors make the whole thing harder to parse when, in reality, the process can scale to any size and something simple or intimate might be more accessible. For this reason, I though it might be useful to break down my own painting process with some small 5×7 inch character portraits.
Because of the scale, these pieces are very direct in their focus. Each is of a particular character with just enough environment and detail to support the intended mood. That said, this is exactly as I would approach a far larger composition with multiple figures or a complex environment. Everything I do here, I would do there. I’d just have to do a lot more of it.
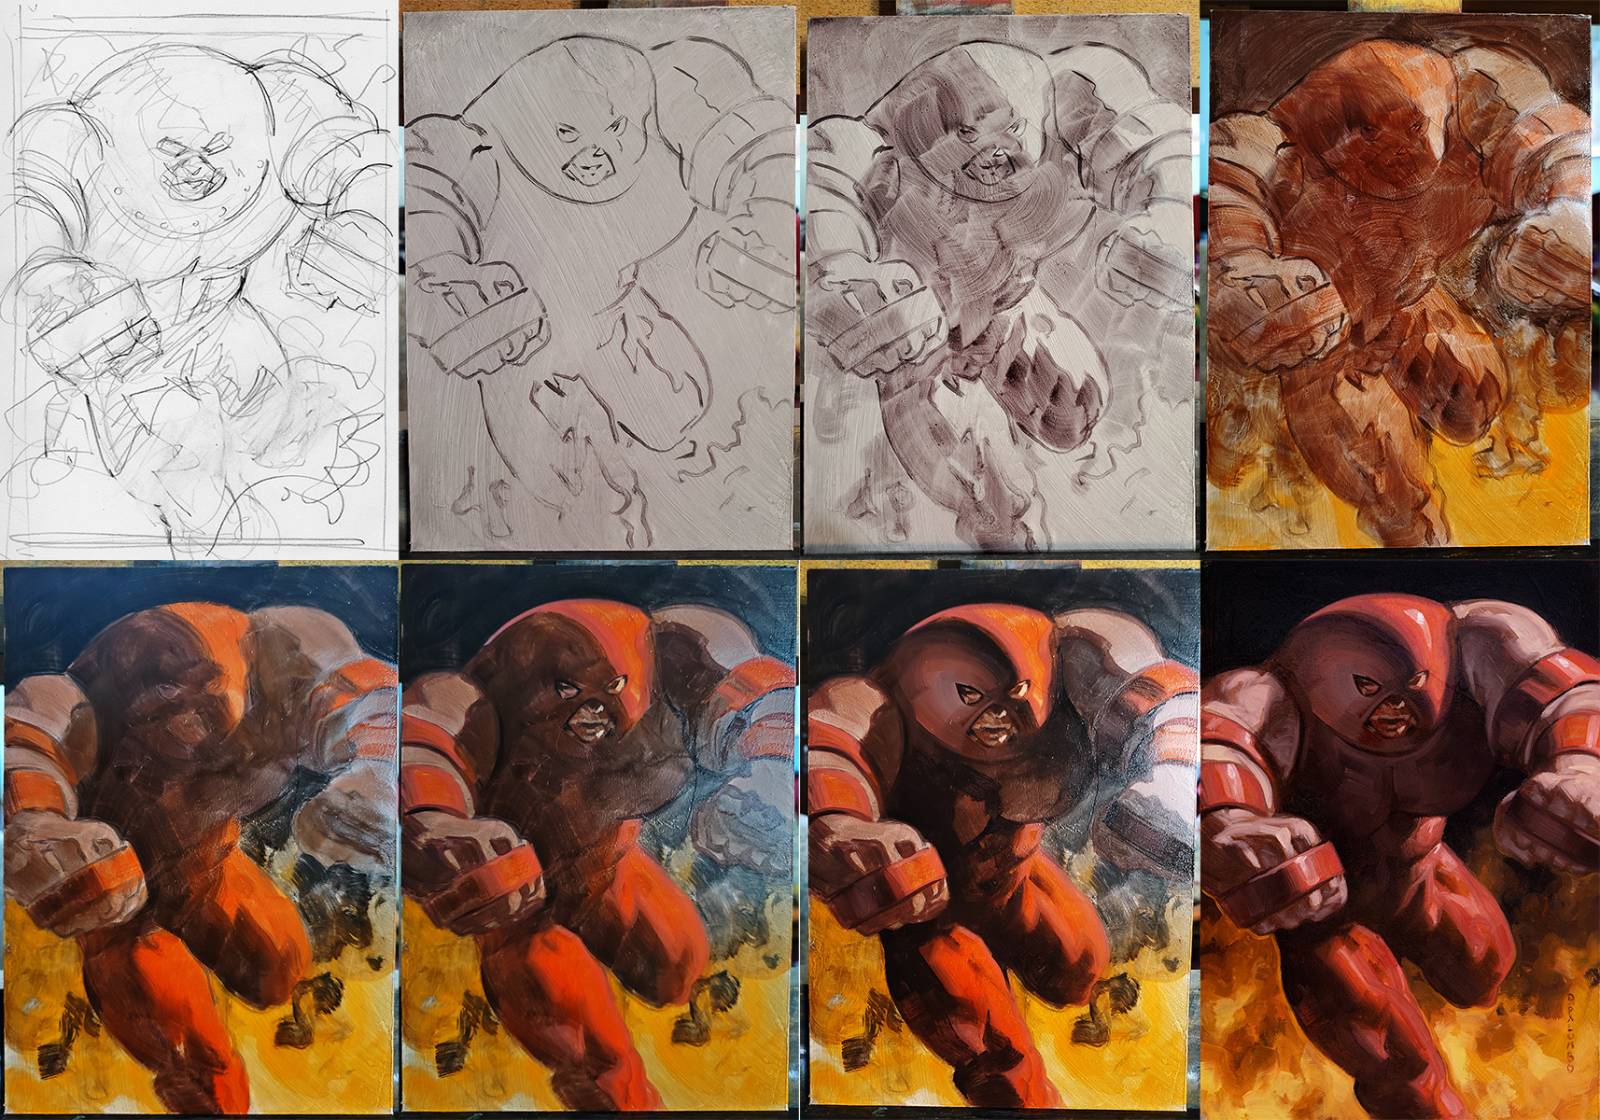
My first step is always thumbnails and roughs in pencil. The goal is to establish the basic story and shapes. In doing that, I’m taking a first pass at poses, camera placement/angle, and I often make notes or do scribble shading to indicate lighting. Everything necessary in the structure of the painting begins here.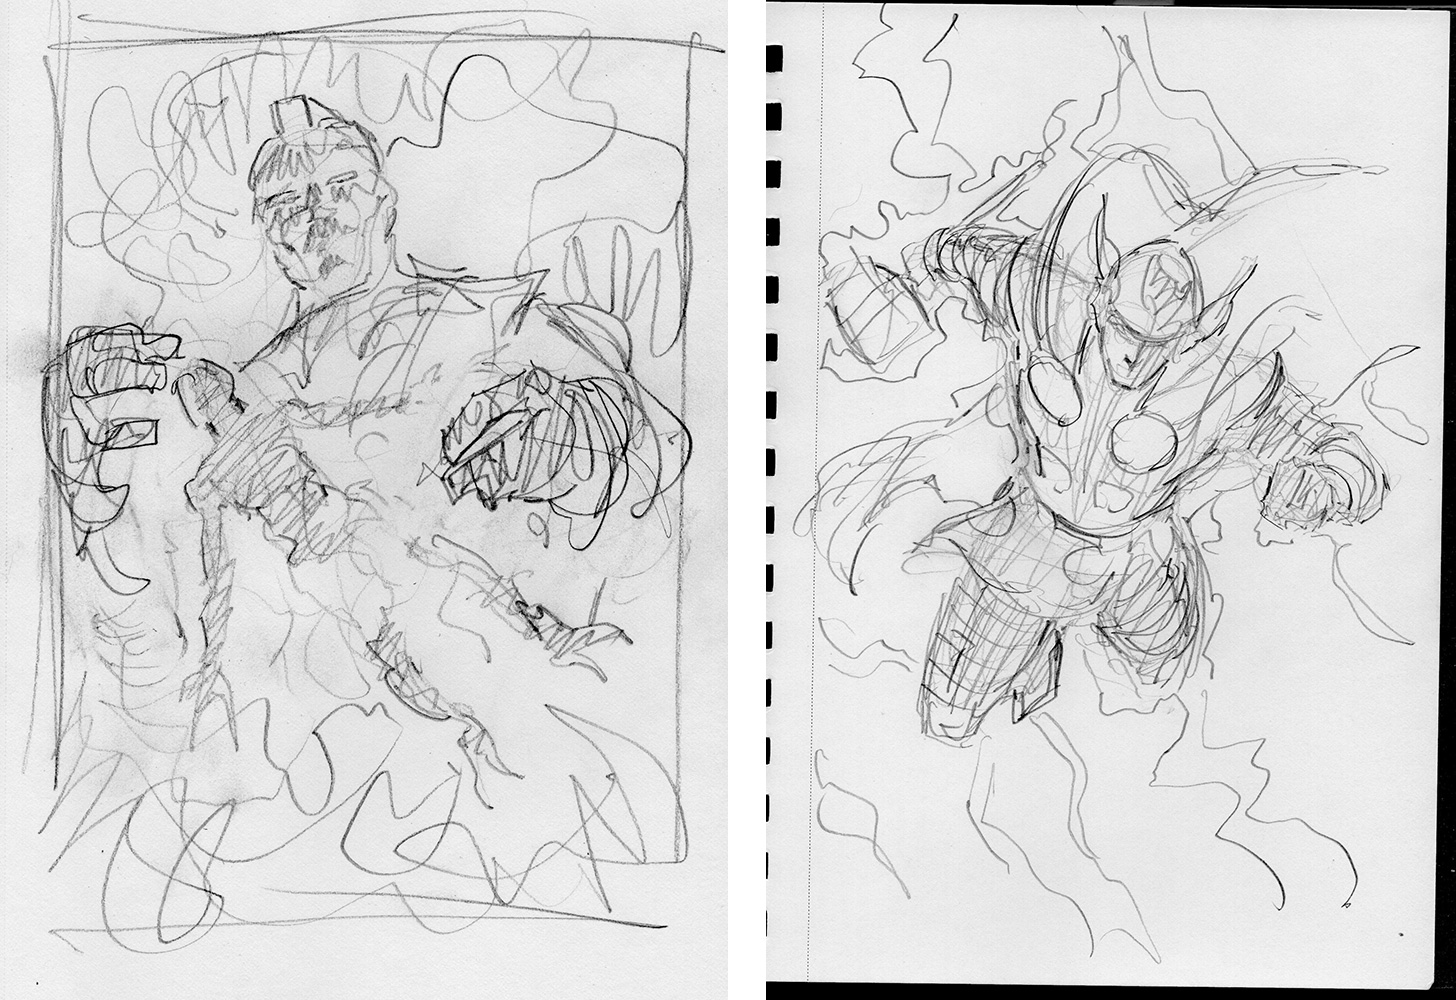
With a basic plan, I will then shoot/design/gather any reference that I need. In the example shown here, A 3d model gives me some basic info but I knew I’d need a real photo reference for the expressiveness of the hands and subtleties of the lighting. The 3d figures can also be useful in further exploring pose and camera placement, though I find it’s best to have a good starting plan first.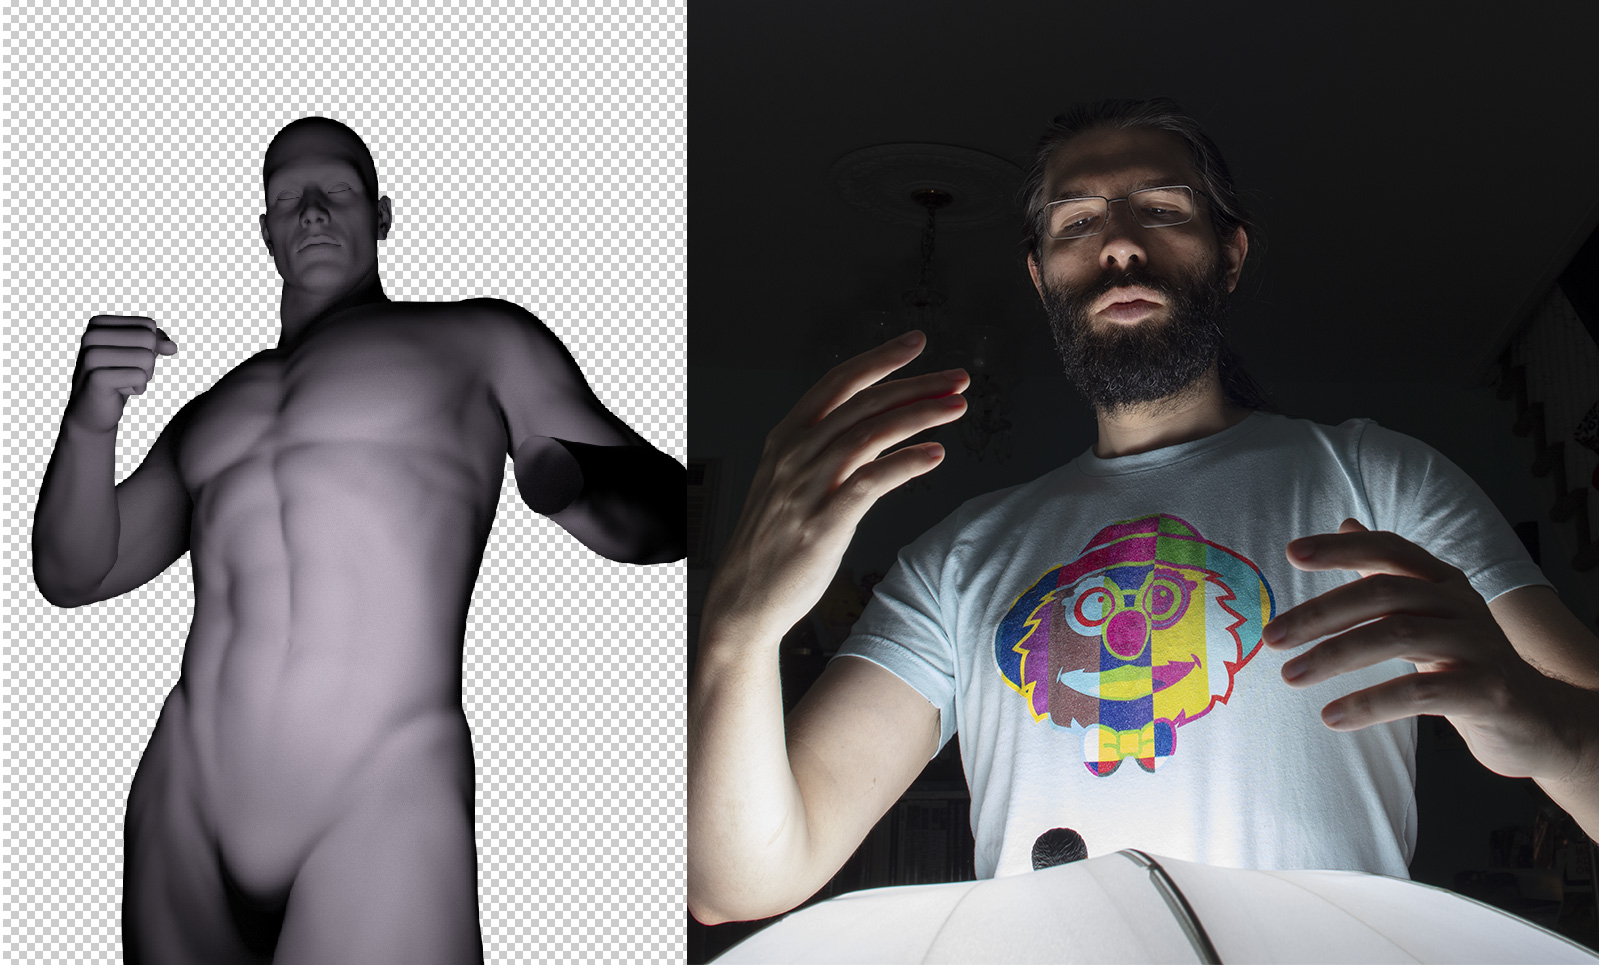
When I feel confident in my plan, I’m ready to get into painting. Normally I would do a monochromatic oil study as a final sketch. That may be one area where these mini paintings differ: it doesn’t make sense to sketch than and then paint them again at the same size. So in this case, I just moved straight into the structural lay-in. This is sometimes done in pencil (which is then sealed with acrylic) and sometimes with direct oils and projection. Pencils are more precise and detailed, direct paint is quicker and more fun. It really depends on the needs of the piece. After the basic forms are placed, I’ll finish the block-in by indicating dark regions.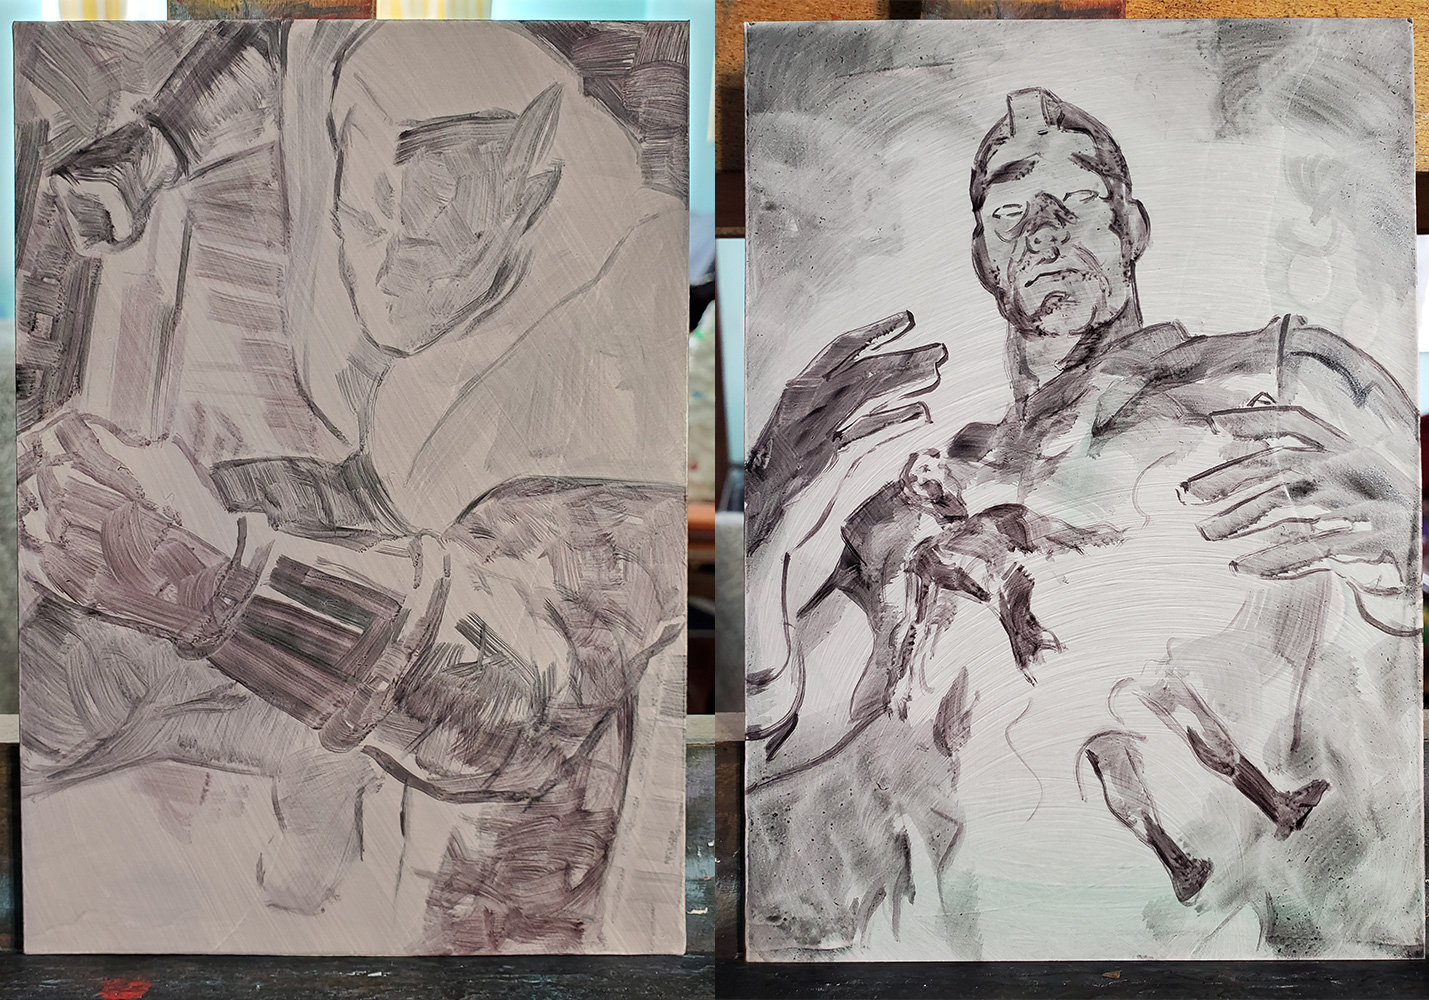
I allow the block-in to dry, and then I wash over some simple colors. I probably have some idea of the color scheme in mind prior, but this is the first time that I begin to commit to a color plan. This layer is very thin so that it dries quickly (1-2 days) and I can still clearly see my structural block-in. I’ve taken to adding some galkyd medium in the past year or so which helps things dry a bit faster.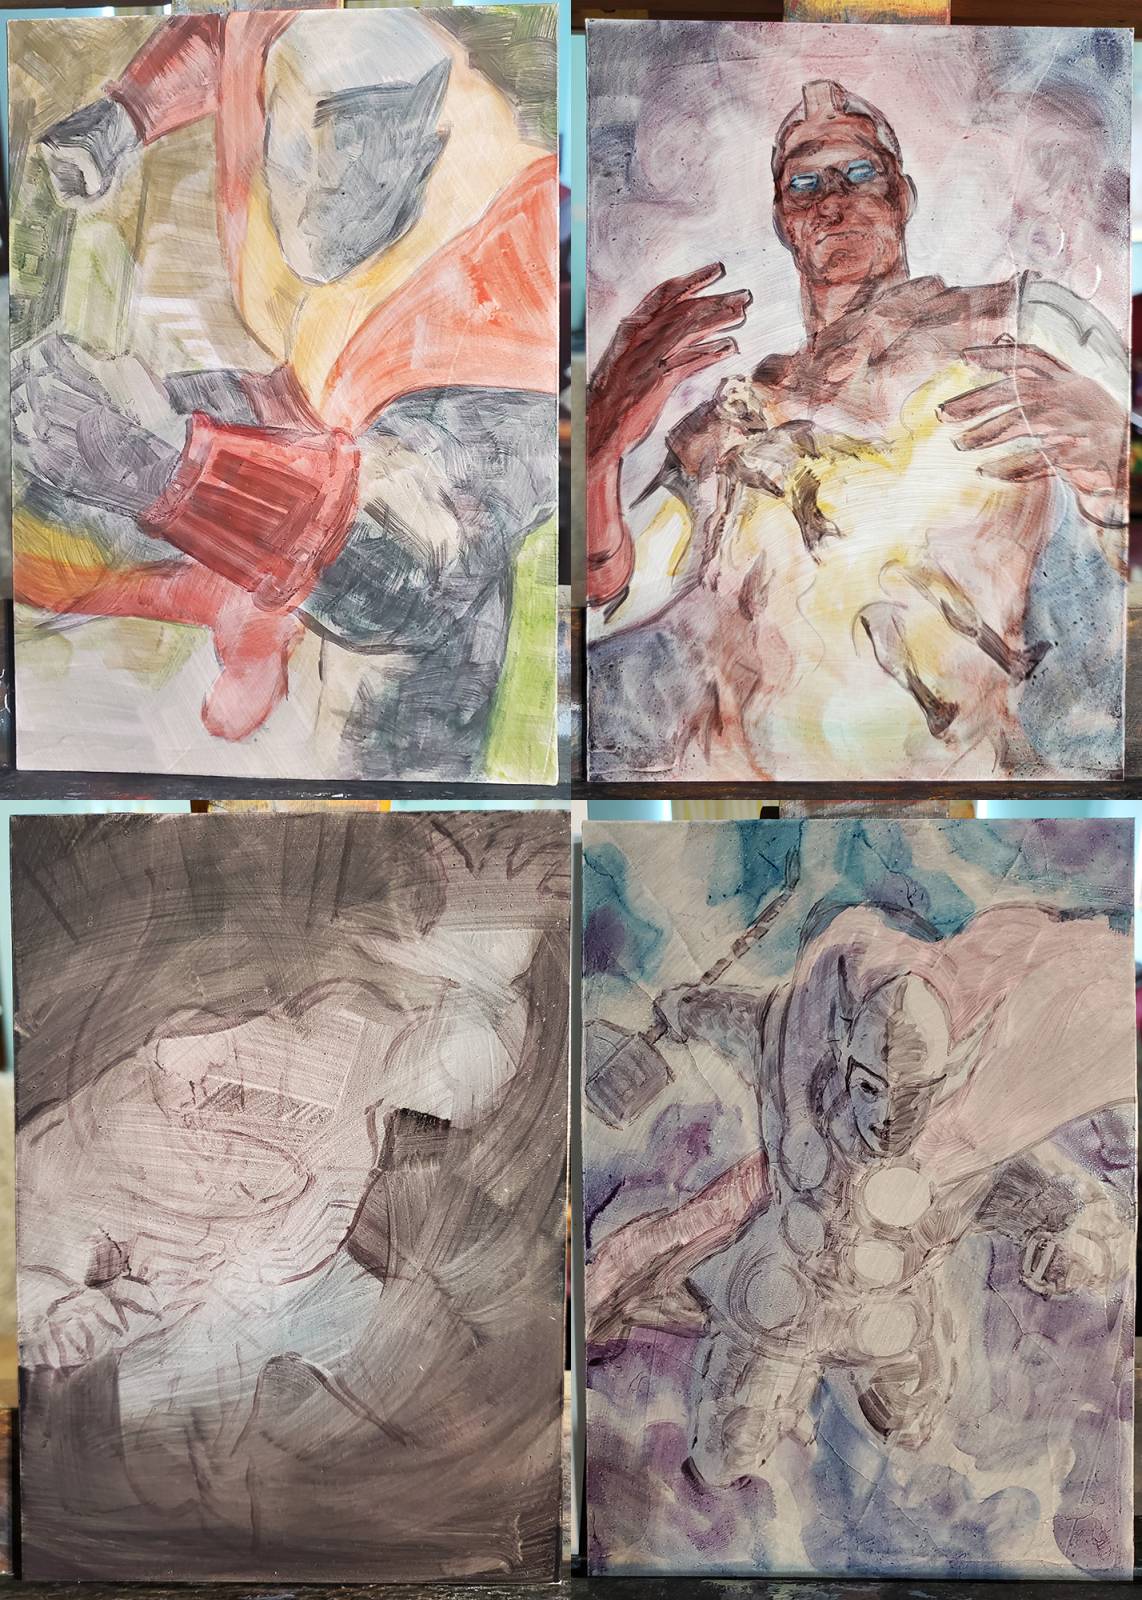
And at this point, I’m ready to paint! From here forward, I like to work with a similar mindset to alla prima painting, thinking globally and building up wet on wet with increasingly thicker strokes. I begin with large generalized shapes of value/color and then find the smaller and more subtle shapes within, refining in this way until it reaches a level of detail and finish that I’m happy with. My underpainting generally serves as a good midpoint to push shadows darker and highlights lighter. That’s basically all that I’m doing: building darks and lights, while varying the chroma as needed. I am also paying attention to details like how a brush stroke lays next to or blends into those around it, but the foundation of all of it is pushing specific shapes of values to where they need to be.
When I have basic coverage in thin layers, I like to start getting more detailed. Usually I will do this in the focal areas first. I find that this helps me determine how much I need to develop the more peripheral and supporting areas without fear of overworking them. A more in-depth explanation with time lapse can be found here.
When the piece is done, I shoot a digital photo and do all color correction and final adjustment (dust removal, etc.) in Photoshop.
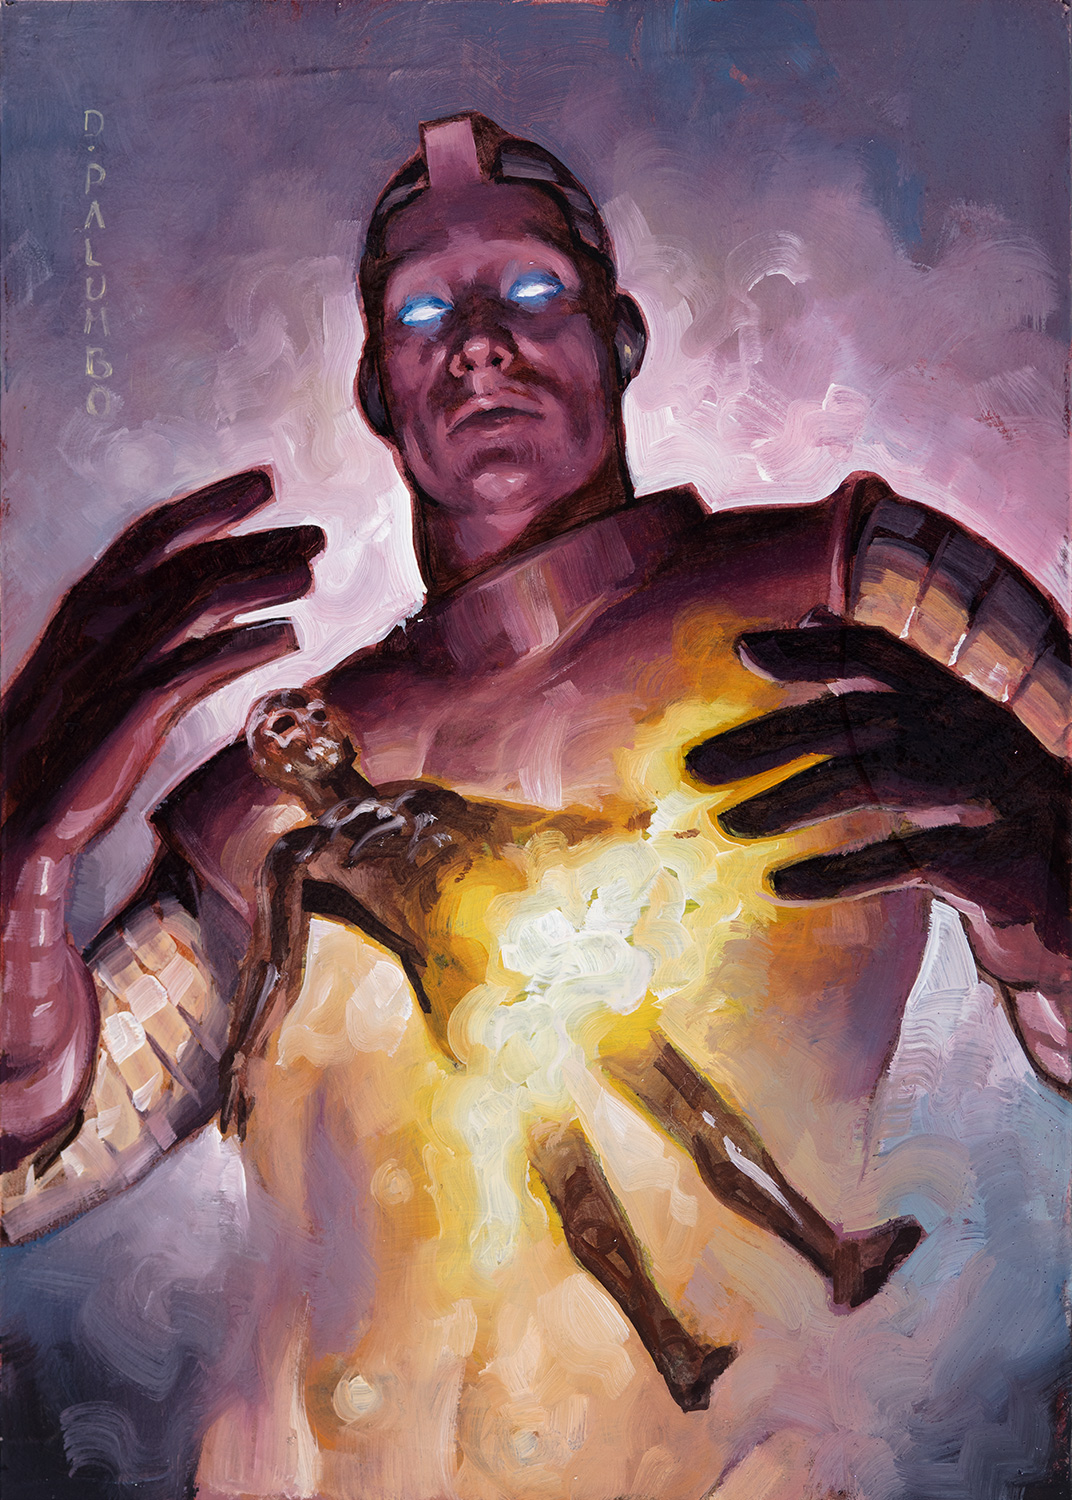
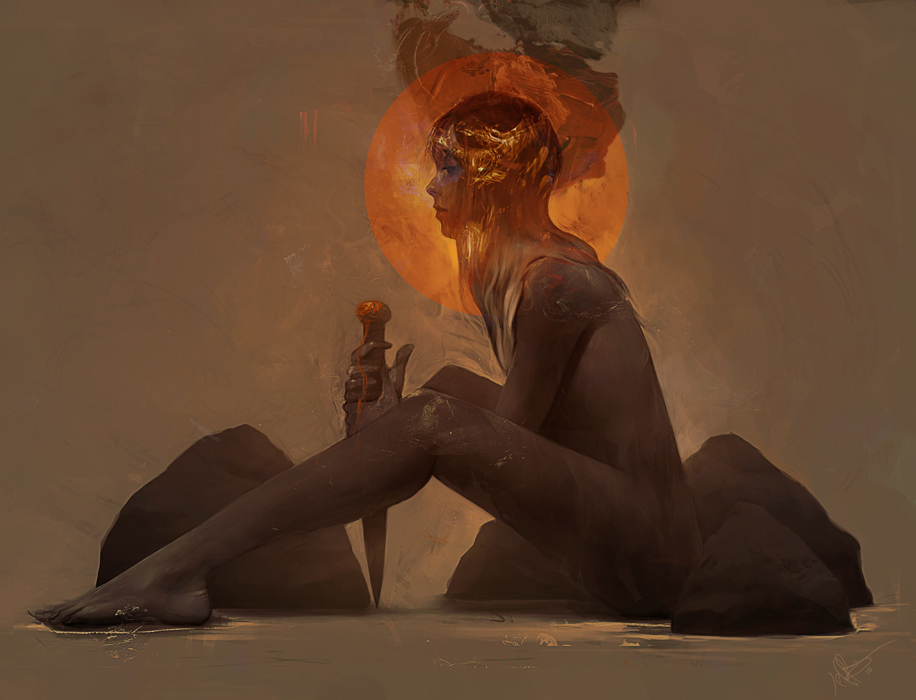
High Evolutionary, 5×7 inches, oil on panel
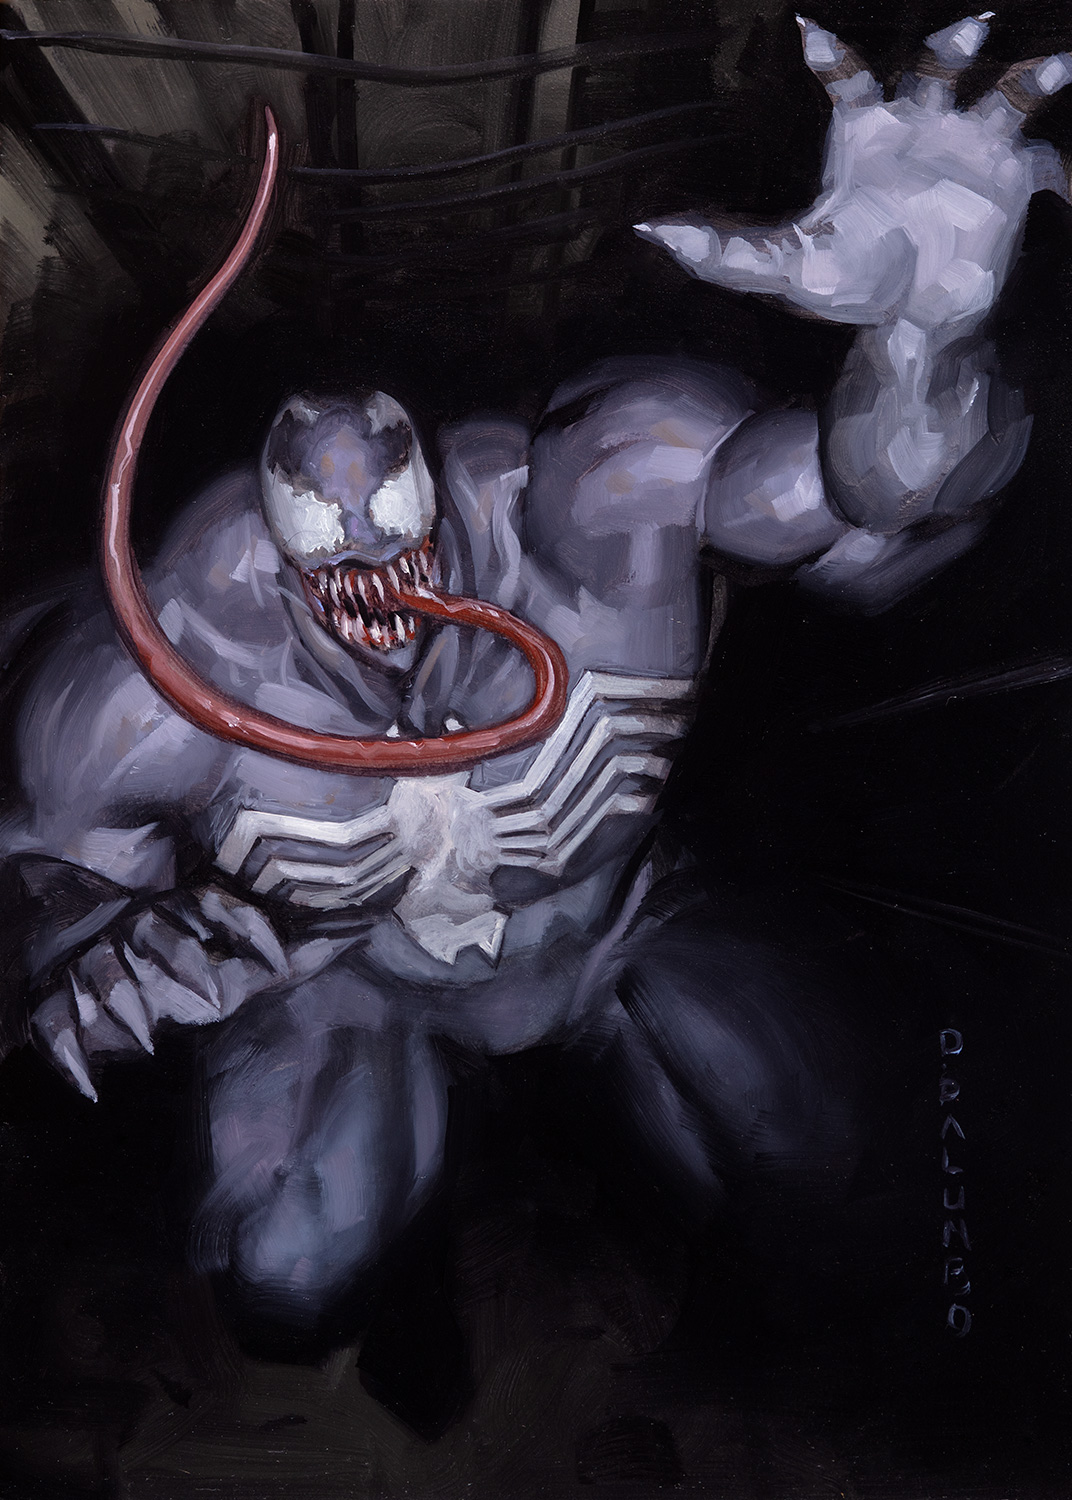
Venom, 5×7 inches, oil on panel

Thor, 5×7 inches, oil on panel
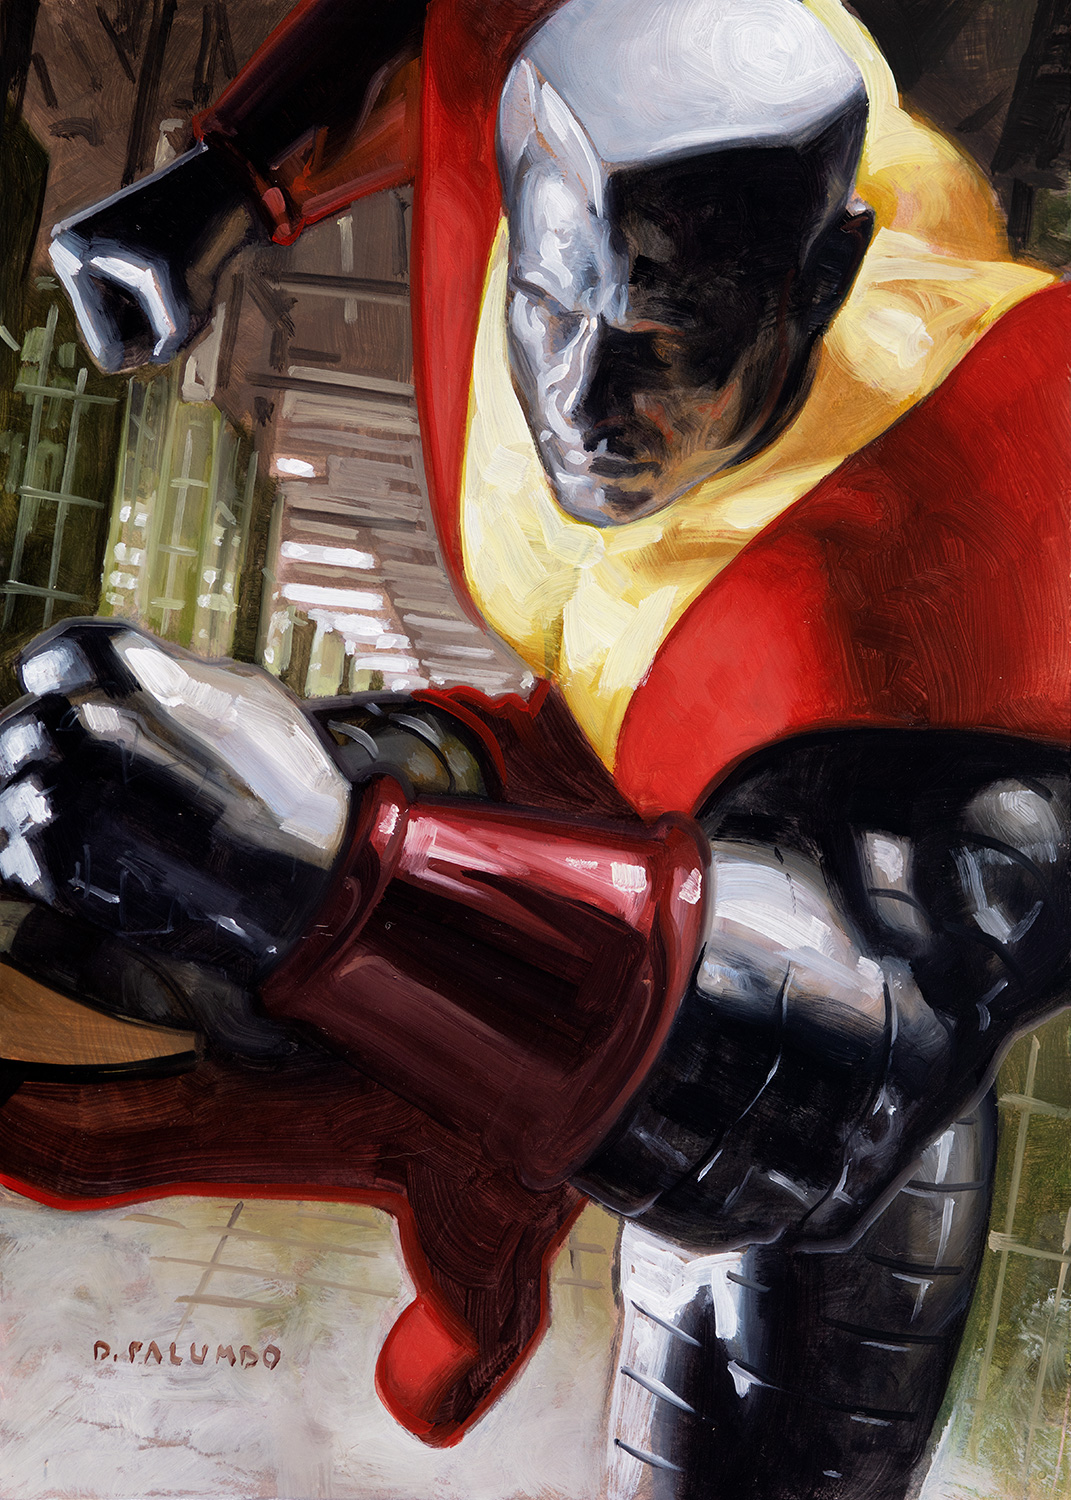
Colossus, 5×7 inches, oil on panel


Great article, and lovely examples, thanks Dave!
So then do you paint your 5×7 for your finished piece or do you go larger, if you finalize the 5×7, what size brushes are you using to get that small?
These are unusually small for me. Most of my finished work is between 12×16 and 18×24 inches. Whatever size piece, I use the same set of brushes: a #1 round, flats in #4, #8, and #12, and a 3/4 or 1 inch wash. On smaller pieces I will mostly use the smaller brushes, and on large pieces I might not need the smallest one. In general I try to work with the largest brush that I can for any given passage and only switch to a smaller one when I need a finer control.
This is really cool and helpful, thank you Dave!
This is a really helpful post. Thank you very much for sharing it for me and everyone to know.
Particularly enamoured with that Venom piece 🙂