I’m sharing some recent mark-making as it was recorded by Trekell Art Supplies for their features they post on their YouTube channel. They came to my studio a little while ago to check out my set-up and tools, to chat and do an interview, and to film me painting for a bit too. It was a solid couple hours of great conversation and making marks, using their panels and brushes as well as other unconventional tools I use regularly. Here is the video:
__________________________________________
Vanessa Lemen – Creating Backgrounds – Trekell Art Supplies
__________________________________________
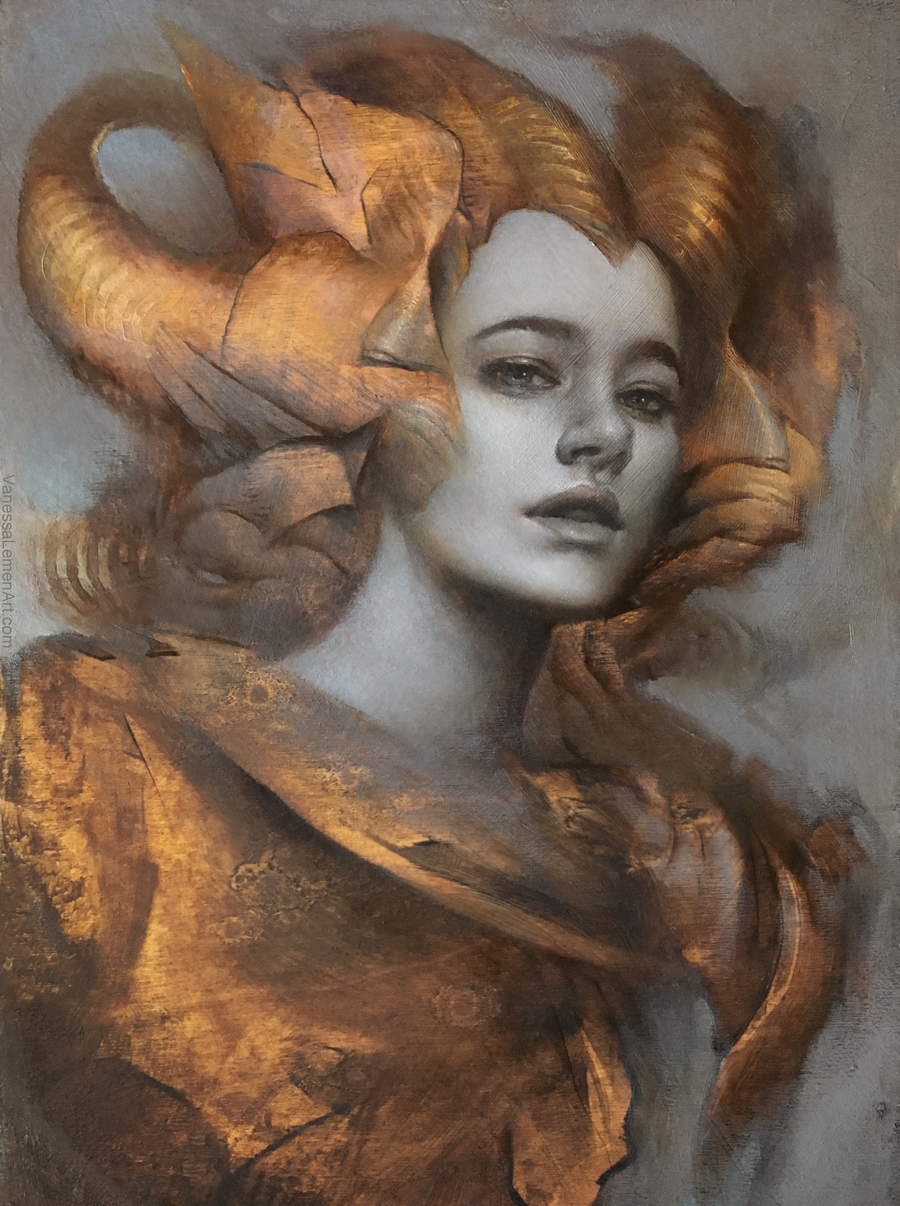
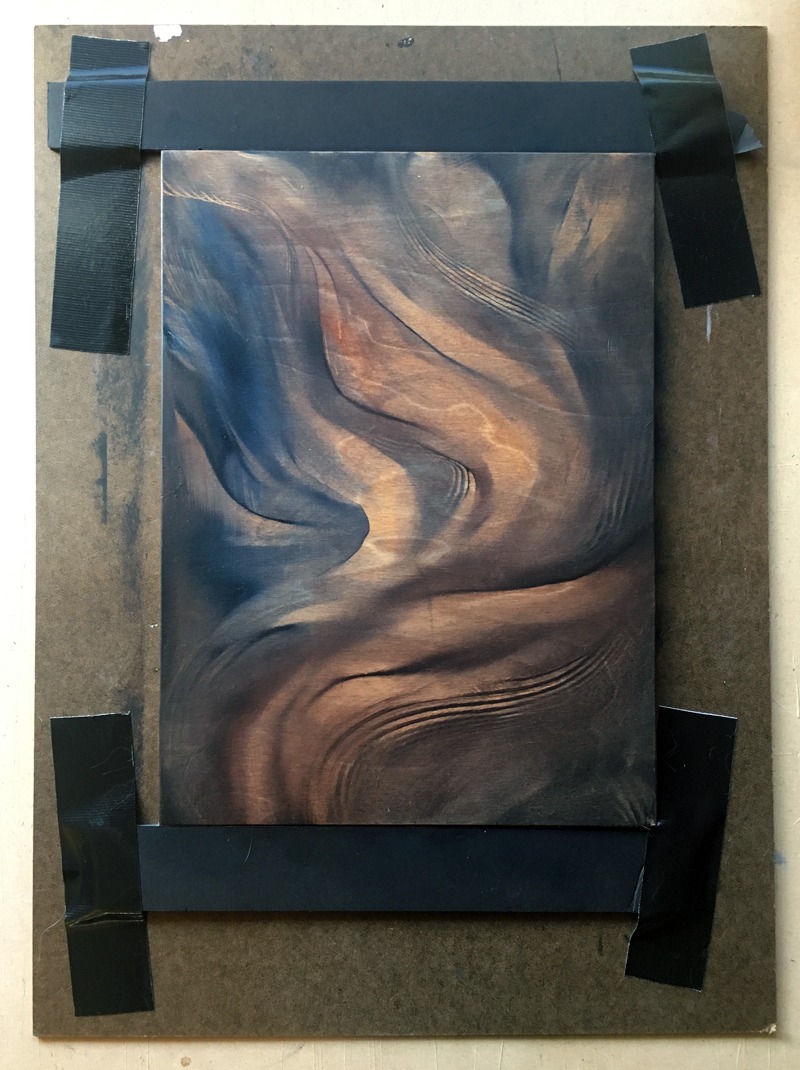
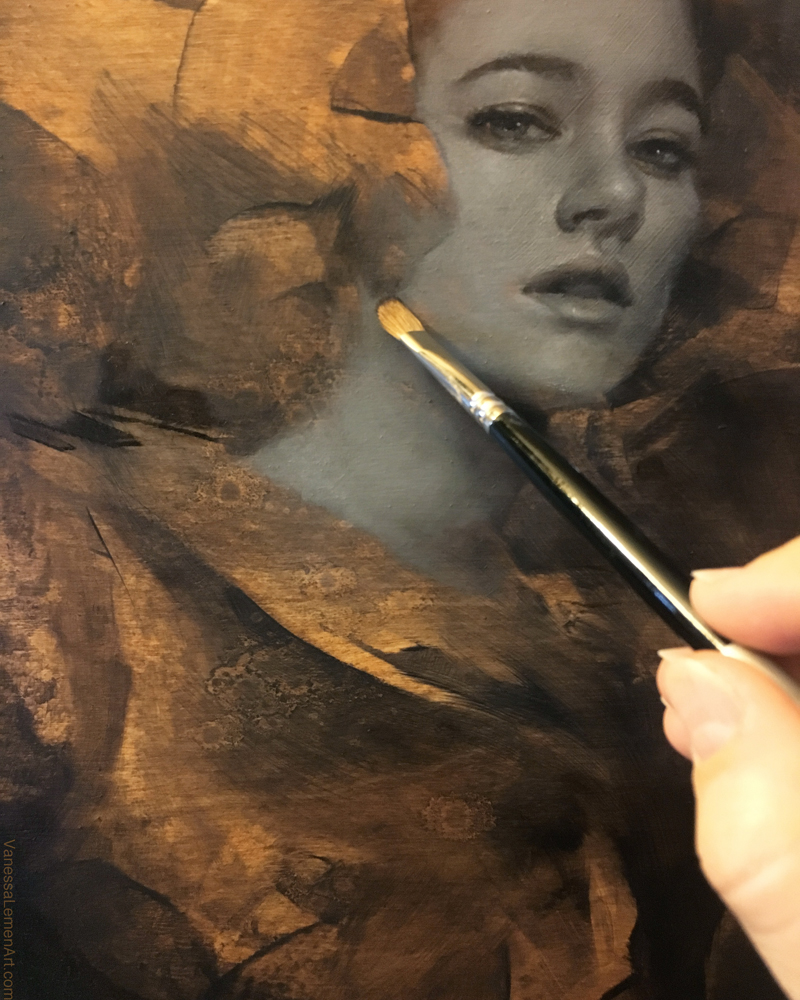
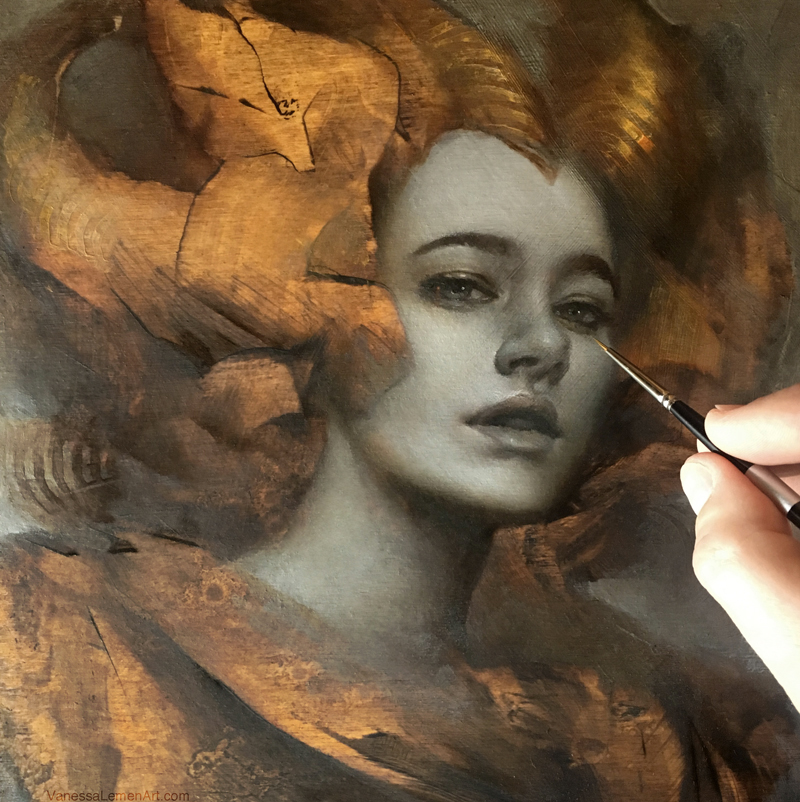
I followed up working on this start, as we planned for the finish to be shared in the video too. Here are images of the start and finish:
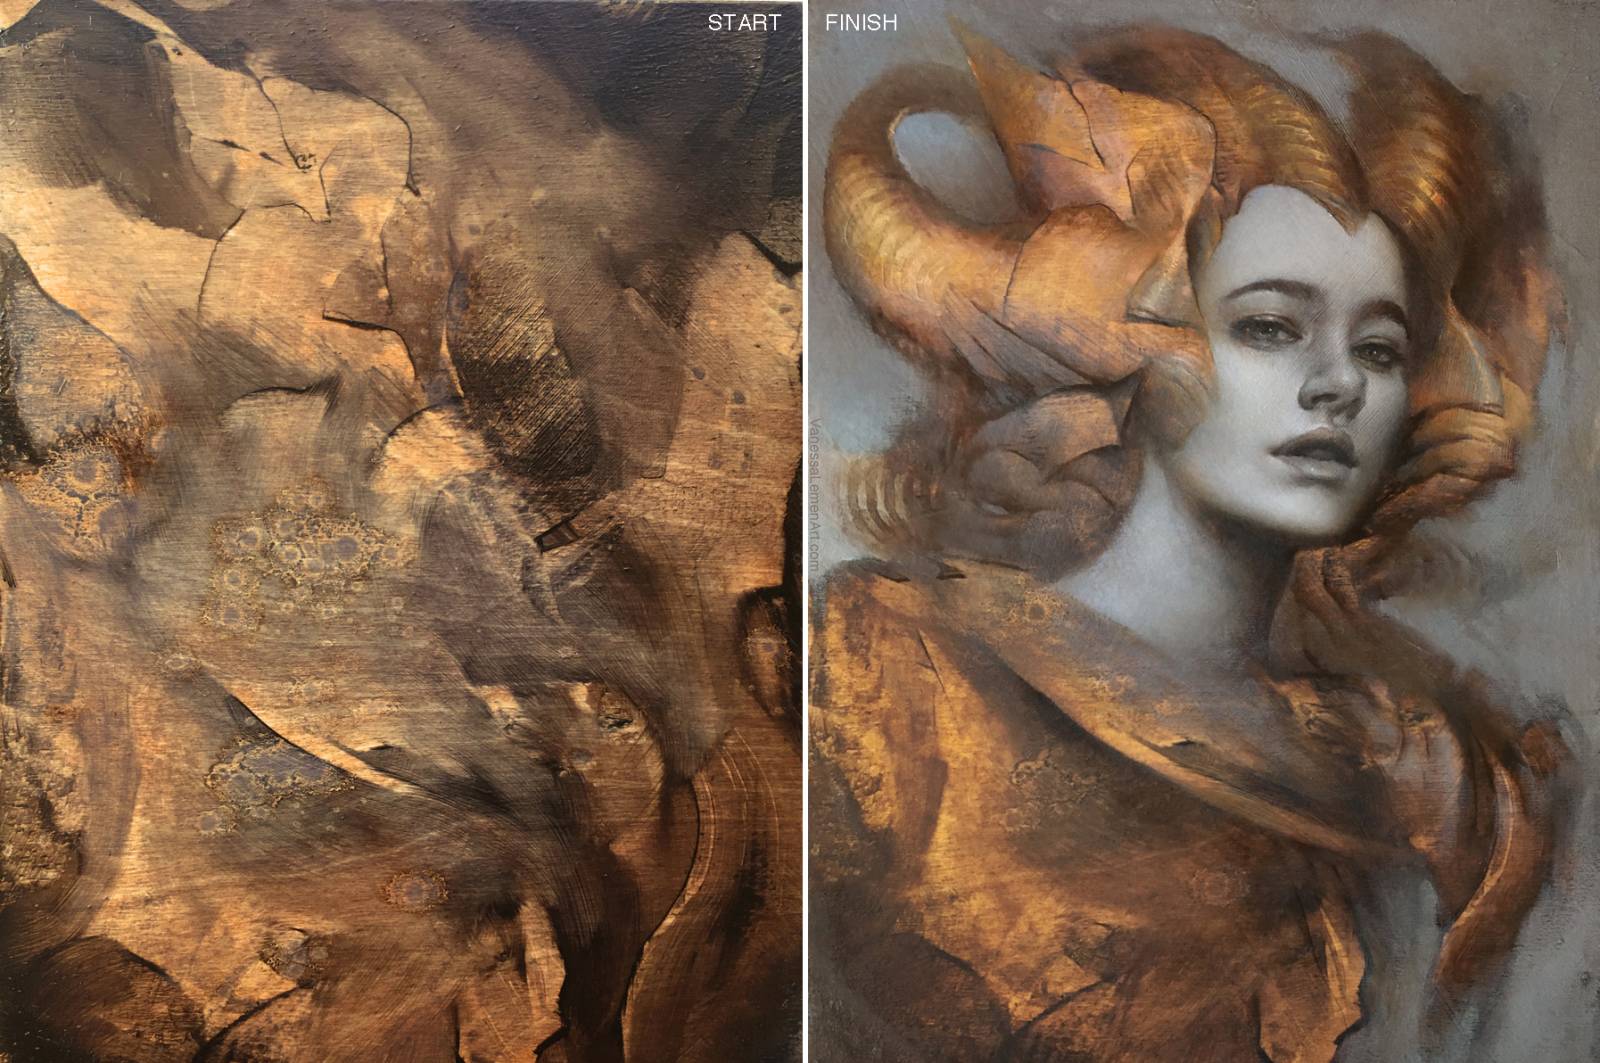
In the video, I mention that I stained the raw wood panel with acrylic and water, but you can also see in the video that the surface is very shiny. The part about what it’s sealed with must’ve been edited out, so I wanted to mention that after the stained panel was dry, I coated it with gloss medium. I applied 3 coats so the surface is thoroughly sealed and has a substantial resist. This is important to note because painting in oil on a raw wood panel that’s only been stained with acrylic and water will basically lead to the paint just sticking right to the surface and I would not be able to move the paint around or pick out the way I do in the video if it were not sealed. Not to mention, the oil will eventually be drawn out of the paint and into the wood over time. (Oh, and by the way, the mark-making I’m doing in the video is in oil).
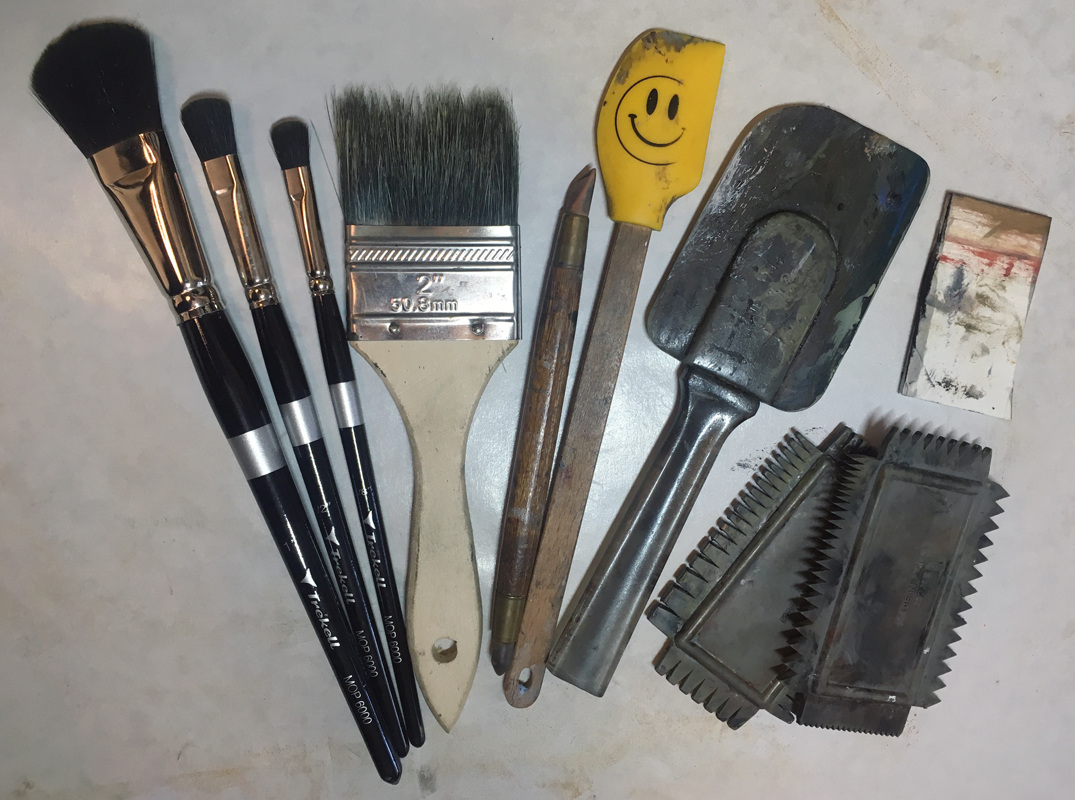
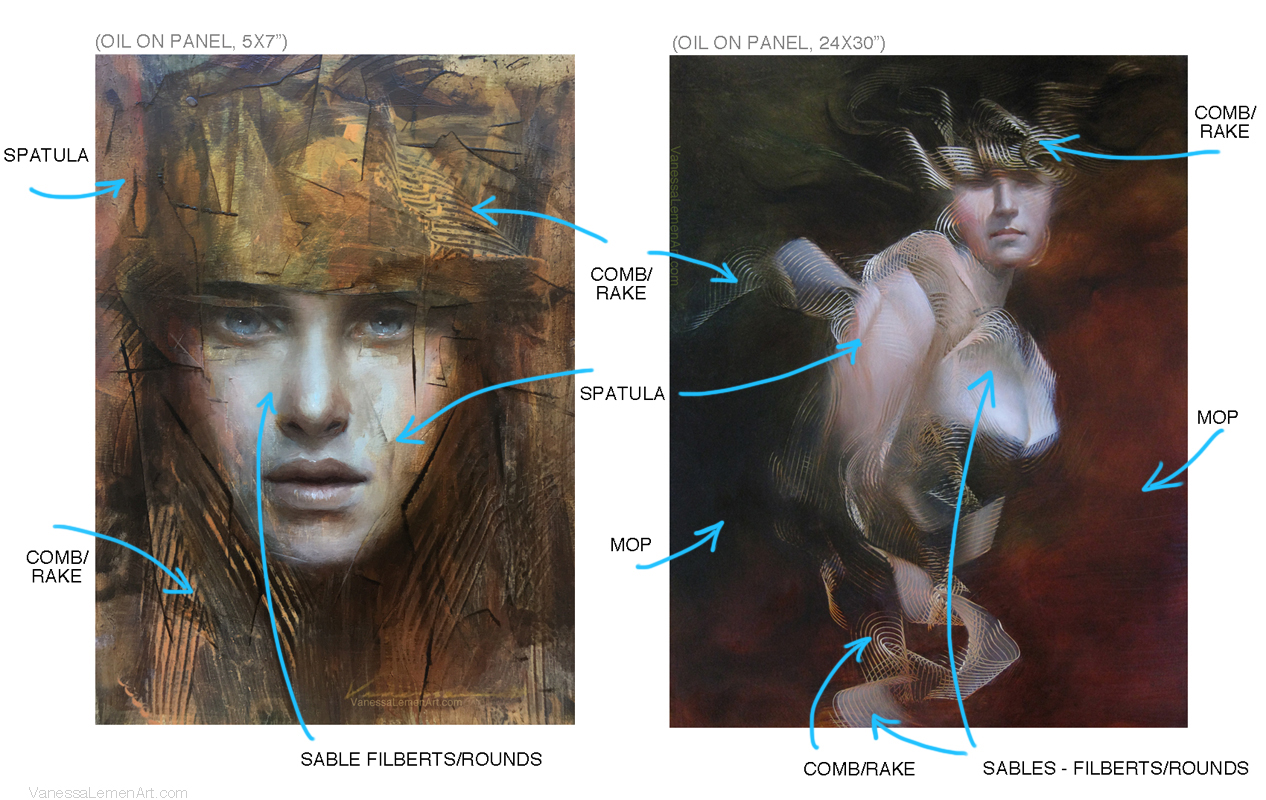
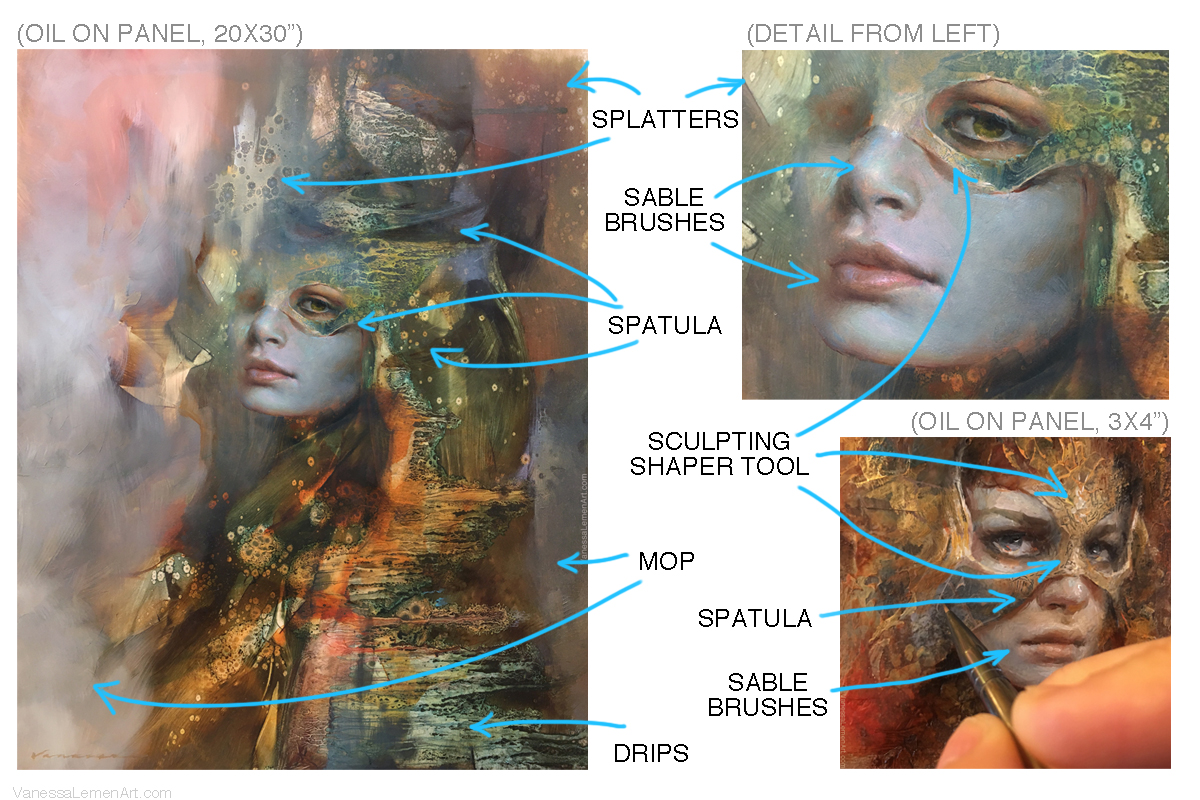
Here are the tools I used to make the initial marks while they were filming me. I use a cheap bristle brush for applying the oil paint to the surface. I mention in the video that it’s a mixture of burnt umber and ultramarine blue with a little bit of linseed oil mixed in. Only a little bit of linseed is needed. Too much will cause it to drip, will cause the mark-making to become a big mess, and will take much longer to dry. The other tools are: mops for softening broad areas of paint as well as softening hard edges. The tools for pick-out used are: a couple of silicone kitchen spatulas, faux finishing combs, a piece of foam core, and a sculpting shaper tool (this tool is what I wrote “Trekell” with by carving out of the paint on a panel in the video).
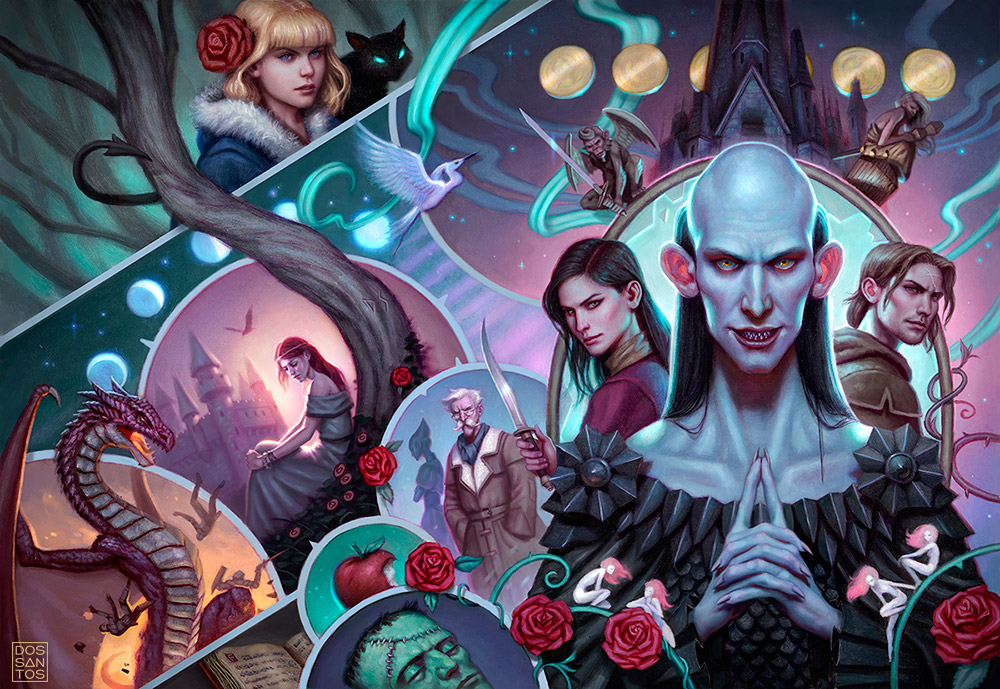
Here are some images of other paintings I’ve done to show how I’ve used the tools mentioned here:
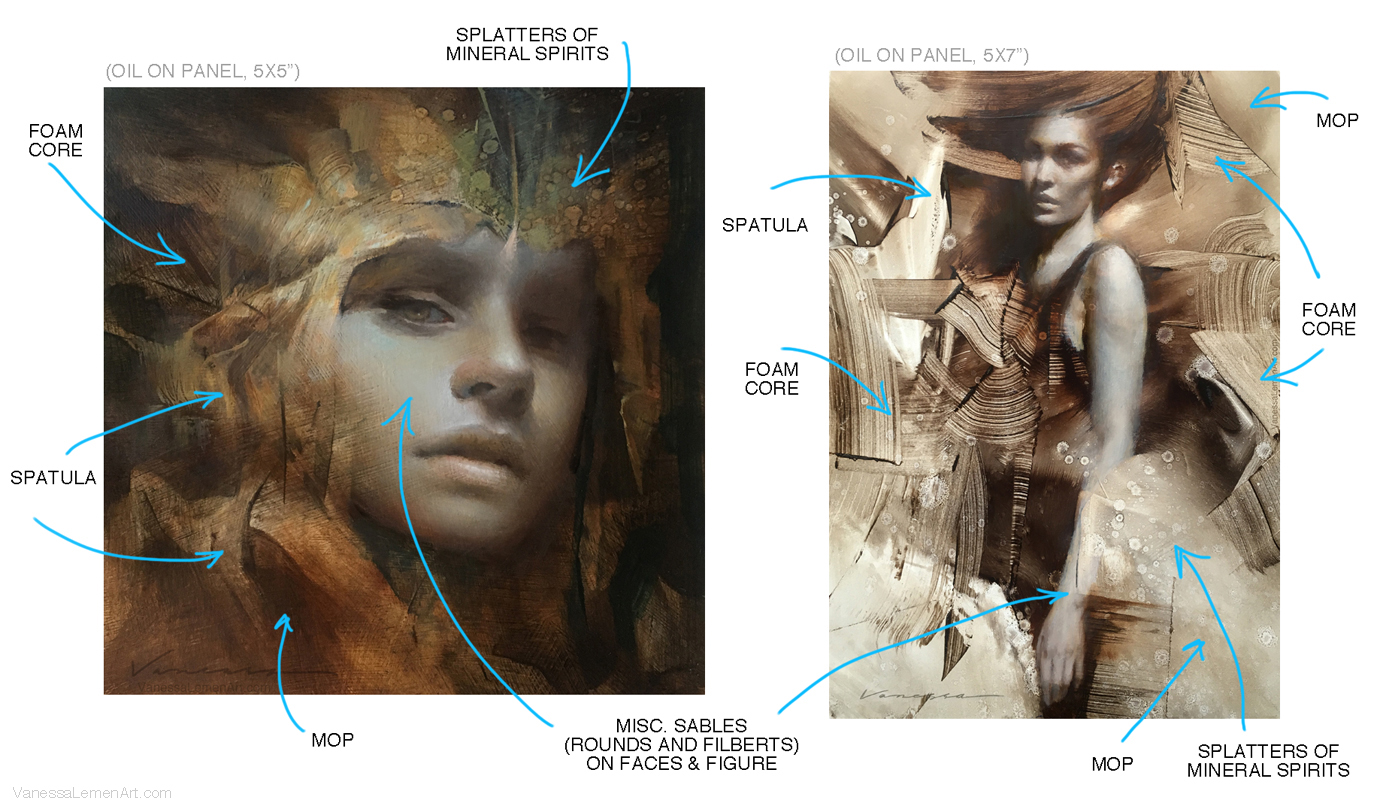
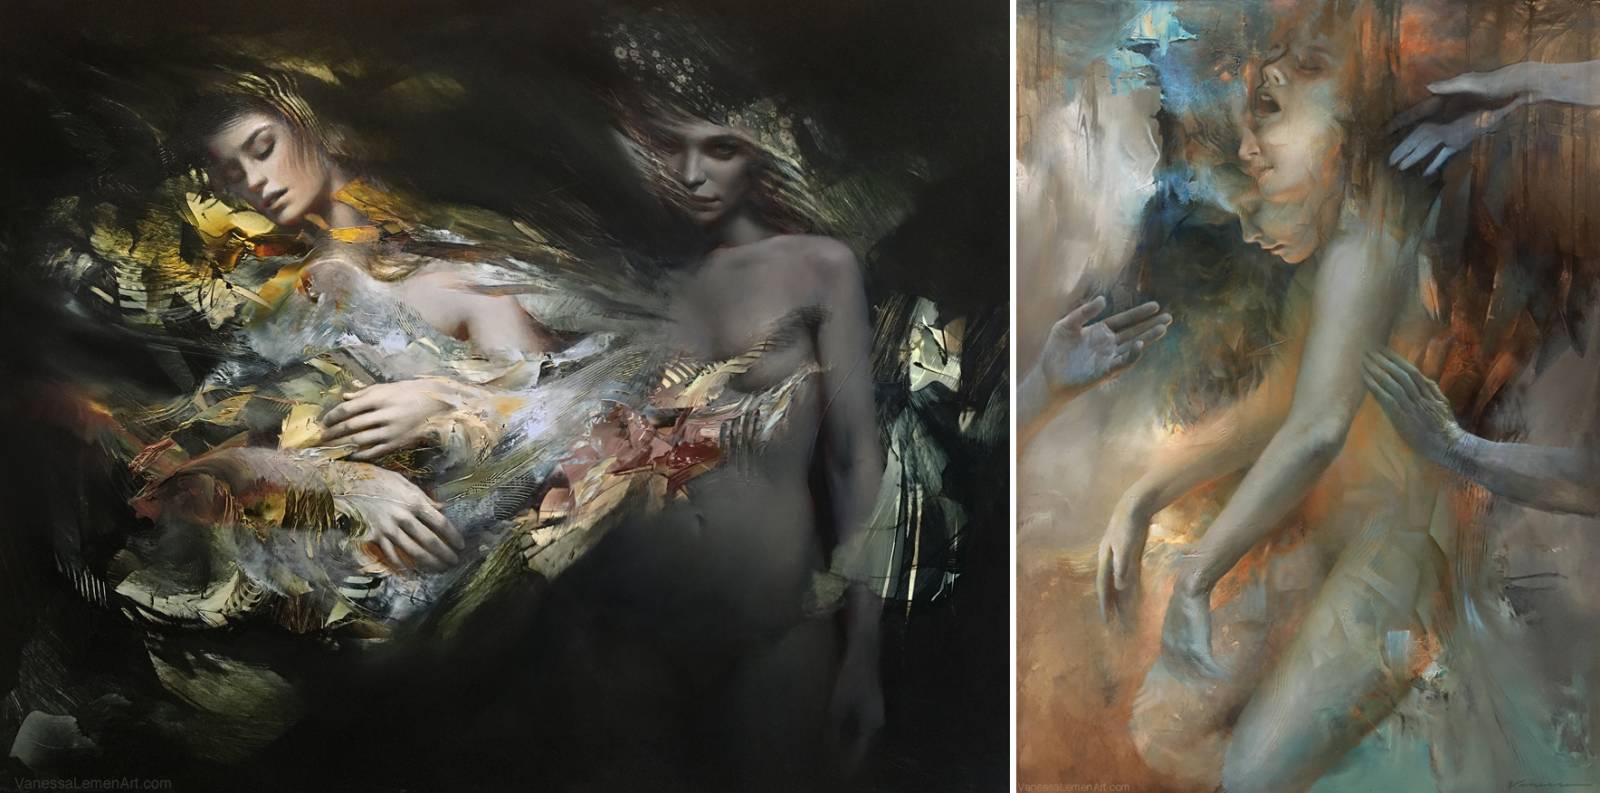
Below are a couple larger (just under life size) paintings that I’ve utilized all of the tools listed in the images above. There are more layers involved in the building up of mark-making in these two, but you can see where those tools were used when you scan around the surface. I tend to use so many various tools to make all kinds of marks when I paint, and there are at least a couple of layers involved in each painting.
Here are some other panels I did the day Trekell stopped by, but were not used in the video:

One quick point about my set-up when doing these abstracts.. I tend to move the painting around and work on it both vertically on the easel and laid flat on a surface, as well as turning it all different directions (vertical, horizontal, angled, etc), but I don’t want to have to handle it by the edges, so I use larger panels with foam core taped around the edges to hold it in place. That way, I can move it around while also painting out to or past the edges. Also, that 2nd abstract was a quick demo to show that it’s possible to use a different color as the stain, and a light color to apply on top of that and pick out from.
The folks at Trekell decided to focus on the panel I worked on the most, and not as much on the rest of the interview because they had content there in the mark-making demonstration that they thought would be best to share. And I’m so glad! Because I was thinking that those were the more intriguing parts for others to see out of the studio visit, to be honest. A couple things I want to mention about the video is that the original intent was not necessarily to only be demonstration – it was actually more interview-driven, and so my dialog was not structured in a way that I might’ve structured it if it had been for a demo. Also, this is the very beginning of the painting – it’s how I start my paintings most of the time. In terms of process, it’s a good example of maybe the first 10-20%. That being said, though, and combined with what I mentioned about the dialog not being structured.. It is a demonstration overall. If I were not being filmed and explaining a bit as I go, the workflow would be different. Most of the marks I make in the video are done in order to show the viewer different things the tools are capable of doing with the paint and the surface. If I were working on a piece of my own for the sake of creating what could potentially be the beginnings of a new piece, it would be a time for exploration and discovery and not all deliberate with explanation. So, a painting done while explaining compared to a painting done in the studio alone time is a little bit of a different thing, to me, really. There’s a different sort of energy, and though, yes sometimes I might talk to myself a bit when I paint alone – haha, I save the explaining for class or demonstration type of environment. But I do treat both ways of working with the same amount of importance, and even with the same amount of potential for great new things to discover.
Just a few more points about where the painting went after the abstract – When I went to work on it later and add to the painting, the abstract underpainting I’d done for the demo was dry. I first drew in a few notes of darks as indicators for placement of where I would be adding the face. Then, I used a couple small bristle filberts for scumbling titanium buff over the dry painting. I built up the forms with Golden Taklon sable brushes using various neutrals and greys, and added details with those sables (rounds) as well. Here are two photos of the painting in progress using those brushes at different stages.
Thanks a bunch to Trekell for the video. Hope you all enjoy it, and I hope this extra bit of explanation is helpful as well. Check out some of my other articles here on Muddy Colors if you’re interested in my process and seeing some stages of progression in other works.


Man this is so cool!
I see so many potentials to just get started or shoot
of to some unexpected place. Thank Vanessa!
Thanks a bunch for checking it out- My intent most times is to shoot off to some unexpected place and to share that with others(!), so to hear that this may have sent out some kind of boon for exploration makes me so glad! Thanks!
Thanks for sharing the video and supporting explanation of your tools and techniques! Love seeing how your beautiful paintings evolve from such interesting beginnings.