Happy new year’s everyone! As expected, as soon as January 1st rolled around, everything immediately got fixed and 2021 seems like its gonna be smooth sailing! Anyhoo, been working on this tree painting (surprise!) off and on for the past few weeks that I’ve finally kind of turned a corner on. It’s been a long slow build up and gone differently from how these normally develop.
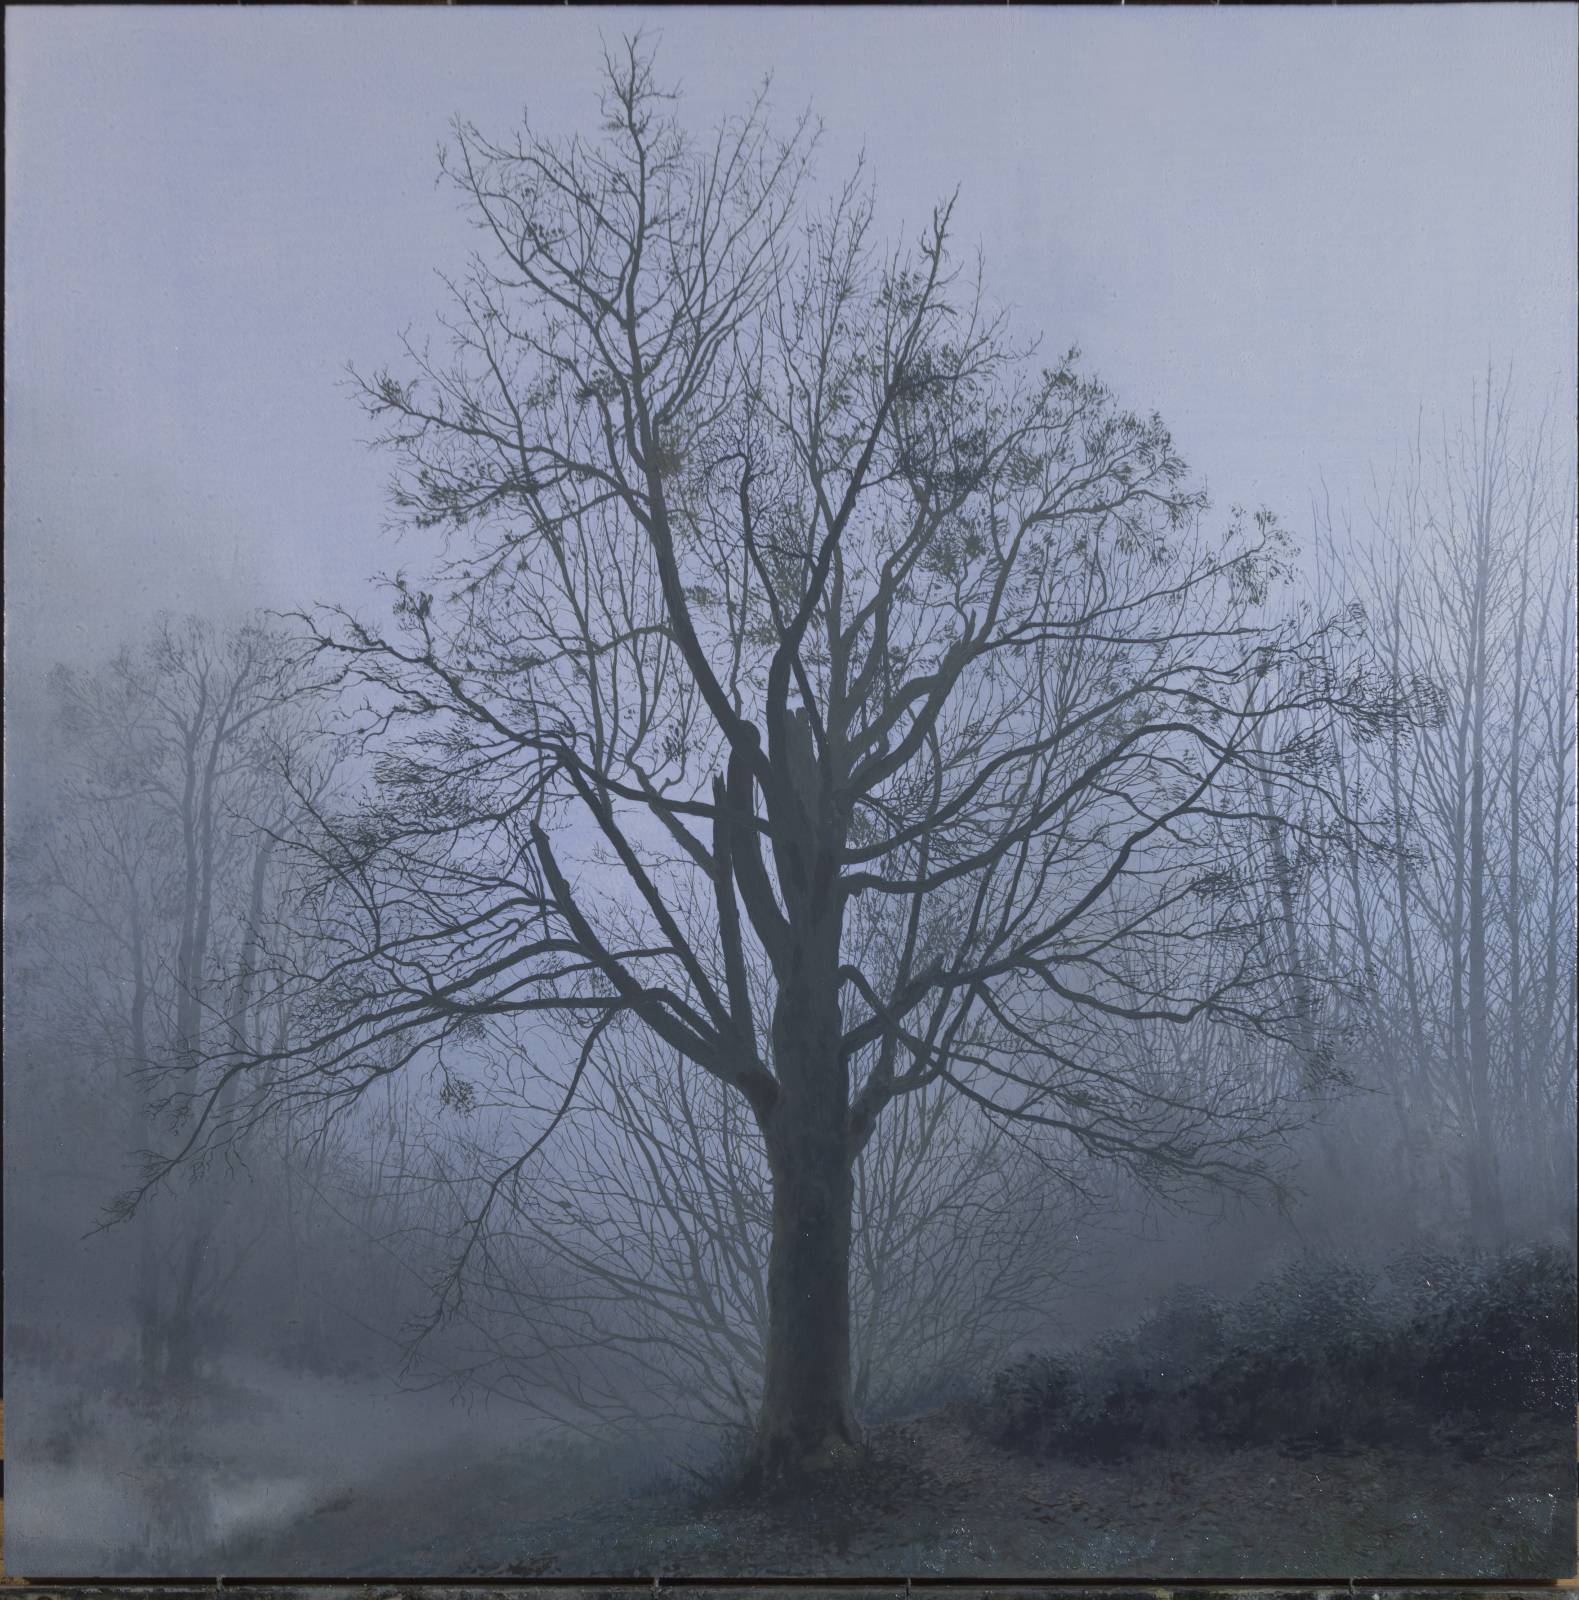
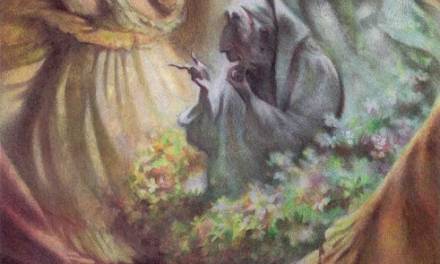
We have this big maple behind the barn that I’ve painted a few times before…it was actually the first one I tried to paint back when we first moved out here. It’s a big old tree with a fun range of branches to tackle. I’d shot some reference of it one last winter on one of those dark foggy Washington mornings and had thought about tackling it a few times but never followed through. Scared, busy…scared.
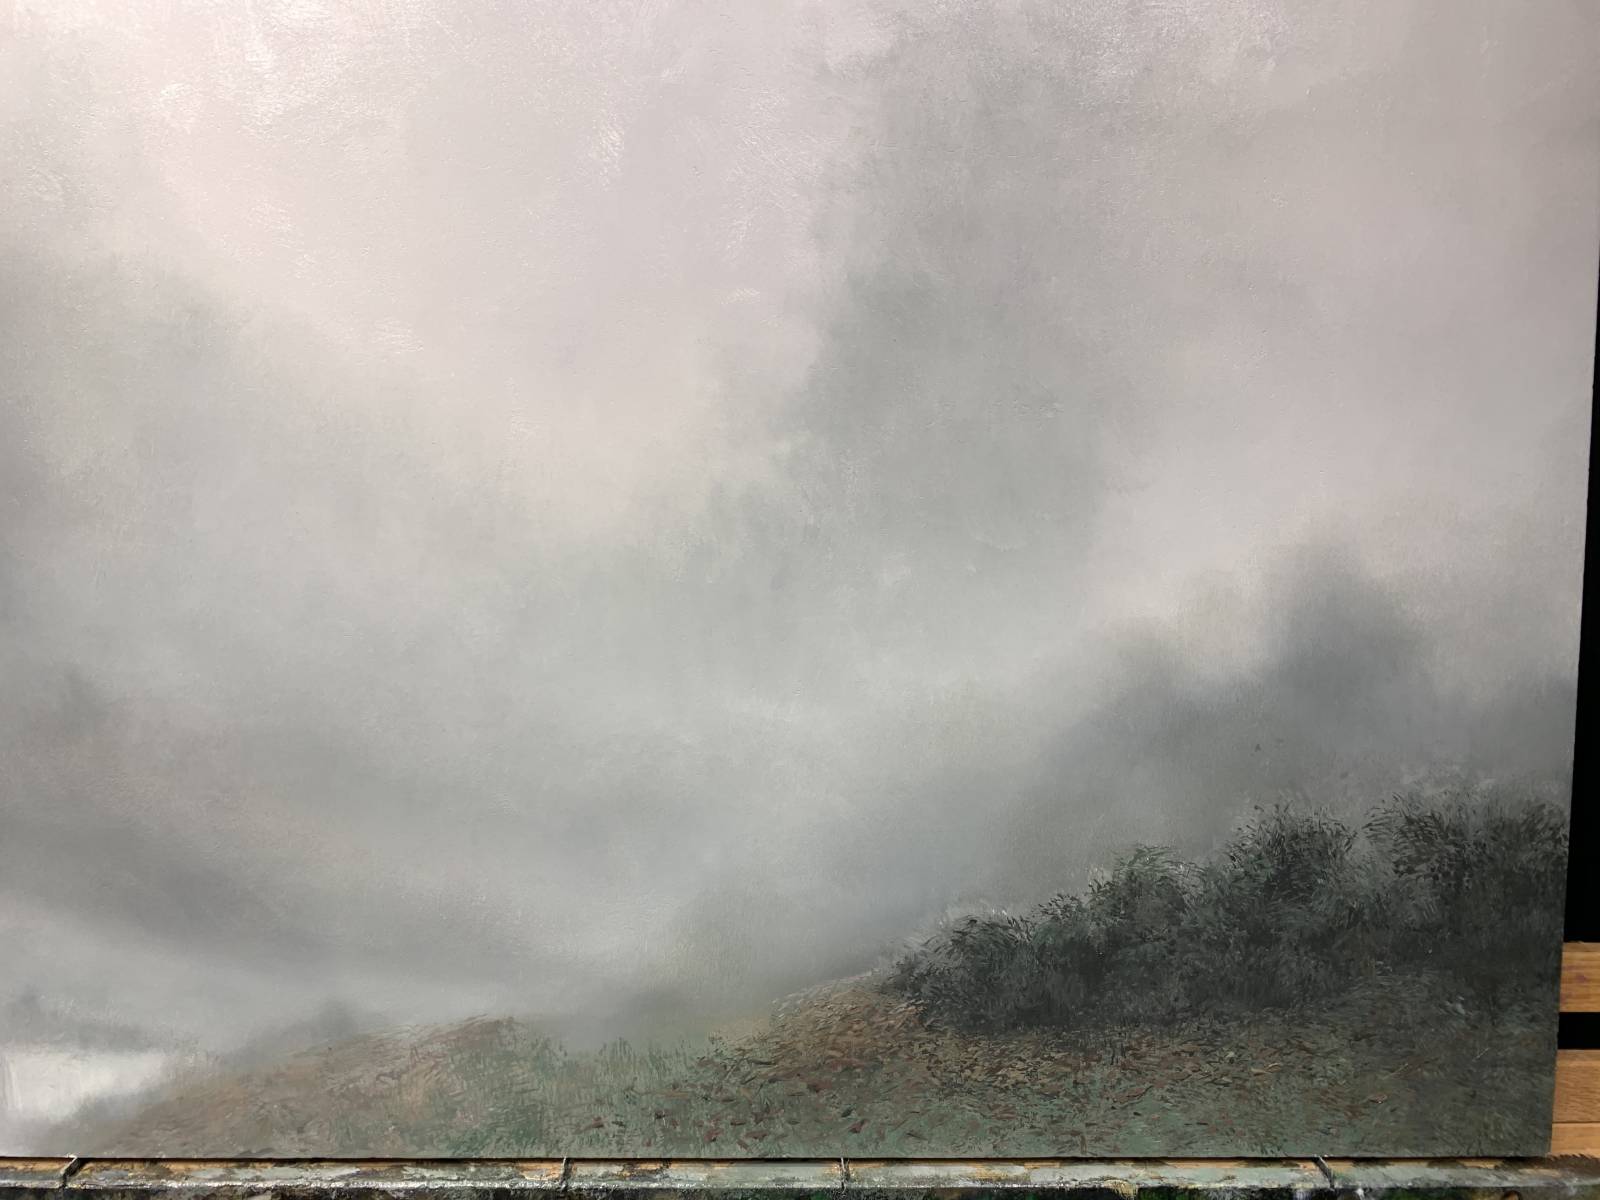
I tend to fare better with a wider value range and more colorful palette which I can use to hide my many mistakes and poor draughtsmanship. I realized pretty early on that because the values were so subtle I was going to have to premix the main values and paint things mostly as flat silhouettes at first to make sure things popped properly in space. So thats just what I did, mixing three big piles of gray that I used straight with little to no modification.
I started back to front, first blocking in the sky and a few trees in the background. I used a soft brush to blend the edges a bunch on this stuff. I kept the key extremely high to start with and the sky is straight titanium white. Once i had everything blocked in and softened, i let it sit and dry for a few days.

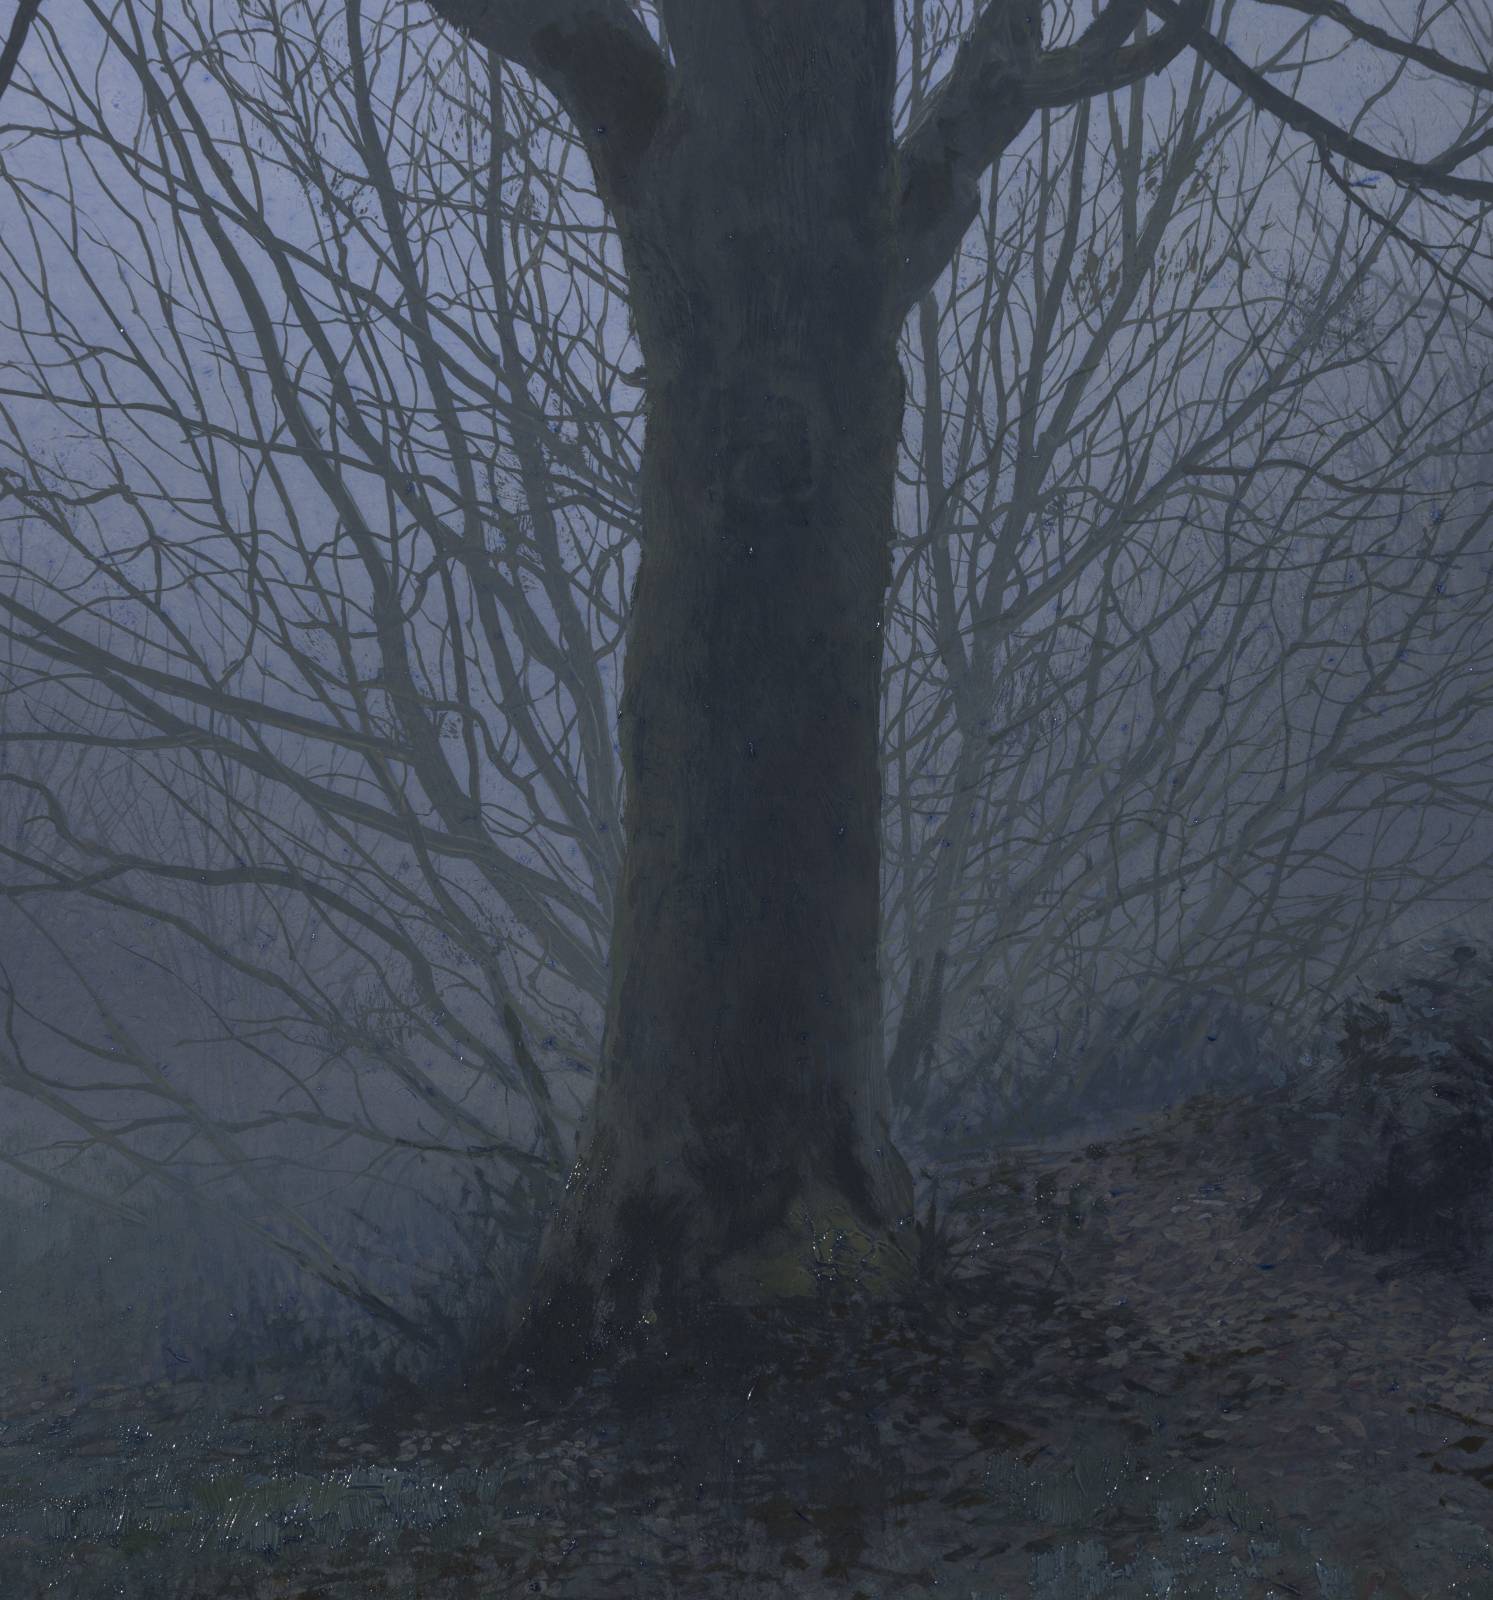
In order to get a better bearing on the value range, i worked back into the foreground and developed it further to help establish the dark darks as well as just kind of a general level of detail and game plan.
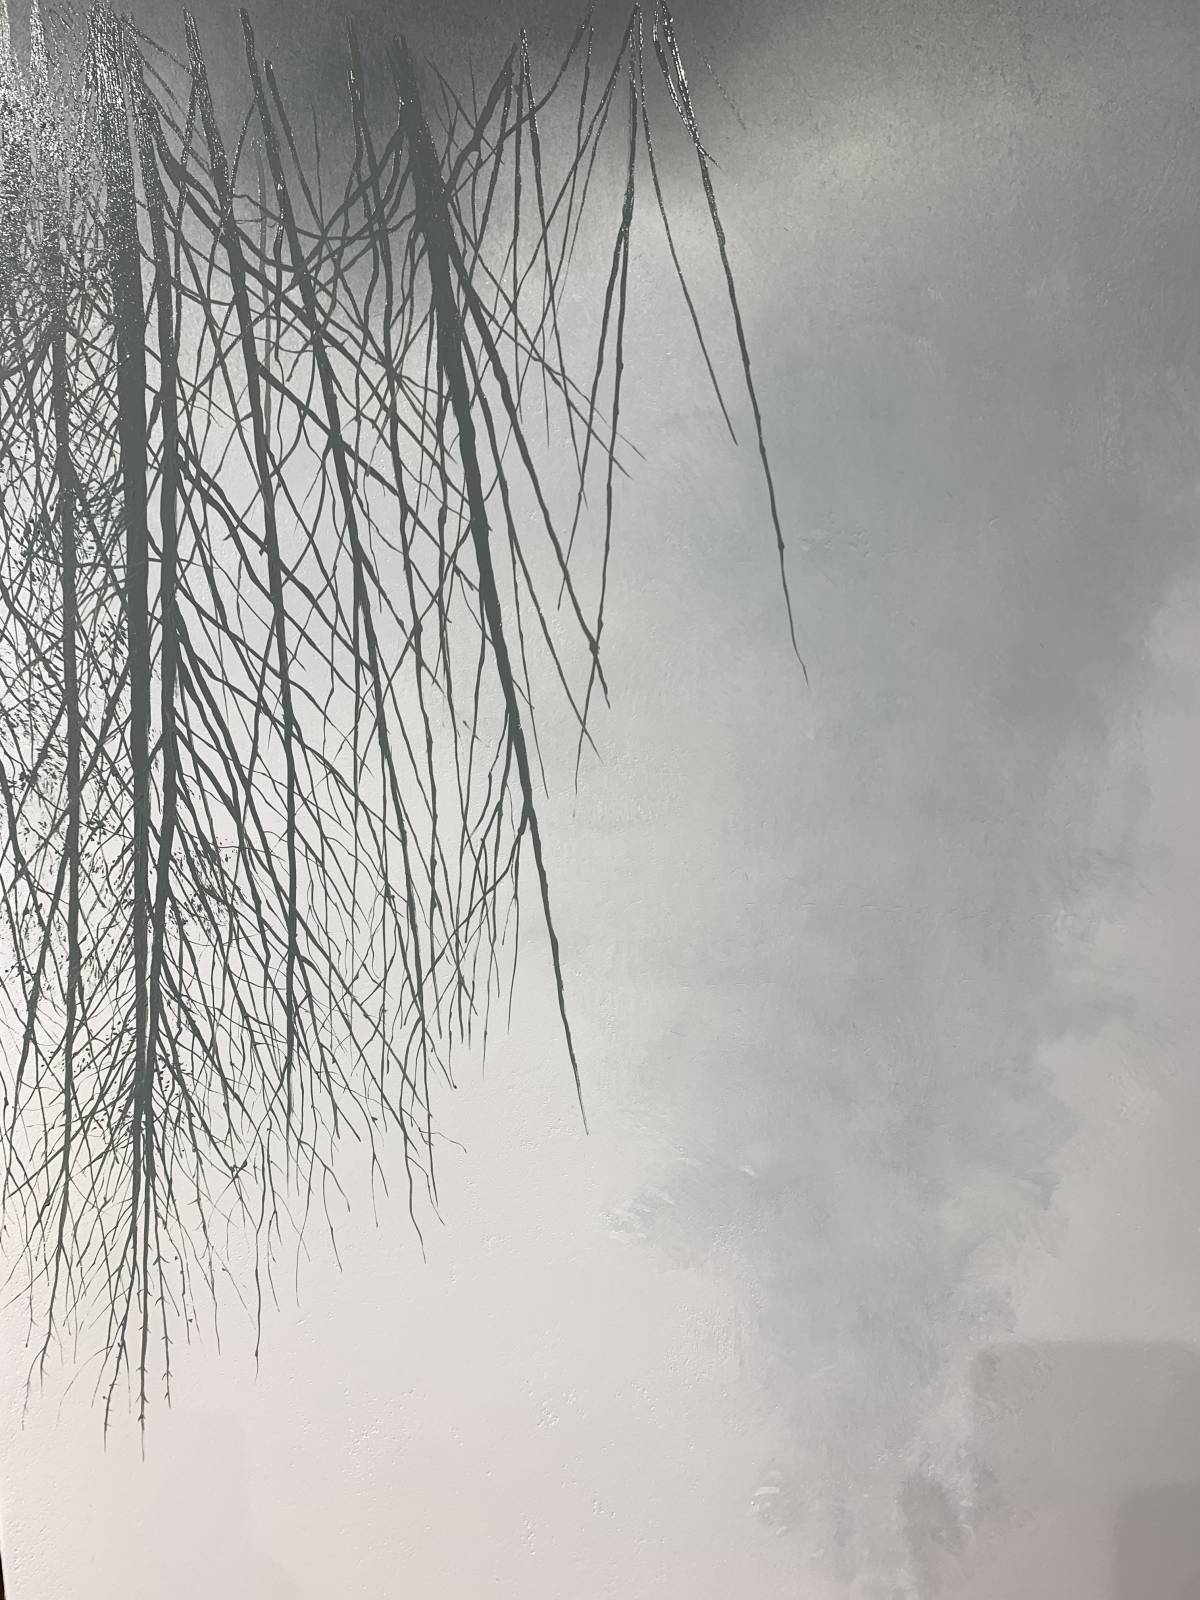
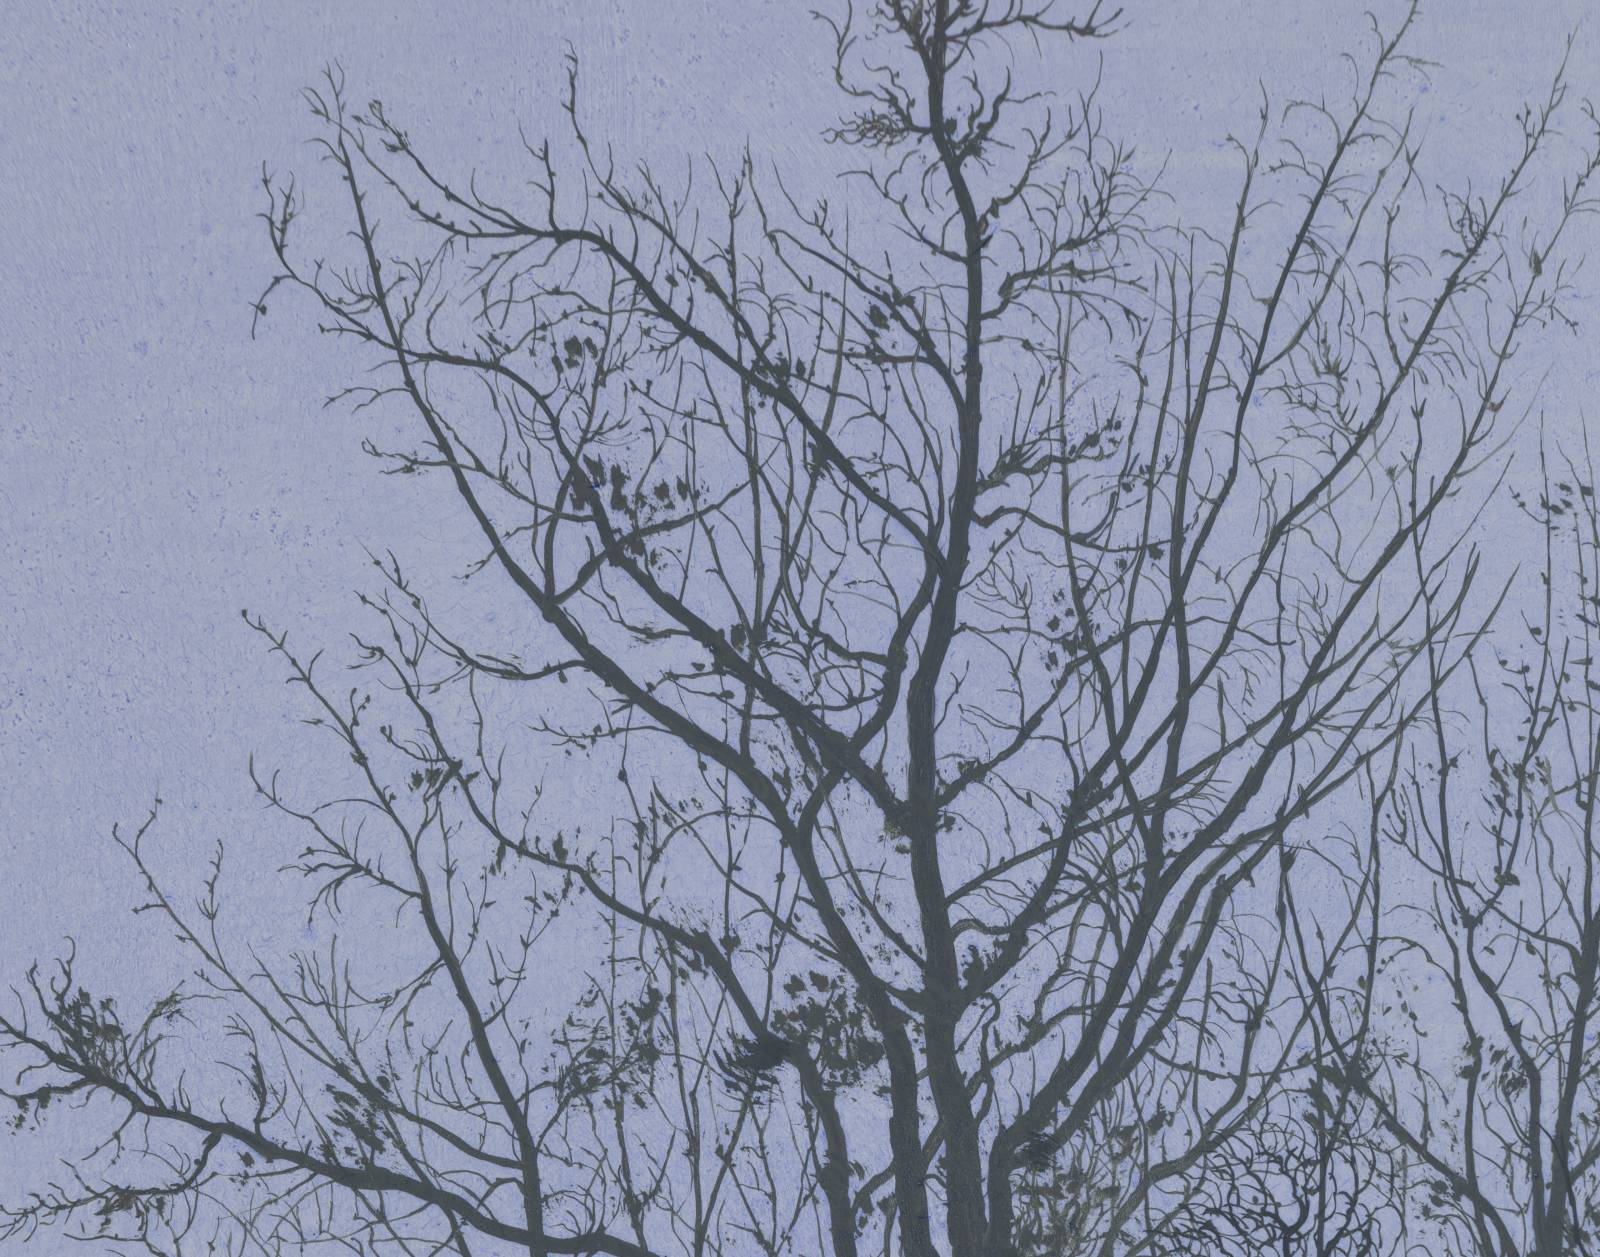
Once that was in I started with the background trees. Against a white background the calligraphy becomes especially important. Branch hierarchies have to make sense both in thickness and growth pattern. I turned the panel upside down so I could use mostly downstrokes as its a little easier to get branch shapes like that. I use various rigger brushes for the branches. I like them because they hold a lot of paint and can be extremely precise with practice. I also use a mahl stick for a lot of this to steady my hand. It feels futile at first but you just have to keep laying down branches and slowly build them out. There are no shortcuts really, or I haven’t found anything that works outside of slow deliberate repetition. It’s a process not too unlike crosshatching, or thats the bag I feel like I’m pulling from.
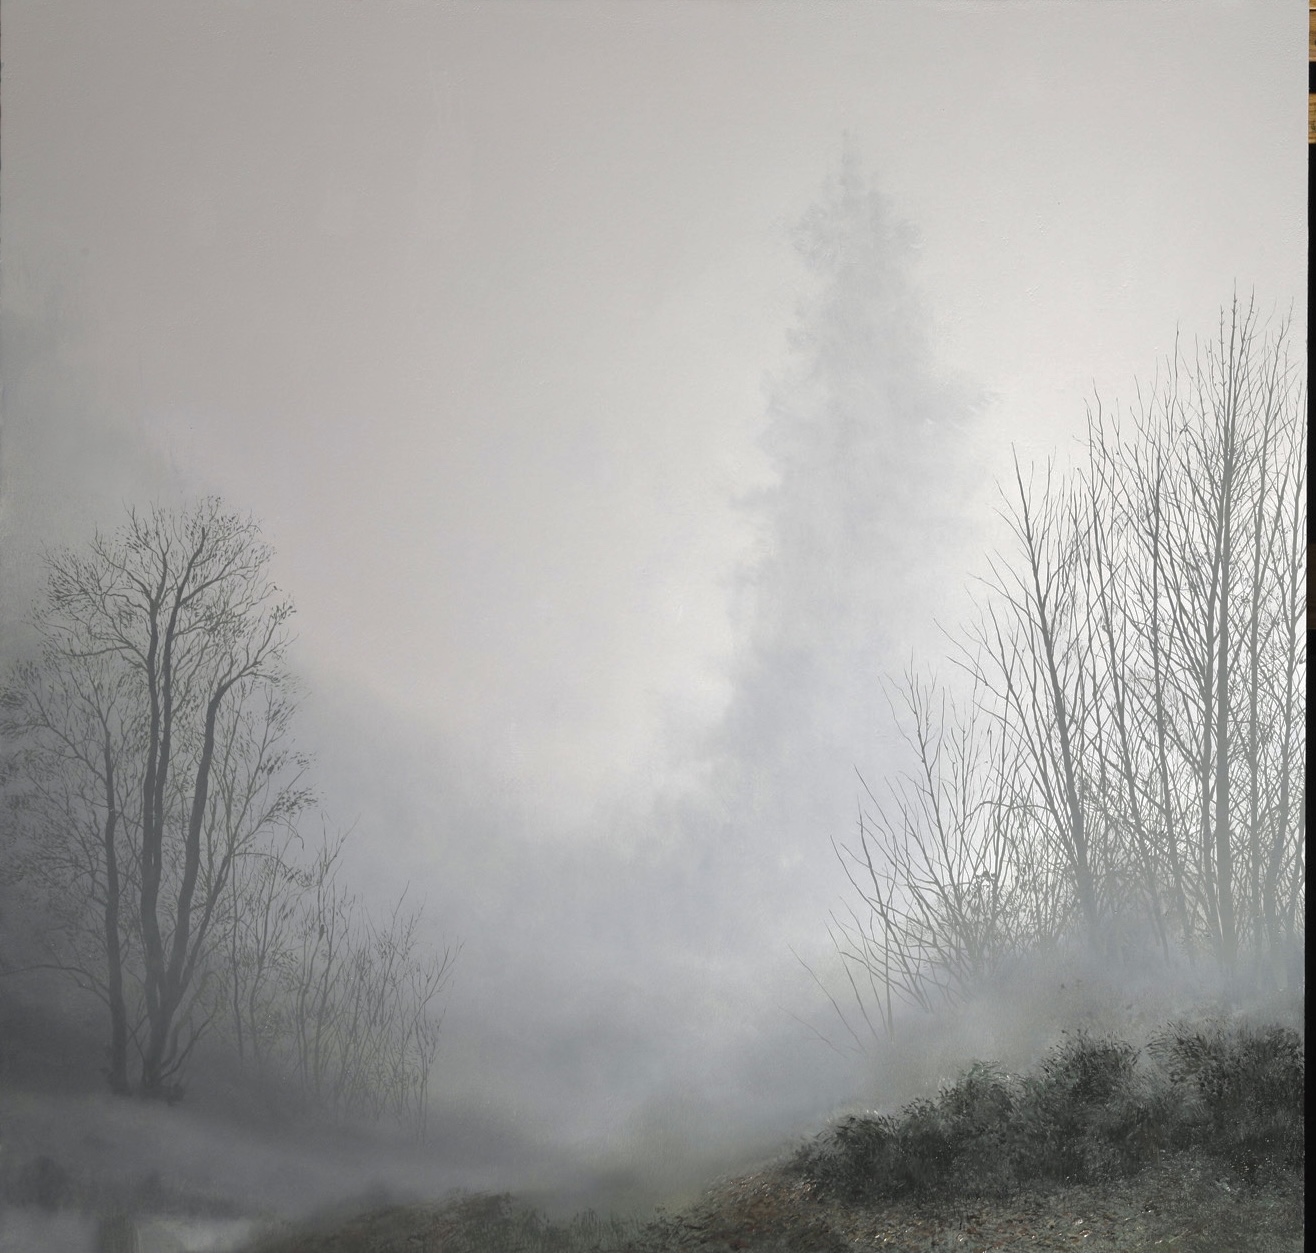
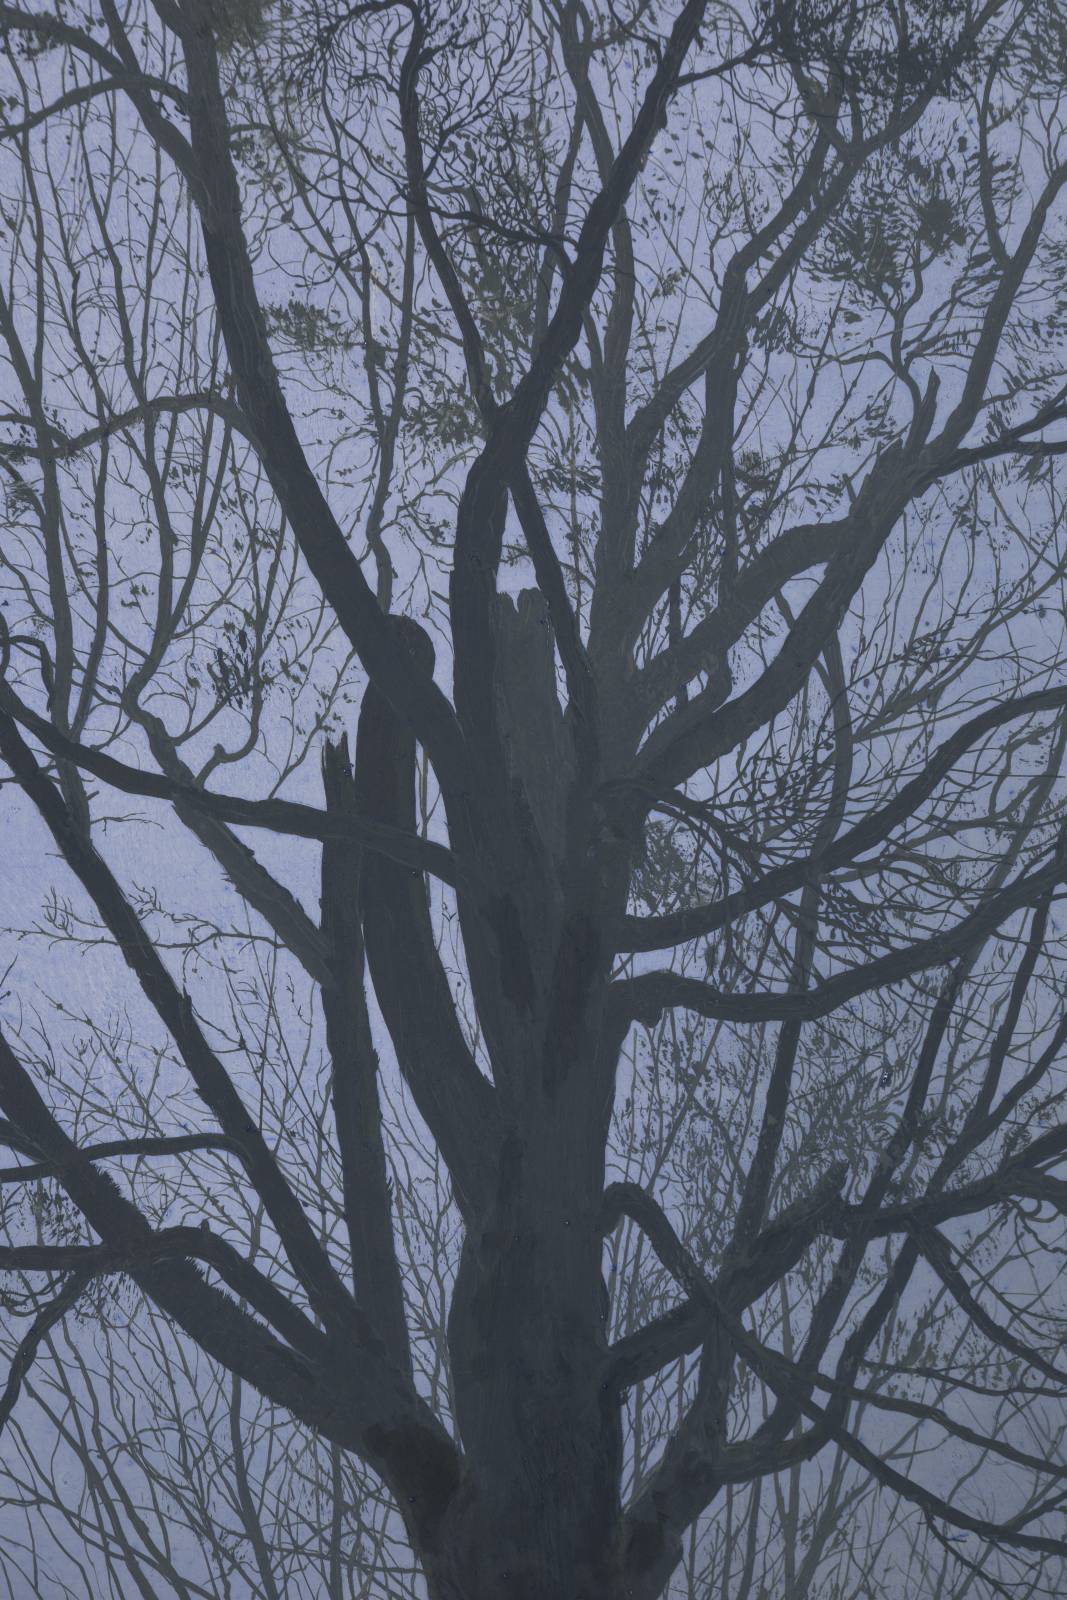
After a few days of letting the background dry, I was able to start in on the central tree. I sketched in very lightly the main branches but didn’t want to overdraw too much. Once you get the big ones in the smaller ones are easy to just kind of “freestyle” it’s also way more fun that way.


The main tree was painted in two solid values to start with, a light gray for the rear an higher up stuff, and a slightly darker gray for the trunk and closer branches. Once again, turned the panel upside down And even sideways for some the branches. The main tree took a little over 3 days to get blocked in, and then maybe a couple more days spent on the thinner outer twigs and stuff. Things I try to keep in mind is to not get too repetitive and to let the brush do the work.
In tandem to this, I’d started doing little wash tests because I got it in my head to do some glazing over the whole thing. Played with different blue/orange combos and found I liked how a wash of transparent red oxide looked over a wash of ultramarine blue best. The two compliment each other nicely into a neutral gray that has some vibration to it up close.
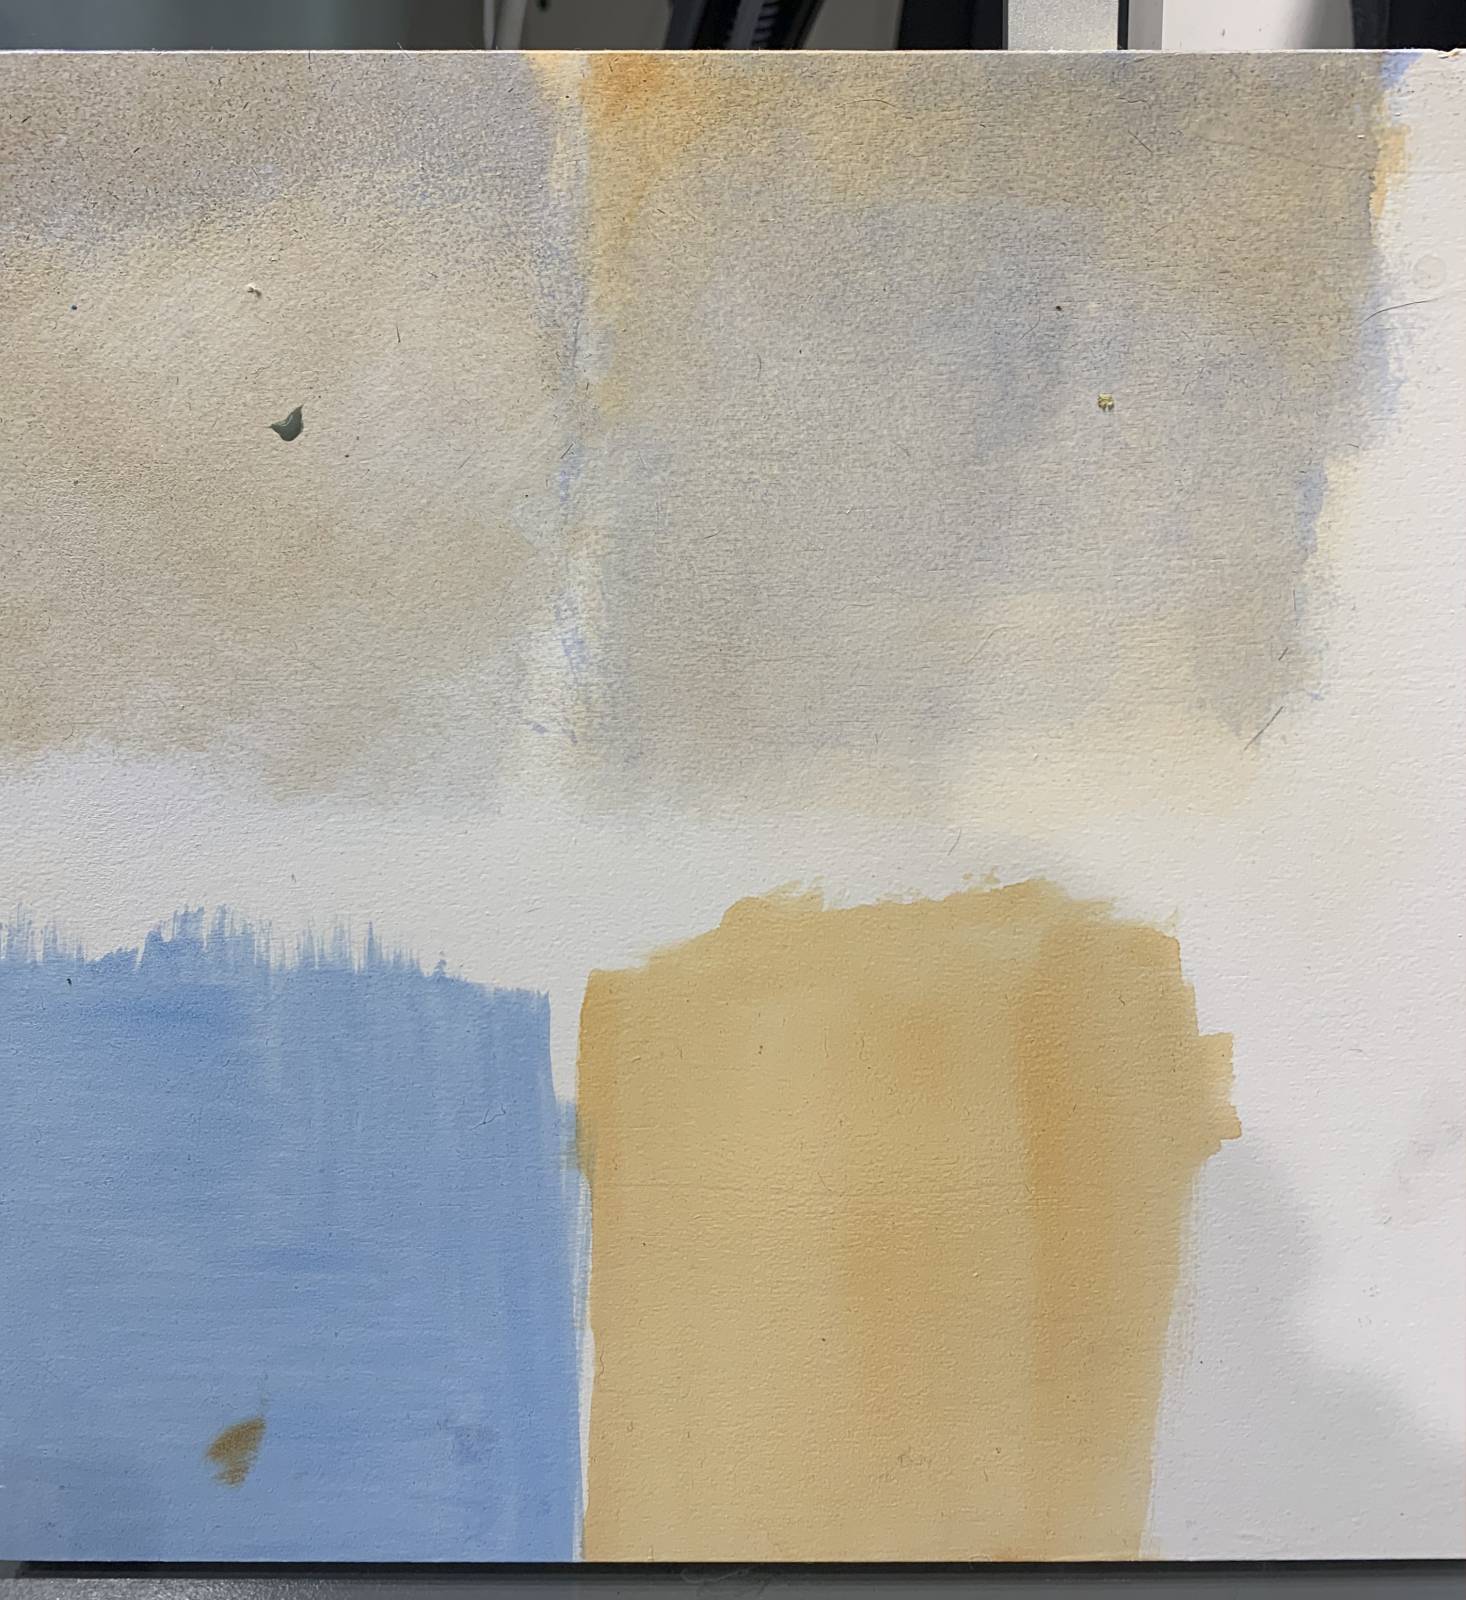
I pre-mixed my glazes so they would be as consistent as possible since I’m dealing with such delicate values I want to be careful and apply the pigment evenly.
Today I applied the ultramarine glaze and am happy with the results so far. It brings a lot of the paint texture out and creates an interesting surface to look at up close. It also does a lot to harmonize things and I’m confident that the subsequent orange glaze will help a lot with that as well as neutralize the temperature some.
few details.

 Once the glazes dry, I’ll likely come back in and knock some additional color notes and details in here and there, and then hopefully stick a fork in it. Boom! Another painting to stack on the old drying rack! hang in there everyone and stay safe.

I might try this approach with the background, nice! But what kind of paints are you using? Oil, acrylic…
I’m using oils but you could do the same thing in acrylics
This is fantastic! Thanks for sharing this article.
Really goes to show that it isn’t worth skimping on the background, even if it will be heavily dominated by foreground elements. The 2 colours you are using as the glaze are excellent choices, the combination always reminds me of ‘Venice’ somehow … or paintings from that part of the world.
May I ask what your medium for the glaze is and what the ratio to paint you are using (roughly)? Thanks.
hey Nico, thanks man glad youre digging it. that untramarine blue/orange combo totally has that vanitian look to it i agree. for glazing, i use a mix thats roughly 50% galkyd, 40% turpenoid, and 10% refined linseed oil. ive found that to be a mix that gets me where i need to be. not too sticky, not too watery.
Just beautiful – as usual Justin. Inspiring stuff.
Thanks you so much Paul. it always brightens my day to know you’re feeling this stuff.
PS What is a “rigger” brush?!
a rigger is a long thin round…not as long as a pin striping brush, but longer than a traditional round. they hold a lot of paint and are great for long smooth lines. I believe they were used for painting the rigging on ships in maritime paintings.