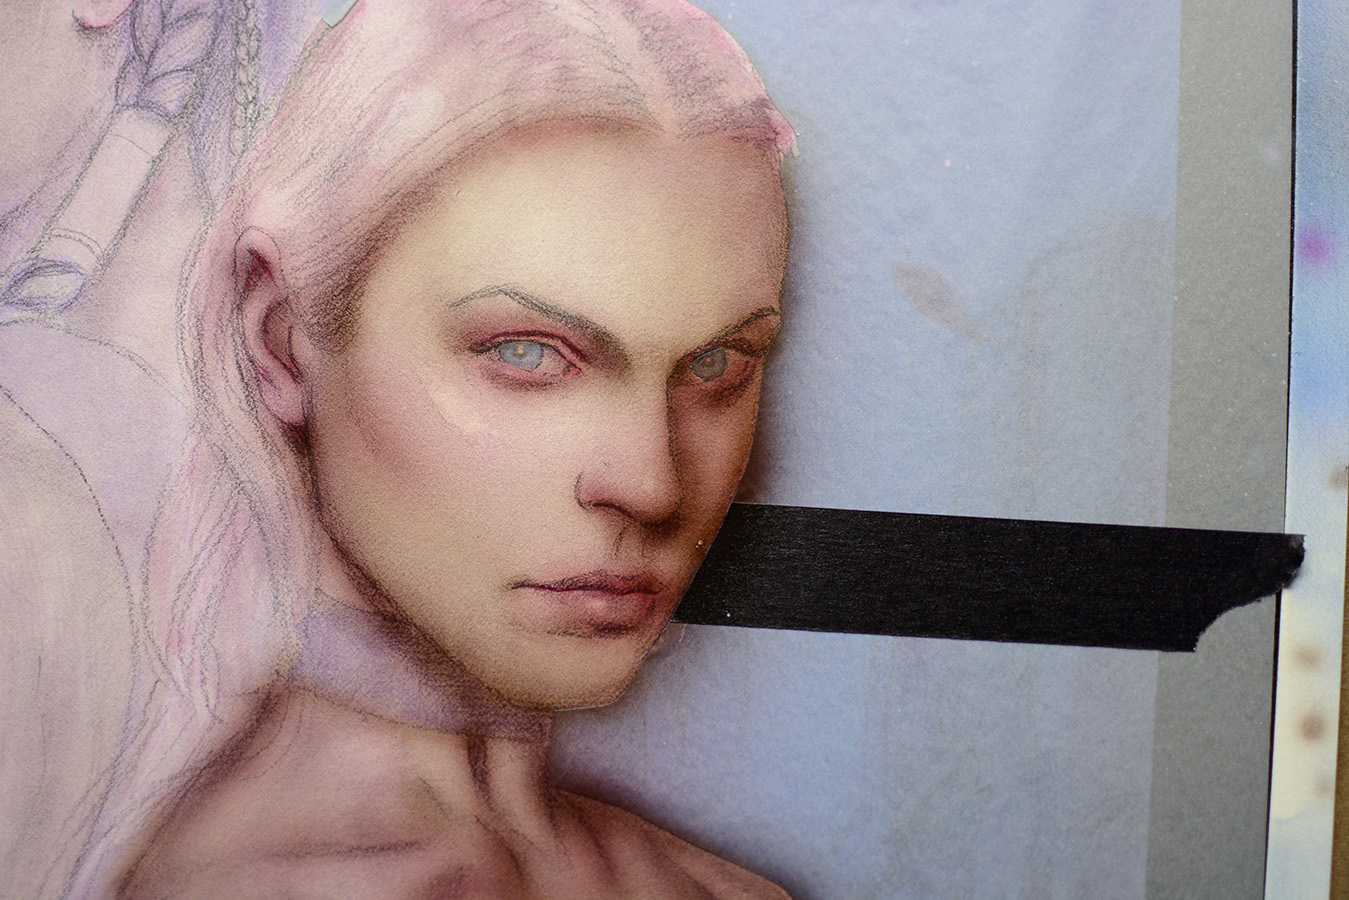
With the aid of a homemade frisket, I often use an airbrush to establish large gradations in the underpainting stages.
After wanting one for nearly 20 years, I finally decided to buy myself an airbrush. I think I put it off for so long simply because I just didn’t know where to start. You need a lot of stuff, and there are so many different options, that it’s a bit daunting. It can also be expensive, and I’m not the kind of person to drop a lot of money on equipment I know nothing about.
So I did a lot of research… days of research, in fact. And I finally decided on a simple set-up that I feel is an excellent balance between cost and quality, and more than capable of achieving professional results that will surpass my needs (and abilities) for the foreseeable future.
I can go on and on about why I chose this model over that, why this is product good and that one isn’t, what other options there are, etc… But that is a LONG post, and really only adds to the complexity.
So instead, I’m just going to show you what I got.
If any one else is interested in getting an airbrush too, but doesn’t feel like doing the leg work, and would rather trust another artist’s set-up, here is exactly what I purchased. I’ve been using this setup for years now, and am still completely pleased with my selections.
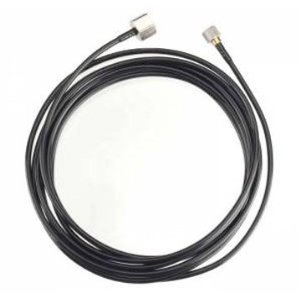
To get started airbrushing, you’ll need:
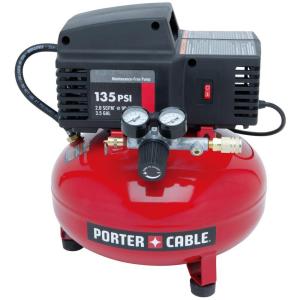
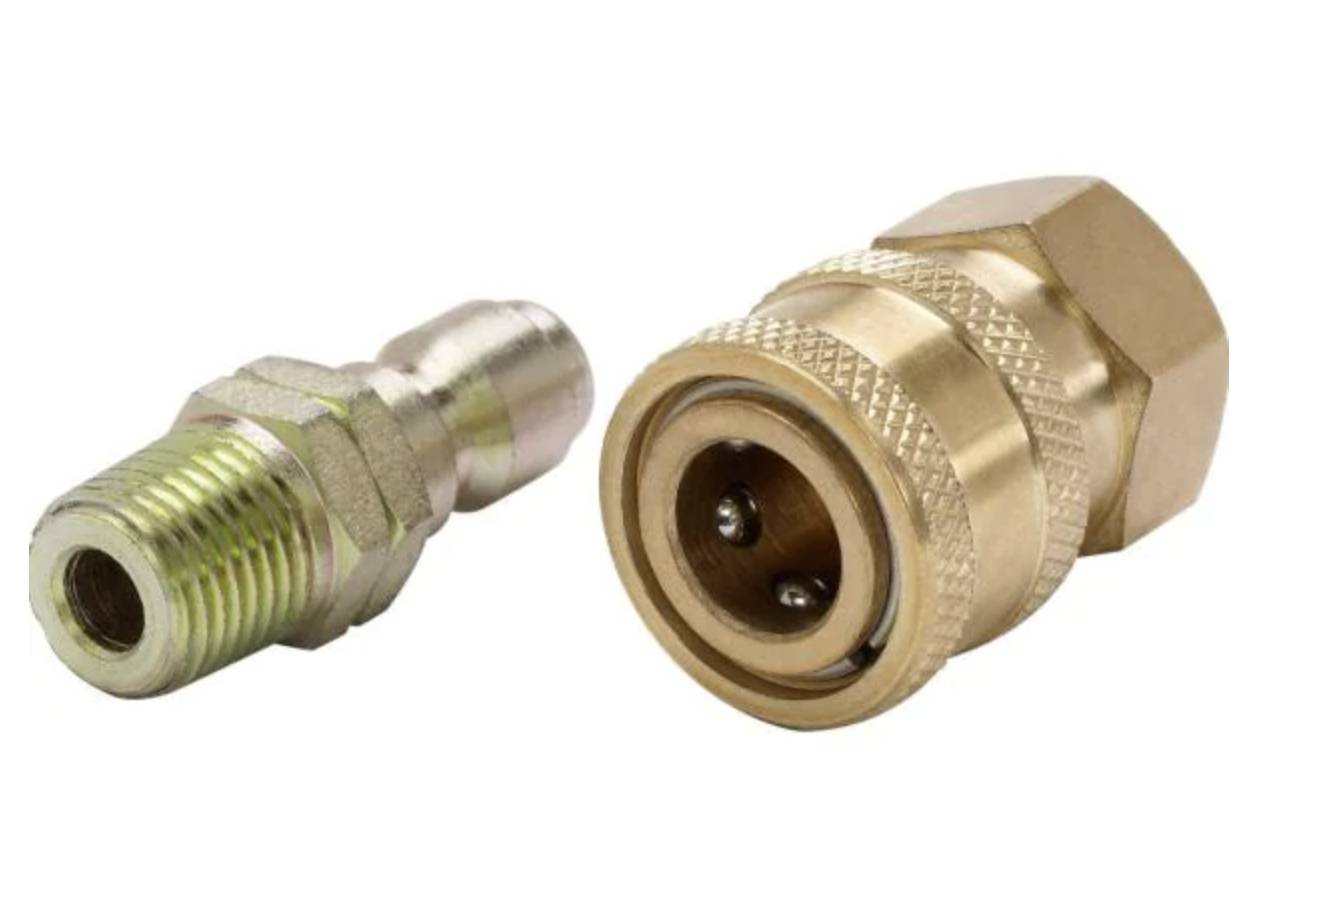
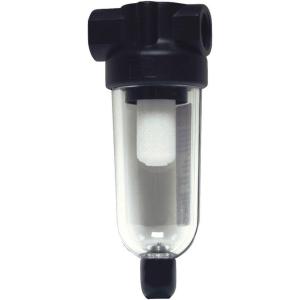

That’s it! Buy this stuff, attach it in literally that order, and you can be airbrushing with a professional setup tomorrow! Good luck!


Score one for personal growth and exploration! I am assuming we'll eventually get to see some of your efforts. Otherwise this was just an informative tease 😉
I'm also looking forward to seeing some results – I've always wanted to try airbrushing myself!
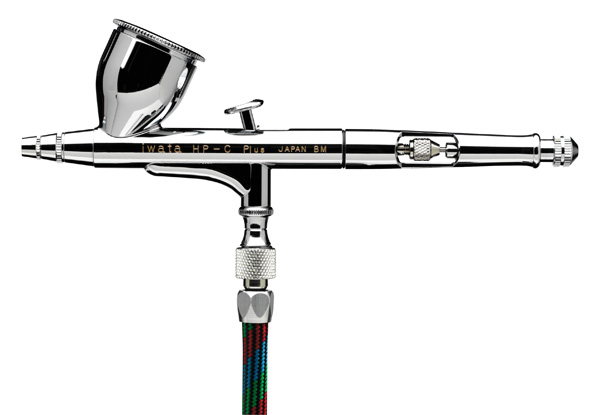
I just replaced my HP-C that I had since 1994 (I over tightened the nozzle and it broke off in the airbrush.. don't do that!) with another HP-C.
Day late and dollar short. I did a lot of airbrush work, acrylics, in the 80s. I started with a compressor, water trap and so forth, but ended up going with CO2 tank for propellant. 2 reasons. First, I disliked the noise of a compressor, and second, even with a moisture trap I still got water in the paint. It's been long enough that I can't remember the medium. Glycerine was in there, and some sort of Flow Improver. I didn't use just water to thin the Liquitex.
I had problems with contrast using an airbrush. Ended up learning how to paint acrylics by hand. At some point in the early 90s I hit the wall with acrylics and switched back to oils, which have a different learning curve, but I ended up preferring oils, which I started out with in the 70s. Around and around. Have fun, Dan!
Great choice of airbrush! The HP-C is one of the most versatile models out there. Got mine in the mid 80's and it's still works perfectly. Wish I had an excuse to upgrade to the HP-C Plus.
How loud is that compressor? If you get annoyed with it down the road the “silent” compressors really are almost totally silent. You pay for it though.
One piece of equipment I see missing from the list is a quality dust mask for water media or something with filters for solvents. Mandatory or you'll screw up your lungs. 3m makes them for most applications.
Happy airbrushing!
HA I remember my favourite airbrushing advice, “wear a masking … it's all fun and games until you start sneezing different colours”
DAN tell us about what different medium you're gonna use. I'm assuming you'll be using the airbrush to speeding up the underpainting processes?
Something I forgot–haven't used an airbrush for a long time, but now thinking about using it for gouache.
Anyway, when I started airbrushing, I remember seeing warnings on tubes of cadmium colors–Do Not Spray Cadmiums–and ignored them cuz I was wearing a really good dust mask. Years later I found out why the warning. Cadmium particles in spray are so small they'll go in through your EYES.
Hey Dan,
Thanks for the helpful info! Researching a new purchase can turn into an obsession! I remember when I finally decided to splurge on my first entry level / enthusiast DSLR. I spent about a month pouring over image comparisons and reading reviews before I finally settled. So this is very helpful. (I settled on a Pentax K-30 by the way. BEST camera in its class and you can't find a better one for the price.)
In any case, will you be using this for acrylic underpaintings? I was a little surprised to see that you're planning to fit an airbrush into your painting, since a few weeks ago you were saying how you were trying to get “brushier” with your work.
Also, you posted a great acrylic video tutorial a few weeks ago by an artist (his name escapes me) who uses an air tank, rather than a compressor. I thought that was pretty interesting, considering how loud they can be.
Thanks again Dan, for all these great posts.
Phil
Wow, an HP-C…I still have one of those somewhere. That's a great gun. The other posts are right though, a mask is a must and if you spray a lot you'll need to move to an air tank or a silent compressor to save your sanity. You're probably also looking at a few more tools (spray traps for cleaning, stencil burner, brush stand, etc.) but you'll figure those out. If it turns out you really dig using an airbrush, read about the Paasche AB Turbo. Pricey and finicky but a really nice gun for tight freehand work.
I'd love to know what Serge would recommend being an airbrush buff.
Hi Phil, Yes, I expect it will be used mostly for underpainting… but I think I'll experiment a bit too. I need to snap myself out of my routine a bit if I'm going to grow, and introducing new mediums is one of the easiest ways to do that. I still think I'll get looser too.
Yeah, I probably should have included the mask too, which I did pick up.
Jeff, I really debating getting a CO2 tank for the very reasons you stated. But I found it was too expensive, and really difficult to maintain. The nearest place to fill CO2 to me is a 35 minute drive. Furthermore, the tanks are expensive. Even renting one (and filling it) for a month costs more than the compressor. If I end up using the brush a lot, I may upgrade. But for now, the compressor was the best choice at less than $100. Minimal commitment, and plenty of uses. I also do a lot of carpentry and can use the compressor for pneumatic nail guns.
I'll say this… it's a LOT harder than it looks! I'll post some pics soon.
Yeah, I've already picked up a few other items as well (a spray trap like you mentioned). This list was meant to be just the essentials for running the actual airbrush. All that other stuff is personal preference. I really did debate a silent compressor, but the extra cost is equivalent to buying a whole other set-up identical to this. I think I'd rather have two HP-Cs instead.
The Paasche AB Turbo was great for super tight detail when that was the only airbrush that could spray that fine. However, the Badger Sotar and Iwata Micron spray just as fine, without the added hassles.
I love airbrushing, mostly only use it for dimensional pieces, large works and underpaintings, although I occasionally spray oils through them for softening stars and things like that.
Not to beat a dead horse, but I also can't stress how important it is to wear a mask.
Be very careful with ventilation, after spraying a while you'll see a fine mist hanging in the air and that will all settle on everything you dont want it to! Even when you dont spray too much, that mist might not be visible but it is still there and that paint dust will build up over time. So make sure you keep all your finished paintings safely put away.
Good thinking. I admit I leave my old paintings hanging around more than I should.
…and if you buy your compressor in a HARDWARE STORE, make sure that you remove all neighbors out of the immediate vicinity before you start the noise. 😉
Vainamoinen
Dan –
I've got the same compressor a few years back (for running nail guns). I hate the sound of it, and it'll make you deaf in enclosed spaces (admittedly I'm also kind of a noise wimp though – I use hearing protection when I vacuum). It's still a good buy though. Most compressors are loud, and it shouldn't run too often if it's just running an airbrush. I'd recommend getting a length or two of hose and putting the compressor down in your basement or somewhere else out of the way. If you get the hose that hangs straight instead of the coiled kind you could even secure it out of the way to make the run to your studio.
Also don't forget to read the directions on emptying it and draining regularly it so you don't get a pool of water inside the thing.
The noise isn't too bad, imo. It's startling in the studio, but the kids can't hear upstairs when they're sleeping, so I'm not bothered by it. And yes, I'm pretty diligent about emptying the tank when I'm done.
Really? You spray oils through it? What do you use to dilute your paint? Turp? I'd like to hear more about that.
You could stick the compressor some place outside or in a basement if convienent and run your airline through the wall to help reduce noise…..
Airbrush come back? Yeah! Be patient and wear a professional gasmask!
I got into airbrushes in the late 80's early 90's as a kid. I had just bought chris achilleos Medusa book. Inside it had his working process, I did my first proper fantasy painting with some dude standing on a pile of corpses looking mean, with a blood red sky in the background! Wish I still had that painting 🙂 I'm gonna bust out my old aerograph you've just lit the touchpaper Dan! 😀
Add a spare needle to that list. Clean it with undue care and attention and it quickly becomes a crochet hook.
I used an airbrush for years but pretty much abandoned it over the past decade in an attempt to get a more organic feel to my work. I recommend a good spray system air filter, as well. The best I found was the Artograph 836, which after a quick search seems to be discontinued. 🙁 I read once that Whelan had an AC guy build a ventilation system over his work area. It's much needed as the the spray dust eventually gets on everything.
weird i think the bob peak book must have gotten a few people inspired. i know i was as well as looking at 80's and 90's Moebius art. Anyway i picked up an airbrush again after not using one for like 18 years, anyway got the same Iwata gun but the compressor i opted for this model.
http://www.chicagoairbrushsupply.com/d3000.html
Paasche D3000R Airbrush Compressor w/ Storage Tank
I didn't want a loud Home depot one and it comes with the moisture trap. it is super quite (tiny too) and puts out enough PSI for what i need. I would recommend it for people who wanted to try this again. BUt yeah totally need a mask. dust masks a N95 Dust/Mist Respirator i found online said are the minimum you would want. I had those rainbow sneezes back in the day so trying to avoid them now. Never new about the airborne particles falling on art. good to know not to spray around other art. Happy spraying Dan can't wait to see your experiments. mine so far are a mess – still trying to get the paint flow right again.
by the way what paint are you using? I have been thinning golden fluid acrylics and it has been good after i got the airbrush medium to thin it.
oh and i also got this for cleaning comes in handy.
http://www.amazon.com/Iwata-Medea-NAC-201-Cleaning-Station/dp/B000VADIVC/ref=pd_bxgy_t_text_y
You forgot ingredient #1, loads of patience! I still have an ancient airbrush setup, but it mostly gathers dust these days due to the fact that I have no patience for cleaning the thing. It was fun to use during the actual airbrushing part of the process, but until someone invents the self-cleaning airbrush, I doubt I'll make it a regular part of my arsenal anytime soon…
First off, I have experimented with this off and on over the years and have come to the conclusion that there are times when it is great although I use it pretty sparingly.
What I have found to work best is thinning the paint with a combination of OMS and Galkyd or other alkyd based medium. I find the addition of the alkyd required to strengthen the thin paint film. It also speeds up the drying process, which is already pretty fast with the amount of thinning required.
Where I have found the most use for this technique is adding soft glow affects to stars and lights.
Other uses:
Thin soft clouds
Vapor trails
Light glazing
Experimental techniques for rock and other organic textures – combination of adding and removing paint layers by alternating between spraying the oils and sponge, splatter and stipple paint away with OMS.
Additional notes:
Even with a respirator, I avoid spraying cadmium colors.
Be careful to not flood any area too heavily as the slow drying oils will run, drip and/or splatter.
I generally tend to paint my oils with very thin layers. However, I am extra careful of what medium and how many layers are under what I spray, to hopefully avoid cracking or lifting in the future. I also let the paint dry for a long period of time, although that is a luxury a deadline will most likely not allow for.
Feel free to speak up if you have any questions.
Dan Colonna
ww.colonnafineart.com