
As a bit of backstory on the small scale sculptures that I wrote about in December, today I’ll show how we make very simple armatures for these bitty babies.
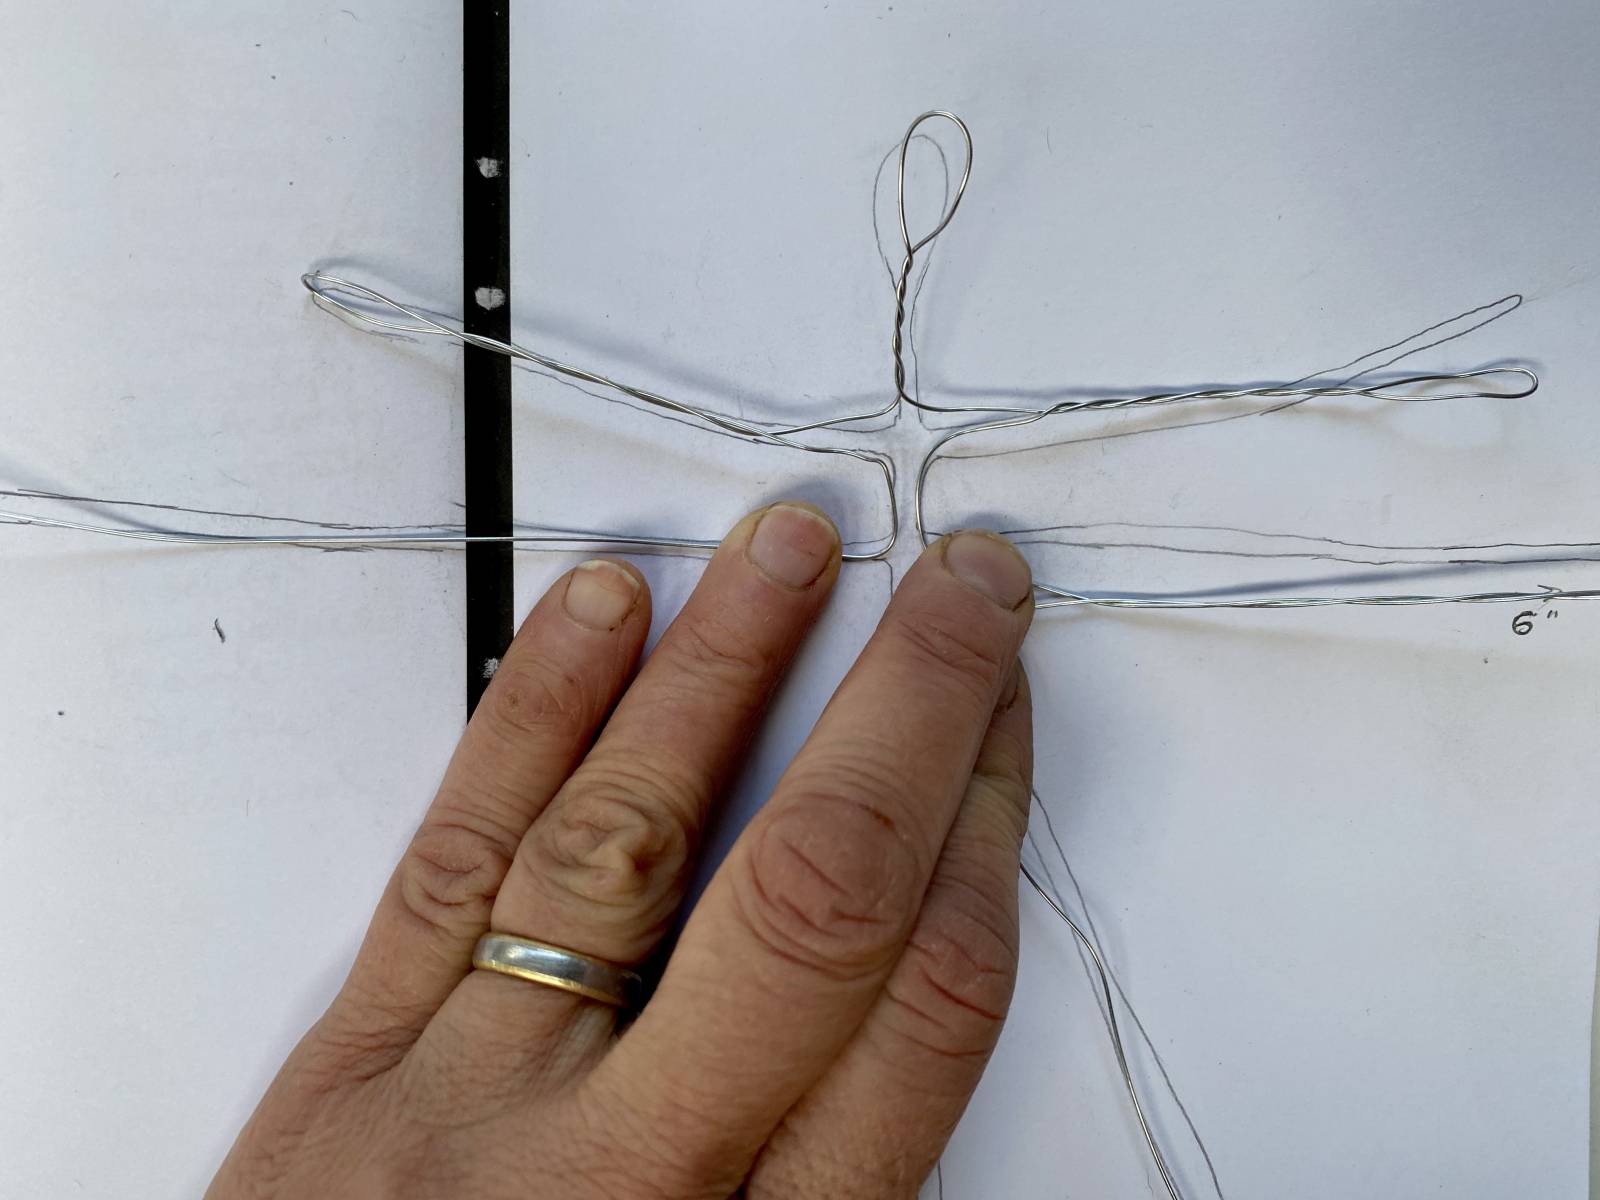
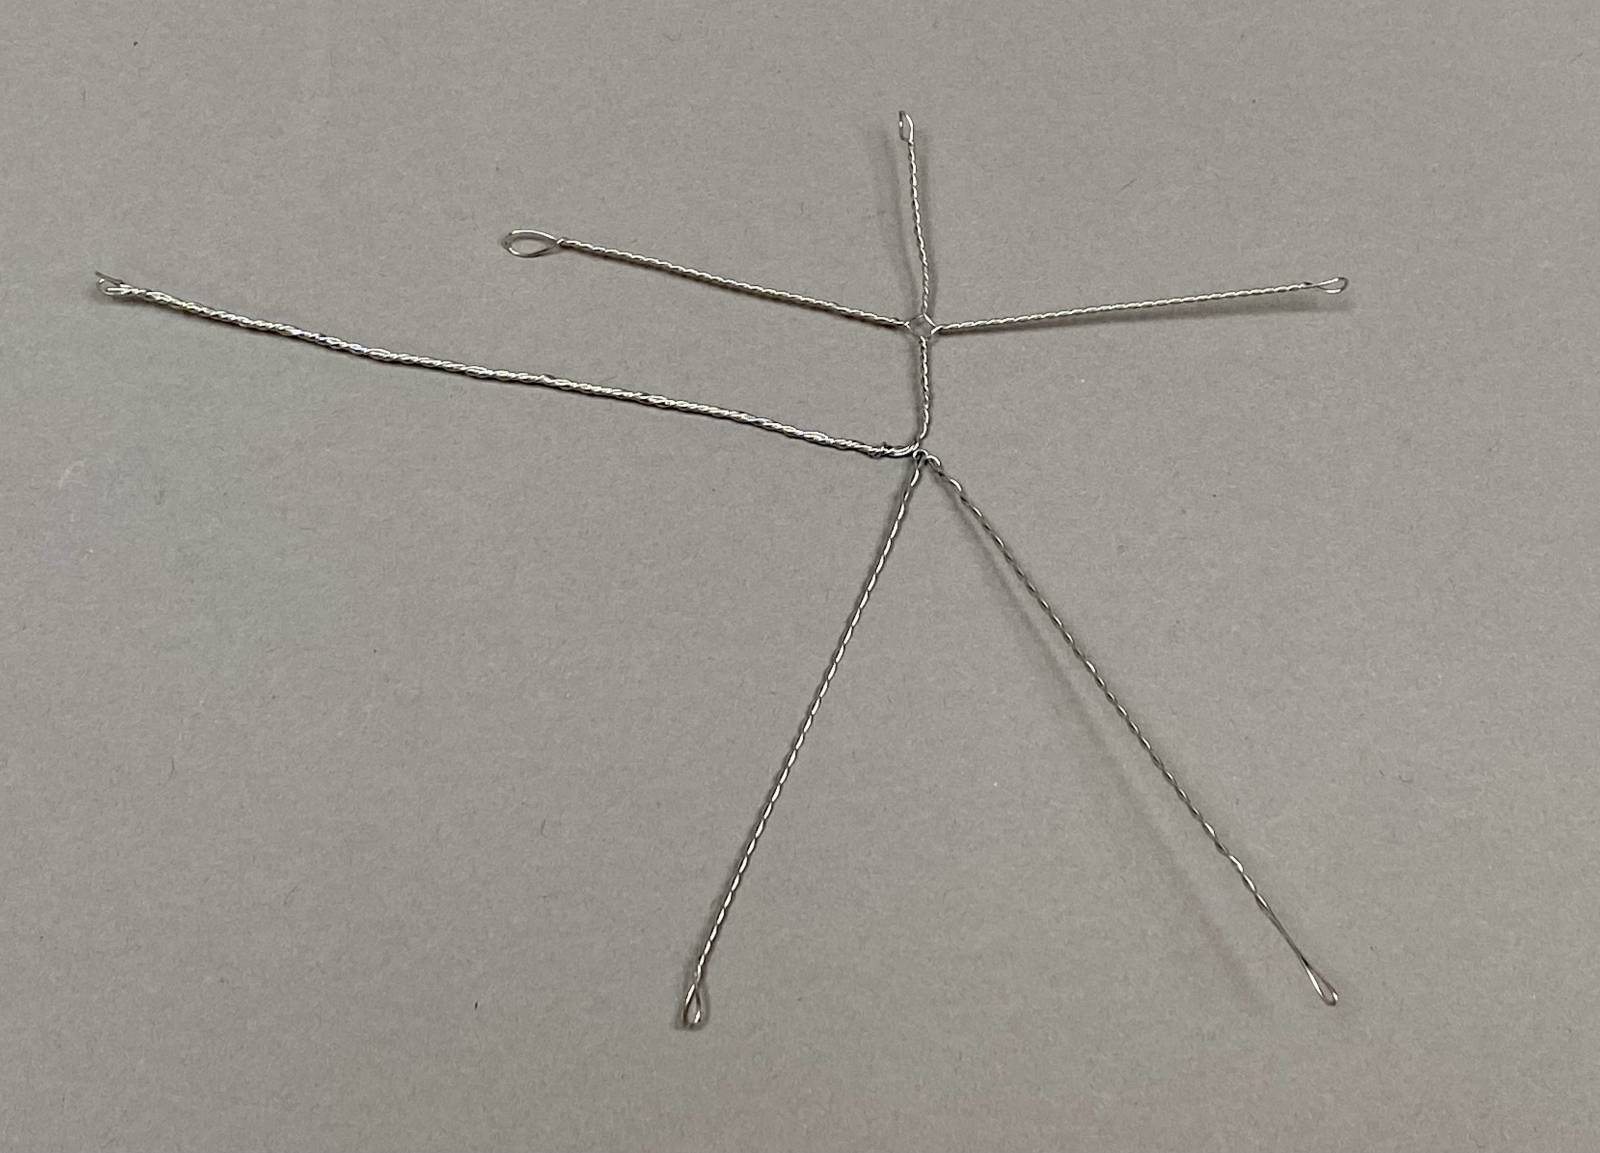
We begin with a simple sketch outline of a figure (head, arms, legs, side supports and tail, if appropriate) that will act as a guide for laying out the wire. The “arms” and “legs” include enough length to account for the shoulder girdle and pelvis. Note the artistic mastery demonstrated in the sketch… 😉
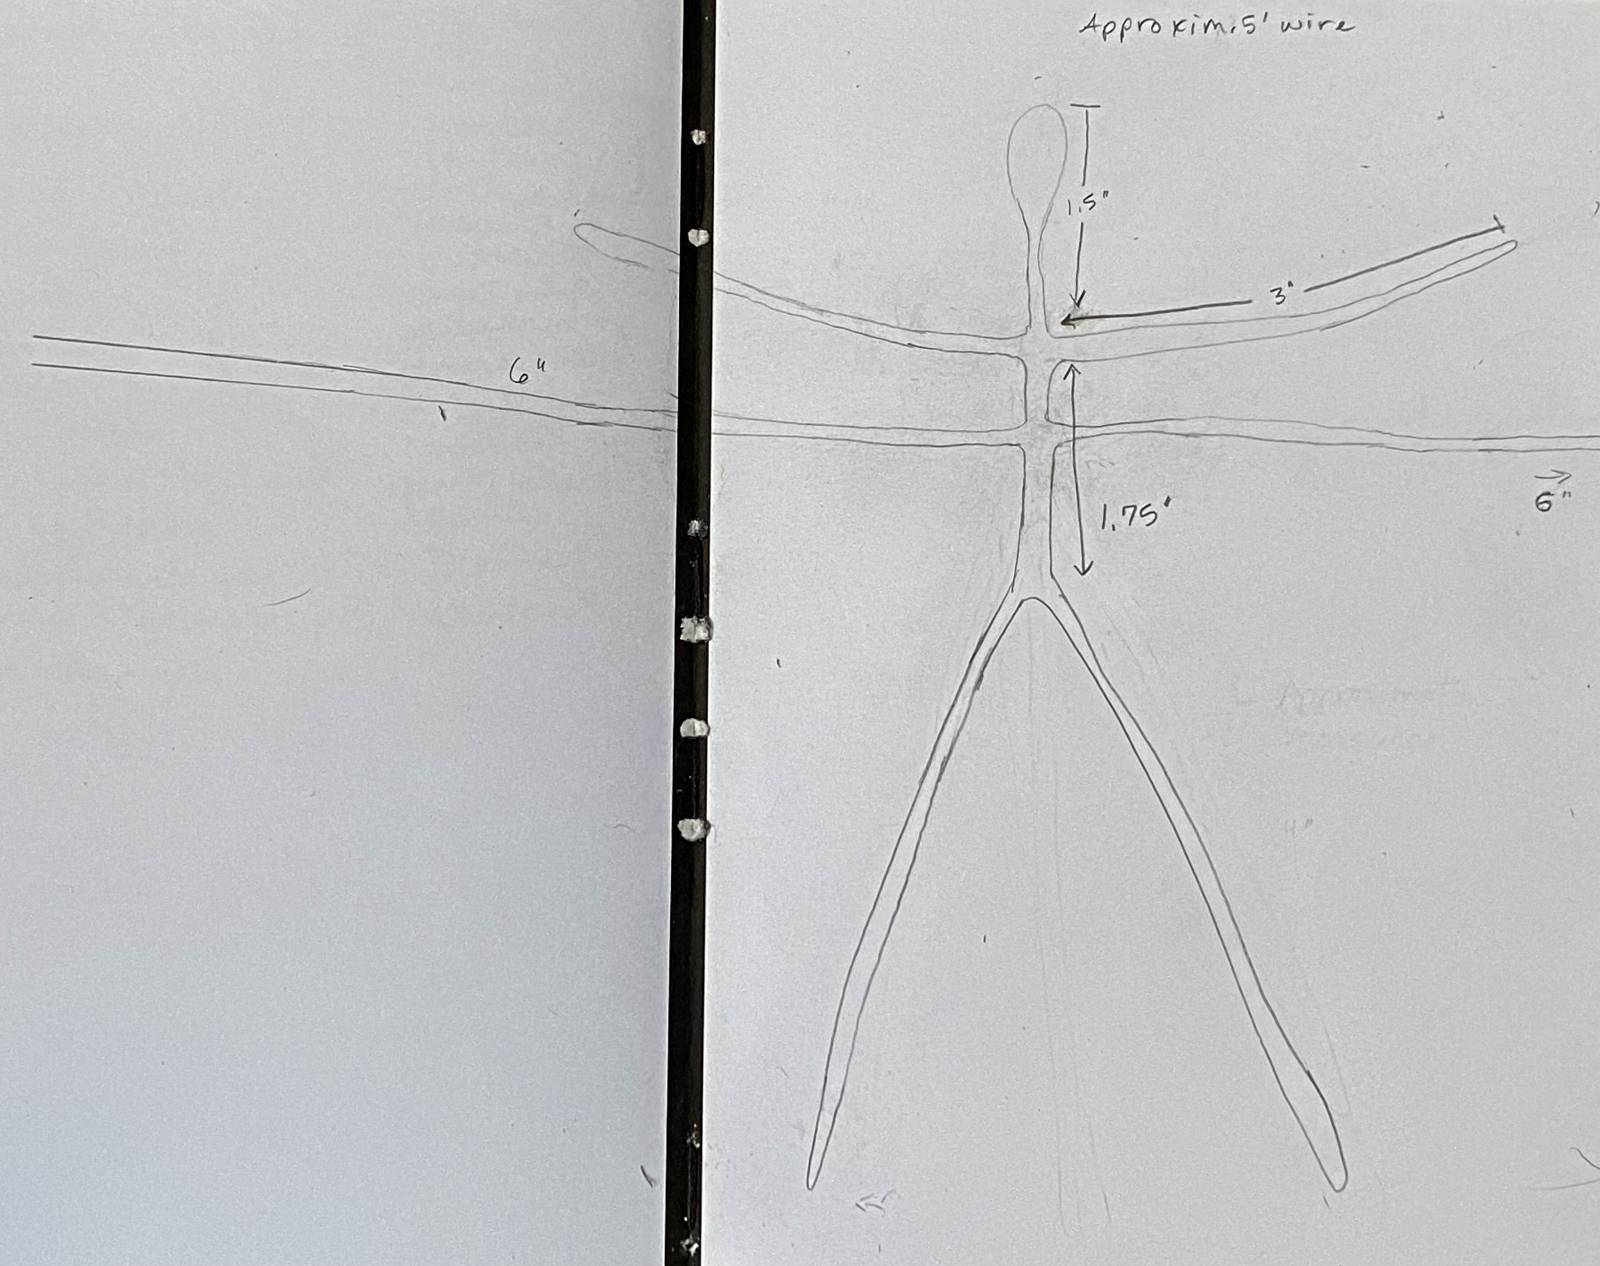 Originally, I thought the sketch was unnecessary, but trust me, as simple as it is, the outlines helps keep you on track when the wire is wanting to go everywhere it wants and no where you want it to.
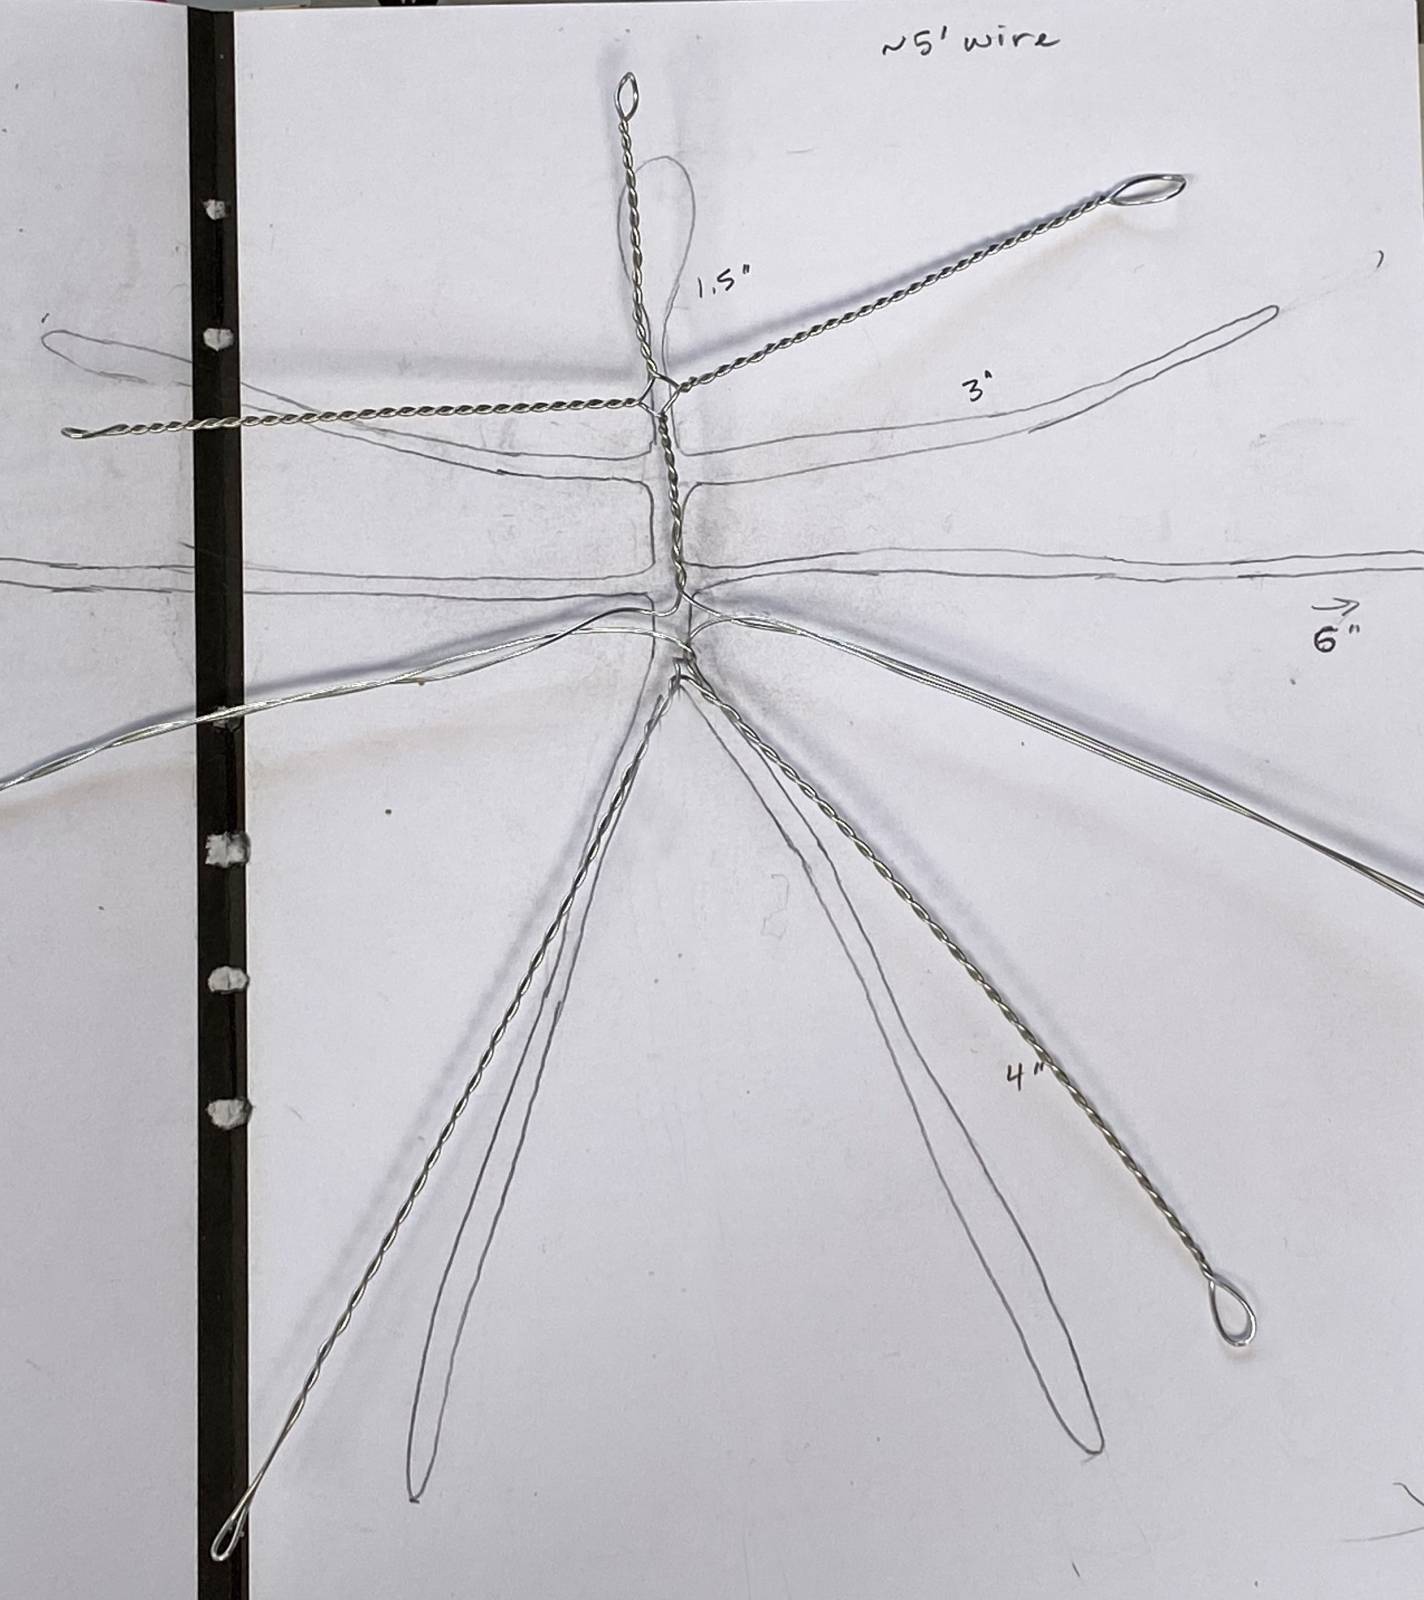
Note that measurements are approximate and quite flexible with this method. This pattern will ultimately create a figure that stands 3.5 – 5” tall. The variation comes from how you bend the armature as you’ll see shortly.
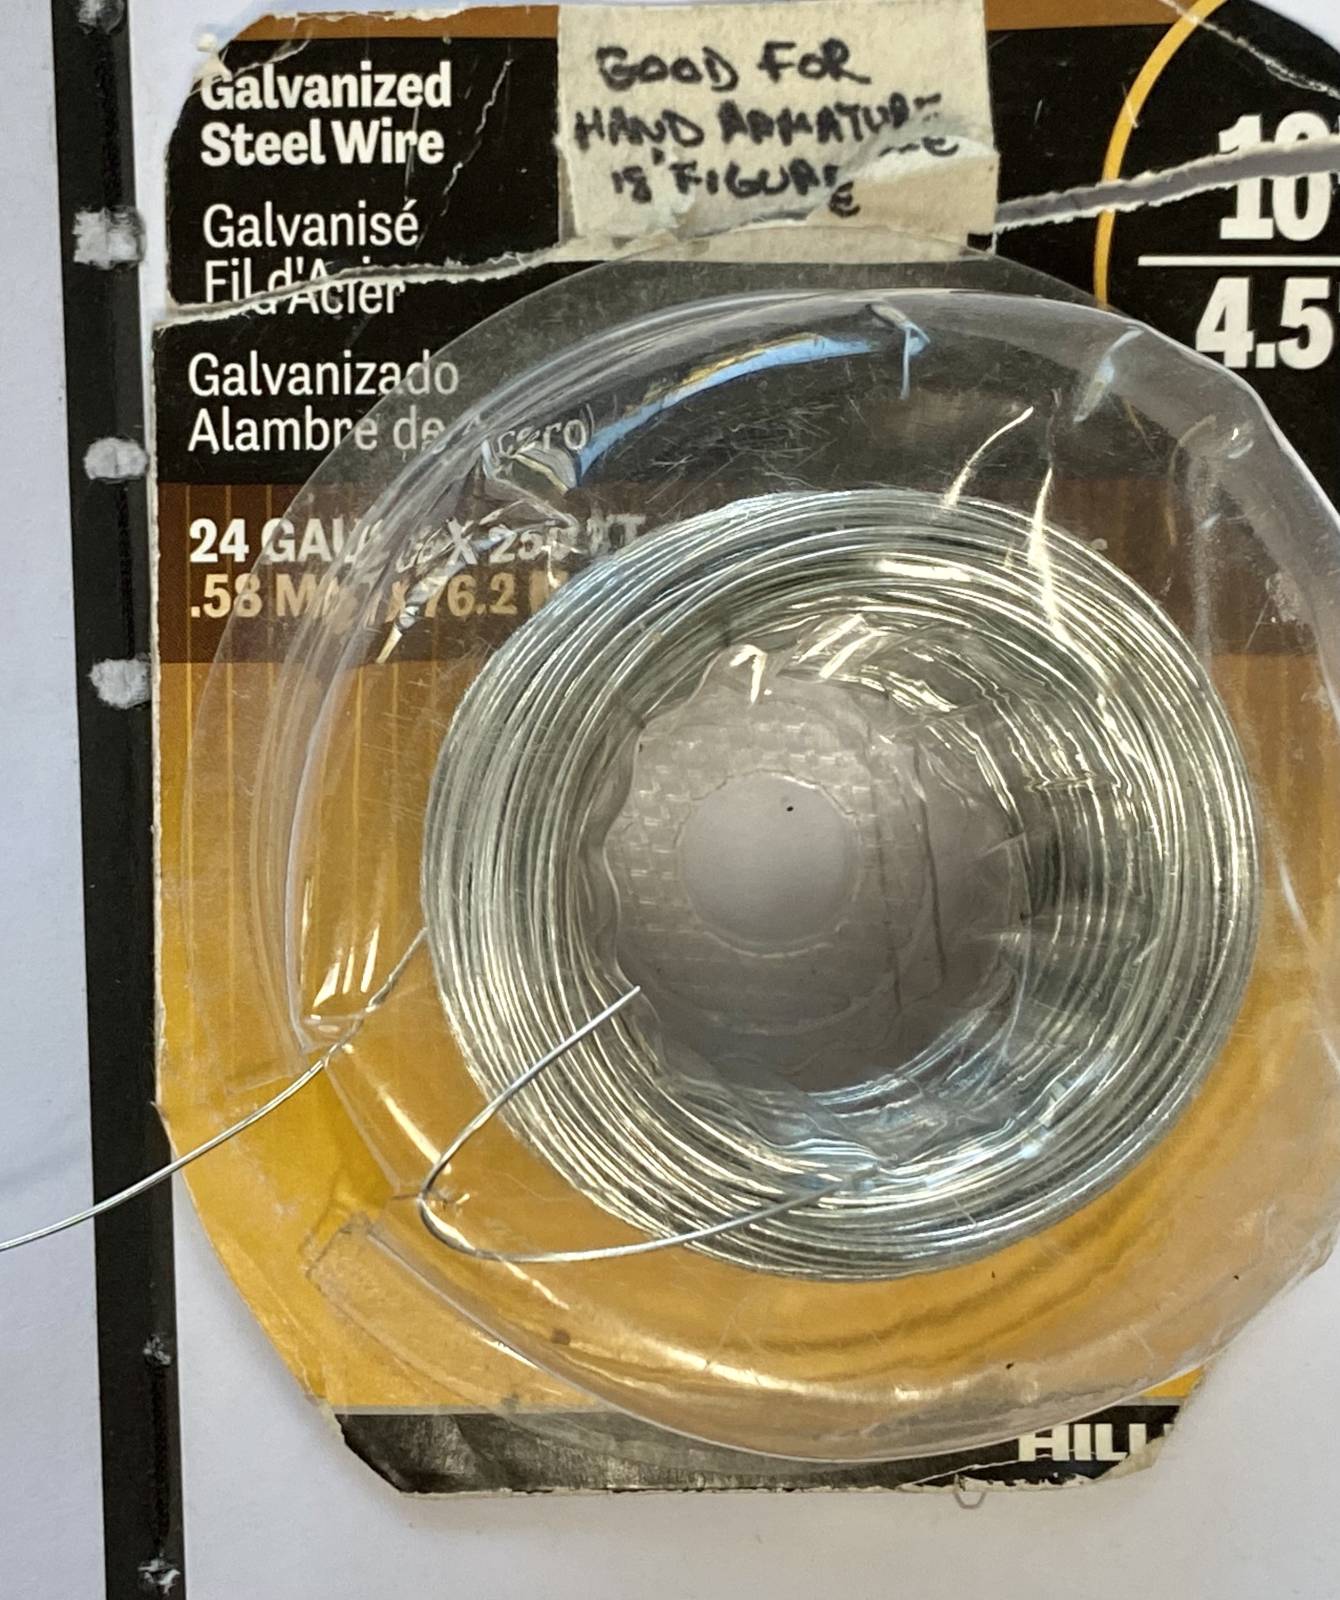 We use 24 gauge galvanized steel wire – usually available at any hardware store. It’s flexible enough for the small scale poses we do and, once twisted, pretty strong. We also use this gauge for making hand armatures on Colin’s 18” figures. For this pattern, it takes roughly 5 feet of wire. I pull that much out, but don’t cut it until I’ve completed roughing out the armature so I can make adjustments if I need to.
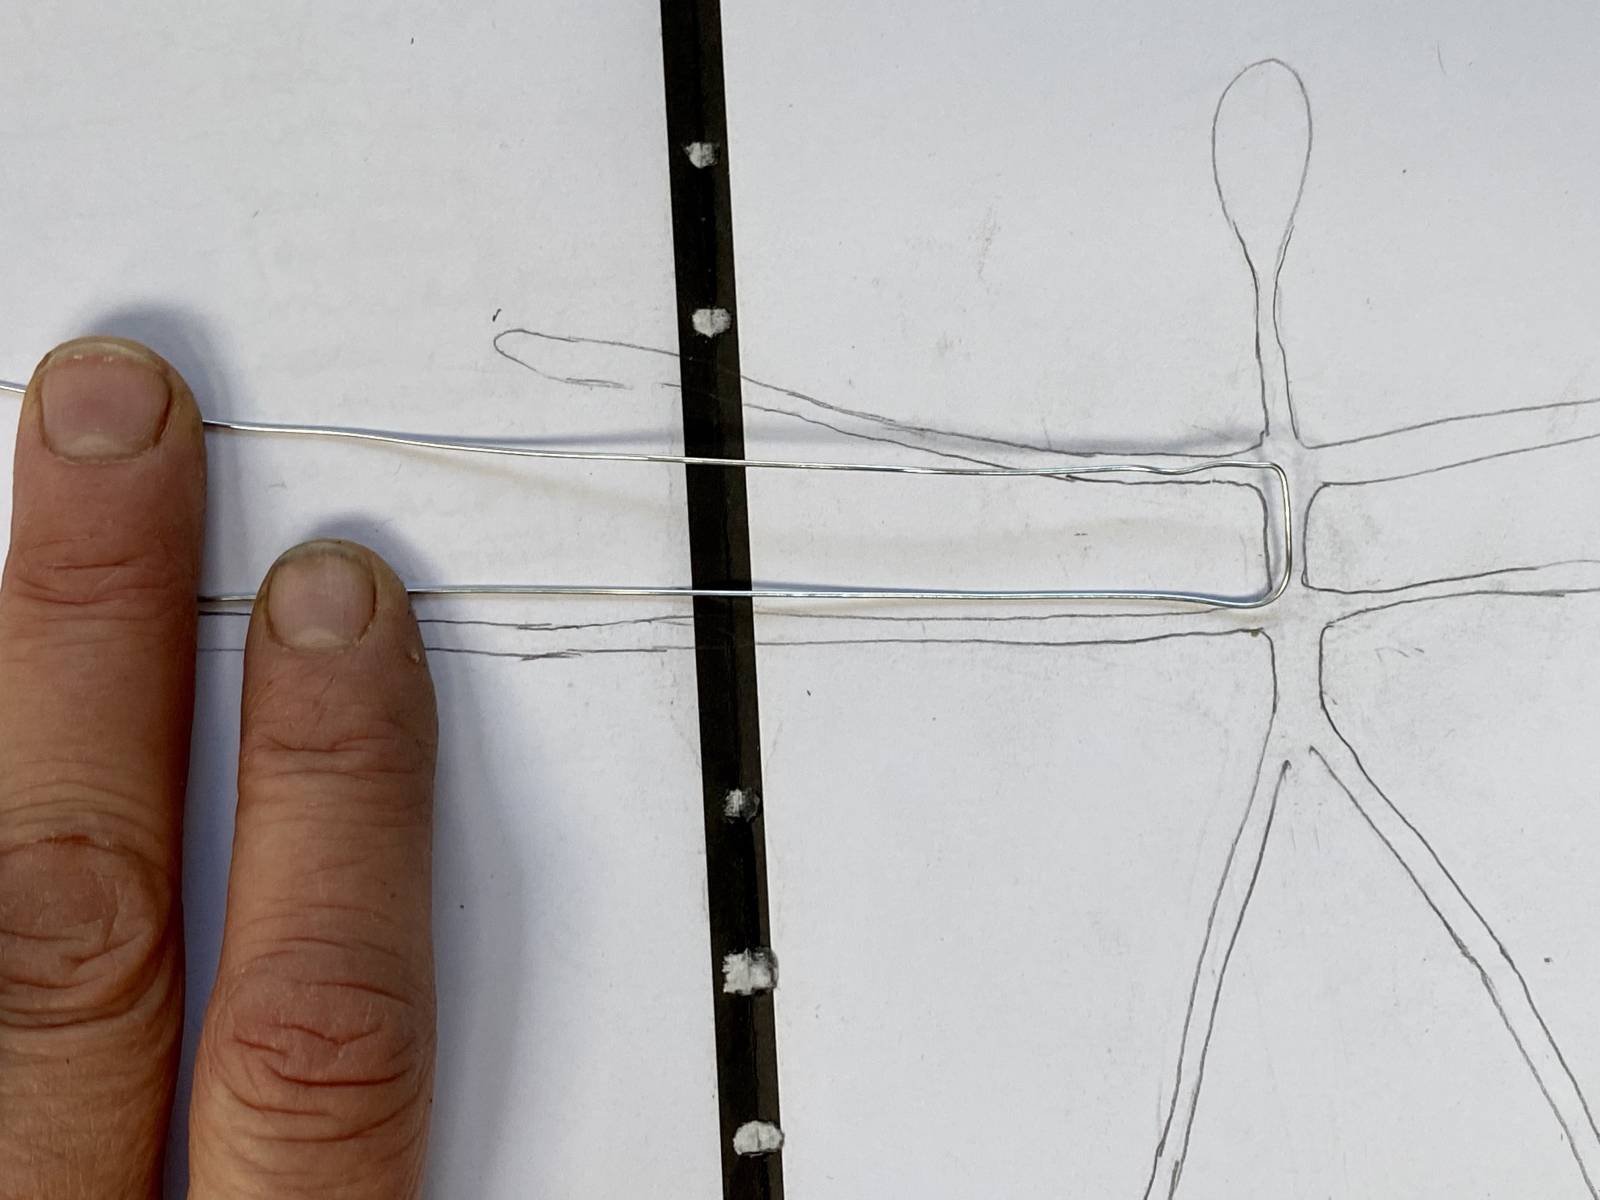 I start following the pattern on one of the side supports – in this case, the left side one. I make simple bends keeping the wire pretty close to the lines.
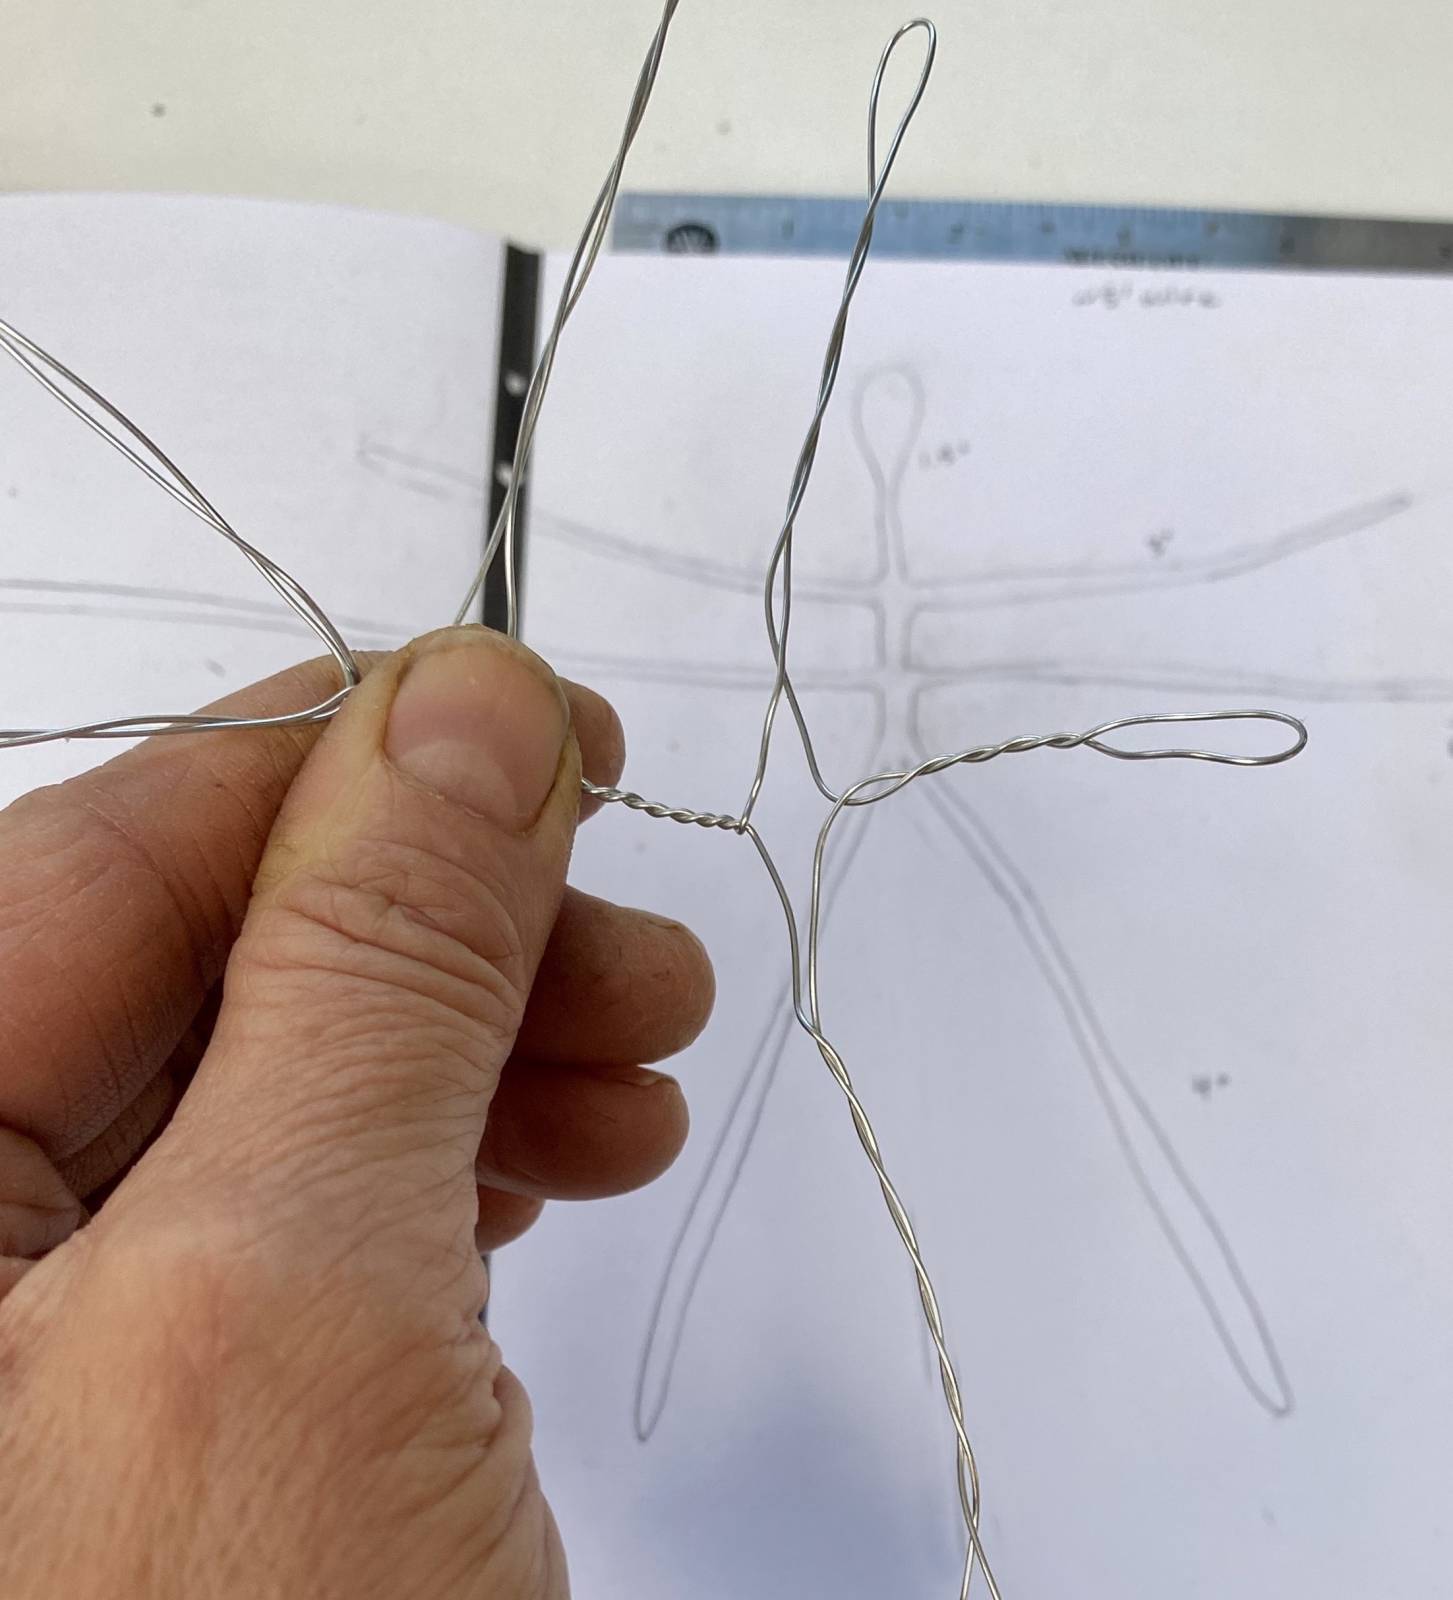
 When I complete the loop for the arm, I twist it a few times to keep it in place – the wire gets pretty unruly by the end if you skip the twist.
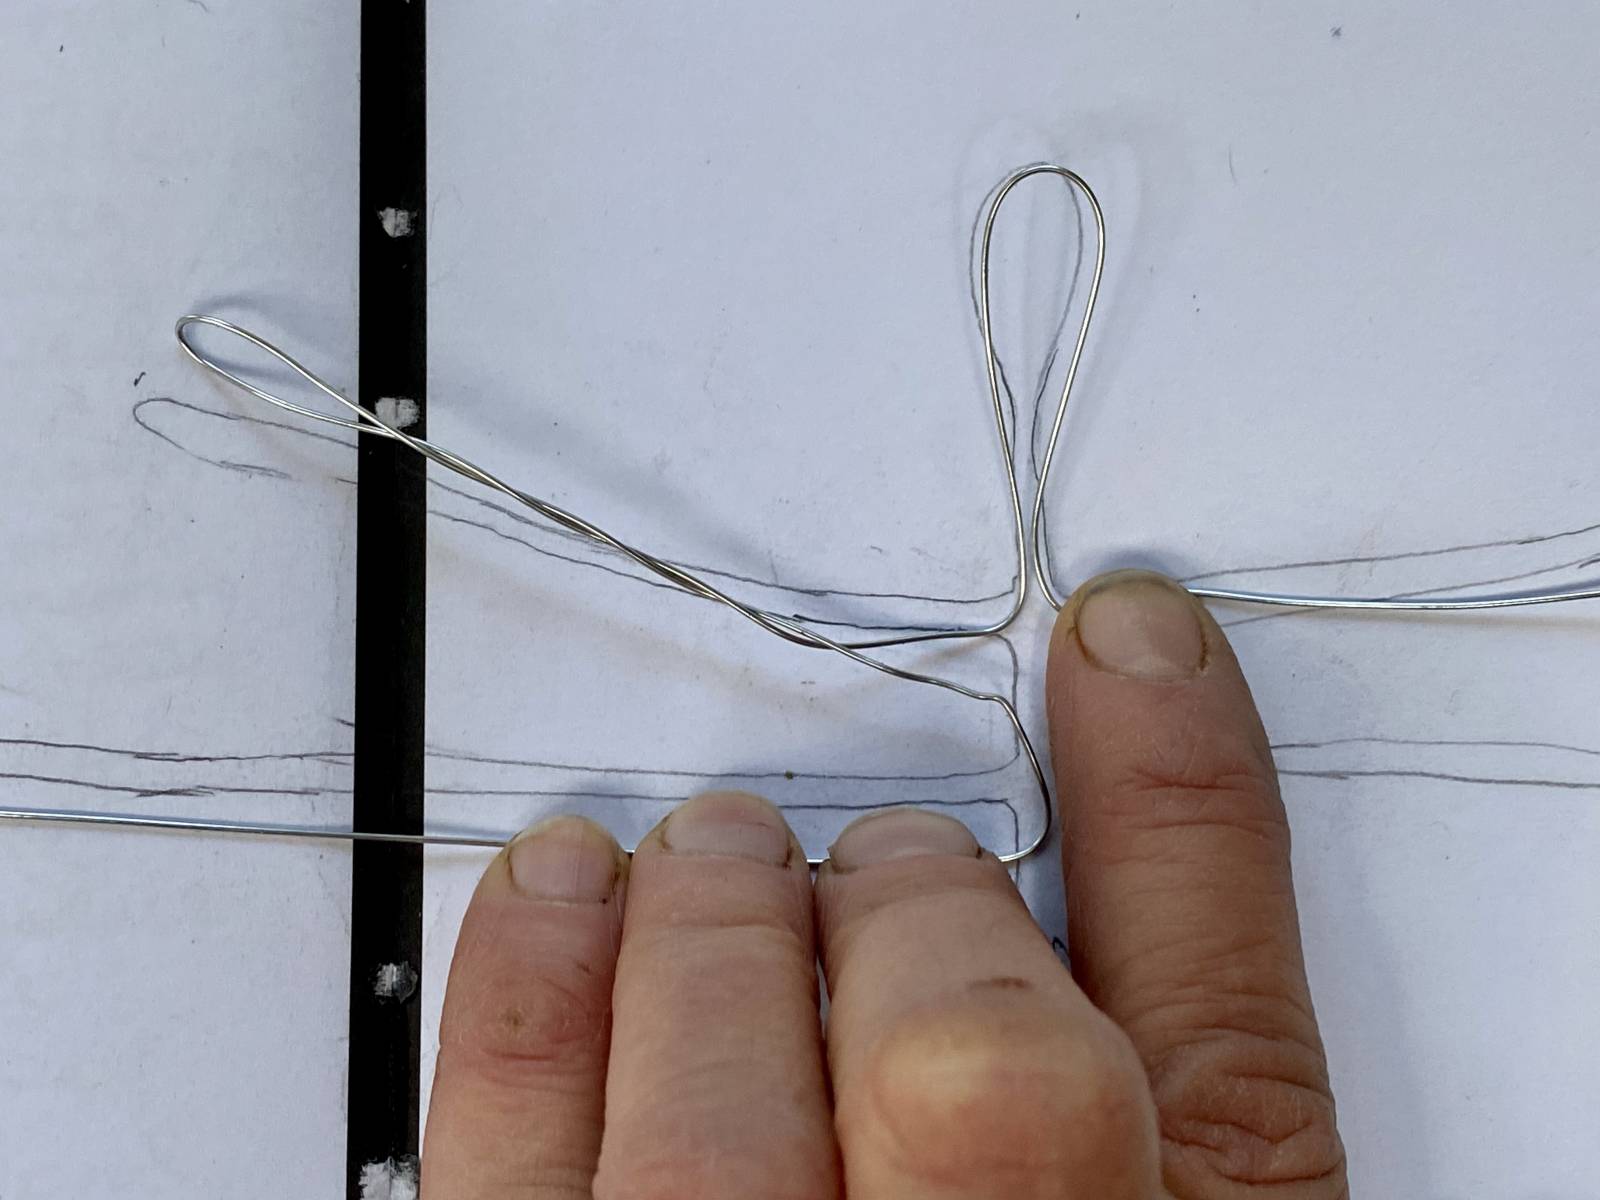
 Repeat, moving around the figure – head, arm, side support, legs, until you arrive back at your starting point.
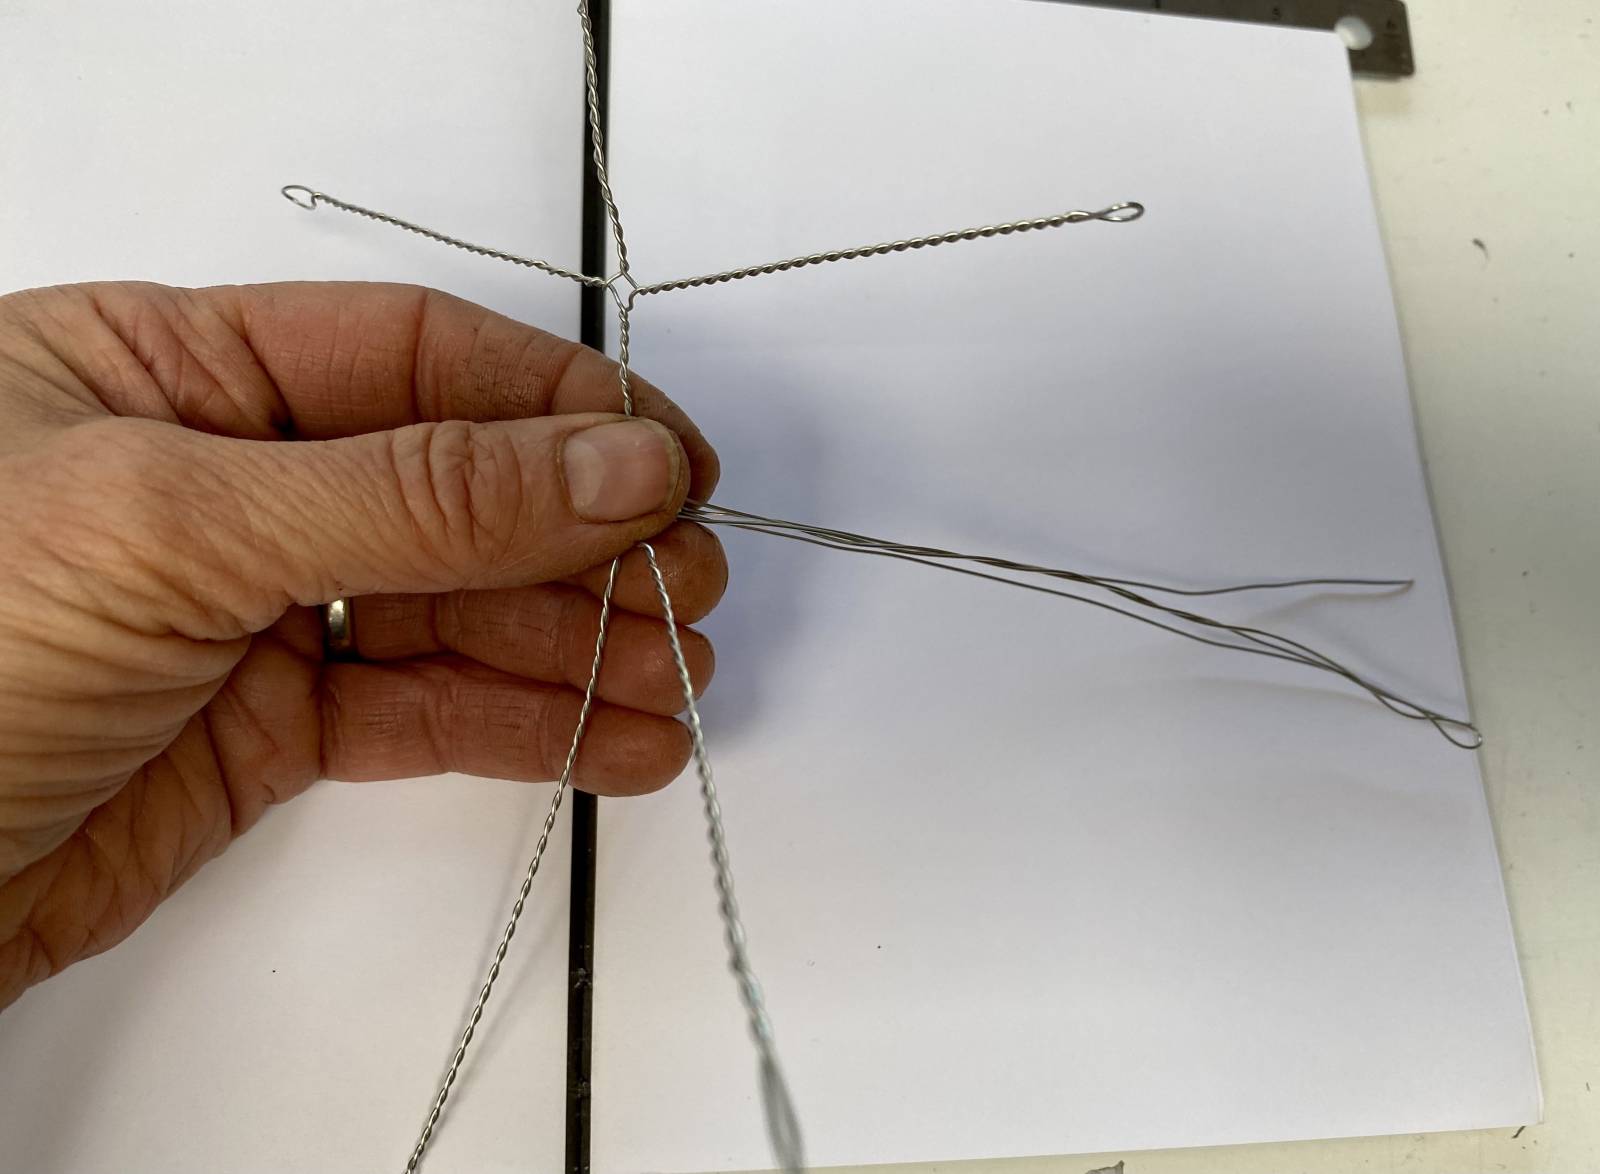
 I hold the figure at the waist and twist the upper, then lower torso wires to stabilize those sections.
 Beginning with an arm, place the loop firmly into a drill chuck. Holding the wire close to the torso with your fingers or pliers, slowly twist the wires until tightly wound.
 Repeat with all the limbs and head.
 Fold the 4 side support wires all together. At this point, if you want a stronger support, you can add a few extra pieces of wire into the twist. Using the drill, twist them all together.
 Basic armature with support coming out just above the hip area. If we prefer the supports to come out higher up the body, we adapt the pattern to reflect that. We also sometimes make the side supports longer, depending on the pose.
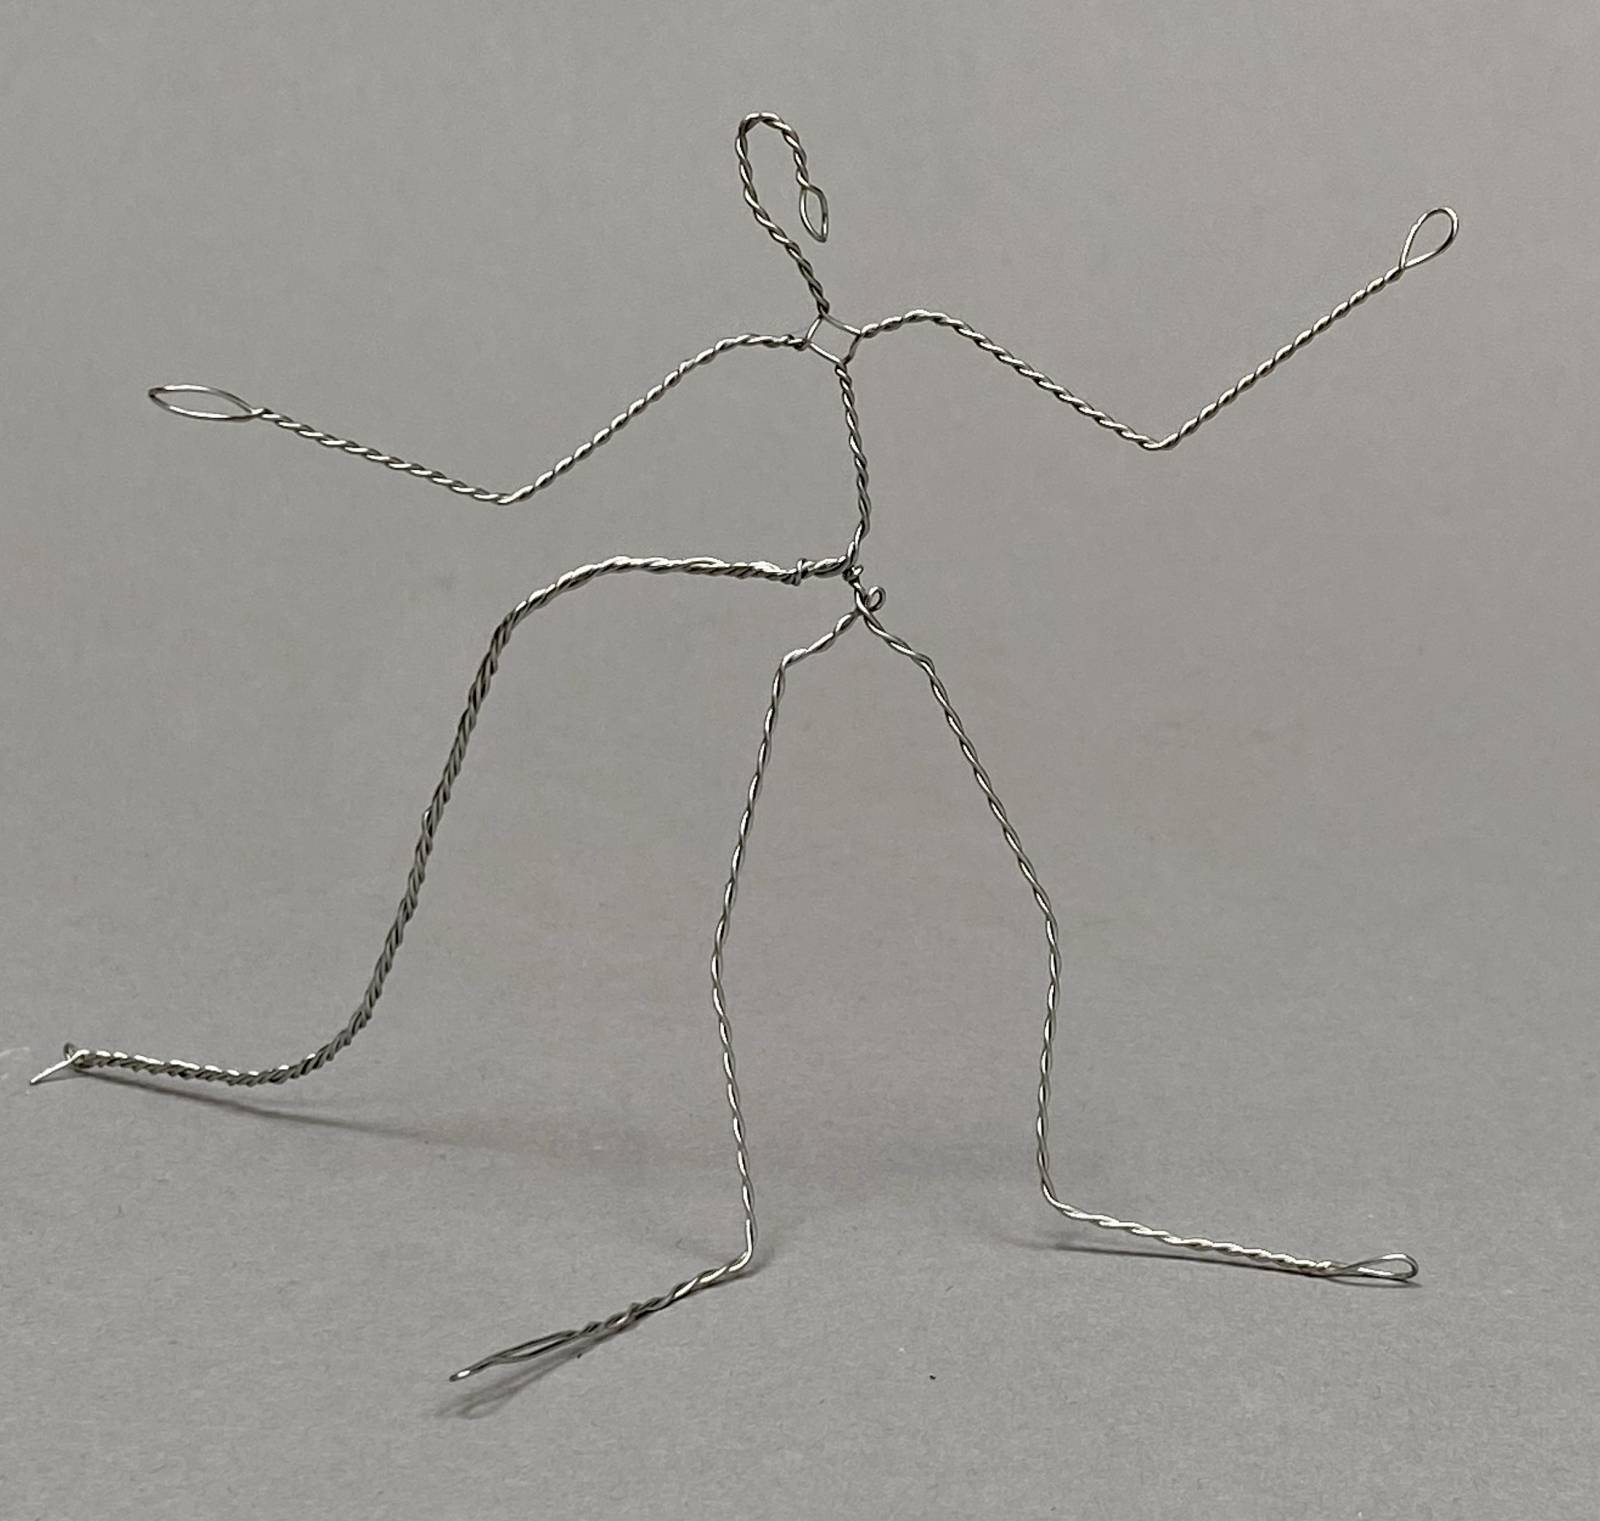
Look Ma… I’m dancin’!
Then we bend the armature into roughly the shape and scale we want. We use this basic armature for both human type figures and animals. We’re not concerned if there’s too much wire for the feet or hands as that can be trimmed off later in the process if necessary. If we need the torso to be shorter, we add a bit of a curve in the wire. If we need it to be longer, we “borrow” a little from the legs, dropping the bend for the pelvis down a bit.
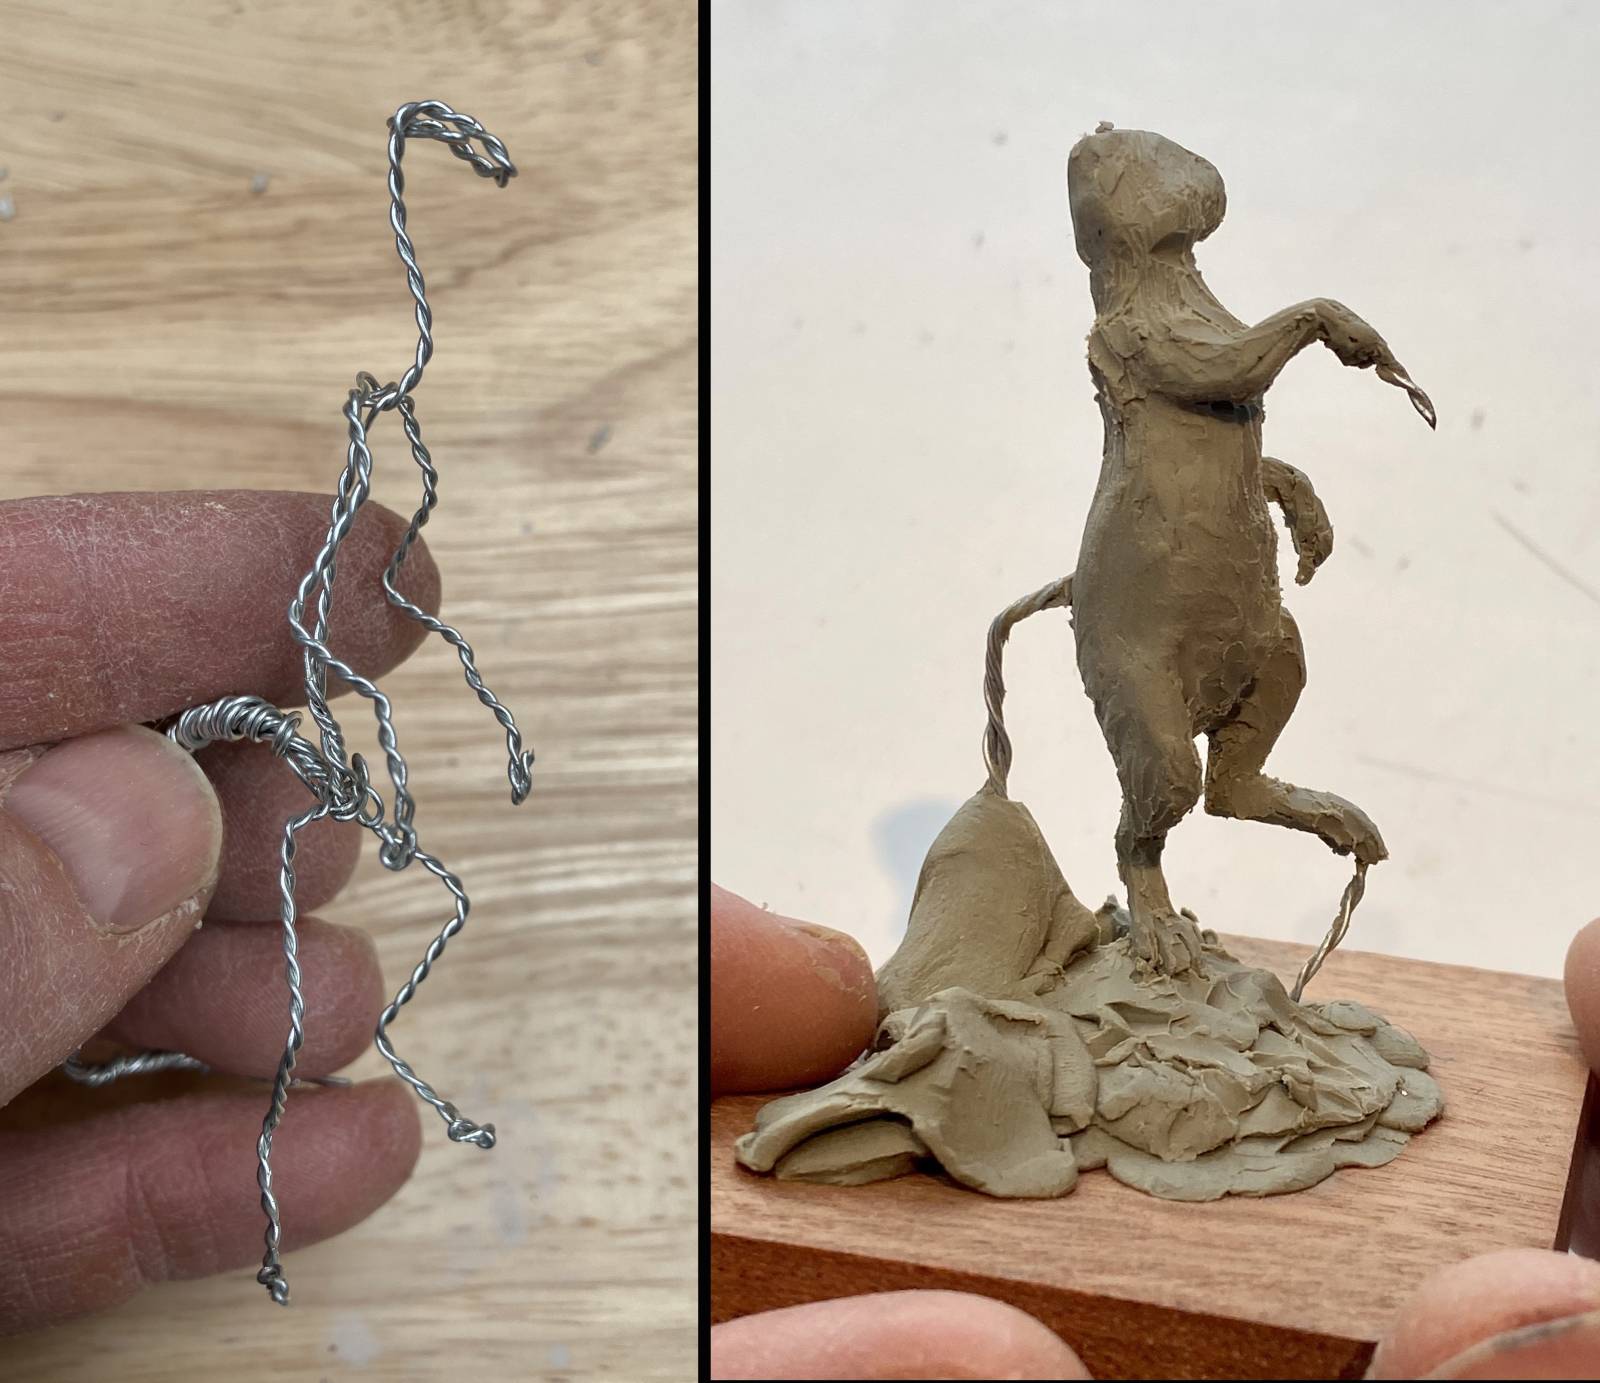 Here, you see a smaller armature that Colin adapted for an anthropomorphic animal sculpture. First, he lays out the rough proportions based on that particular animal skeleton, then adjusts it into a standing pose.
The armature maintains enough flexibility to reposition limbs during the clay rough in. The side support in this case comes out the back and the extra wire from the feet helps to support the sculpture as he works on it.
He begins the basic block in holding the support in his hand because it’s faster and easier to mash volumes onto the armature and make adjustments quickly. Once the rough in is complete, he attaches the figure to a board using clay to make it easier to refine (and not squish) details.
In the molding process, we’ll remove the clay base and extra wire on the feet.
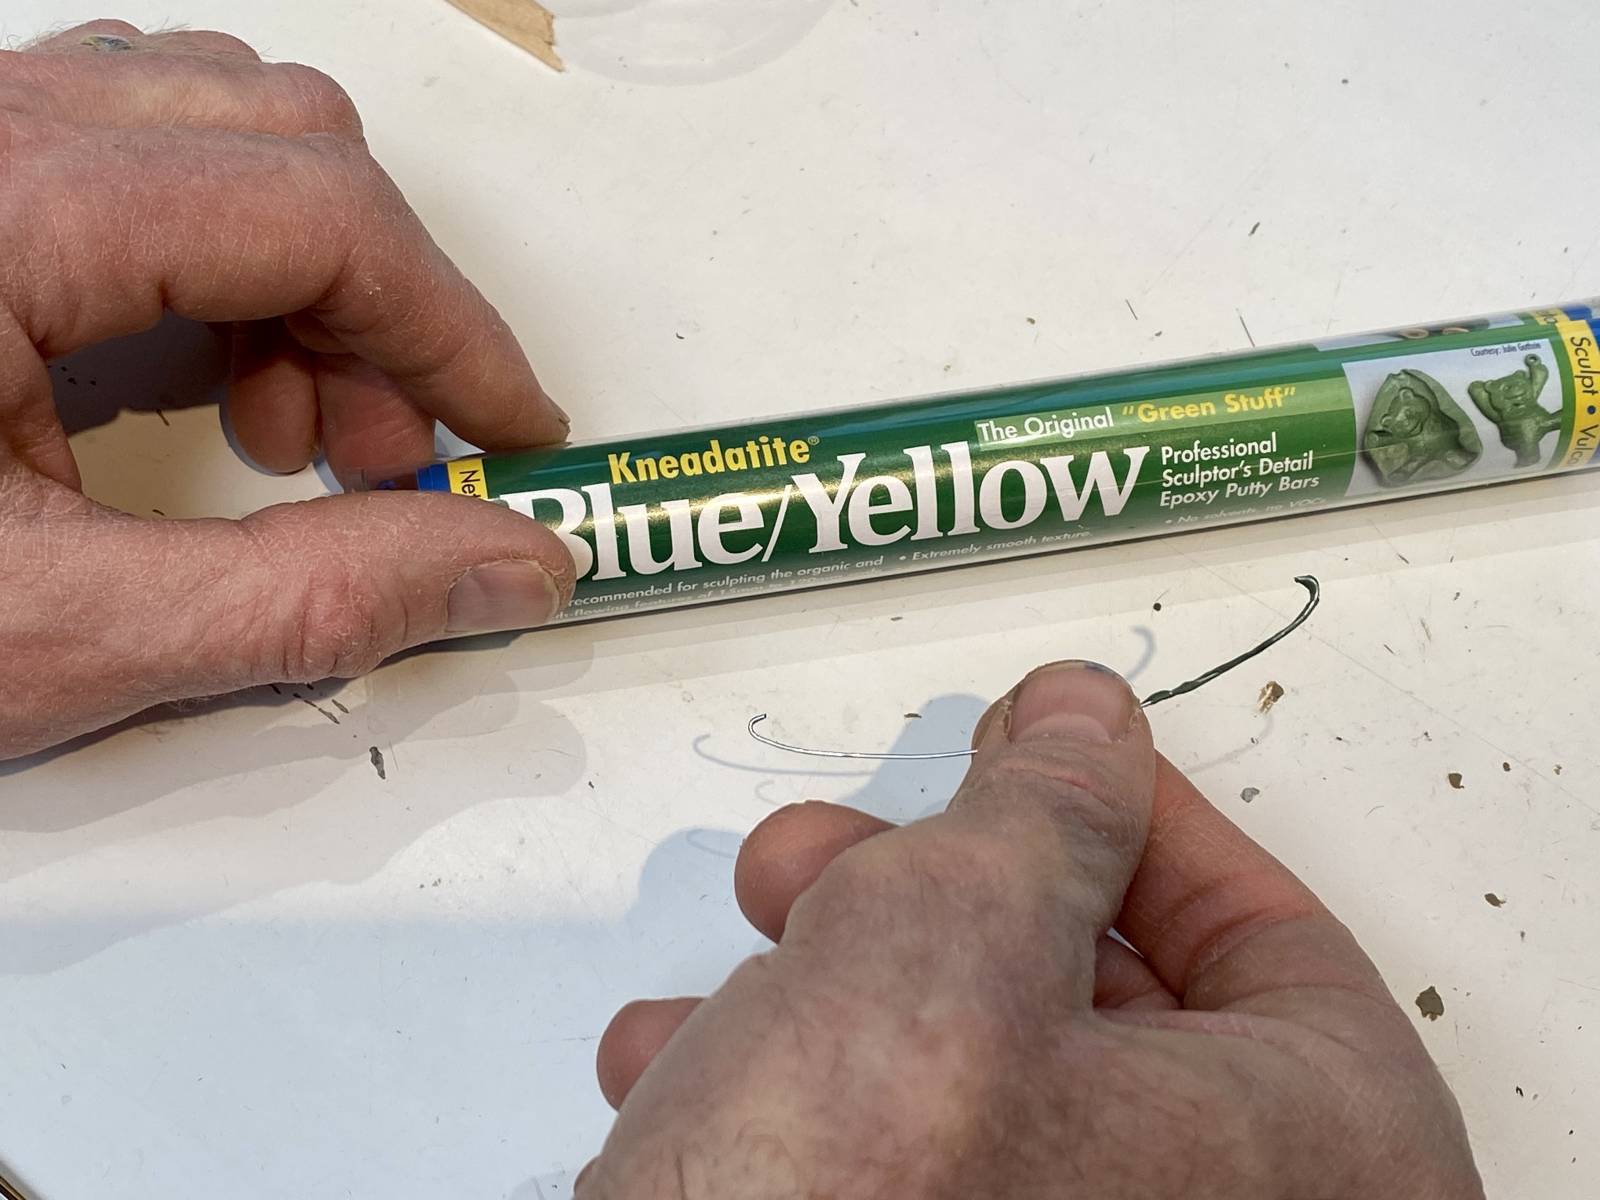 For an animal with large ears, like a rabbit, he creates a separate armature wire that will provide support with maximum flexibility for placement. Since twisted wire would have too much volume, he lightly coats the wire with “Green Stuff” to help the clay adhere to the wire once it’s attached and will simply stick the wire into the head of the main sculpture. For this size sculptures, the mold making process we use will not put stress on this delicate attachment point.
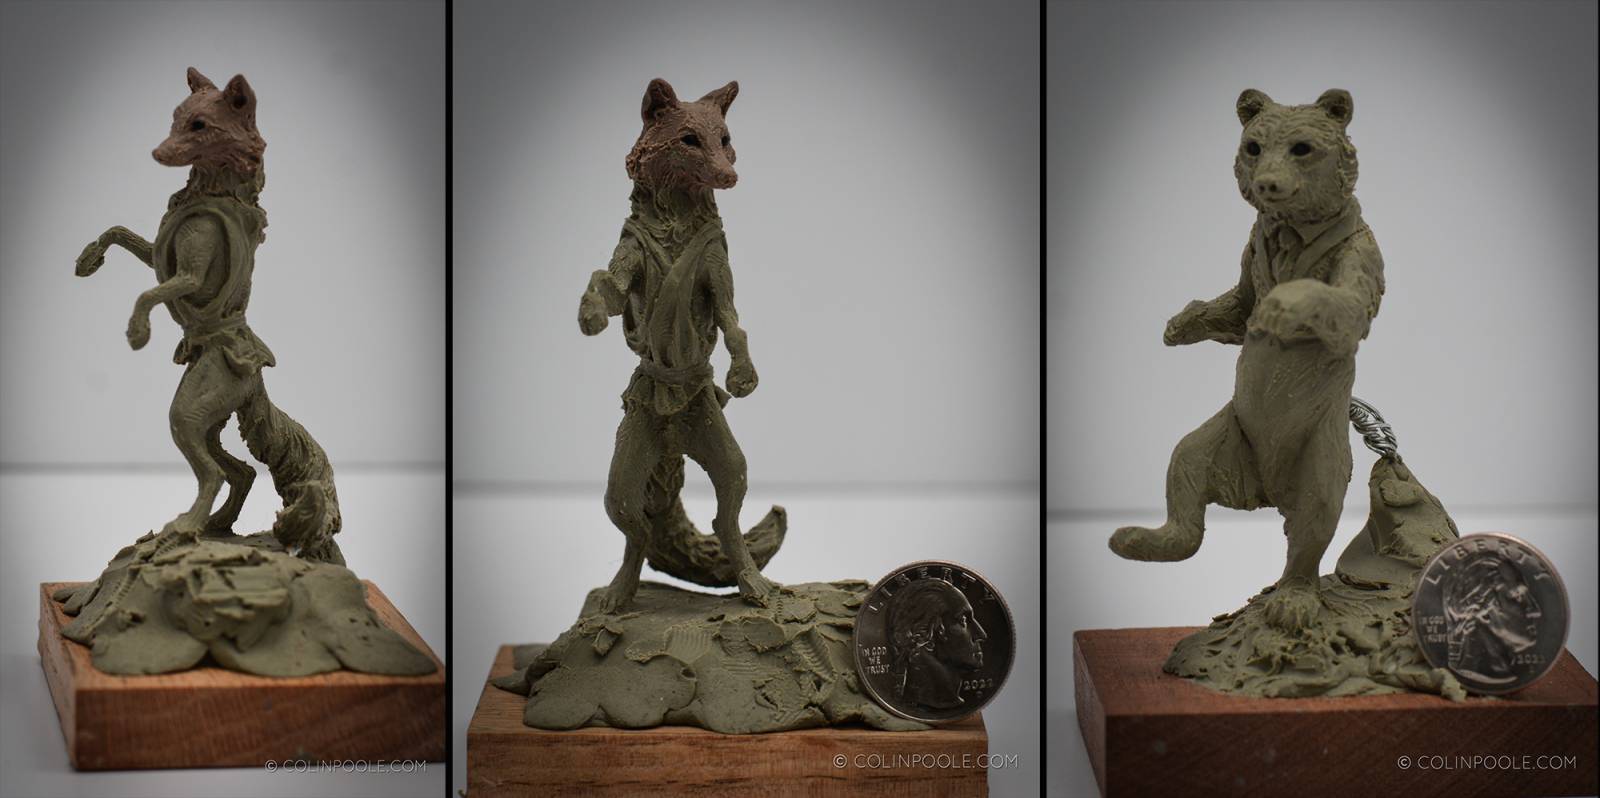 We’ve used this style of armature for small sculptures in oil-based clay (plastilena), Sculpey and Monsterclay. While we usually work with Le Beau Touché high melt, with these smaller works, we’ll often mix some waxier clay like Monsterclay into the plastilena to support more detail. You can see Colin used this mix on the fox’s head which helps the tufts of fur at the sides of his head and the tips of his ears stay put.
Note that the support wire on the fox is hidden in the tail but the bear’s support structure connects with the lower back and will be removed prior to molding. In both of these sculptures, the wad of clay at the bottom will not be part of the final piece.
If you want to see the next steps involved in taking one of these miniature sculptures through the mold and wax into bronze, I show the those processes in this post: https://www.muddycolors.com/2022/12/making-small-scale-bronze-sculpture/
Happy sculpting!
Thanks Kristine! Great step by step. Made me want to grab some wire and start twisting.
Hey Jared – Thanks so much for reading and commenting. I’ve been having a ton of fun working with these small scale little guys – hope you will too! K
Thanks for sharing =D. It’s easier now how to start sculpting for a beginner.
Hey Isabel – glad I could give some suggestions for starting. Working on this smaller scale has some challenges, but it does let you get started. You can try different sculpting materials to see what feels good to you and which allows you to work the way you want to. Happy Sculpting! 🙂