This is the post that many have asked me to write for a long time. Color is such a personal aspect of painting. I’d thought perhaps my way of painting and using color might not be the right way for someone to learn. It’s definitely not the ultimate way to use color.
Why? Because there is no ultimate way to use color. There’s no ultimate palette either. No pigment, no brand, no rules regarding how you use color to make pictures. Or did you somehow miss the past 2000 years of art history?
Color for painting is results-oriented. And if the results I get are stimulating for another painter or audience, seasoned or not, the methods of getting there don’t really matter. This is true for any painter and it makes the very idea that color is personal so very, very exciting.
Color is exciting! Color is personal! And you should never, ever be intimidated by it.
It means you are free to express yourself in any way you’d like. Do you need to know color forwards and backwards before using it? No. Do you need to know everything about mixing and balancing and manipulating pigment? No. Should you have a basic understanding of how color works in general? At one point in my training I might’ve said yes to that question. Now I say that one learns color mostly by painting. Lots of observing. Lots and lots of painting.
Last year, I listened to a marine biologist give a lecture about learning about ocean life. She said she’d found it was better to ‘experience first, understand later.’ The same is true for writing or music, and is indeed true for painting or drawing or any of the visual arts. We keep coming back to learn more and more as we go along, all of our career. We don’t load up facts and then spew out painting after painting because we had all the necessary information ready at hand.
Try it first, decipher it next. We are explorers. Each of us has our own perceptions and emotions in our private worlds of color. (People with synesthesia can hear color. Whoa. Let’s not go there right now.)
I teach my students that they must dive in while they learn basics. That way, they come back from the experience with specific questions, not just general thoughts like, “how do I get better?” or “what’s the right color?”
“Some say they see poetry in my paintings; I see only science.” —Georges Seurat
Let’s get something cleared up before we dive in. There is no ‘theory’ about color. Oh, you can make up all the theory you want, but color itself is based on the science of light. Viewing color, however, is emotional. Why? Because it’s based on the way we observe a color’s temperature: warm colors and cool colors. Our emotional connections to color, influenced as we grow up, become signals throughout life. The way two temperatures converge or contrast, changed by the colors around it, triggers that emotional connection.
That’s when color gets interesting and exciting to work with. That’s what you want to learn: how to mix it and use it to get that emotional response.
What do you want to say to the viewer? How to you want to express your visions? Color is communication. You’ll learn by doing and testing the results and showing your work. This is the part where people think of it as ‘theory’ because you are expressing ideas, communicating thoughts to an audience.
In college classes of Color Theory they love to shock the new student into being amazed at how color shifts and changes based on the colors next to it. Two crazy bright colors next to each other gives a different emotional response than another set of two crazy bright colors. Or with dull vs bright colors.
Since the early 1800’s many have described color as purely artistic and without physical basis. A good friend loved to chide me and say, “yeah, but how do you know that the blue I see is the same blue you see?”
Well, we don’t. We only have standard practices to agree to what we see is similar across the board.
Because of that, I can guarantee that mixing red and blue together will get you a purple color each and every time. Or blue and yellow gives you green; red and yellow gives you orange. How one manipulates the myriad of color combinations is where emotions are built, yet the physical basis is still there. It’s not theoretical. It’s just the study of light.
This 10 Things list is not doggedly technical. There are plenty of others who have written extensively about that. I approach color practically and from experience, because I want my students to learn by doing, then combining research. Not the other way around. Everything I express here is based on mixing color for decades. I like to keep things simple and direct. I’ll go over what I’m thinking when working with color and you’ll be able to get right to it, to find the way you want to work. There is no ultimate way.
And I’m still learning about color and how to handle it. (Well, when are you going to fully learn it, Manchess??) As we go through life, our attitudes and interests shift and change and along with it, our palette of colors, our ideas, our communications, and our emotions. The colors you use to learn today will not be quite the colors you work with years from now. Or maybe they will. Who cares?
The idea has been expressed that one should work with as few colors on the palette as possible. That’s a great idea because you can spend less money on paint! But unless you get to working very fast to learn an extreme amount of color mixing with just those few colors early on, you’ll miss combinations that might answer many problems. In the beginning, put as many colors out as you want. You’ll find yourself naturally using less as you learn.
I’ve found over the years that my palette is expanding because I’m experimenting more and concerned less about whether I’m ‘doing it right’ or not. For example, flesh colors are fairly easy to mix, but I put a big lump of flesh on my palette anyway. I use it as a base to add color to shift it’s temperature and can speedily mix to match. Do I use it all the time? No, of course not. Some days yes, some days no.
Why are we so eager to find a formula to painting? Why do we have to have a specific system? So we don’t have to think so much? Why, when hundreds of years of painting explorers have broken open the barriers to all forms of art and released us from the bonds of “doing it right” do we still strive to find the one and ultimate way to paint?
In the early to mid 19th century, as the range of colors broadened and tubes allowed painters to work outside, a group of painters got so excited about using those fresh colors that they changed the very idea of what painting is all about. Maybe you’ve heard of them. They came to be known as The Impressionists. None of them agreed on how to work with color, and yet their work is wonderfully diverse.
For a while, I reduced the number of colors on my palette. It was back to training time. I worked with this limited palette for a number of years before I was tempted back to adding a wider range. Simply because color is exciting! And the range of colors we have today is magnificent. I instantly found new combinations I hadn’t thought of. I was energized all over again even though the basics of color mixing hadn’t changed. Light science was still as practical as ever.
Never be intimidated by color or let anyone tell you that some people have color sense and some don’t. Color is about observation, and learning to observe is work. (did you think because you have eyes you know how to see?) Under the constraints of the current conditions of light on a subject that you are studying, that observation will shift. It’s a dynamic process, not a formula.
Light changes constantly if painting from life or even under studio lamps. Our eyes don’t grow so tired as they are transmitting light all the time, but our brains fatigue at constantly decoding those signals of the hue and temperature and value of light on the subject and how to mix pigment to match it. Like anything else, we need breaks to replenish our energy for observation.
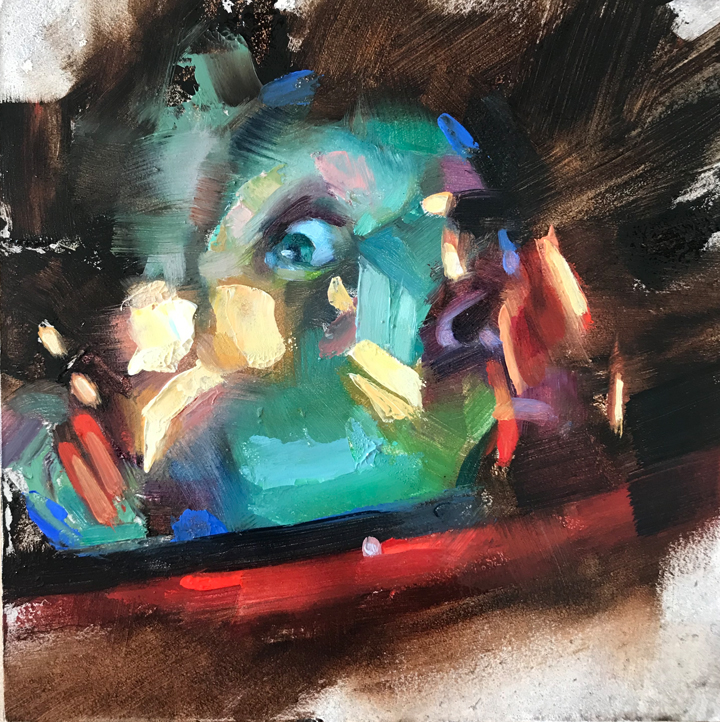
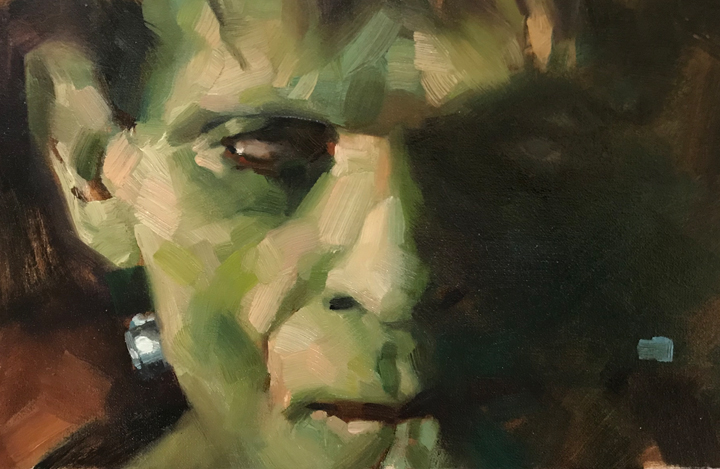
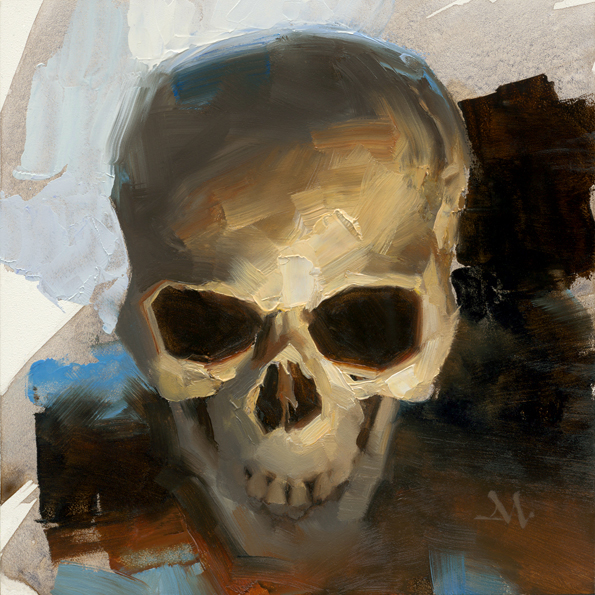
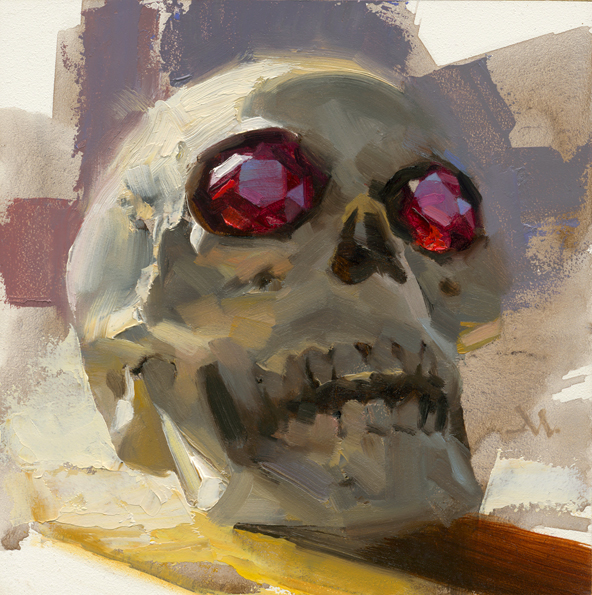
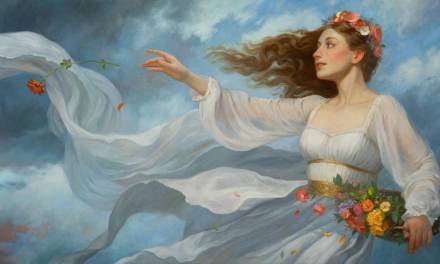
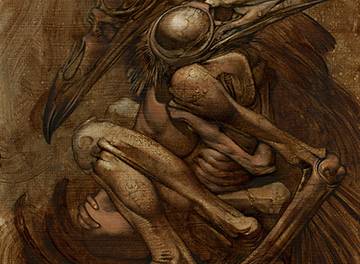
Before we roll…study the paintings of mine above and below for the different points in the post.
Color basics in a nutshell.
Every color has four basic qualities: hue, value, chroma, temperature. Doesn’t that sound complicated already? Naw, here’s what I mean.
Hue is the color: red, blue, yellow. Everything comes from those three primary colors. Everything. They’re called primary because by mixing combinations of those three hues (colors), all other hues (colors) may be obtained. The same results cannot be obtained from paint of any other three colors.
Value: the lightness or darkness of a color. Easy, right? Yellow is lighter than blue, red darker than yellow. But what if I add white? Well, now you’re just throwing a wrench into the works. But yeah, when you do that you can have a blue that’s lighter in value than a yellow. Honestly, just keep in mind that the value of a color is more important than the ‘correct’ color.
Chroma: otherwise known by everyone who works digitally today as saturation. That basically means how pure it is, or how much white is or isn’t mixed with it. Adding white makes all colors lighter, but also makes them paste-y or chalky-looking.
Temperature: the degree of warmth or coolness of a color. Yes, a color like red can be made cool. Blue can be made warm. One easy color to understand in terms of temperature is green. They can be warm in sunlight or cool in shadow. Pretty simple, yes?
To add to all that, there are secondary colors. You get them from mixing the primaries that are side by side on the color wheel. Green, Orange, Purple. When you mix those colors together, you get what are called, tertiary colors. What everyone here knows are Muddy Colors. You can’t really obtain a fresh hue from them, so most folks don’t talk about the tertiaries much. Because they’re afraid of them. Because they’re ugly, or wrong.
No, they’re not. There are no wrong colors. There’s only an off-balance of color harmony in a visual, but the color itself isn’t wrong. Muddy colors can be gorgeous. See the point below about using them.
Which color should I use?
If I’m working on an illustration of a scene, I determine early the time of day I’m shooting for. Also weather conditions. Is it sunny morning light or an overcast day? The reason for deciding is that it will determine how the light effects the colors of the costumes and room or landscape.
The one thing I remember from a painting class I had, where the instructor showed up for only a few days out of the entire semester, was his curt description of what to think of when painting a subject. He seemed irritated to even talk about it, but he said, “if the overall light of a painting is warm, the primary shadows (the bold ones) are cool, and the secondary shadows (the tiny cracks and crevasses) are back to warm. Conversely, if the overall light of a painting is cool, the primary shadows are warm, and the secondary shadows are back to cool.” And he walked out.
Despite his being tired of teaching or simply a jerk, I remembered it. But it took years to understand what he meant. Turns out it’s just that simple. Warm light gives you cool shadows. Cool light gives you warm shadows. Generally. But even that can shift.
See more about temperature below. It only sounds scary. It’s not.
Mixing color.
Achieving good color relies on training to match color in nature. Even if you’re matching color in a photo, it’s the matching that matters. Here’s the sequence.
You must observe first what is the general color or hue, then what the value is. Then the temperature of the color you are matching. All this is done almost simultaneously. But you can step back and compare what you’ve mixed with surrounding colors to get as close to a match as possible.
I think ultimately you want to mix to match a subject’s color, value, and temperature, then lay the stroke down once, to capture the shape, and leave it. You should try this early on in your training. Just put it down and LEAVE IT. No color is wrong. The only thing that makes a difference to your stroke is whether it works with the colors around it. To do that you have to get a lot of paint on the surface so you can compare colors and temperatures against each other.
You know what this takes? It takes some grit. It takes the desire to be wrong and not care. It takes curiosity. It takes patience. It takes deliberate focus and the long view of working now for a goal, days or years away. Think I started out painting correctly? C’mon. Dump that talent junk.

Don’t stress the pigment.
It’s better to mix your colors gently and briefly. Don’t over-mix them before you use them. When you brush them on, they’ll mix yet again with whatever wet color is on there already. (This works well even if you’re painting over a dry color.) The pigment can become sullied and lack brilliance, even if it’s a muddy color. The same is true for wet mediums, too. If you keep stirring that stuff, you’ll kill it. Mix briefly, apply, and back off, dude. Leave it there and don’t keep touching it. Jeeeez.
Go around the color wheel, not across.
Keep in mind that it’s easier to decrease than to increase the brilliance of a color. So work with strong colors and gently grey them down from there to match reality.
When mixing colors, don’t listen to the idea that the only way to grey a color is to mix it’s complement into it. Sure, it works, but it deadens the color. It will sully the brilliance. Too many years of people painting that way. No ultimate way, y’know?
Take painting an apple. Starting with a medium red, some artists would move across the color wheel and push some green into the red to grey it a bit to try to gain roundness or depth. I rarely do that. Go around the color wheel. Add a lighter or darker red to the mix. You can move to either side of those initial reds to lighten or darken the pigment. I suppose you could add a bit of that deadened color here and there on the painting for even more depth…if you really have to.
Modulating color.
It’s important to learn how to adjust your colors the way they’re mixed and applied to the surface. Short strokes or long doesn’t matter, but you want to vary how the brushwork is gradated over a particular subject, like a facial cheek or a hand.
Let’s say you’re painting a leg. Premixing the flesh color for the entire leg and just applying that will give you a very flat-looking limb. Mixing the general color of the flesh and adding a little adjustment of warm and cool pigment will start to modulate the flesh and emulate how our skin shifts in color over the body.
Going back and forth with these close color mixtures will enhance not only the dimension of the object but the beauty of the brush work as well.
Great, I can hear you saying, ‘but how, dangit!?’ Okay, let me elaborate.
Mix yellow ochre and white, and now add, umm, a Cad Red light, just a small amount. Stay focused now, and notice the color you have. Now apply it. Remix from the same pile but this time add a little more yellow ochre to the mix. Apply it. Remix again and add a little more cadmium red (and I mean a little) and apply it, or maybe drop a touch of Alizarin Crimson in that mix. Too much? Add some white to balance it again. Apply that. NO! Don’t touch it too much! Let it sit there. Remix again and this time add a bit of violet grey to part of the pile. You can put that on the side of the leg, depending on where the shadow side of the flesh is.
I bet you didn’t get too much mud, did you? Not if you stay in a range or family of color (see below) like those warms and whites. If you added too much violet grey it might’ve gotten sullied a bit. It’s ok. As you mix-apply-remix you’ll start to gain insight into what I’m doing with my paint.
Use color range: dark to light; dull to bright.
You remember how we’re told to work from dark to light in oil painting? You know, the underpainting is a thin, brownish or greyish combination and puts in the values of shadows, and then you pile lighter colors on top until you get all the way up to the highlights on a forehead or nose. Well, think about this for your entire range of colors. Like this:
The bottom layers can be dull colors and you work your way up to fresher and fresher colors at the top layer. Or think of it as going from dull, muddy colors to fresh, clean colors. For a portrait, the duller skin colors go on first so they’re underneath your next layer of slightly fresher skin colors, on and on, until you’re putting in brighter colors and finally highlights.
Oh, I know. You put what you thought was a fresh color on top of a muddy color and it all got muddier. Several things going on there. Maybe the color wasn’t as fresh as you thought and just instantly blended; you dug through the bottom layers and mixed them all together (learn a more delicate touch); you added a complementary color that mixed with the bottom color and you got that nasty tertiary color…or muddy color.
Well don’t give up, for cryin’ out loud. You can either wipe it off, or brush it out a bit to act as an underpainting and reapply a fresher color again.
One thing is for sure. Don’t do what I used to do: keep piling paint on waiting for it to suddenly brighten up on you. Remember that each color you add to a mixture pushes it farther toward a dull dark color. (Most technical folk say that every additional color added to a mixture is a step toward blackness. But trust me, it ain’t gonna go black on you so fast, if ever. Unless you’re adding lots of dark colors to speed that up.)
Local color vs atmospheric color.
You’ve probably heard of this term “local color” before and wondered what it means. It’s used to describe the color of an object that’s…local. An apple is red. Jeans are blue. A tree is brown. That’s what the color is of an element near us, and identifies where that object sits within a picture or a scene.
When we get some distance from an element, say a brown-grey mountain, the depth of the atmosphere causes the local color of the mountain to shift and changes how we see it. Mountains in the distance can become blue or purple, or more. That’s atmospheric color.
I know you’ve seen that before and love the way colors shift over a landscape under different light, like sunset. I love it, too. And it’s fun to paint when you can get the color of it nailed because it mimics how we see it and can give a painting great depth.
I have students who want to use it all the time because it’s so cool. So they put it everywhere and explain to me that they’re working with atmospheric perspective. They’ll even put it in a room. Atmospheric perspective is mostly used for great distances, not short ones. If used too much in a short-depth landscape, the effect will not be distance, but fog. That’s how fog works. It obscures detail over short distances, like smoke does. If the effect is used in a room, it means the room is smoky.
Ya don’t show atmospheric perspective between the front of the house and the back door unless the place is ready to burst into flames or someone burned the chicken again.
And make sure you don’t add color halos around multiple figures in a scene just because their edges overlap. That just smokes up the scene and flattens the depth immediately.
Value is everything.
We’re basically talking about realism to capture a scene or view. You nail the value, you nail what’s necessary. Doesn’t matter what color you have, even if the color you mixed is correct to your eye, if you don’t capture the value you lose the depth. There are plenty of styles of painting where value isn’t all that necessary to communicate an idea, but if you’re interested in presenting a situation for realistic affect, you must capture the value of the subjects, the light, the shapes.
A limited color painting of a subject must capture the value correctly, even with wild, bizarre color, or it won’t read with depth.
Temperature is critical.
Look, there’s no good light or bad light. There’s just light. And light changes the temperature of all local colors, in a room, on a stage, in a landscape. Cool overcast light will shift all of the local colors of objects in a scene as will warm morning light, or sunset, for example.
The temperature of a color also changes based on the colors around it. It can appear warm or cool depending on how we see or detect that color. It’s not a big deal. It’s just Nature.
Let’s say you’re painting part of a red barn in shadow. You stare at the boards and detect a cool shadow that’s shifting the reds cooler than the reds in the sunlight. (yes, every color has warmer and cooler aspects. EVERY color.) So you mix a darker red, like alizarin, and then need to lighten it up because it’s too dark so you add some white, but it gets pinkish, so you add some warmer red, but too warm so you add some blue to cool it down. You look back at the barn, and suddenly you detect some browns on the boards but they’re lighter and a little warmer than the red—hold up. If you keep adjusting that pile of color to match what your eye keeps detecting, you’ll mix a pile of mud.
First off, your eyes keep detecting different colors on that wall because the light shifts constantly, you shift constantly, and you’re goal shifts constantly. Simply, there are tons of colors bouncing around in that barn shadow, coming from the sky, the ground, the painted boards, the trees. First you see one kind of red, then detect another, then see how the sky bounces off some of the rougher boards that face upward, then the greenish red from the bounce light coming off the grass. What do you do? The thing is, you can use all those colors! Uh, but not at once.
Deep breath. Calming thoughts. Now, here’s what I might do.
Take it in steps. Think dark to light for the barn wall. The local red paint of the barn dominates. Mix the cooler red and place it down as a first layer. Now mix a second, lighter value of red to place over it. Light over dark color. Gives it depth and texture. Now you might add some blueish red for those sky colors affecting the boards; greenish red for the bounce light from the grass near the base of the wall. But wait! Now you look at the wall and see some raw umber shadows within the shadows and a touch of purple on a board, not blue—
Yeah, that’s the process you have to make sense of. Once you start studying, you see all kinds of color. But you have to trust what you see. Don’t anticipate it. Look at it, decide, and put it down. Forget the formulas and systems. Trust what you see. Make up your own methods.
“One must be of one’s time and paint what one sees.” –Édouard Manet
Or another case. Say you’re having trouble painting color on someone’s jacket and it looks rather blah and flat. Shift the temperature slightly of the color you are using and add that. See how much dimension it gives the subject. It will change your mind immediately about the possibilities of working with color temperature and you’ll quickly lose your fear of it.

Yep, digital.
Color harmony.
Nice term, isn’t it? Lyrical, musical. Related to balance. Gives a direction to a composition. Oh hey, another musical term. The eye moves through a composition like music weaves a theme. Color can control the viewer by the way it’s balanced in a picture to move the spectator’s eye.
Some have different definitions for color harmony. I think of it as how the colors in a picture pull together to match reality or to match an idea in your mind. Look the picture over to give it direction, not to level it out to boring. Or brighten everything so much it all becomes blasé.
A painting that’s mostly greyed colors can have a spot of bright garish color that pulls the eye toward it, or can build a string of colors to ever livelier levels until it reaches a crescendo of a strikingly bright one. (Huh, musical again. Color is musical! So I guess someone with synesthesia really can hear color…) It’s a way of guiding the viewer through the piece.
Think of colors in families. Red’s a family: Cadmiums, Alizarin Crimson, Transparent Earth Red. (Browns go in there because of their warmth.) Yellows: Ochres, Cadmiums. Blues: Cerulean, Prussian, Ultramarine. Then it breaks into the Purples like Dioxizine, and Violets…but then they’re closing in on the reds again. You can slide the Oranges and Greens into families, too, or split them into either warm or cool families.
You can pick a section of the colors along the wheel or along the prism line (nobody talks about that one. It’s back to light science…) and build a color composition with different temperatures within your selection.
I used to cut a long, narrow window in a piece of paper and lay it over a painting in a book. I found that most of the colors were greyed down, with a very small percentage of fresh, clean color. Like Nature: mostly dull with bright accents. Think Spring and Autumn.
Do you see how you select and work with color? All of it is yours to explore. Yours to manipulate, express, and project.
Achieving color depth.
No painting needs the entire color wheel to make it work. You don’t have to include every color! But just as we think of building the layers from the bottom up, with duller color on the initial layers and fresher colors on the last layers, think of your canvas from front to back, foreground to background, and how the colors play over that distance. They shift in tone and value and chroma. If you’re only working with two colors and white, you’ve limited the picture plane to two dimensions and it will read as flat. Great for graphic pieces, not so great for illusion of depth.
An easy way to explain this is to encourage you to study the work of master painter, Norman Rockwell. Look at how he painted clothing in, for example, a frock coat in one of his historic scenes. There are smaller strokes of multiple temperatures of the same color in the fabric indications. It gives the clothing a feeling of modulation and depth. It’s not a trick. It’s how the fabric picks up light coming from all angles.
Now think of your overall painting. Does the range of colors in your painting include temperature shifts? Or are you painting with all one warm color, or maybe one warm and one cool color? I used to do that. I used blue and yellow a lot for quite a few paintings. I kept them separated as much as I could in the painting and it all went flat. (flat was the style at the time.) I didn’t realize that while it was okay to paint in blue and yellow, cool and warm, I could use the greenish color that would occur when they mixed to find a third level of color to help give the painting interest.
Add a third color.
When my students have trouble with a painting turning flat, I relieve their struggle by simplifying the situation, not using too much technical information. I tell them to add a third color. Most of the time they’ve mixed just one color with white to arrive at the right value, but a flat color. The solution is in the mixing. If they’re working say, with blue and white, they can add a third color to shift that blue, (not over-mixing it) to make it more complex and give it much more depth. If they add a warm color, they can slightly shift color temperature of the blue to warmer.
Next they can add depth by placing a cooler blue stroke within or near the warmer blue to get an interesting vibrating color passage. The juxtaposition between the two temperatures adds a small illusion of depth and richness to the blue. This can be done to add wonderful interest to just a straight, flat, boring blue sky.
Layering color.
You can also achieve color depth by layering colors over each other. If a warm color is already down and dry, you can mix a cool color to brush or scumble over it and vice versa.
Muddy colors are beautiful.
Do yourself a favor and don’t worry so much about a muddy color. Study how you got there when it happens though. Memorize what colors you combined to produce it and determine immediately whether it’s warm or cool. In fact, you must do this, because it is how you learn to mix color. If you can identify and correct immediately, you’ll learn very quickly how to avoid it, and later work with it.
Every struggle you’ve had with making muddy colors will quickly lead to understanding how to achieve fresh color and eventually lead you back to being able to use muddy colors against a fresher color to add excellent depth to a painting.
It all comes back to the mud. Don’t fear them. Use them. Eventually you’ll use them to build a painting up from dull color to brilliance.
“Do not paint much after nature. Art is an abstraction; derive this abstraction from nature while dreaming before it.” –Paul Gauguin
Imagine twenty thousand years or more ago, you’re sitting by a fire, staring at a cavern wall. You look at a piece of burned stick in your hand and look back at the wall. You get a hunch, a feeling, and walk over and drag the stick across the wall. You make a black line. Maybe another. Maybe you change direction, make a curve. What is that? Why does it feel familiar? In time, you’re making lines that represent animals. Represent nature. Represent reality.
Those lines are suggestions of what we perceive, not actual reality because we are limited by our receptors. Still, over those thousands of years we’ve learned to communicate, to stimulate, to inspire with those limitations and suggestions.
When it comes to color, we are all limited to the perceptions of our eyes, the decoding within our brains, and the emotional connections to color temperatures. Add into that mix the limitations of paint pigment and now you see why color makes painting seem difficult to master.
We merely need to embrace the limitations of pigment and learn to work within it’s constraints. After all, we are not simply recording reality. We are using reality to suggest a reflection of reality. When we see that reflection, our intellect and emotions put it together to complete the impression. A painting is simply a guide to stimulate your response.
And just look at the magnificent realms and ideas paintings have captured over history. You are part of that human event, as it continues.
………….
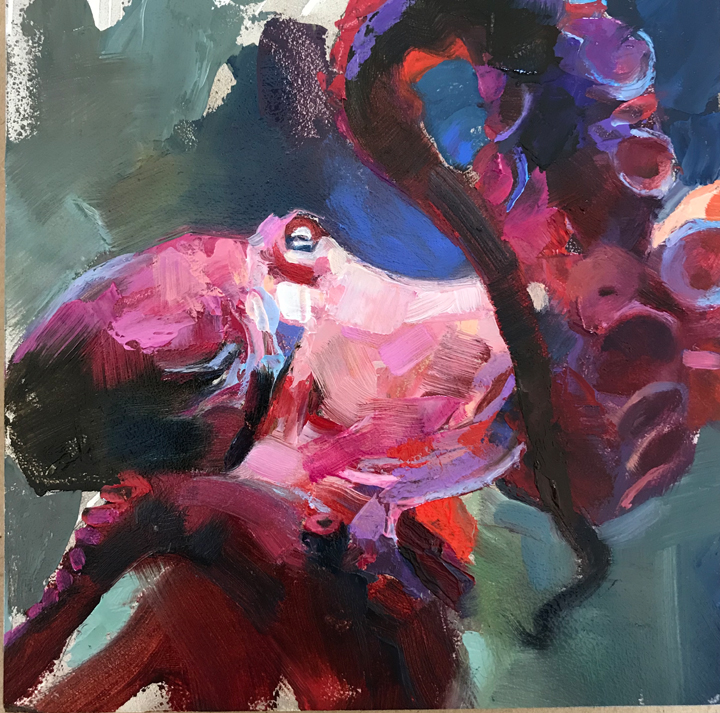
The next post will be about studying paint mixtures, with some basic recipes for colors to identify, mix, and record. I’ll use specific paintings of mine to show you how I achieved those mixtures. We’ll start with the octopus painting. It’s gonna get even more practical!
Thank you! Eagerly awaiting the next installment.
Such a great post, as always, thanks.
Excellent! Thanks, Gregory! Sharing!
Thank you for sharing your vast painting wisdom with us Greg, it’s always appreciated! 🙂
Holy f@#k, Greg.
Thank you, Greg. This was amazing.
I used to struggle teaching color in class. I can’t put my finger on why, but it felt so overwhelming to me and my students. It wasn’t till I tossed out the color wheel and focused on terms -hue, chroma, and temperature (value had it’s own lecture)- and color harmony did the dialogue move smoothly and comprehend able.
Thank you so much Greg, simply awesome.
Love it!!
This is sooo interesting, Greg.. What a pity I’m painting in watercolor …
SR Risk Management Private Investigator certified in various types of private investigation in Malaysia like matrimonial, infidelity, matrimony detective.