I believe I began describing this process in a previous post but I have a project that I am working on that involves this procedure so I thought I would further explain the process with much clearer examples.
I do a lot of fantasy art and one of my favorite things to do is find a reference angle that seems impossible to get to. These days with drones and GoPros there are no more “impossible” angles, but I still reach for them in my own work when I can. Sports are intense and a good angle can make all the difference in something recorded versus in the middle of the action. This example is an “extreme” sports like image and I chose a what I will now call “drone” angle for the shot to show what he is clearing below.
While I can’t show you the entire image now, and I will get into why later, I am going to show you the process I go through with figure invention. Having studied the figure a little, and teaching many forms of figure drawing I have learned that memorizing the tools allows you to work straight from your head if you have been taking in reference material you need that is similar to or related to your subject. And if you practice memorization enough then you will end up with something similar to a photographic memory.
In addition to invention I like to add stylization to the entertainment art I make. Stylizing is stepping a few degrees away from realistic and injecting design aesthetics into the rules of realism to create something cartoony, unique, ethnic, angular, fractured, ________, you fill in the desired aesthetic tweak to the art. The two together can equal fun but also frustration when you really don’t have the reference to help fix a problem that has no yet defined solution.
I am working on a project that involves science fiction and extreme sports. It is really exciting because it involves many of my favorite things in life. The images I am developing have to stretch the truth a few degrees, and I want to find progressive angles that help tell the “extreme” side of the story. Here is a process I go through when searching for a unique angle for my illustration.
1. Define an idea.
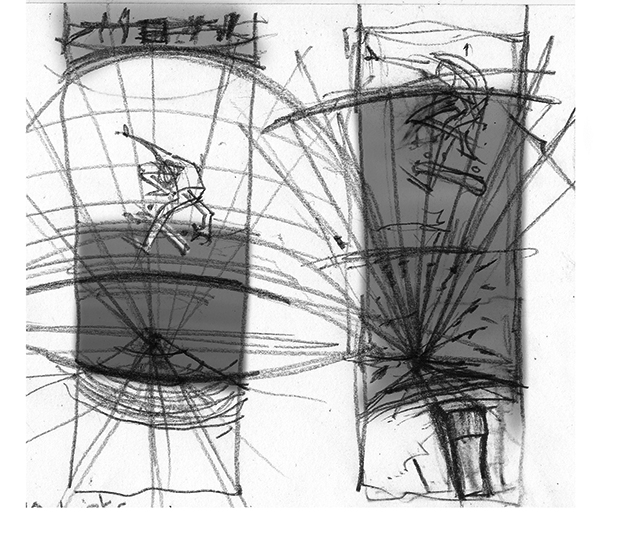
Here I have two two thumbnails of an idea of a character doing a massive ollie over a roof gap x10. Not only do I have him ollie it, I also have him doing a 720 Lazer flip. (Sorry for the skate lingo) My first poses are drastically off but more stylized than I end up with. I will go back and explore the more stylized choices but the aesthetic of the story is sorta Norman Rockwell meets animation, therefore extremely animated poses are not quite what I need here.
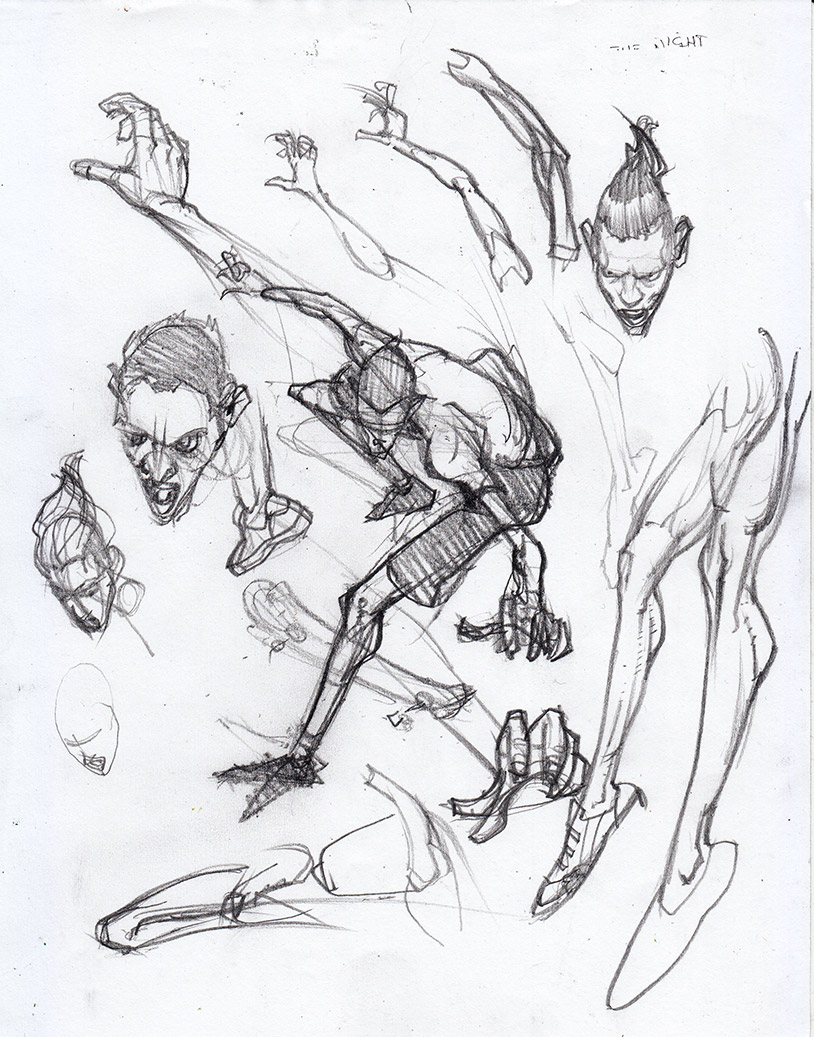
After trying a version of the pose and having a time looking at legs, feet, hands, heads, etc. it is time to get real about the pose. While there are cool things going on in these sketches it is clearly not the pose I need to make this read the way it should. So I look up reference.
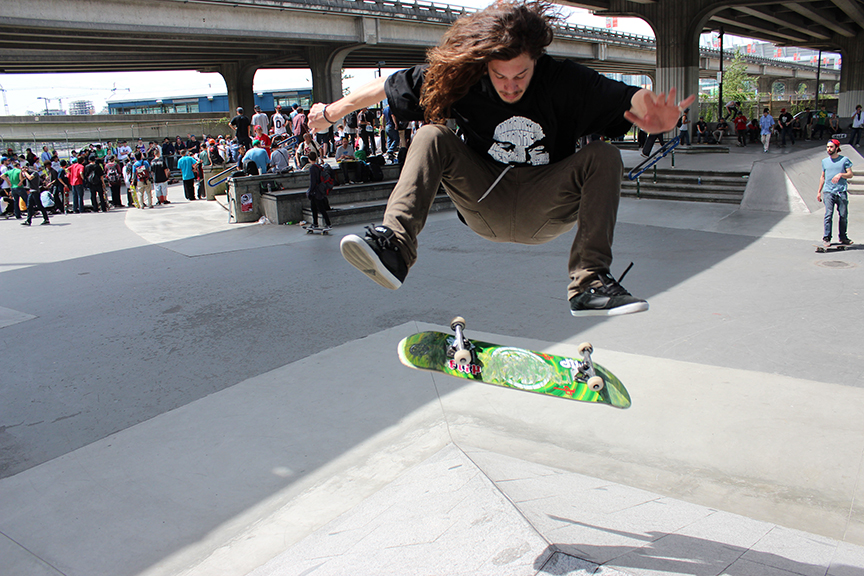
I found this image on a blog somewhere, I do apologize for not remembering the exact place I found it or the photographer. I am looking for something heel flip like, but since my character is jumping a large gap, he needs to be in a stalled position for a few seconds longer than a normal flip trick. So i am looking for something standard to get a good stall pose established, but looking for the feet to be in a heel flip position.
2. Now that I have some inspiring reference I have to change it to fit my camera angle. So the first thing I do is copy the reference to learn as much about the mechanics of the pose as I can. I look at elevations of shapes and I look at perspective of the forms.
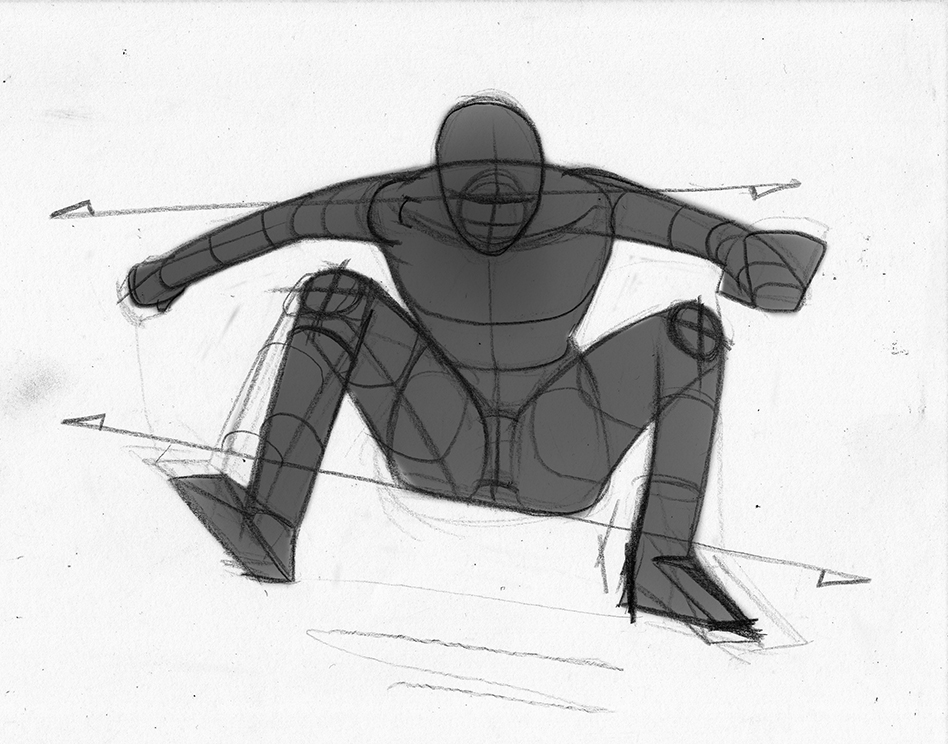
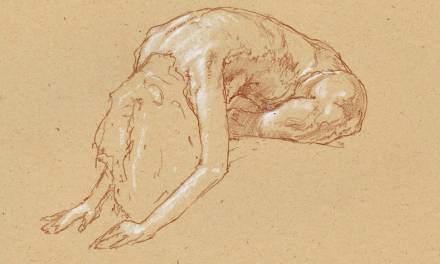
The next drawing I do is an orthographic drawing of the pose. This helps me turn the pose in my head for the first time and attempt to keep the weight and balance as accurate as I can. Here I have done a side profile of the pose to help me see it at the angle I am painting the picture from relatively speaking.
3. I have several ways of explaining stage projection, but I think this method graphically is the simplest to understand. You have a stage inside your head that you project objects, scenes, etc. onto and you have total control over this stage. The stage can be rotated in any direction, but in this example I show that I am taking my orthographic drawing and I am projecting it into a cube and rotating the cube in space. This cube represents the fictitious stage in our head and my single figure is just an example of how to project it and move it to the desired angle for the picture.

It requires practice, but with a good understanding of perspective, figure drawing, anatomy, composition, lighting, staging and eventually color and atmosphere, you can light that stage and create stellar HD quality action that can be projected onto a canvas.
Keep in mind that I do have reference material just like this photo, but all of it is bits and pieces of the things I am going to paint and I still have to figure out how to fit them in to my illustrations.
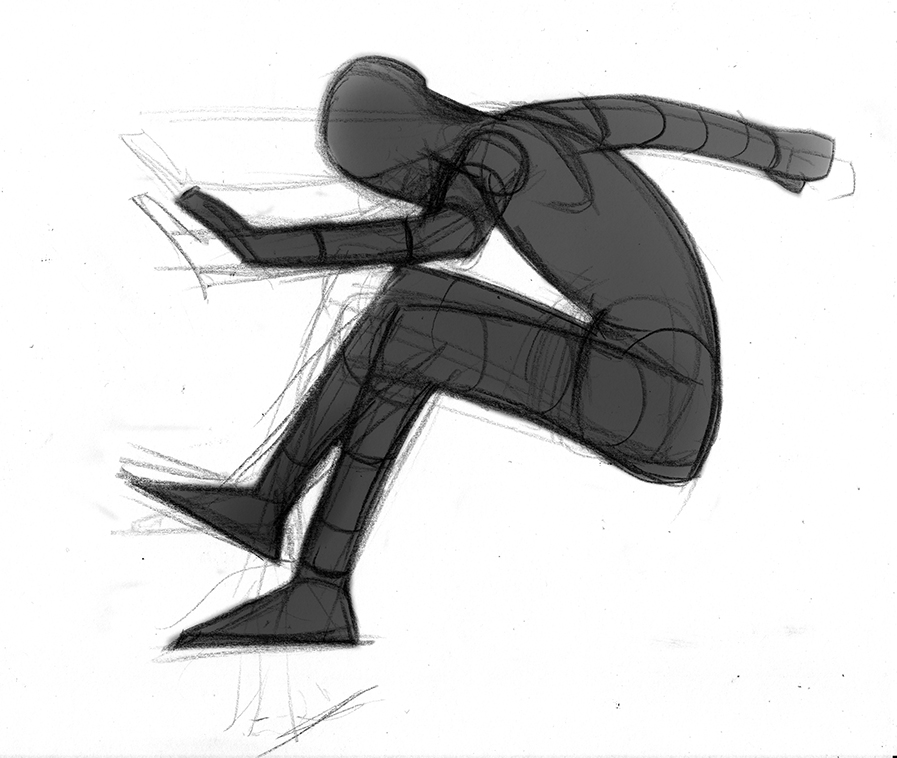
4. So now that I have a rough idea of the angle of the pose I now draw a rough “nude” cartoon of the figure to work out the mechanics of the body. This is where I start to think about the orientation of the muscles in space and how to project them into the mannequin to further enhance the illusion of a referenced or hopefully believable pose.
5. This stage can take several hours and many iterations to work out the subtle nuances of every part of the body. This mannequin had a few more slight changes to it but I did those as parts and not as a whole drawing. I changed the length of the legs, and the stretched the torso out a bit more.
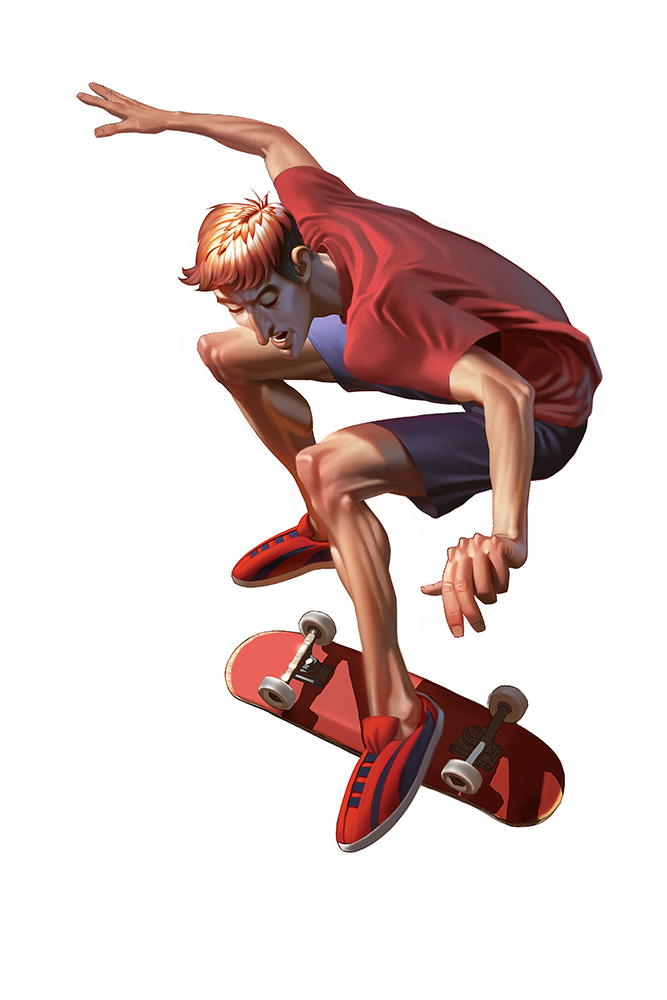
So all of this leads me to the final image which is where I have to tell my brief story. I would be finished with the entire illustration but I had a “techno-glitch” with my 3gig digital file and needless to say, the large almost completed illustration is now a 13 meg black square with red bar running along the top of it. 4 days of painting reduced to black, and not so Rothko either, just digital blackness.
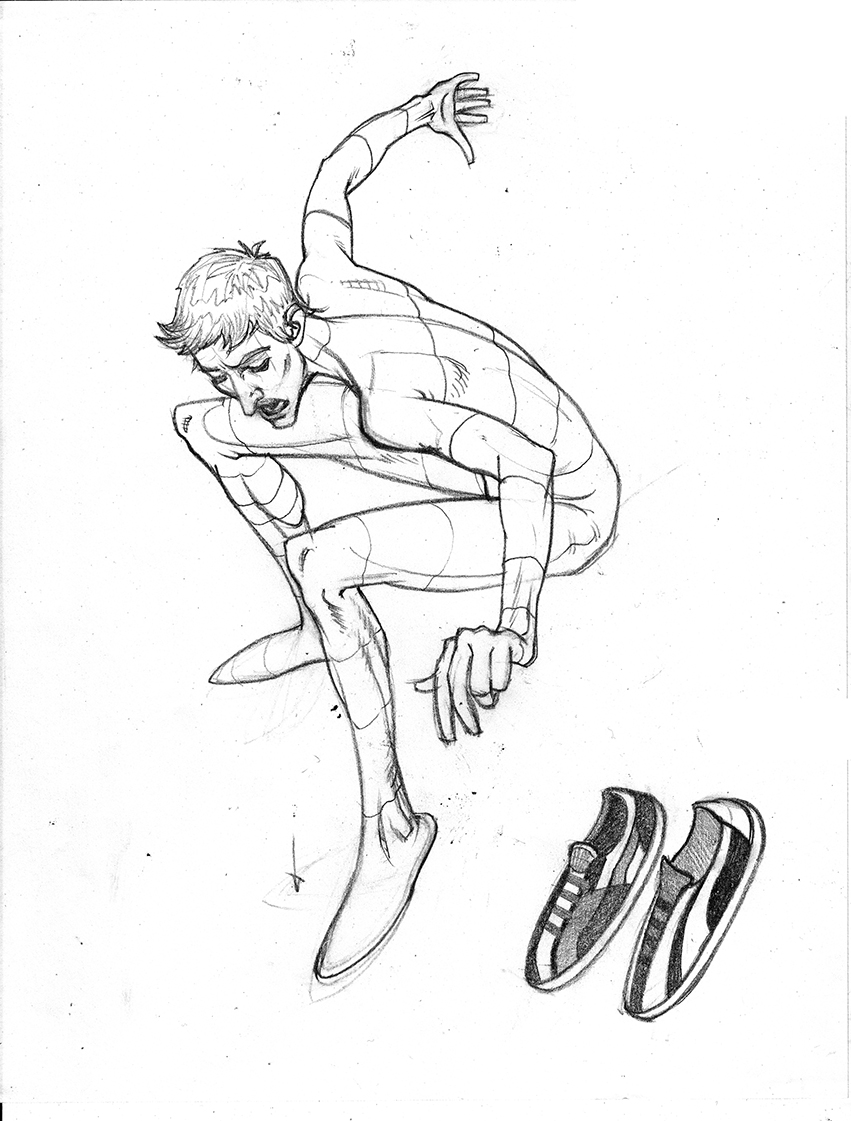
What I have here is just the pose and even with that this author, just before publishing this article decided that the pose wasn’t correct and needed more changes to it and is continuing to noodle around with the pose beyond this published article. I will publish the finished image next time I write. And more than likely this pose will have further changed from what you see here.

Nicely done, Ron! Very informative text and images.
I used to do something like that a lot, and you can find Burne Hogarth showing a similar method in some of his books. I recently started using a posable wooden figure and it's a lot better much of the time, though it won't do extreme bends.
Thanks Ron! Really nice breakdown and the images are great.
Good stuff! It's cool to see another illustrators process that has some similarities and differences to personal techniques. It's always beneficial to see this business is hard work and great illustrations don't come easy.
Nice post!! Thanks for sharing.
Dermology anti aging Serum
dermology anti aging cream
Dermology
dermology hair removal cream
dermology hair removal cream
dermology hair removal cream
dermology cellulite cream
Xtreme No
Xtremeno
hgh energizer