I hope you have all been well and good. This is a bit art schoolish but I had a few questions sent to me about shadows and any tips on the variations of tone within them.
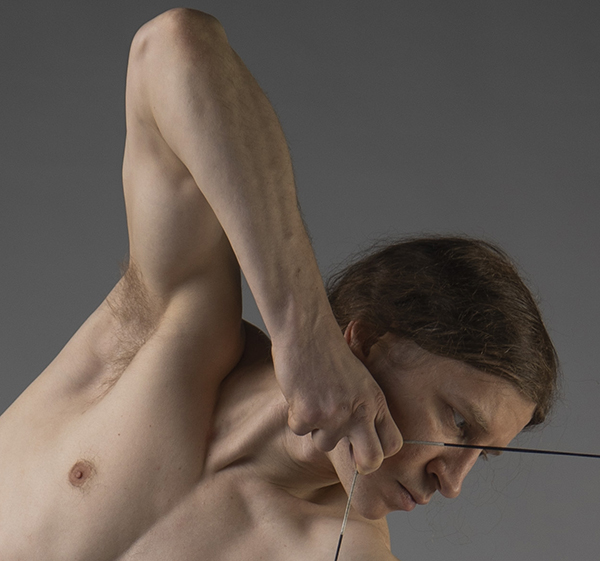
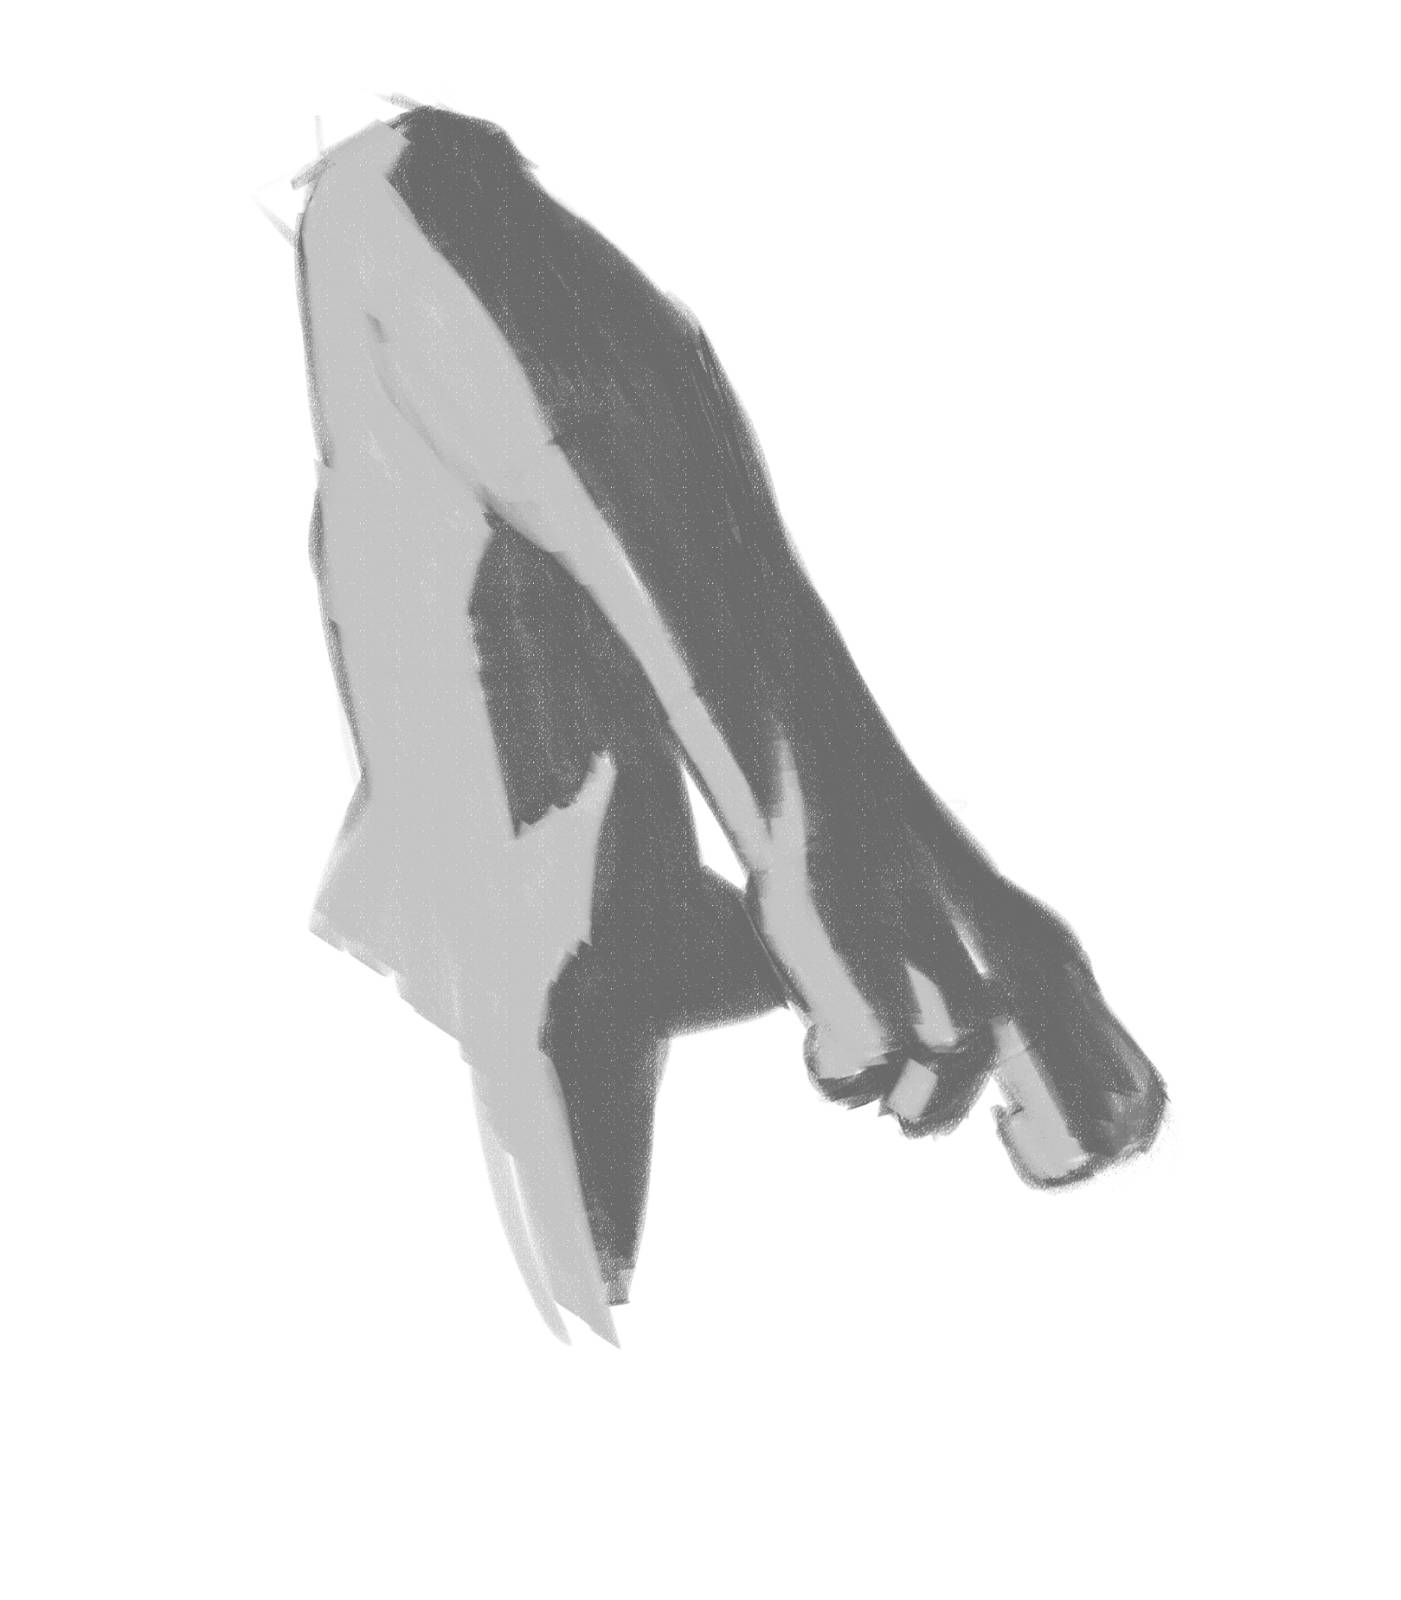
I have a quick short tutorial on the differences in form and core shadows, and how to build them up. This is the reference I am working from.
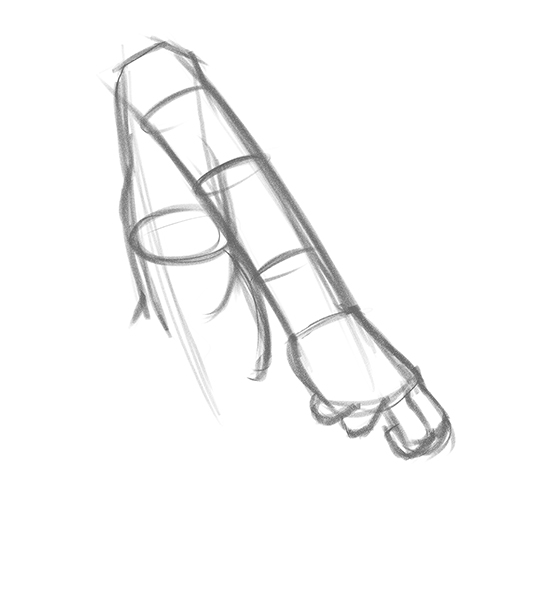
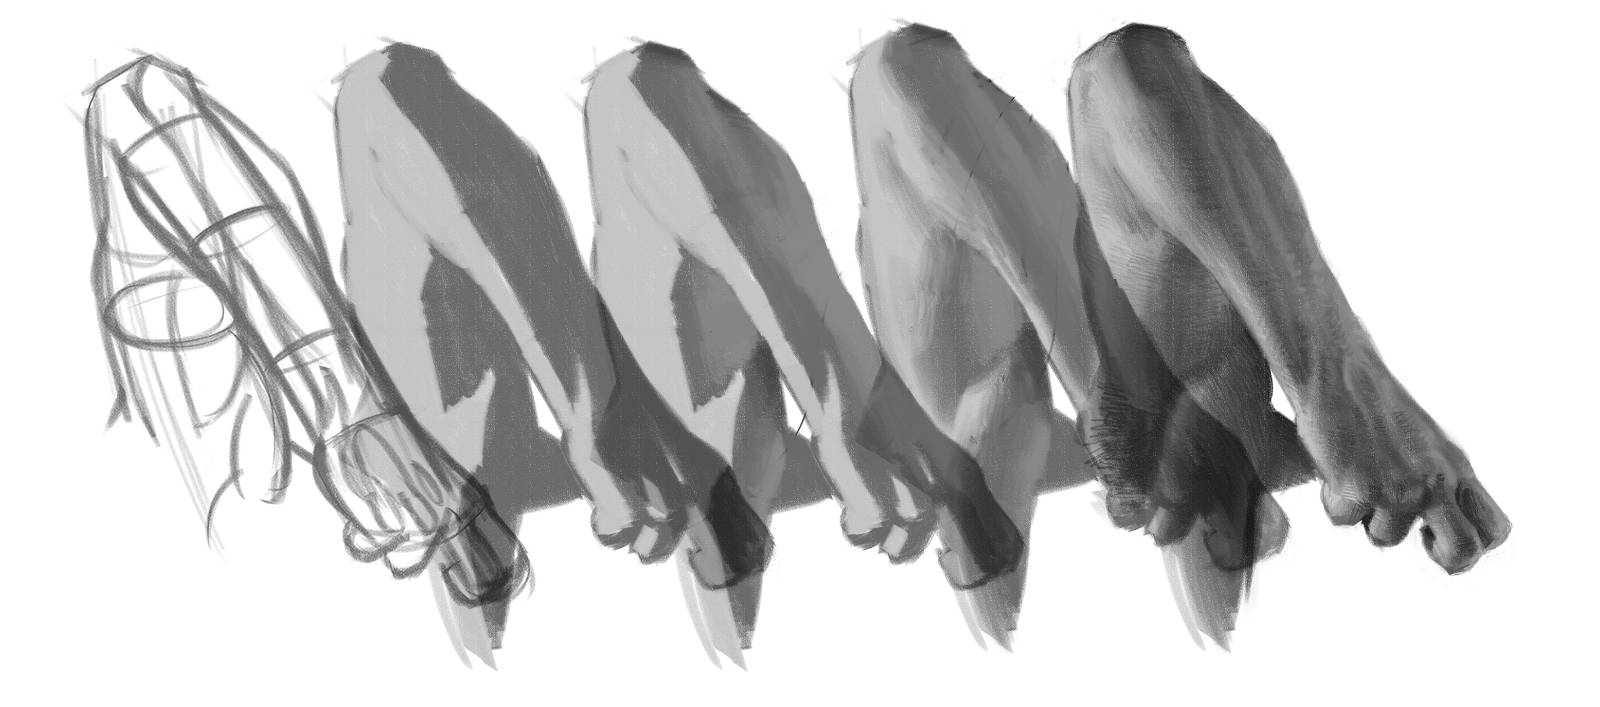
This is the armature stage, locating and containing the spaces where the bones will sit under the muscles and the skin. The ellipses are added to help generate a much stronger impression of form.
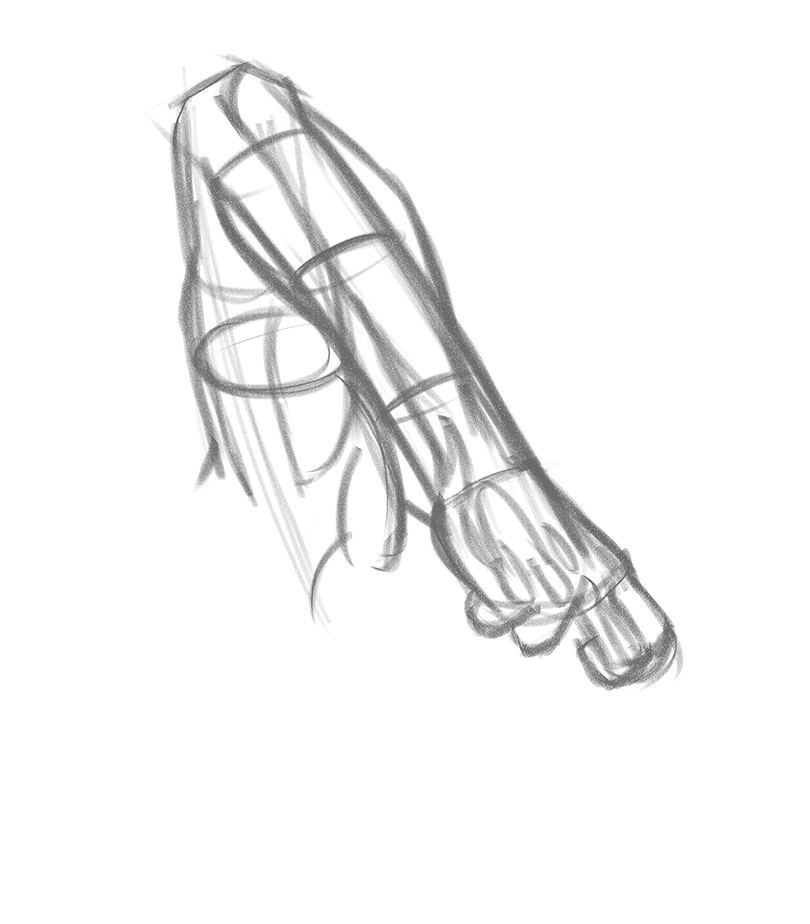
Here is a more advanced line design with the muscle forms, which are more like inflated cylinders and American football forms. The ellipses around the cylinders allow me to feel the forms that will be built up in the render. The shadows are also mapped out as circular swishes across each surface to define where the shadows will be filled. This edge is simple and clean to help with the notan measuring in the next stage(s).
This is the posterization stage also called the notan stage of the drawing. This has two different types of notan, the first is the local value, or the lightness/darkness of the subject. The second notan of measure is the shadow value, first defined in a flat value, uniform all over to measure against the local value which will give us a gauge on how strong the light source is and how much range we will have in the reflected light side of the forms. The edge that divides the shadows from the local values is called the terminator line. A clear, sharp division makes measuring that much easier to do.
Everything should remain flat when we are first learning so we can learn to read the local values, read the light, and how to control it, and learn to adjust according to hierarchy of focus and of importance.
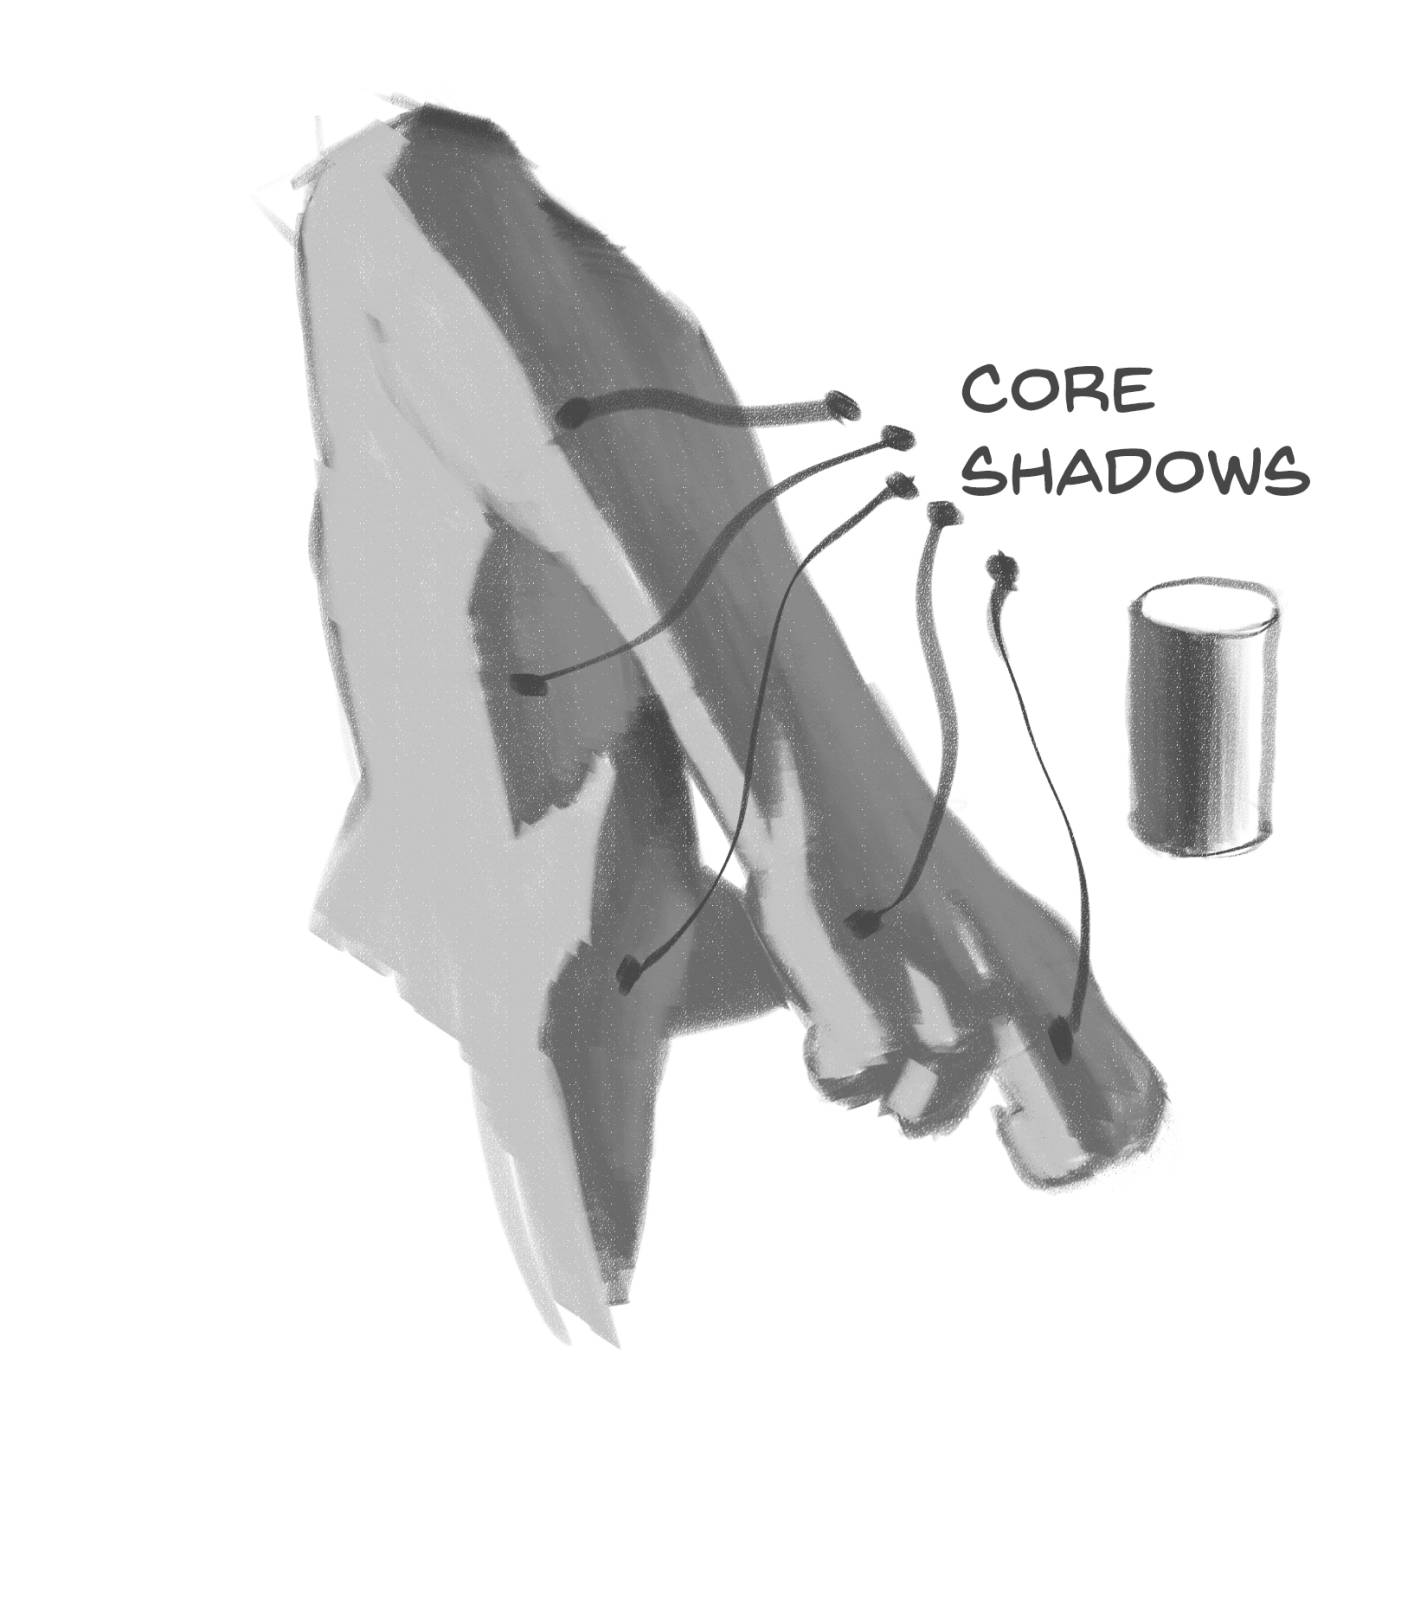
These are core shadows. Core shadows are darker planes against the terminator because the rest of the form is slightly or greatly illuminated by a surface nearby, reflecting light into the shadow side of the form. The darkness of the core is the “true” value of the shadow pattern, the rest of the form is distorted by the reflected lights.
There is no gradation on the light side of the form yet, keeping each step a simple problem to solve. The edge turning on the reflected light side is a very different gradation than the gradation on the lit side. It is not a simple continuous tone, it varies based on the topography, in this case the division between the extensors and the rotator muscles/supination group.
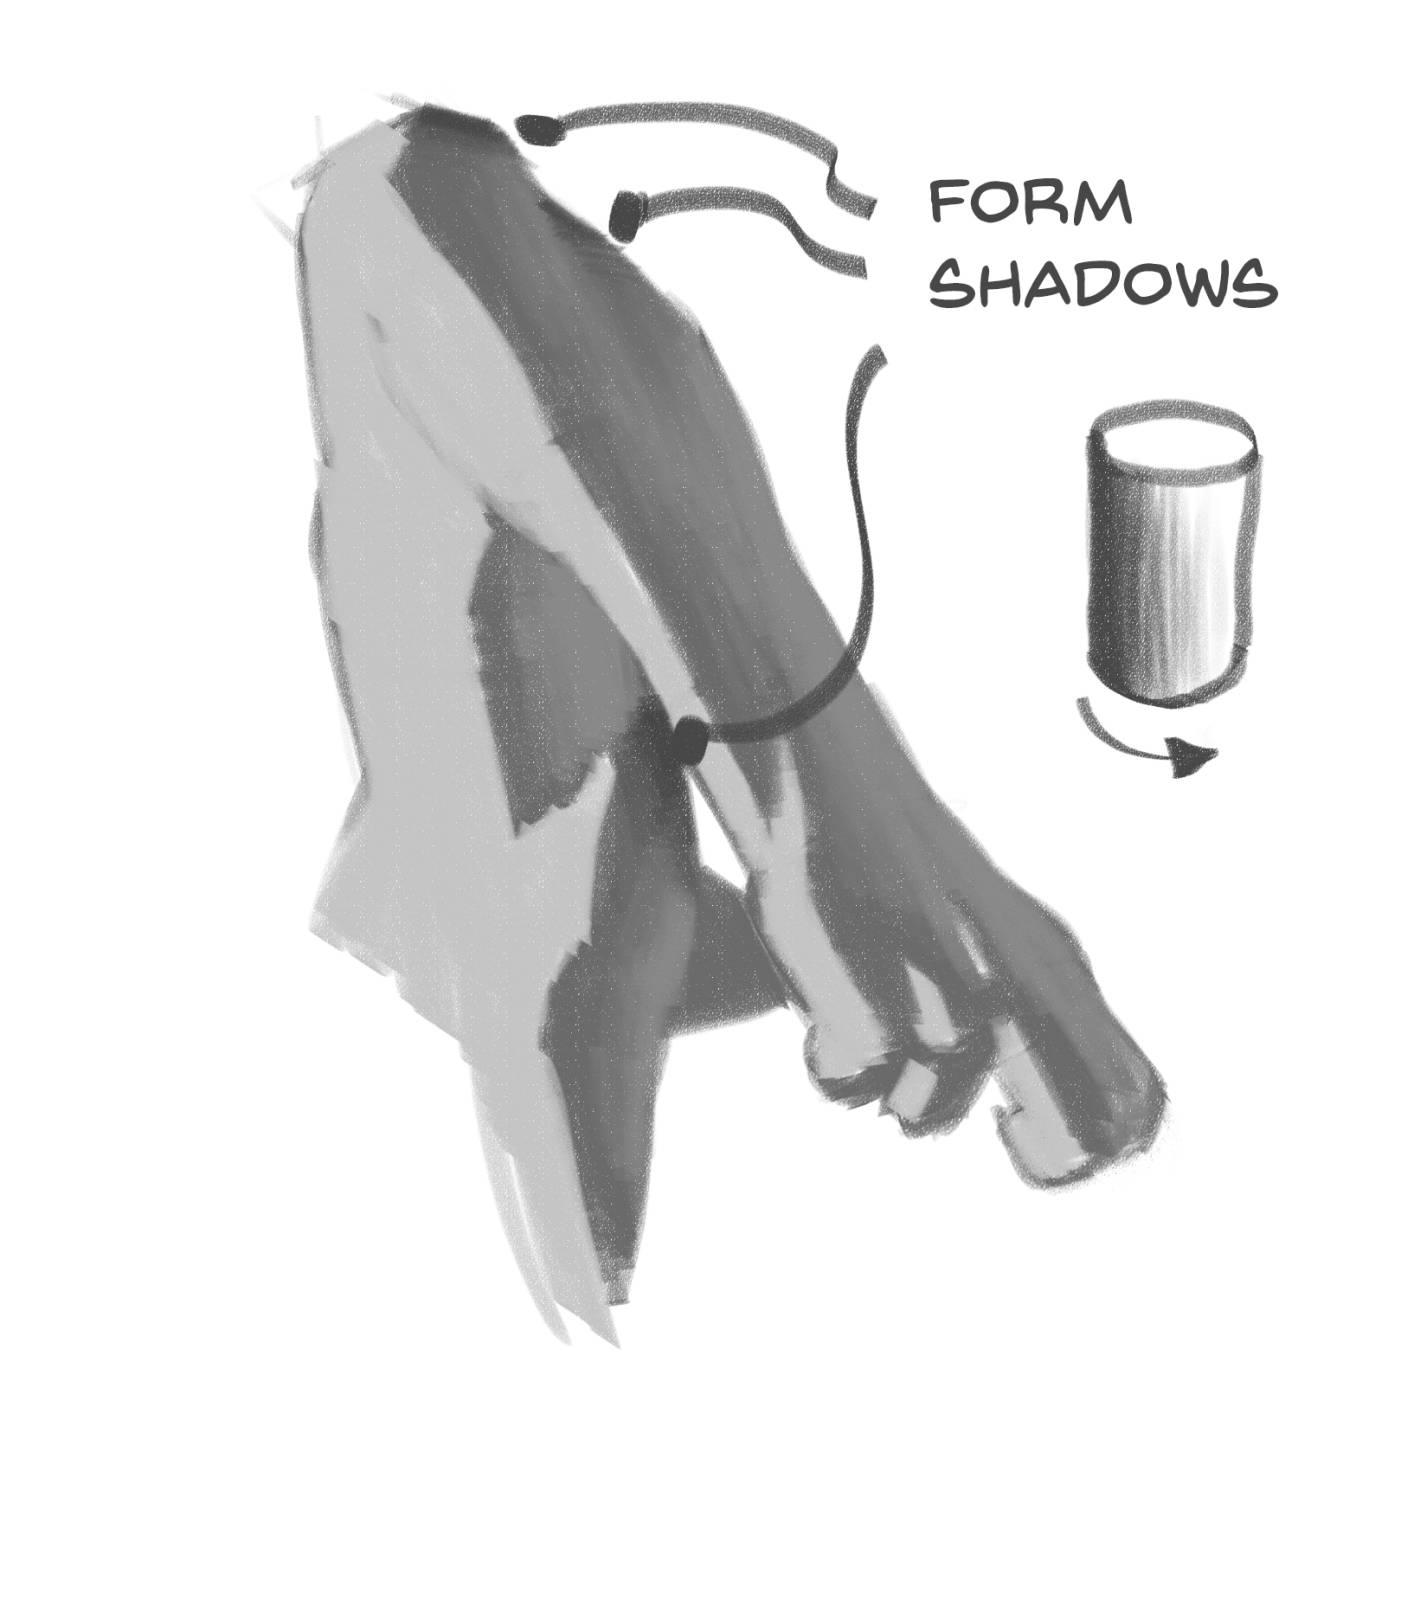
These are form shadows. They begin at the edge of the object and gradually get lighter as they travel across the form. The one on the bicep is due to the proximity of the upper and lower arm to each other and how the two halves are preventing light from traveling across the form. This area because of proximity is in shadow from the forms edge inward.
The elbow is at an angle where light is not hitting the top of it at this angle and so it is darker on the top most surfaces than what is facing towards the viewer.

This is a gradation inwards from the core shadow inward through the light side of the form. These are a continuation of the form but are lighter in value than the terminator and roll the form or sharpen the form from that edge. The volume of the core shadow changes thickness based upon it traveling over the muscle masses and then pinching down into the tendinous and bony insertions.
The core shadow is a plane that is neither lit by the direct light source, nor influenced by the reflected lights, and again is the true value of the shadow pattern without all the reflected light in the shadow side.
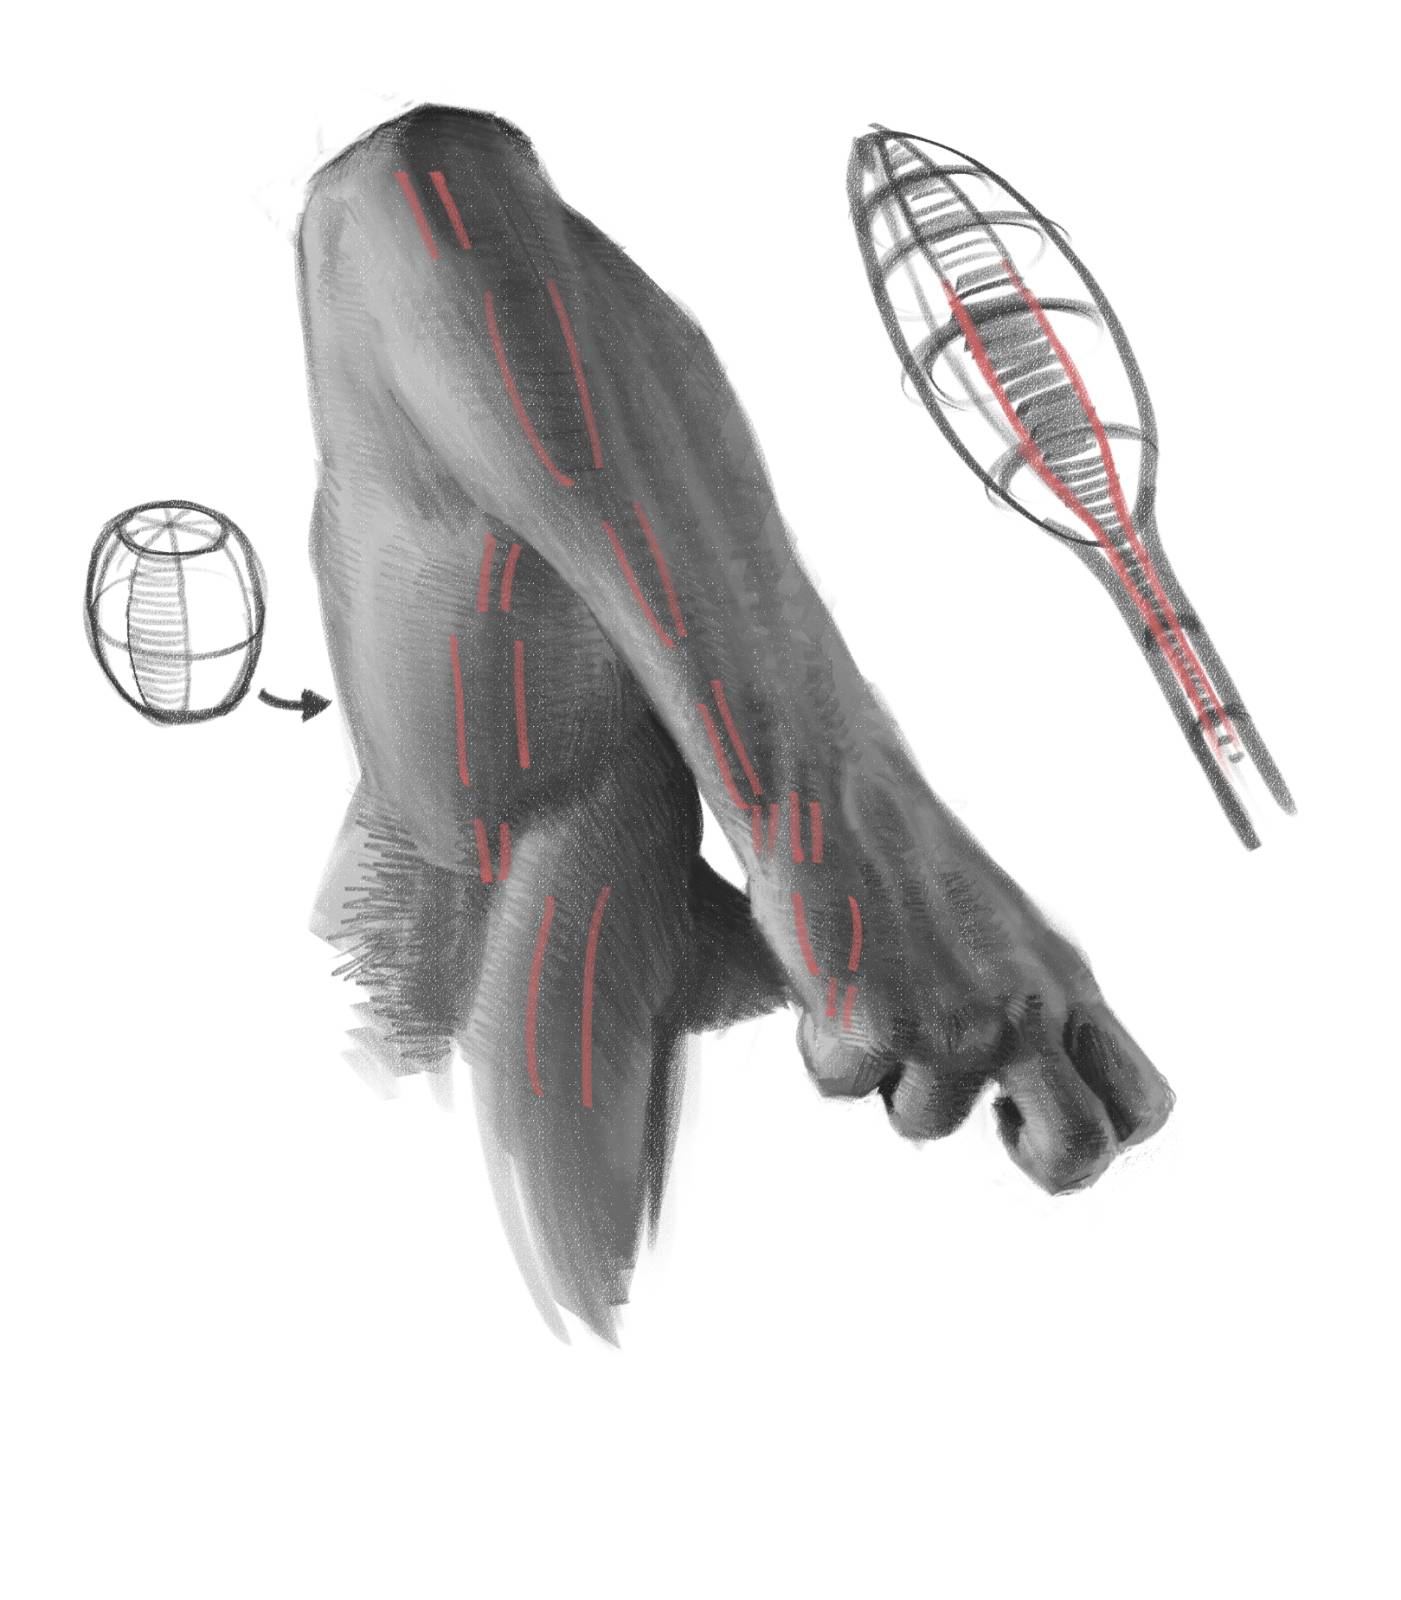
These are the changing planes of the core shadow and how they fluctuate greatly between muscle and tendon. There is a triangular scale change from each width. The zigging and zagging of scale through the muscles heads are due to the change across each new muscle in the muscle bundles. There are several muscles overlapping each other along the arms length and the light traveling over each different muscle will distort the evenness of the core shadow, not as perfect as the geometric samples above.
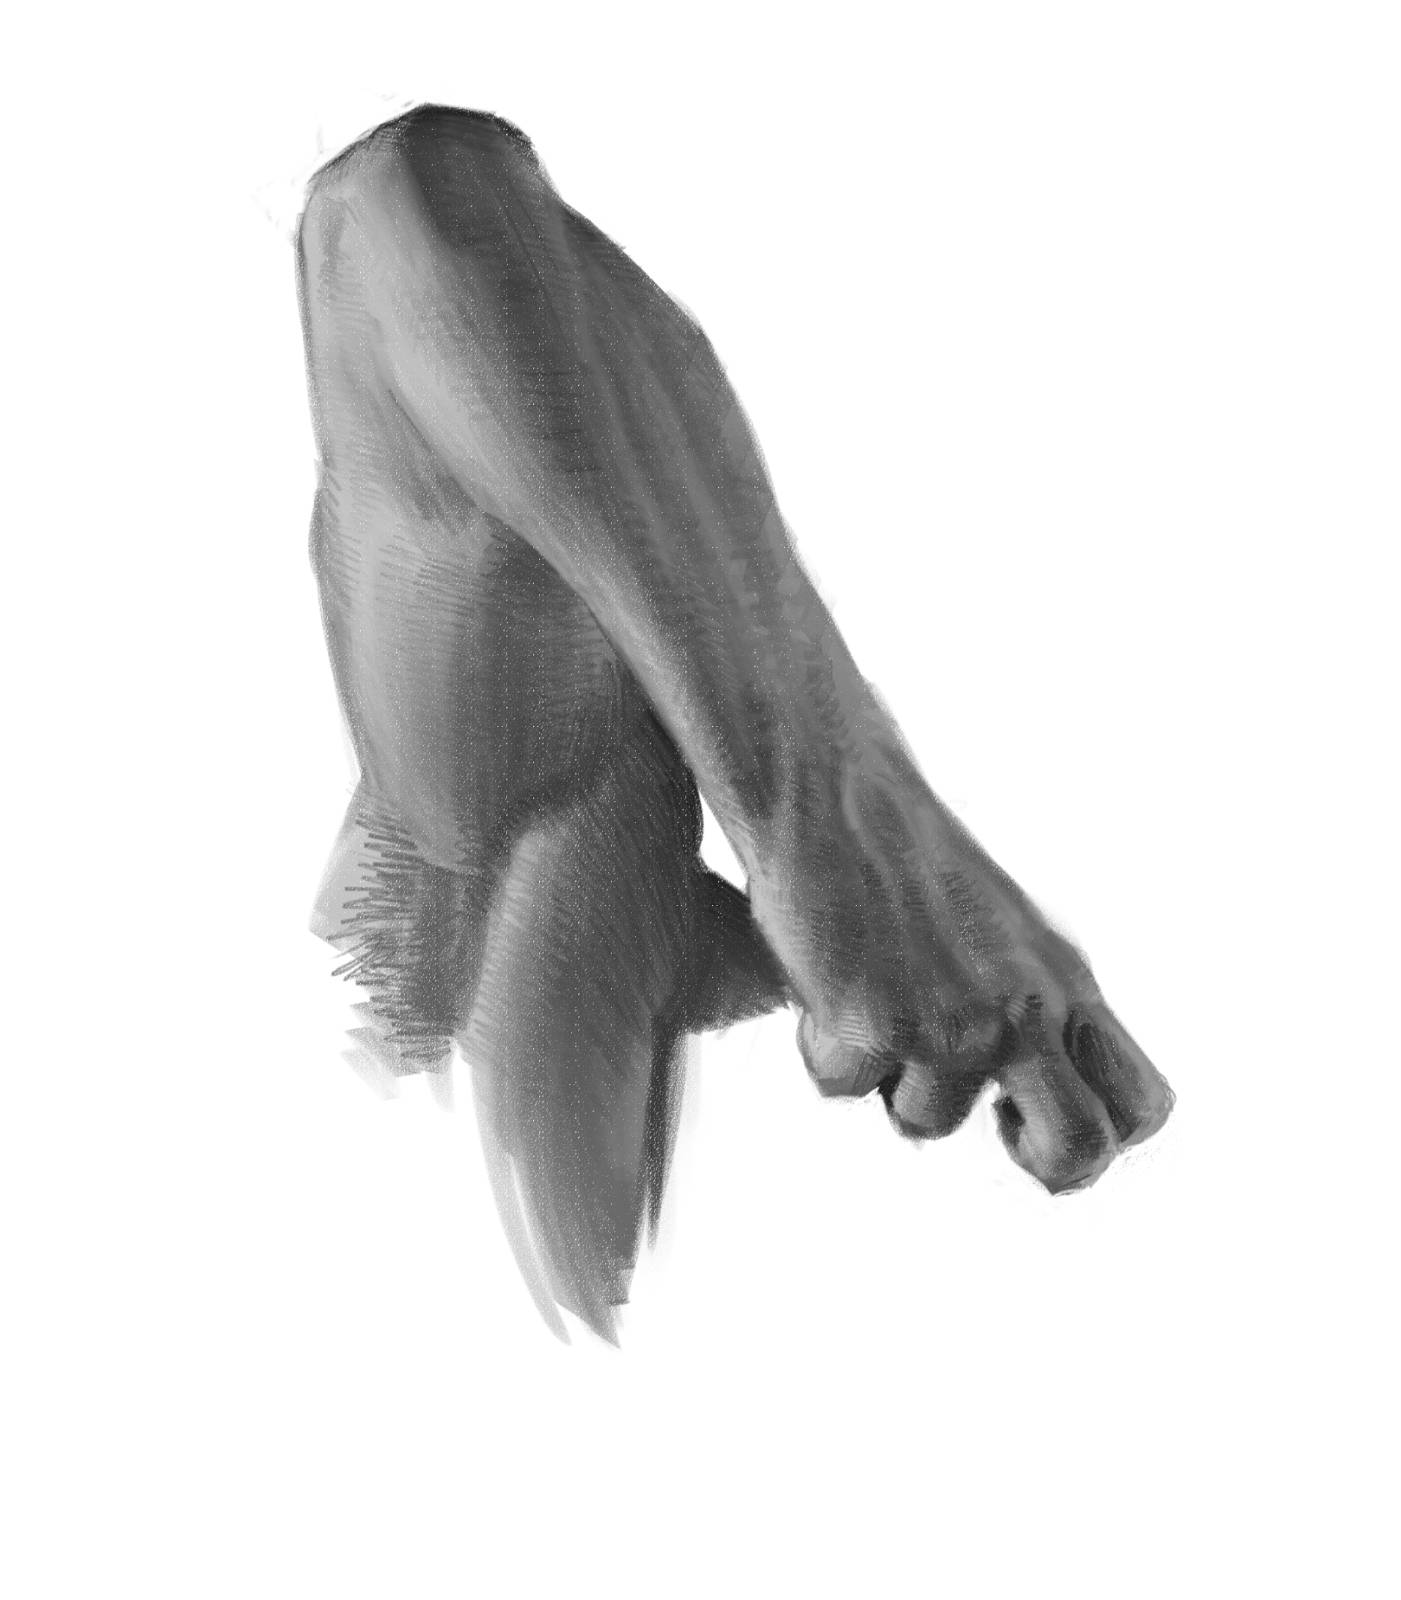
This is the final render for the time being and could be taken much much farther along if we really wanted it perfect. The process for clarifying the forms is short form hatching, traveling the lines “around” the forms to give them maximum visual thickness. The more fidelity I put into the cross hatching, the more I get the lines to blend together into each other, the more photographic the painting can feel. Fidelity of form is what takes the render time, bringing everything up as dimensionally as can be.
In this case, you can see that the gradations are not only going around the form, they are also traveling along the length of the form as well. The distance in the hatch lines helps as well as lightening up on the stylus to make more transparent strokes as I spread them out across the form. It looks complex but takes very little time if you can get the hand to move quickly stacking the lines along the planes.


Hello Ron Lemen,
I greatly appreciate your clearly illustrated article, Core and Form Shadows. I found it browsing ‘shadow, for an unrelated project to produce abstract art beginning with cast shadow.
Now I’m following Muddy Colours. You and your MC colleagues are a generous mob, as well as informative.
Best wishes, thanks heaps
Sandra
Führerschein kaufen. Wir bieten absolut alle Führerscheinklassen in Deutschland an, von Klasse A Zweirädern bis Klasse D Unterklassen für Pkw, inklusive Unterklassen B und C für Pkw und Lkw. Weitere Informationen zu den Führerscheinklassen finden Sie unter Führerschein kaufen
Führerschein Klasse B kaufen