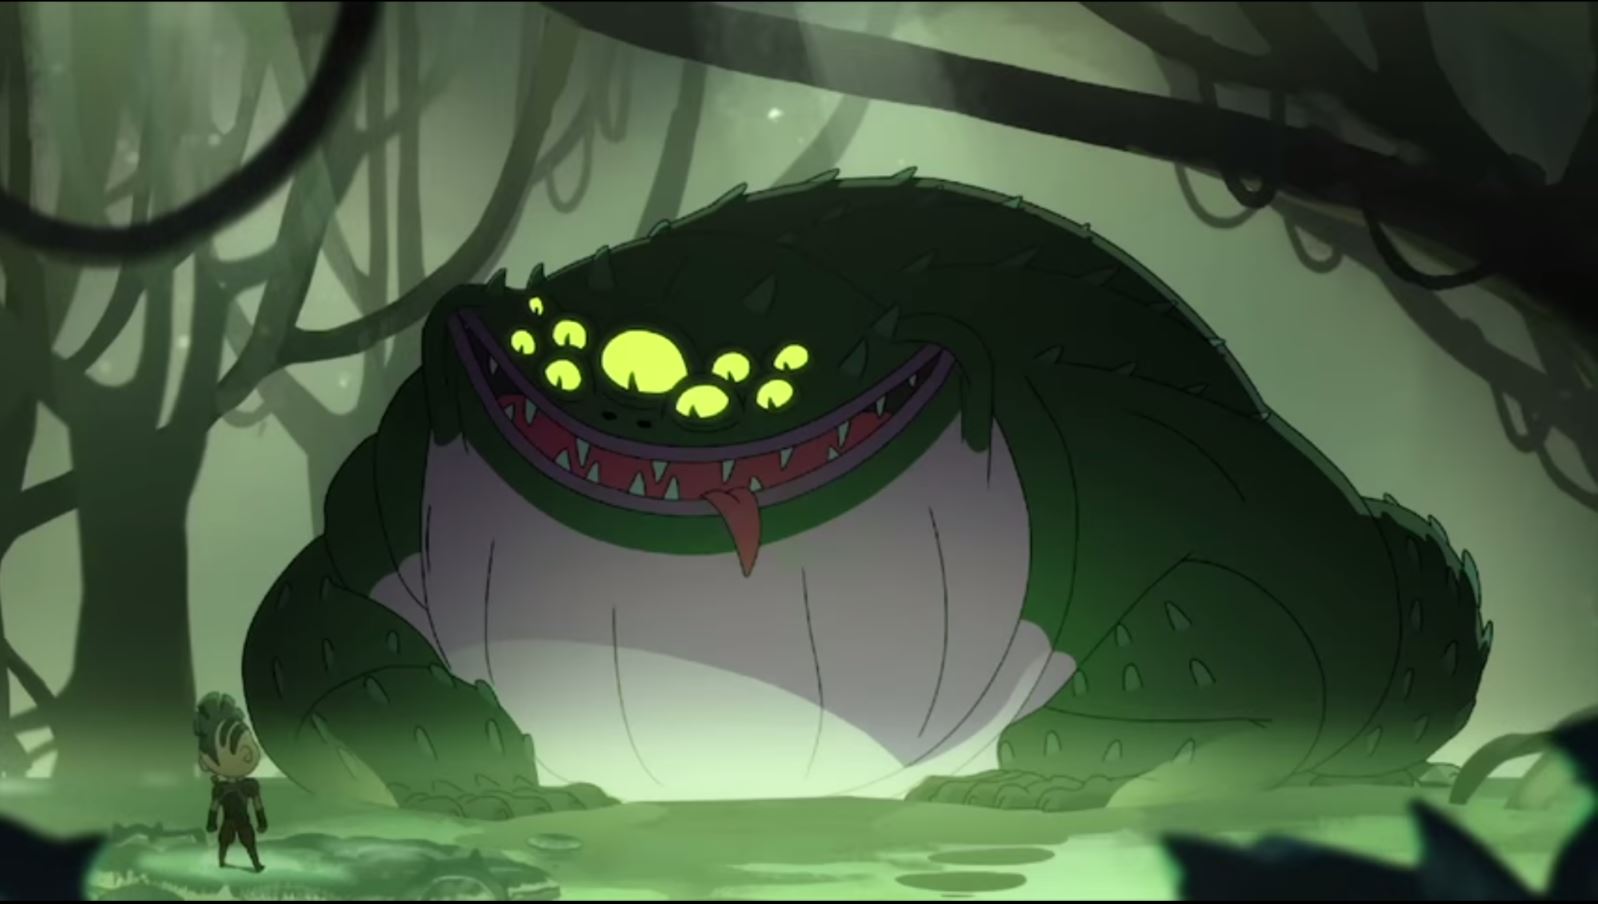
Amazon Studios have just released their 2015 pilot season. Among them is a 2d animated adventure called, “Niko and the Sword of Light”. An epic tale in which a young warrior embarks on a quest to defeat the darkness and restore light to his land. Armed with his magic sword, Niko journeys to the Cursed Volcano, making new friends and powerful foes while uncovering secrets about his mysterious past.
The pilot is based on a fully animated comic book released for the iPad back in 2013. It was a passion project created by Jim Bryson and 3 other friends from animation college, Adam Jeffcoat, Bobby Chiu, and Kei Acedera. They started with this idea ‘what if our comic books came to life’ and from that Niko was born. They then successfully pitched the idea to Amazon Studios and began work on the series at the start of 2014. They worked alongside Titmouse studios in L.A. providing character designs and creative direction on the show. Here Jim shares his specific method for animating on the pilot episode.
When we set out to make Niko, we were trying to capture the nostalgia of the 2d hand drawn films we watched as kids. There’s something about the look of 2d that goes so well with an adventure story, and we feel like people have really responded to this approach. We love the handmade aspect, we love that it’s not perfect and we all love to draw, so it really was the only way we could see making this project. A lot of the questions we tend to get from people are about the animation. Is it digital or is it 2d hand drawn animation? How long does it take? What programs do you use? Where do you get your ideas? Etc etc.
So for this article, I thought I would share the process I go through to animate one of the scenes in the pilot. But first, I should mention that although we did the animation for the app ourselves, when it came to the pilot, Titmouse Animation Studios, LA, was hired by Amazon to produce the show and we have to hand it to them for knocking it out of the park with some incredible work.
We worked with them closely on the look of the show and I would design and produce model sheets for the main characters for their animators to reference from. Partway through the production I was given the task of animating a few of the scenes with a devious giant toad called ‘The Mugwhump’. The show was being produced in Adobe Flash which was the same software we used to make the pilot and I have grown very familiar with it over the years. For animation I personally prefer the very first version of Flash when it was produced by Macromedia, called Flash MX because you can get a really tight, accurate line which feels more like hand drawn pencil. So my system is to use Flash MX for the rough animation and cleanup then to color and add FX in the newer Adobe Flash was has much more extensive tools and options.

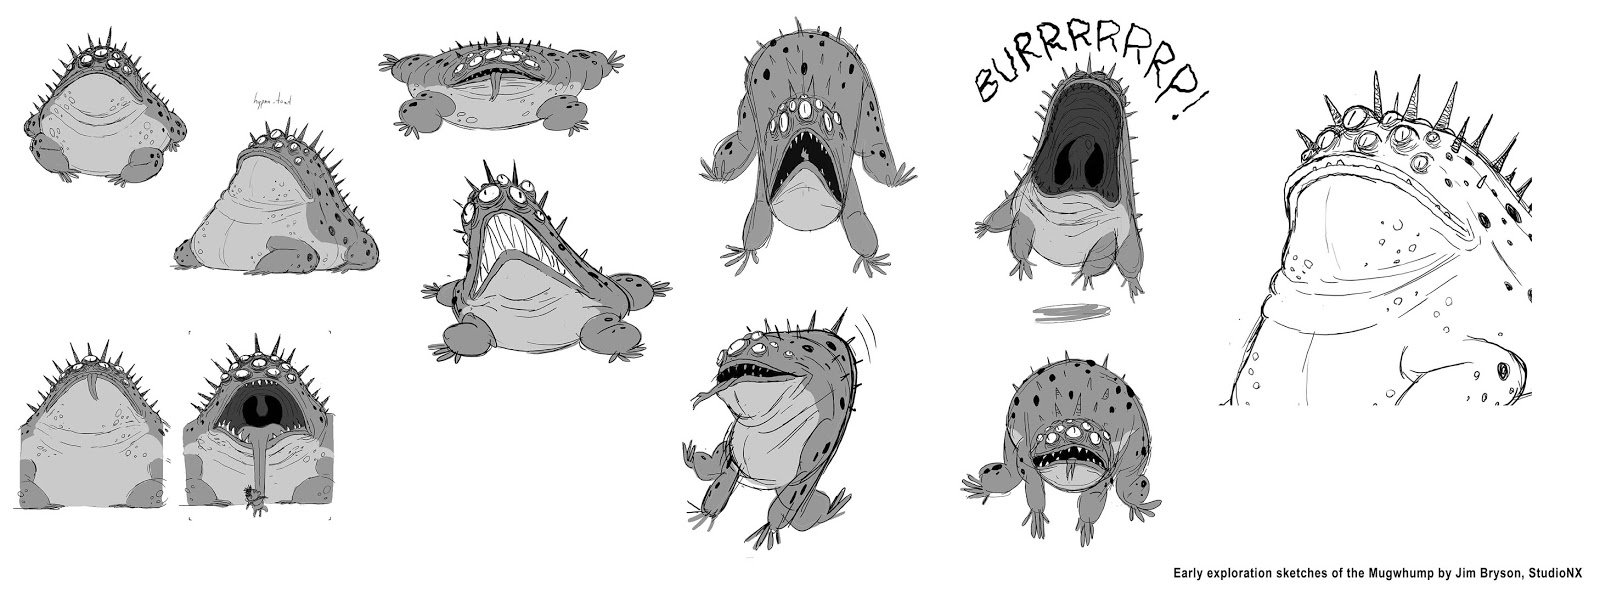
Whenever I start working on a scene, the first thing I like to do is lots and lots of drawings with old fashioned pencil and paper. In order to become familiar with his design and the way he might act I try to draw the character hundreds of times before I ever get to the computer.

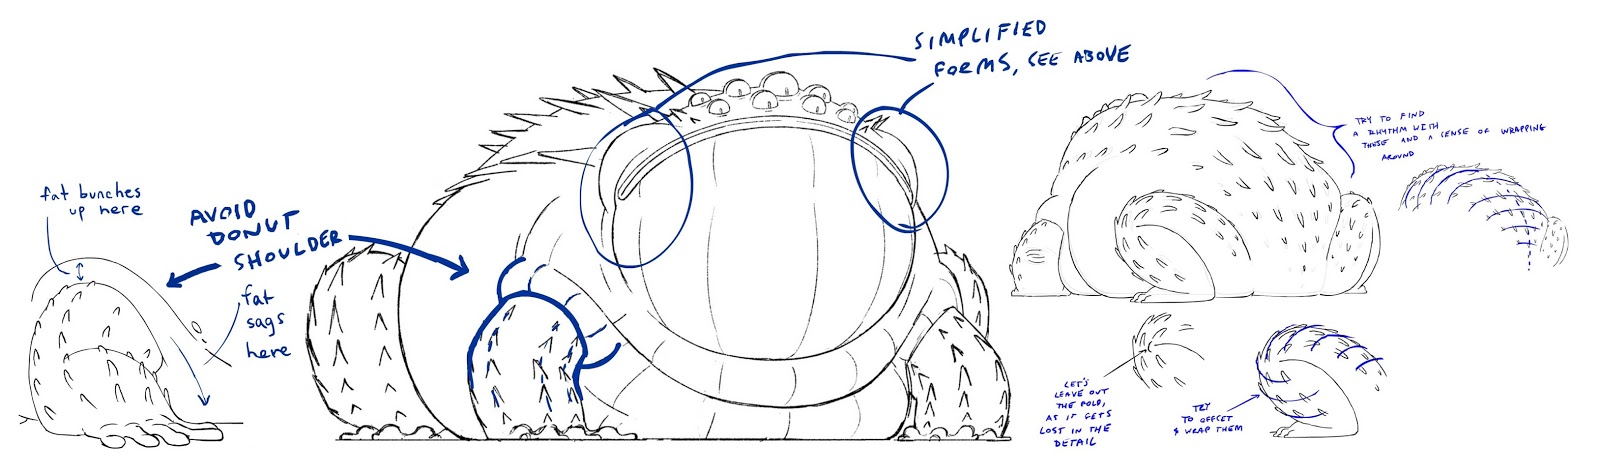
I then try to break the characters structure down and figure out how it’s built from all angles. Understanding the proportions, simple underlying forms and anatomy are all really important for me to understand the character in 3d space and draw them in a convincing way.
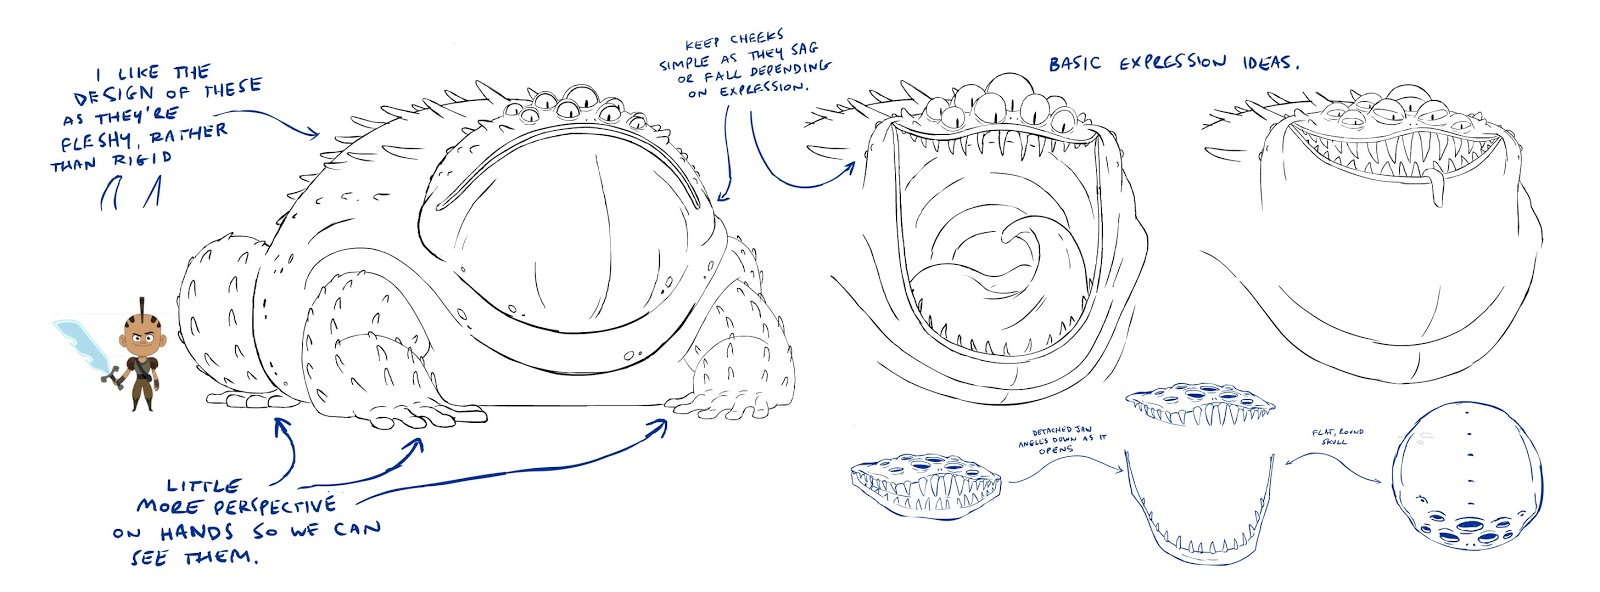
It was important with such a complicated character that the other animators working on the Mugwhump scenes were also getting all the information about how to put together the forms so I produced model sheets for them to use as well. I even wanted to understand how his skull worked so that all his eyes weren’t just floating around on his head.
By the time I sit down at my cintiq, I feel confident with exactly how I am going to draw and act the character out. The first job is to get just a few key drawings ‘right’ before doing any animation. I think the biggest mistake I’ve made with a 2d animation scene is to start putting down too many drawings. If I find myself doing this, it’s almost always because I haven’t planned it out properly and I don’t have a clear idea in my head of how the acting should play out.
In the first video, I am just focused on getting the key acting to read in as few drawings as possible. I start by drawing those specific keys on model and then add the breakdowns in more roughly until I am happy with the flow. I am not concerned about the lip-sync so much at this stage. Instead I am focused on acting with the whole body and trying to keep a handle on the forms to make sure things are moving in a convincing way.
Now I have added some breakdown drawings and dropped in some more key mouth positions for the lip-sync. A lot of animators have trouble with getting their mouth positions to read and someone once told me that it helps to treat your character like a muppet. Imagine how the puppeteer has to ‘lip-sync’ their character in real time as they are performing, and how, with just two positions, they are able to get really convincing voice acting. They only have two simple positions of open and closed, but they get all the expression by emphasizing big body gestures and downplaying the subtle stuff. At this stage I have also added some of the skin details to the key drawings and taking care that these bits don’t slide around as the larger forms are moving in space.
In this final video you can see all the in-between drawings have been added and the details have been put in last. Finally I added an FX layer for the shadows to move with his body and give him dimension. I make sure to draw these shadow layers only on the key drawings to start with, then I in-between them in the same way as his body so they move consistently with the body.
So this 11 second sequence of ‘The Mugwhump’ took approx. 7 days to animate. The next stage is for the cleanup artist to add the final line and then it goes to color and comp. Its quite a complicated character to keep on model with all those eyes and details but it’s quite satisfying to see the results of all that planning when you are you finished.


To date, I haven't been impressed with a lot of Amazon or Netflix originals. But after reading this post and having seen many things on Instagram about it, I decided to take a look. I was very impressed. It made me smile and laugh out loud several times. More importantly, I think it's promoting a lot of characteristics that don't get much attention today – like courage and perseverance through hard things. Thank you so much for putting so much heart into this project! It really shows.
The animation was great! Much better than a lot of things I see on TV now.
This was great to see. Thanks for the post.
Enjoyed very much. I loved the turtle!