Around this time last year, I was in the midst of redesigning and renovating my studio. I had always wanted to do it but put it off because of time constraints and feeling too busy to take something so monumental on. Well, then came COVID. To occupy my mind, I thought I would do a few things here and there. I told myself, “Do a small project. You can get it done in a day.” Well, you know how that goes. One thing leads to another and then I was getting my husband involved. The once small projects approach had now become a massive room renovation. I was painting the entire room, creating custom closet shelving, redesigning my easel with customized fixtures from lighting to a swiveling mahlstick, making a large palette desk that boasts a handmade palette cover and brush holder, and literally painting and faux finishing almost every object in the room. I even painted custom storage boxes! You know how it goes. Once you get started, you can’t stop! This isolation renovation included disrupting the entire studio while still managing to get work done in the chaos. I am a neat freak so this was a lot, both mentally and physically, to deal with.
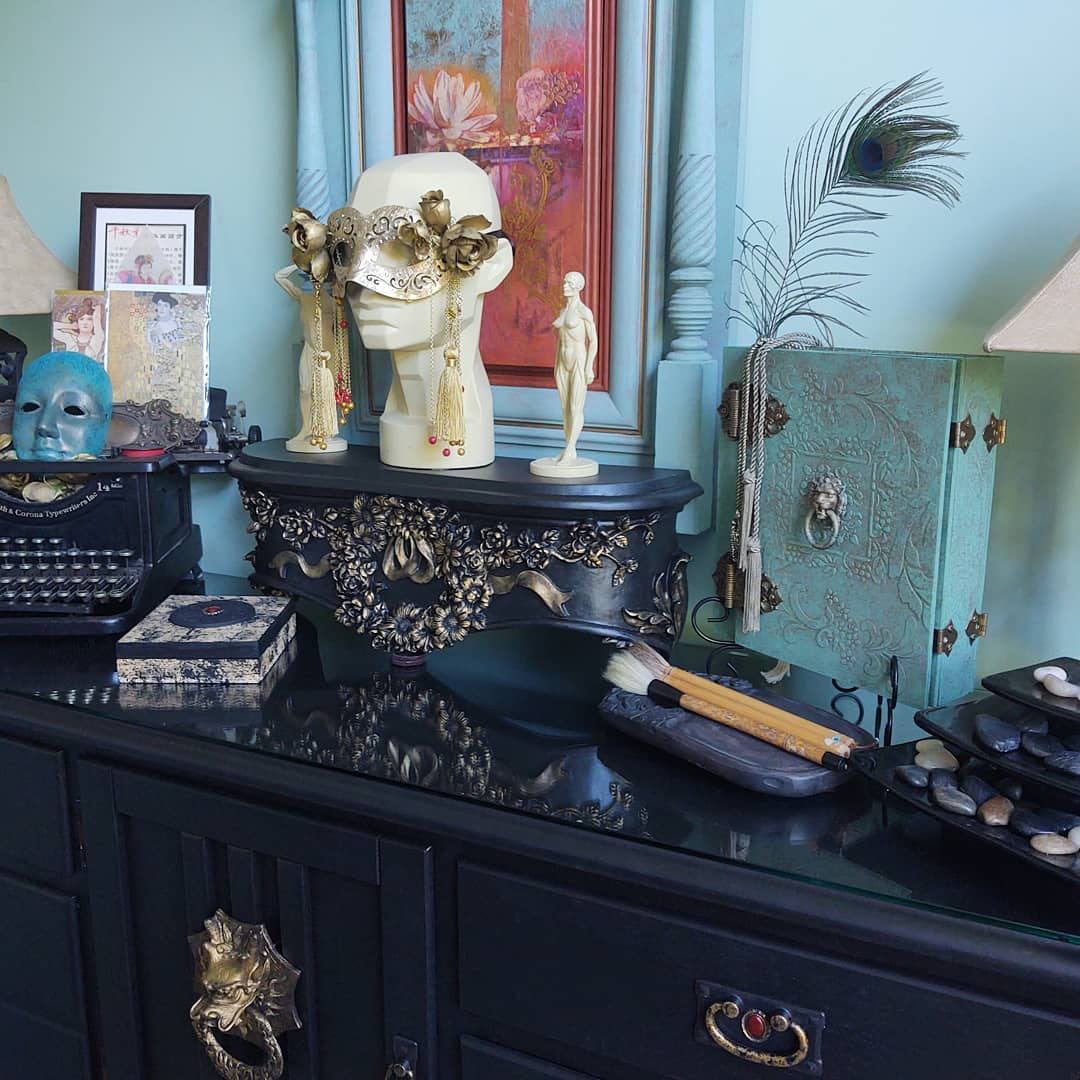
To keep the creative juices flowing, it was important that the studio be an external expression of my artistic personality. I love all things decorative! Shown is a mask I created, my portfolio, a custom decorative box I made, an antique typewriter with painted accents displayed on it, my water fountain and a Chinese inkstone with brushes.
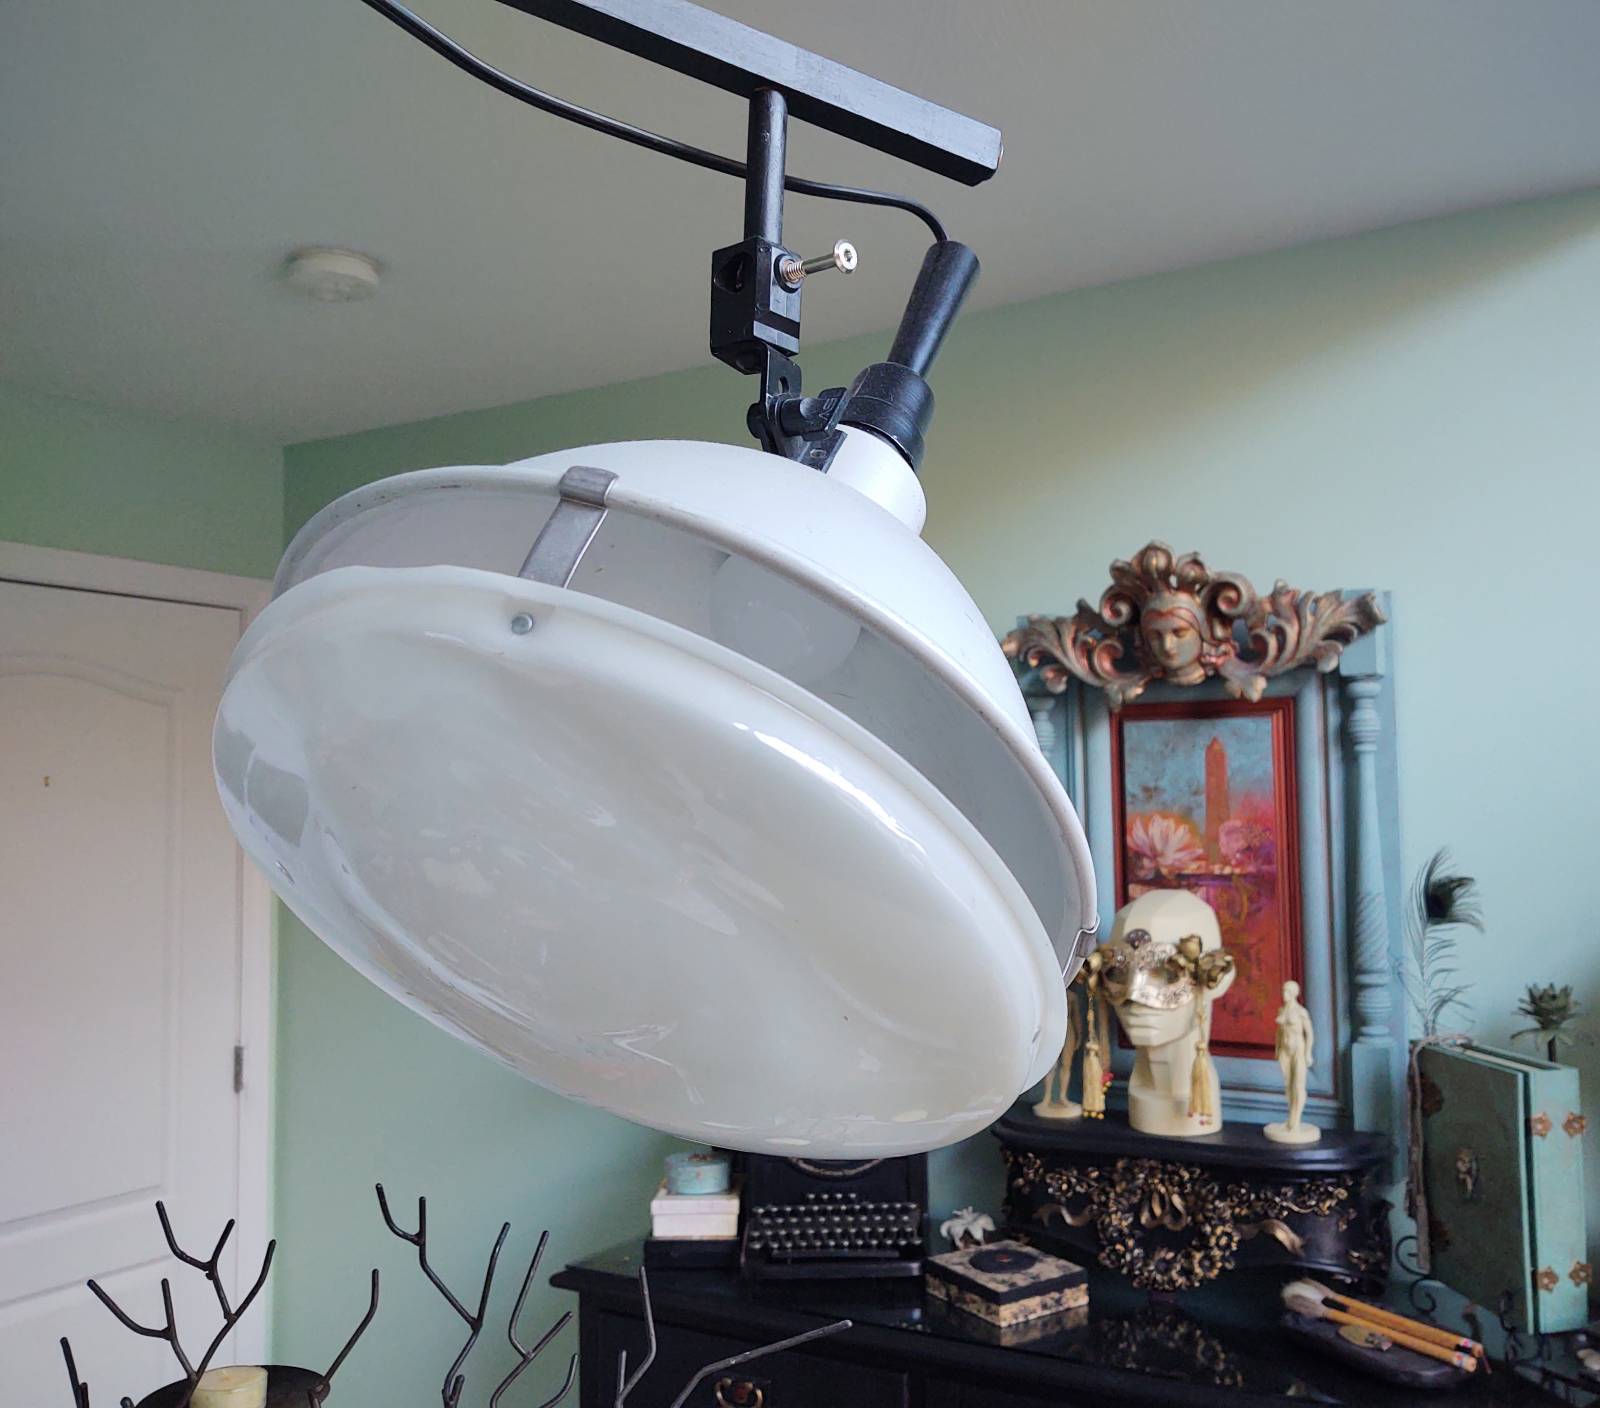
In the midst of my renovation, I was also teaching extensively online. Yep, working, teaching and renovating all at the same time! With online teaching, the redesign began to include camera setups with movable arms to make slight adjustments in viewing angles. Currently, I have two adjustable 1080 HD web cameras: one on the easel and one over my palette desk. The palette desk can also convert to a flat working area for demos that don’t need to be done on the easel. I also renovated a computer desk to sit near the easel on my left so I can see students at the same time I am lecturing or doing a demo. The computer also has its own built-in camera.
At the same time that I was starting my renovation project, I was also watching award-winning performances free online from the Metropolitan Opera in NYC. The Phantom of the Opera, which I originally saw on Broadway, inspired my studio redesign direction. I pulled out all of my NYC theatre memorabilia. What a joy it was to go down memory lane. Somehow, I felt reconnected to a city I love even when I could not physically be there. The other good thing that happened in this renovation process is that I began to get rid of things that I really did not use, need or want in my practice anymore. The purging process made room for me to put into the space the things that uplifted and inspired me. This was liberating!
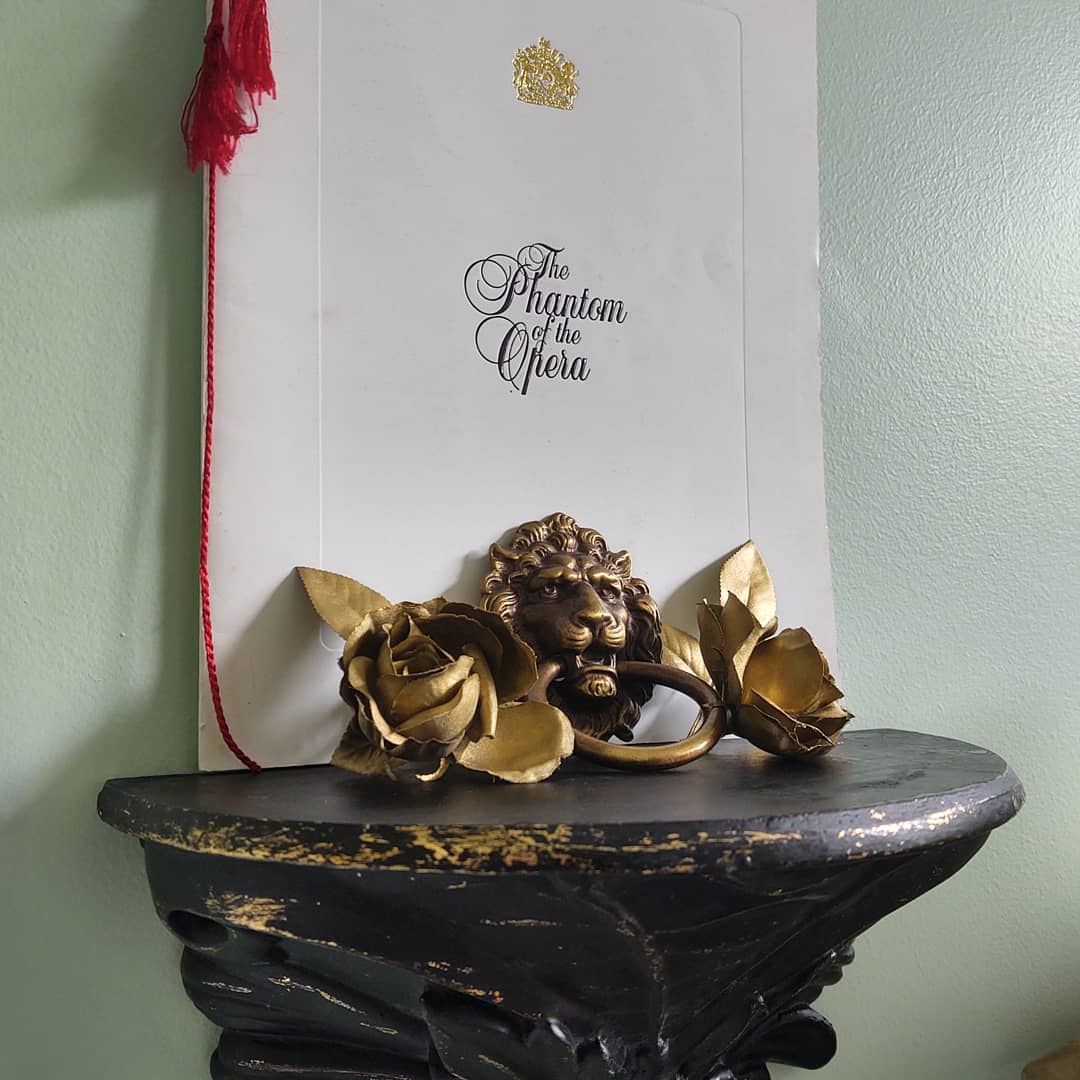
The inspiration for the renovation is proudly featured in the studio. I added a few decorative accents to tie it in with other elements in the space.
In addition to the massive studio renovation, I had also begun to contemplate on the direction of my work, developing ideas about where I wanted to go in the years to come. This purging, reevaluating and redesigning process was something I didn’t even realize how much I really needed it. Although 2020 was a complete nightmare, some positive things grew out of it. My crazy isolation renovation project ended up being the best gift that I could have ever given myself during a time where everything seemed taken away. If you are considering a studio makeover, I say do it! Don’t put things off. Some day can really be today and you are worth it! Create from the heart!
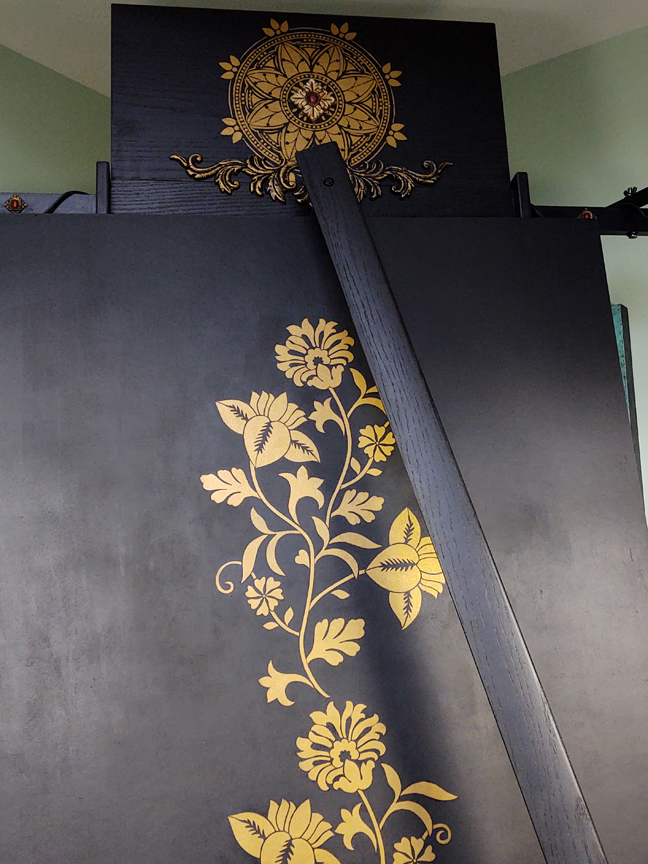
My easel is fitted with a maulstick that swivels and swings, lights that rotate and move in and out and an adjustable platform for paintings to move up and down as well as back and forth. The backboard in black with gold accents allows me to tack up inspirational images and reference shots while I am working.
To see more specifics about my studio lighting, check out a previous Muddy Colors post I did entitled Custom Studio Lighting
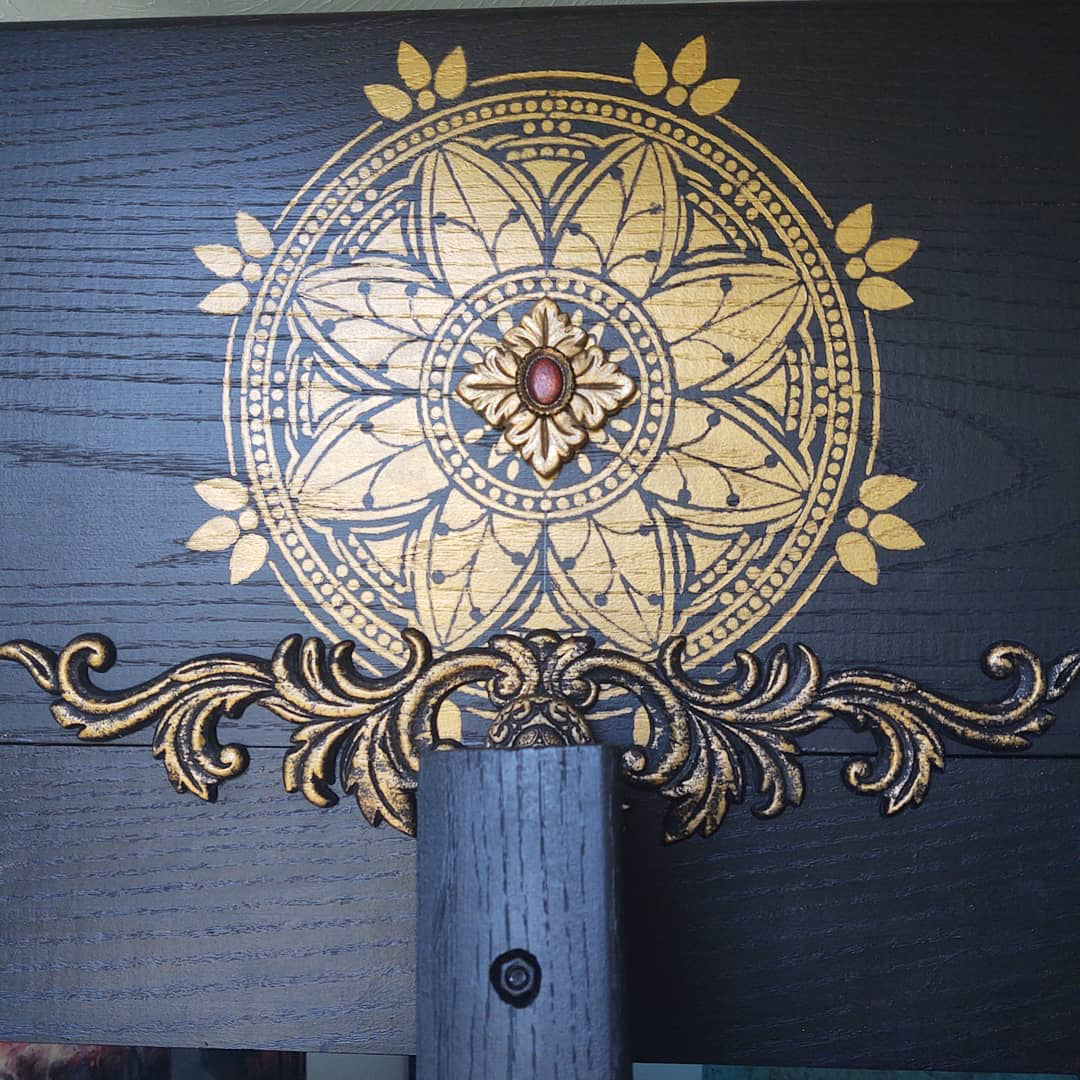
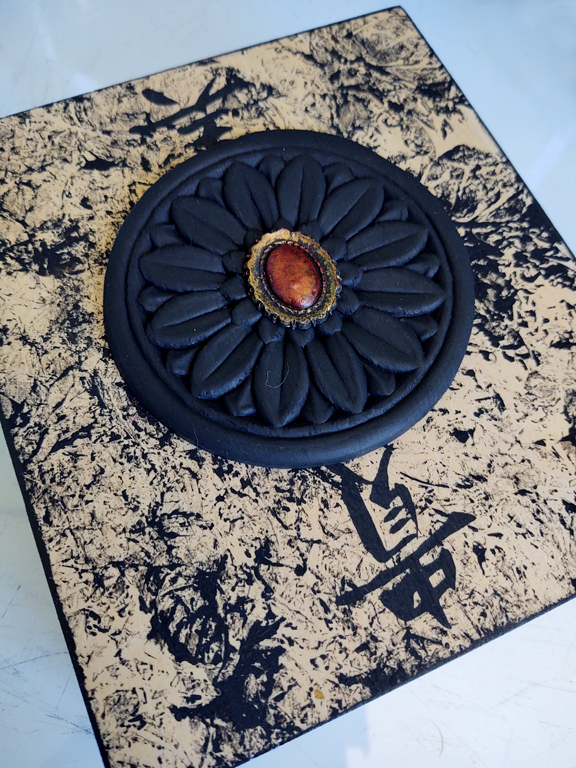
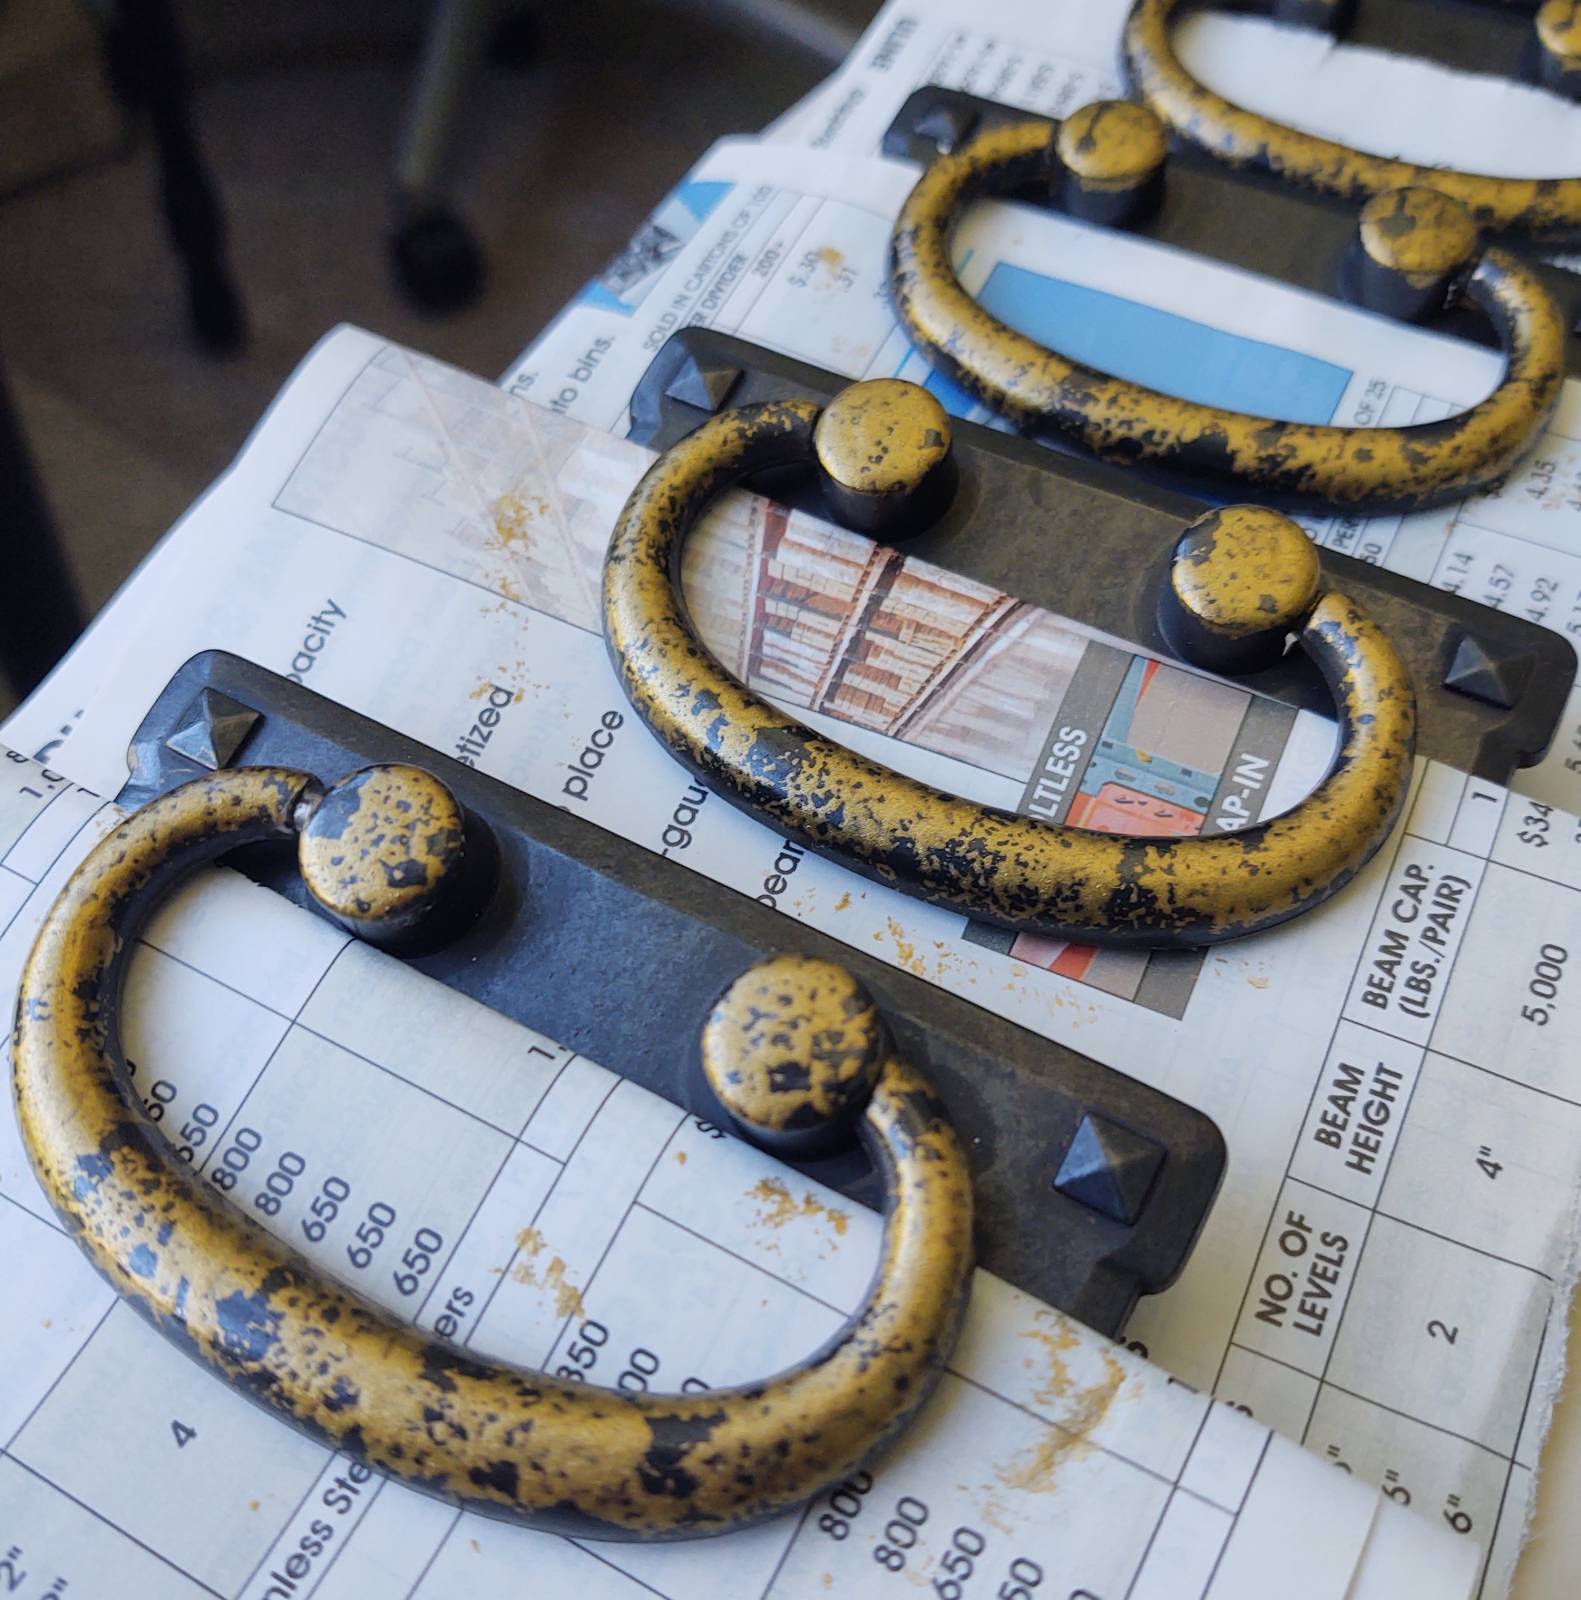
The decorative assemblage accents on the easel are hand painted. The lower circular accent was hand sculpted!
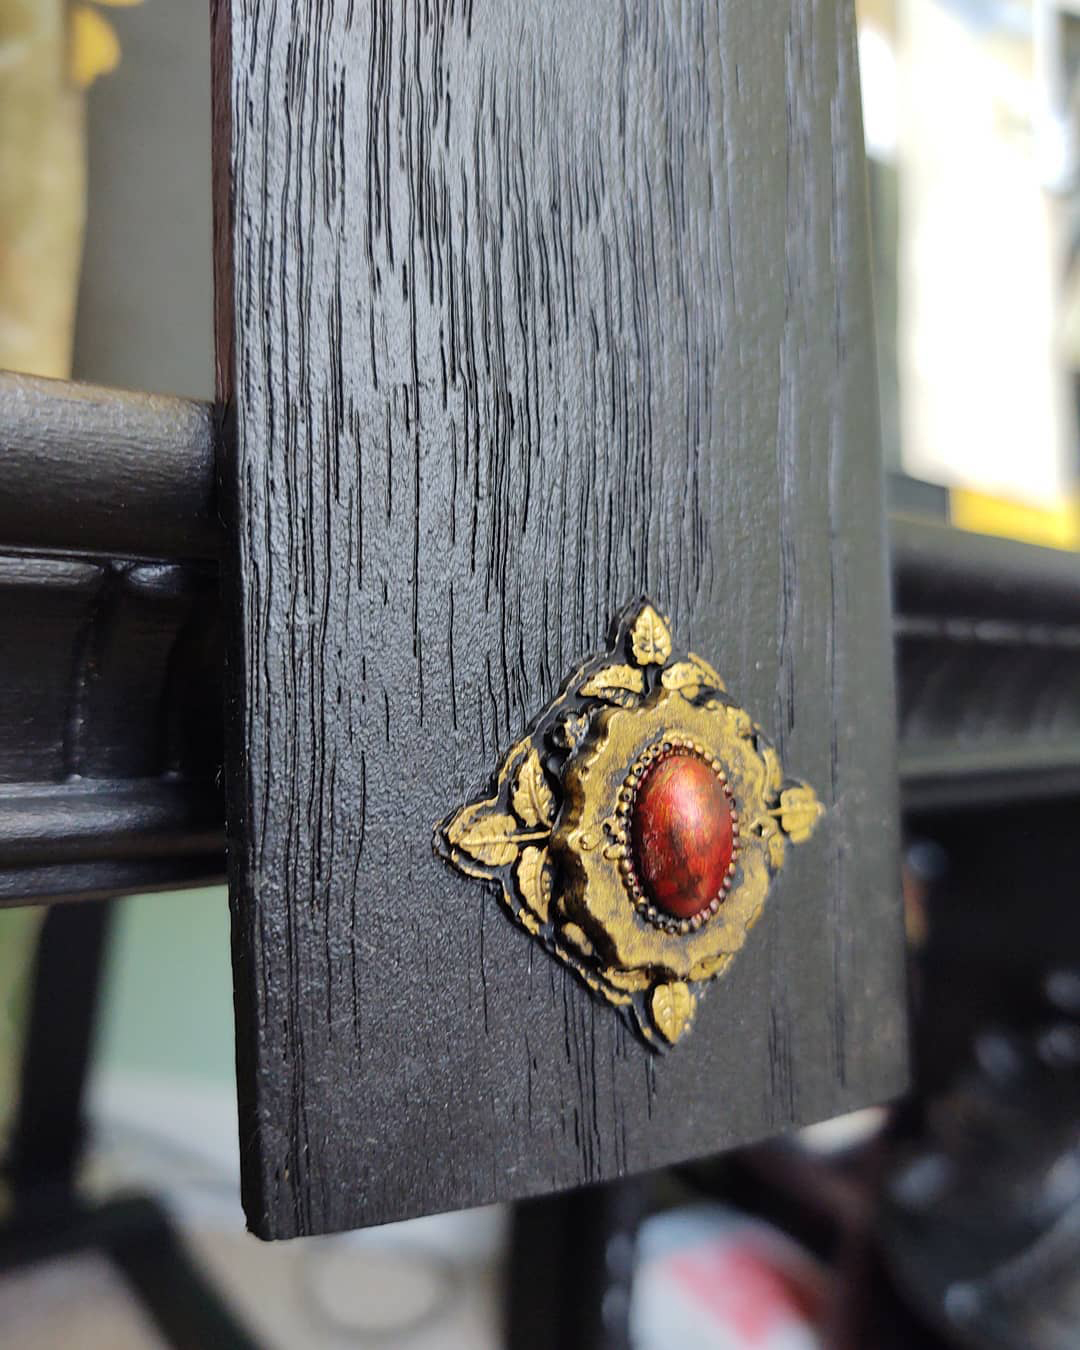
The accents on my easel and mahlstick were made using molds and then hand painted. The mahlstick is tapered on one side for comfort while working.
I painted my art taboret drawers black to match the rest of the studio.
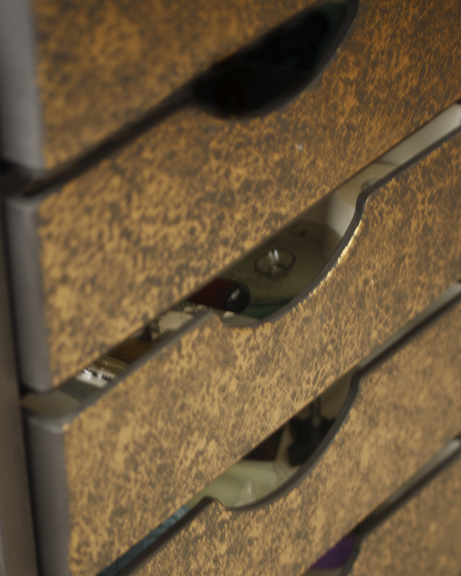
After painting the whole taboret black, I sponged the drawer fronts with gold. I later added a decorative accent to the top draw. You can see the accent in the picture below, where my taboret fits nicely under my palette table.
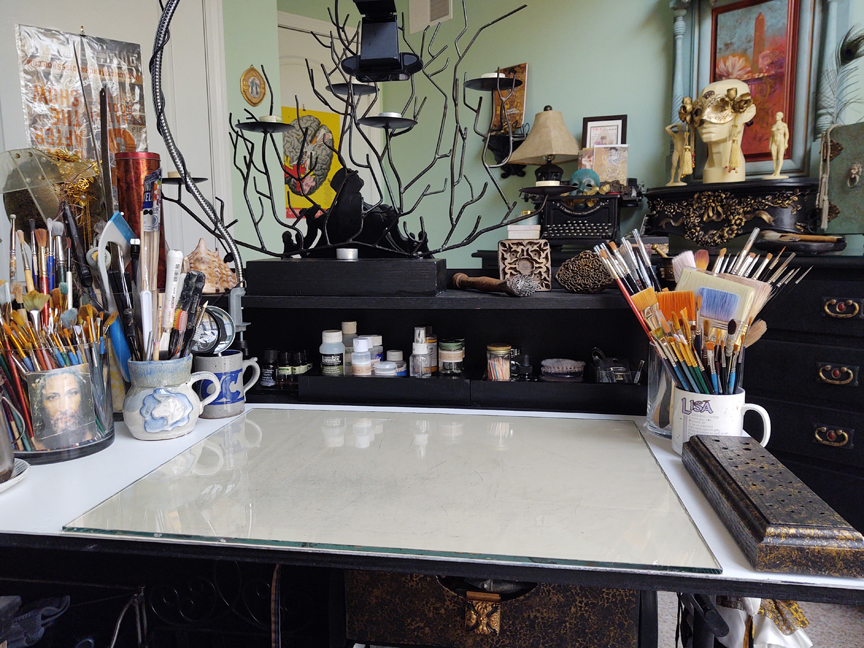
My large (52″ x 28″) palette table converts between glass for oil painting (shown on top) and plastic for acrylic painting (under the glass). It has an alcove that I can put supplies in as well as an upper shelf for displaying things that inspire me! Above the palette table in one of two 1080 HD web cameras. On the backside of the palette table is a large desk that serves as my office space for business stuff.
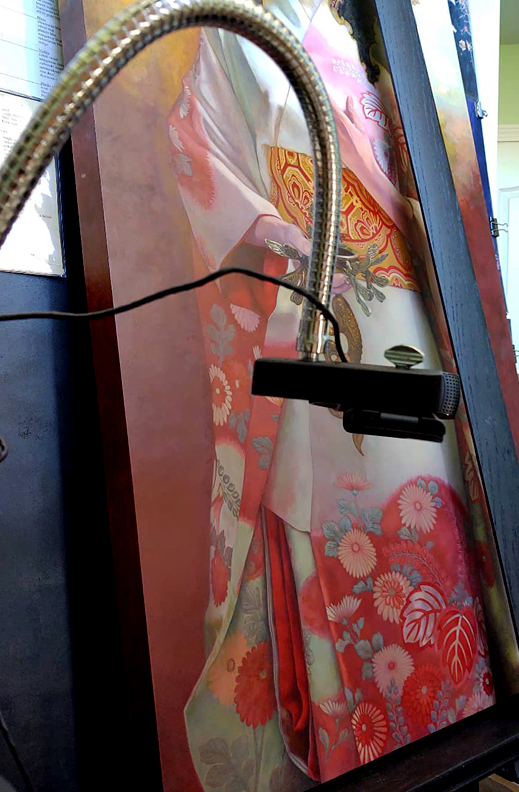
My second HD web camera on the easel is on a long metal arm which can be adjusted and moved to anywhere I need it to be. When I am not using the camera, I put a large magnifying glass attachment in its place.
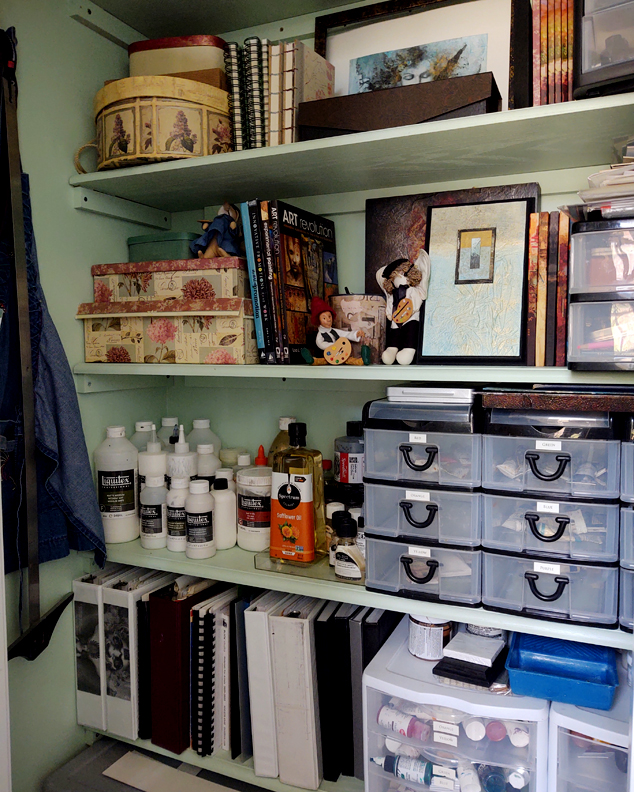
My studio closet has everything I need. I love when I open my closet up and it looks organized and visually pleasing! I redesigned the solid oak shelves so that they fit my materials perfectly when storing. All of my paints are stored in plastic containers, where each color has its own drawer. Below are very large plastic bins for storage of flat work.
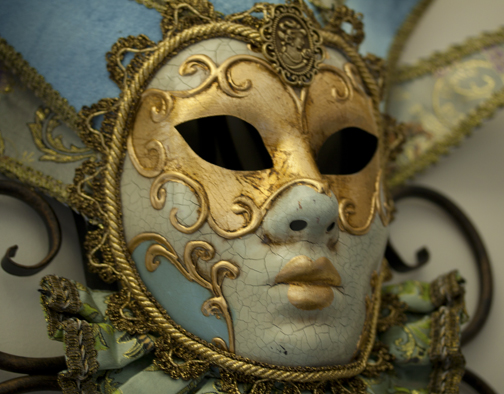
Around the studio, I have decorative masks that I collect and hand make. I love the theatre and want to surround myself with things that spark the muse inside me!
I love to decorate boxes to put things I collect inside. When I have leftover acrylic paint from a painting session, I will either do something in my sketchbook or decorate an object!
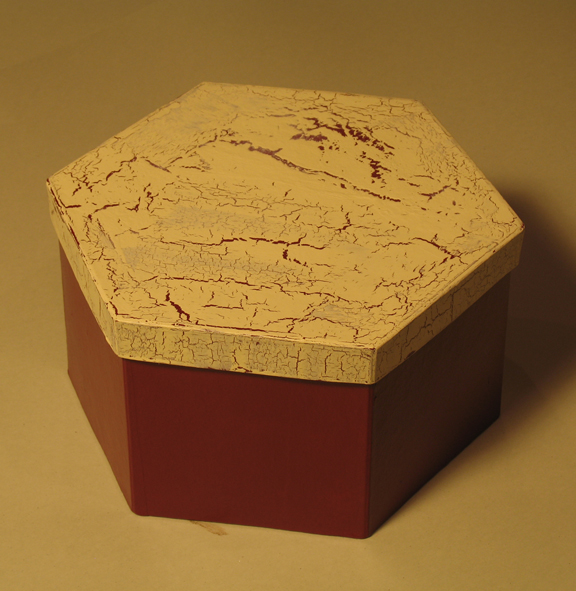
I also decorate boxes for my studio closet storage. Some of the paint I use comes from other rooms in my home that I have renovated. I never like to waste paint…it always must go somewhere.
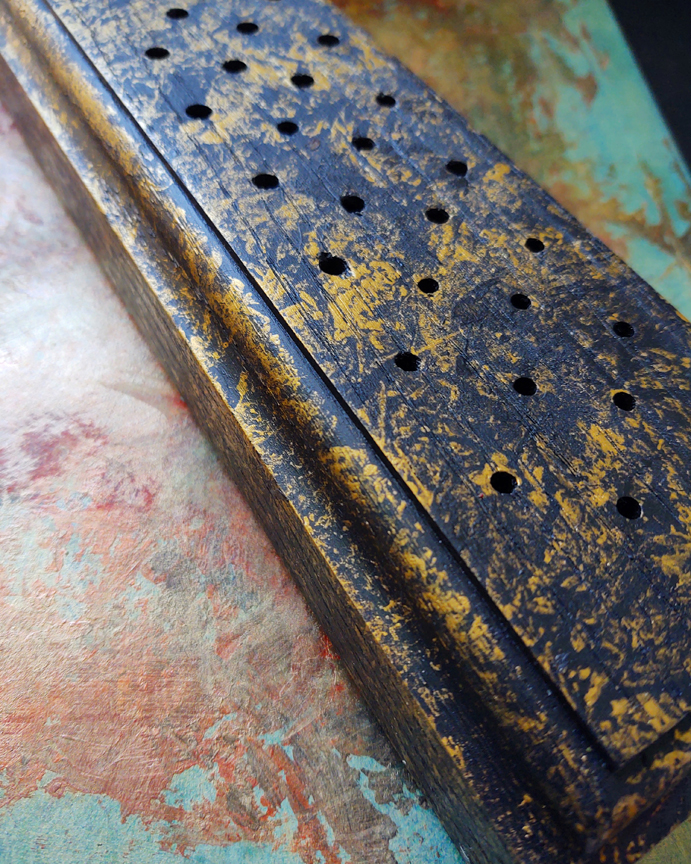
My custom handmade brush holder matches the rest of the studio decor. It is made of two piece of solid oak that have been glued and then edged with a router with a decorative bit attached. Holes were drilled for various brushes to fit inside!
This is my custom handmade palette cover.
Here are some work-in-progress shots taking during the isolation renovation process.
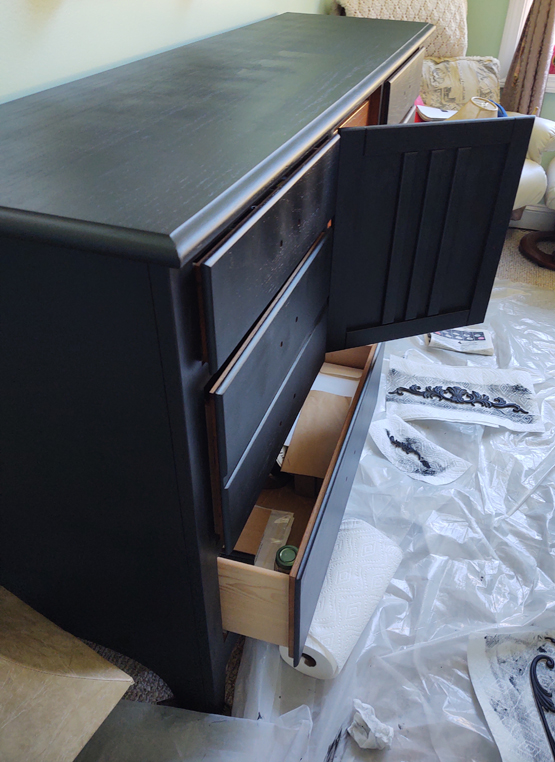
My storage dresser was being painted in the studio. Even though I had plastic tarps, I still got paint on the flooring….ugh. I did my best to “fix” the situation. After it was done, I ordered a custom piece of glass to fit on top!

I custom painted this accent and put it in a central location on my storage dresser in the studio. I love faux finishing things!
I faux finished each dresser drawer pull and later added a custom accent for a pop of color. See the finished dresser in the post above.
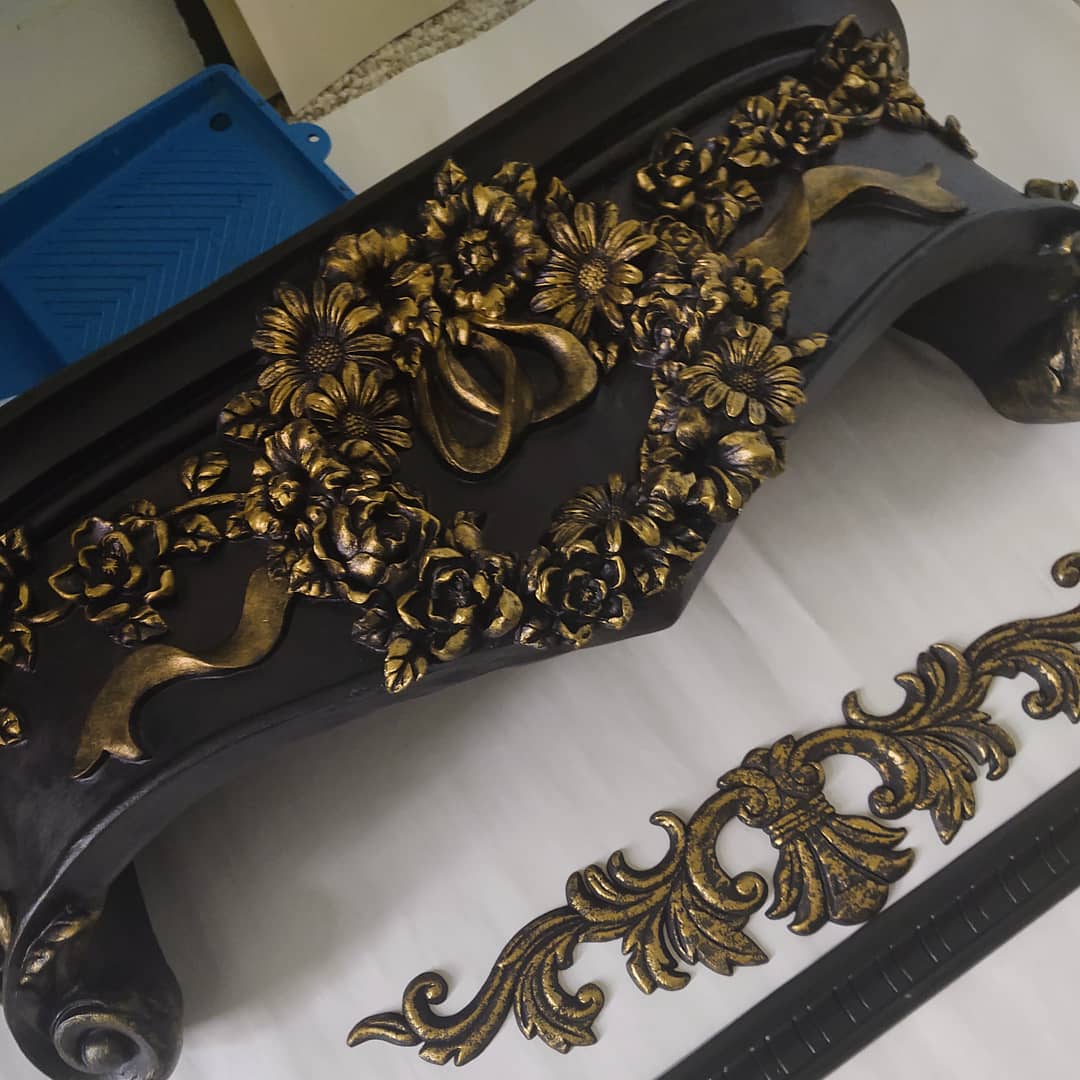
I hand painted these to work as shelving and accents in the studio. The bottom two moldings were added to my easel.
If you are interested in learning more about working in relief on the painted surface or working in experimental mixed-media techniques, check out my Masterclass on patreon!
https://www.patreon.com/lisalcyr
A Unique Approach:
Masterclass is a unique approach to learning, where each artist works on their own projects, whether that be standalone works or works in a series. Unlike a workshop or an assignment-driven class, this online atelier supports each individual artist’s intent on creating works that they really want to pursue.
There are approximately SEVEN Live Events every month. The Masterclass Saturday sessions (usually held on the first Saturday of the month) are from 11:00am to 1:00pm EST and the In the Studio sessions are from 2:00pm to 3:00pm on the same day. In addition, there is a monthly Paint, Draw + Create Together event (once a month) on Tuesday from 11:00am to 1:00pm EST and the weekly Sketchbook Meditation + Exploration Social events (3 to 4 times a month) are on Tuesday from 7:00pm to 8:30pm.
Patron Art Feedback sessions for Masterclass are conducted four times a year, giving each artist time to create their works. Artists that cannot attend live can submit up to 3 pieces for a live session review. Each review is recorded.
Experimental + Traditional Techniques:
The Masterclass online atelier covers a variety of topics from studio best practices to a vast array of experimental and traditional painting as well as expressive drawing techniques. The instructor provides monthly assistance and guidance through live demonstrations, lectures and group chats. If you miss a class, you can watch the recording at a later date.
Painted Passages: This series of posts and videos on how to employ freeform painting techniques to create magical backgrounds and environments in mixed media.
Collage Techniques: This series of posts and videos on using collage techniques in mixed-media works of art.
Working in Relief: This series of posts and videos focuses on working in relief in mixed media, exploring self-expression through texture-building and bas-relief techniques onto the painted surface.
Studio Basics: This series of posts and videos on artistic best practices for the studio artist, from working surfaces, grounds, painting mediums, varnishes, drawing and painting media to brushes, tools and equipment.
Expressive Drawing Series: This series of posts and videos explores alternative mark-making using drawing materials to create expressive works of art.
Conceptual Development: This series of posts and videos focuses on developing concepts for visually expressive works of art.
Masks, Props + Costuming: This series of posts and videos focuses on how I create unique masks, props and costumes for my figurative subjects.
Insights from the Natural World: This series of posts and videos explores using nature as an inspirational muse for creating artistic works
Just Imagine: This series of posts and videos explore working in a sketchbook as well as creating custom made books. Tactile surfaces, unique designs and engaging presentations stimulate brain activity, allowing artists to drift back to a playful state of mind.
Paint Pictures with Words Writing Club: This series of posts and videos explore writing about our works, creating poetry and prose and using the power of words to assist in the creative process!
Mixed Media Artist Series: This series of posts and videos includes insightful and thought-provoking profiles of leading artists, working in unique techniques and innovative approaches in art.
The Art of Promotion: This series of posts and videos cover artistic promotional strategies and practices.
Check out the complete Collection of Content already on the Navigating the Labyrinth of the Creative Mind site!
Behind-the-Scenes Access:
The artist brings you into her studio through live behind-the-scenes access and weekly posts and videos to current projects and creative endeavors.
In addition, you have early access to the artist’s upcoming Shows and Exhibitions.
Creative Enrichment:
Discussions regarding artistic growth and development, nurturing the creative spirit, developing personal content, embracing a multidisciplinary mindset and creating message-driven art are also explored as ways to assist artists on their own creative path.
Throughout this online workshop experience, artists discover a multitude of ways to ignite creativity, opening the door for the artistic spirit to shine! Check out the testimonials above from artists around the globe!
Get weekly access to the Rediscovering Your Creative Self weekly podcast which focuses on developing a relationship with the creative spirit that resides within and making daily lifestyle changes that enhance creativity, building a more creative and playful mindset.
Throughout the audio program, topics such as battling the inner critic, handling creative block, working through anxiety and self-doubt and interrupting the patterns that bind are explored. Managing fears, seeing mistakes as rites of passage, knowing when to open and close doors, riding the wave of triumphs and tribulations, avoiding distractions and coping with naysayers that keep one from seeing the light that resides within are covered.
Every month on the Navigating the Labyrinth of the Creative Mind site, there is new Sketchbook Challenge prompt and directive, allowing artists to discover alternative ways in which to practice art that is more personal. Art created from this endeavor is shared on the private Community Chat with other artists.
Sketchbook Meditation + Exploration Weekly Social
Every Tuesday night from 7:00pm to 8:30pm EST, you can attend an open sketchbook night social event called Sketchbook Meditation + Exploration. We discuss the Rediscovering Your Creative Self podcast episode of the week, setting an intention for our work and making daily lifestyle changes that enhance creativity.
Artists use the Sketchbook Meditation + Exploration weekly get-together as a time to commit to working in their sketchbook, experimenting and discussing with other artists topics that will help in developing a relationship with the creative spirit that resides within. Recordings are available for Masterclass artists if they miss a session!
Build a Community:
Be a part of a creative tribe, interacting with artists and enthusiasts from all around the world who have shared interests in art. This is an opportunity to create a robust artistic community, broadening your horizons as a creative person.
Your membership also includes private access to the Community Group, where patrons share art and works-in-progress, post the monthly Sketchbook Challenges as well as the weekly Sketchbook Meditation + Exploration Social art and work from the Paint Pictures with Words Writing Club. They also share inspiration, discuss new artistic tools, products and equipment as well as interesting and informative books on art and so much more!
Join Us:
TheNavigating the Labyrinth of the Creative Mind Online Atelier has weekly posts and videos as well as several LIVE events each month.
Join month-to-month for $25/mo US or save 5% if you join yearly!
@copyright 2021 Lisa L Cyr, Cyr Studio LLC, all rights reserved

Love the redesigning of your studio and all your collectables that inspire you, it’s amazing how change can help recharge our creativity! 🙂
It’s so true! Artists always find a way!