One of the most difficult concepts to grasp about painting is the use of edges. Students often go immobile when I mention that they should vary their edges in a painting. It shuts them down. Most have no real idea what I’m talking about or even where to start.
It’s not surprising. Controlling edges is an advanced stage of painting that alludes most everyone, until it’s pointed out to them. I had trouble with edges, too, coming up through my skill challenges, but as I never had a teacher pointing these things out, I had to learn the hard way: from critique, and sometimes ridicule.
That meant I was learning on-the-fly, listening to what other artists and critics said about my work that complimented or tormented my efforts to communicate to a viewer; how I guided the viewer’s eye through a piece. I paid extreme attention to what was said about certain passages, certain spaces in my painting, no matter how small or seemingly insignificant. It hurt, but I learned.
I’m about to cut years of struggle off your painting skills. The items below will shake your understanding and increase your ability to lay down interesting paint by concentrating on edges and not only give your work beauty, but will give you a new awareness of control.
Contrast edges.
Edge control is built generally from pushing and pulling the eye through a painting. Pushing it back or pulling it forward. It is the contrast between all edges that allows you to make shapes important or subtle.

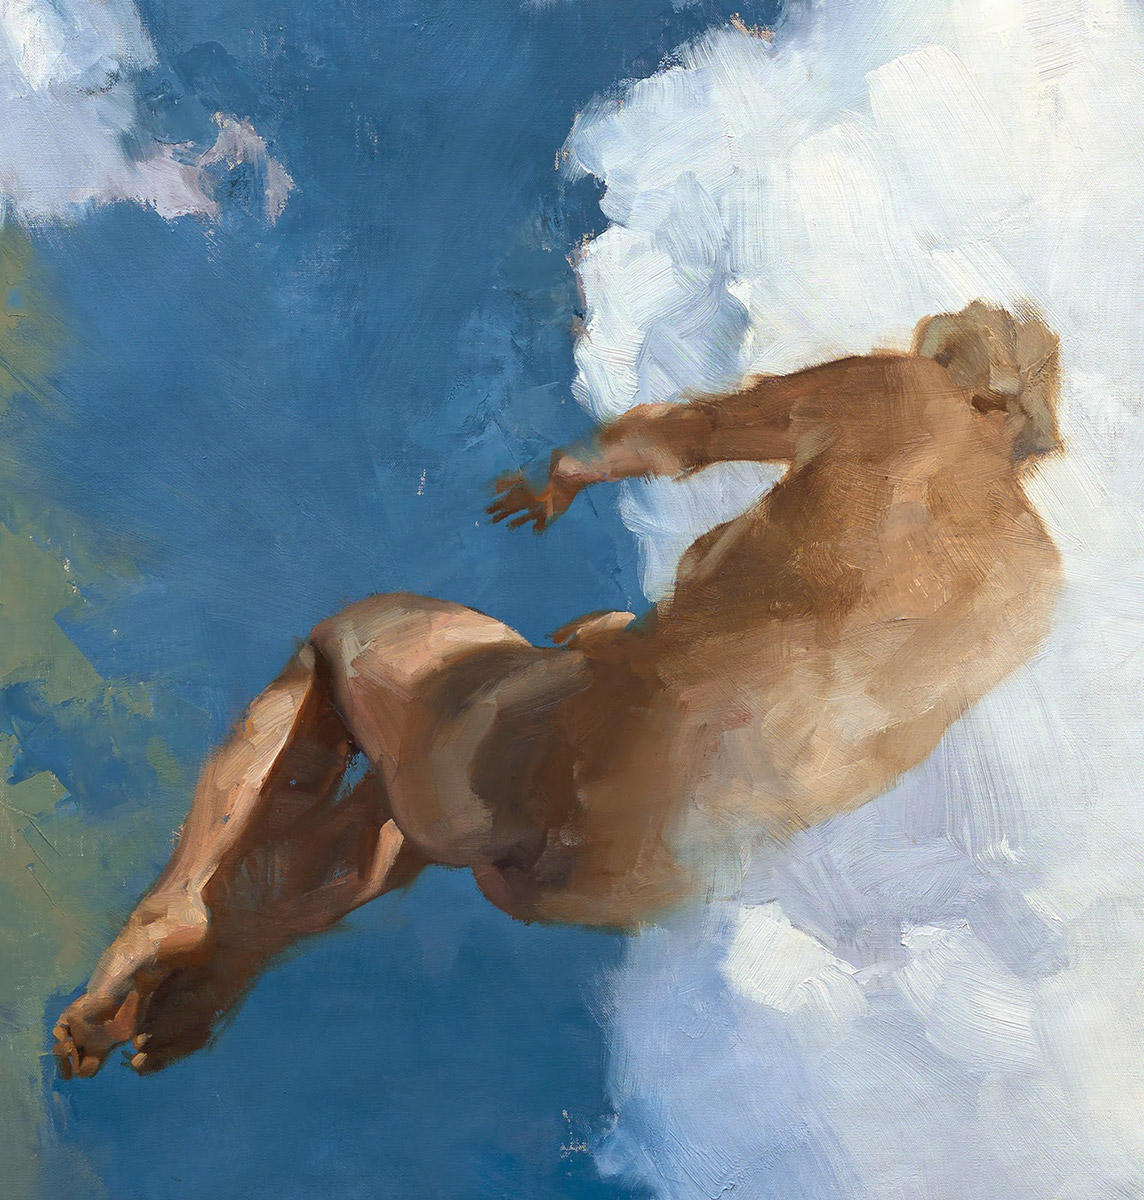
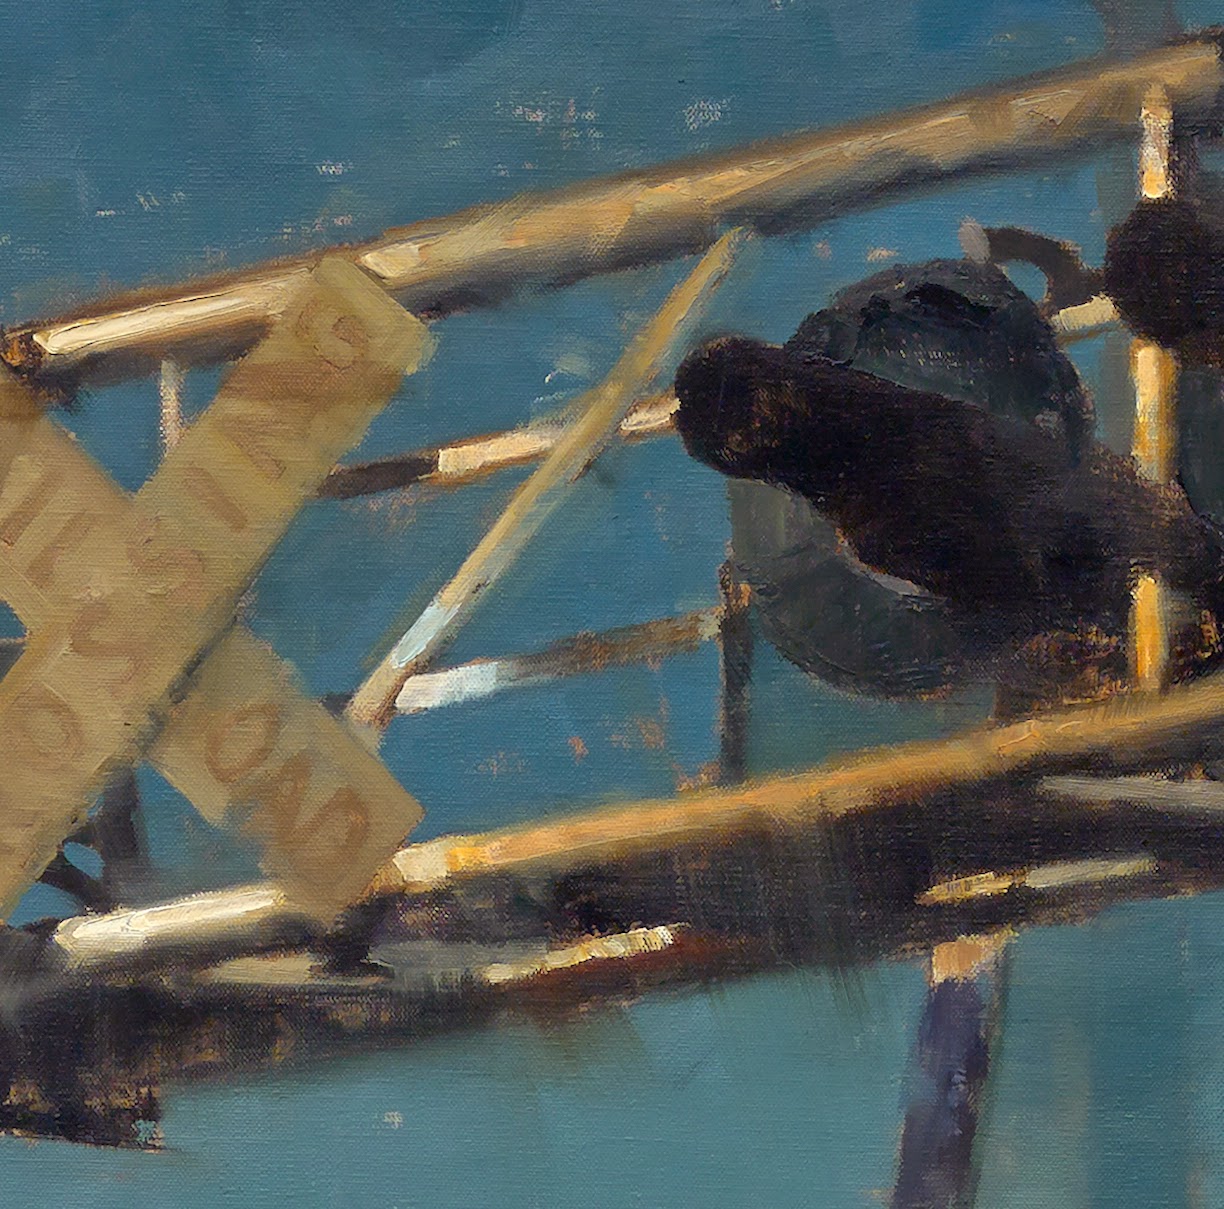
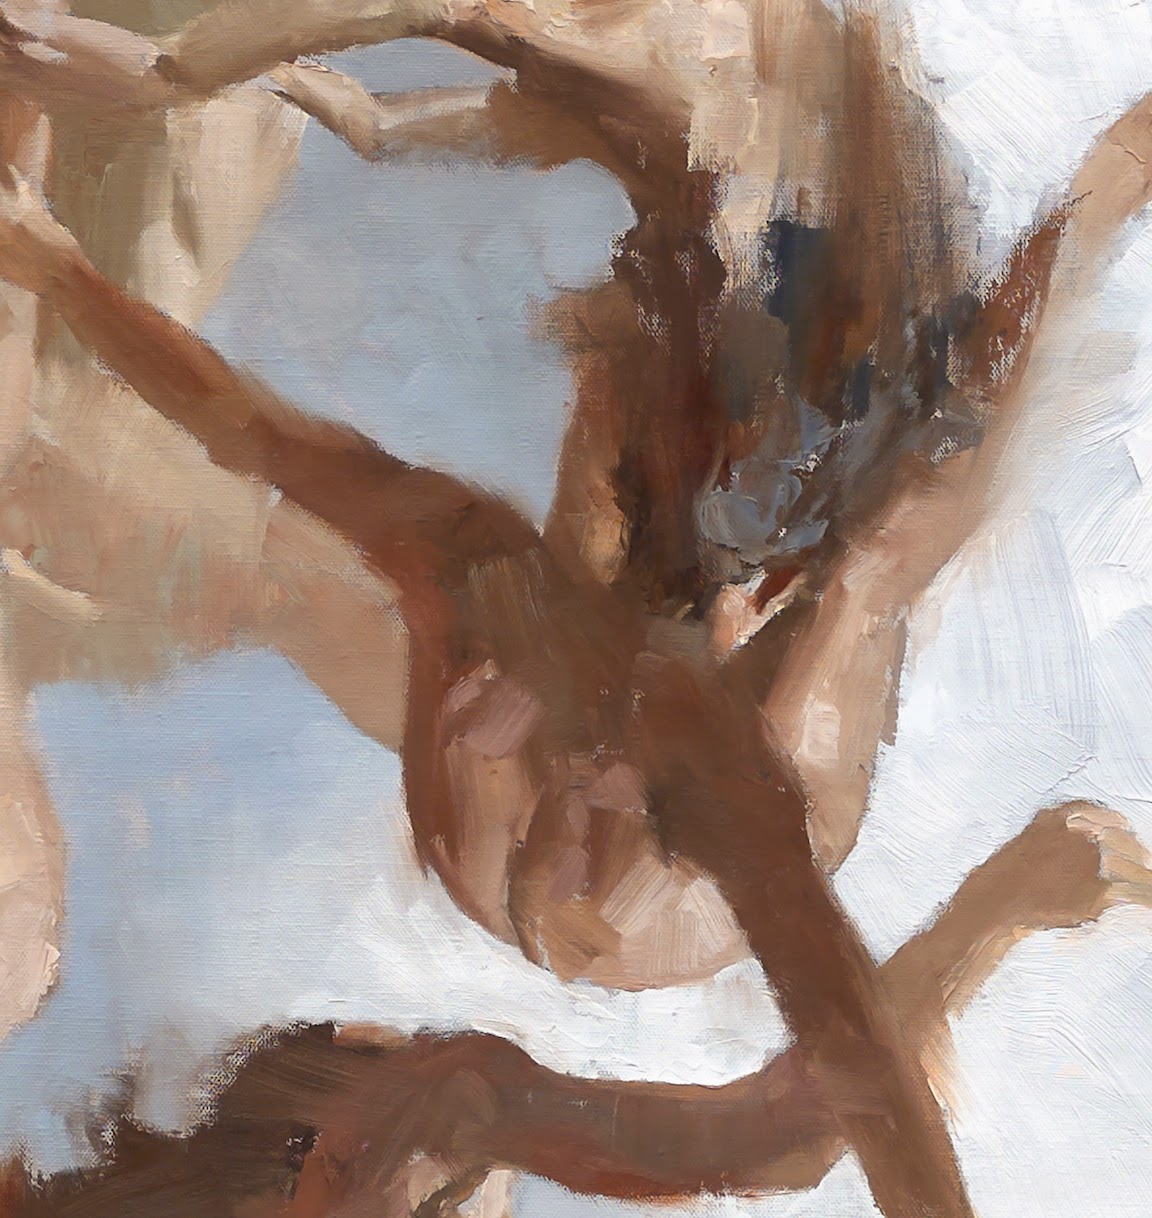
Sharp edges.
The easiest edges to identify. That’s why they pop forward. The brain zeroes in on them immediately, so use them to drive the viewer’s eye to certain elements in the painting. The contrast is high with these edges. Set them against soft edges, and the sharp ones dominate.
Soft edges.
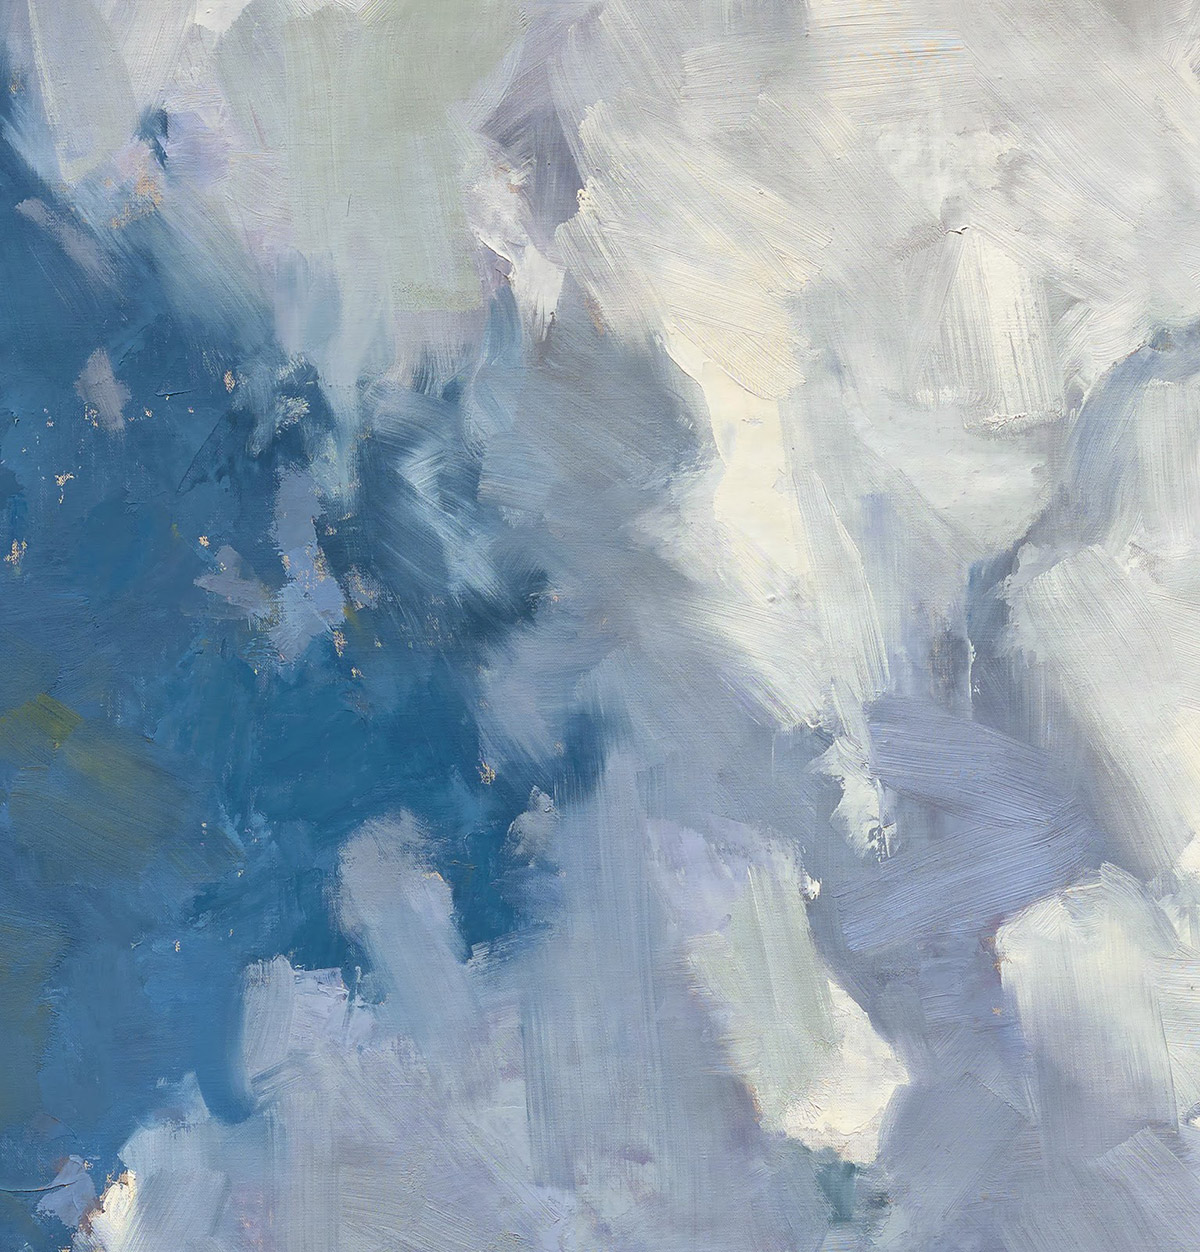
Use these edges to bolster the sharp-edged focus of a painting by pulling the eye away from elements with soft-focus. Sharp edges sit on top of soft elements that lay in the background. Yes, on top of. Background edges that are sharp tend to jump forward. Again, the eye whips past everything soft to focus on anything sharp edged.
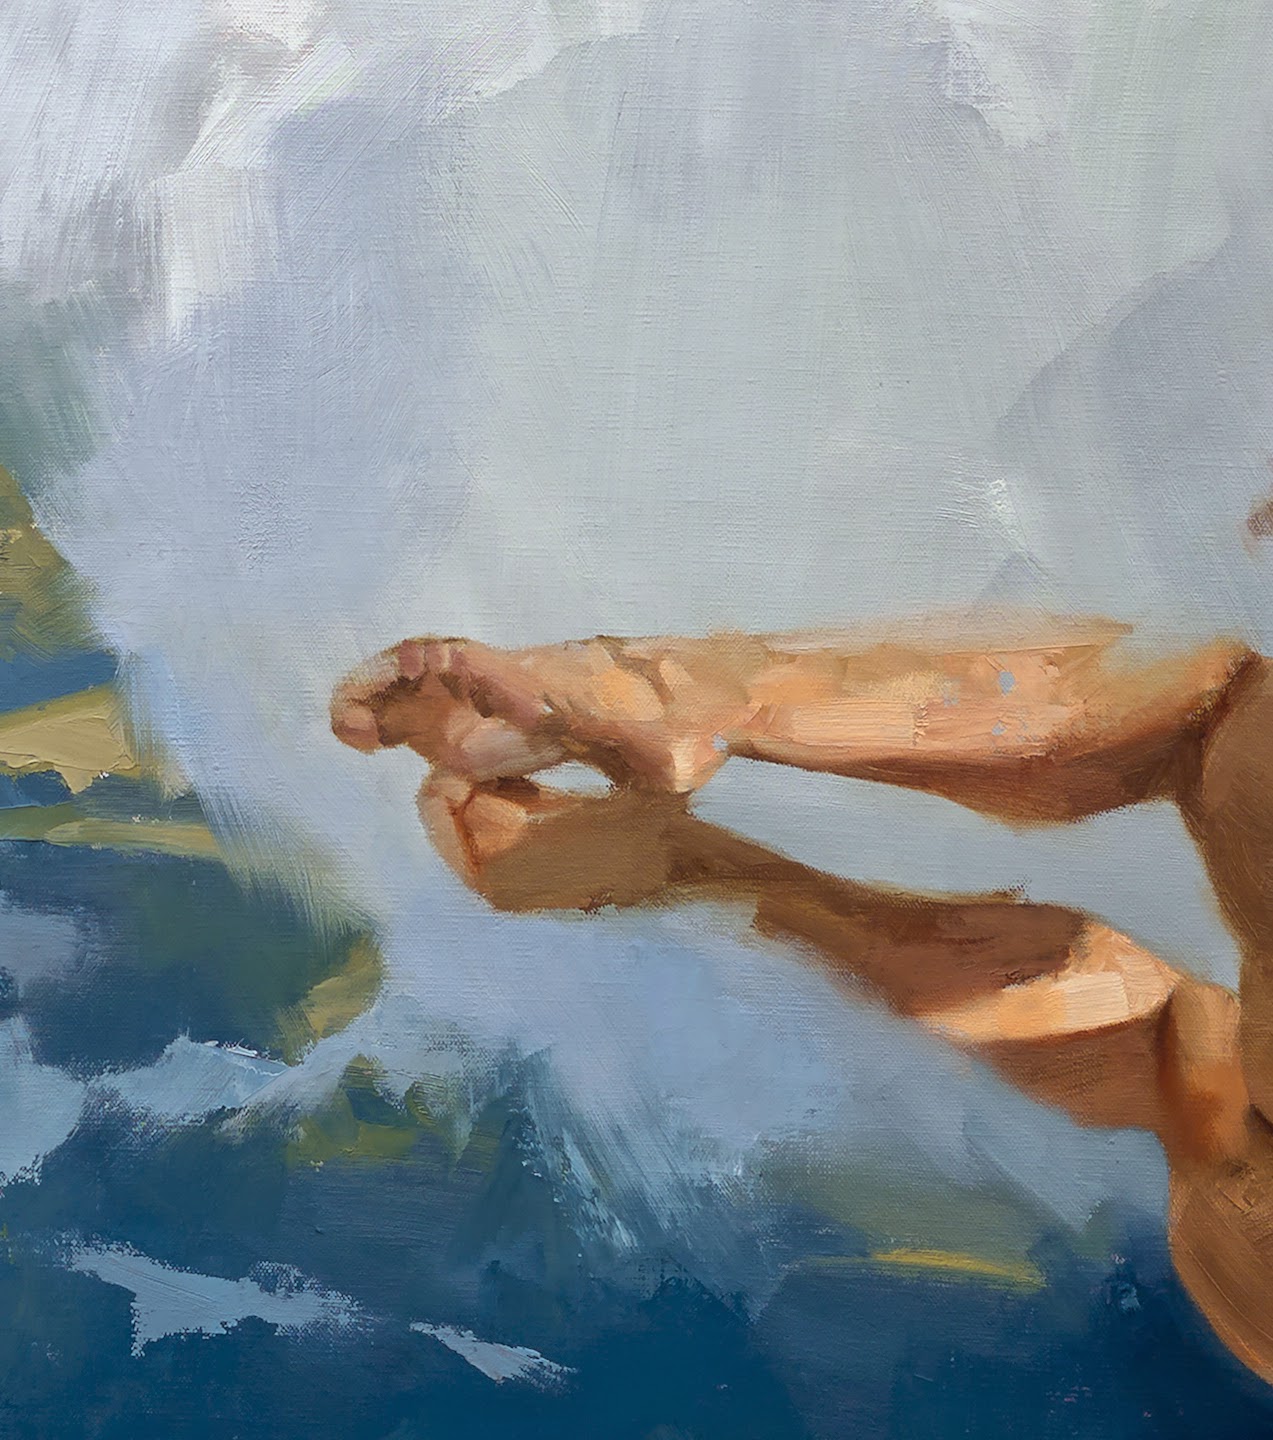
Lost edges.
Some of the most beautiful areas of a painting are where the eye expects to see an edge, yet it’s not there. Arms that bleed into the background, a cheek that disappears, edges of hair that are lost. It stimulates interest. This takes lots of risk to learn where and when to use them to full advantage. The risk is ambiguity. The payoff is curiosity and engagement.
The brain wants to complete a lost edge, but it must become involved with the piece to accomplish it. This is how a painting lingers in a person’s mind. There’s just enough information to stay focused, but isn’t overwhelming to the eye.
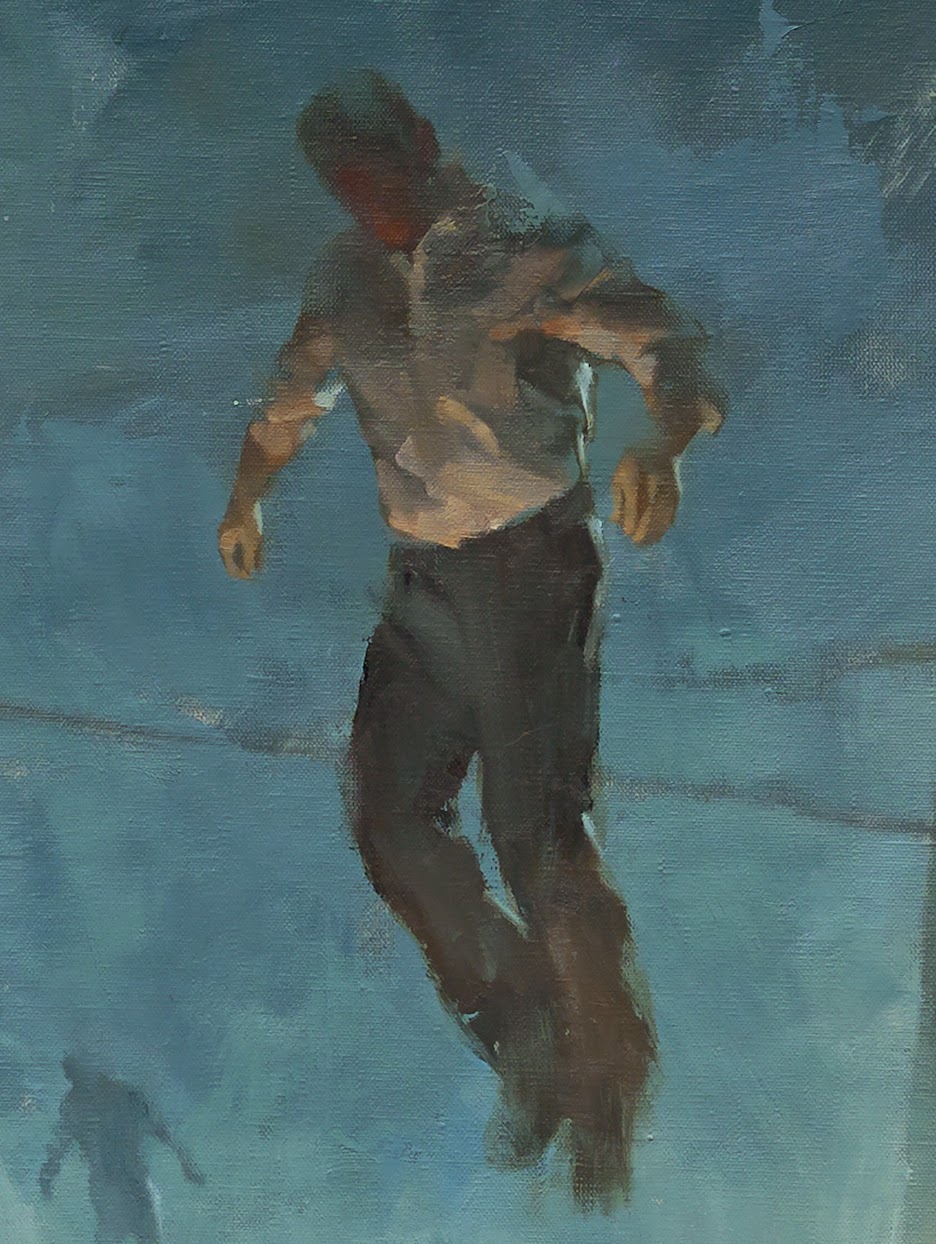
Sustained edges.
These are edges that work between edge extremes. Neither too sharp nor too blurred, but with just enough roundness without dominating the overall focus in the work. They can be edges of figures, sleeves, folds, trees, mountains, architecture, etc.
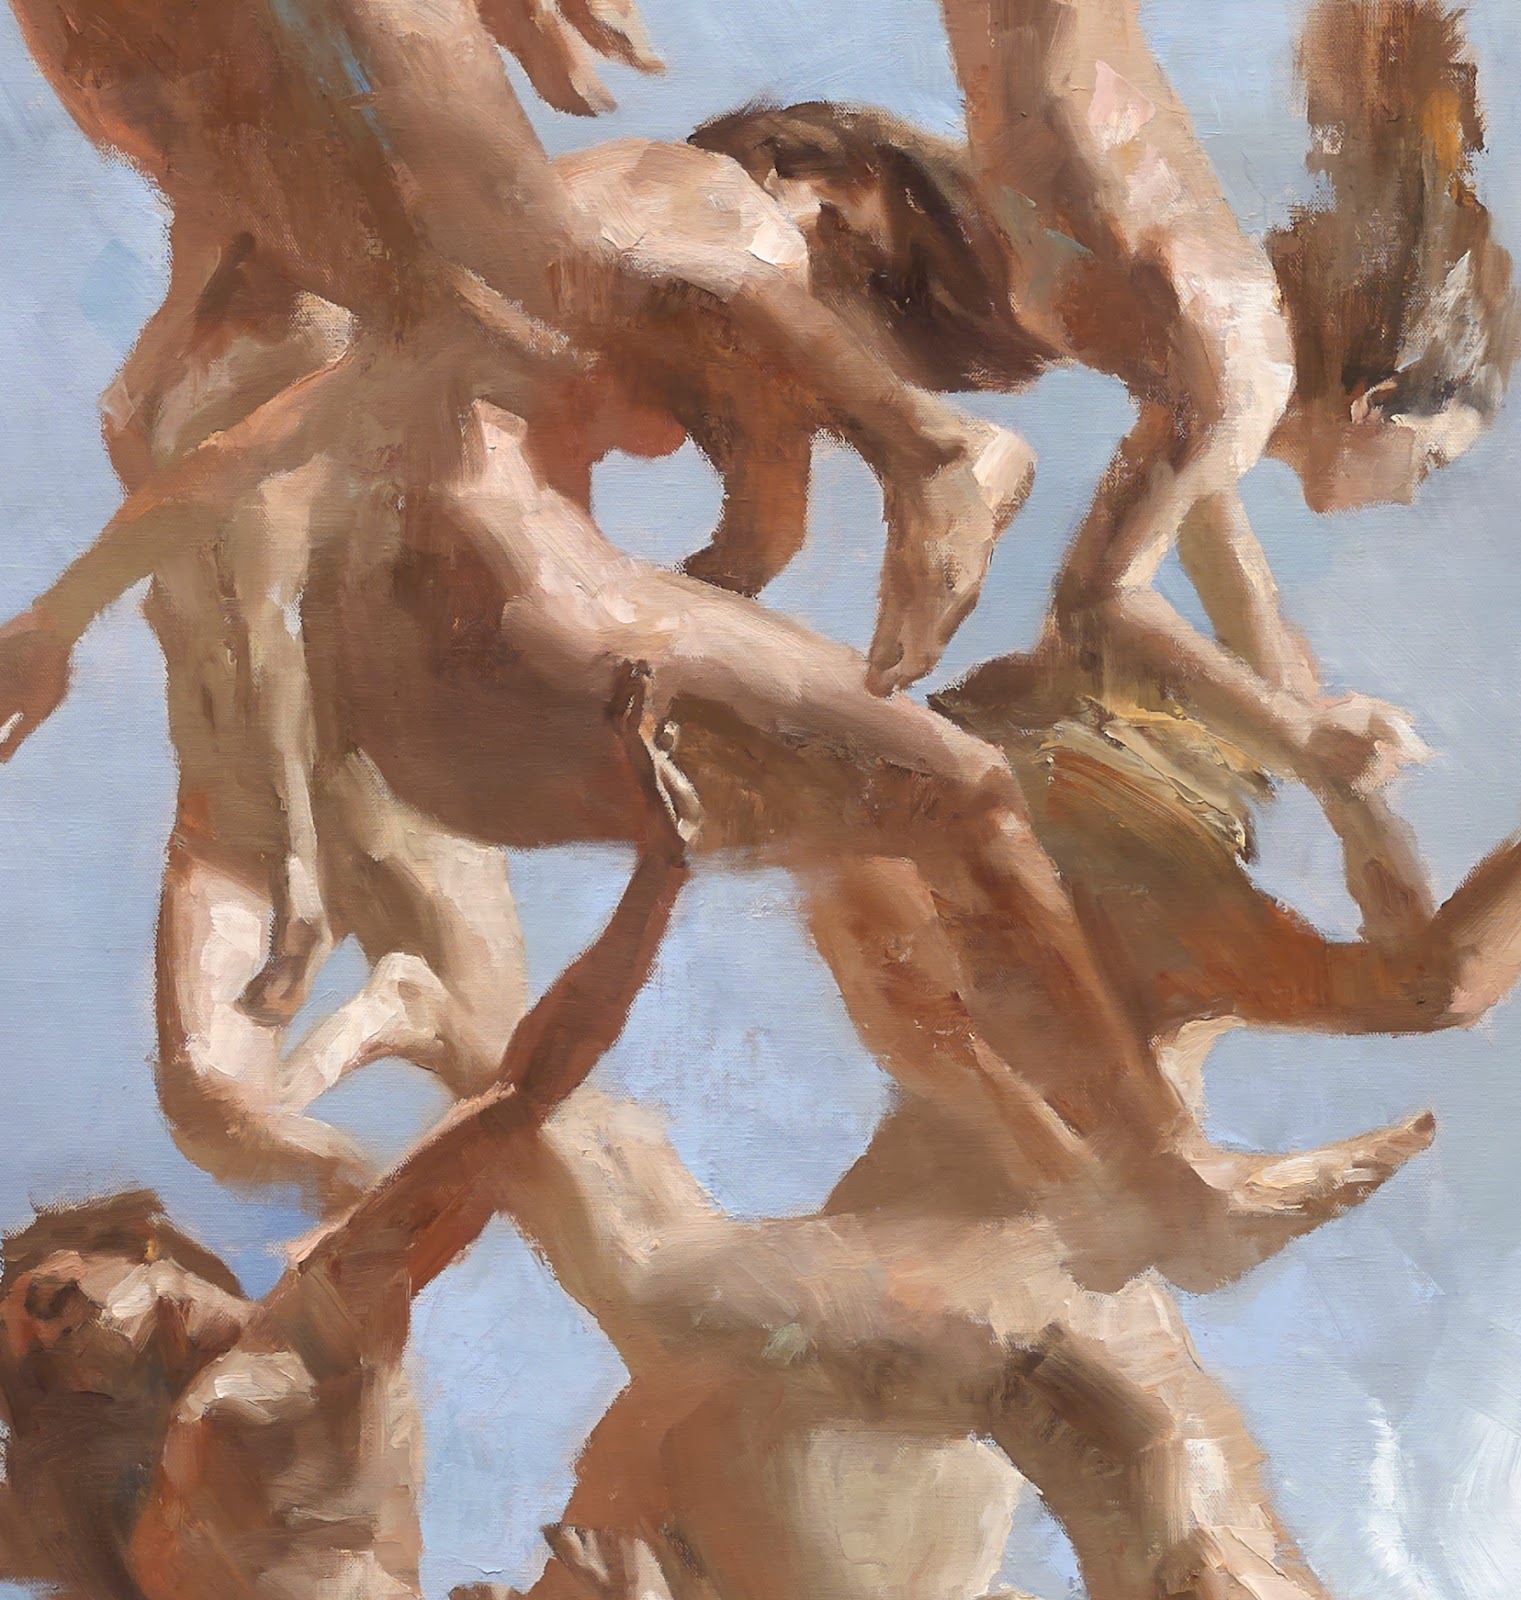
Repeating edges.
These are difficult edges to control because they draw attention to that repetition, and if they are integral to an element such as leaves or folds on a sleeve, they can overwhelm the eye. The first thing the viewer will want to do is rest. In other words, look away. This is not what you want from a viewer, just in case you hadn’t figured that out already.
You must find a way to vary these edges. Take their power to confuse away. You do this by using sharp and soft and blurred edges, no matter what your reference tells you is ‘right.’
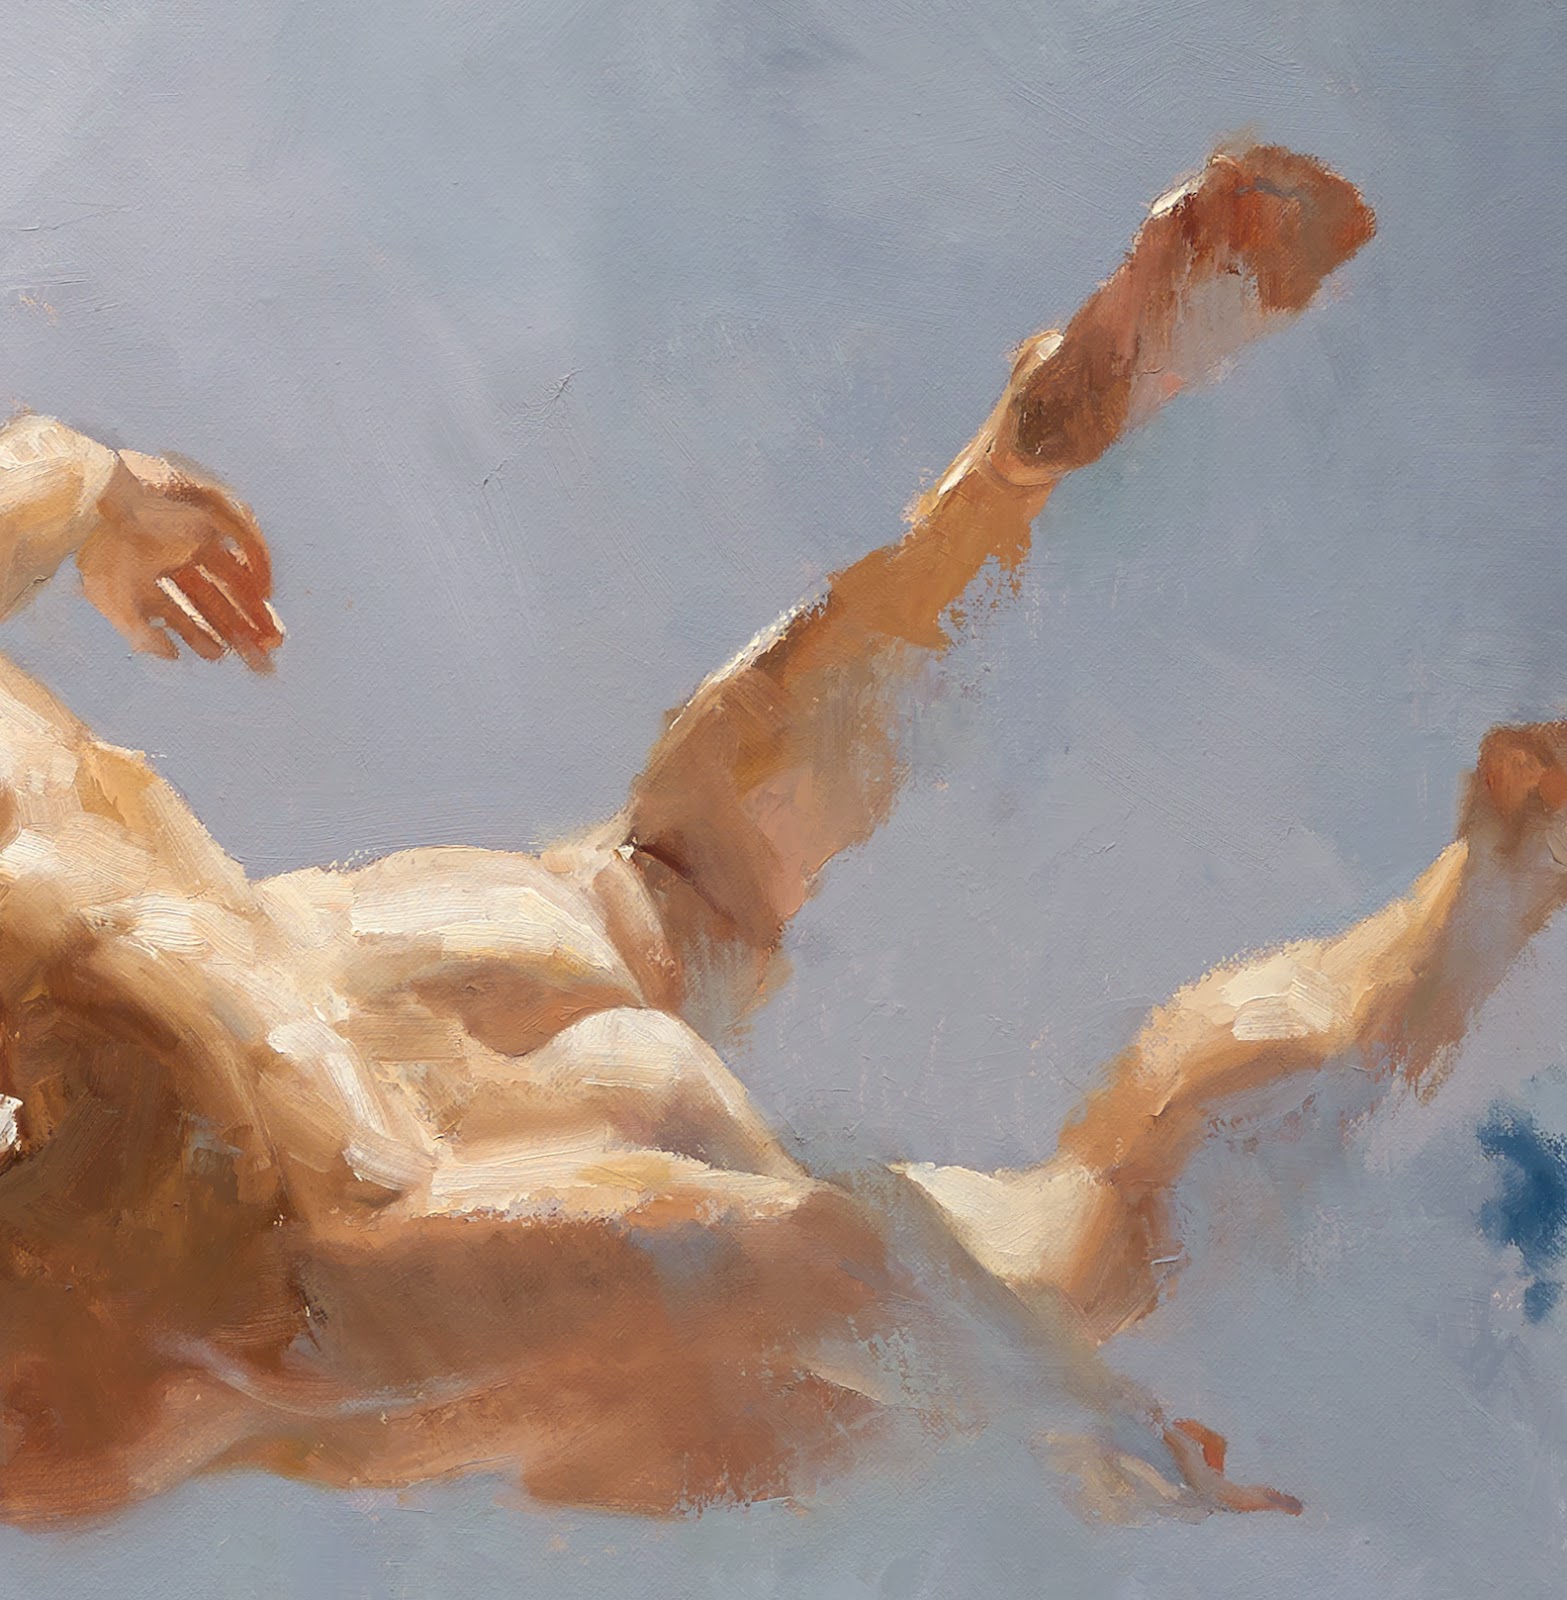
Shadow.
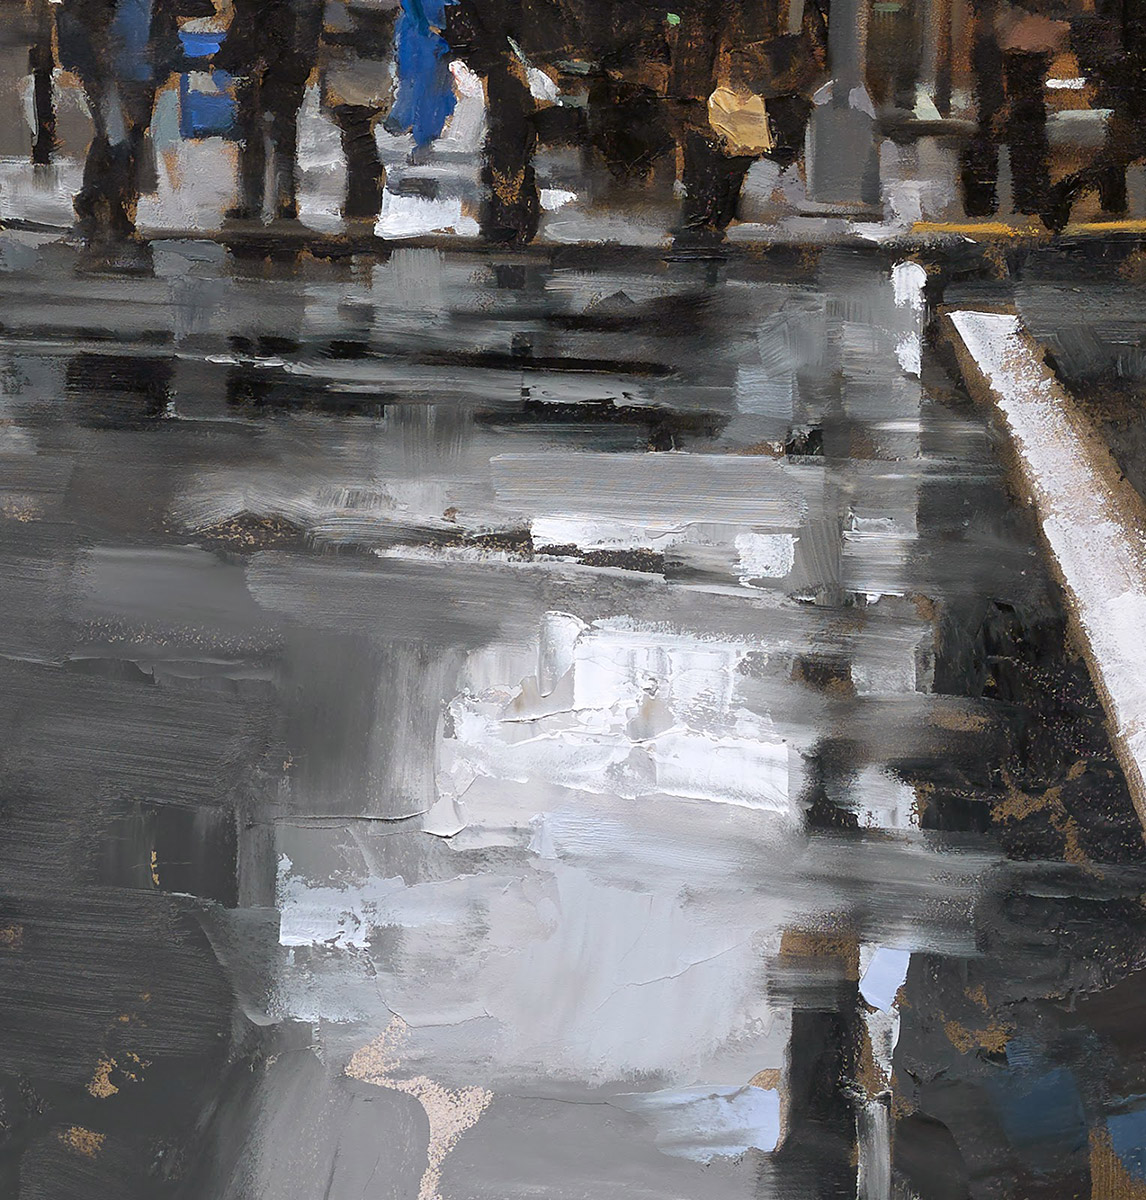
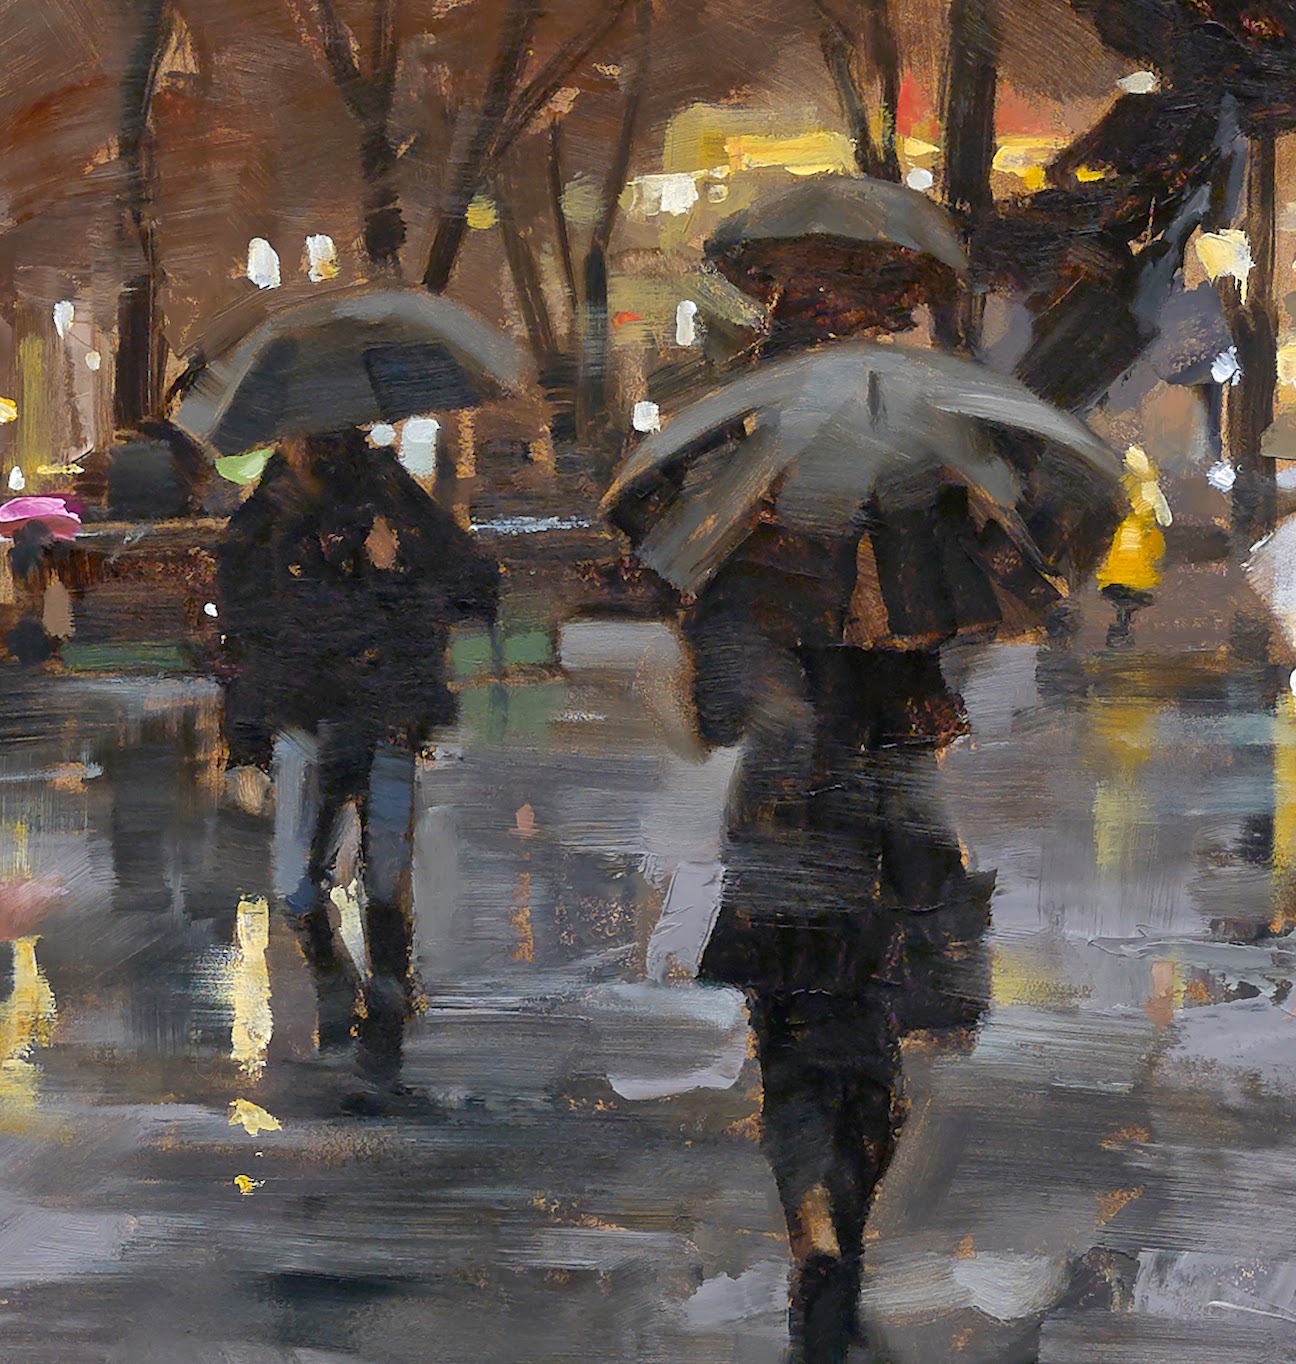
Shadow control is critical to a successful painting. And they are the greatest teachers for understanding depth, value control, and…oh yeah, edges. Now you get what I mean by soft and sharp edges, yes? What observer hasn’t noticed how shadows vary in such a short range of vision? Look at tree limb shadows on the ground, and the information slaps you upside the head. The limbs closest to the ground are sharpest, while the limbs up high cast very light, soft shadows. It’s their edges that communicate this the most.
How a shadow rolls over a surface is determined by several factors. The texture of the element, the shape of the element, the angle of the element. Study a car in different lighting conditions and you’ll find an amazing array of hard and soft edges, all based on how the individual shapes cast shadows. Control those edges and you’ll have a shiny car or a dull car.
Shadows determine depth in a painting, and that’s portrayed by how you control the shadow edges.
Color.
You can control focus in a painting by using color. The edge between contrasting color can demand attention or allow one color to dominate another. The way those colors bleed into or over each other will draw attention, either away from or toward a subject.
Ragged edges.
If all of the edges of paint application are the same, it communicates as pattern. And this leads to a flat, graphic quality. There is no edge control, other than to make it all the same. This is completely fine if that’s what you need in a piece. Making all the edges the same everywhere you look will demand that you control focus in another means, say through color or value.
Varying the edges between pattern and rendering can add much interest. It’s the contrast between the two that does it.
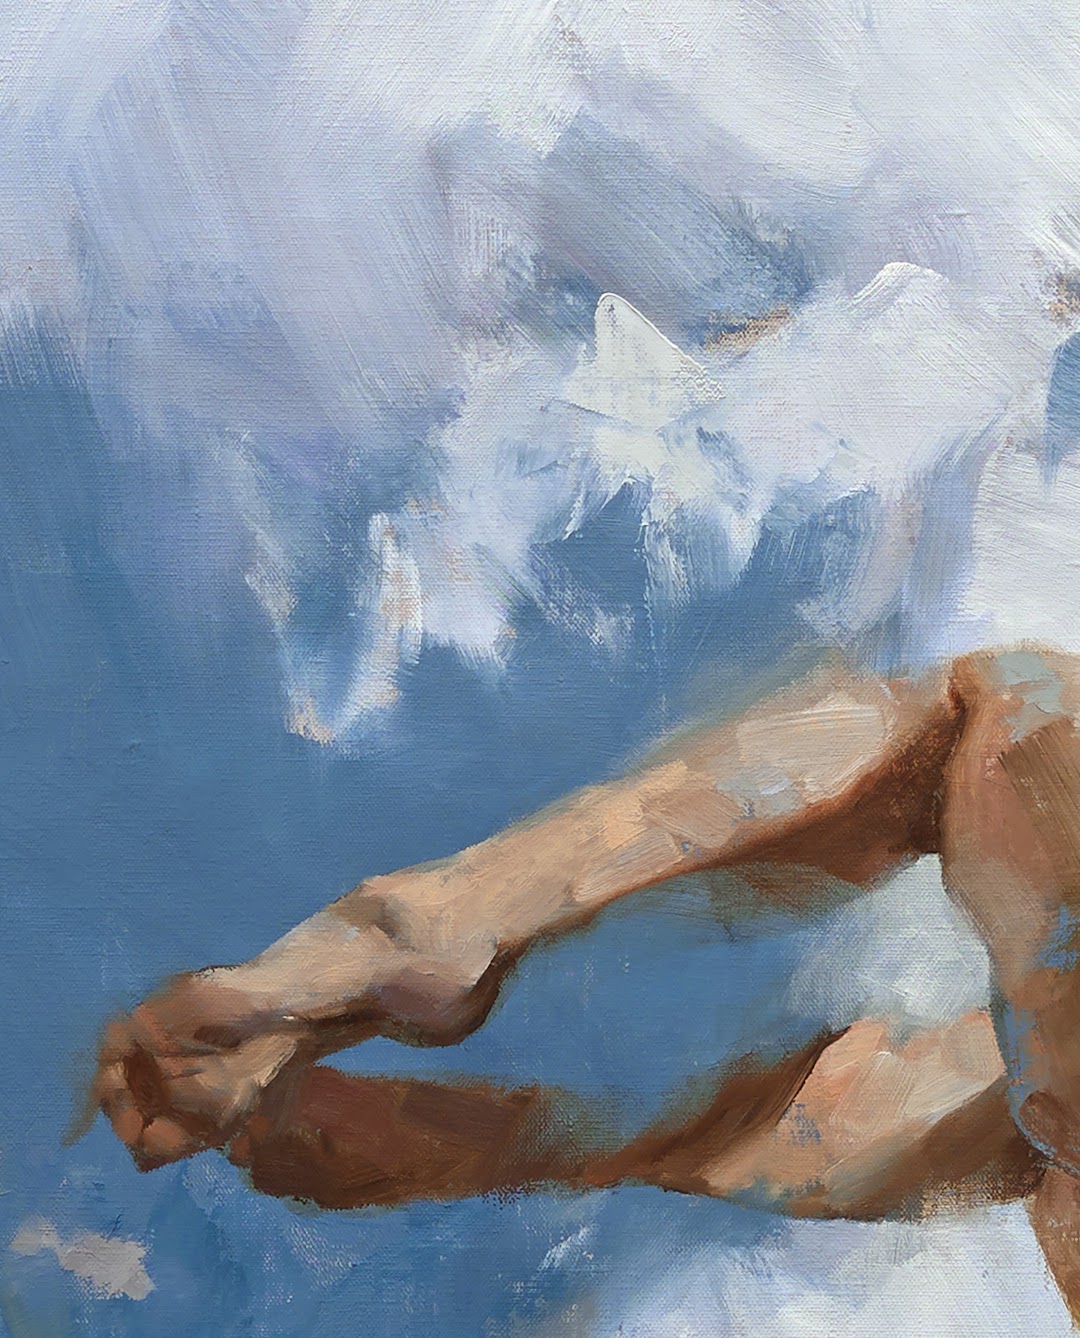
Light edges.
Try painting dappled sunlight without controlling edges. But through careful study of how light streams through leaves and strikes an object will reveal how edges vary between sharp, soft, blurry, lost, and blended. Light tends to flare through a short range of saturated color just on the edge between shadows and lit areas. Notice how the edge can lend interest and depth if captured in a painting. Flare the light with rich color invading the shadow and you gain depth.
Blending strokes.
Brush stroke edges can vary within the stroke itself. The front edge of a stroke can be sharp while the back slips into blurred nothing. Strokes can be short and sharp, or they can be fuzzy like an airbrush. A stroke can go down sharp and be blurred later with a different brush. The difference between a palette knife edge and a brushed edge is evident here.
Texture.
Blending between colors or values gives you a smooth affect. Simple enough. But you do this at the risk of losing texture, and therefore, interest, if done too evenly. Certainly there are many great paintings that are slick-smooth, blended to perfection to give the idea of crisp, clean beauty. But using that same blend on leather, or fabric, or a wall can destroy the effect. The surface texture of an object reflects what the surface is made of. Yes, there are illusions to be aware of, i.e., that plastic resembles glass, etc.
The way paint is applied makes a huge difference in what’s projected to the viewer. Ever wonder how those artists of the 19th century got those velvet dress effects? Study the evidence in front of you: value and edge control.
Your eye discerns visual contrast all day long: judging edges, surfaces, values, contrasts. The working brain takes about 30% of our energy each day, and most of that is dedicated to visual deciphering.

Updated from the original post, April 1, 2015.


This was an extremely article! I have been made aware of edges before through this blog but it is always helpful to have a refresher. Thank you!!
Your work is fantastic and an inspiration as always. Thank you for this in depth look at edges. The sustained edges was a new concept for me, and what you said about the dangers of repeating edges is something that I have never thought about, but it makes so much sense.
Awesome topic. Thanks Greg
Awesome topic. Thanks Greg
I feel the joy of understanding.
Thank you.
Great article! I have always been intrigue by the edge traitement in paintings or sculpture. Leonardo Da Vinci was using “sfumato” like over renaissance painters in Italy. The “Non finito” technique in sclupture is very interesting too… like you says it… it helps focus on the main part and let the imagination of the watcher do the job on the other parts. It is very evocative. Thanks for sharing your thoughts!
And “clair-obscur” also…
great article!
Thanks, All! Keep your eyes focused on the actual shapes of the pigment and you'll gain much insight into your own way of expressing paintings…
Dang…in that second paragraph I meant to spell the word 'eludes,' not 'alludes.' Then again, I should've used 'escape.' Much simpler.
Frankly, it eluded me. : )
killer write up man! GREAT info. paintings are pretty sweet too 😉
I like art. I enjoy watching your genre pictures. They are charming! I can`t speak about edges as I don`t understand anything about them but the pictures are great. Can I ask you for a favor? I`m writing a paper on one writing service which has something to do with the painting art and I need some images. Can I use yours? Thanks!
Absolutly love it! Great article. Thank you. Now i know where to expand my observation and study.
>> “I’m about to cut years of struggle off your painting skills.”
A true statement. Thank you, Greg!
Thank you Greg for you endless wealth of art knowledge, it’s always fun to look at the various details in your work as well as seeing what you chose to bring forward and leave back with your brush strokes/palette knife work! 🙂
The hardest thing for me about edges is, how on earth do you actually MAKE those edges? I’ll see a place on a shape where I think, “that’s a sharp edge, it should be a firm one” but I have no idea with my materials how to accomplish that. I see people talk about edges and texture hand in hand, but even though knowing what to look for is great, how to actually accomplish that task is still something I haven’t seen people demonstrate. I know they’re important, I just don’t know how to do them.