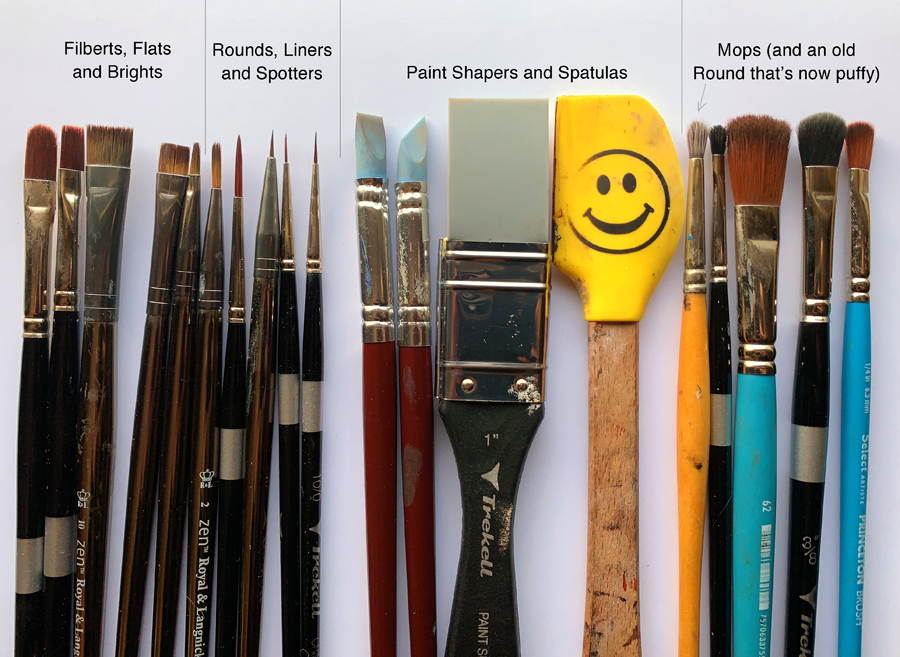
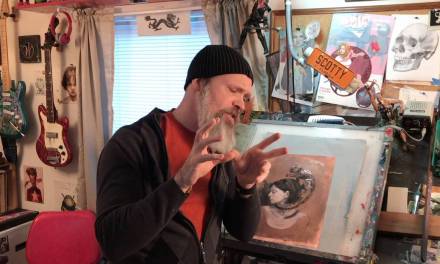
Finished up this painting recently, and I’m sharing some notes on the tools I used to create it. All of the brushes shown here are sables:
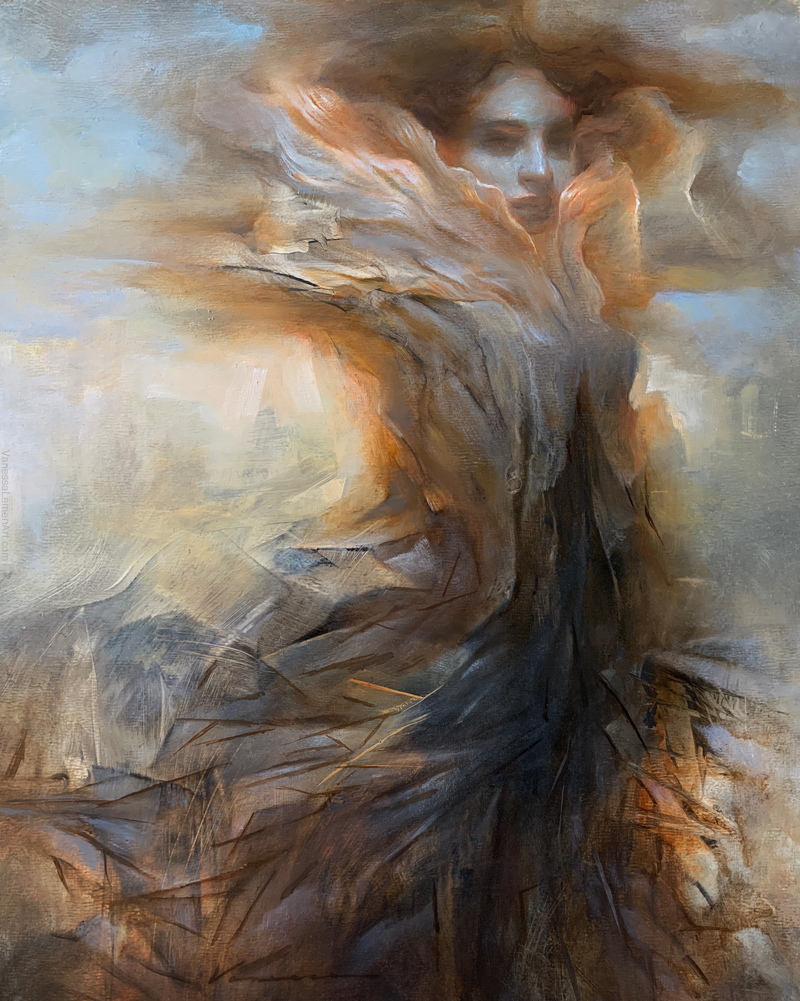
The painting is a small 10×8”. Here is a comparison of the start and finish of the painting for a visual reference point for the info below:
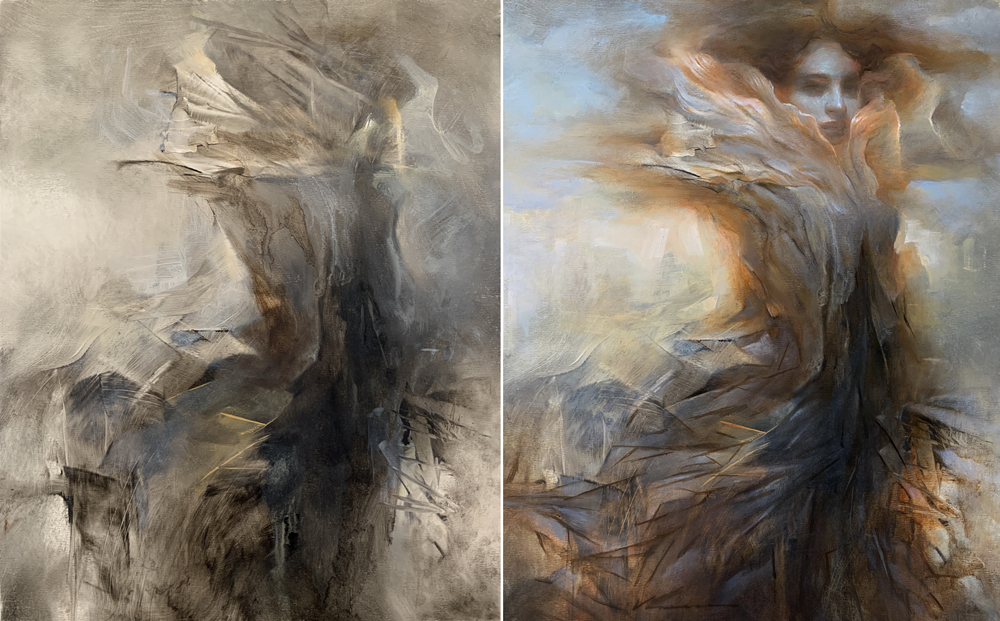
In the beginning of the painting (image on left, above), the first marks I put onto the surface were with a larger utility brush to get some coverage. (I forgot to include a utility brush in the image, but these are inexpensive bristle “chip brushes” from the hardware store). Then I used a large mop to soften, and then did some pick-out with paint shapers and spatulas. I tend to usually paint and experiment for a little while in that stage, maybe a few hours, sometimes less – picking out and painting and softening. I will push the paint around while it’s still wet and malleable, sculpting the initial marks, pulling things forward and pushing things back mostly using those 3 tools. Then I let that first stage dry before I paint on it again. In that initial layer, the paint is very thin, and tends to dry relatively quickly. After a few hours, it’s noticeably different in terms of how the paint moves around on the surface. Left overnight, it could be ready to build onto with a new layer. (This also depends on climate/humidity and time of year).
I tend to use flats and filberts for laying paint down usually for more coverage, but also use them for translucent glazes too. They work well for pick-out as well when using mineral spirits on the brush. In this painting, I used flats and filberts in the area of the sky and background, using a very small filbert for working in the larger planes of the face. You can see some of the brush strokes in the atmosphere that were made with flats and filberts. Much of those areas were also softened with mops too.
I use flats similarly to filberts, in terms of what I mentioned above, but because the shape of the edge is different, it can inform the mark’s appearance differently too. A flat brush is blunt across, and can be used for making a hard edge too, similar to the mark that a spatula or paint shaper can make but by laying the paint down. Flats and brights are great tools for making square tile marks. Paint shapers can technically be used to put paint down too, but I don’t use them to do that very often. I mainly use them for pick-out.
Brights are similar to flats but are less springy and more rigid because they’re shorter. I find they work really well for pick-out, and are especially great for picking out hard and straight edges. I tend to use them also for laying paint down with a hard edge to it too, and much of what you can see in the lower left of this painting (image on the right, above) was done with a combination of brights and liners over the top of the underpainting on the left that was done with a spatula.
I use rounds for a few different things, depending on the size of the round. In this painting and other paintings this size, I used rounds in the smaller forms and to clean up edges, pushing contrast along those edges. Larger rounds can be used for the larger planes of this small face. You can see in the image of the painting tools that the small filbert and the large round that are next to each other are similar in size and I do use them for similar things. I also use larger rounds to soften very small areas, and feather some marks that I make with tiny rounds.
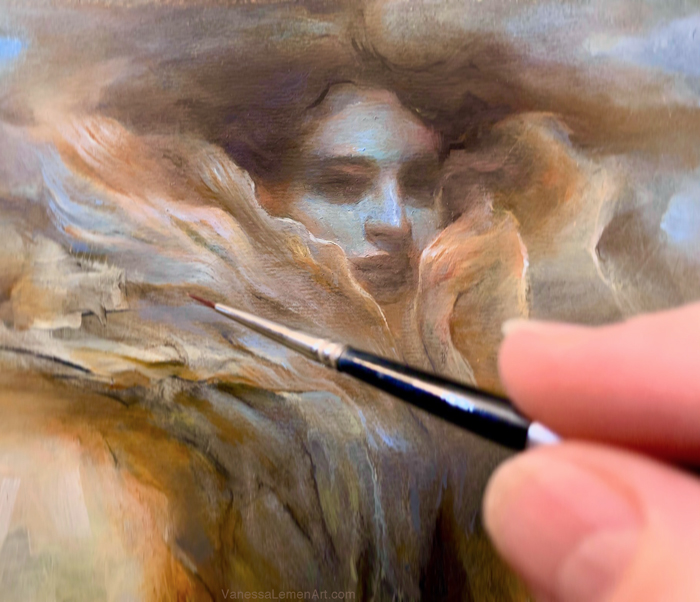
Spotters are very small rounds. They are shorter than liners and so are a bit more springy/rigid than liners which are longer so tend to be more ‘flimsy’ or have more give to the stroke. I used spotters to make a lot of the lines in the lower left portion that have a similar feel to the hard-edged strokes that were made with the spatula. I used the liners for those marks as well, but more in the tinier details in the face and some of the detail work in the gauze-like forms around the face. These spotters and liners are very tiny. Here is a photo for scale:
I also use mops at every stage/layer, softening some areas, cutting back into those softened areas with a spatula, then softening edges again. Mops are great for larger atmospheric effects in backgrounds and smaller softened areas in the smaller forms. I have a lot of various sized mops in order to utilize them to get the effects to work best for the size of the area and effect I’m using them for. So larger mops are great for large areas, smaller mops for smaller areas, but also smaller mops can be used to soften portions of marks while not manipulating the entire area.
My paintings are built up in many layers, while still allowing the underpainting to show through at some level too. I focus a lot of attention to keeping the marks feeling cohesive throughout the stages in the various layers. When a painting is dry, I’ll add translucent layers of paint on top of it, and continue to pick out and lay down paint in that way for a several layers. Each layer that is added creates varying degrees of transparency and opacity that is built up and this develops an array of levels of dimension and movement.
There are a lot of thin layers on this little painting overall, with some slightly thicker paint in the atmosphere and face.
Spirit Of The River Oak, oil on panel, 10×8″
I’ve shared a bunch of other posts here on Muddy Colors about painting, process, and other kinds of tools I use. Two posts that are great visual additions to this post can be found here and here. There are more posts about process too, and you can find them in this list here.
I hope you’ve found this information helpful. Thanks for checking it out.
**This painting was created for the 100 Trees group exhibition at Modern Eden Gallery, opening April 9, 2022. One hundred trees will be planted for every artwork sold. Find out more here.


we use a lot of the same types of brushes! I couldnt live without my scrapers, spatulas, and mops. hope you guys are doing well down there. Hugs from the PNW
oh hey Coro! I didn’t see this until much later – sorry about that. But yes! I am the same way about my scrapers, spatulas and mops – they’re the tools I use the most for sure. And the brushes that are old and beat up and have become something different from what they were at first. Love those too. 🙂 We are doing okay here, thanks. I hope you guys are doing well there too. <3 Hugs to you and the fam!
Thank you for sharing about your tools. I am a fan of your art. I hope to take one of your classes. I love your powerful images of women. I am an older woman who was disempowered by gender bias. I was so indoctrinated and bullied at a young age about the inferiority of being female that I believed it. My life choices were limited.
Your art empowers me and opens up hope
My best wishes to you.
Also, do you use “Sable” small rounds for detail? I see you use Trekell brand. Don’t know if you use synthetic or sable. So glad sable is improving in quality. Again thanks! Your art is amazing. Wish I could afford an original or two or three.