 (this is not a paid or otherwise compensated review, just my observations as a user of the product)
The first easel I ever owned was a simple A-Frame. I bought it when I was in art school and needed something relatively small and inexpensive. That was over twenty years ago and somehow I’ve never upgraded. It helps that most of my surfaces are less than 20×30 inches. When I need to work larger, my humble student A-Frame does feel a little undersized. Overall though, I haven’t had the need for anything more elaborate.
Late last year, my mom (who’s also a painter) found this new and strange looking easel call the The Artristic which is built to give an unusual amount of flexibility in positioning your surface. Despite her excitement and the novel design, I wasn’t convinced that it would be useful for me. When it comes to my painting tools, I tend to keep it simple and functional and then put it out of my mind. In other words, I just wasn’t sure that I had a problem that this easel would solve. When I ultimately had the opportunity to sit in front of it, I realized that I might have been wrong to dismiss it so quickly and shortly after that I had one of my own.
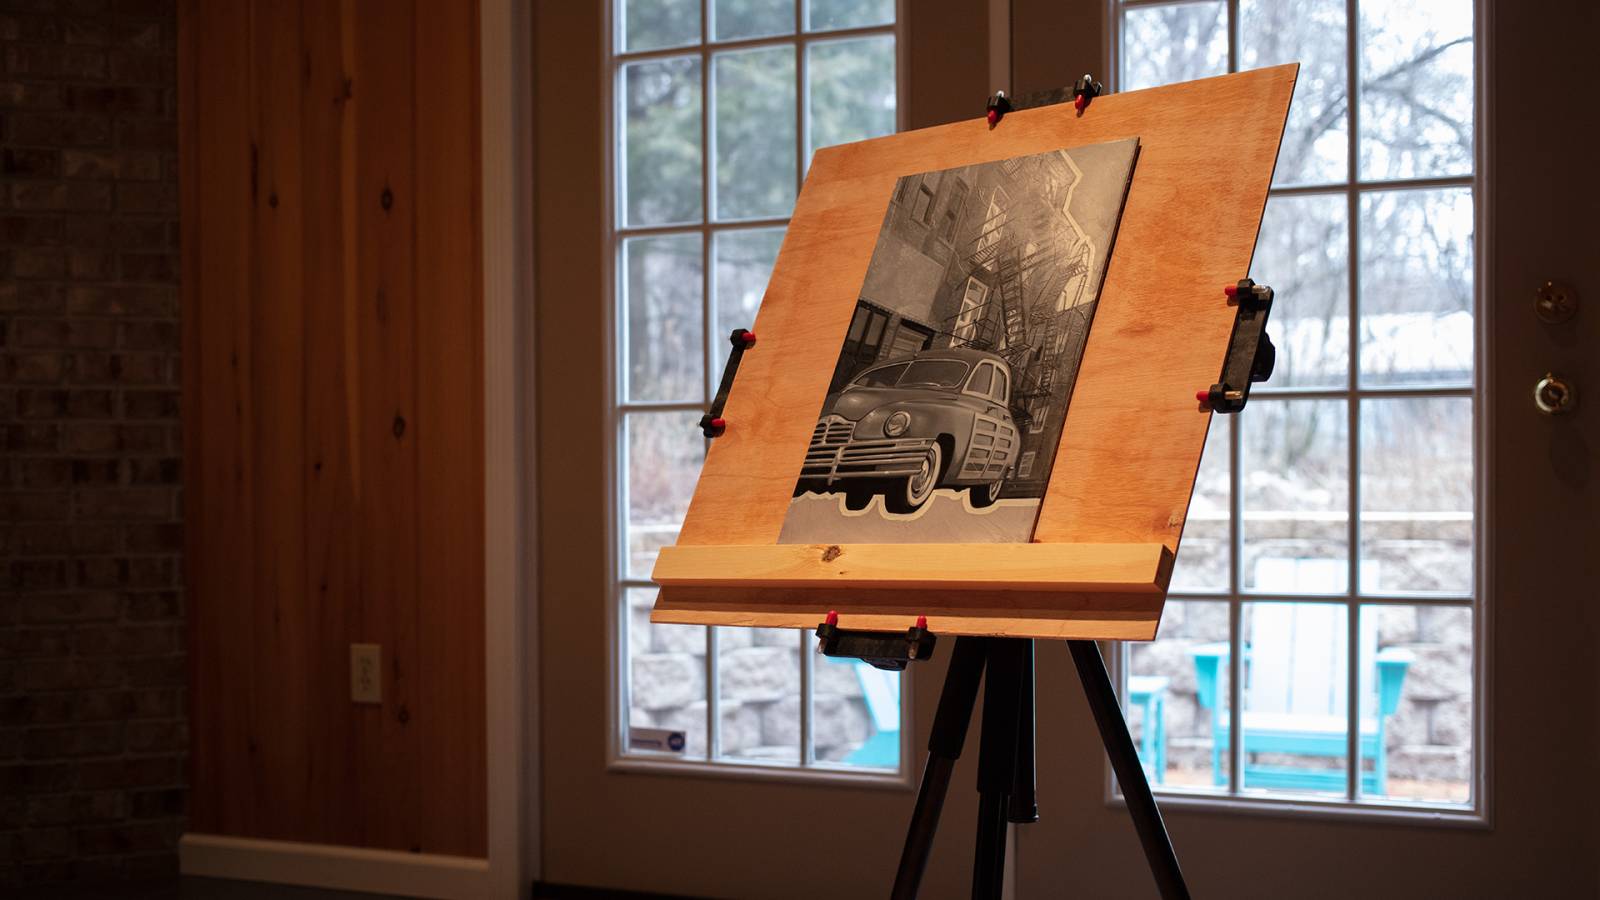
The design is basically a tripod topped with a three way head with telescoping arms which hold your surface. The base of the head can pan and tilt while the top portion can rotate the painting surface. The end of each telescoping arm is T-shaped with a pair of screws running though it with spikes on one end and rubber tips on the other. These can be used in a number of different ways to hold different types of surfaces. The entire head unit is mounted to a set of adjustable height tripod legs with a central column that can be raised about 9 inches. The idea behind this rather unusual easel design is that it can tilt, swivel, and rotate your surface to nearly any imaginable position, allowing you to avoid holding awkward and uncomfortable positions while working. It is also relatively portable if you work plein air or have a need for something you can easily pack into a car trunk.
Materials And Measurements
The tripod appears to be aluminum with plastic flip locks and is a three segment leg design. There is a bubble level on the top platform and legs can be unlocked to splay nearly flat. Max height of the tripod with legs and center column fully extended is roughly five feet tall. Collapsed height is around two feet, but you could get lower if needed by unlocking and splaying the legs. The feet are fixed rubber tips and I don’t see any option for swapping to spiked feet for outdoor use. That said, the head can be removed and attached to any tripod with a standard 3/8” screw, so if you needed something taller, shorter, lighter, heavier, etc or wanted legs that allow spiked feet, you would just need to swap it to an appropriate camera tripod from another manufacturer. Essentially, the legs seem to be an off-the-shelf basic aluminum tripod. They seem robust and sturdy enough for my purposes.
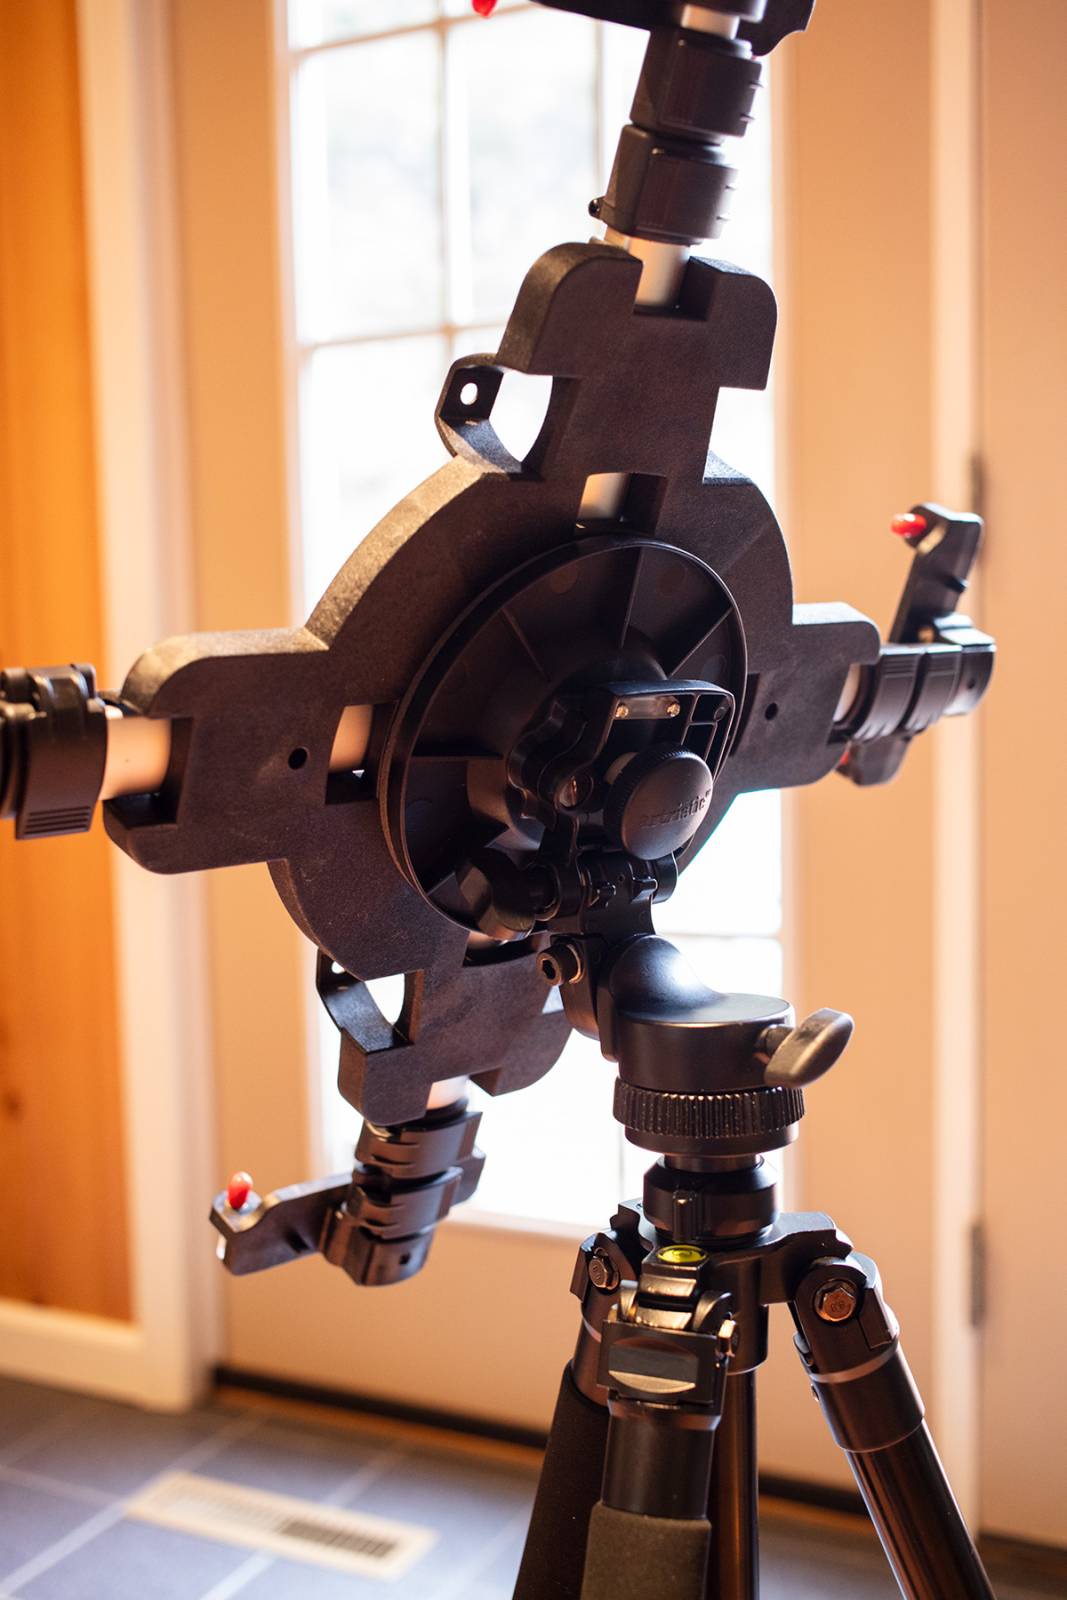
The head starts out as a typical 3-way photography head. The base which attaches to the legs is metal and has a metal hinged plate. Screw locks allow for this base to swivel 360 degrees and for the hinge to tilt from a flat table to just past a 90 degree vertical. The grips for the locking screws are plastic and feel a bit cheap. Sometimes locking or moving feels coarse or imprecise, though this is in comparison to high end tripod heads that I’ve used where fine control would be much more critical. Overall it does its job.
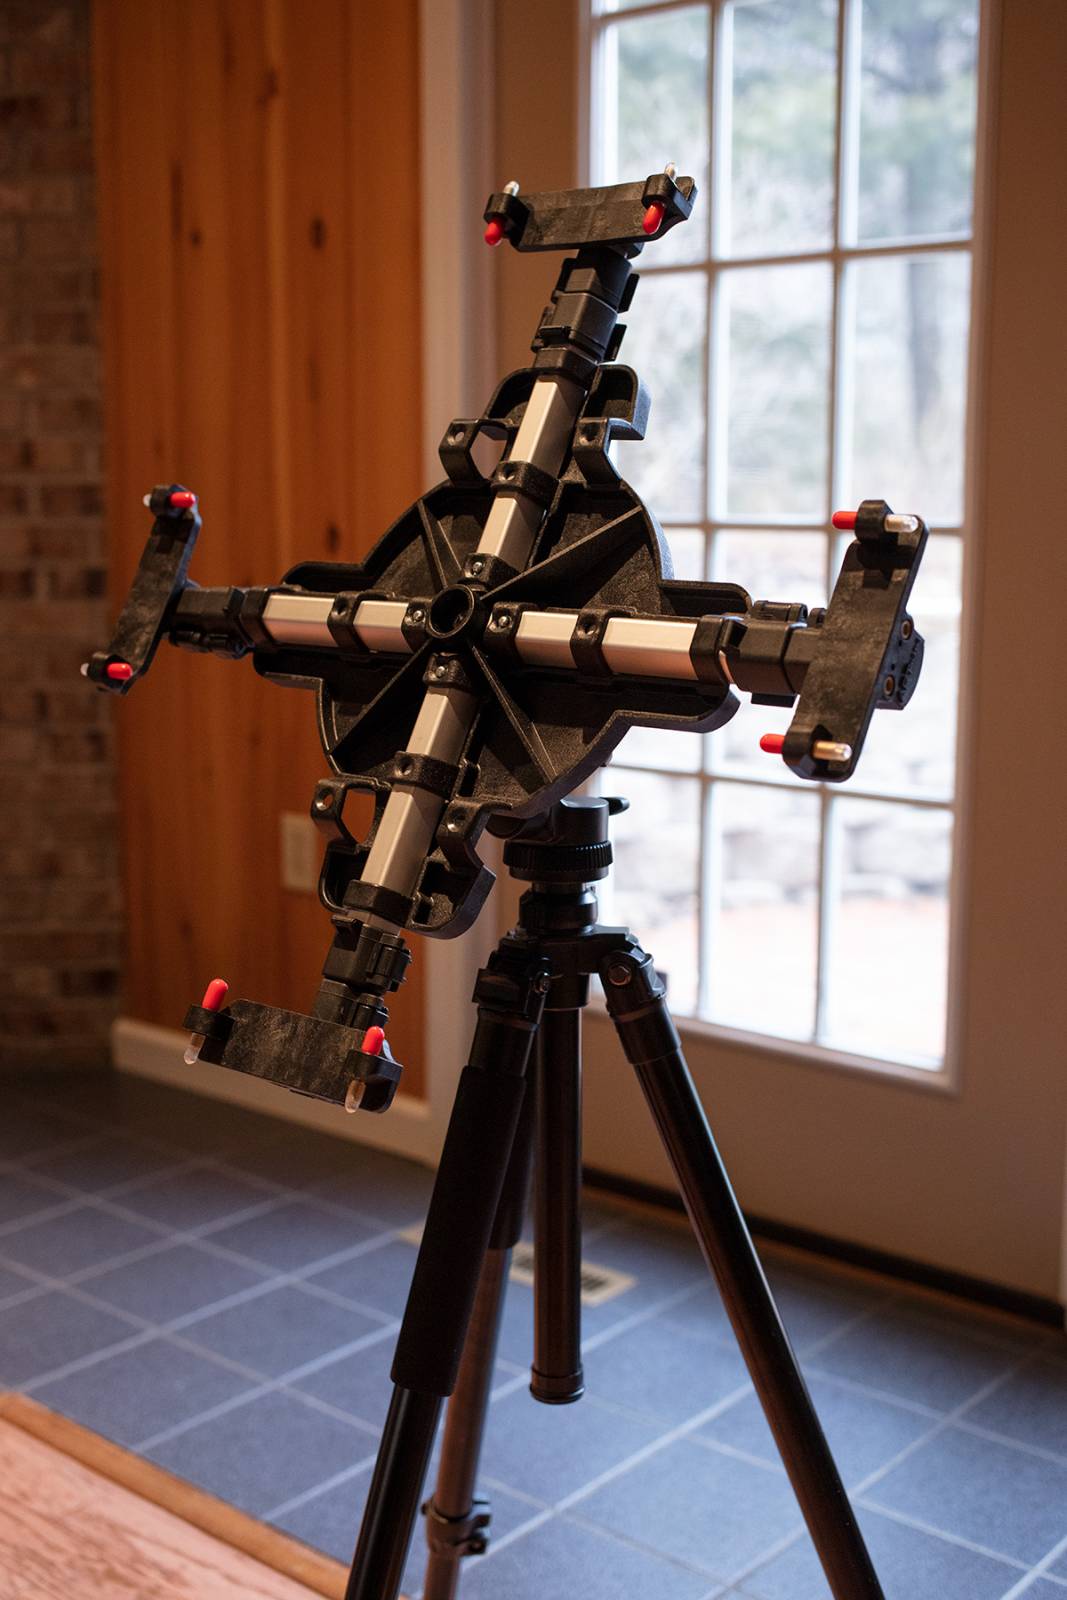
Attached to the hinged plate is the contraption which actually holds your painting. While I suspect the legs and tilt/pan portion of the head are simply generic camera tripod parts, the business end of this thing feels much more like a custom designed piece of gear. I’ll call this part “the bracket,” because this is what actually holds your surface and transforms a fairly basic tripod into something interesting.

Twisting a locking disk behind the bracket will allow it to freely spin 360 degrees, allowing you to place your surface at any conceivable angle and then locking in place by tightening the disc. The bracket itself is a roughly circular platform that is made of some kind of very sturdy plastic. Where some of the plastic knobs and flip locks might feel flimsy, this part feels very solid. There are four extendable arms which attach to this platform and they can be removed and positioned in a number of different configurations depending what type or size of surface you will be mounting. These arms appear to be lightweight aluminum with plastic flip locks and, again, look to be off-the-shelf tripod parts. On my easel, one of the sections is pretty tight to extend and I don’t see any way to adjust the tension. The end of each arm has the previously mentioned T shaped piece with the spikes and rubber tips.
How It Works
It seems that the primary intended surface is stretched canvas or cradled panels. To mount the canvas, you would extend the bracket arms until the metal spikes grip into the inner edge of your stretcher bars. It’s a smart design that allows uninterrupted access to every edge and I have every reason to believe it would work very well used in this way. Depending on how you set up the bracket arms, it can hold canvases from 7”x7” up to 47”x47”
I don’t generally work on stretched canvas though. I mostly prefer 1/8” Masonite panels, and for sketching I have been working on watercolor blocks. For something like this, you would use the rubber tip side of the T-bars instead of the spiked side. The rubber tips are placed so that a 1/8” surface slides nicely underneath. A thicker surface could be gripped by the tips. There are still a couple issues though. The first is that the smallest panel surface that can be properly fitted is around 19”x19” and I regularly work smaller than that. It’s likely I could re-position the arms and find a way to secure a smaller panel, but that would still leave another issue. Because the rubber tips hold the panel in place, they interrupt and cover parts of the surface edges. My mom says she’s used it in this way and it wasn’t a problem, but I’m pretty sure I would find it annoying. Obviously, this would not be an issue for boards with a handling margin.
The solution to these issues is to produce a support. This isn’t hard and I made mine in about ten minutes with about $10 with of materials from the hardware store. Just be aware that you may not be able to use this easel properly right out of the box depending on your preferred surface.

In Use
I’m still very new to this easel, but first impressions are that it definitely has some advantages over a conventional design. While the ability to rotate the surface is the most novel, I find the tilt to actually be the most useful to me so far. It allows the easel to rapidly convert to a drafting table, which makes painting my small preliminary studies way more comfortable than they had been on my traditional easel. It’s too soon to tell if this will improve the back and neck pain I sometimes get from poor working posture, but it feels like it will. It definitely allows me to position my body more comfortably while working small. I expect that the rotation feature will be really useful the next time I need to paint straight lines as well, as I’m all too familiar with having to contort myself for awkward angles.
It’s also worth noting that this unit has a relatively small footprint and would be ideal for small spaces. Mine is currently set up for working from a seated position and it only occupies about the space of a dining room chair. It can break down for travel too, though more likely by car than airplane.
Another benefit I’ve found is that it makes photographing work easier because I have much more control in getting my camera and surface parallel. The best way to do this on any easel is to place a mirror on the easel and then center the camera to be pointed directly at its own reflection. This is totally doable on a conventional easel, though I find myself having to make a lot of awkward height adjustments to match the tilt. Because the bracket has so much freedom of movement, it’s much easier to quickly get everything aligned.
As to downsides, this easel will definitely limit how large you work. While they claim working sizes up to 4’x4′, I’ll probably not go beyond 24”x36” for panels. Besides the physical limits of the bracket, I’d also be worried about putting too much weight on the hinge in the head, which could be a critical point of potential failure if you abuse it. For this reason, I also need to make sure that I don’t lean on my surface when I have it in drafting table position. And of course, the need to build your own insert for working small or on thin panels is something to keep in mind.
Some parts also feel more durable than others. Mostly it’s well built, but some of the more off-the-shelf components feel a bit cheap. This gives the easel an almost prototype feeling, like someone had an idea and cobbled it together from available parts of varying quality.
Summing Up
So who is it for? Definitely it’s a great option for folks who work small and close, which is how I’ll likely use mine most often. It’s far more comfortable than my conventional easel for doing prelims and small studies. I imagine it might also be great for landscape work so long as you can set up near your car on firm ground. If you have limited mobility or find yourself practicing poor posture while painting, it could potentially be a very big help.
All in all it’s a very clever concept that’s mostly built pretty well. I’ll be using this as my primary easel going forward and I look forward to seeing what effect it might have on my workflow (and neck and lower back) over time
Learn more at their website here


That is a nice set up. Have you tired this as a standing desk or easel for your smaller pieces? I am looking for a small set up for standing but the height is always an issue at least for me. I was using a watercolor set up on a tripod at times but it is a pain to connect and adjust when it is so tight to my tripod head. https://enpleinairpro.com/collections/packages/products/traveler-series-watercolor-package
Forget about rotating.
This Artistic easel seems a lot better and more stable for tilt adjustments. Definitely interested.
This is so interesting! Loved hearing your thorough and honest review of the product, David.