
Welcome to part of 1 of 2 on the companion piece to last year’s Thrain at the Battle of Azaznulbizar. This image is from the same battle, but depicting events on the other side of the mountain where Azog the orc is about to make his final stand. As with the last post, I am painting this image as if I was court painter to Durin VII, commissioned to paint some of the heroic moments from his family’s history. (Even though I know it’s all lies! Azog really died from a drunken fall and most of the dwarves got swampfoot. It was a rock concert, not a battle, and the whole land dispute was settled by lawyers out of court. Tolkien got it all wrong. But look, these dwarves are paying in actual gold and I need the money. So I’m doing what I’m told okay?)
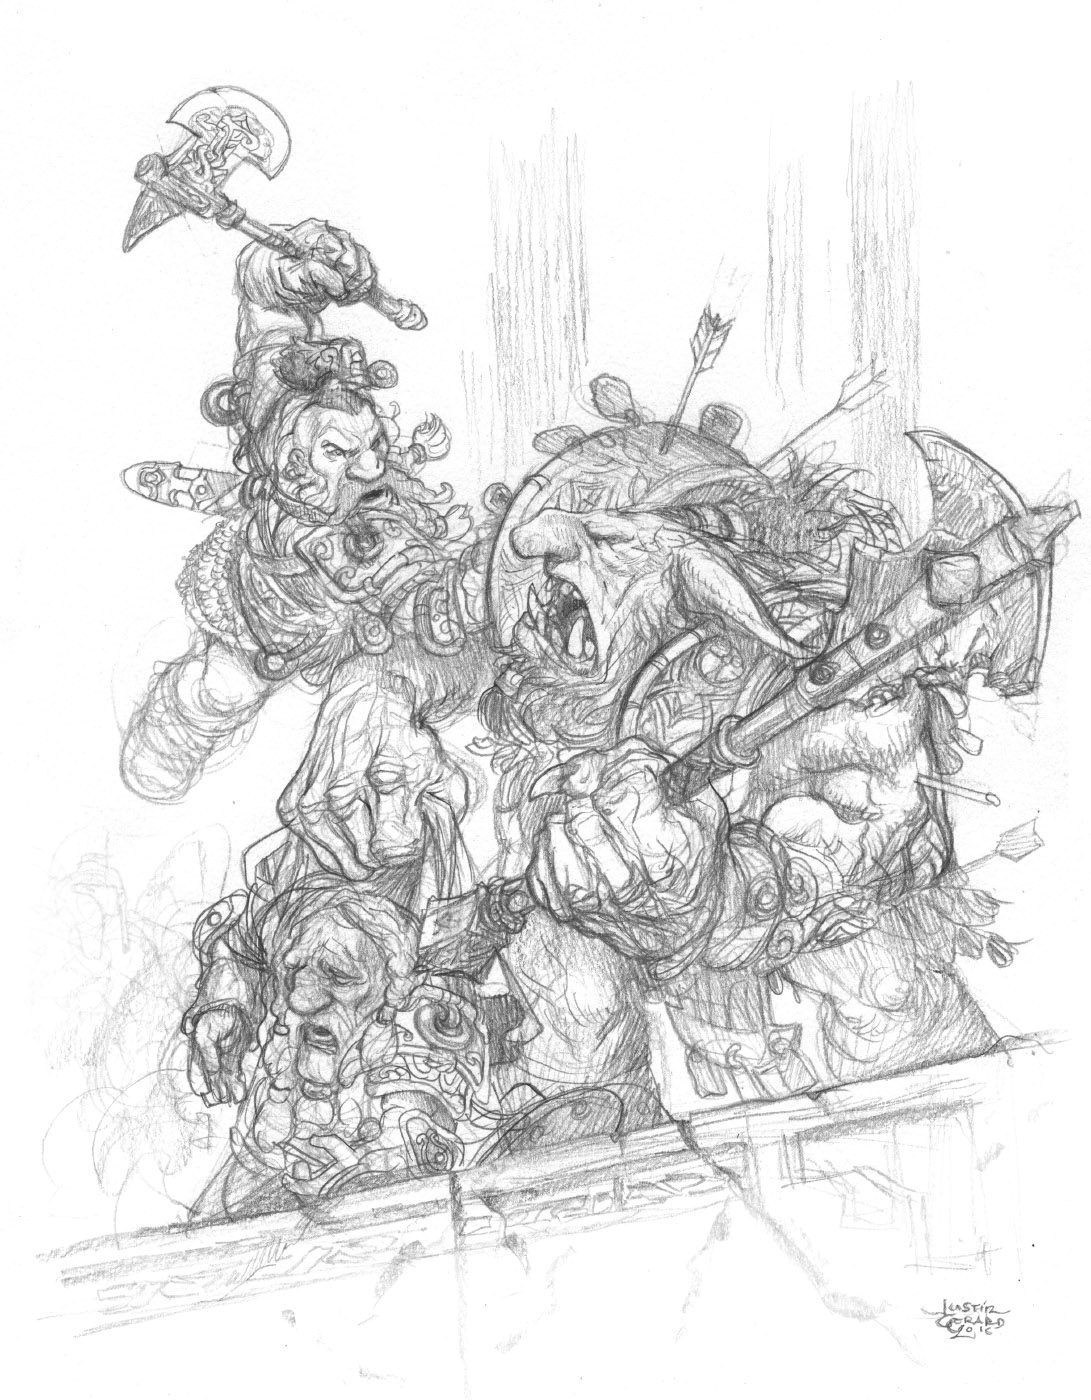
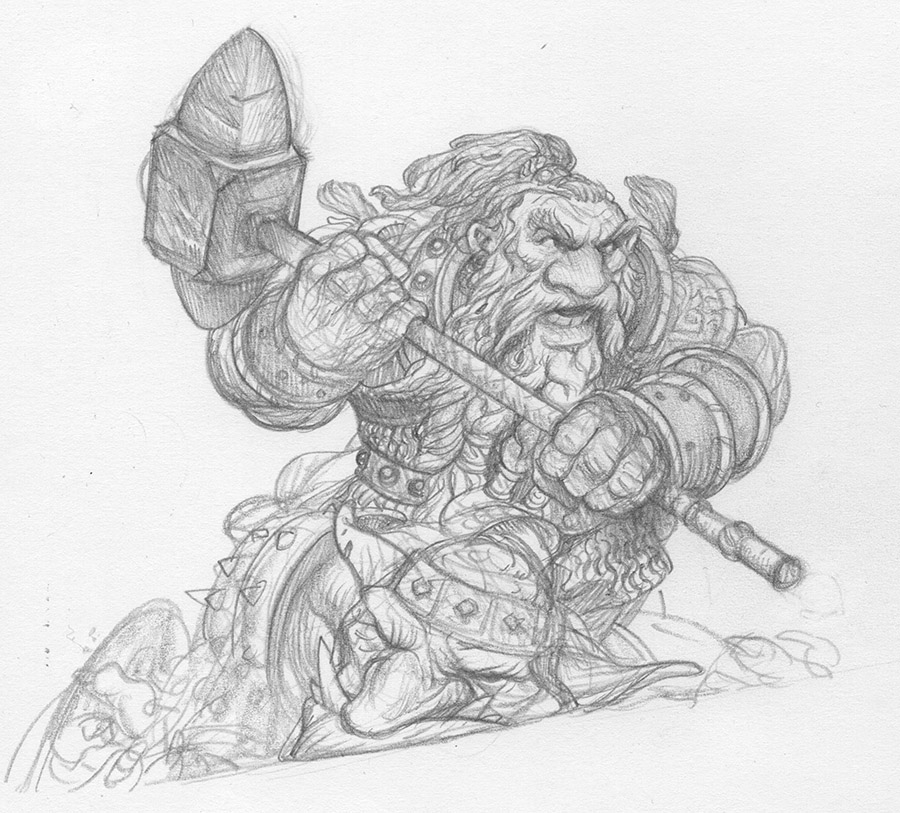
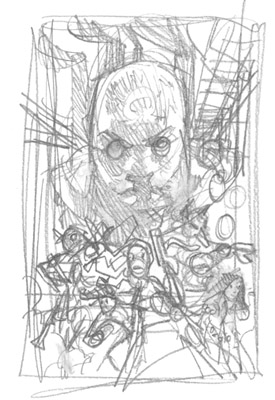
The drawings for this image were completed on Canson XL Mixed Media. I did the drawings of the characters separate from the background and then assembled them in photoshop. I enjoy working this way, but sometimes after I assemble the final drawing I find that some of the drawings aren’t following the perspective quite right. Then when I get them into Photoshop they look mushy, like a camper’s tent trampled by bears.
To fix this I created a simple perspective grid in Photoshop. There are a lot of great tutorials out there on how to do this, so I won’t waste your time demoing one here, but this demo by iingo offers a quick and simple guide to making your own.
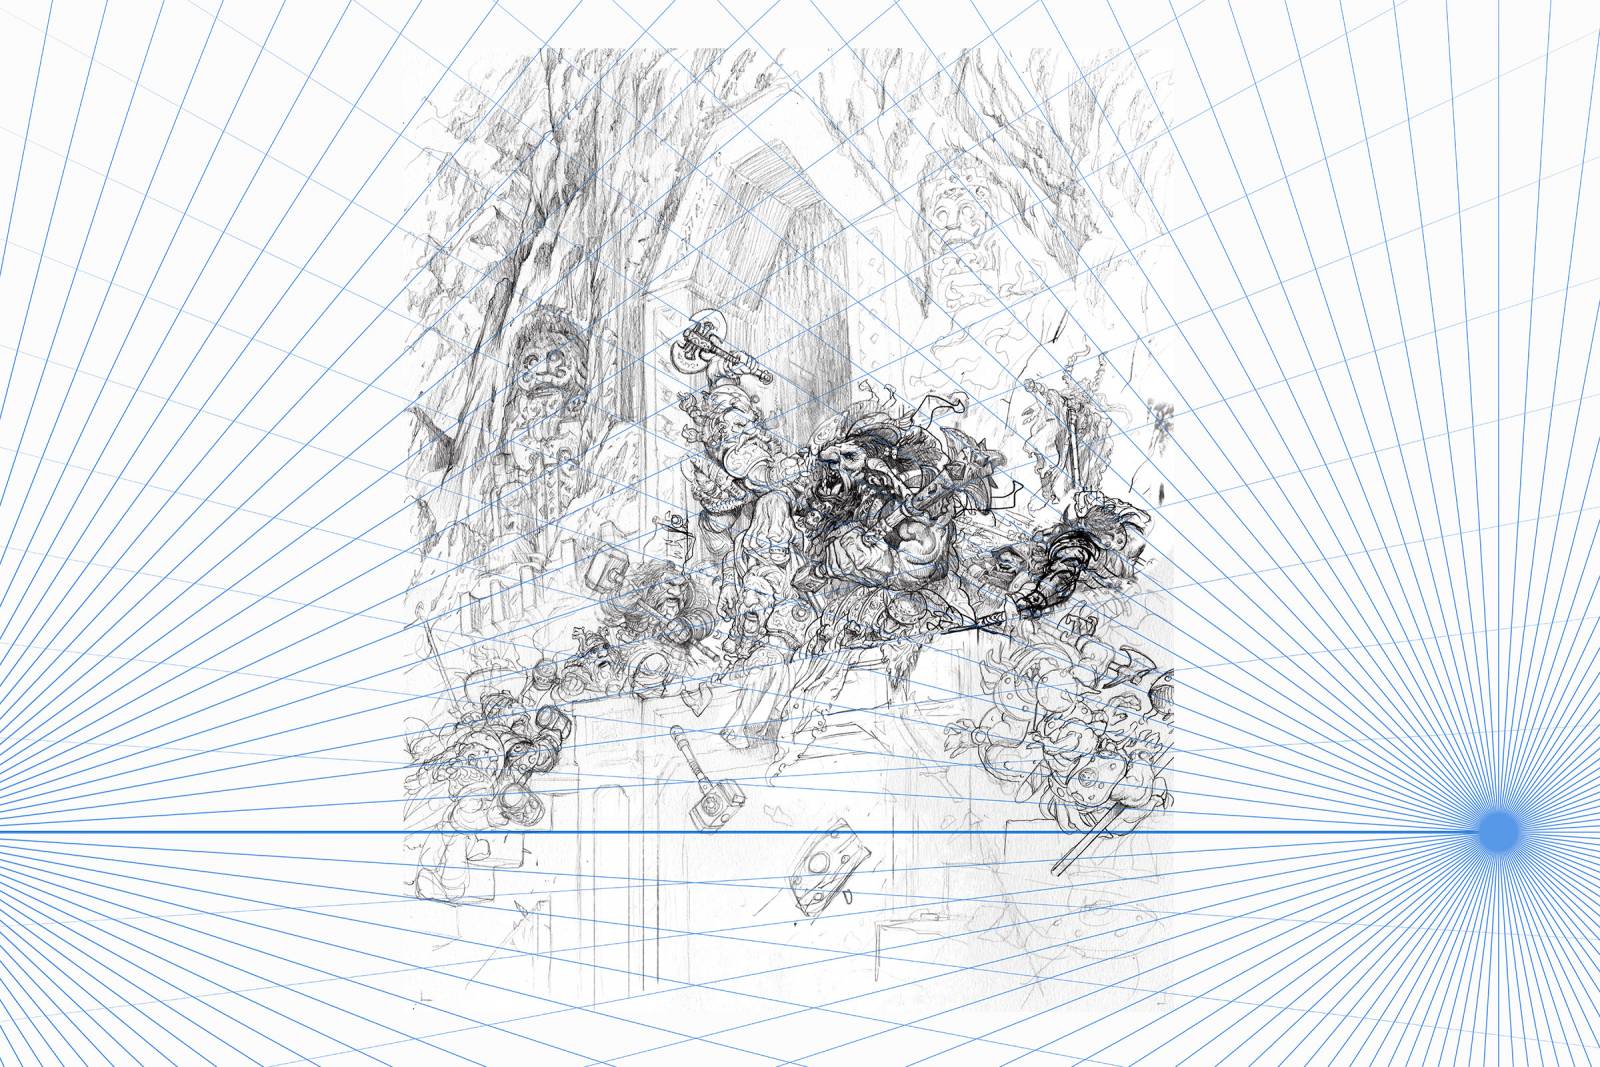
Using this grid I was better able to wrestle the composition into something more civil. After this I begin adding shadows transparently to slowly build up a nice value base. I leave this perspective grid on a separate layer at the top of my file so I can flip it on and off as I work.

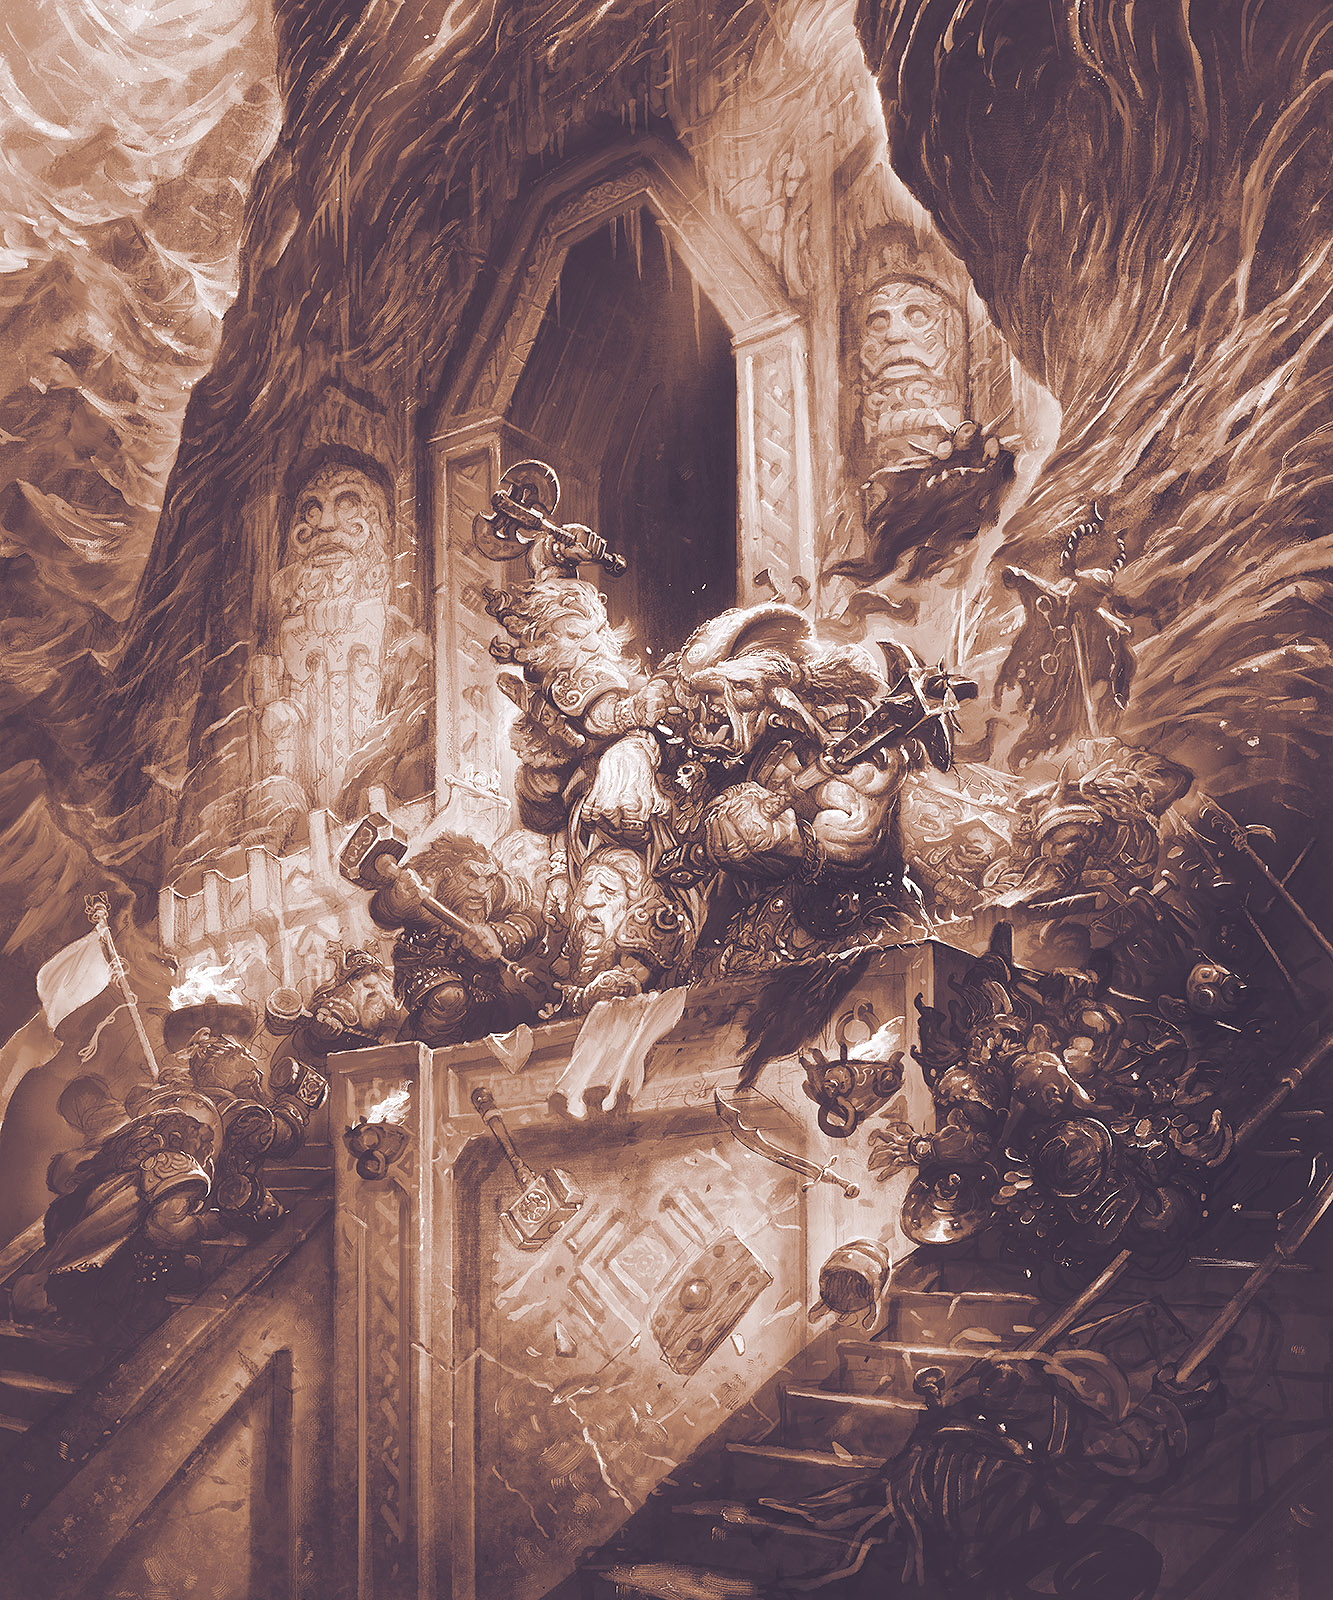
Once I am happy with the values I start working in sharper details using textured mixer brushes to build up a solid underpainting for the later color layers.
Tip: To save time at this point I work with 4 different tools, and only one brush from each of those tools. That way I can quickly switch between them using keyboard shortcuts. It may sound crazy. but it does save a lot of time. I stick to only one brush for normal brushes, one brush for eraser, one brush for smudge tool and one brush for the mixer tool. Using just these 4 tools I can make a crazy amount of brush shapes occur without having to constantly click on different tool presets.
Sidenote: Unfortunately, there is as yet, no keyboard shortcut for specific brush presets. (Adobe techs, if you happen to read this, I’d love it if I could bind specific tool presets to specific key strokes. As in, ctrl+shift+1 for my chalk brush, ctrl+shift+2 for my watercolor brush and so on. OOooooohhh the amount of time that would save…)
Lastly, I add a nice, warm tone to my underpainting.
In Part 2 we will be adding full color to the image. In recent posts I have talked a lot about working with transparent layers, but for this image I am going to be using normal layers to achieve a variety of effects that are difficult to achieve with only transparent layers. We’ll be going over those and having some fun with mixer brushes. Tune in next time! SAME BAT-TIME, SAME BAT-CHANNEL.

That’s awesome, Justin! Really inspiring image. Looking forward for part 2. Thanks alot for sharing it.
Awesome! Thanks for sharing 😀
Thanks again for sharing Justin! Always love to see your dwarves come alive. You might find the BrushBox PS extension handy, you can assign toolset shortcut buttons, that can handle the type of tool switching you spoke to. I use it to setup different sets of tools that I am using throughout my process: Design, Drawing, Rendering, PostFX and such.
https://gumroad.com/l/brushbox
Hope you find it helpful, it’s a creature comfort I would definitely miss if didn’t have.
Thanks again and I can’t wait to see the followup post!
Hi Joshua, I saw this extension awhile back but wasn’t sure enough about it to buy. Thanks, I’ll check it out!
Dwarfcoin exchange rate is unbeatable at the moment 😉 Man, this underpainting is mouth watering…Thanks for the post!
To help with the hassle of not being able to easily access favorite brushes quickly through hotkeys, you can save tool selections as buttons in the action panel or you can buy the BrushBox extension (https://gumroad.com/l/brushbox). Hope that helps.
PS Sooo, when are you going to update that store of yours so I can throw some money your way (no pressure, just curious, and I remember you mentioning you were going to do this awhile back)?