
Here is the thing. If you are like me you have probably been working on the same desk for years. In my case I have been working on this desk for no less than 20 years. It is my nest. My safe place. My sandbox. It is the cardboard box to Calvin.

But just like my art has evolved, so has my command center. This post is to show you what I have done and encourage you all to mod your space so that every day when you enter it, it is a sacred space to you. And because it is special, you will create special things there.
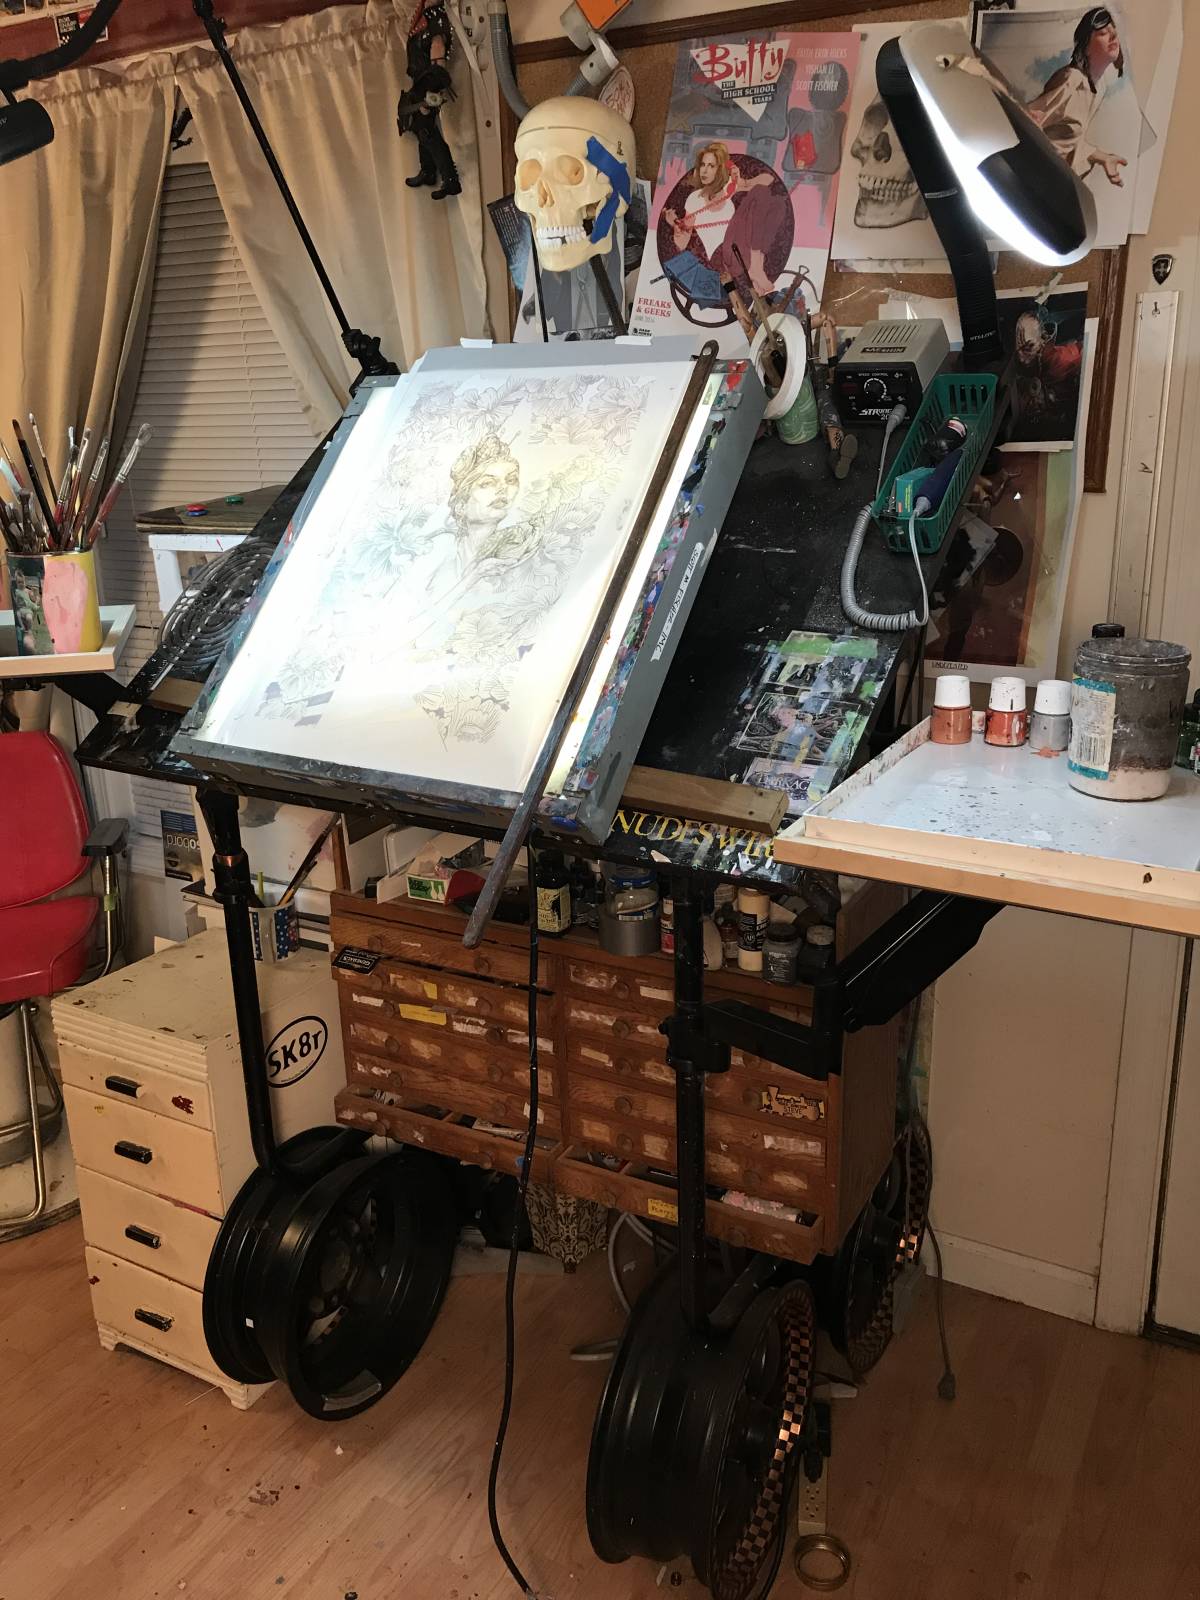
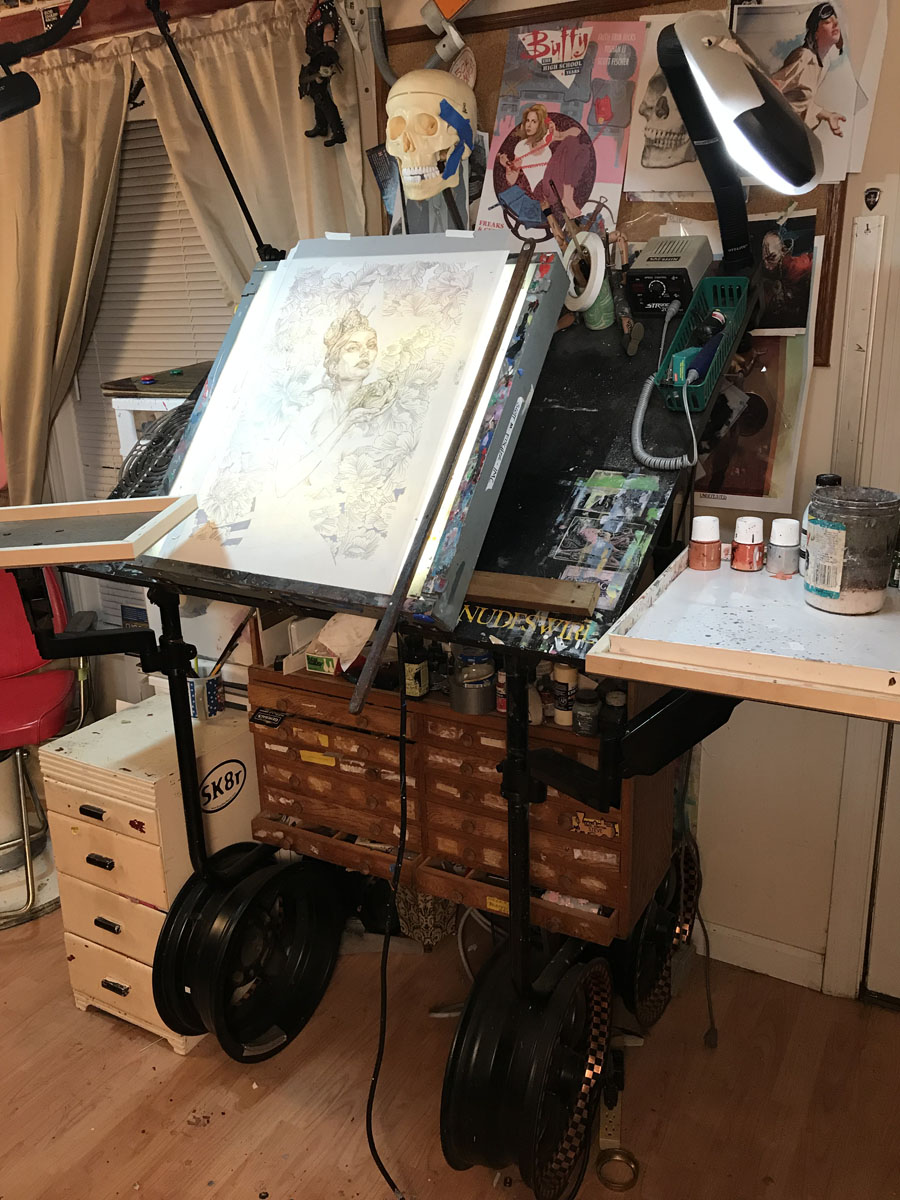
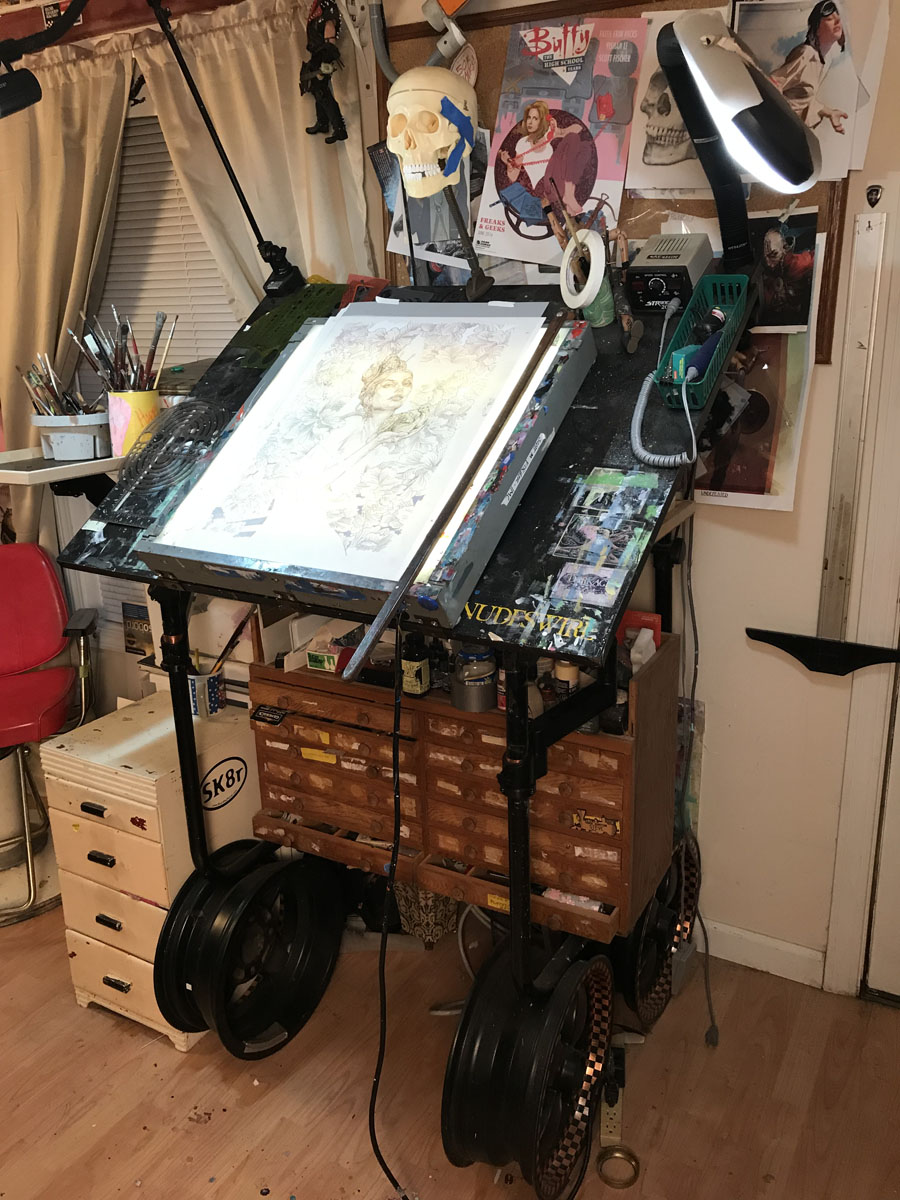
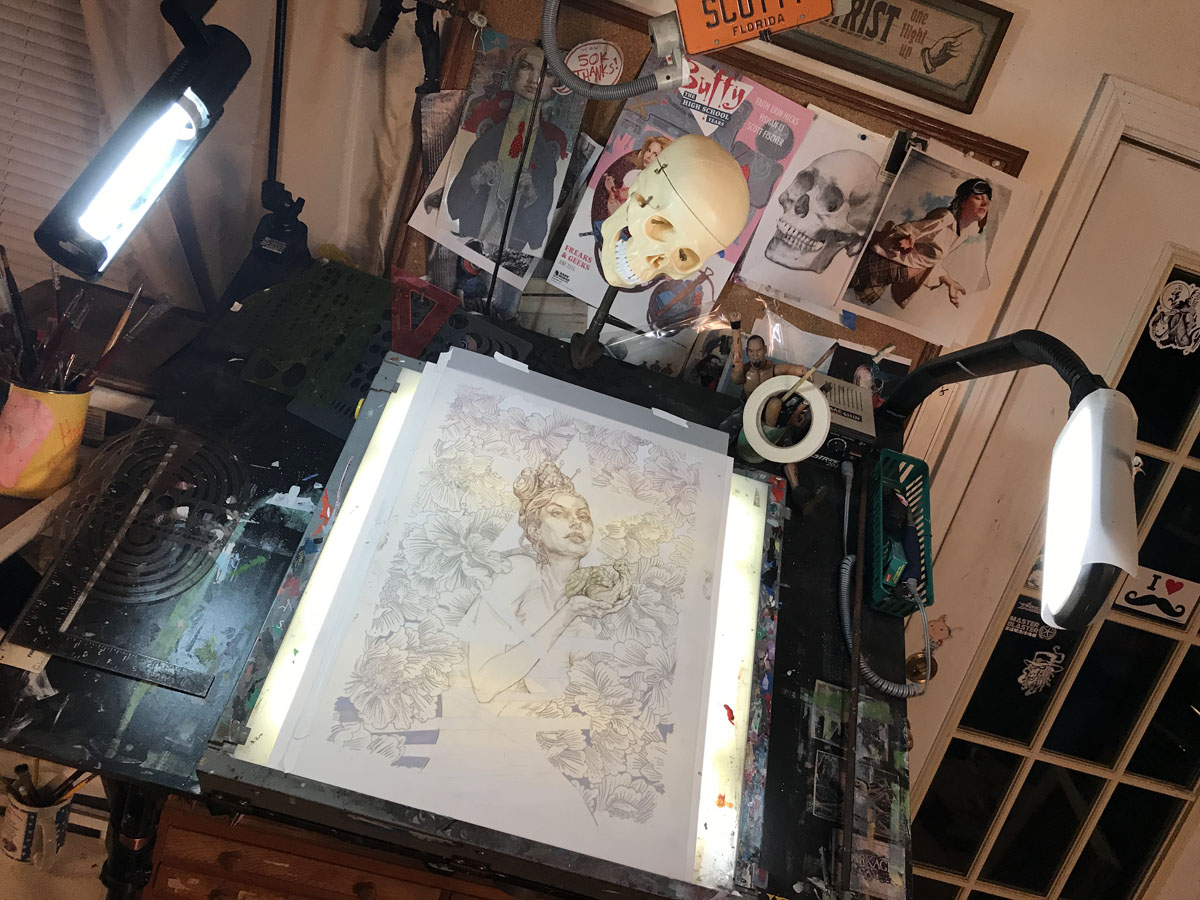
One of the first mods I did to the desk was to add a light table. This was one of those moments where I walked into a second hand store, and there on the floor was a 24″ light box! $20 later and it was in the car and 20 min later it was on this desk.

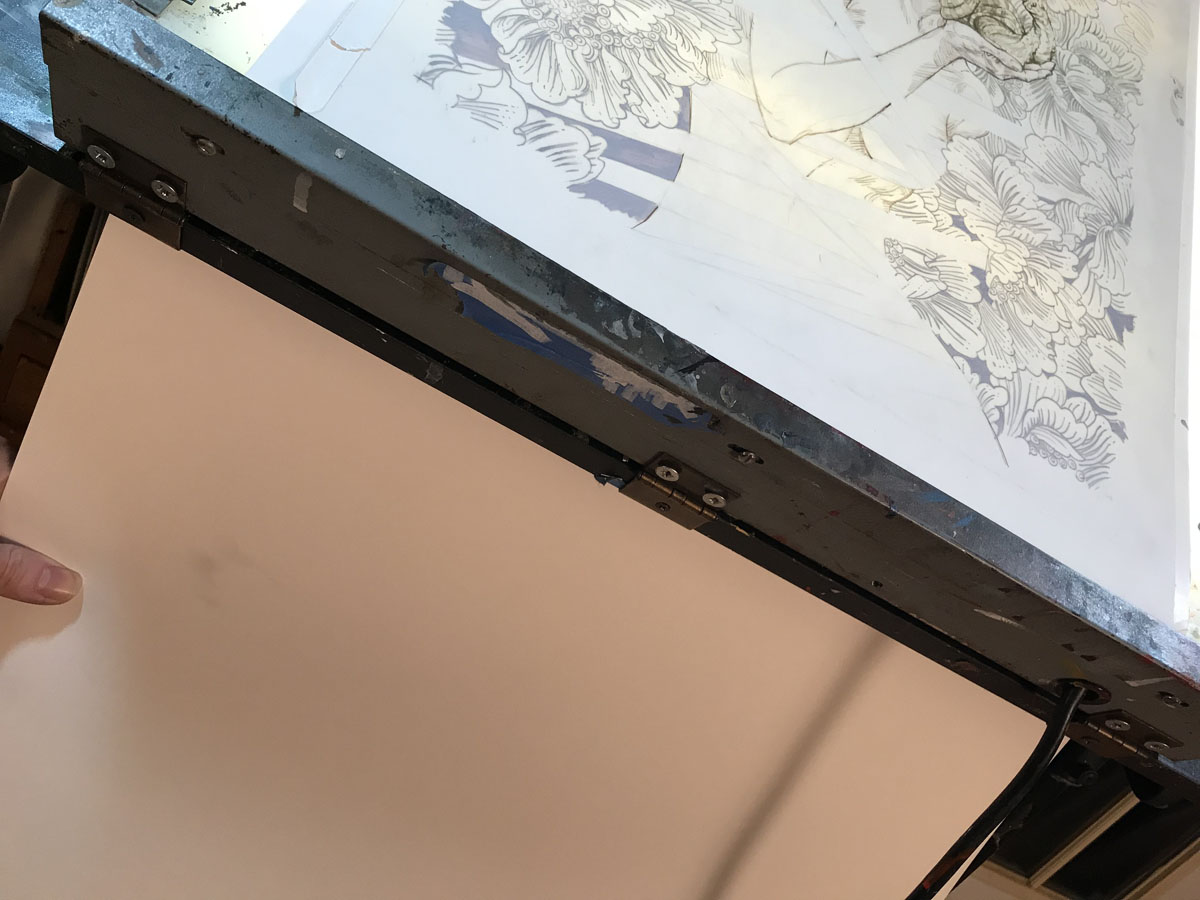
For the first few years it just laid flat on the desk. But I kept wanting to tilt the surface of the desk quickly without undoing 4 leg clamps and praying all my schtuff doesn’t fall off. This is how things evolve. You live with it for a bit, and imagine how it could be better, and shake it up. Besides the viewing angle, tilting the surface allows you to reach the upper areas of an image this size without leaning over the desk and breaking your back. Hinges along the bottom were a simple solution, and to set the angle, all I needed was a piece of wood wedged underneath and gravity holds it where I want.
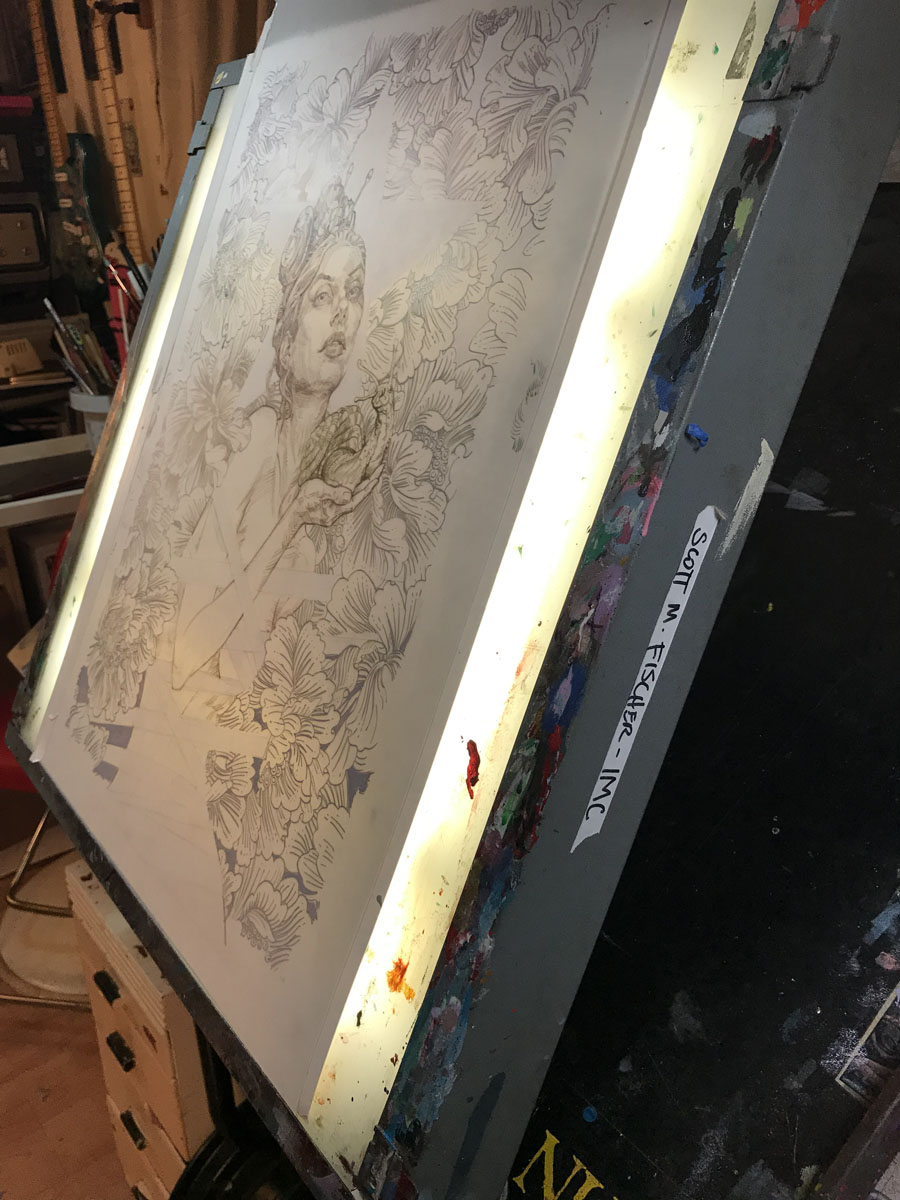
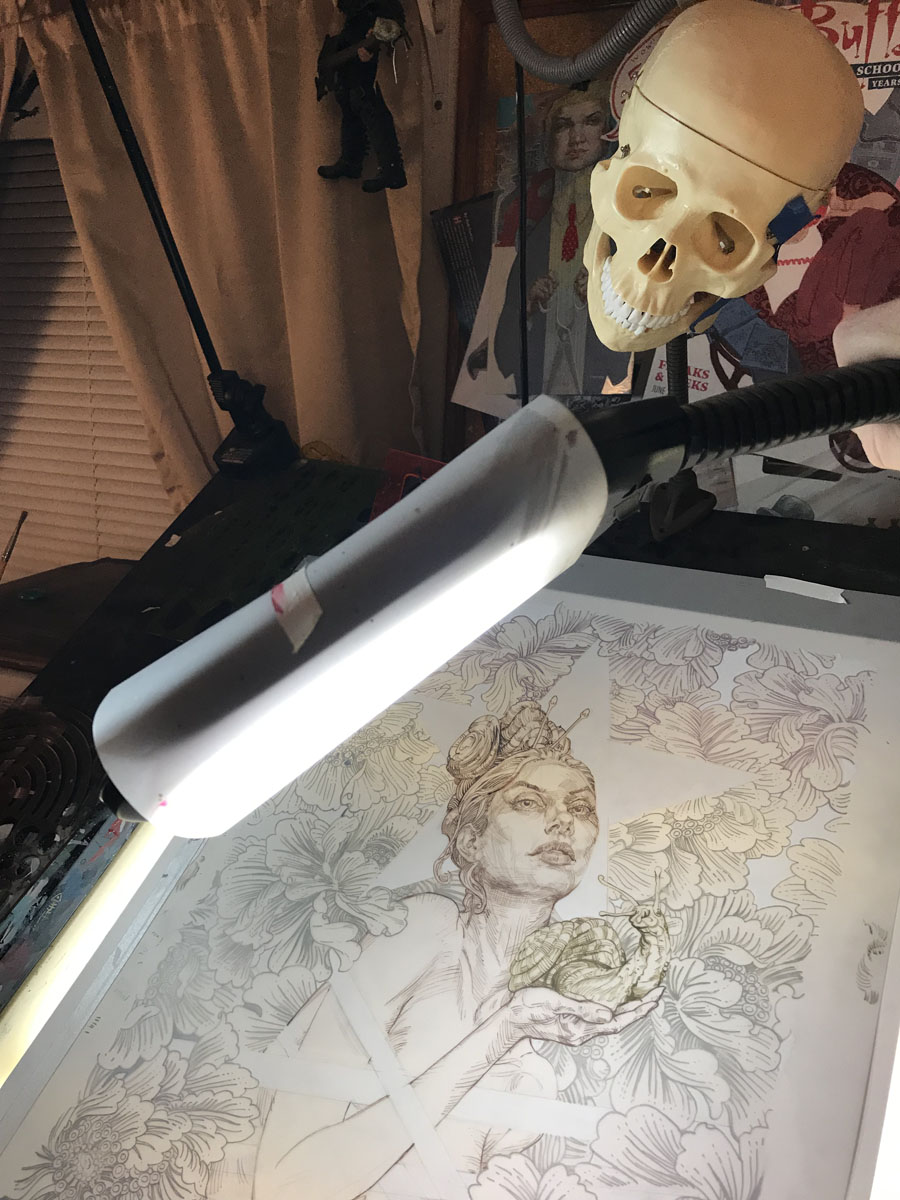
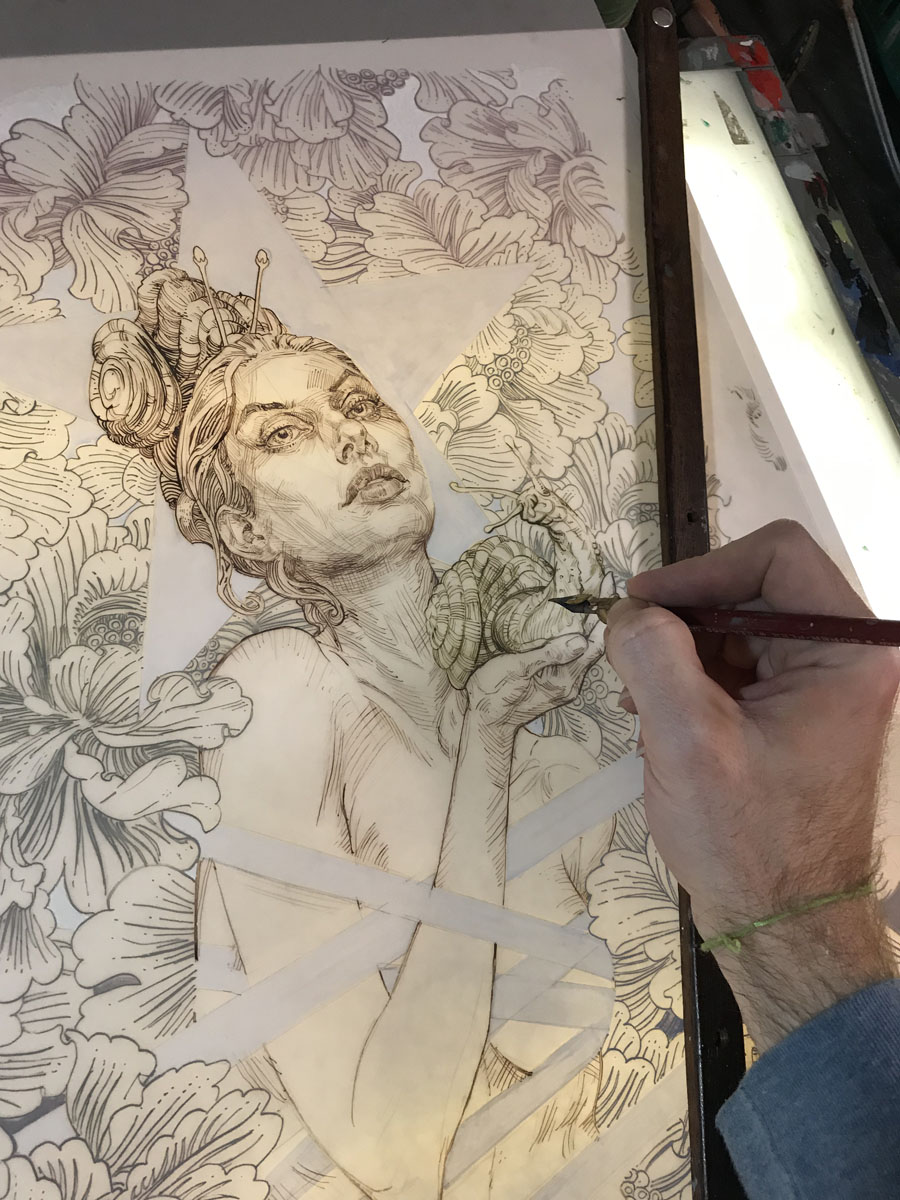
But sometimes the paper I am working on is still too big. And this is where a vintage heavy metal frame light box is the champ. I can use magnets along the edge to hold things where I want. (I can also hold ref along the edge!) Prelim drawing/ref for a new piece on the left. Live art in progress on the right. Blue and yellow magnets.

This brings us to my latest mod. I use to have a little Artist Taboret table next to the desk. But it never seemed to be at the right height or position for me. If I can help it, I want my pallet as close as possible to my work so I don’t look away from the art and break my train of thought. And my studio is usually a mess and that Taboret was an epicenter. I wanted something I could stow out of sight easy.
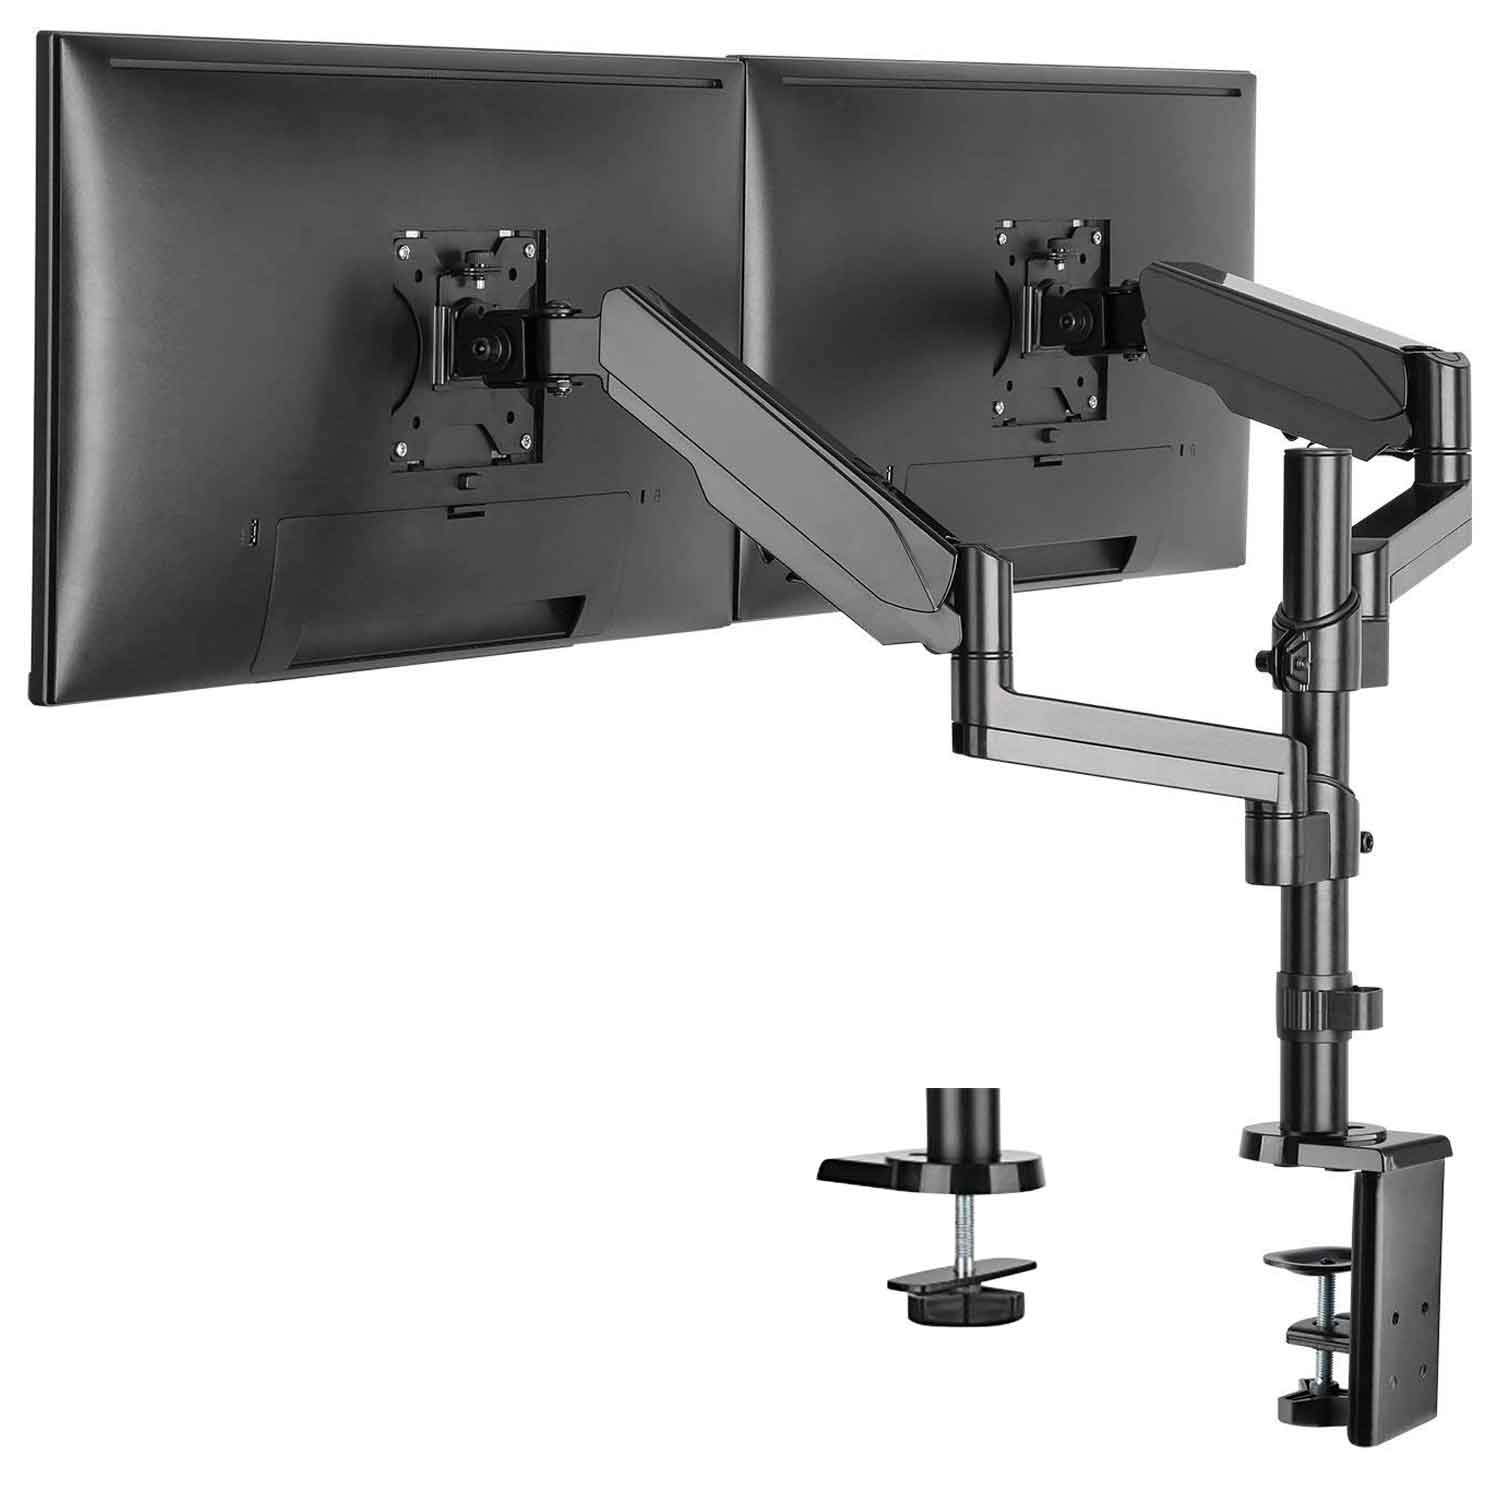
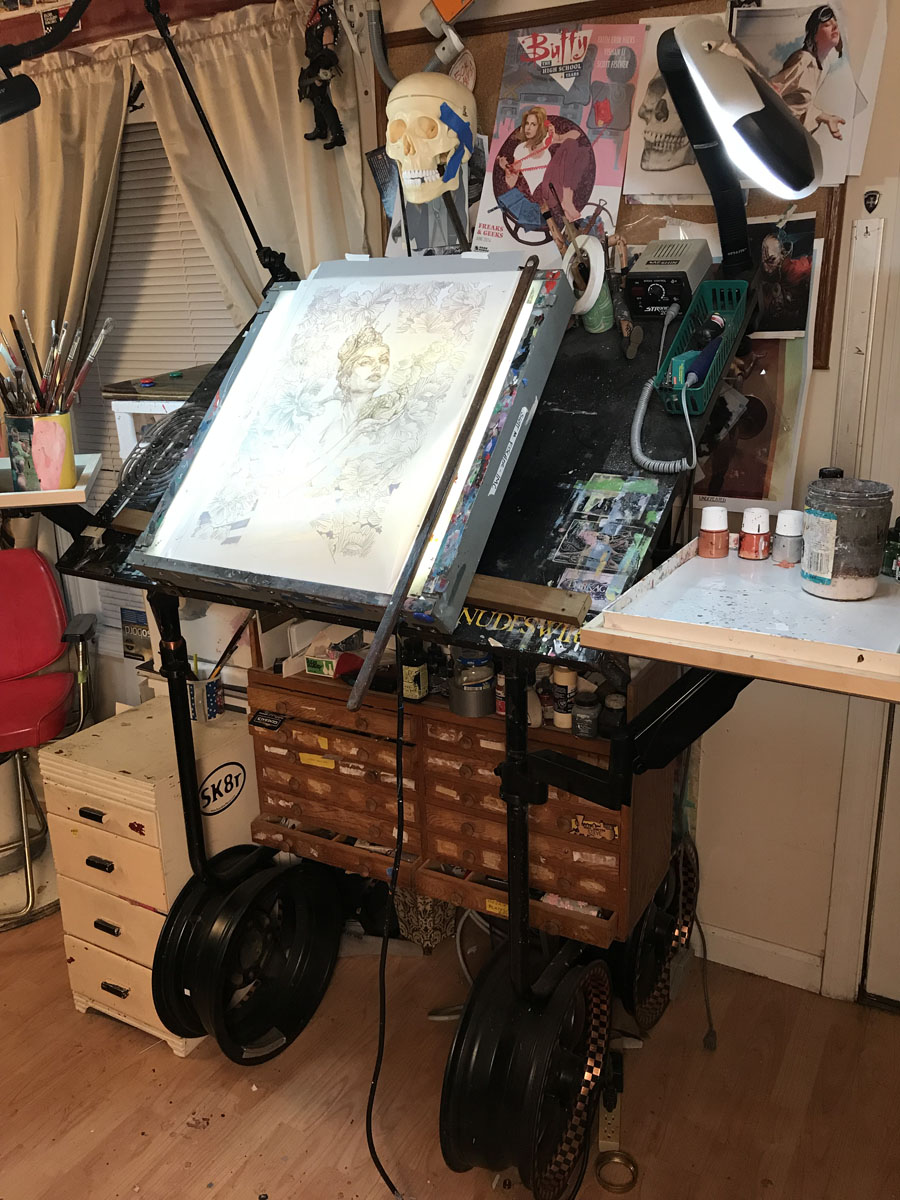
For digital, I’ve been working on a Cintiq mounted to an Ergotron adjustable arm. And to me the arm is as important as the Cintiq to get a natural flow going. And I dig how I can just push it out of the way when I am not using it. I noticed my desk has round legs on it. Hmmm…
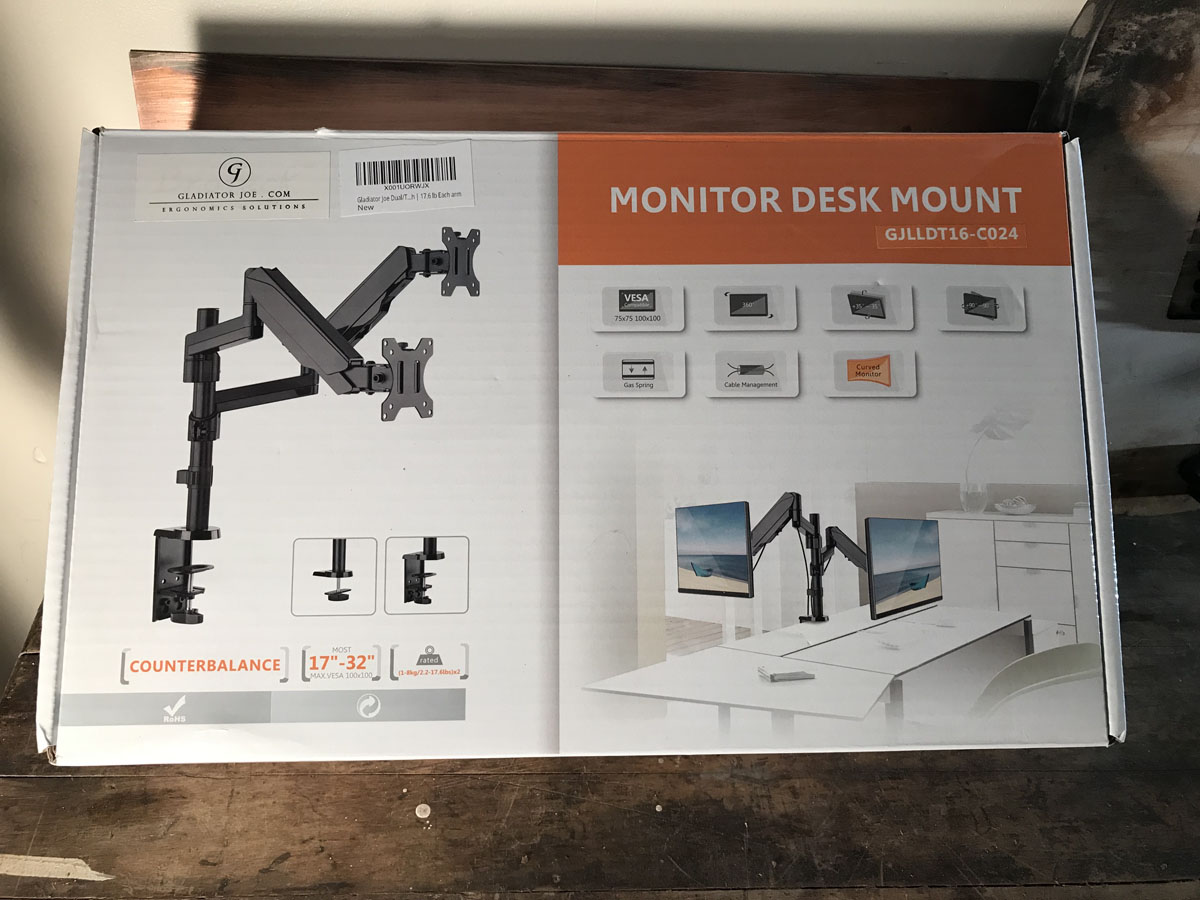
After loads of searching specs on line, the best bet for me was a double monitor adjustable stand. I got this one which has two removable arms. (Some manufacturers fix the arms to the stand.) Dual Monitor Mount You won’t need the central table clamp pole, just the arms.
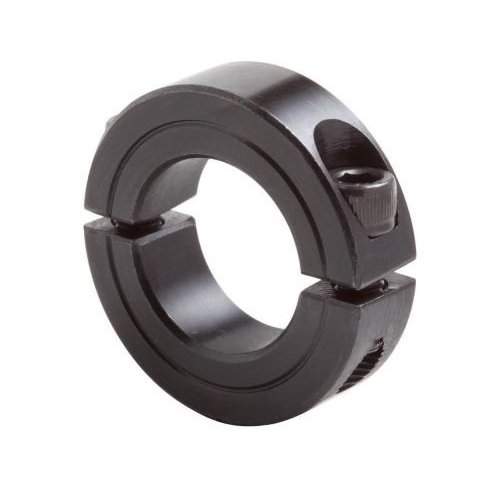
The diameter of the arms were pretty close to my desk legs. I needed a fixed point on my legs so the arms couldn’t slide up and down as I moved them, so ordered a couple collared sleeves that matched the 1-1/4 tube thickness of my desk and put those on. Split Shaft Pipe Collar Had the clamp on the arm been the exact size as my legs I could have skipped this step. But sometimes things in life get you close enough to make it possible, but that last gap requires some ingenuity to cross.
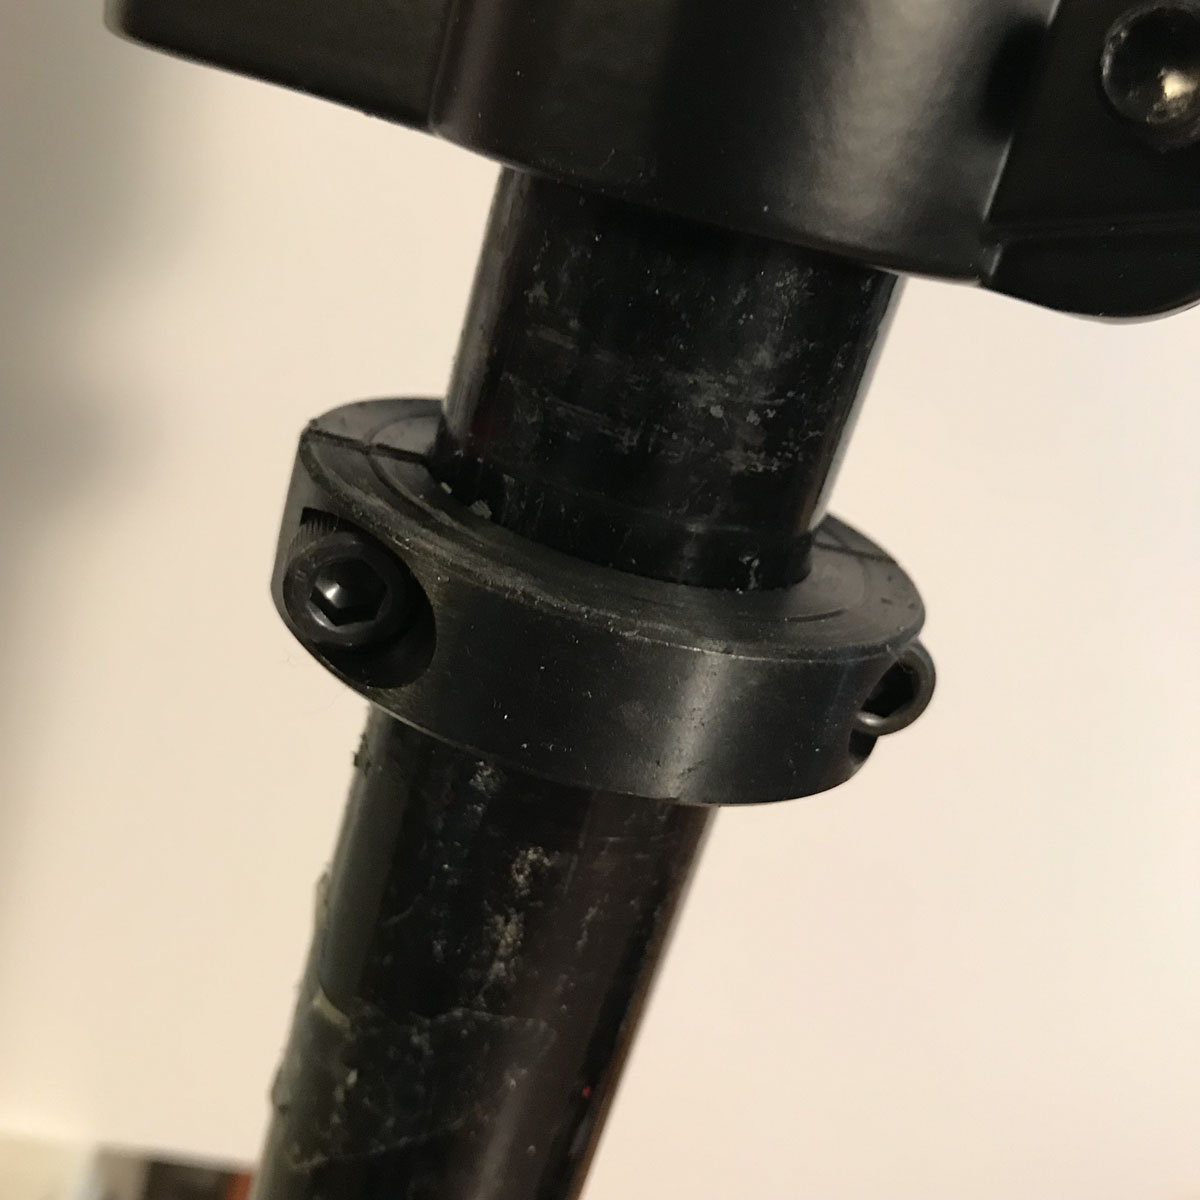
Then it was a simple matter of sliding the arms on. But you see the copper? That was put in as a bushing by me to fill a little gap where the arm clamp was wider than my desk leg. You could do it with paper, I just happen to have copper around, lol.
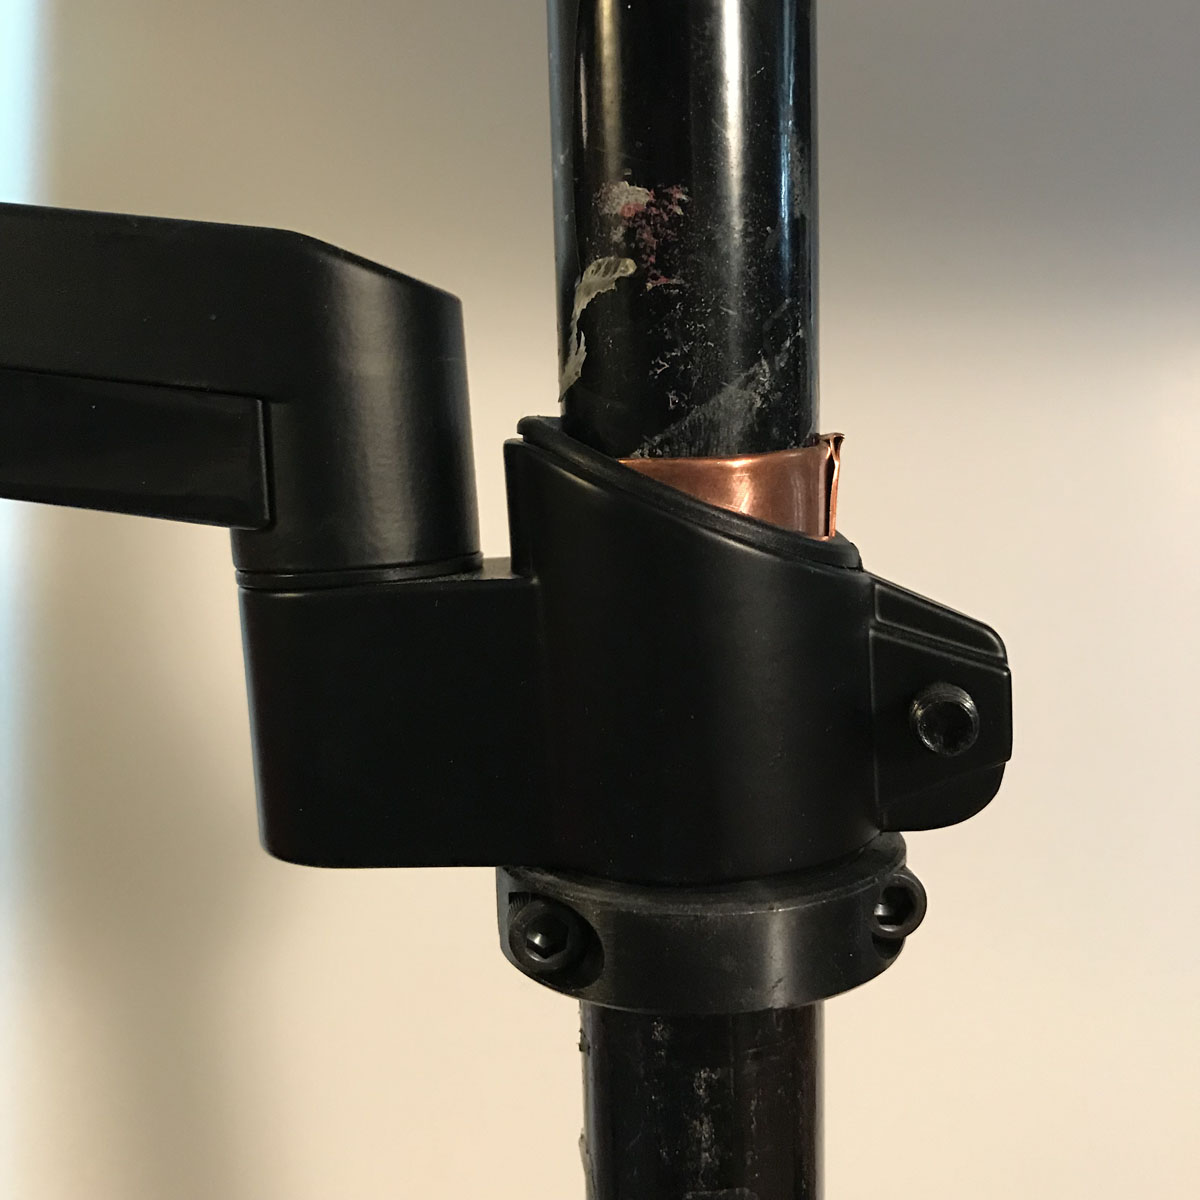
Now we were cooking, but I need to figure out how to mount trays rather than monitors. First thing, you have to remove the last pivot bracket and rotate it so that it is flat like a table. You don’t want a vertical pallet after all.

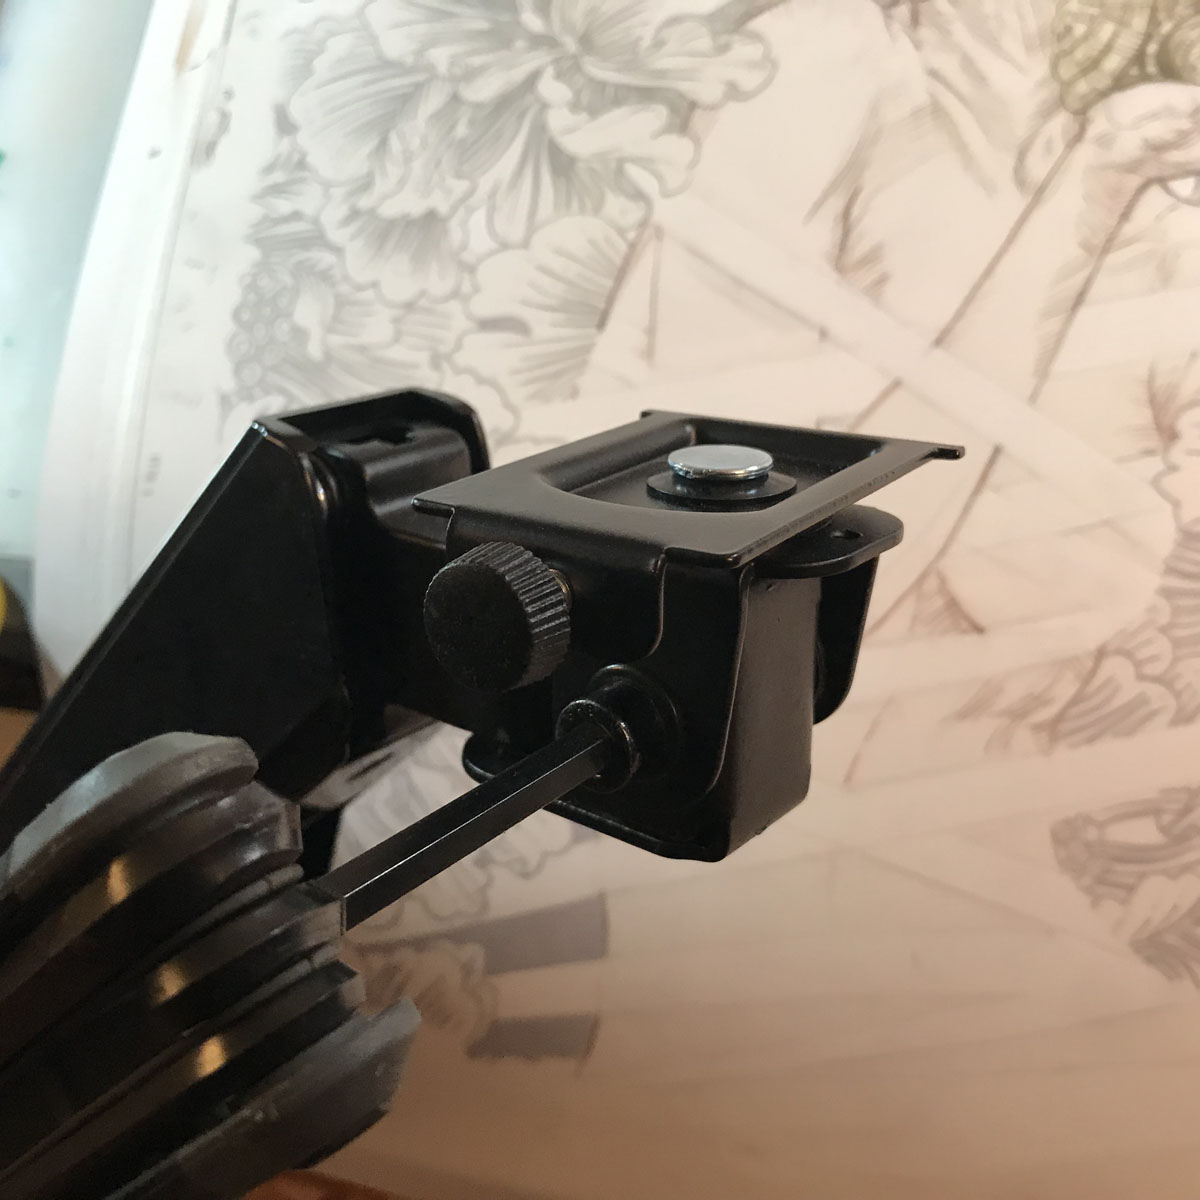
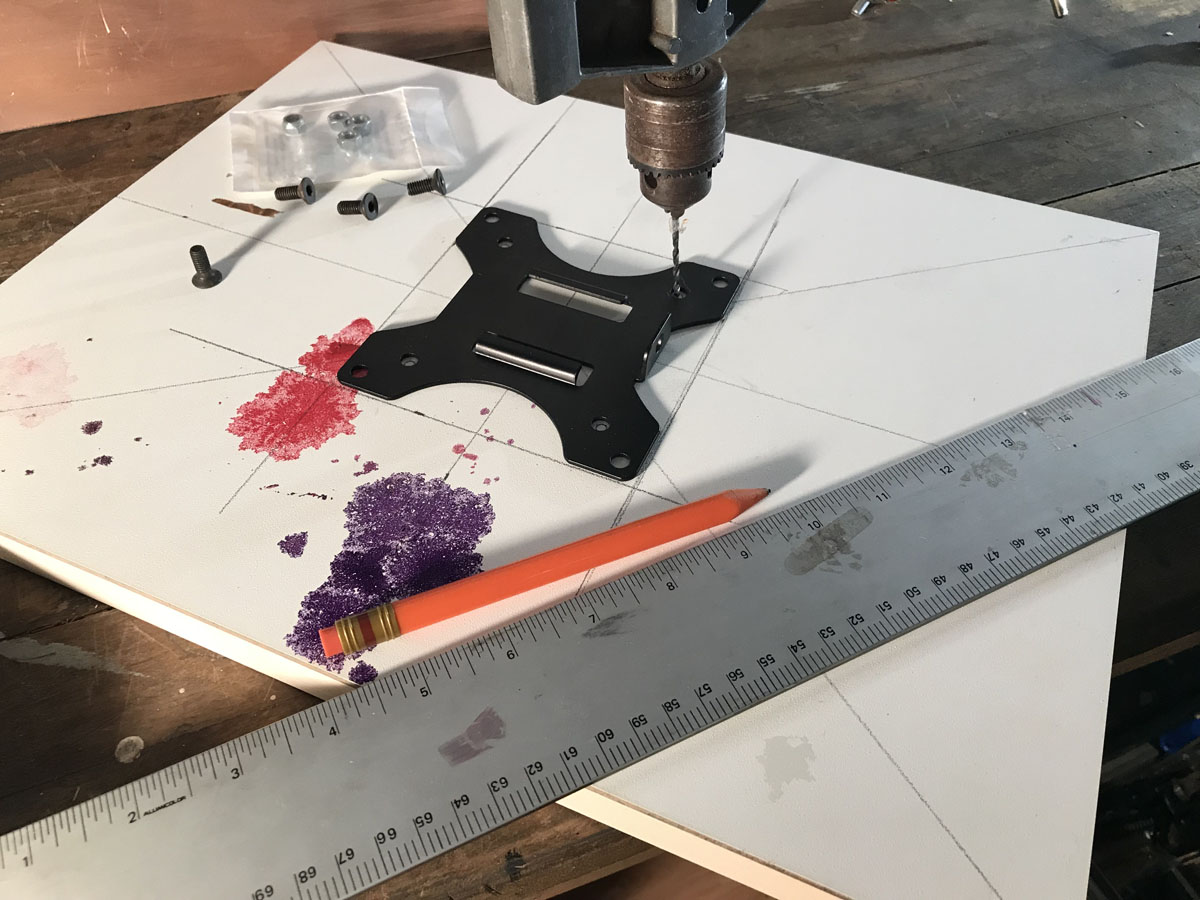
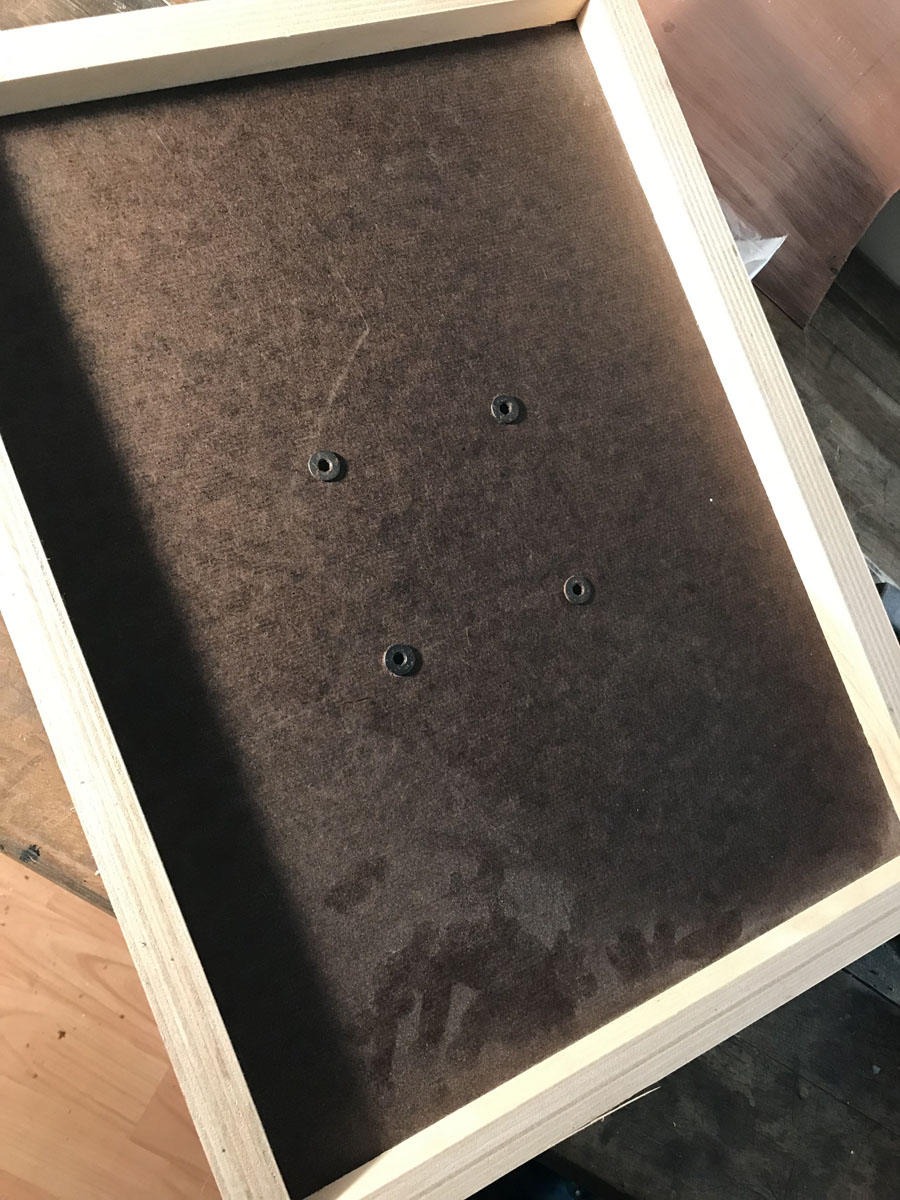
Ok now you find a rad tray. I was thinking of like an old TV tray or something. But as an artist I happen to have some cradled panels laying around that are perfect. They have a lip to stop things from falling off. Are pretty light and come in all sorts of sizes. You take the bracket that you would attach to the back of a monitor and you attach it to the panel. Simple stuff.
 And here it is attached to the arm.
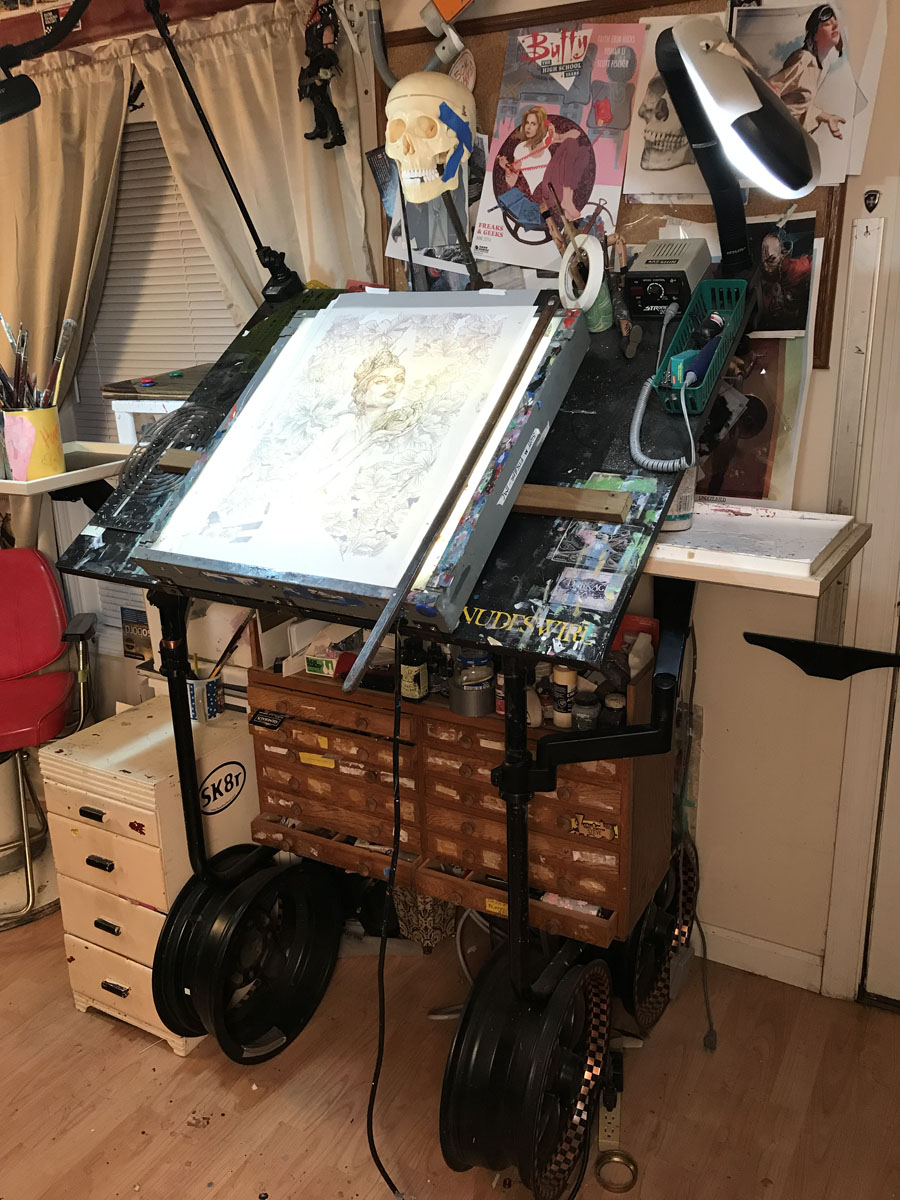

Now this may seem like a lot of trouble to go through for a couple tables. And you would be correct. But dudes. It is your space. Your place. I think of it like a drum kit where everything needs to be where it is so the drummer doesn’t have to think, they can just go primal and play on instinct. It is a little thing, but when you have done this as long as I have, you find ways to make life easier and unique.
I mean, flip through this succession of photos like stop motion animation. It is like a freakin robot or something. And I am so psyched to step up to it every day like a pilot in a cockpit that fits like a glove! It is as if the arms of my desk want to hug me with creativity!

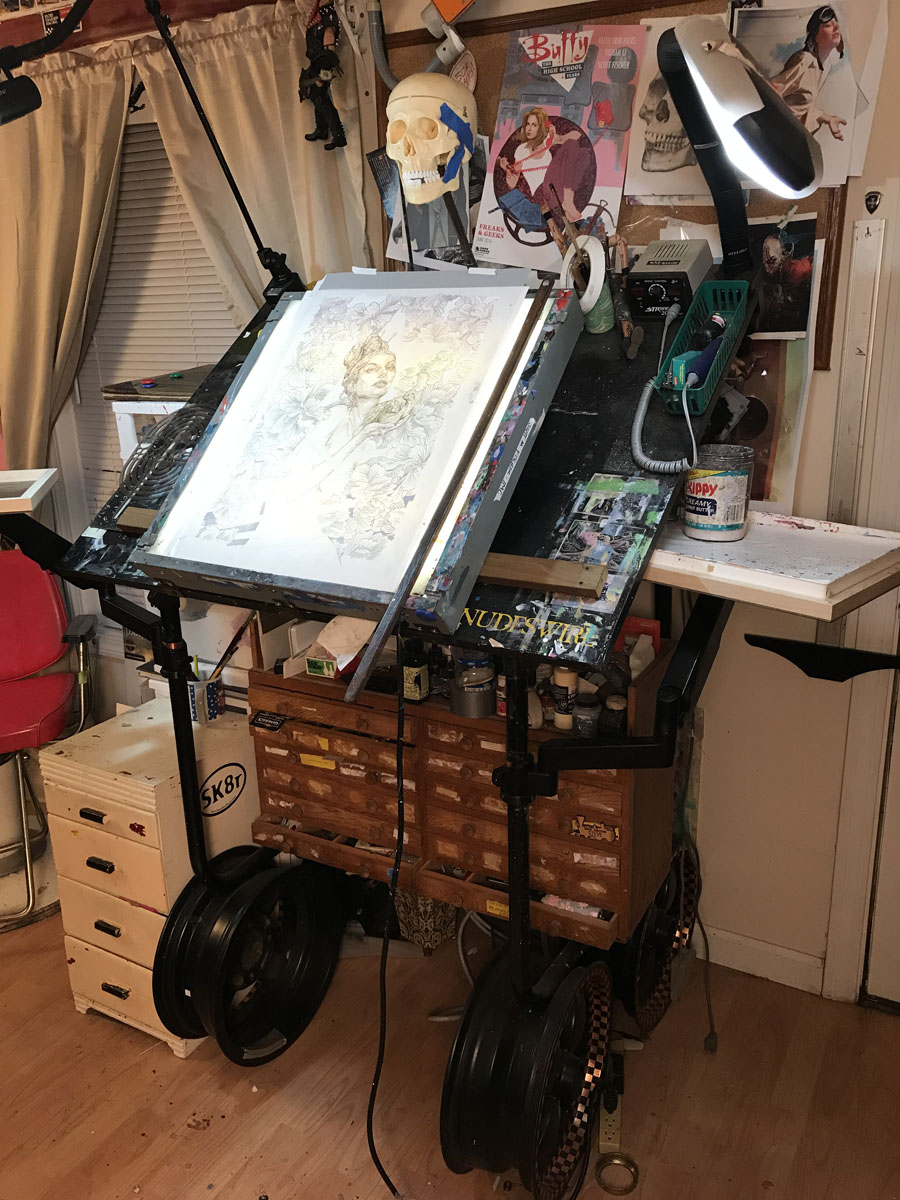
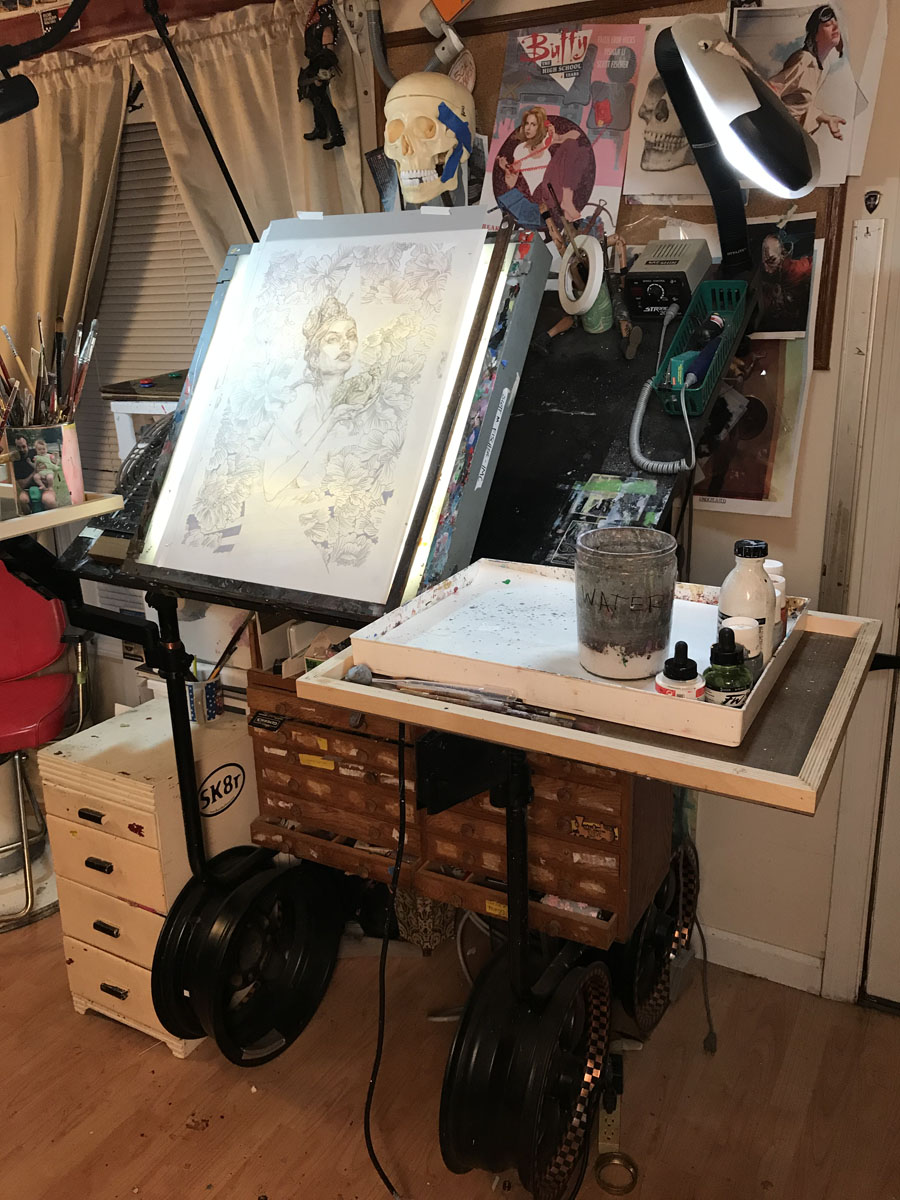
Did you notice how that right tray can stow all the way under the desktop even with stuff on it? That is what I am talking about! Stealth-mode.
Bonus mods!
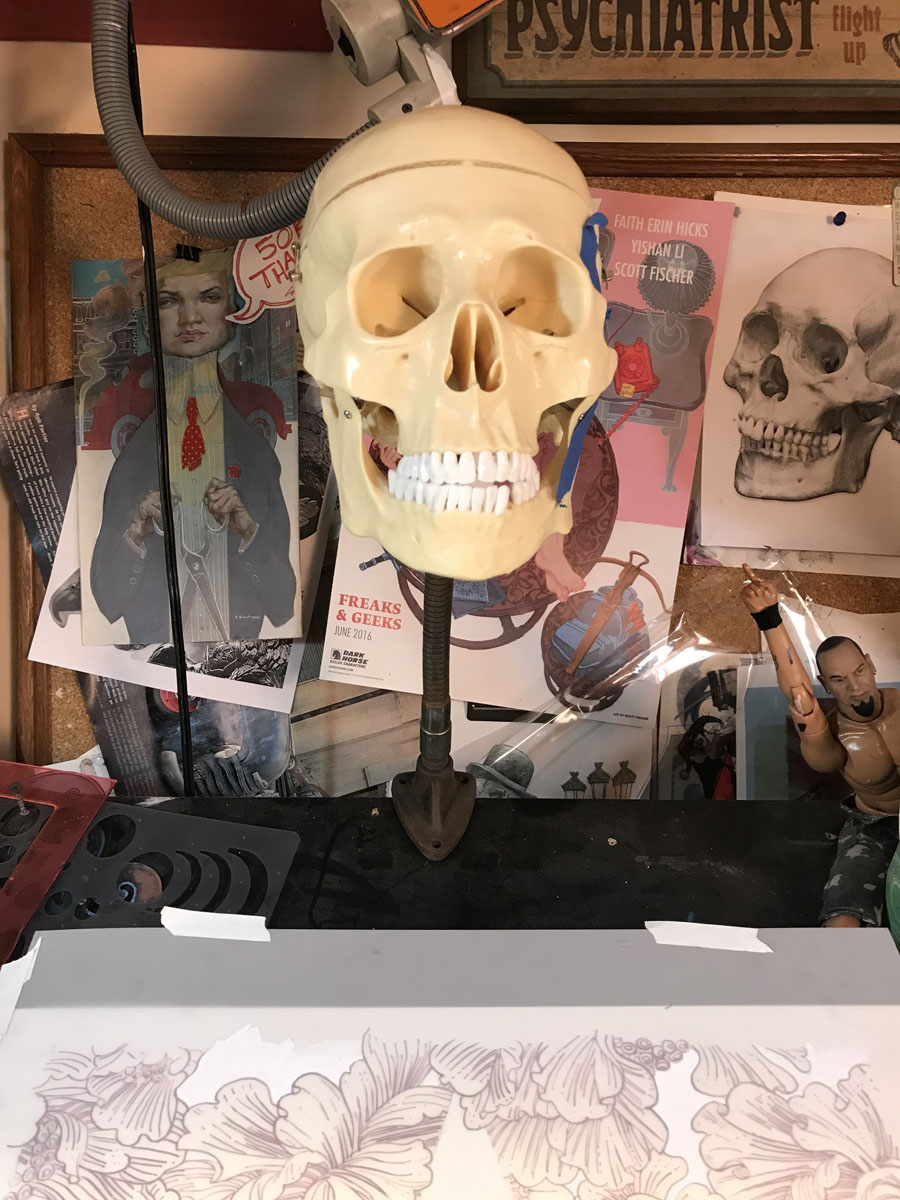
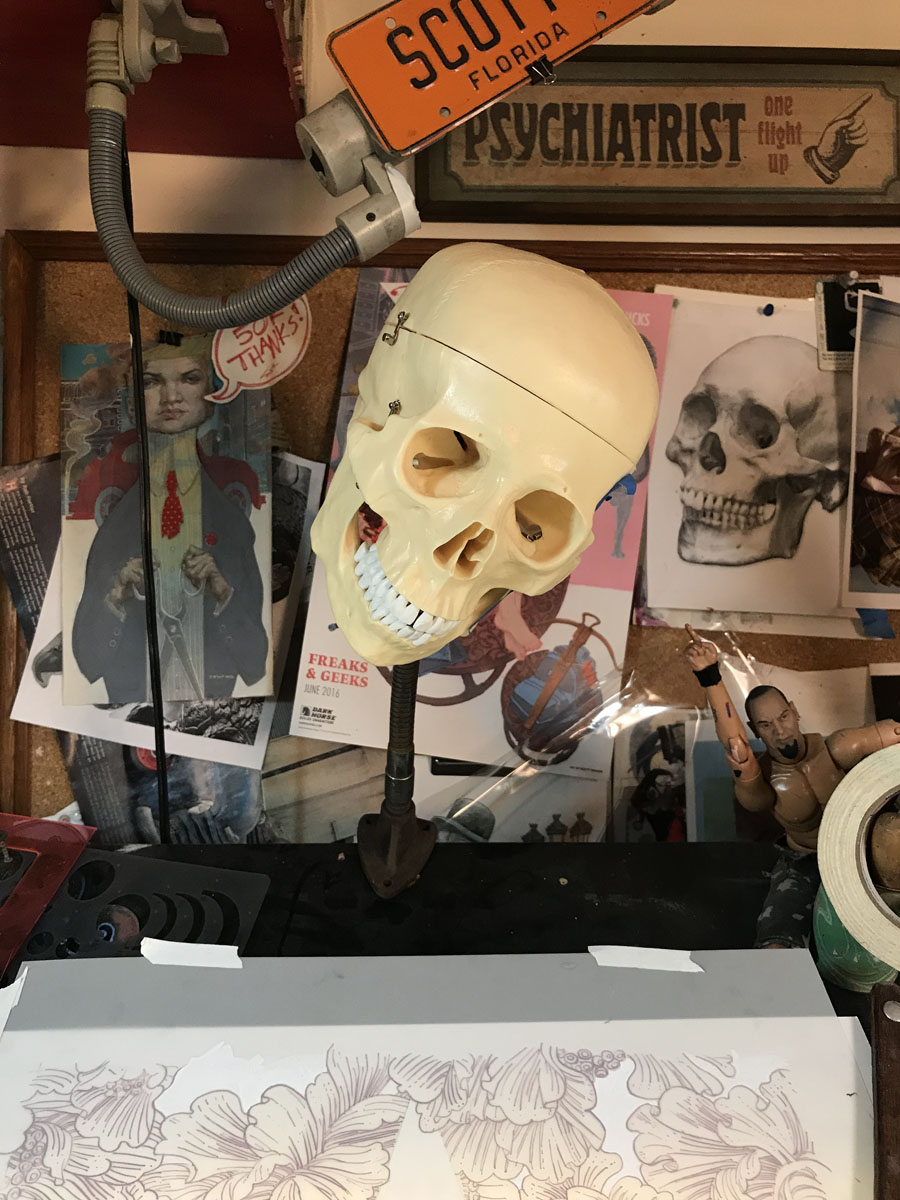
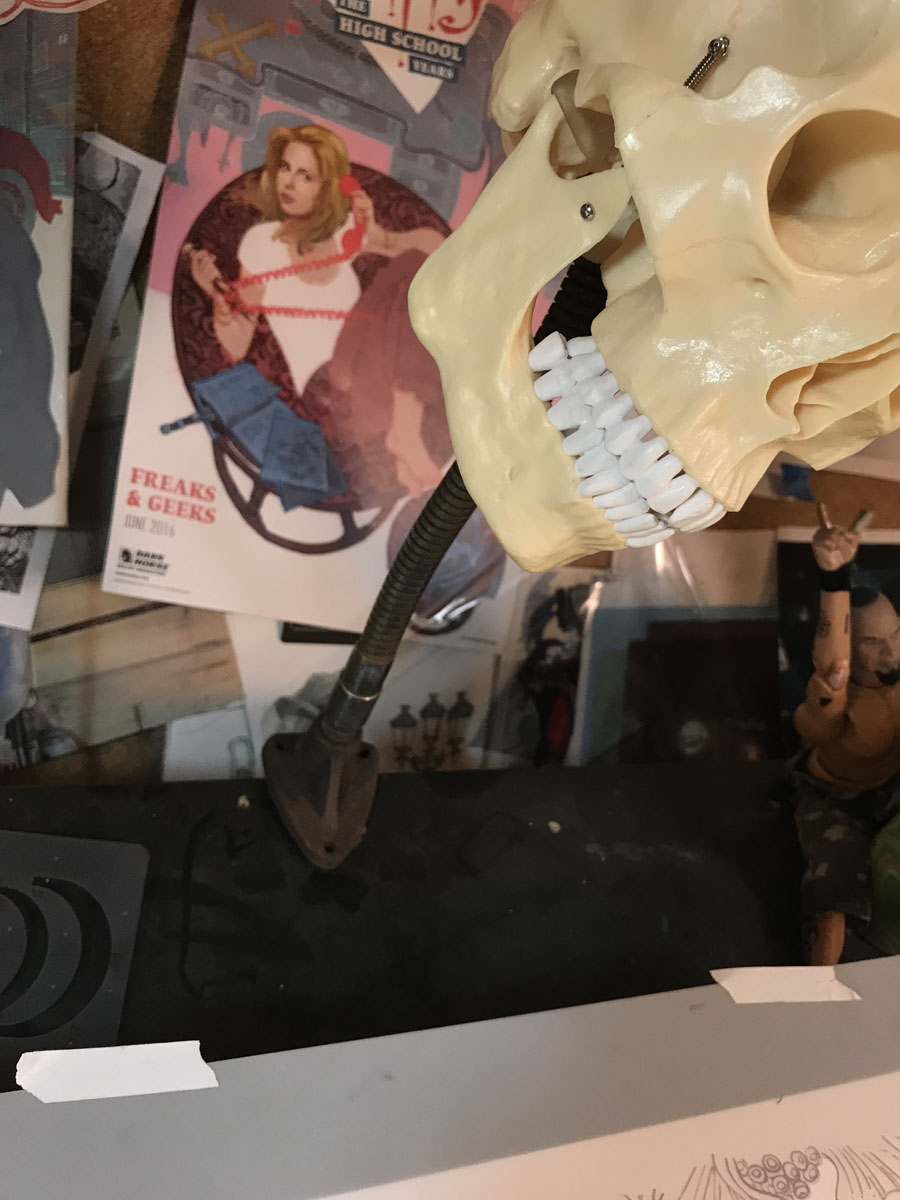
How about a skull attached to a clamp on lamp stand to help nail that lighting- AND- face your death every day, questioning you existence, and making you want to work harder to leave some evidence you were even here?
I do a dual light set-up with an ott-light on both sides of me. Cause there is never enough light.
 Extra bonus mod!
Wrap a piece of vellum or Duralar around the light to act as a difuser. Better than paper IMHO. Lets more light through but removes some of the harshness.
Here is a little mahl stick. Piece of cherry wood with a screw through a hole. Keeps my hand off the surface. Done!

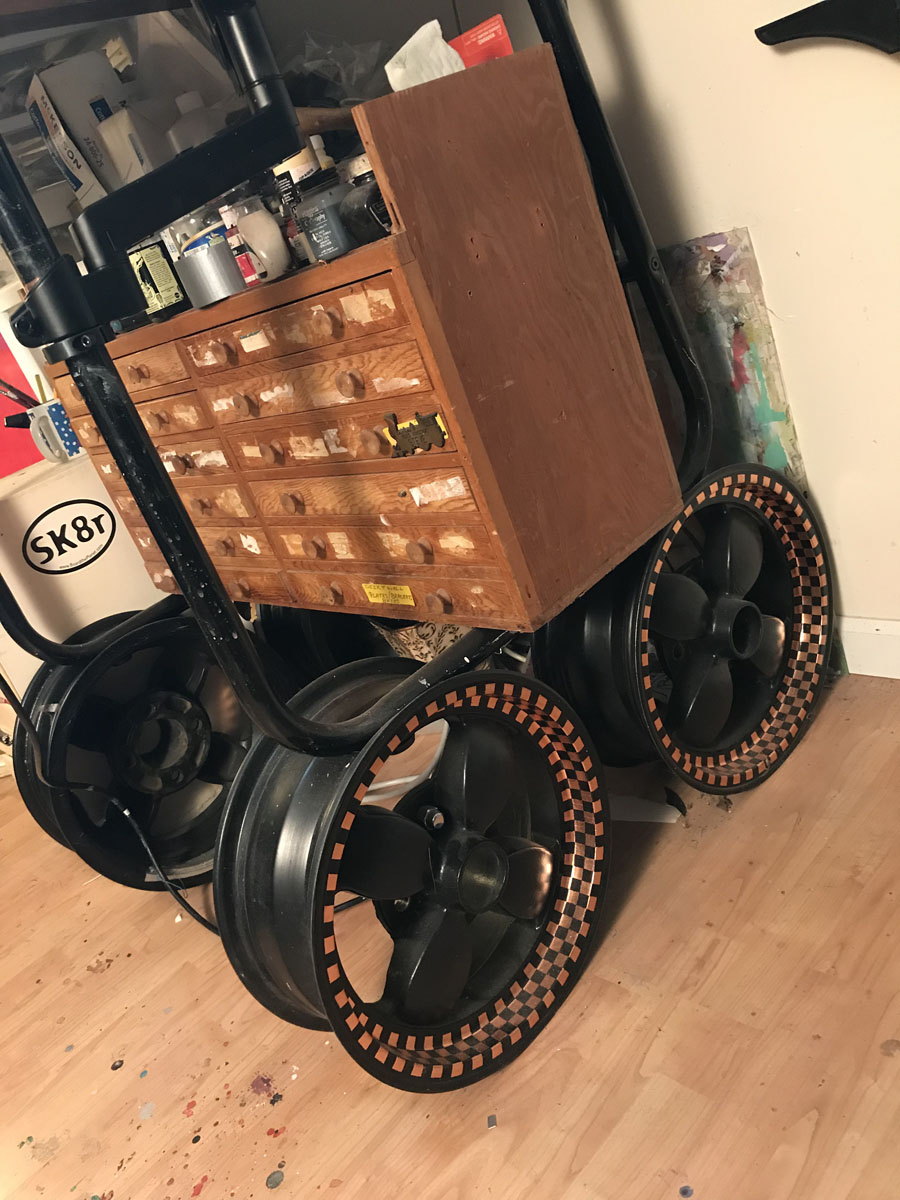
Not a mod, but an old engraver’s tool chest under there to hold your loot!

And finally, some Vintage custom copper leaf-checkerboard Libre Datsun rims to raise your desk off the ground. Ahhh… ok I guess this is a little over the top for most people. But when I walk up to this thing, all the mods all the custom tweaks, all the history of the thousands of pieces of art I have created here… it feels like a custom hot rod to me. Dripping with mojo. I want to get in there an floor it!
But I guess maybe just some milk crates or cinder blocks would do?


That’s a lovely setup, thanks for sharing! Really like those adjustable palette arms- and those custom rims, too!
Hello, Scott.
Your studio equip is terrific and your phrase “It is as if the arms of my desk want to hug me with creativity!” blew me away.
Thank you very much for the snapshots and the text full of internal light and energy.
Looking forward to your new studio mods.
nice post