Our first dog was a rescued Australian Cattle Dog or “Heeler”. These little toughies were bred from crossing wild dingoes with god knows what. When my wife handed our “Syd” his first juicy prime rib bone, he promptly flashed his gigantic teeth and said, in dog language, “Give me that s**t then get the f**k away or I will destroy you!”
So… my wife called a professional trainer, and said, “We want to train him using positive reinforcement. What do you use?” To which the trainer deadpanned, “whatever it takes.”
Ok.
Three dogs later I can attest to the utility of the “whatever it takes” approach to training dogs, particularly the working breeds specifically selected for their insane drive. Positive reinforcement for desirable behavior, and “no” for undesirable behavior—never hurting, scaring or threatening the dog, but never wavering in your commitment to teach him what he needs to know to live in human society. It seems impossible at first, but, if you persevere, you get a mature dog that is even more happy and energetic, still in love with life (like all dogs are, the buggers, how do they do that?), without any loss of drive, vitality or personality.
In fact, training brings these things out in dogs, because it gives them the confidence to function in our alien (to them) world. You get a dog that is welcome in other people’s houses, at parties, whatever. He can hang out with kids, even babies. He helps people who have a prior fear of dogs. Everyone loves him and wants him around. If you show up without him they ask why you didn’t bring him. That was Syd.
Soothing the savage beast
Anyway, thanks for listening. This concludes my Muddy Colors piece for this month. I hope you enjoyed it. Next month, Cats: You Want to Believe They Love You, But…
What? What’s this got to do with making art? Oh, ok…
Most pictures demand a ton of hard work. But you sure don’t want them to look like they did. You don’t want all that struggle and maybe frustration to diminish the dog’s, er… the picture’s personality, its vitality (or your own, for that matter, if you run out of steam before the finish line). And it requires work because, like dogs, pictures have their own mind, their own soul, and their own language. And we humans are not born with a deep understanding of these things. We need to develop them. That’s the combined work of every sketch, doodle, study, drawing, painting and thought you ever have about making pictures.
A challenging picture for me
This was a tough picture, with some tough communications issues between artist and client to make things even tougher. It was a Cattle Dog of a picture. But, as with Syd, the story has a happy ending.
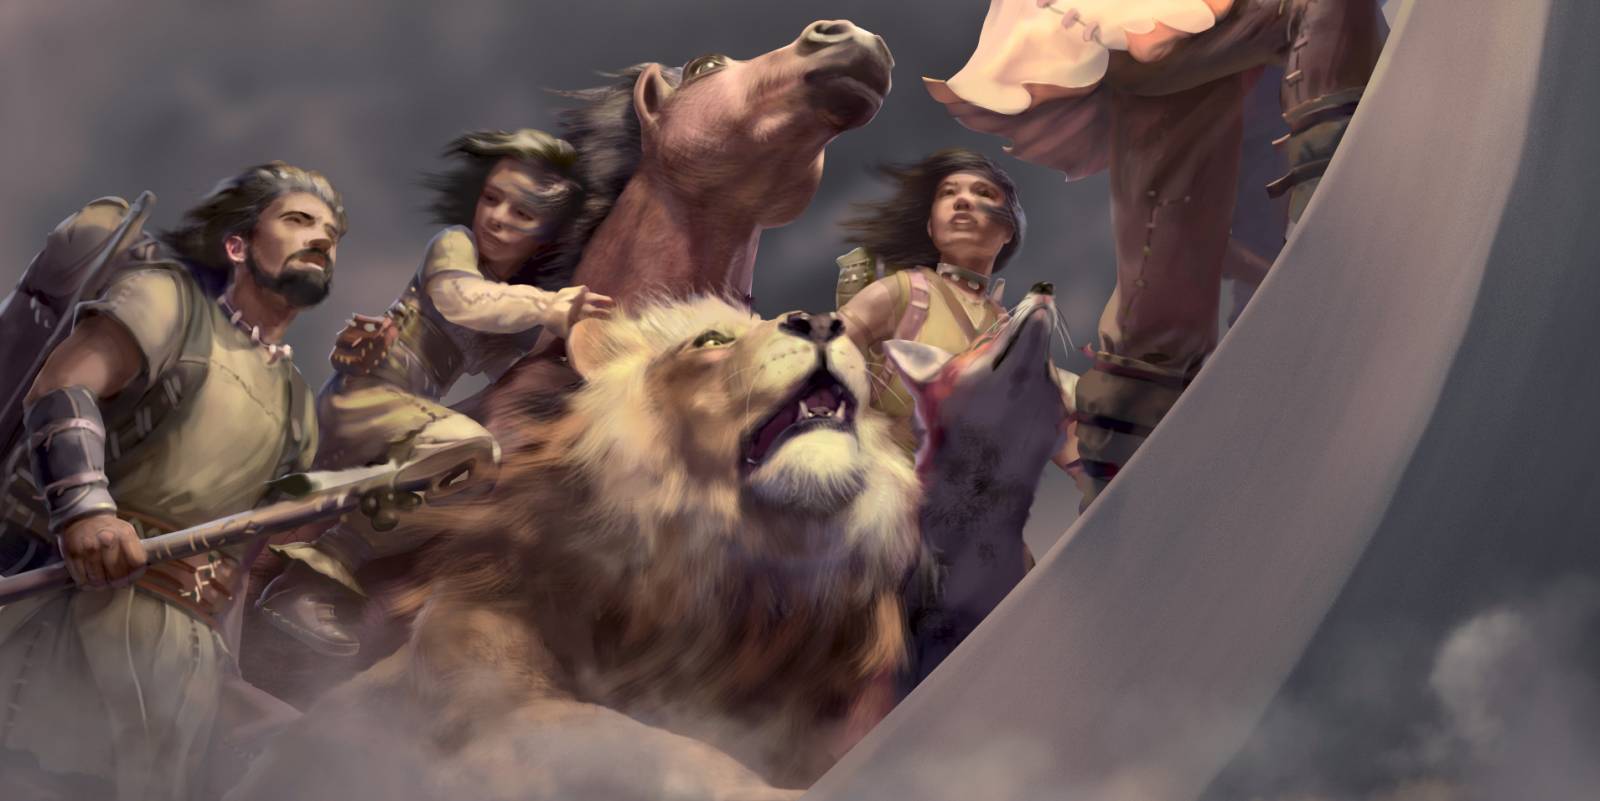
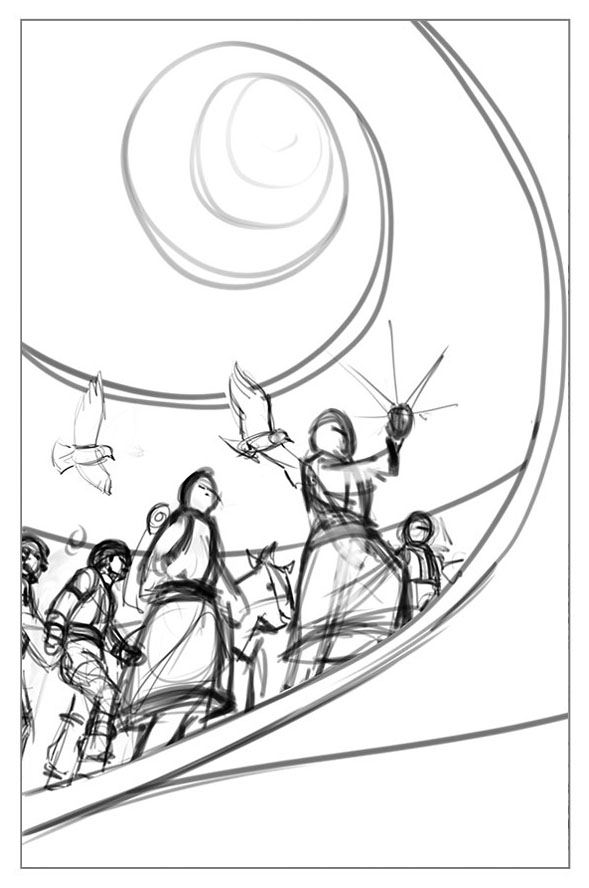
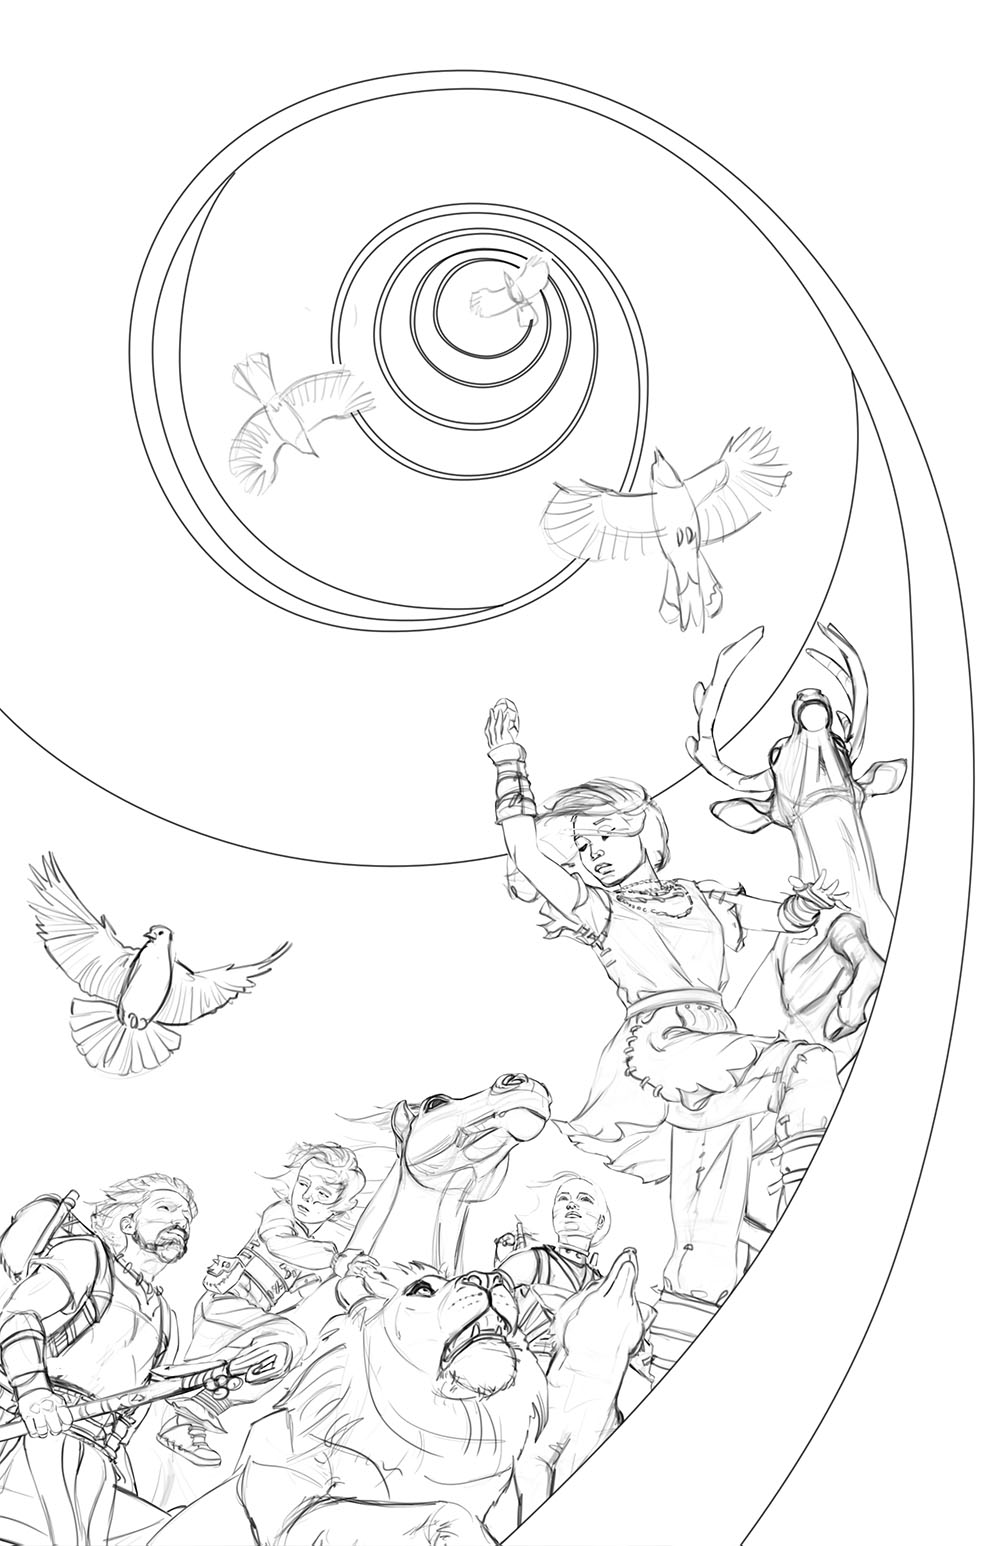
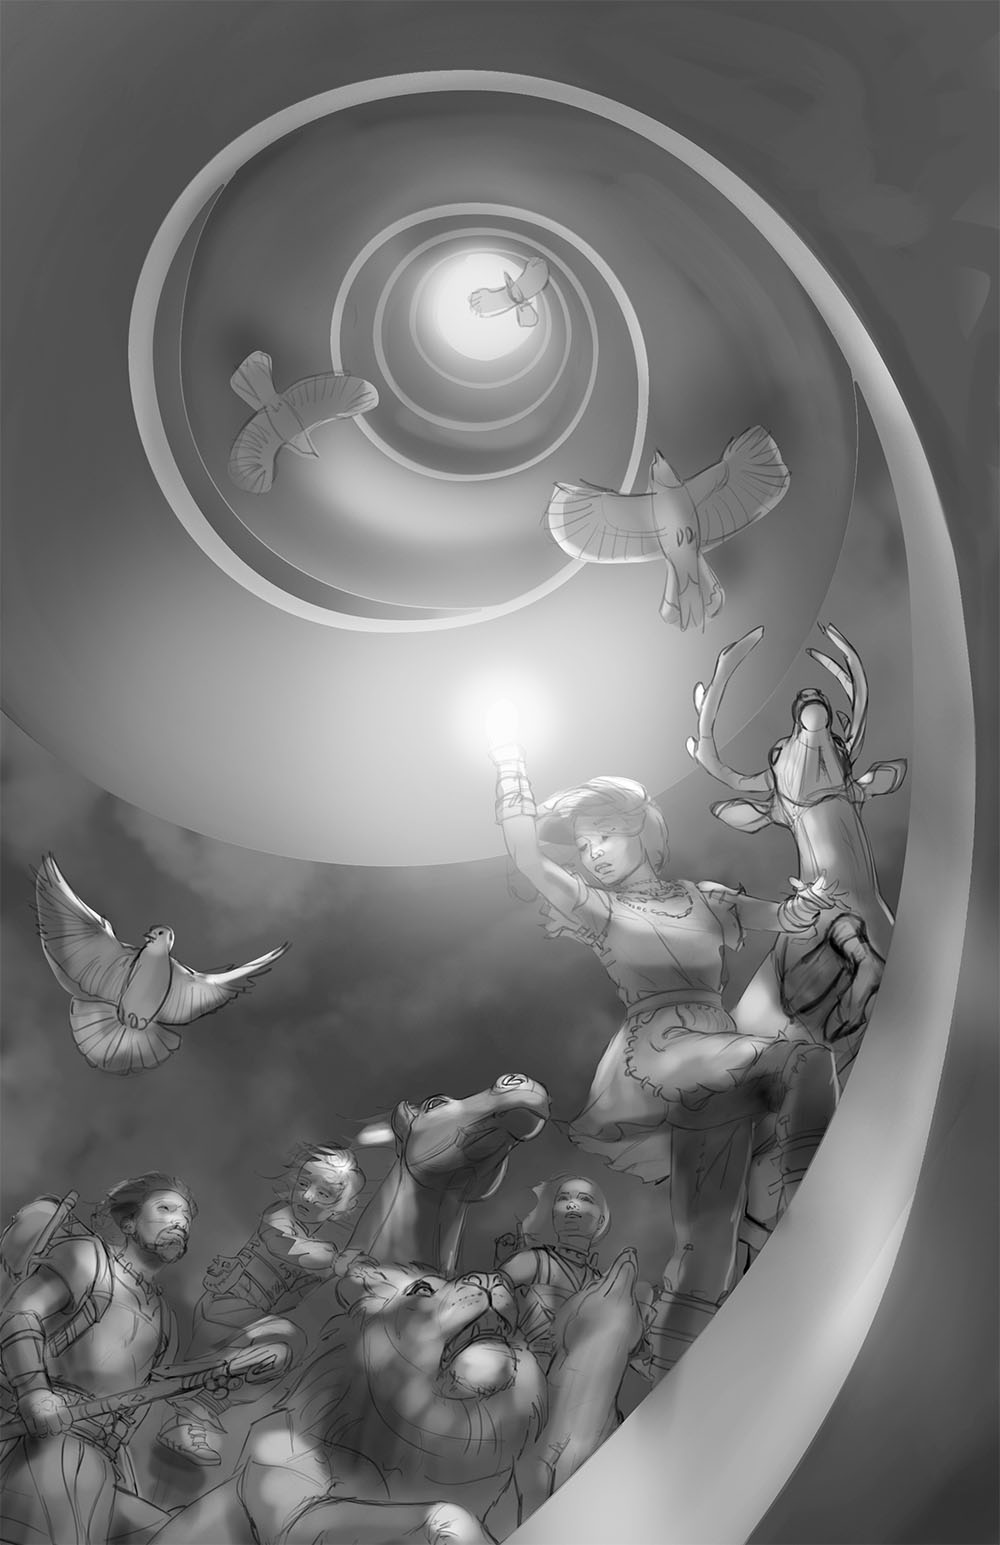
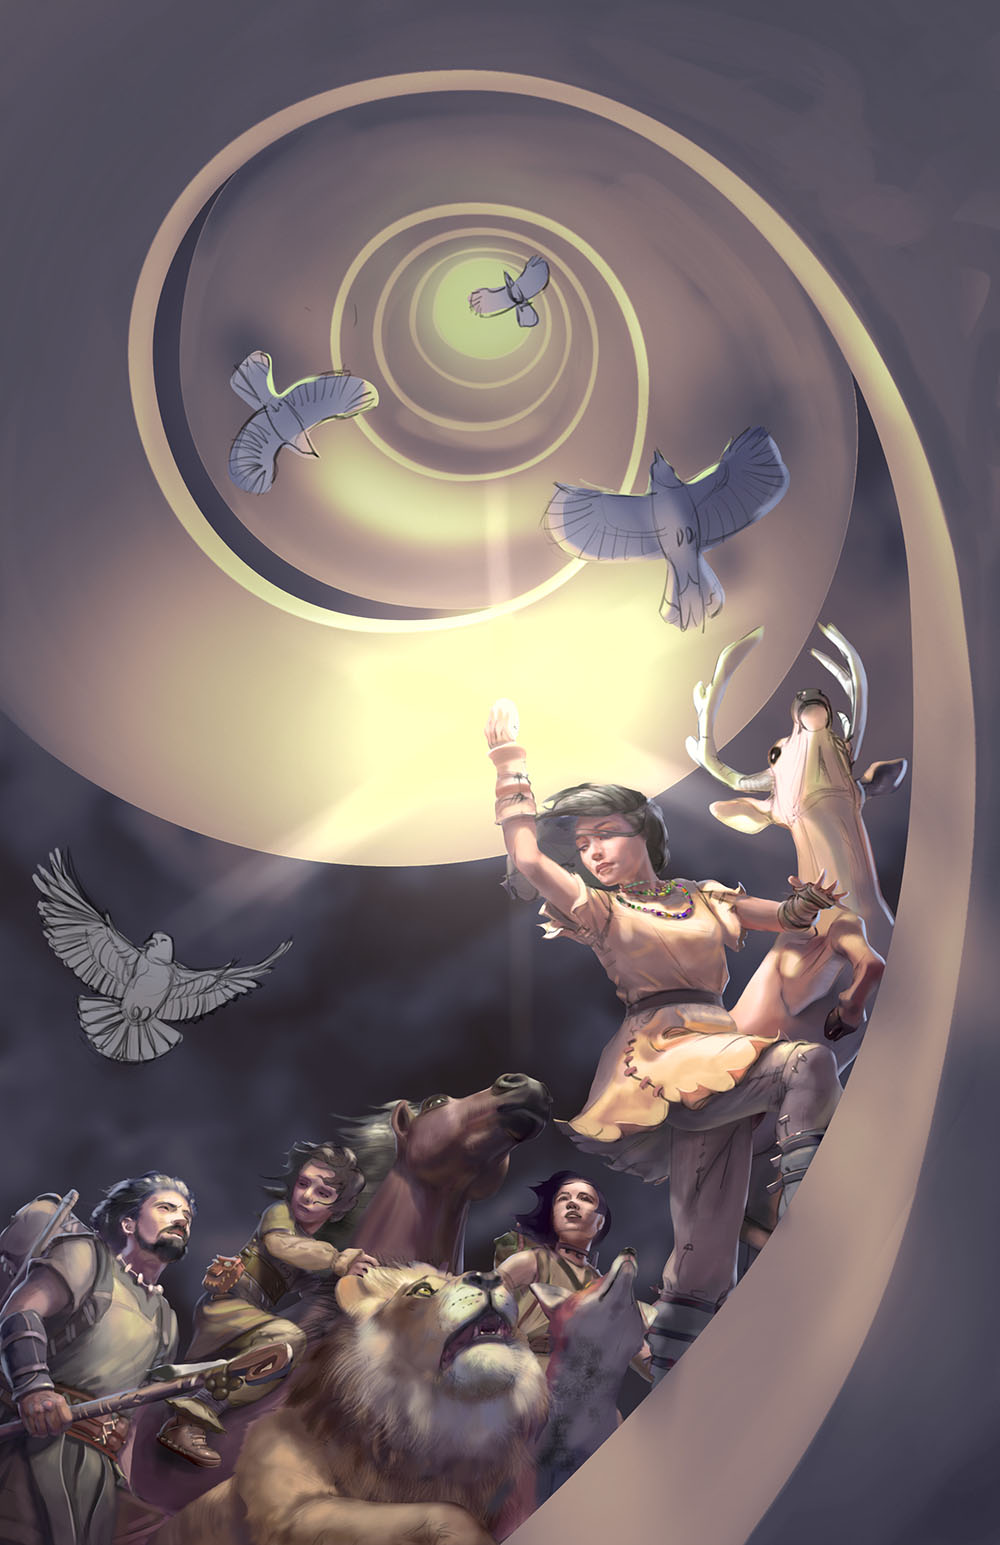
The brief described a prehistoric people’s exodus, as they followed their leader up a “spiral path” to their promised land in the sky, with her lighting the way via a glowing gem. I had two approaches in mind: a pulled back view showing a lot of people and animals (and a good chunk of the spiral path), or a more zoomed in view focusing on just a few characters (which would make it harder to show a lot of the spiral path).
The pulled back view delivered the mass migration feel I wanted, with lots of people and animals:
A pre-historic exodus
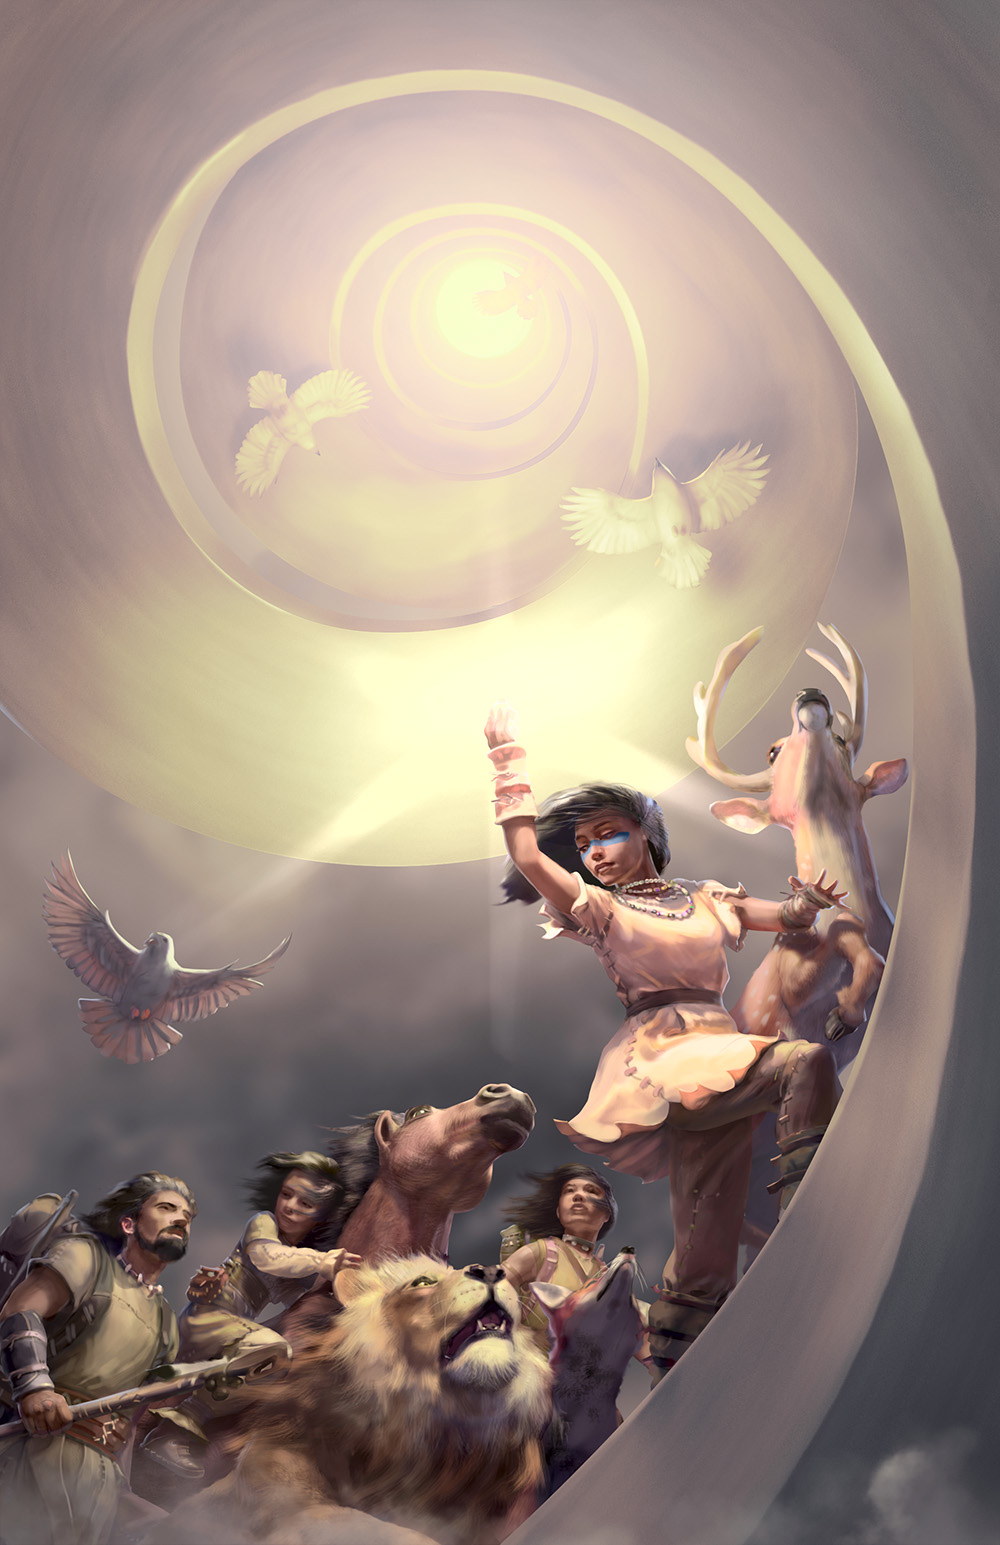
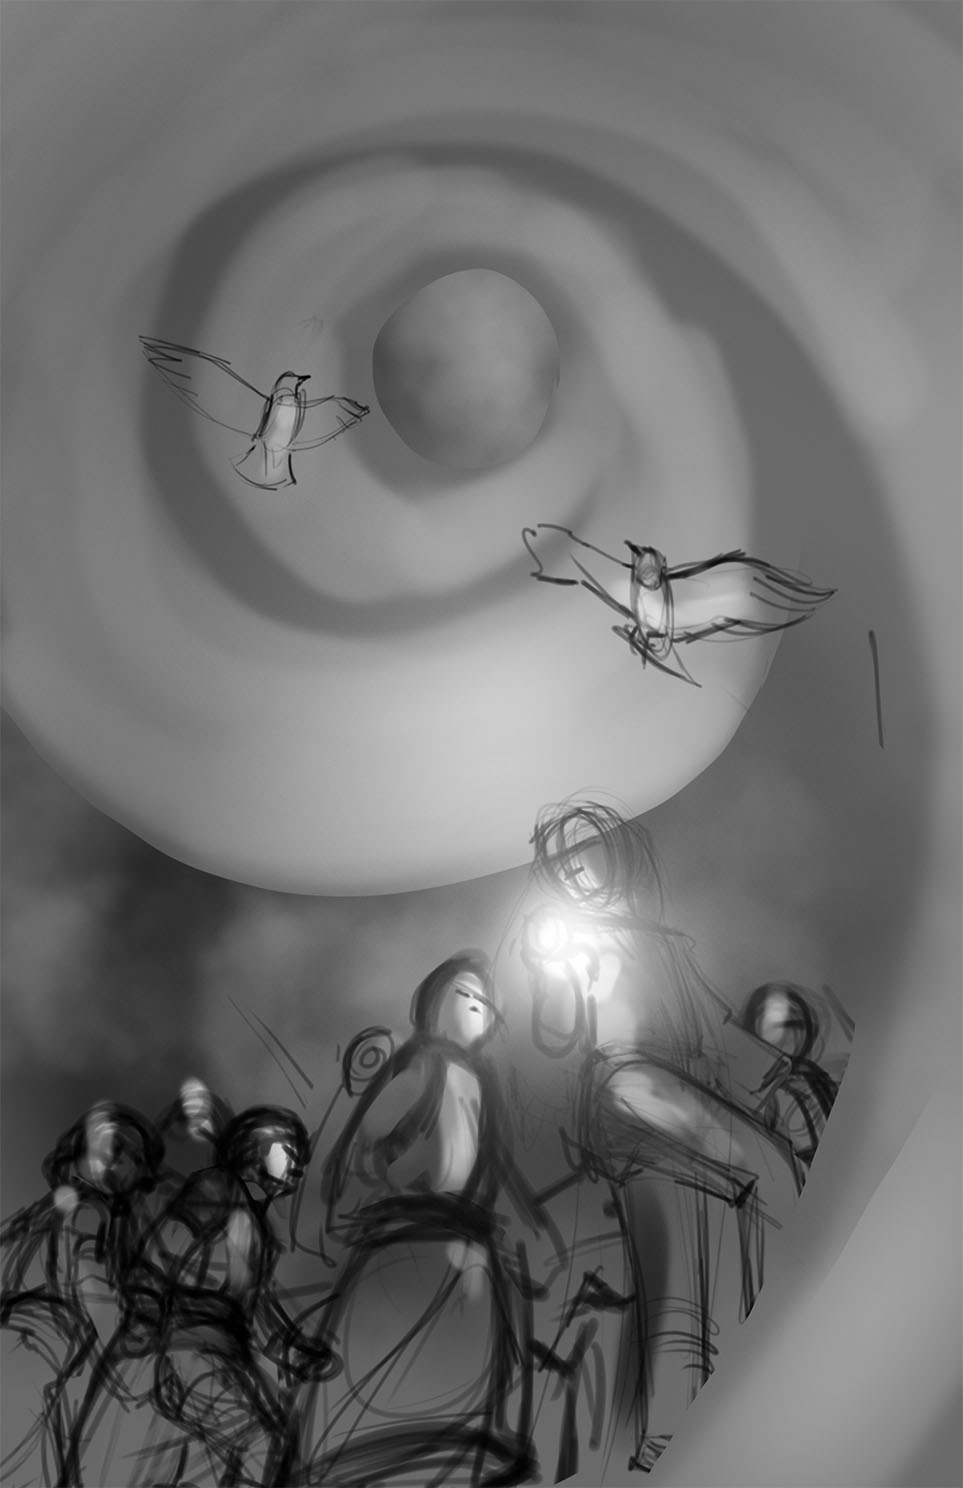
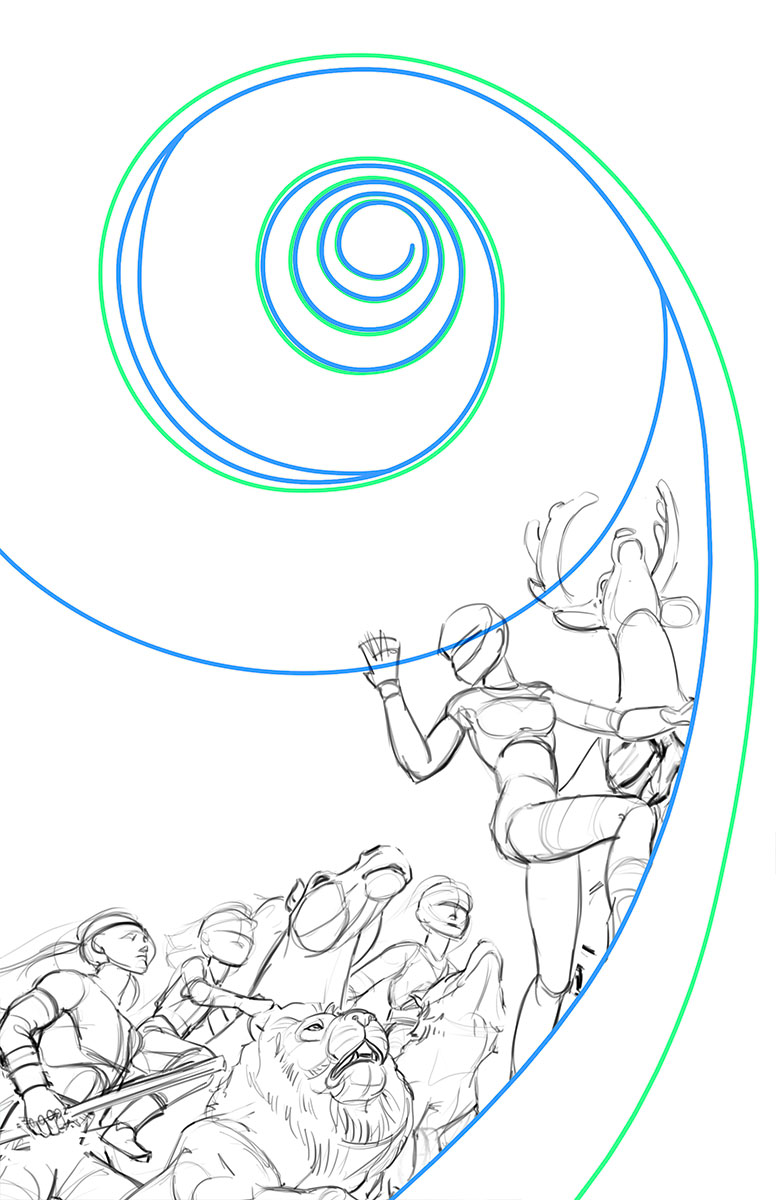
But the client really wanted to see the spiral as a vortex kind of graphical element, which meant we needed to move the view to be inside the spiral path, looking nearly vertically up through it. This meant that the characters would be viewed from an awkwardly low angle—an angle not so conducive to the epic look we are going for with a cover like this.
For the characters to be staged well and for the perspective to be convincing required a balance of fudging and acceptable distortion.
Focus on characters and graphic spiral
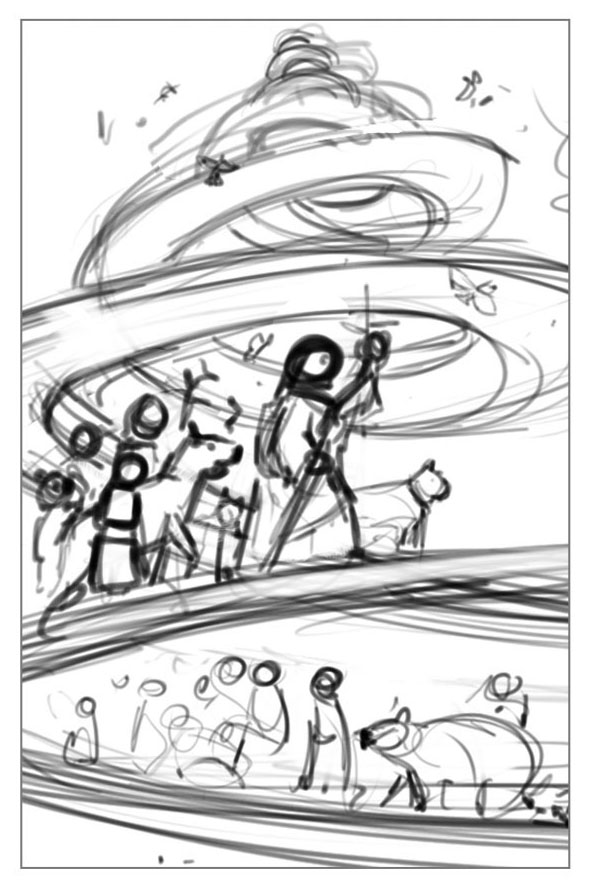
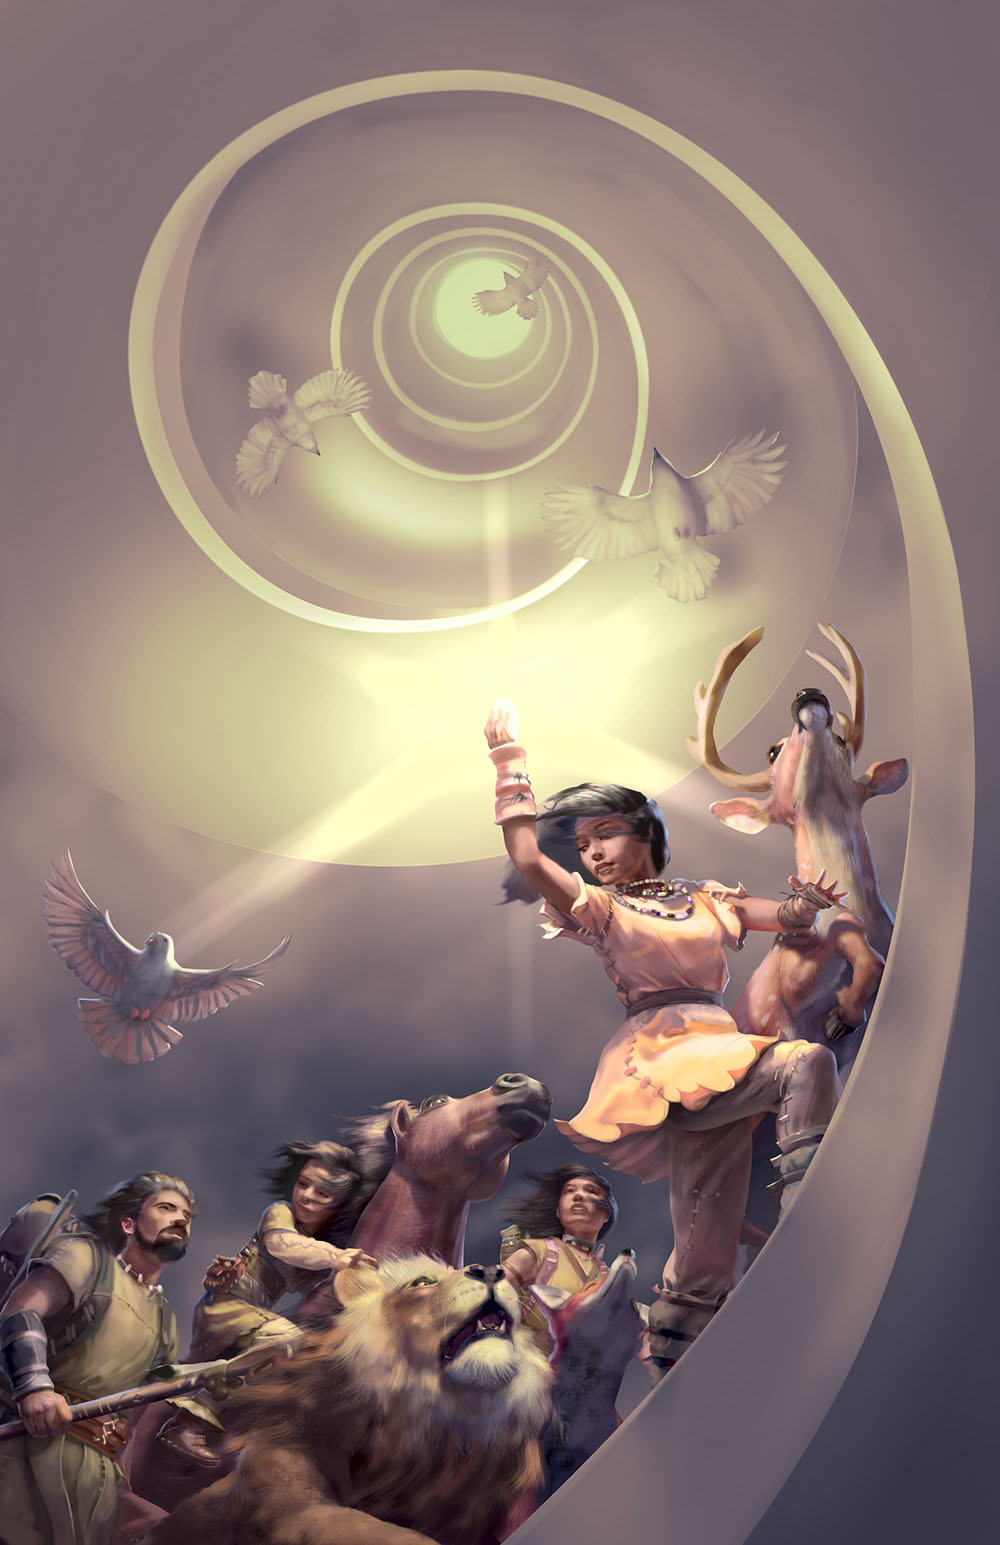
Then some final tweaks to get the framing right, and changing the lead character to be looking back toward the gem / crowd of followers
The final thumbnail
It was a surprising amount of work to get here. There were so many back and forth sketches I gave up trying to show specific animals and characters, and focused on getting the most basic elements in place: the spiral path and some figures on it not too distorted, but still consistent with the upward view. Ok, we have something to build on.
Costume Ideas and World-Building
Before starting the actual drawing I need to think about world-building and character design which, for this picture, are the same thing. I must communicate their world solely by means of what they are wearing and carrying.
My general method for everything in artmaking is to load up my brain with knowledge and understanding of the subject matter, then work from memory, then correct and tweak by (re)consulting reference as needed (what I originally used, or something new as new issues come up). For me this is the best of both worlds: although I will never produce the level of realism I could if working more closely from staged photos, I am liberated to imagination only when actually working, by pre-loading my art brain. We each need to do whatever it takes to get the results we want.
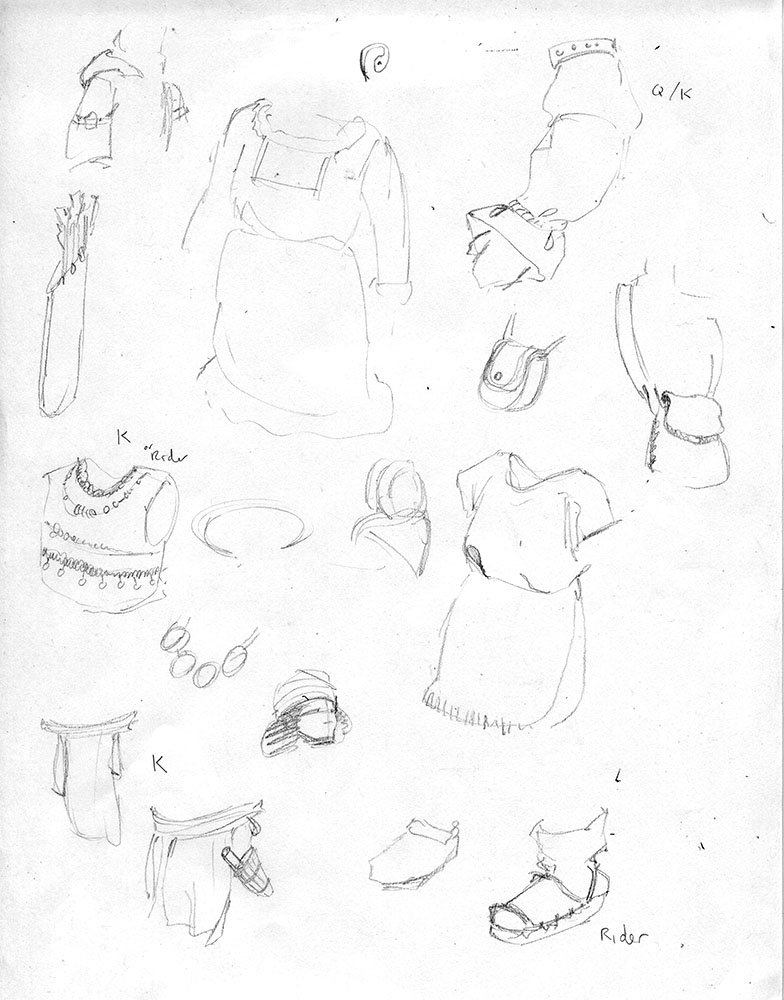
I use Google images, Instagram, Pinterest, etc. often finding inspiration where it wasn’t expected. Though I do save pictures for this, mostly what I do is make quick sketches like these, emphasizing and extracting what I’m interested in:
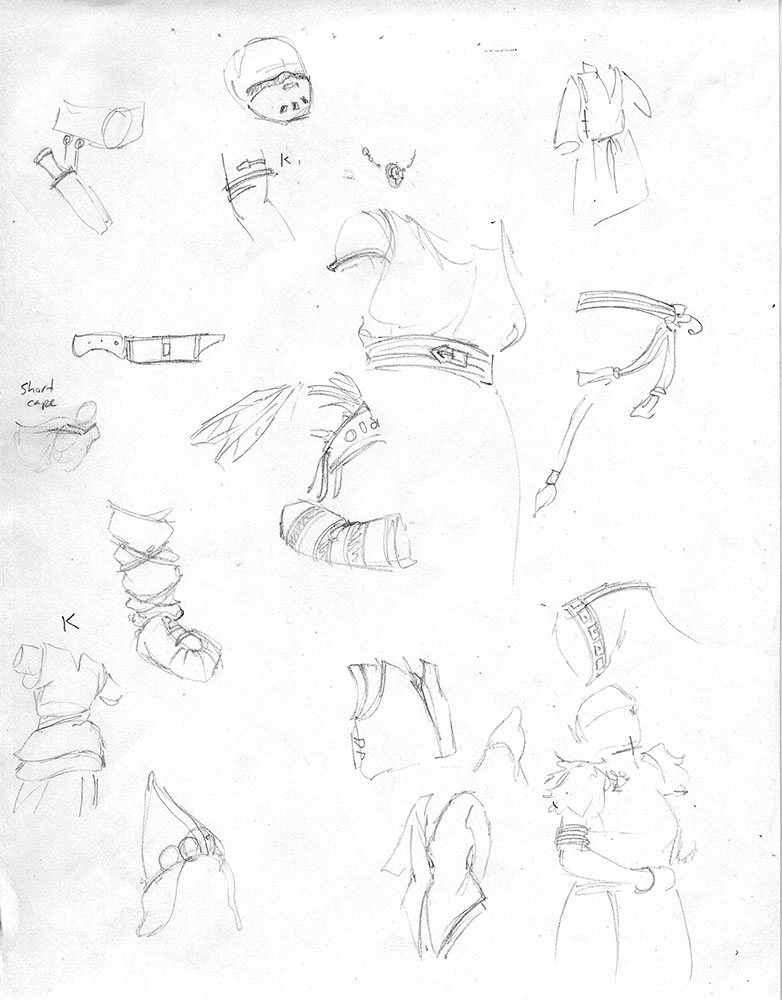
Costume idea sketches
This way I am simultaneously editing in / out what I want to use or not use, and combining the refs into a small number of sheets, corresponding to each element (e.g. each character). It’s kind of like a model sheet. Though I haven’t decided exactly what I will use yet. For example, I became very interested in these pre-historic framed backpacks, though they barely made it into the picture:
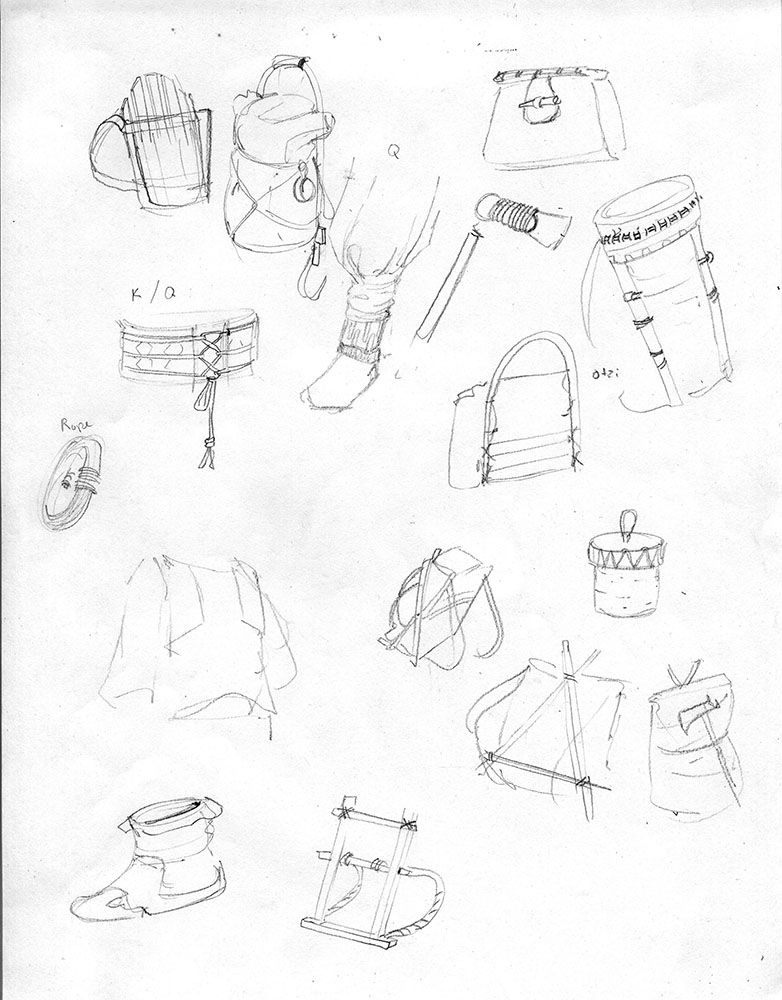
Prehistoric framed backpack designs
With every setting, every world, the smallest things make all the difference. For this prehistoric setting, did these people know how to sew yet? Did they cut their clothing or was it still the natural shape of the hide? Did they have textiles? Buckles? Buttons? These are the types of questions that often fall to the illustrator to answer, because we illustrators must make these imaginary characters and their world real visually.
Details describe the character and world
Of course much more attention was given to the main character’s design.
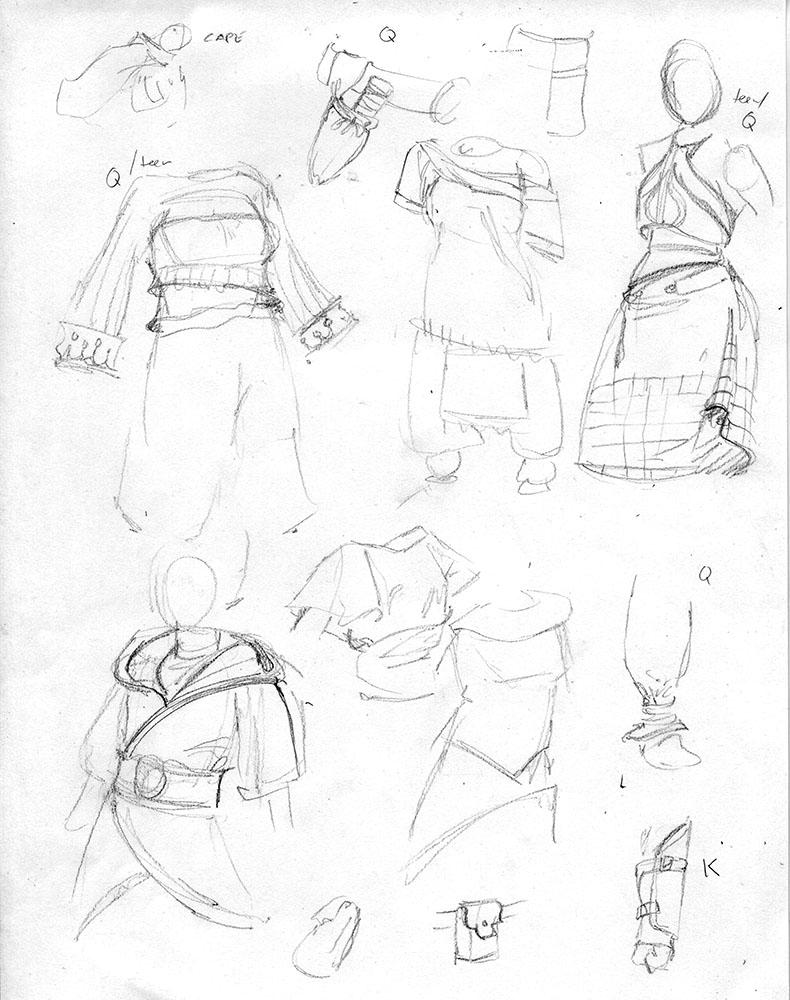
More character costume ideas
Sometimes I am simply copying the element as I see it, other times I am using it as an inspiration for an on-the-spot new design.
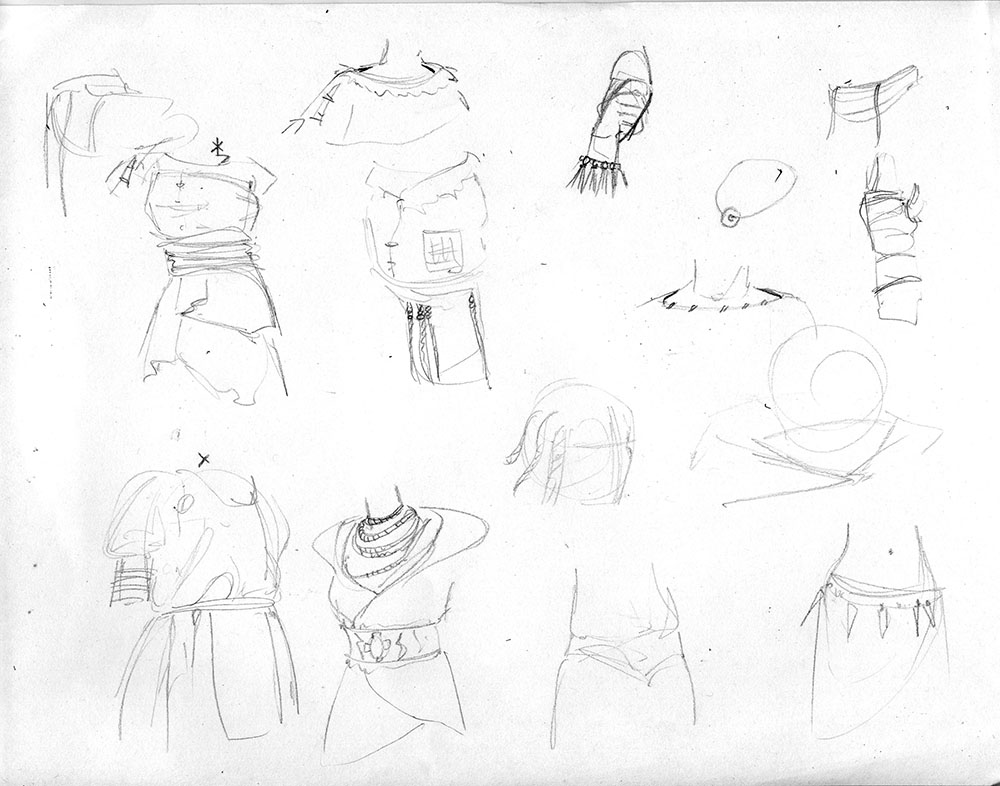
So many ideas, so many options…
When I go to draw the character I only have one or two of these reference sheets to consult, which means my creativity mental processes stay focused on what I am drawing, with only quick glances at my sketch sheet for inspiration or direction. This is my approach whether the element is a building, animal, person, vehicle, etc.
Developing the Picture
Now comes the long hard middle ground slog. I’ve got the idea, crudely represented in a thumbnail (and fraught with potential non-sequiturs that will not shake out well when I push it all the way to being a fully convincing environment with real characters), I’ve got my costume and character thoughts… and far away, on the other side of a vast hellscape of pitfalls to avoid, mountains to climb, problems to solve (and a need to grudgingly accept that they cannot all be solved without compromise), lies the joyful and relatively easy final phase of rendering and finishing.
Taking the first step from a very rough thumbnail into that middle territory can be daunting. I can’t see the end yet. There isn’t even a light at the end of the tunnel: it’s just a tunnel. You just need to start walking and build on each previous step.
First things first: because each figure in this picture is at a different elevations, that means they’re each viewed from a slightly different angle. It be easier if they were all the same elevation OR if they were wildly different, flying around in zero gravity like superheroes. But here there is only a subtle yet critical difference in view angle as we move from the back of the line to the front. On top of that, I am forced to employ a lot of fudging to allow us to see them and the upward view of the spiral, without too much ugly distortion. So I needed to acquire a strong intuitive grasp of this semi-faked perspective. And since I’m a scientist posing as an artist, the first thing I did was to understand the actual perspective, with a guide drawing like this.

Remove the perspective lines and I have a procession of monoliths winding their way up the spiral path. Good enough.

Something to put my 3d visualization brain in the right place
We tend to imagine and visualize things as from the angles we most commonly see and draw them. So, unless we apply a lot of discipline when drawing less familiar angles, we may find that our extreme upshot morphs bit by bit into a more familiar horizontal view angle as we draw, or worse, different parts adjust themselves in different ways, and the result is blatantly inconsistent or somewhat weaker than it could be, in terms of pushing the illusion of form and space. So I need to use blunt force to push my brain into the right environment. Whatever it takes.
For this picture I relied a lot on manikins and plastic models to set up the composition. This is a great way to get your brain to intuitively plug into an atypical perspective situation. I’m not looking to the models for anatomical details, lighting or drapery. I’m just trying to create a simple 3d sculpture of basic forms, that you can then draw into. And for me it’s more engaging to use actual physical objects than, say, Zbrush (though I do use ZBrush for keeping certain characters on model more easily, just not for this picture). The animal models are not poseable, so I take different shots of different parts of them and stitch them together, otherwise know as: whatever it takes. This composite setup is the result of combining lots of different photos of lots of different models into something that mimics the actual staging.
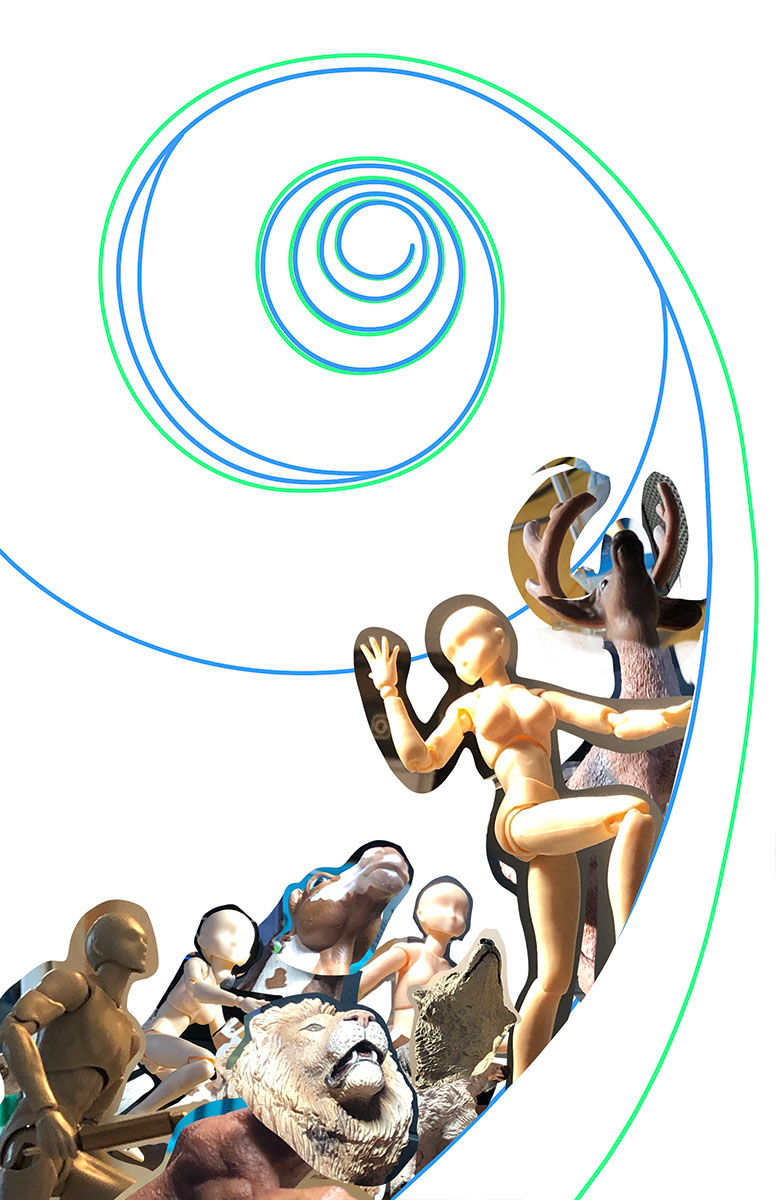
Working out the staging with manikins
I then do a quick drawing over the models, mostly tracing, sometimes converting to my own anatomical forms as I go, to create a guide drawing on which to base the final drawing. I do this intermediary stage simply to replace the manikin photo with a Chris drawing, so that when I do the actual drawing I will not be looking at manikins, as that would put my creative brain in the wrong place. I would be too influenced by those real, lit, 3-dimensional, photographic (stiff, uninteresting, not really realistic, plastic) forms.
The guide drawing, mostly traced from the manikins
Some people (including me, sometimes) use Zbrush to create reference, so let me be clear on how this is not exactly that. What I want here is to create a coarse framework within which I can draw freely, creatively, spontaneously and intuitively. When I use ZBrush I do it to design characters, develop them in detail, so I can then pose them and copy fairly closely from that, to save work (with multiple images of the same character) and, more importantly, to stay on model.

Using ZBrush to create model ref: not the same as what I’m doing here
For this picture I’m only using the models to establish rough forms in their proper place. I’m not looking for details, lighting, texture, etc. I’m going to invent all that stuff and / or get it from photo ref later. The manikins and guide drawing are like a staging or scaffolding which will be completely thrown away once the actual drawing is done. But the process is one of piece by piece replacement of that guide drawing until every bit has been replaced.
The guide drawing of each figure is the basis for the new, final version of that figure—but also, the guide drawings of the other figures, together, create a context in which to nest the individual figure I am currently working on. In other words, when I draw the first figure, say, the guy in the back, the new drawing of him is on a stage that already contains realistically placed (if not detailed) other characters.
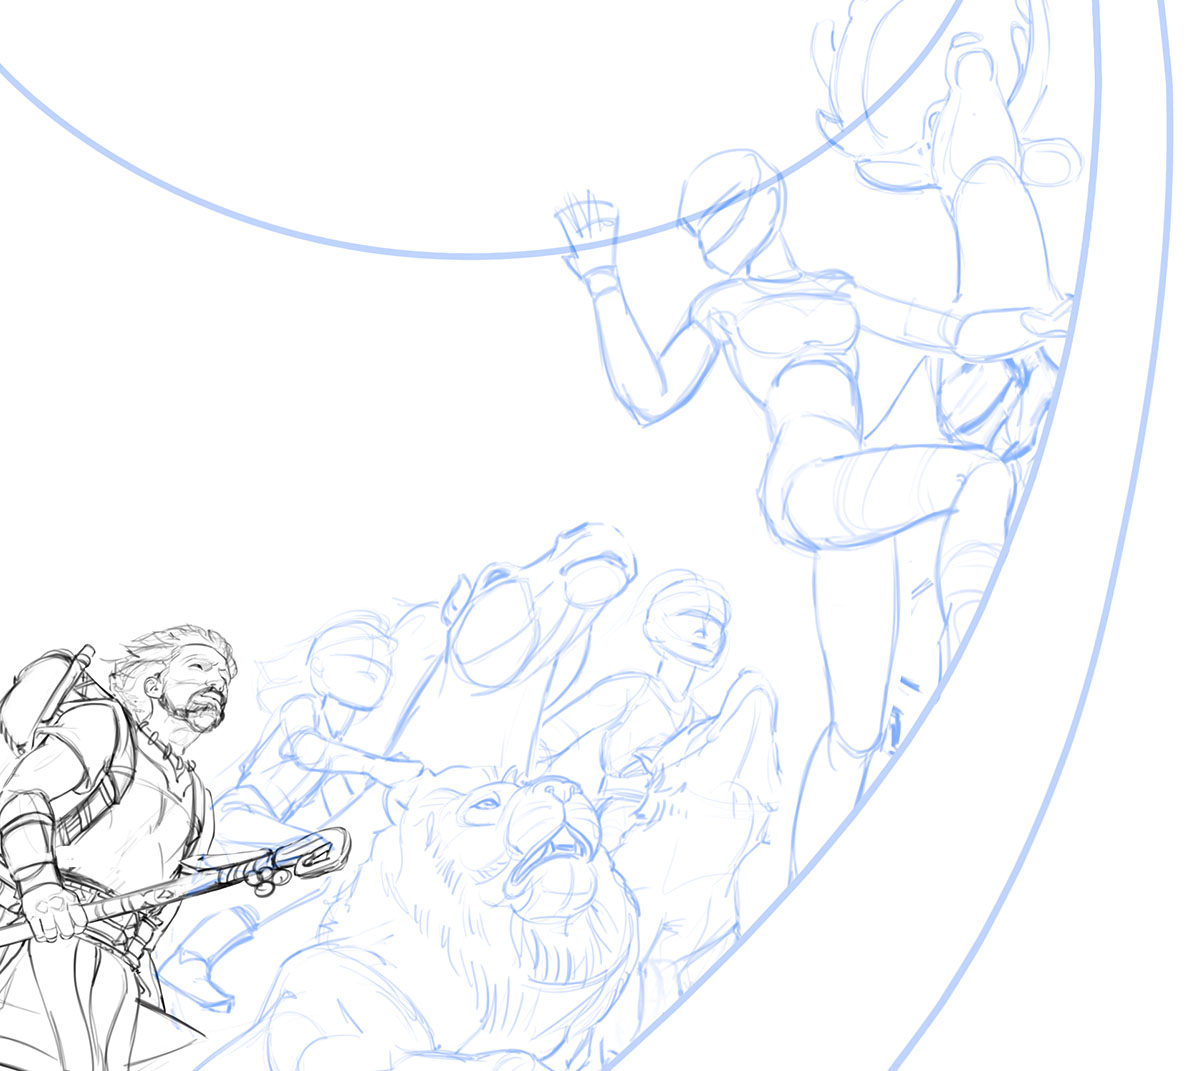
Drawing the first figure (bearded guy) on a stage populated by manikins
That means I don’t have to think about perspective and view angle, so much as simply look and feel, which boosts the chances for success, making it easy to spot and fix problems related to the view angle(s).
Now is where I refer back to all those costume ideas I jotted down, and a lot of image ref from the internets as needed. In some places the final drawing may conform to areas of the tracing, say, the lion’s ear. If the tracing works, that’s fine! But mostly it doesn’t.
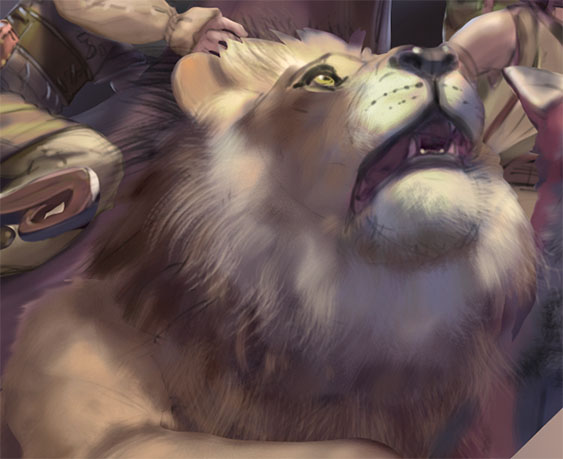
Let’s look at how the transition from manikin-based guide drawing to actual prep drawing works for the lion. He was one of the figures I was most happy with.
The blue is the guide drawing (tracing of manikin(s)), which itself was made from multiple photos of different plastic models, picking the angles I wanted for different reasons and assembling them together.
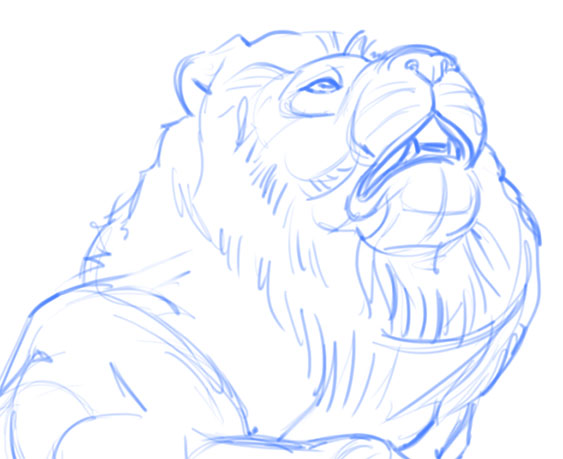
Tracing of the composited manikin photos so I’m not looking at plastic when I draw
Now I assemble pictures of real lions, basically Googling “lion looking up.” I also look at paintings of lions by other artists (but I don’t have them open while I work because I think they would influence me too much).
With a bunch of lion head photos open on my desktop (most from a similar angle, but several from other angles so I can understand the forms), including different poses (e.g. mouth open / closed), I draw a realistic lion on top of the manikin-based guide drawing. This does not mean conforming to the guide drawing, as you can see by comparing the two. Features like eyes, snout, lips, and their positions were (re)done using reference photos of actual lions, and not the manikin. The red is the final drawing.
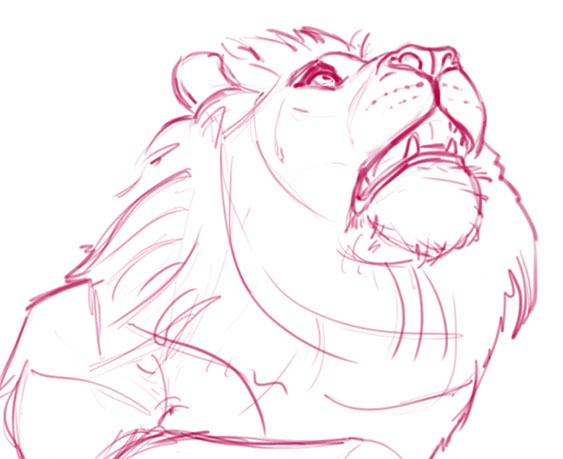
Final drawing based on manikin + photo ref
They look very similar, but if you overlay them they don’t line up, especially in the facial features, which I really want to look like a real lion and not some plastic model someone made. The basic forms of the mane and part of the body are fairly close to the manikin—but those are going to be created anew in the “paint.” For me it’s a waste of time to draw fur when I know I’m going to really make it with paint strokes.

Comparing the manikin-based guide (blue) vs. actual final drawing (red)
And here’s what I end up with after going through this process with every figure. At this point the manikins and the initial guide drawing have served their purpose, and they’re gone. I’ve got a fresh drawing of each figure made from imagination and photo ref, but which adheres more or less to the staging established by the manikins. Still plenty of opportunity to slide things around, rescale, etc., but the composition and the believable 3d space have been established (achieving these combination being the significant challenge in realistic imaginative painting).
The final prep drawing
The process to this point had taken a lot longer than I normally like to spend, because it was a difficult setup, and there was some indecision, spontaneous changing of the mind (including retroactively to things that were already approved) on the part of the client. It had become difficult for me to maintain the needed positivity and momentum to bring this piece to the finish line. But I never let the client know that. I remained professional and just kept going.
It’s very hard to explain the balancing act between taking client direction while also maintaining the personal spiritual investment and faith in yourself and the idea that are needed to hit a home run (or maybe a triple… I hate sports analogies). However, this particular client always took responsibility for his contribution to the process issues (which, in professional terms means he was willing to pay for it).
Painting
Finally. For me this is the easy(iest) part. If all that groundwork has been well laid, it pays off here. With digital media it can be tempting to do less prep, to leave questions for later, to not commit. But that approach can come back to bite you as you find yourself lost, trying to find your footing on a fluid ground, dealing with components that have become increasingly unwieldy because they are no longer simply sketches. It’s not that the picture is a done deal, or in the bag at this point. There are still problems to solve and decisions to make. But for me, personally, the decisions made in this phase are more aligned with my skill set, and I’m not operating in a near total vacuum as when I first start the piece.
I’ve only relatively recently started using tight(ish) line drawings as part of my painting prep. I went years not doing that at all, just going right in with the big brushes. But I discovered that that has its limits. Nevertheless, I highly recommend you try making some pictures without using any prep line drawings, just big brushes, getting smaller and smaller and achieving tightness and detail that way, as there is perhaps no other way to learn to talk with brush marks. It’s why some traditional painting training starts with the palette knife. So for me the line drawing is merely a framework upon which to hang the painting. Hardly any of it is visible when I’m done, and often the final forms and shapes no longer conform to it anyway.
I do all the prep (models, reference, studies) so that to the greatest extent possible, when I am actually painting I can be thinking only of what makes a good picture and not about objective right and wrong such as perspective and anatomy. I want to be thinking of making interesting shapes and powerful shape relationships, aka composition or design.
A lot of beginners and non-artists seem to think that just getting everything to look right is all there is. If it all looks right and good then you have a great picture. But getting everything to look good is nearly nothing in picture making, as you can see from the variety of styles and levels of draftsmanship out there all making great pictures. Simply getting it all to look right is a tangible hard skill, and a requirement in realistic painting, but if that’s all there is, the picture is akin to a parlor trick or sport. Any level of realism or correctness (or lack thereof) can still make a GREAT picture. And, conversely, all the realism and correctness in the world does not automatically result in a great picture.
 My approach is to draw or paint as much as I can without looking at other pictures (i.e. ref). That does not mean I don’t look at ref a lot. It doesn’t mean my goal is to not use ref, or to use it less. I know I have to and always will. It just means I look at ref for answers to questions that have come up in my ongoing attempt to work from imagination.
That may seem like a subtle difference, but it’s not so subtle in terms of how your (or at least my) brain works. I know this because in the distant past I made pictures working closely from ref, as in staging, lighting and shooting a setup of, say, a figure, that the figure in the final picture would and did closely resemble. Working like that, as the hours pass, my brain gradually drifts from “all is possible” mode, trying to find its own solutions, to deriving more and more from what I’m looking at, because that is such a powerful influence. How can I be looking at a shot of an arm, posed, clothed and lit exactly how I “imagined” and not essentially copy it?
For me that process moved too much of the invention and creativity to the photography side—which is perfectly valid—I personally just want to keep it in the drawing arena because I think I express myself best artistically by literally moving my hand and arm. It’s that simple. I know I won’t get photorealistic results this way, but for me the compromise is worth it. I can get realistic enough.
So even if in the end I spend just as much time looking at photos as someone else might, the differences for me are a) what my state of brain is (hungry, focused, desperate!) when I come to look at the photo, and b) the fact that I am not looking at a lot of photos. I arrived at this process after spending one (very difficult) year painting without using ref at all. It’s what works for me (though it is continually evolving).
Painting the Lion
Here’s a brief step by step of how the lion moved from drawing to painting. It’s analogous to the move from manikin-based guide drawing to prep drawing, because I invent and change a lot in the “paint” as I go. I needed to give this lion painting energy not simply fill in the drawing with value and color. Because the end goal is a living creature that is also an art-creature with the kind of dynamism I would not see in a posed shot or plastic model, or even a real lion if by “real” we mean a photo of one.
Lion rough paint UNDER the prep drawing
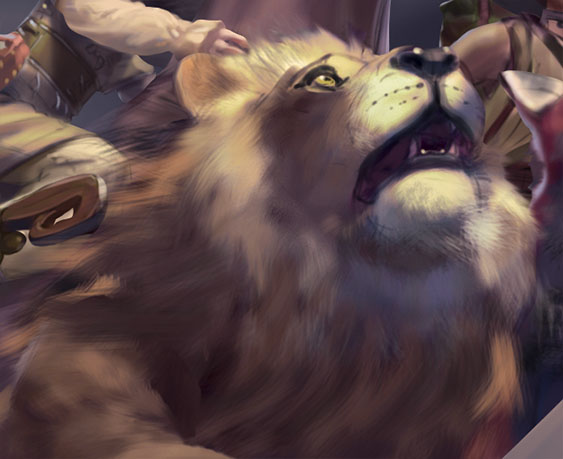
Developing the painting OVER the prep drawing
What was going to make this lion rock was not the accuracy achieved via the model(manikin) or the photos. For me it’s a combination, or balance, or more accurately a phased transition from the framework provided by the manikin-based guide drawing, to the photo-based prep drawing, to what is ultimately a freshly painted finished image that may not conform to either of those things in the end. But I needed them to be there nonetheless. They’re sort of like rafts that allow me to cross to the next place. For example, if I first paint the fur of the main looking something like some photos, then I can easily paint my own mane fur over that, in a way that brings out the motion of the lion and the movement of the figures as a whole. Then I don’t need the underlying painting / drawing of the mane to be there anymore.
Notice how much continues to change in the painting. No matter how tight your drawing may be, painting (or, what I choose to call “painting”) is different from drawing. It is a different way of making marks and creating shapes, and much of it cannot be anticipated in the drawing (or if it could, it would not be worth spending the time on, because you need to paint it freshly anyway).
See how the lion’s expression becomes more focused in the painting, more directed at the main character, as his bottom eyelid presses up and his mouth relaxes a little. I don’t want to achieve that by endlessly futzing over a line drawing first, then struggling to preserve that. And I might not have moved it in this direction had there not been a partially-rendered main character in place for him to look at. I need to do all this stuff directly in the “paint.”
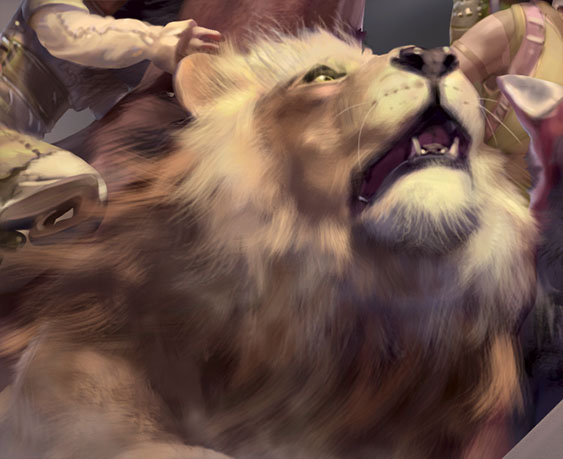
The final painting of the lion, deviating from the prep drawing when that makes for a better painting
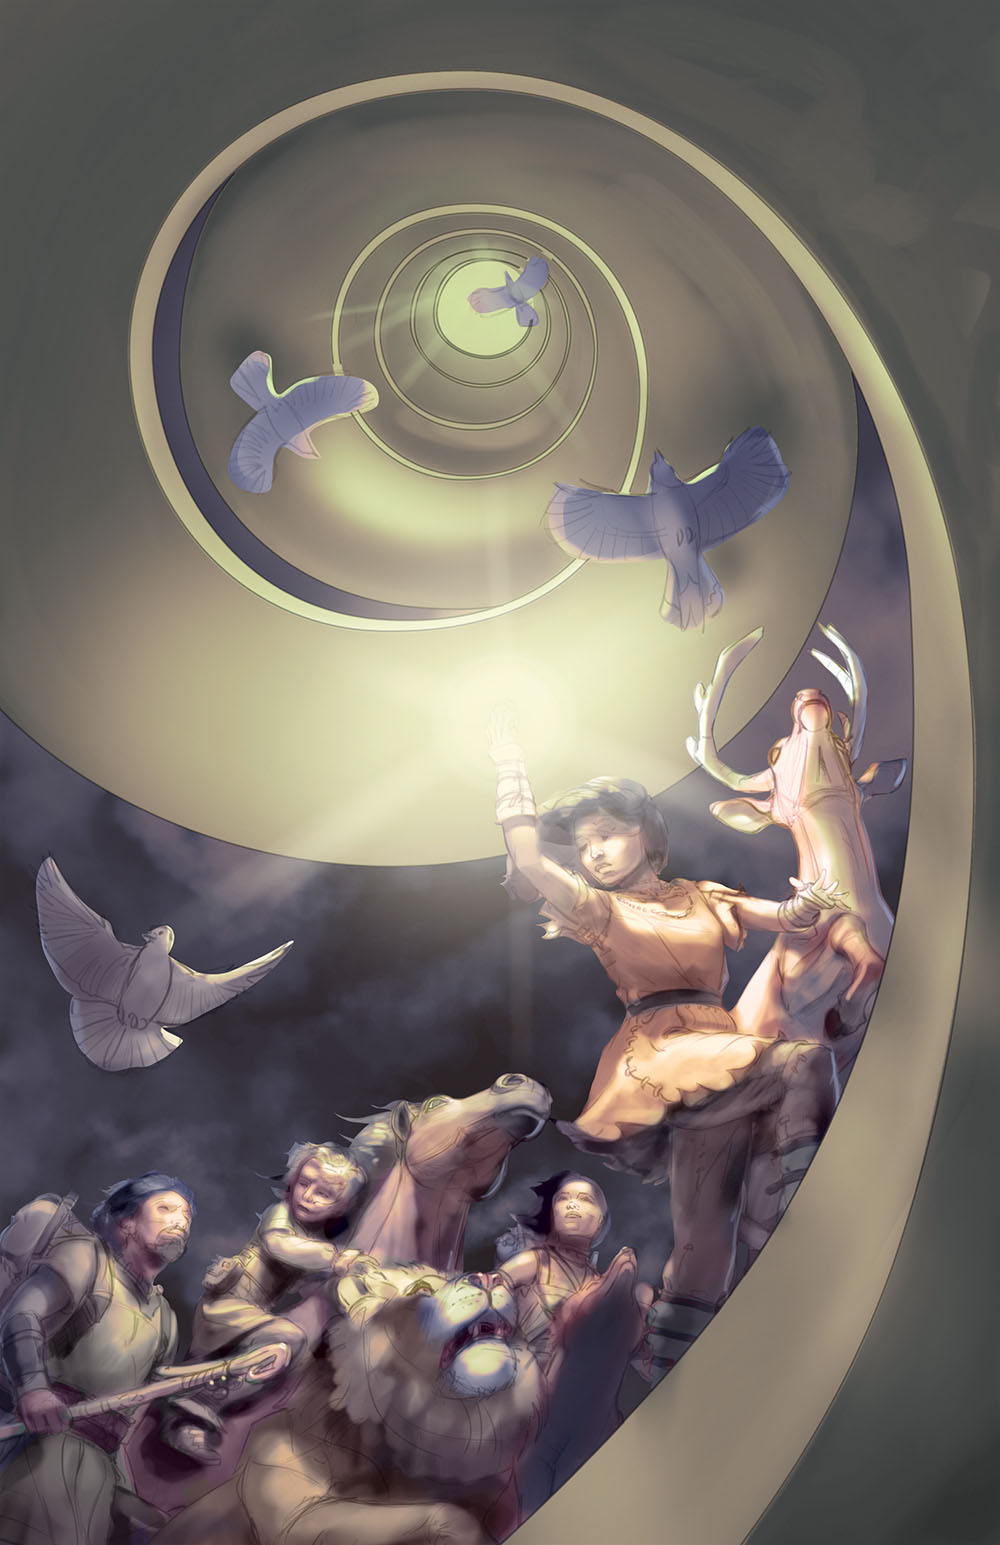
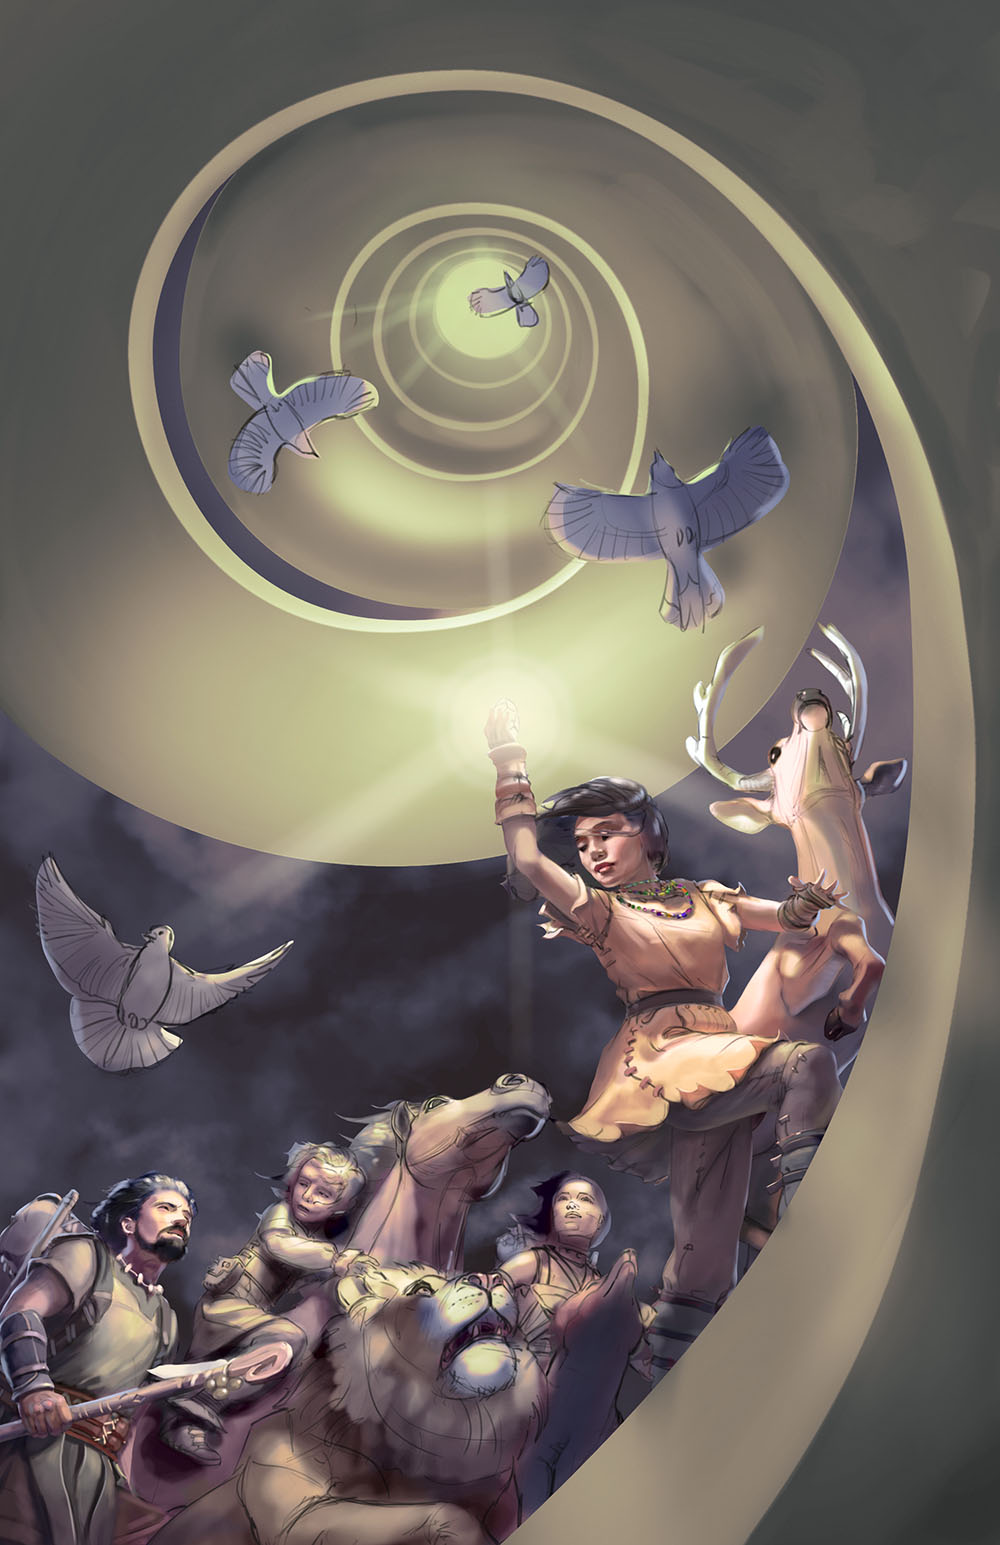
Completing the Painting
I essentially keep doing what I did for the lion for each figure, and for the picture as a whole. I don’t finish one figure then another, etc. I bring each up to the level of, basically, the first lion painting above, then I bring them all up to the second level, and so on. Because as I am developing in the paint, the characters continue to talk to one another and influence one another as they all come alive together.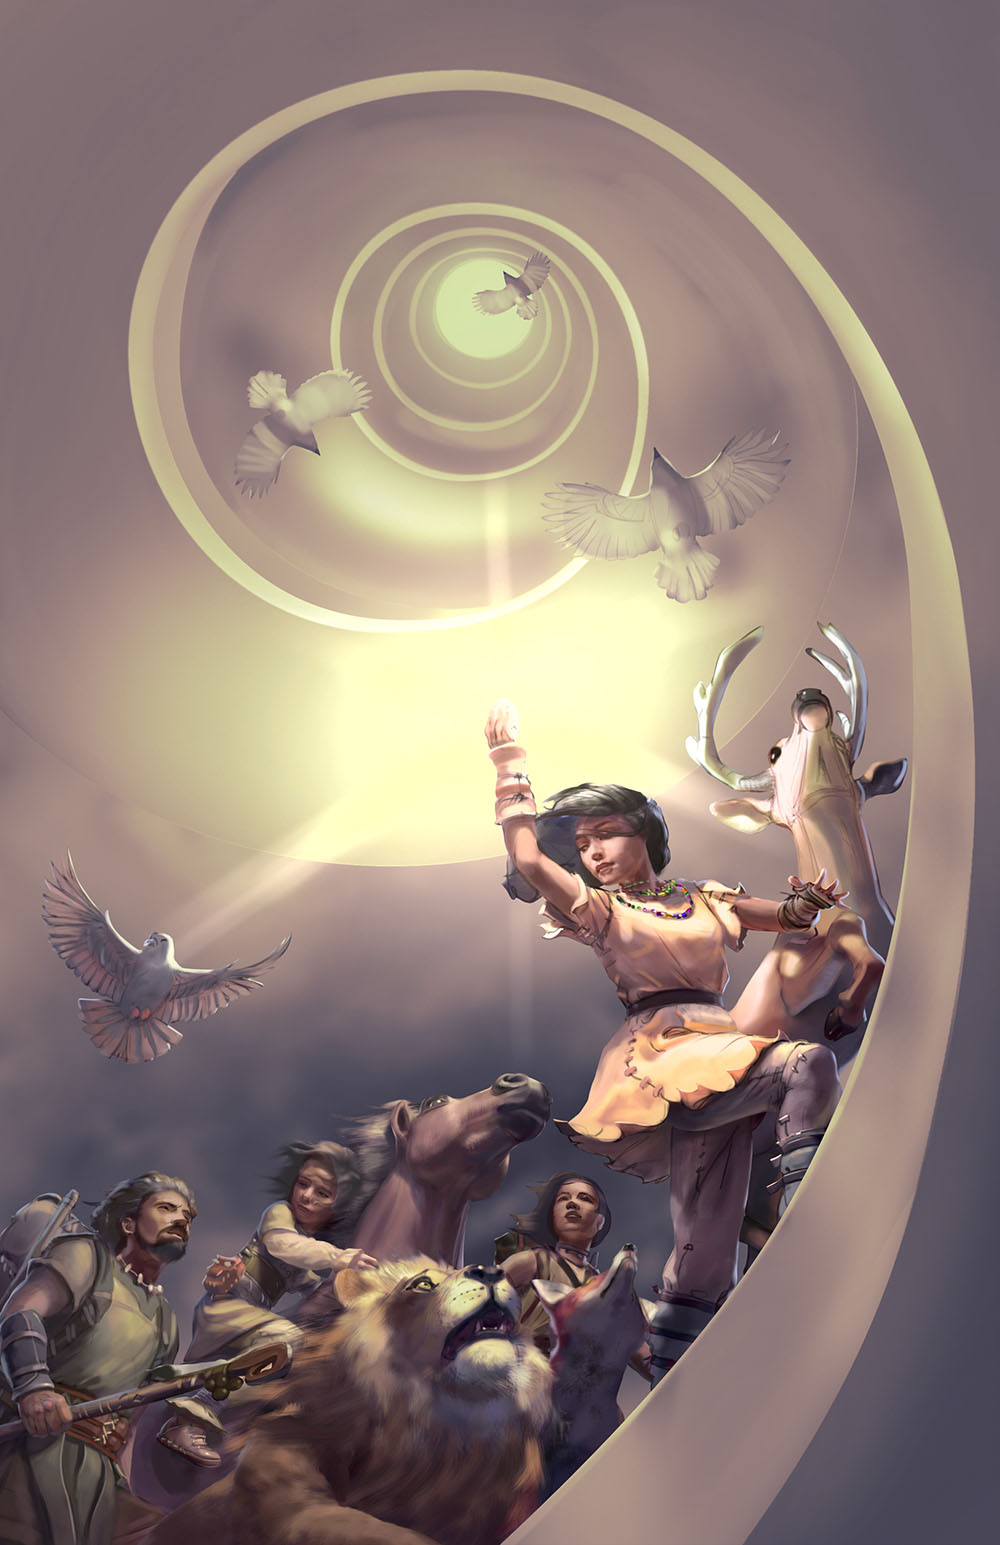
I usually get to this point where I’ve got the characters and other individual elements fairly solid individually, but I want to push the design and picture cohesion more. It’s a back and forth largely caused by the fact that with digital media you cannot see up close detail and the whole picture at the same time.
It’d be great, wouldn’t it, if we could just sit down with a brush or stylus and create a painting without all that prep and headache? Maybe some people can. Or maybe it just looks that way, which is what we want. But don’t think for one second that because a final painting looks effortless it didn’t require an enormous amount of practical, un-sexy work, of all sorts to get it to look that way. Do whatever it takes to make the pictures you want to make. Shoot hundreds of references of models then photo bash them; set up painted objects to see how the colors reflect around; make models from Sculpey; go to the pet store and draw mice—whatever it takes. Every picture is different. Don’t worry if you can’t settle on a single specific method that works for every picture.
To go back to that dog training analogy from 50,000 words ago… (Dan keeps suggesting I consider making these posts shorter, but, with the plague and all I’ve got no one to talk to, so y’all will just have to suffer), you don’t want all the hard work, exactness, strictness, even, to kill the life and personality of your picture—and it won’t, if you approach in the right way, which is to keep it all in service of the living thing that is your picture. To honor your picture.
Because the point of all that stuff is precisely to enable your creativity to shine through, by applying practical methods such as separating the variables, and putting enough support in place so that when the real time performance of painting happens, you don’t have to worry about, say, forgetting your lines, or whether your costume fits, or whether you remembered to use the bathroom before the show begins. Instead you arrive ready to act. You just put it out there. You emote. You communicate. You achieve flow. You shine.
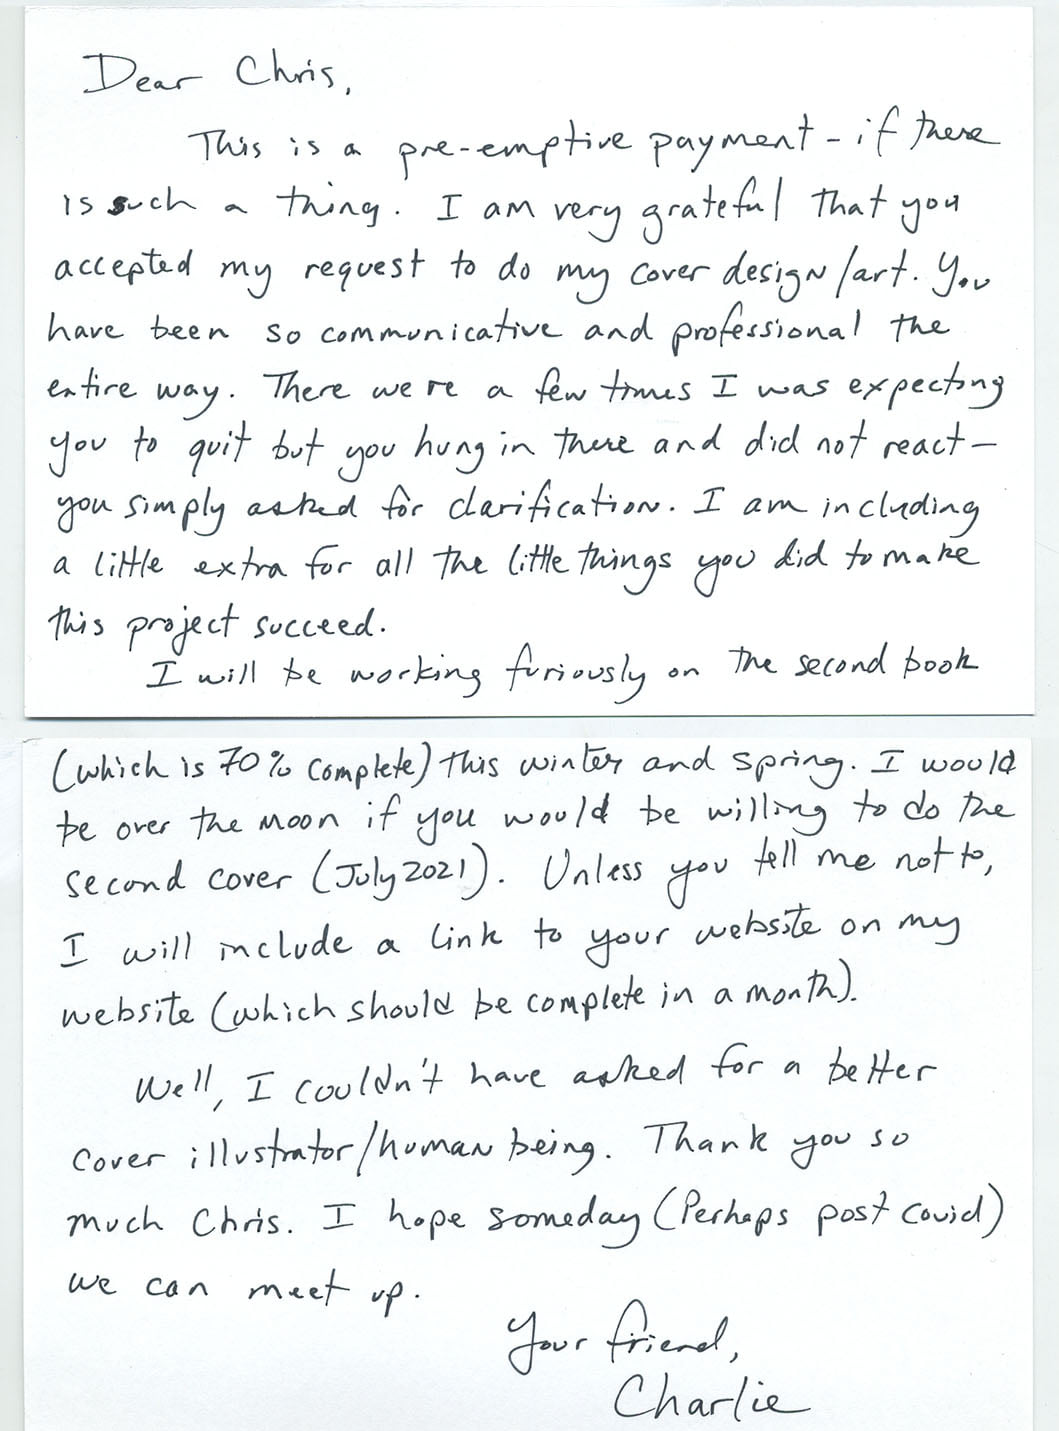
Then you get an amazing card from the client telling you how much he appreciated all your hard work and perseverance, and how he can’t believe you hung in there, and here’s an extra couple of thousand dollars for you over and above the top dollar you’re already getting. Yeah, right, like that would ever happen.
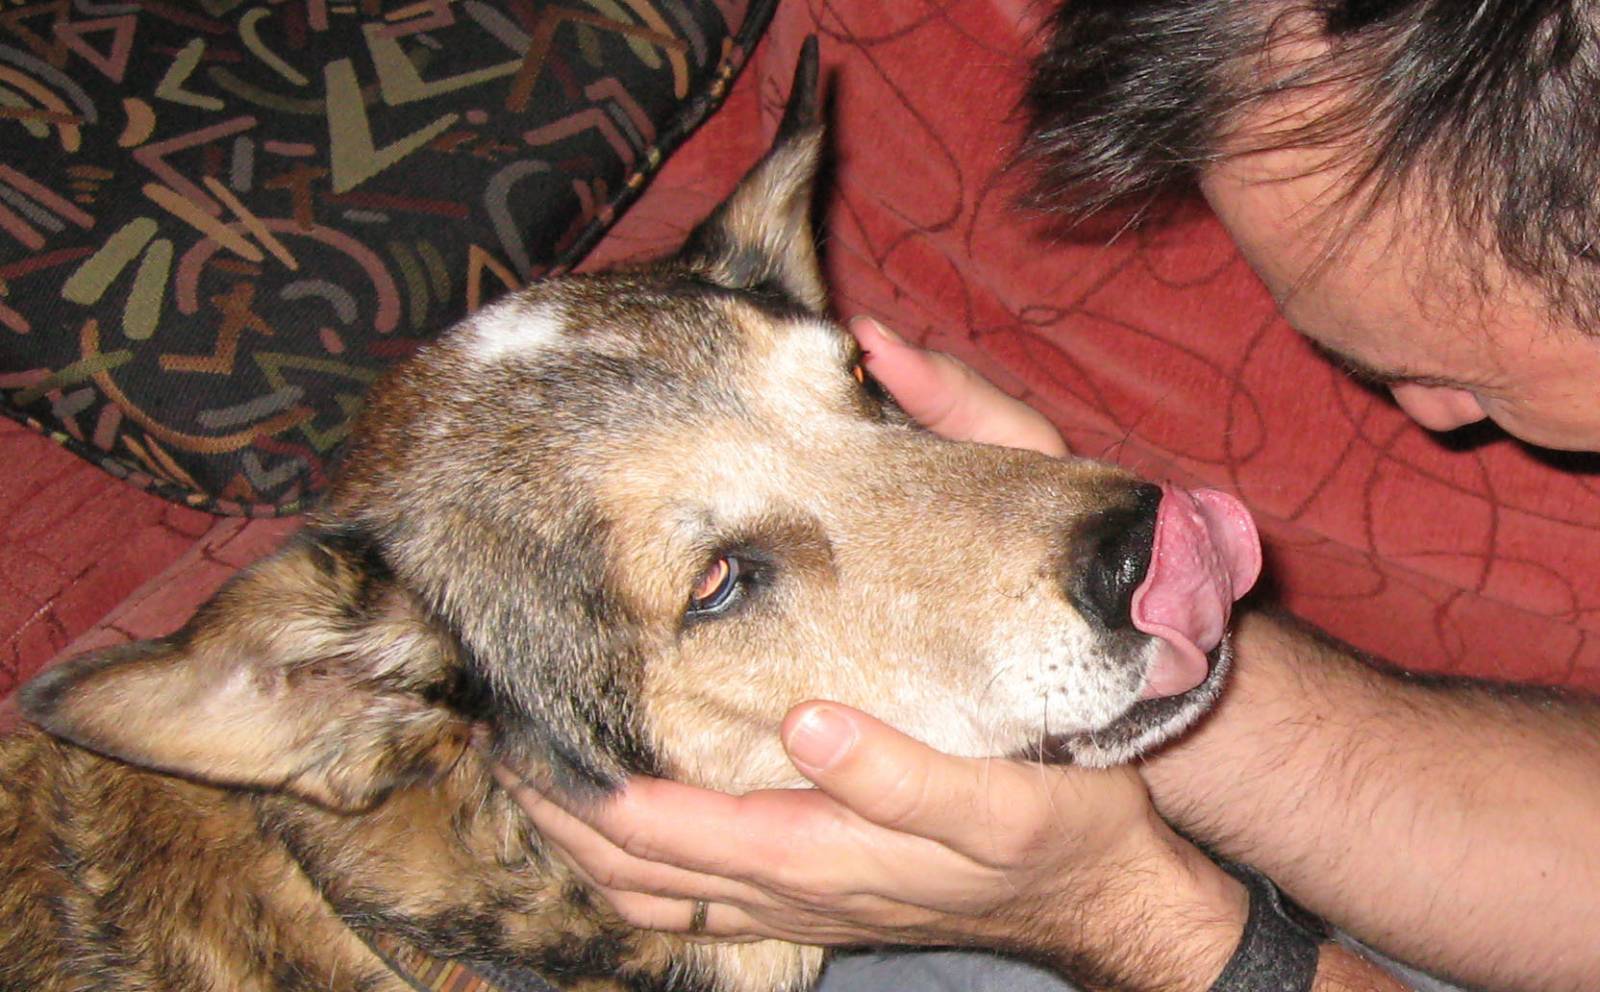
[DRAMATIC PAUSE… Hey, check out another picture of Syd…]
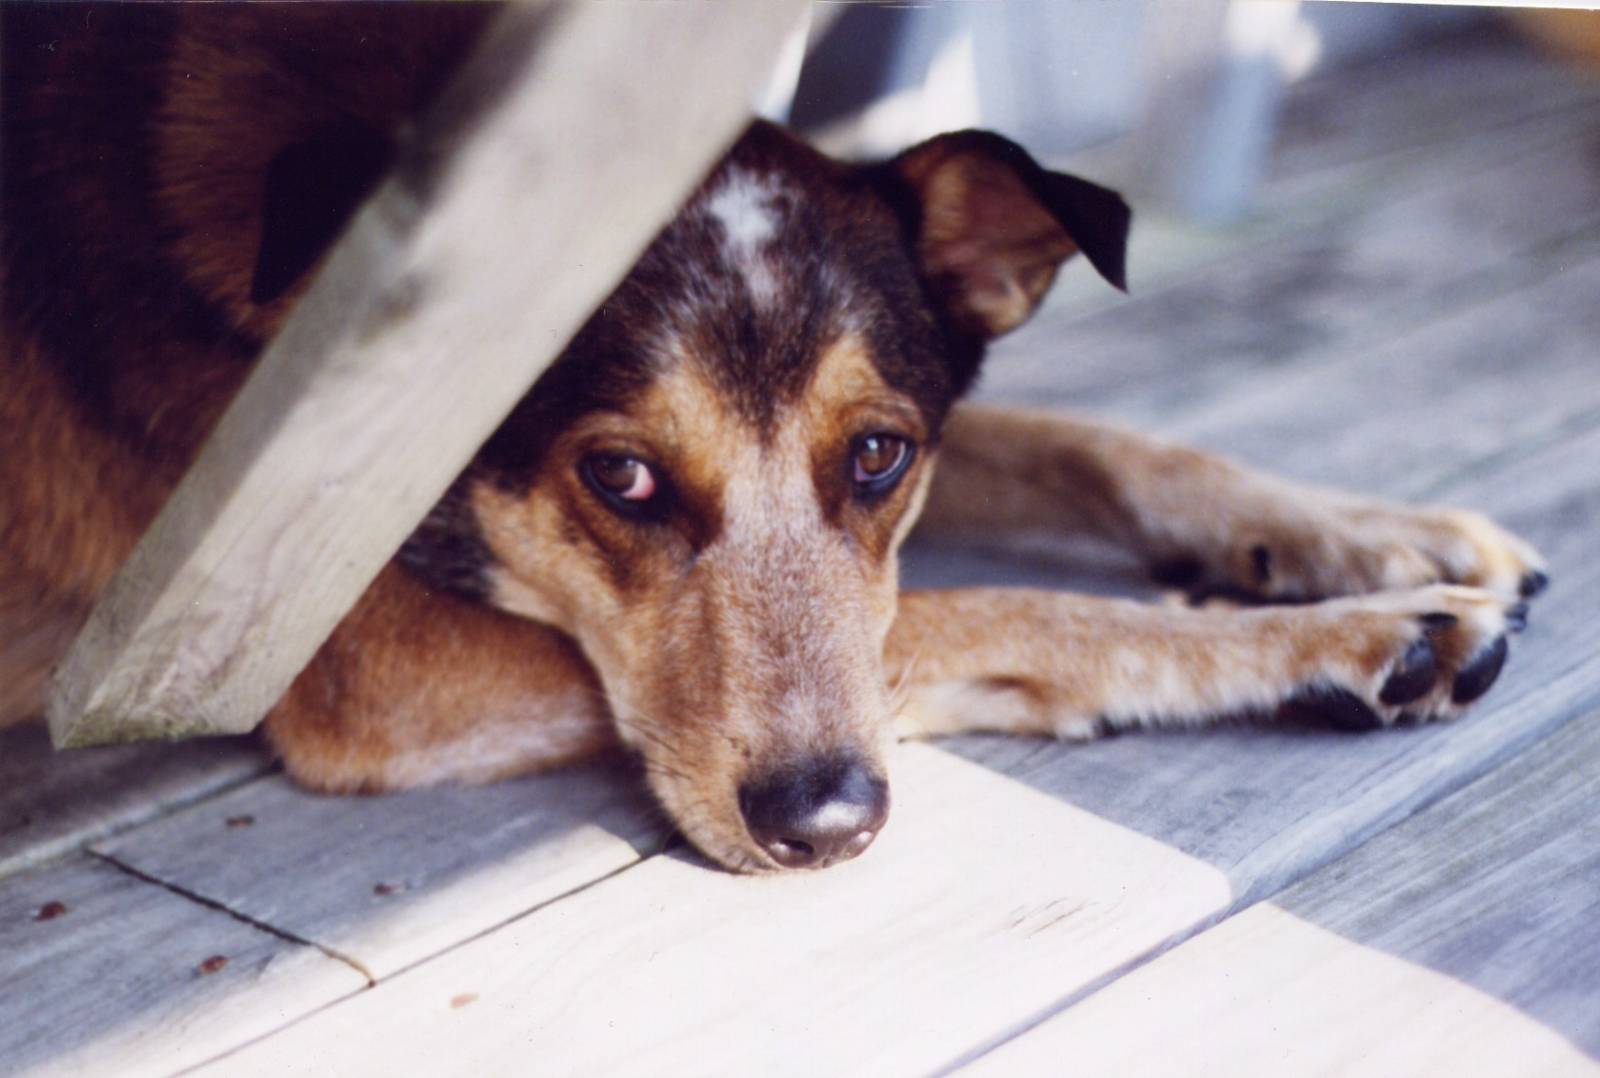
But that did happen! So let that be a lesson to you, kids. What lesson, I’m not sure… but it’s probably something.

What a wonderful read to start the morning with! Such a great reminder that at the end of the day, you need to do whatever it takes and put some serious work into painting and visual problem solving sometimes.
Thank you for taking the time to write all this up, the details are very insightful and helpful.
Indeed, Steph. Thanks for reading.
Seriously, this is a fantastic and informative look into your process and struggles. They feel all too real and I can feel the hard work that you’ve had to go through to achieve this piece. Thank you 🙂
It never ends, my friend. Always new adventures to be had.
Thanks for the support, my friend.
Wonderful advice Chris! I love seeing creatives’ processes.
Thanks, Natalie, for the comment.
I can relate to so much of this post, I love the poetic metaphor.
your process was a joy to read. I’m amazed that you remembered this experince so vividly and I feel like we all went on this painful journey together. so many videos show the painting process as a straight line where each step is just as appealing as the finish, mistake free. Its so validating that even pros go through bumpy rides, rabbit holes and detours. It also shows why I think its so much easier to illustrate for someone else than for ourselves. When challenges show up I quickly lose passion for the picture, cave in or question why I’m doing this to myself.
What I struggle with is researching. The problem with google is that to find what you need you first have to know very specific things about what your looking for. drawing in real life is a luxury since you come up against unusual things naturally. Sometimes I’ll have an object in mind but can’t word it exactly how google wants me to say it. Or I’ll find bare bones info about something I want to learn about and find out later the info IS there you just had to say it an a crazy specific way, like you knew the answer before you asked. for Exp: a specific hat I can’t describe or prop name and the image suffers becuase of this. Gathering refs is an art itself and compared to my influences its something I greatly lack. Its also hard becuase like you said, more real isn’t more right. All the pictures that inspire me have concepts of real life, but are never copied, I don’t know how they do it.
I esspecially relate with not having artists to talk to. I feel a huge barrier trying to communicate online without being long winded or worried I’m coming off as attention seeking. many of the artists I meet irl didn’t have any interest in fantasy or illustration and I can’t talk deep enough into art stuff with my family as I’d like. I constantly feel like I’m an outsider looking in on the cool kids table, not skilled enough to get the attention of my heros but enough to the average person to considered “talented”.
Congrats on the well deserved bonus!
Thanks for your thoughtful reply, Zach. I think whether we go through big bumps or not is not so much a question of pro / not pro or beginner / advanced as one of whether or not we are always trying to achieve more. When you need to earn a living at this time and predictability become important, so for that reason, I guess, a lot of pros (including me, most of the time) need to simply do what we know works. And there’s nothing wrong with that. But this year I’ve been more interested in growing and learning.
As for ref, yeah, it’s tough. You pick up little things over the years, like, if you are looking for an unusual angle of sample, Google the plural of it. So “mice” instead of “mouse.” With the singular you tend to get the same angle and expression over and over. But with the plural you get a crowd, so there is a lot more variety. Or like for the ref of the deer’s head, rather than Googling “deer low angle” or “deer underside” or something, it’s “deer looking up”. That gives me a good underside of the head at least.
Thank you for your posts and your reply! Its an honor to take your time and hear your thoughts! I completely agree, I wish you plenty of discoveries this year!
(Speaking of which, if you want to practice harder perspectives, if your working on computer paper, its thin enough that you can put a perspective grid under it and still see it so you can refer to it when your making thumbnails or finished drawings and remove it for more cleaner results.)
I appreciate the google tip! Its crazy how little things like that make such a big difference.
Hi Chris,
I thoroughly enjoyed seeing all the work you put in to get your gorgeous results. Thanks for sharing your process, some tips, and for humoring me.