Disclaimer: I am not formally trained in art restoration and the methods used here were arrived at from past experience and consultation with other artists who have deep knowledge of art materials and care.
It was one of those emails that you never want to get. A collector had bought one of my pieces from another collector and the painting, while in transit, took some significant damage. I asked how bad and I have to admit my heart sank a bit when they sent a photo.

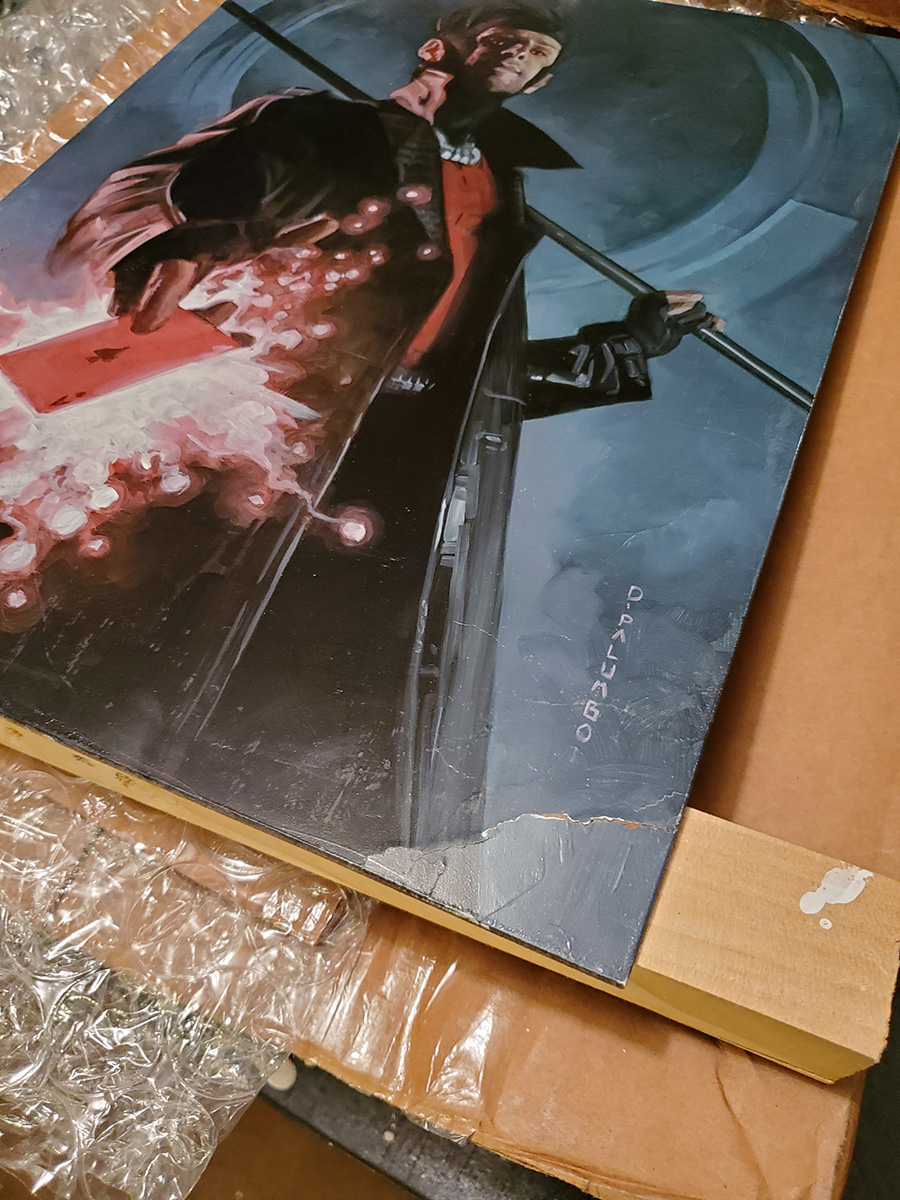
Apparently the packing was a bit light and the corner of the box was partially crushed, leaving the corner of the painting heavily scraped and the actual board with a 2-3 inch crack. I’ll take this moment to urge anybody sending art to over-protect with the assumption that it will get slammed in at least one door and fall down at least two flights of stairs.
After a few follow up questions and some other close-ups of the damage, I agreed to restore the piece as best I could. Here’s what I did and how I feel it went:
First, the details of the piece itself. The painting is oils on Gessobord, which is a type of art branded 1/8th inch MDF. I like this surface because it’s strong, light, and I can cut it using a utility knife and ruler. Despite this, MDF also kind of crumbles and breaks apart when it does crack. I wanted to be sure that it was treated very carefully to not make things worse. My worse case scenario plan was to cut the entire corner off the board and join a new one on. Fortunately, this wasn’t necessary. When the painting arrived, I could see that the corner was bent back maybe 15 degrees but not broken all the way through.
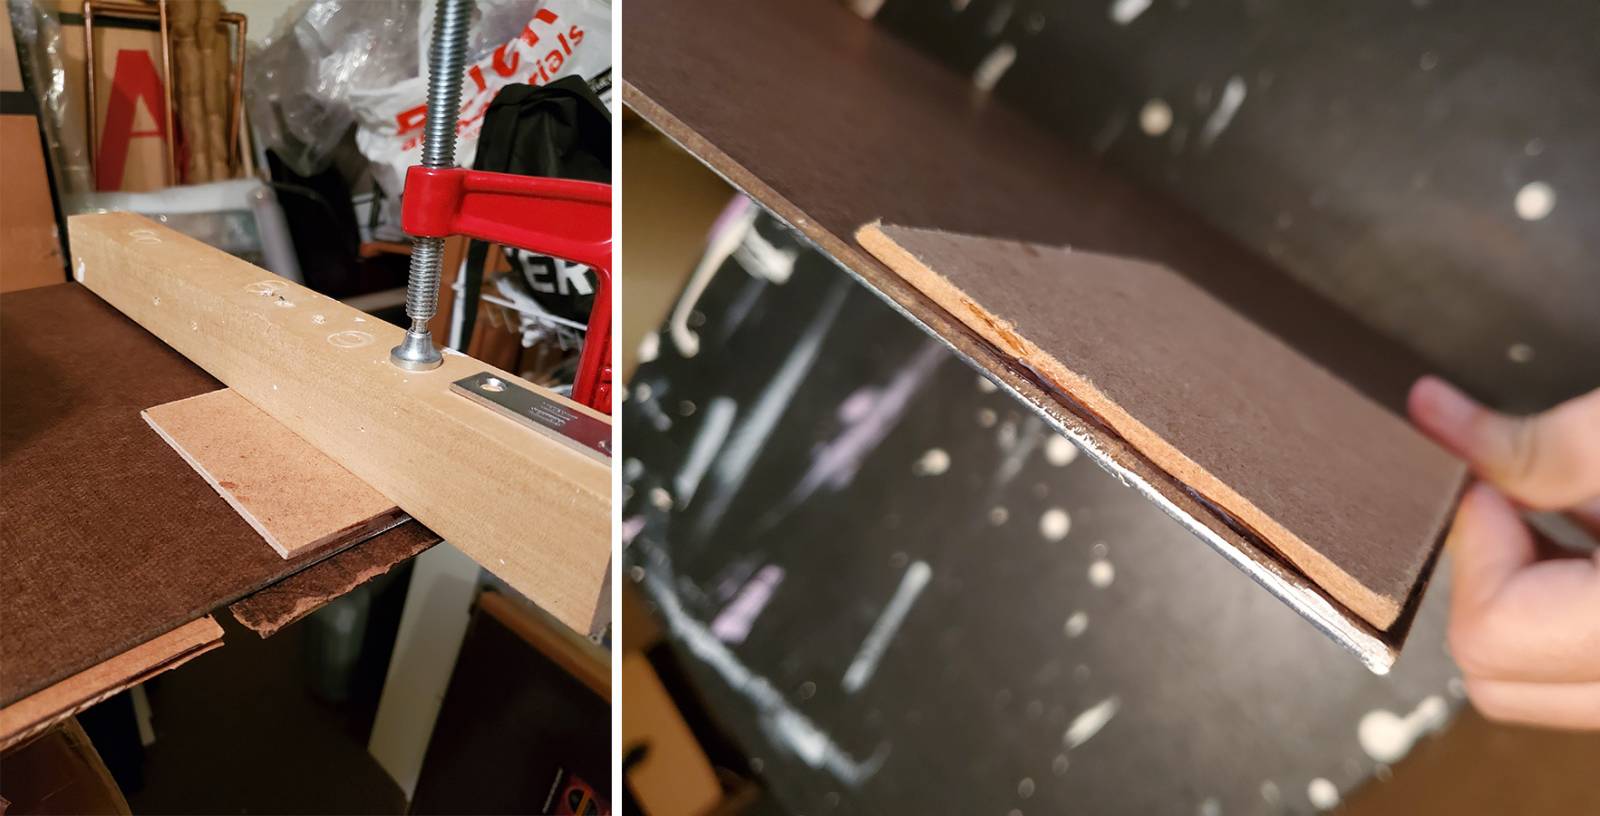
My first step was to reset and reinforce the damaged area so that my handling would not cause any further destruction. I cut a square of MDF from another art panel which was approximately twice the size of the break. This was to be brushed with an MDF-safe epoxy and used as a mending plate. I laid the epoxied mending plate carefully over the back of the broken corner and placed a loose (non-epoxied) piece of MDF on the front side, and then a heavy strip of 2” wood on the back of the mending plate, sandwiching the painting and mending plate together. These were clamped tight so that, from the side, I could see the surface had flattened back out. I left the epoxy to set for 24 hours, after which I took off the clamp and could see the structure was now flat and strong again.
This left the job of fixing the paint surface. I began by carefully remove the layer of Gamvar varnish that I give all of my paintings. This is done by gently wiping Gamsol over the surface with a lint free towel (I used Scott shop towels). Working slowly and patiently, you want to get any stickiness off the entire surface. Once cleaned and dry, the painting will have the dull look of an unvarnished painting. I could see that much of the scuffing was actually limited to the varnish and the paint surface itself was mostly intact apart from the still very visible crack.
Using a fine grit sandpaper block, I worked over the crack to even out the surface and expose the raw gesso and MDF under the gesso. Gesso is a water base primer and so it should never go on top of oils. By sanding off the oils, I had a surface which could be re-gessoed. The area where the MDF shows through the gesso is evidence of why regessoing was necessary: there was an uneven hump in the mended MDF which was both unattractive and also not properly protected from new oils.
My first attempt at sanding was a bit too hesitant and didn’t give me enough room to spot gesso, leaving the patch still a bit obvious. I sanded further and then reapplied my gesso to the exposed vein of MDF.

From this point forward I could, essentially, just paint. I began, and I always would, by laying down a toned surface. From there, I simply repainted the area as close as I could to match the original. I applied my oils with a touch of Galkyd to speed drying so that I could re-varnish sooner.
There were a number of things that went my way for this repair. First, that the crack hadn’t penetrated too deep and so I was able to save the original corner. Second, that the affected area was not terribly detailed or a focal point in the painting. Those would have been fixable using a similar process, but would have definitely been more challenging. Also, my normal painting surface has a rough texture which, by it’s nature, camouflages imperfections (and dust) more than a pristine smooth surface would.
In the end, I was very please with the repair. My goal was to make it all but invisible and I feel that was a success. What really surprised me in the process was how comfortable it was to repaint an area that had been literally sanded to the primer and beyond. That’s the sort of thing that I normally dread, but it was a good reminded that it’s all just colored mud on a surface. If you could do it once, you can do it again.
But even better, ship that art in a double box.


This is amazing! Well done and well presented. I did hear at one point that the “dangerous” ingredients in paints (cadmium, cobalt, etc.) weren’t dangerous unless aerosolized via sanding and inhaled. (Some folks out there may not know that without a mention.) Thanks! LOVE your work.
Definitely a good point, thank you!
Nicely done! Those are always panicy moments. I’m sure your collector was pleased as punch!
Thanks! Yes, I think everyone came out happy 🙂
Excellent article! The result is fantastic.
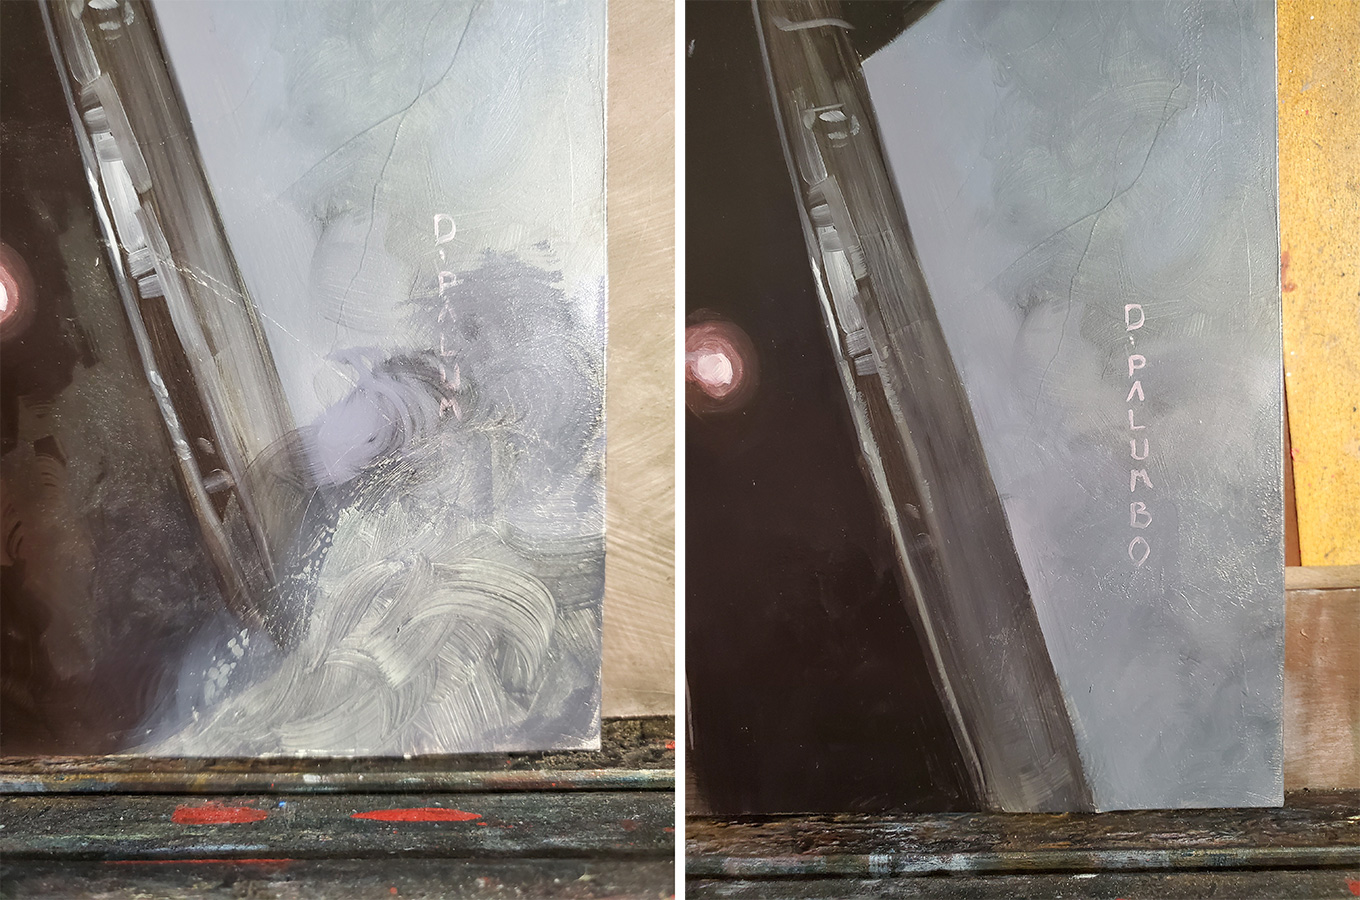
What looks like cracks, just above your signature … is that actual cracks or surface/paint texture?
thanks! Those are gesso texture, the cracks were thankfully limited to the break area below the signature
I get it that you’re a nice guy and you love your work, but there’s something wrong with one collector selling your work in the secondary market to another collector… for a profit… and then damaging the painting he sold by not packaging it correctly. Rightly, it should have been his responsibility to get it fixed at his expense. Why did they get you to do it? I hope you were compensated for your time.
Yes, I was paid for the repair and there was no expectation for anybody that it would be otherwise. I don’t see it as being nice exactly, so much as caring about the life of my work once it’s out in the world.
The primary thing that I personally collect these days is mechanical cameras, many of which are 60+ years old and showing their age. With proper servicing though, they’ll continue on working beautifully for years to come, some probably well beyond my lifetime. Unfortunately the folks who built and maintained these machines are few and far between these days, so it’s really something special to have a true expert work on one of them. I know really well that feeling of finding THE GUY to do the job, and the respect and appreciation I have for that opportunity. So beyond being compensated for my time, It was meaningful to me to be the guy for this rescue operation.
thx