
Continuous skill acquisition is a big part of our creative practice. In our experience, time spent learning new skills always leads to different creative paths beyond those immediately visible. It’s important to us that no matter what we want to make, between us we have in our “proficiency palette of experience” the knowledge we need to create that thing. If a concept requires skills neither of us have in our repertoire, well, Colin has a quote taped to his easel: “Creativity is doing what you don’t know how to do.”
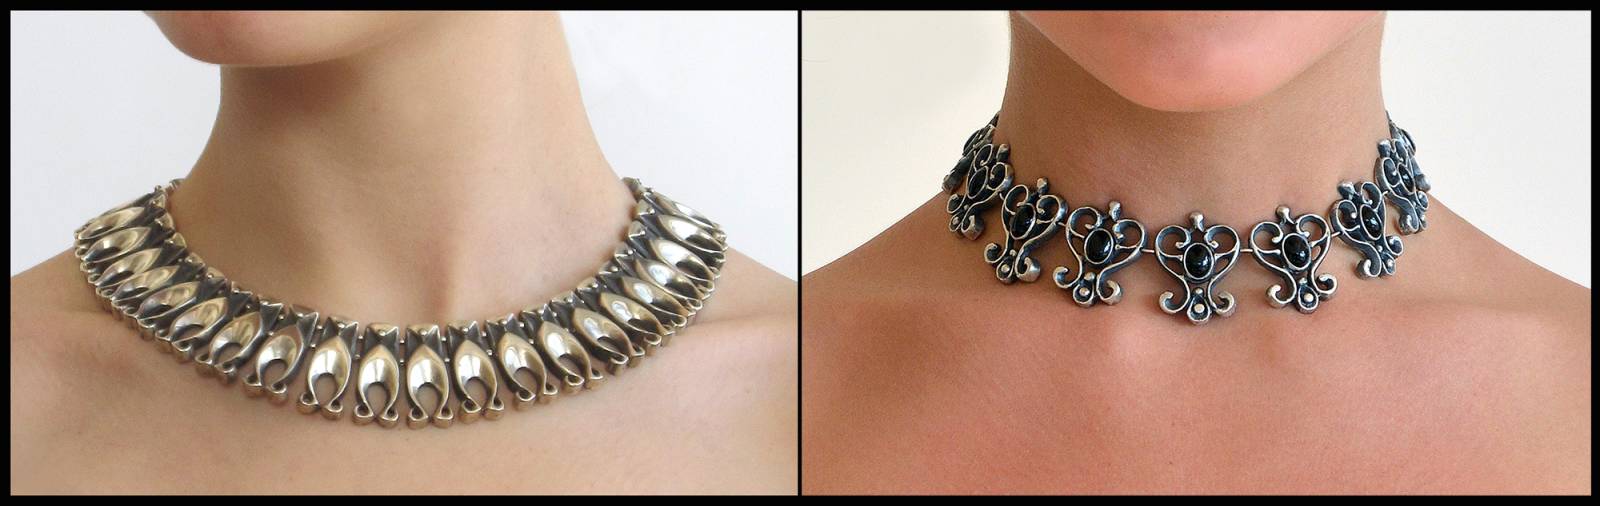
Many years ago, I wanted to make some neck-pieces to expand on the ideas in a sculpture series I was working on. I could either design the jewelry and hire an artisan to carve and produce them, but that’s not really our MO, so I learned the techniques of silver casting. The jewelry casting process is similar in many ways to bronze casting, but on a much smaller scale and involves learning to work with some different equipment and methodologies.
 Lucky for us, the time spent developing those techniques opened the doors of opportunity for creating small scale bronze sculptures. Today, we’ll share an overview of how we produce these mini-sculptures and how we adapt them for uniqueness within a series.
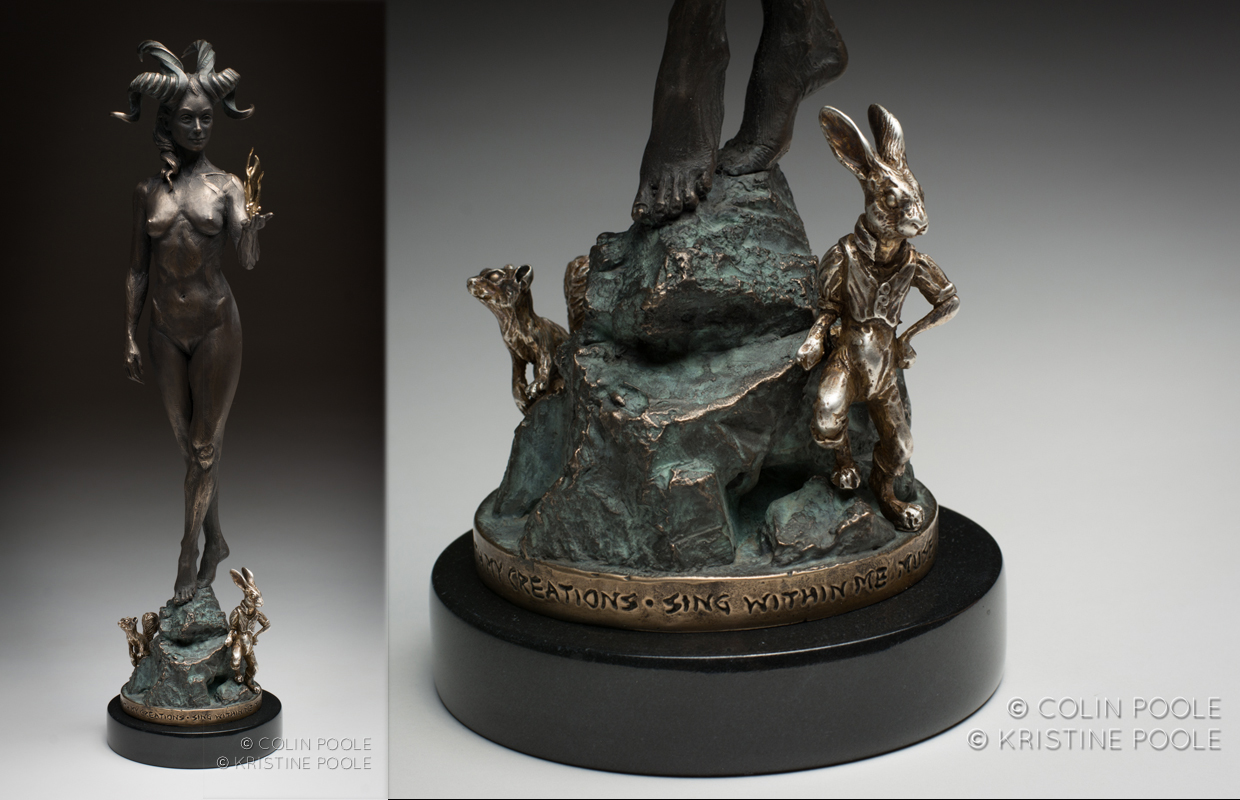
When we did the Spectrum Fantastic Art awards, we customized the Grand Master for each year’s recipient. The year Scott Gustafson was selected for the Grand Master award, Colin sculpted a pair of anthropomorphic animals for his statue in honor of Scott’s body of work.
Colin got the flu and was too dizzy to stand at his easel, so spent a couple days working on these little sculptures (I mean, why would he just want to stay in bed when he’s sick? Really?). He did the originals in Sculpey, at the time a material new to him.
 These originals were cast in sterling silver and brazed to the base of the bronze figure.
 These are pretty small sculptures for traditional bronze mold-making techniques (our mold-maker won’t go near anything this scale and he’s really good), so we opted to use the jewelry techniques. They are at the large end (especially bunny) for these processes and we weren’t sure it would work, but there was only one way to find out!
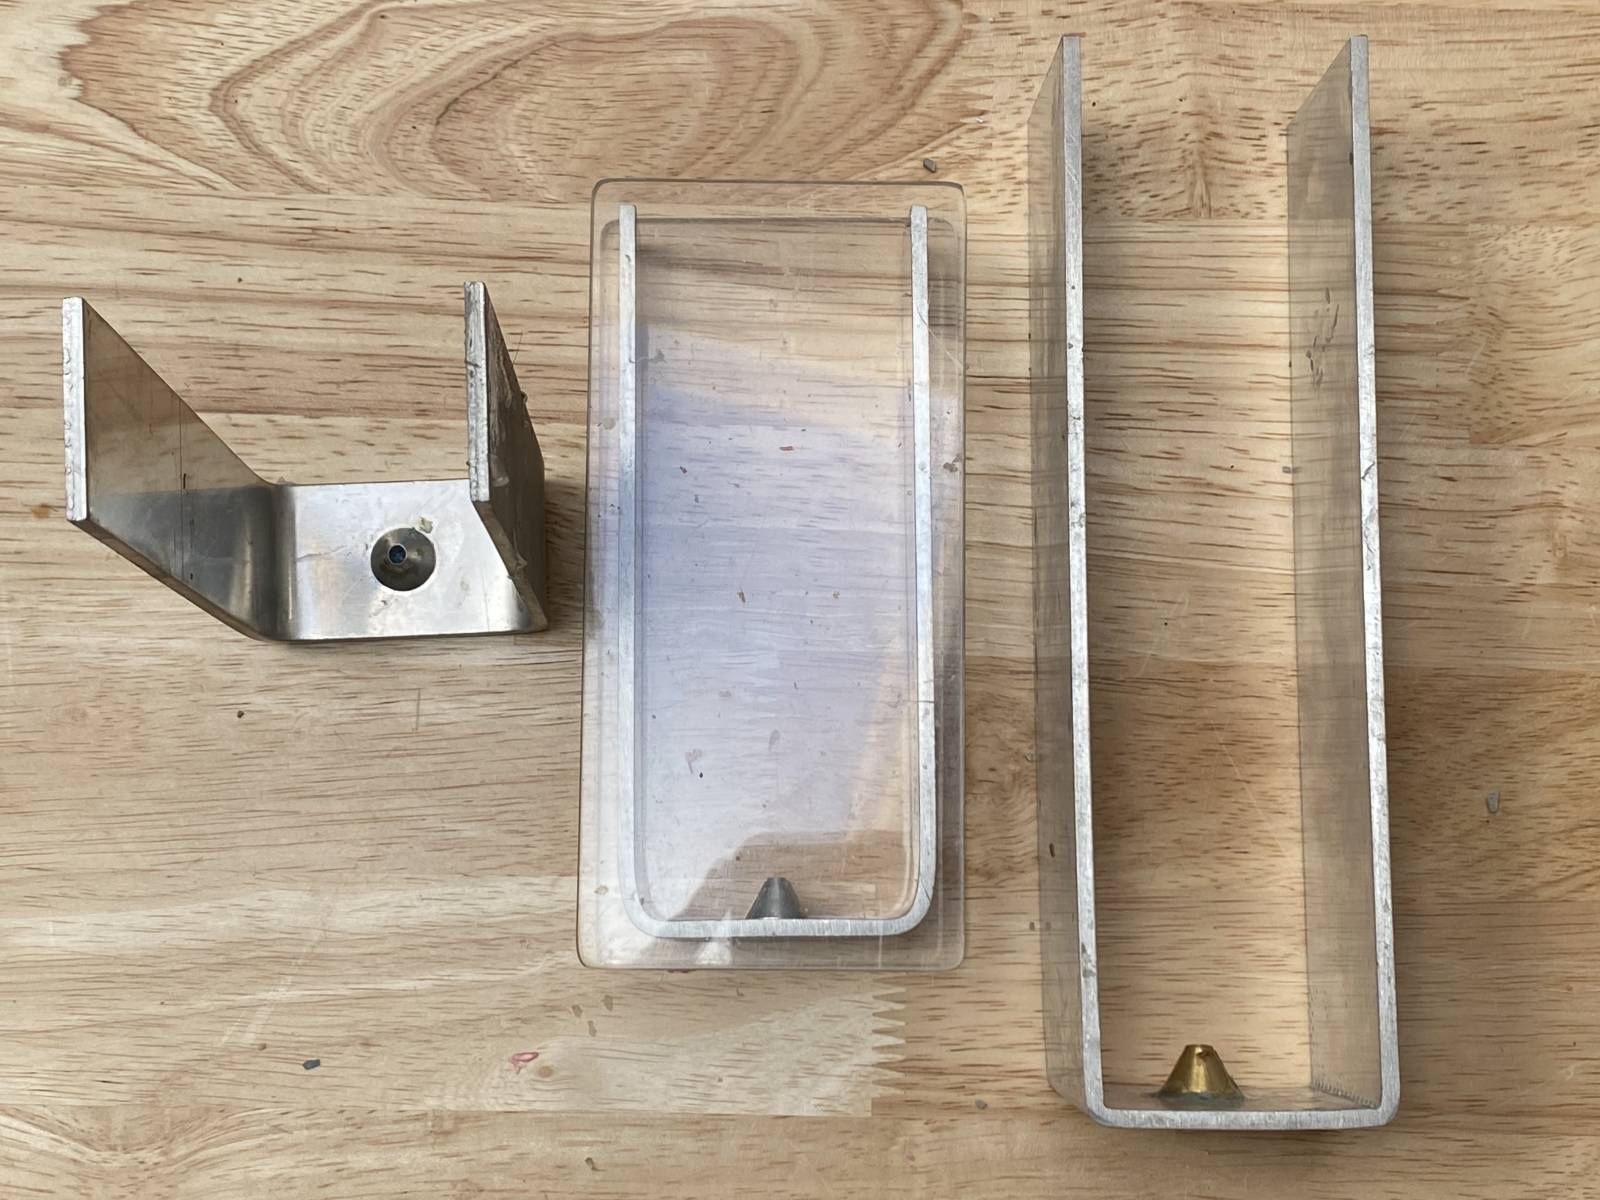
For this process, we need to make a special type of mold. These mold frames are by Castaldo, and are readily available at jewelry supply stores. They come with two acrylic sheets that we use for making the mold and later, for injecting wax into the mold. There is a nipple you can see at the bottom which the original is attached to with a small wax sprue. This will be the conduit through which the wax will flow. It is important it is the proper size and shape for the wax injector.
Bunny was too big for any mold we could buy, so we made a frame out of aluminum strips from Home Depot. It is important if you make your own that the bends are all at perfectly 90º and you must file the edges of the bends so there are no gaps between the metal and acrylic sheets. The nipple can be bought separately and attached to the home-made molds. We also cut acrylic sheets to fit the mold.
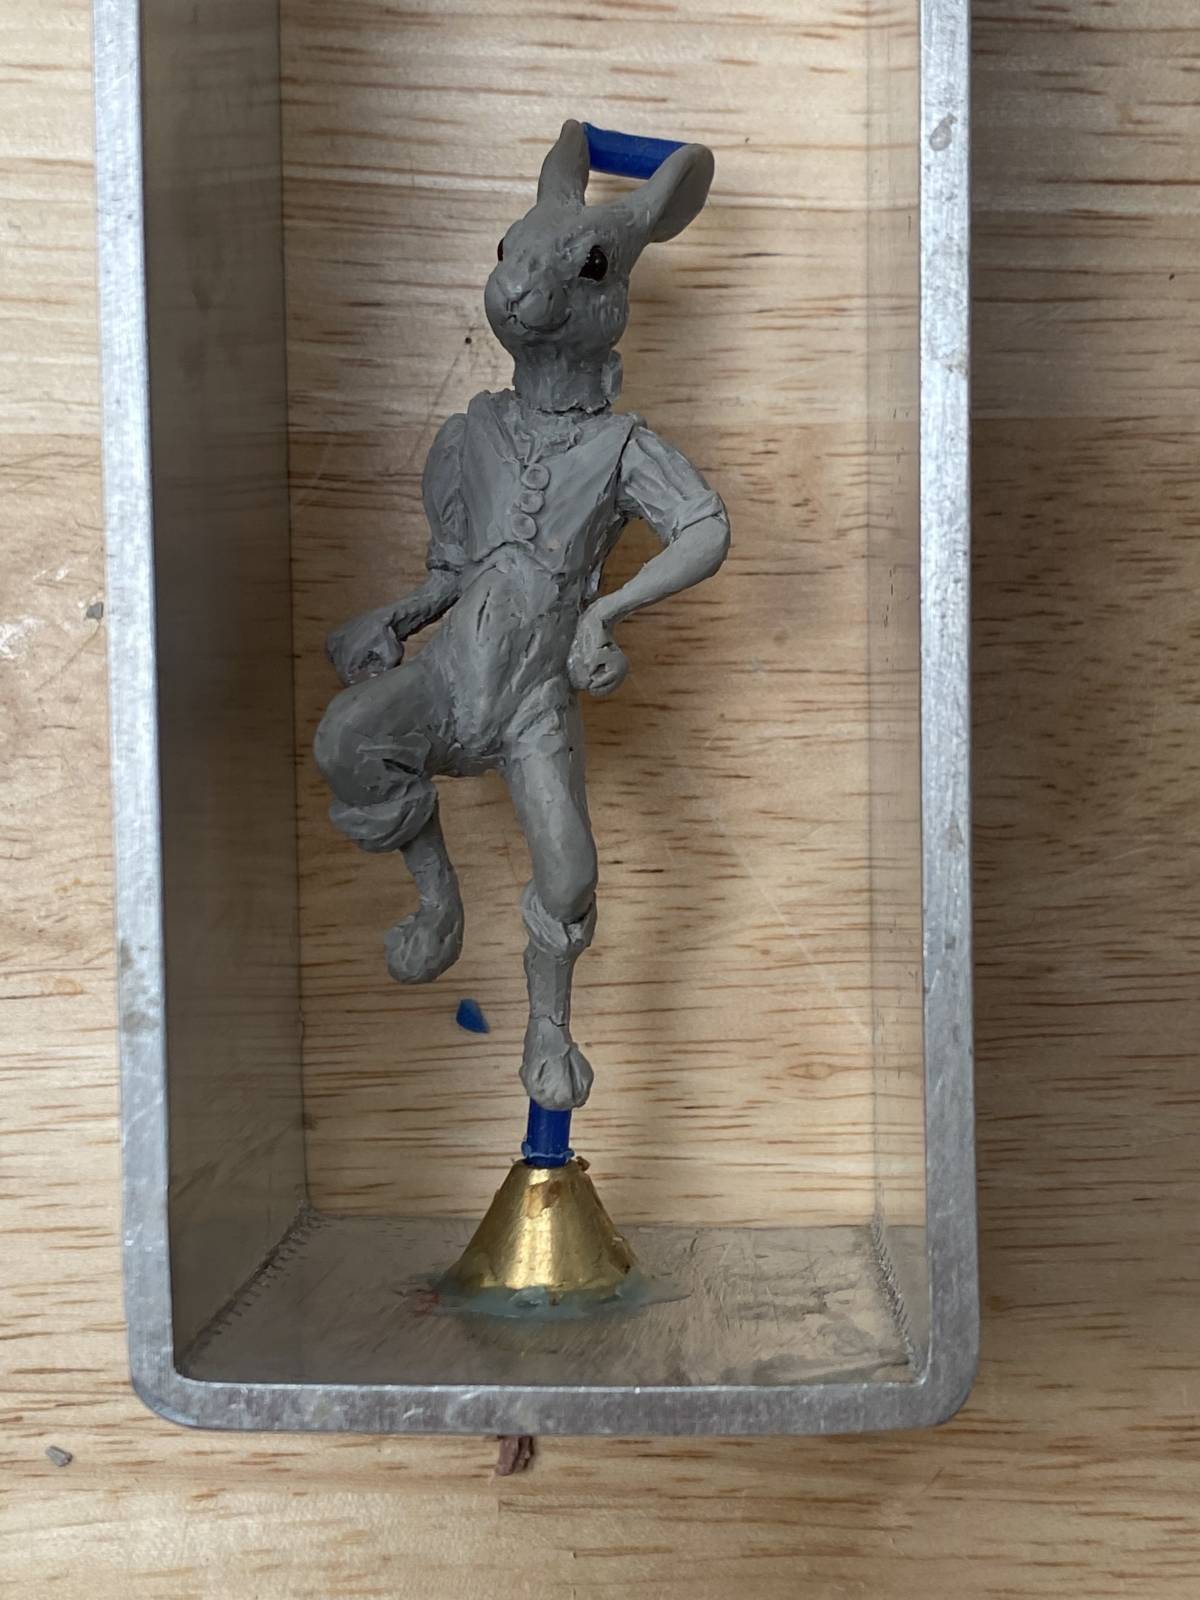
 It was a bit of a balancing act to get the weight of Bunny properly centered on a tiny wax sprue. Notice that I also attached a wax sprue between his ears as a little insurance for them to fill properly (and there is one from his tail to the base to help with fill and stability). I take care to think ahead about where the parting line for the mold will be so the model can be easily removed and position the model accordingly (“mold locks” are a whole topic of conversation we don’t have space to get into detail on).
 Once the model is firmly attached, I put the acrylic plates on both sides and secure them with rubber bands. I use “Cold Mold,” a 10:1 ratio (by weight) silicone mold material that cures perfectly clear, is firmer and has a higher tear strength that traditional silicone for bronze molds (also available through a jewelry supply company). It’s considerably more expensive, but we’re using less on this scale and being able to see through the material as we’re cutting open the mold is invaluable. Plus, we’ve discovered that the increased tear strength is really useful with some of the “creative” ways we’ve had to cut apart our molds to release the casts.
You will need a vacuum chamber and pump to de-air the silicone after mixing, otherwise you’ll have bubbles all over your mold and it will not only be hard to cut apart, but also will not function properly. Our vacuum chamber is from Smooth On, but there are other options available. Or, if you happen to be a creative genius like Craig Elliott, you can make your own (but then again, Craig can build a full-size helicopter out of safety pins and cat fur). For the novice, probably buying one that you know will function properly and safely is the better option.
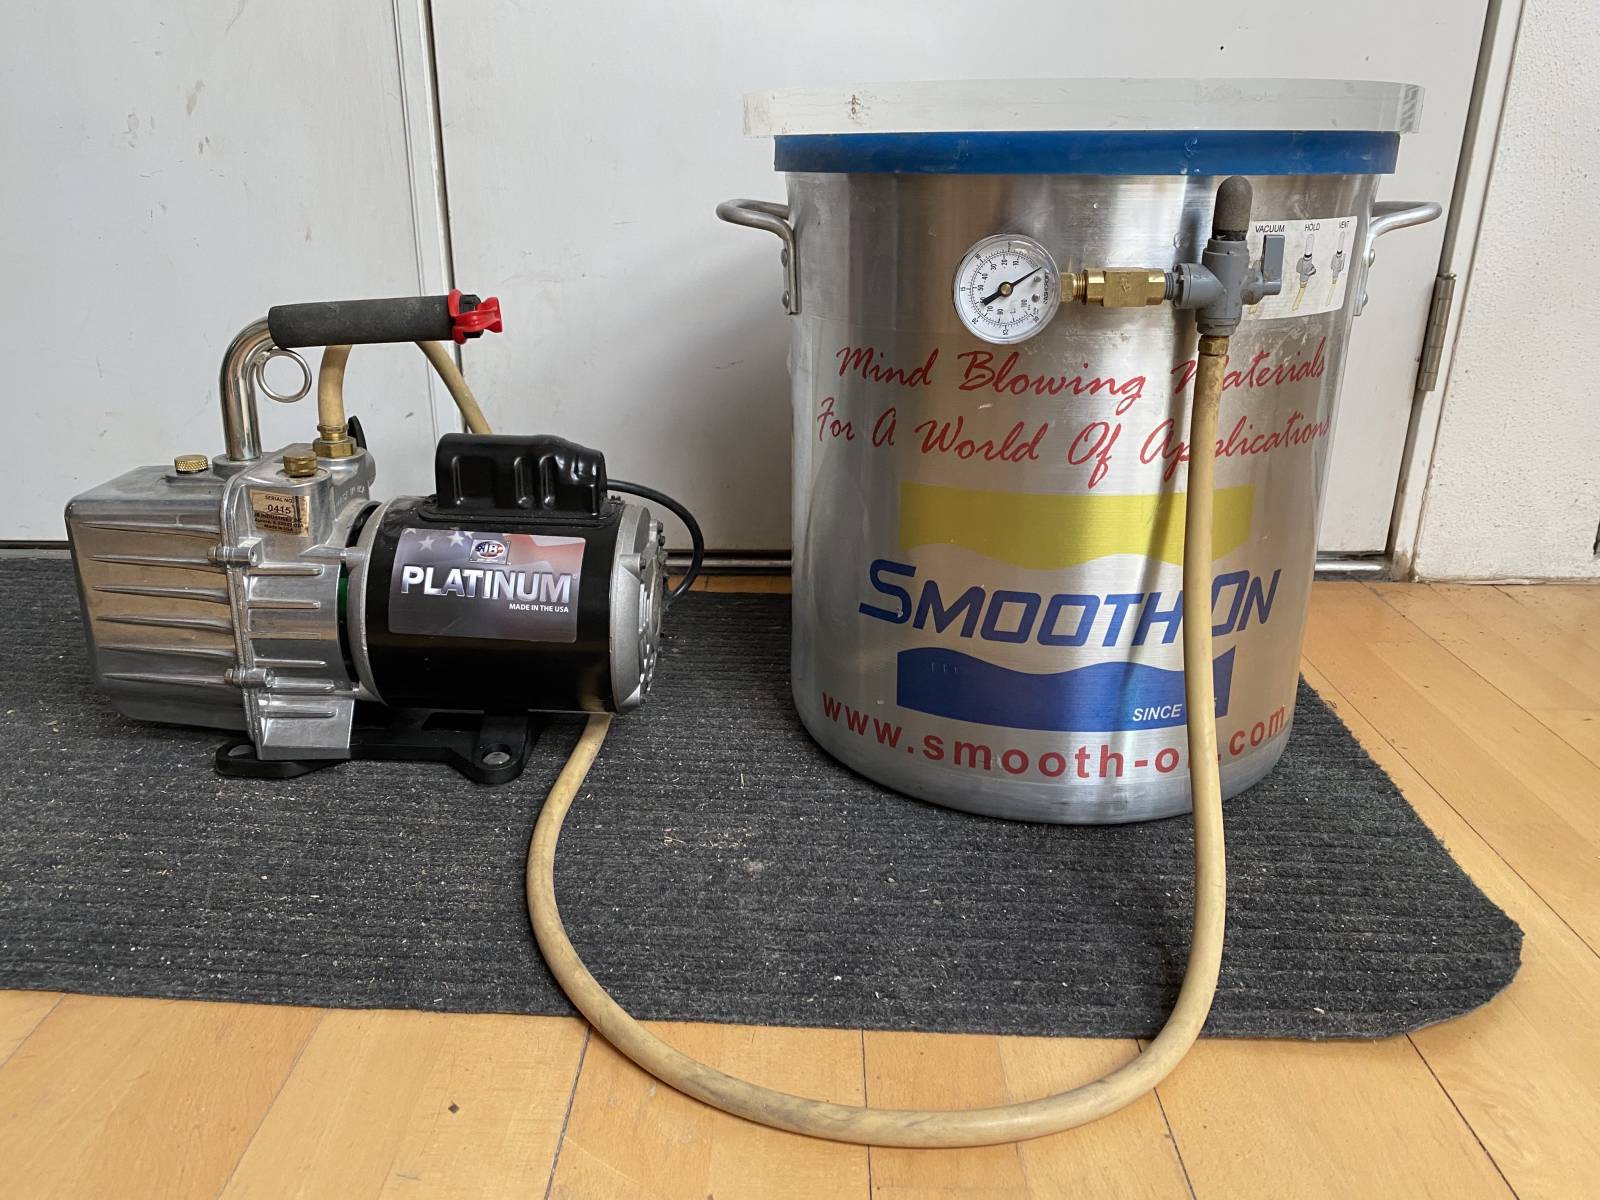 The Cold Mold is measured by weight, mixed thoroughly and then put in the vacuum chamber. The material will expand to the top of the bucket and eventually collapse down to its original volume. Once it collapses, I vacuum the air for 2 minutes, release the vacuum and pour the material down the side of the mold – never directly on top of the model as it can dislodge it. When the mold is filled, I put it in the vacuum chamber again. Then we take it out and let it cure for 24 hours.
Once the silicone is cured, we remove it from the mold and cut it into two halves, which is how the original and the wax casts will be removed. We use a scalpel with a no. 11 surgical blade. These are crazy sharp and dangerous, so much care and caution must be used – I cannot stress this enough. Exacto knives literally won’t cut it.
We mark the cut line first to be sure we’re cutting where we need to (with the Cold Mold, the original is clearly visible through the material which helps immensely with this part), then cut an undulating line around the entire mold, about 1/2” into the surface. This helps the two parts lock together properly. Then it’s a straight cut down to the surface of the original, keeping the seam at the surface of the model as tidy as possible. Often with the larger molds, one of us helps to gently hold the material apart while the other cuts. The material is very firm and it’s hard to split it while cutting by yourself. Much care and good communication are essential if you are working with another person on this step.
Now we’re ready to inject wax! A wax injector is a pressurized tank of molten wax… sounds a bit hazardous, but used properly, it’s a wonderful tool. We use a special jewelry wax that is designed to capture detail. It’s much harder and more brittle than the microcrystalline wax typically used for larger bronze casts. We currently use “Joe’s Injection Wax” in pink. We would prefer a neutral gray, but apparently jewelry makers are all about cool colors. We’ve found that the red and blue waxes stain the molds, making it difficult to see whether they’re filling properly, so we avoid those colors.
We fill the hopper with the wax beads, then allow them to melt completely, which usually takes many hours. An air compressor pressurizes the material inside. On larger pieces, we’ve had the most success with the wax temperature around 170º F and the pressure between 12 – 15 psi. It can take some fiddling to establish the best temperature/pressure ratio for each different design we do.
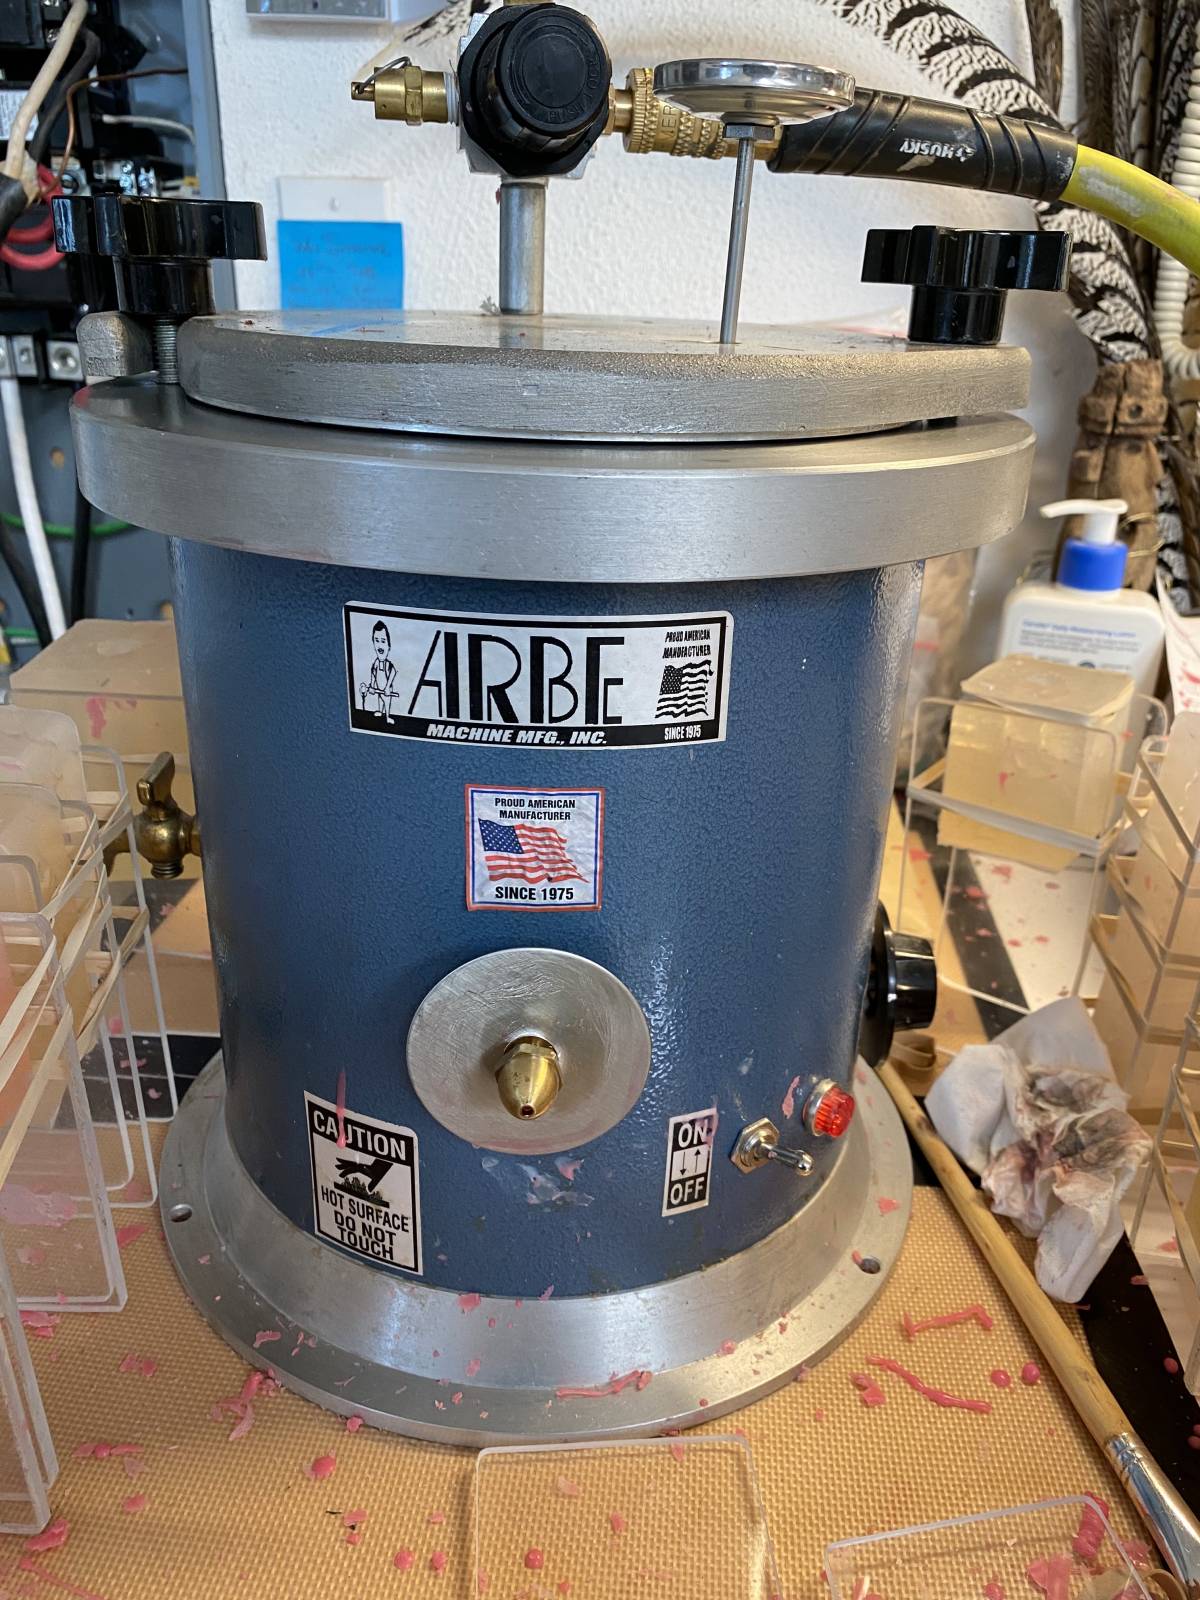
We secure the mold between the acrylic sheets with rubber bands. Pressing the nipple of the mold against the nozzle of the injector forces the molten wax into the mold. Small designs fill in a fraction of a second. Our larger pieces take many seconds to fill completely. We let the wax cool fully, then remove it from the mold.
Then, just like bronze, we repair any bubbles, seams, defects and re-sculpt any details that may be lost or “soft.” And the rest is the usual bronze process.

The original sculpture in Sculpey, the wax cast directly out of the mold and the raw bronze cast before patina.
One day I was looking at these little guys and thought they are so delightful they really deserve another run (Colin always says I’m the “Dr. Frankenstein” of our waxes – re-inventing and reassembling existing works in new ways).
If you’ve ever noticed the bases of Colin’s sculptures, they’re wonderfully detailed miniature landscapes – rocks and pools and springs and waterfalls. I thought it would be fun to see Bunny and Squirrel wandering around tiny snapshots of these landscapes – perhaps out for a morning stroll, perhaps conquering a mountain together. So I cut small sections out of the bases, recreated the cut areas and began adding Bunny and Squirrel in different arrangements.
My first attempts were all working within the way the figures were originally positioned.
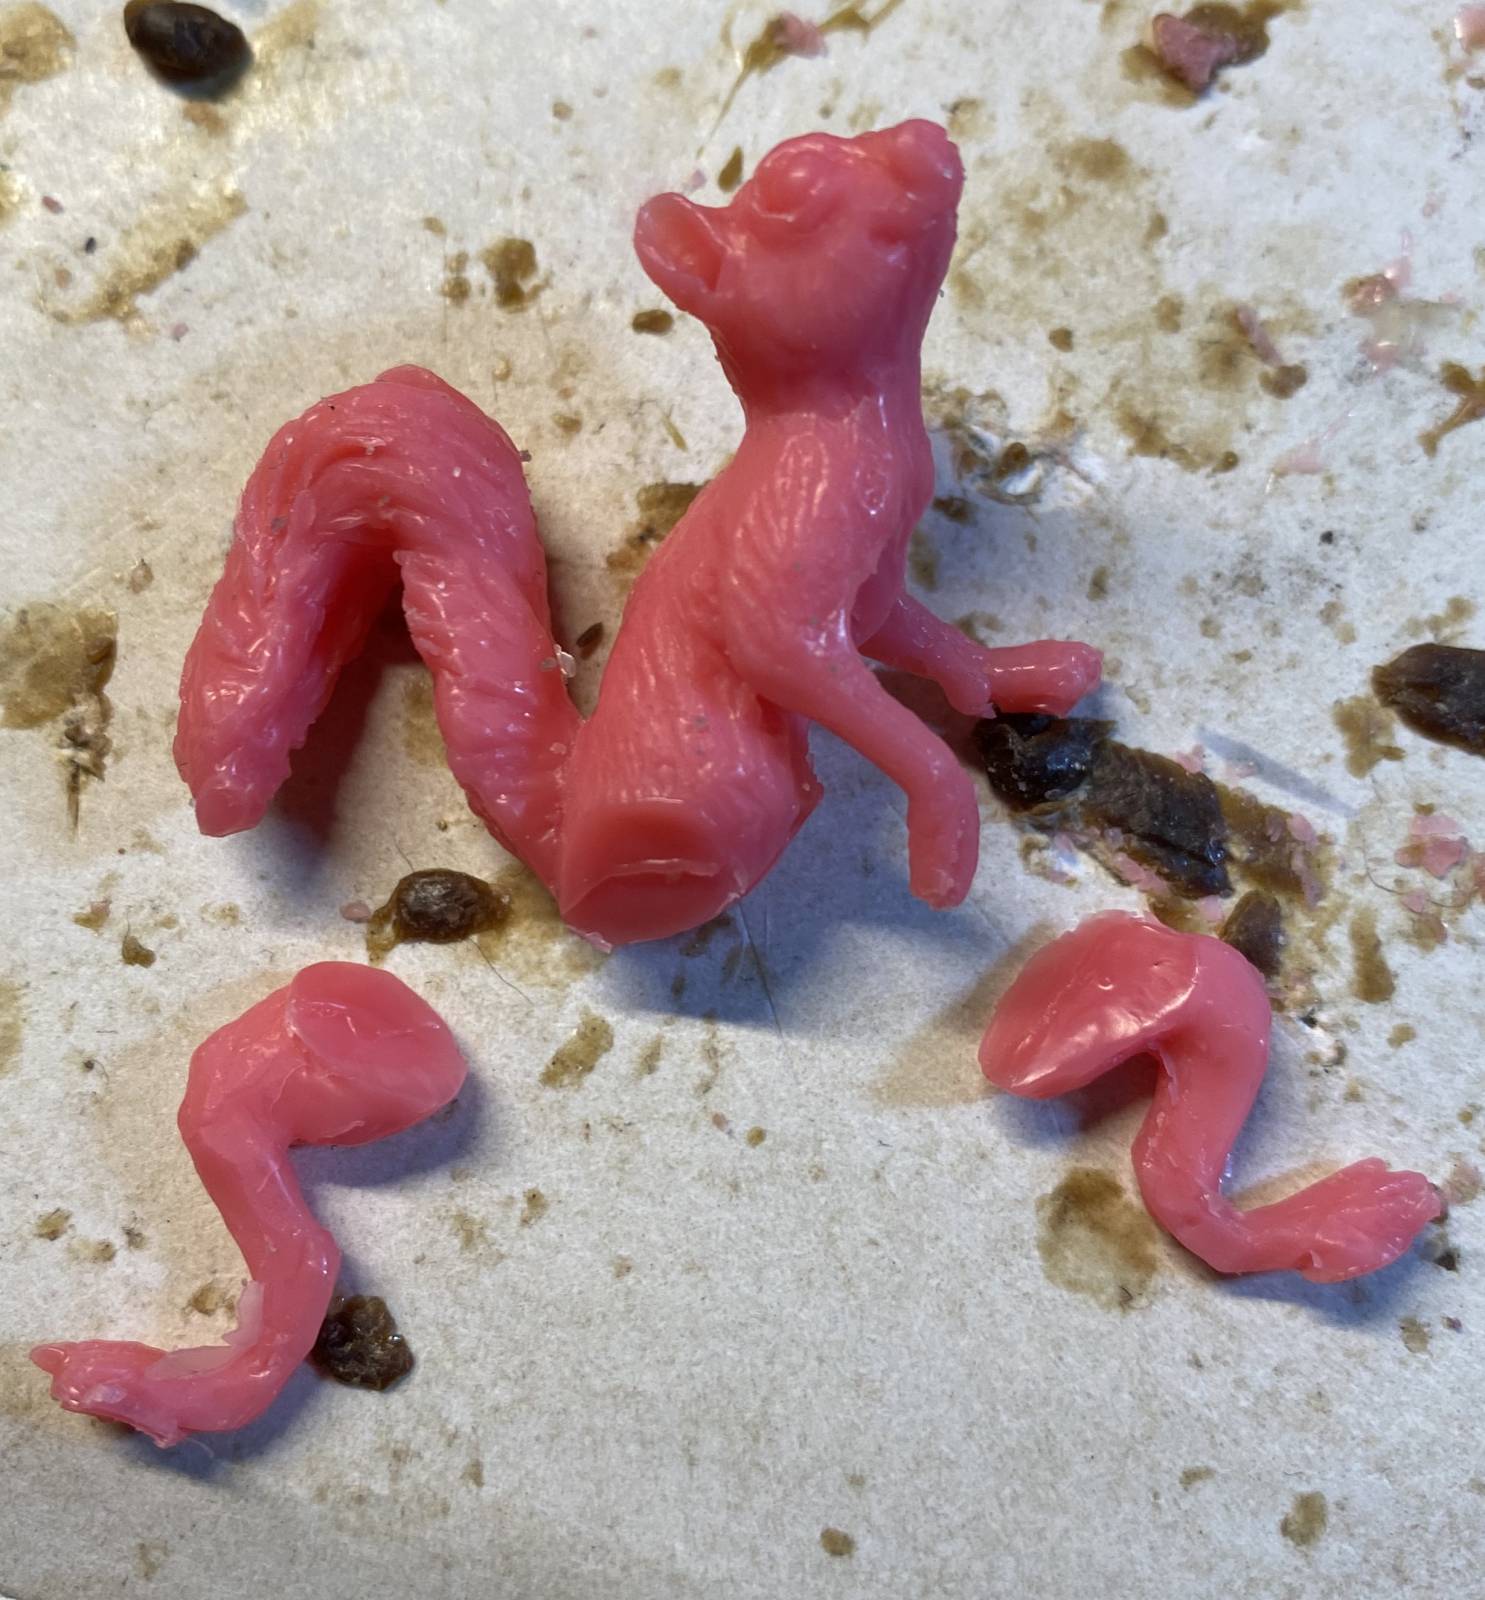
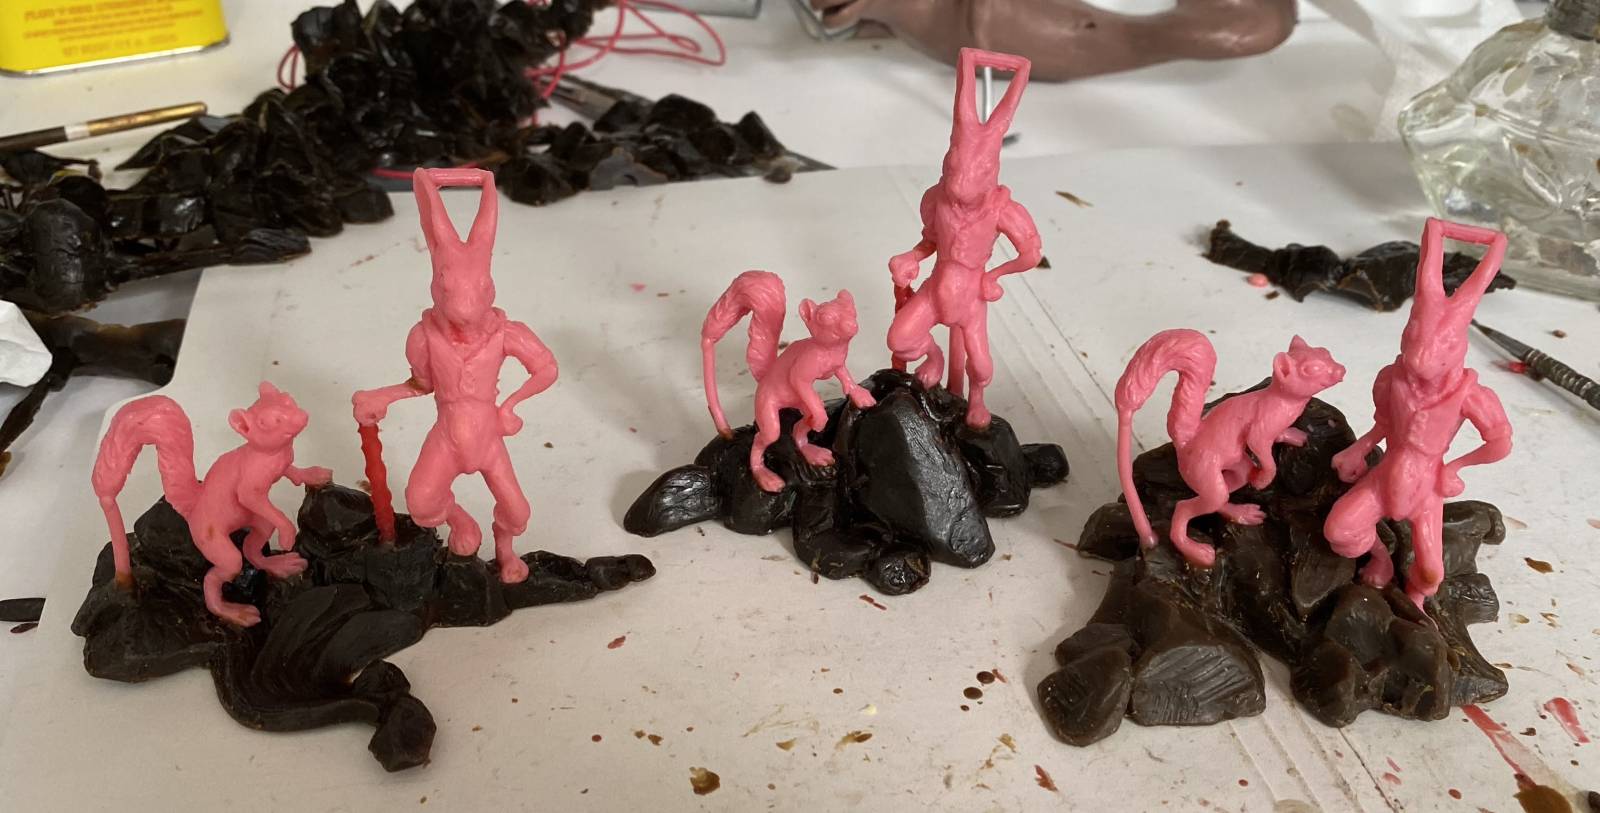 Then I started imagining different ways that these two characters might interact. I cut them apart at the joints and reassembled them in various standing or seated positions to create different relationships between them, a collection I find much more satisfying and entertaining.
 It gives viewers a choice to select which most appeals to them and even with such small work based on a mold, have something truly original.
While the nature of the bronze process is to cast in an edition, each piece replicating the original sculpture as closely as possible, we enjoy adapting pieces to create uniqueness within similarity. Frederick Remington did this with his western sculptures – creating details on the costuming, harnesses and ropes in the wax of each piece in an edition. This is why the works cast from his molds after his death do not generally have the same je ne sais quoix as those cast during his lifetime. On Colin’s larger sculptures, he often builds options into his creative process, for the sake of each piece being distinctive within the group.
Whenever I start writing these sorts of posts, I always think, oh, this is so basic. Then, as I begin explaining the process, I’m always like, “wow… this is actually kind of complicated with lots of parts!” That said, I hope it all makes sense, provides a basic roadmap and helps you see the possibilities in developing this skill set for your own works. The thought of seeing what so many talented artists might create when working on this scale just sets my heart aflutter.
Wishing you all a very happy and creative holiday season!


Oh wow, that’s an awesome process!
For cutting the silicone, would retractors help with keeping the halves separate while you cut the mold line? I’ve used them for resin casting molds, wasn’t sure if they’d be helpful here too with the higher tear strength.
Hey Andrew, thanks for commenting. We’ve never tried retractors, but I looked them up and they may just help – definitely will give them a try. It’s pretty rigorous pulling those things apart by hand.
We haven’t done a lot of resin casting, but it’s a process we’d like to learn more about.
Thanks again and wishing you a wonderful 2023!
Hi again Andrew – We did end up ordering some retractors, but haven’t made any new injection molds for some time, so will have to give you an update on how they worked when we finally get a chance to try them.
This takes me back to the 1970ties, casting bronze at UCLA. After all those years thoughts been bugging me about small – miniature painted bronzes. Finding this writeup is what I hoped to find. Thanks bunches for sharing
Hi Bob – happy to hear it was useful! 🙂