To help eye placement, try and paint in the eye opposite your dominant hand first. If you’re left-handed, paint in the right eye first; if you’re right-handed, paint in the left eye first. This method helps overcome a visual bias and makes it easier to match your dominant side to an established eye direction. If you’re using reference, you’ll have a pretty good idea where the iris places in the eye and how much of it is framed by the eyelids, top or bottom or both. If this is a character of your own invention, reference is still a good place to start. Do a Web search for a person or thing that represents what you want your character’s eyes to look like, and use that reference as a guide.
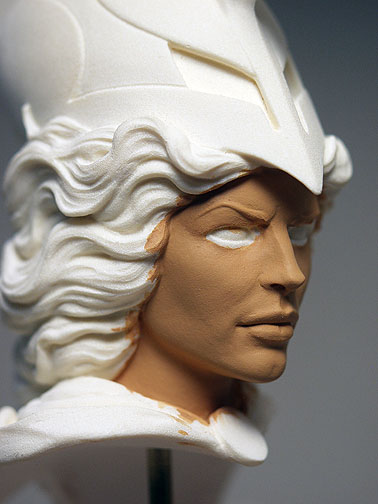
First, we paint in the white of the eyes. The white of a real, human eye is actually more of an off-white, but working on a small scale, unless you’re going for a particular effect, you’ll want the white of the eye to be truly white, to help the iris read clearly. If you’re working on a larger-scale figure (1/6 or larger), then you might want to think about adding a touch of grey or grayed-yellow. Now, it’s time to position the iris. To start, it may be a good idea to lightly draw in the irises with a pencil. You can do this on the primed resin, before you paint the white in, and the pencil line will faintly show through the white paint. You can also draw it on after you’ve painted in the white, but be careful not to scratch off the primer or the paint when you’re drawing.
A simple but effective way to paint in the iris and pupil goes like this: Establish the darkest part of the iris first. That will be the ring that runs the perimeter of the iris and the shadow under the upper lid. For our example, we’ll use a blue eye to demonstrate our method, but it will work with any iris color combination. So we’ll paint the entire iris using a middle blue color with just a touch of white.
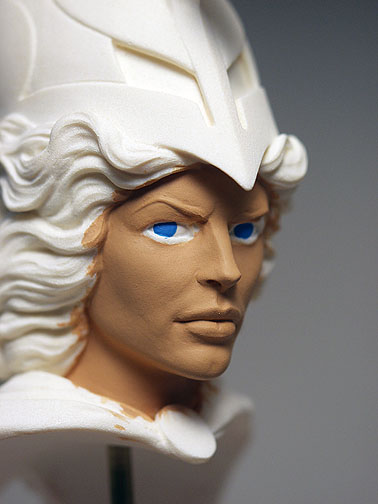
Now we’re going to add more white to that middle blue, to bring the color up lighter by several shades. The color shouldn’t be too light, but light enough for there to be a noticeable contrast between it and the first middle blue color. We’re now going to paint in this lighter shade, leaving a ring of darker blue around the iris and a shadow line across the top, under the eye lid.

Next, we need to decide where the highlight is going to be placed. Wherever there’s a highlight, there’s a corresponding refracted light opposite and below it in the iris (if the light direction comes from above) For our example, we’ve decided the highlight will be on the upper right of the eye, just under the eyelid, so we’ll mix a little more white into our second middle blue color and paint a refracted light onto the bottom left of the iris, inside the darker ring. So, the iris is made up of three colors.
Now it’s time to paint in the devilish, mischievous pupil. Starting on the eye opposite our dominant hand, we paint in the pupil with black. The size of the pupil can indicate character. A large pupil can denote innocence and openness. A small pupil can indicate a menacing or closed character. Your call. The trick is to get both pupils in the same place in both eyes. If they go a little oval-shaped or end up not exactly where you want them, you can use a little of the middle blue paints to make the correction.
Okay, you’ve got the pupils where you want them. Now it’s time for the highlights. You’ve got a couple of ways to do this: You can take a little white paint and use your brush to point it into place on the eye, trying to paint onto both the pupil and the iris, or you can mix up a little light grey, put that in place and then place a dot of white inside the grey, essentially outlining the white highlight with a little light grey ring. It’s a subtle effect, and it works well in some applications.

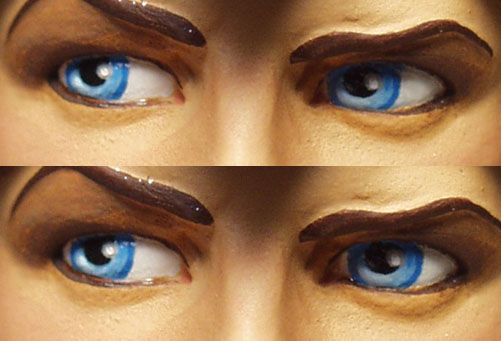
Let’s say your character is looking off to the side. Which side doesn’t matter, just off to the side, maybe pensively or intently. You’ve worked and worked hard to make sure that both irises are perfectly matched, one to the other, and your character still looks a little cross-eyed. What’s the dang deal?! Well, the dang deal is this: If your character is looking off to the right side, the iris of the right eye is placed in the far right corner of that eye. Placing the left iris in the corner of the left eye, jammed up against that left eye’s tear duct, will result in that cross-eyed look, even though both irises are evenly matched. Partly, this has to do with the amount of white visible in each eye. The more open part of the eye is from the tear duct side, so the right eye has more white visible from the tear duct to the outside edge of the iris. The left eye’s iris has the disadvantage of occupying the more open part of the eye, while the white is over in the narrow corner. You can test this by penciling in both irises, making sure they’re evenly spaced. With both eyes showing, the character looks cross-eyed; cover the left eye, and things look fine. By moving the left iris out of the corner a little and creating a little white space between the edge of the iris and the tear duct, the character’s gaze looks right.
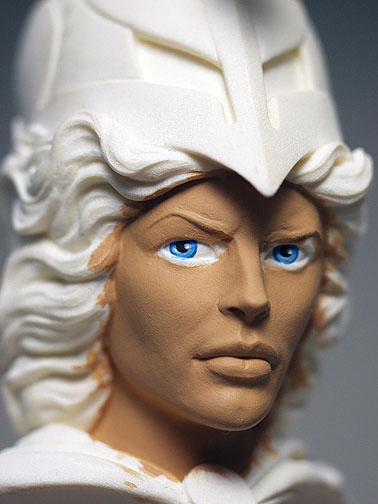
With the eye painted, we go back in with the flesh color and paint in the lower lid being careful not to paint onto the white of the eye. Adding a little light brown to our flesh color, we create a shadow tone that we’ll paint above the eye and a little below to add a bit more drama to the eye. With the shadow in place, we VERY carefully paint in the top and bottom eyelash line. When painting in a very tight detail, the paint should be just a tad more fluid to aid in paint flow. A slightly dryer paint will result in the paint skipping across the surface as opposed to laying down a smooth, even line.

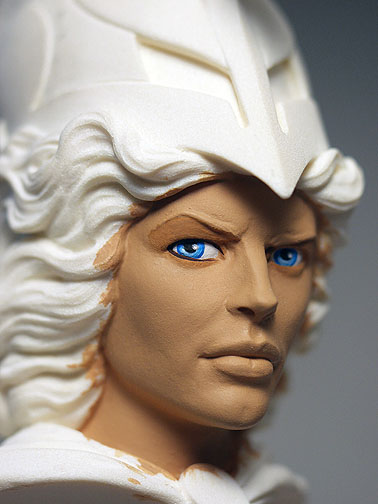
Next, we’ll create a slightly darker shadow color using a bit more light brown and a hint of black and paint it above the eye and out toward the outside of the eye, blending as we go to create a little more drama. Lastly, we paint in the eyebrow.


To finish the job, we’ll paint in a cheek blush and lip color. Mask-paint in the chrome color, lay in the basic hair color and use dry-brushing and highlights for a sheen effect. Lastly, we’ll satin varnish the hair and add a high gloss varnish to the eyes and lips. And she’s done!

Next time, we’ll cover the blush, hair, dry brushing, masking and varnishes.
-Excerpt from Pop Sculpture, written by Tim Bruckner, Zach Oat, with Ruben Procopio. Wastonp-Guptill/Random House.


When you say if you're left handed start with the right eye, do you mean on the right as you look at it, or the character's right?
If you are left handed, start on the right eye as you look at it, or the character's left eye. Right handed, start on the left eye as you look at it, or the character's right eye.