I have a friend in comics that is trying to break into painting but he can’t make the leap from line drawing to tonal drawing. While he made edges during his career using hatch lines, translating those lines into tonal edges is a huge leap for him.
Edges are elusive and can be difficult to explain to someone if that person does not understand the concept. An edge is an artistic concept. An edge is a boundary between spaces and objects. An edge is a boundary between one value and another. And an edge is a boundary between one color and another. There is an edge chart that defines the four types of edges in drawing and painting that exclude texture. The edges are: sharp, firm, soft, and lost respectively in an edge gradient.
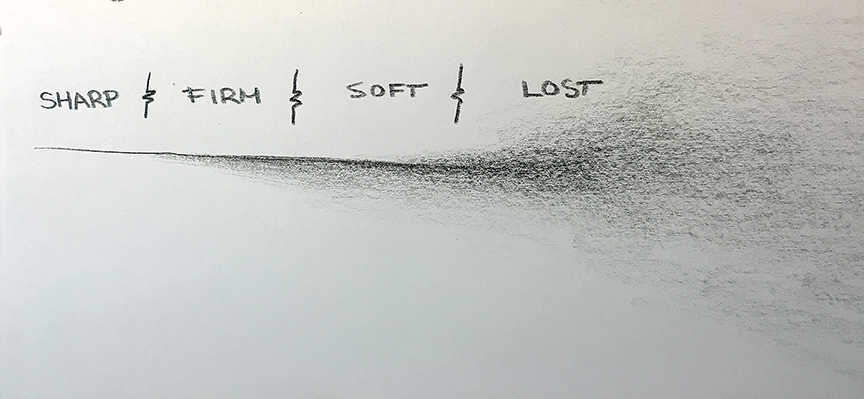
I also want to clarify the term boundary. Boundary is used to explain where one thing ends and another begins. In Western thinking, boundaries or in the case of art, lines are a division of space. However, in Eastern thinking the boundary or line is a tool to join two distinct spaces or color or values, etc. This takes some time to clearly understand and is so true. In drawing, we have to use lines to denote where on the page we intend to work on and render something. However, those lines should not be misunderstood. They are not important, what is important is that the lines help you measure the spaces you are planning out to make the rendering portion of the picture positive in its production.
Once we understand the true purpose of line in drawing, once we understand line is a construction tool in a tonal drawing, and when we can separate our brains from thinking about “just filling up the boundaries” and creating a continuous fabric of form, that is when edges really get fun to create, or rather, that’s when the art of illusion making gets interesting.
Edges do not have to be difficult to do and do not always require hundreds of hours to map, fill and control. Depending upon the materials used edges can be labor intensive or instant. To discover which tools complement your rendering temperament requires lots of experimentation with no attachment and the love of “digging in and getting dirty.”
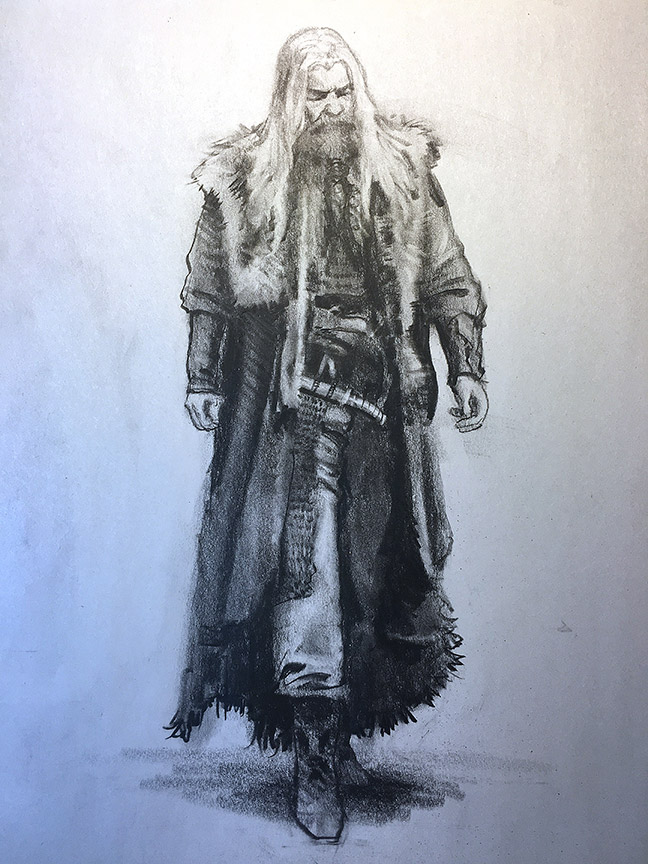
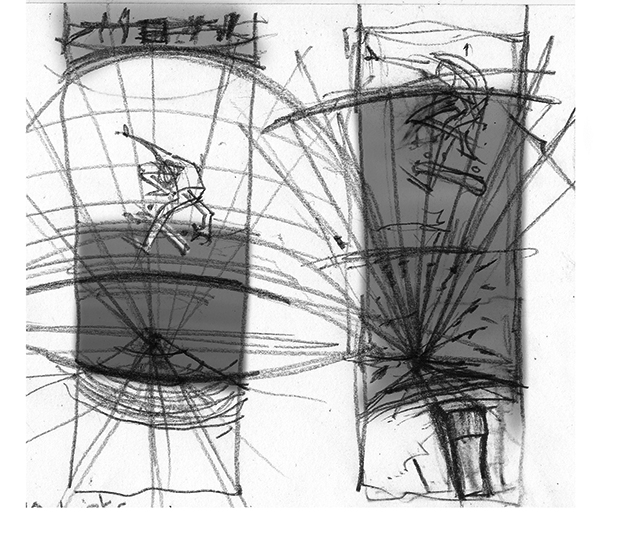
I dug in to make this drawing. It is a little larger than life and was done in about 30 minutes. I used outline as a graphic design device but went to town within that outline with a variety of edges. Knowing the materials I am working with and how they function, from the paper to the charcoal pencils to the erasers, knowing how they work together inspires a mechanical approach or a painterly approach. In this case I took the drawing in the painterly direction and mashed together the edges quickly. The speed is a necessity for me since I am teaching a class, I only get brief moments between helping students to get my own drawing in. I find it important that I also do a drawing with the class so that I can separate how to build a picture to completion vs. the demonstrations that often illustrate the beginning stages of a drawing.
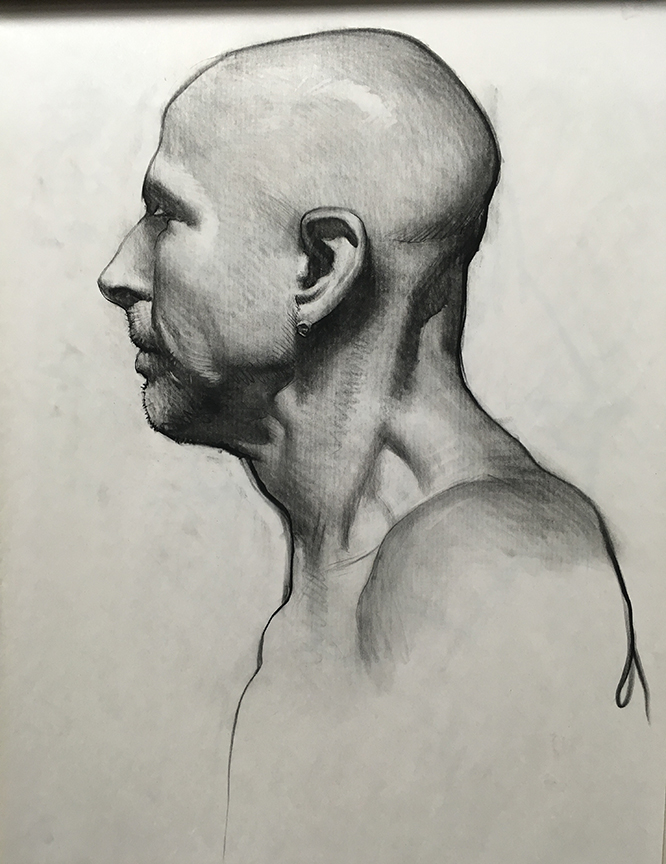
Edges help reinforce the illusion of dimension. Edges cannot be drawn on in just one direction either because what an edge represents is an ever changing surface of an object that expands in multiple directions at once. If the surface has the influence of bones or muscles underneath then the edges will have a more specified look to them, either more rounded or more angular in a formal geometric way but will still have a continuous surface in every direction. This continuous surface concept is where it gets tricky to describe what we are doing. I will let the videos tackle this dialog.
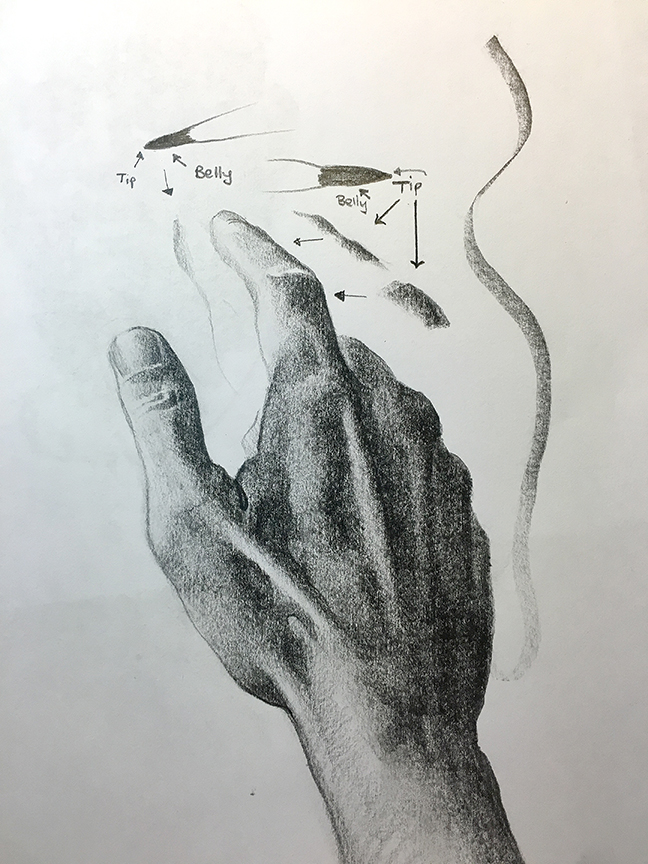
This hand drawing was done in about 5 minutes and represents that “all over” look of the edges and how they disperse over the surface area. Knowing what the shapes are that I am looking at makes it much easier to design the picture almost entirely of edges without much of a line drawing to start with. If I use the pencil just right, I can make the depth of the edge all in one pull.
I think the ultimate trick and goal in the arts is to make something truly from an effortless-like appearance and approach, using every rule, tool, facility and dexterity to muster up instant life from the materials we use. However, most art schools do not teach this and many of those that do do not always have the strongest academic foundation programs and the students are left to their own skill to try solve this riddle if they even know to look for it.
Here are a few videos that I hope will entertain the idea of edges and how to work with them. They are sped up to keep them within attention span time but are still easy to follow.
The pencil is both a writing and drawing implement. While writing likes to limit the pencil to an upright and tip only position, drawing allows for both. Watch the video for how I hold the different pencils I use. It is in the bending and pushing of the pencil tip that allows for all the range of sensitivity and resistance. Where you hold the pencil, up close to the pencil tip or further back towards the back end of the pencil will determine whether the line is a truly mechanical line or an organic one. The rest is a lot of hard work, and then more hard work on top of that. Enjoy the practice.
[youtube https://www.youtube.com/watch?v=QmaLAokCB0k]
[youtube https://www.youtube.com/watch?v=zNPpIKlaJCs]


Great post Ron! Those videos are great!!
Donald Trump Reveals Simple Plan to Help Every American Earn More Money
➜➜➜➜➜➜ http://www.start-cyber.com/
Donald Trump Reveals Simple Plan to Help Every American Earn More Money
➜➜➜➜➜➜ http://www.start-cyber.com/
This is absolutely amazing, I never quite understood what was up with holding the pencil is different ways before! Thanks so much for the demonstration Ron, you're a great teacher!
Damn man, you are awesome! I always stare at your drawings wondering how the hell you make those lines so clean and perfect.
Thank You so much for this. It gave me new perspective on using of the pencil and helped so much. My pencil sketches finally look better.