Traditional painters run into lots of issues that digital artists don’t have to worry about. One of those issues is painting extremely fine lines, which can be difficult if those lines are finer than your smallest brush. Usually in a case like this, I would rely on a tight drawing to do the work, but even that can be hassle. Here’s a great trick that can help you achieve machine-like precision the next time you run into this issue.
The secret is an acetone transfer. A lot of artists don’t know it, but all laser printer copies can be transferred to just about any surface with the simple use of acetone. A lot of crafty Moms know this trick, and use it to transfer photographs to unique surfaces like scrapbook paper or even wood.
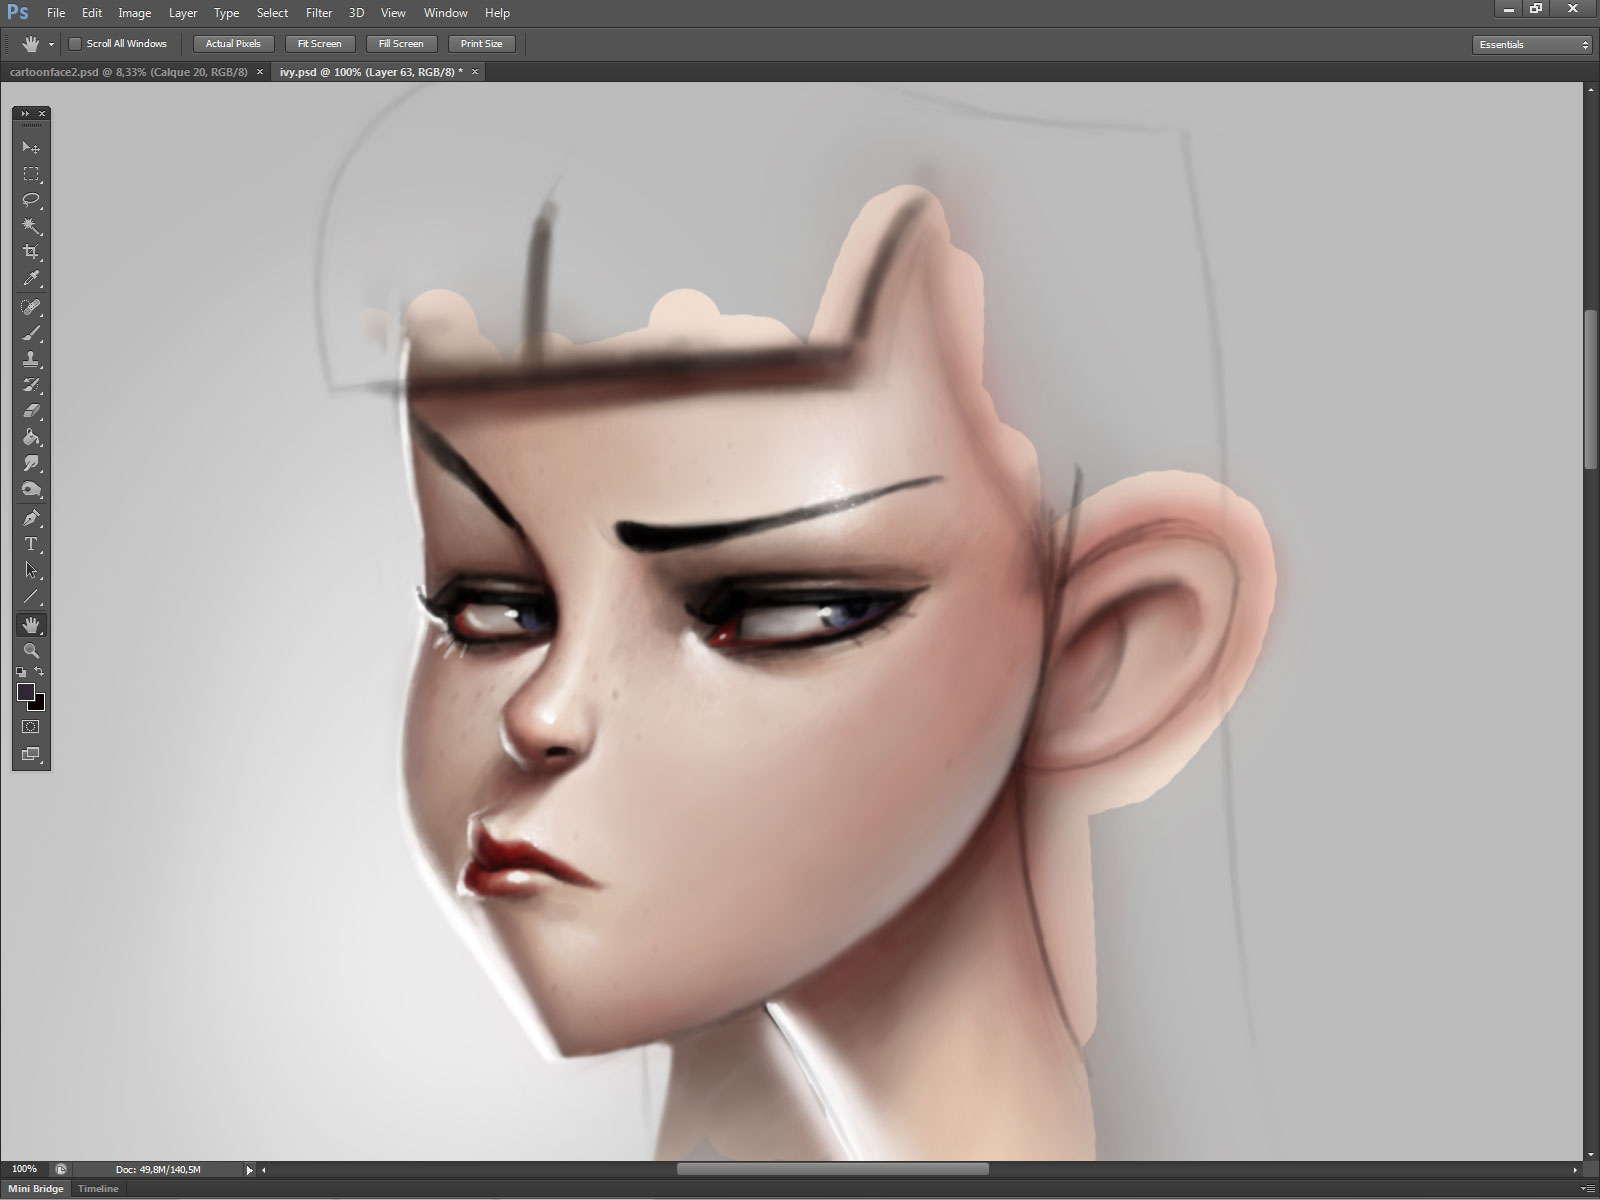
Recently, I was working on a painting that was to have a lot of tarot cards flying around a figure. But given the size of the painting, drawing these cards was just too difficult. To get any real precision, I would have had to enlarge the painting to a point of the figure being too large to paint efficiently. Instead, I opted to use an acetone transfer, and saved myself a ton of hassle.
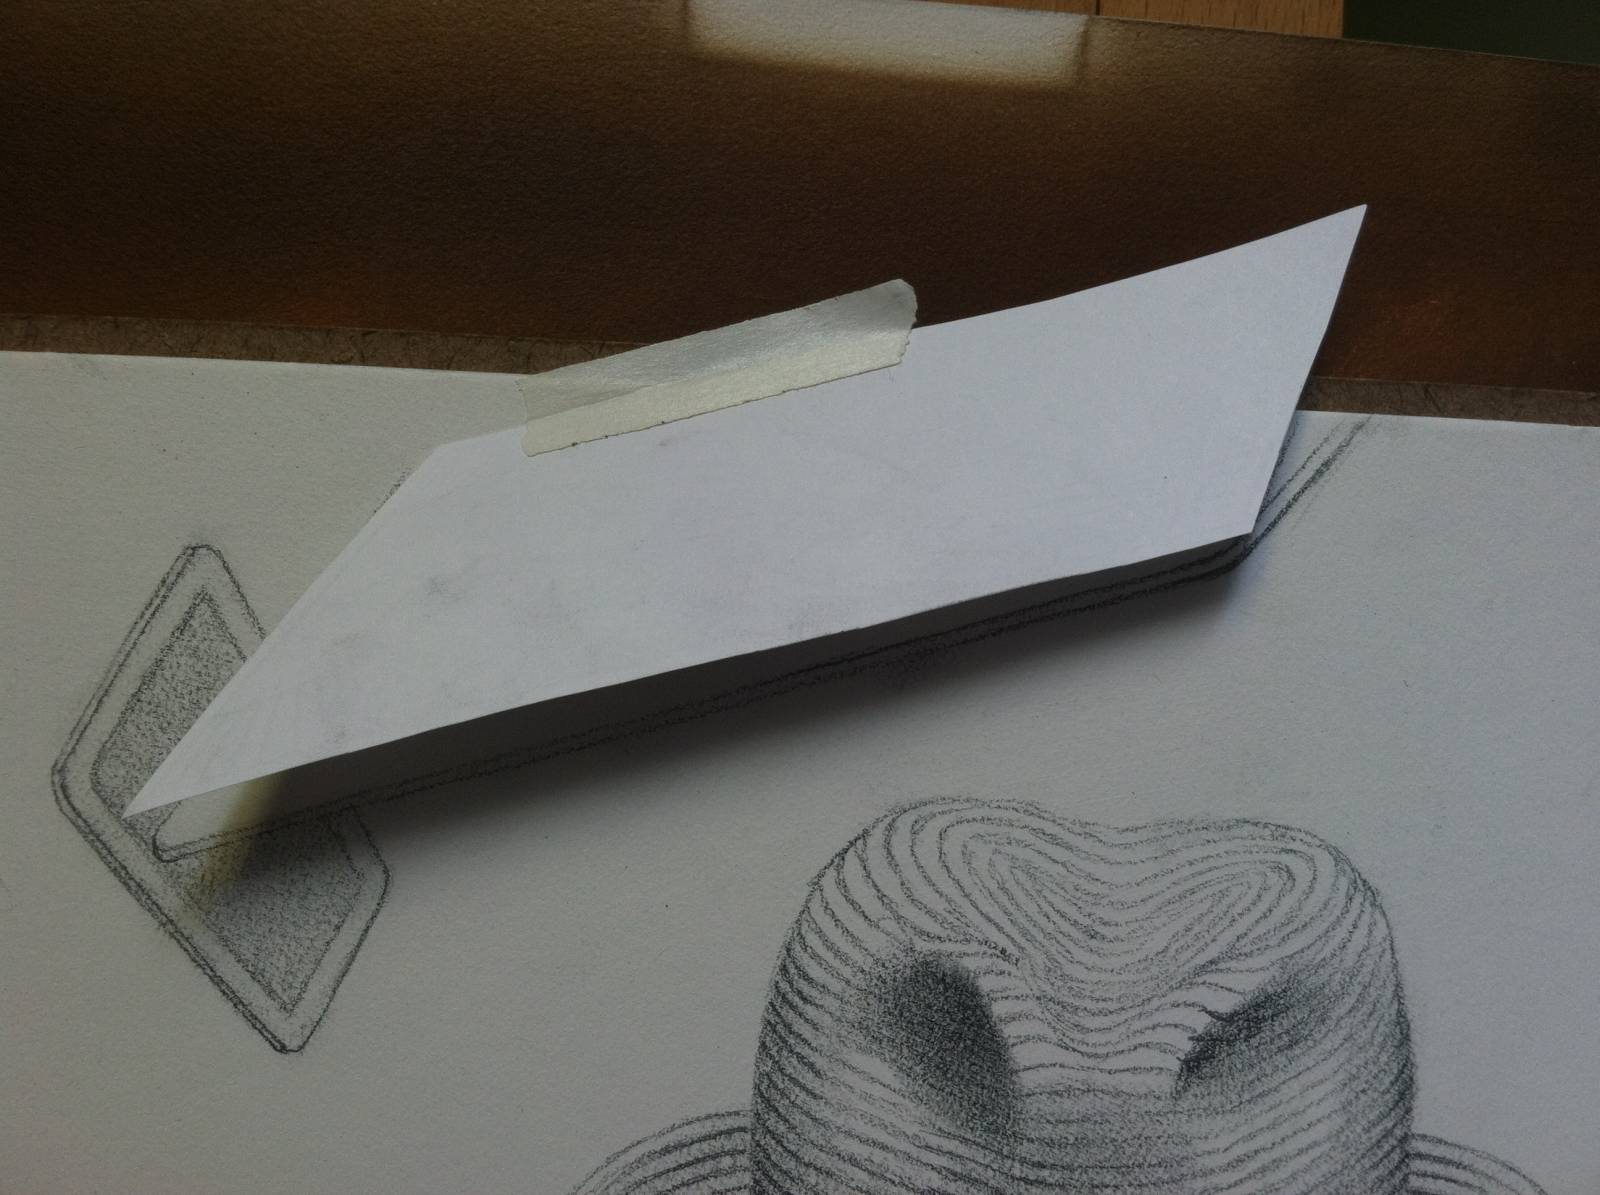
The first thing I need to do was actually know WHERE I needed the transfer to go, and in what shape it would be.

Once I finished my underdrawing, I snapped a photograph of it and used it as a template to lay out a tarot card in perspective with the help of Photoshop. I was certain to make sure that my digital file matched the dimensions of my original art.
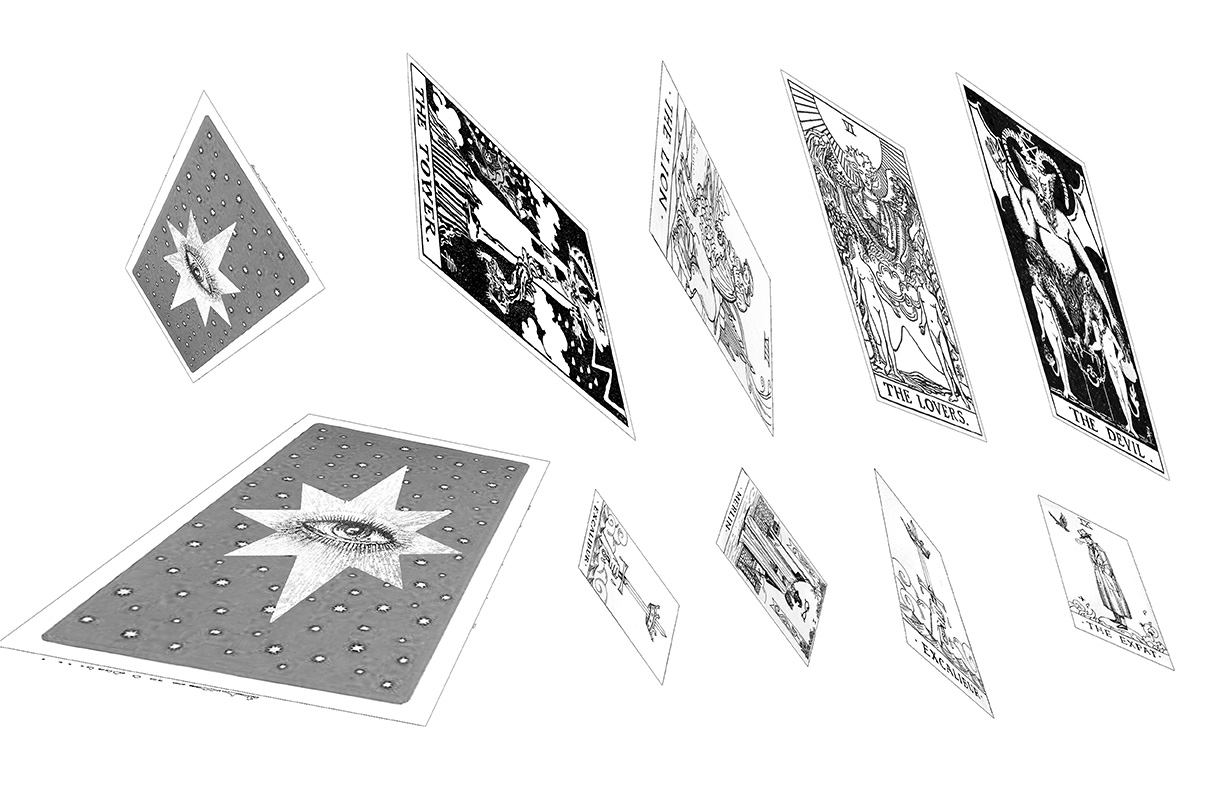
I then took that image and flopped it horizontally. I brought the file to my local FedEx to have it printed on their Laser Copy Machine. This trick does not work with inkjet prints, so be sure you’re getting a color laser copy!
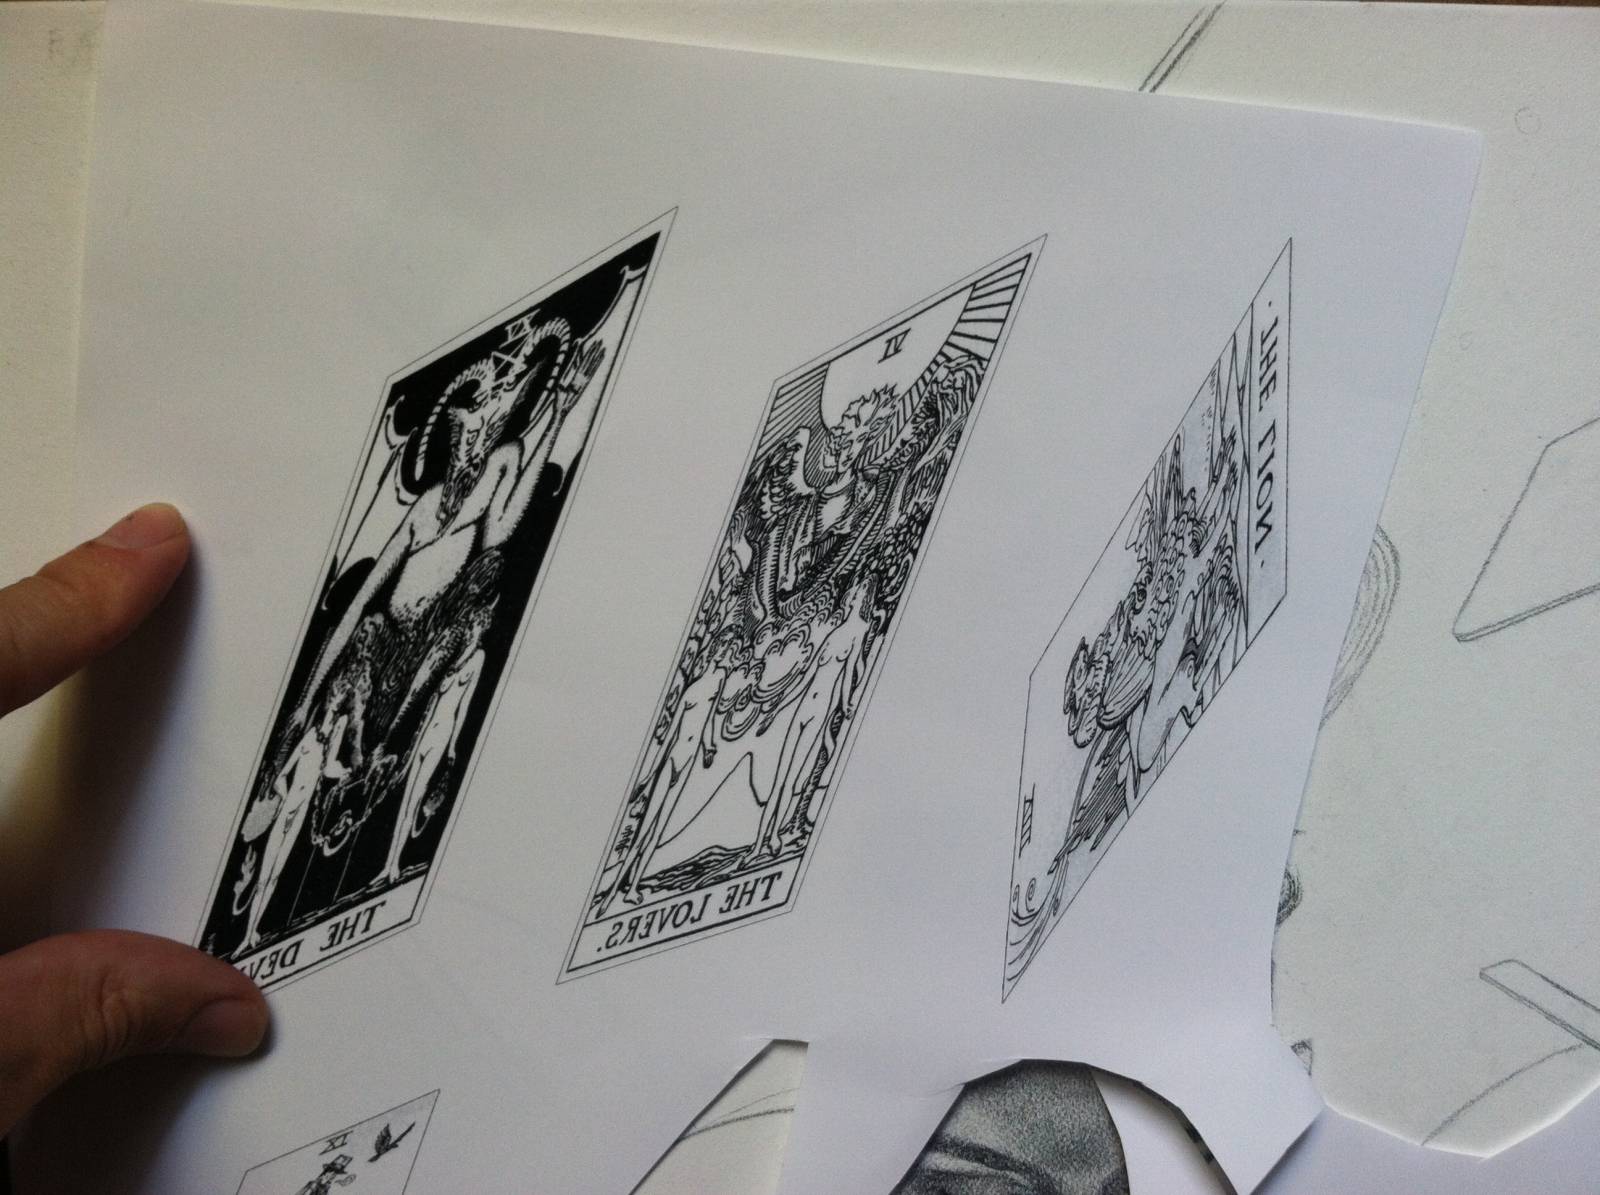
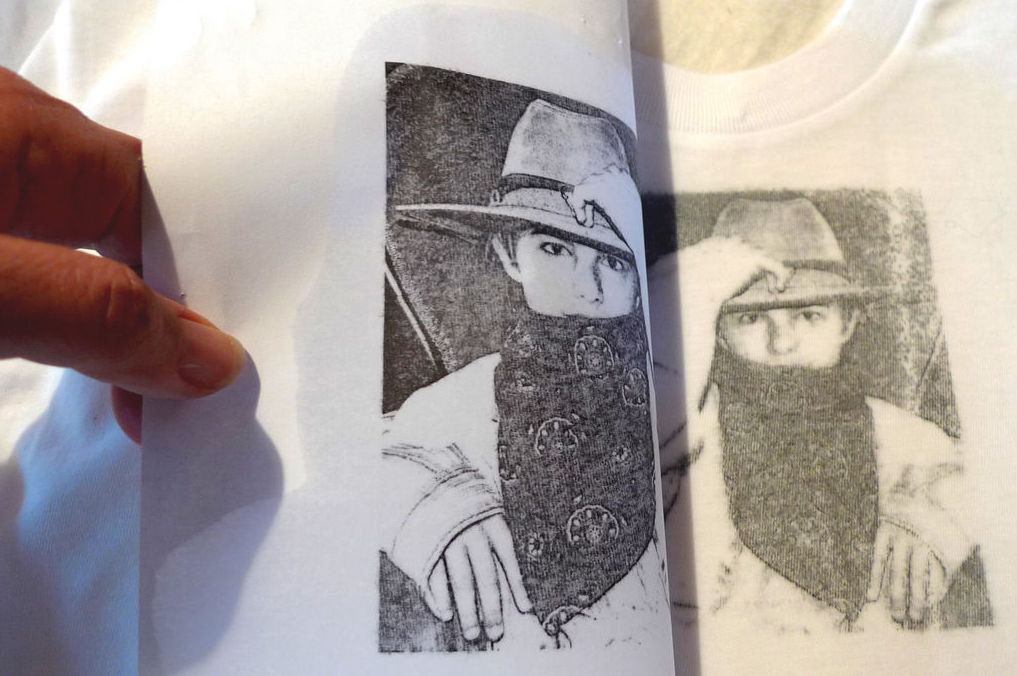
The next step was to trim the desired portion of the printout and place it FACE DOWN where I wanted it to go on my painting. It’s a little like applying a temporary tattoo, so the image will be reversed once transferred. Hence the need for a flopped image to begin with. For extra security, I secured the image in place with Artist’s tape to make just it wouldn’t slip around.
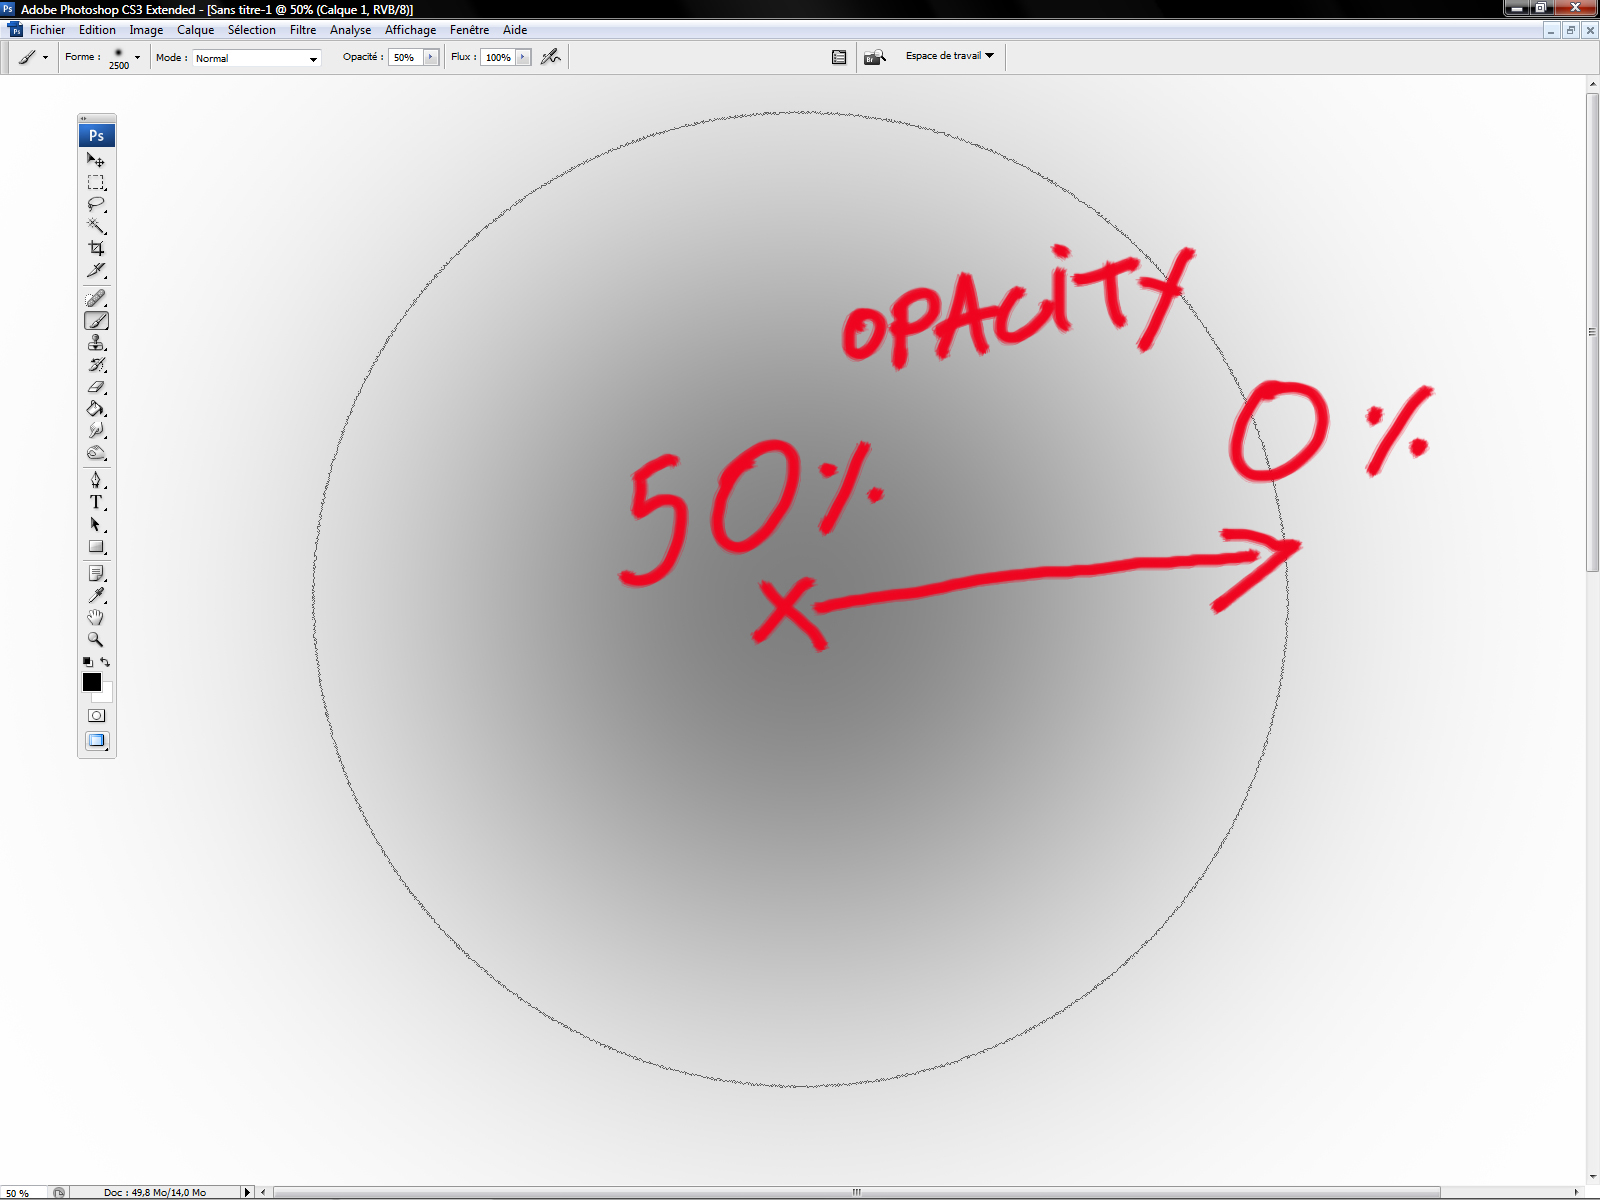
Here’s where the magic happens! The toner that Laser Printers use will come loose from the paper it is bonded to when it comes into contact with acetone. All you have to do is saturate the back of the paper with acetone, the toner releases, and as it dries, will bond to the new surface below it.
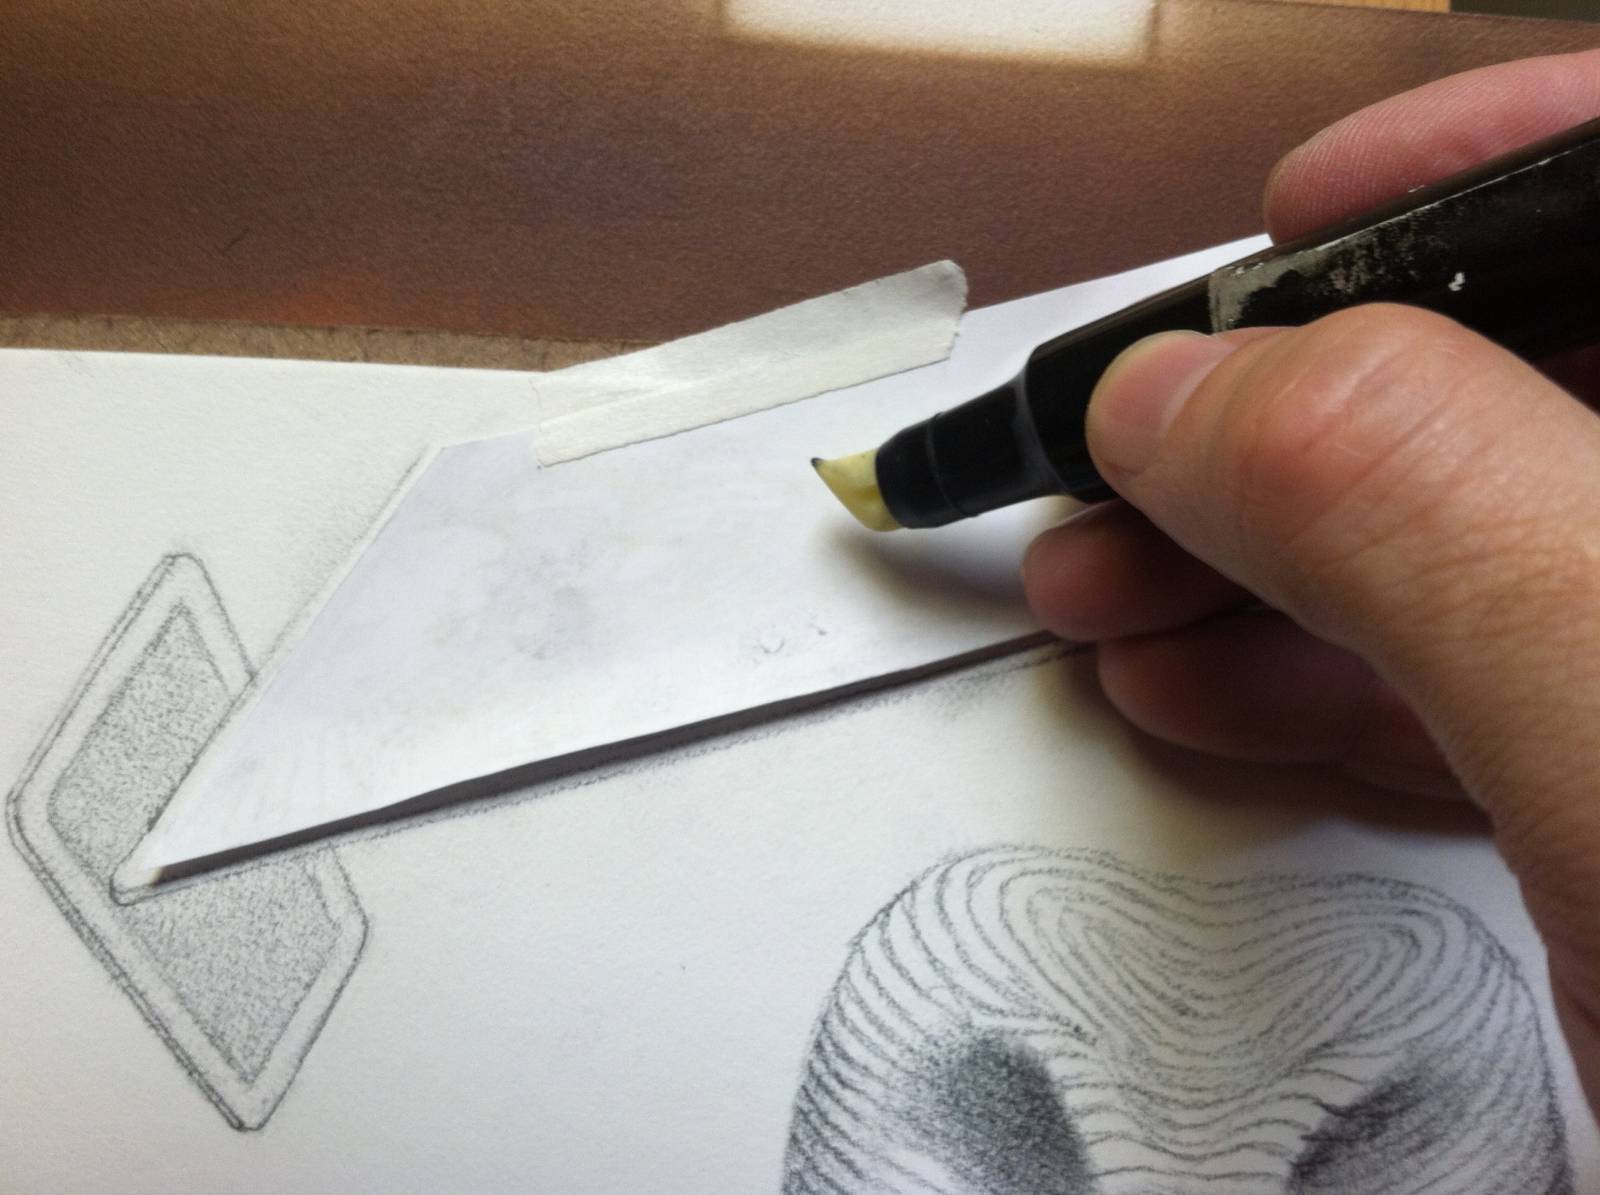
There are a lot of ways to apply acetone, including a simple cotton ball. But one of the most convenient ways is to use a Chartpak AD Blender Marker, which is firm enough to also act as a burnishing tool, ensuring a quality transfer. Be aware though, that not all Blender Markers are created equal! This won’t work with Copic Blenders for instance. A large transfer can use up a marker in a hurry though, and they aren’t cheap. So I actually refill my blender marker with acetone manually. A large container of acetone can be purchased quite cheaply at your local hardware store. But even nail polish remover will do if you’re desperate.
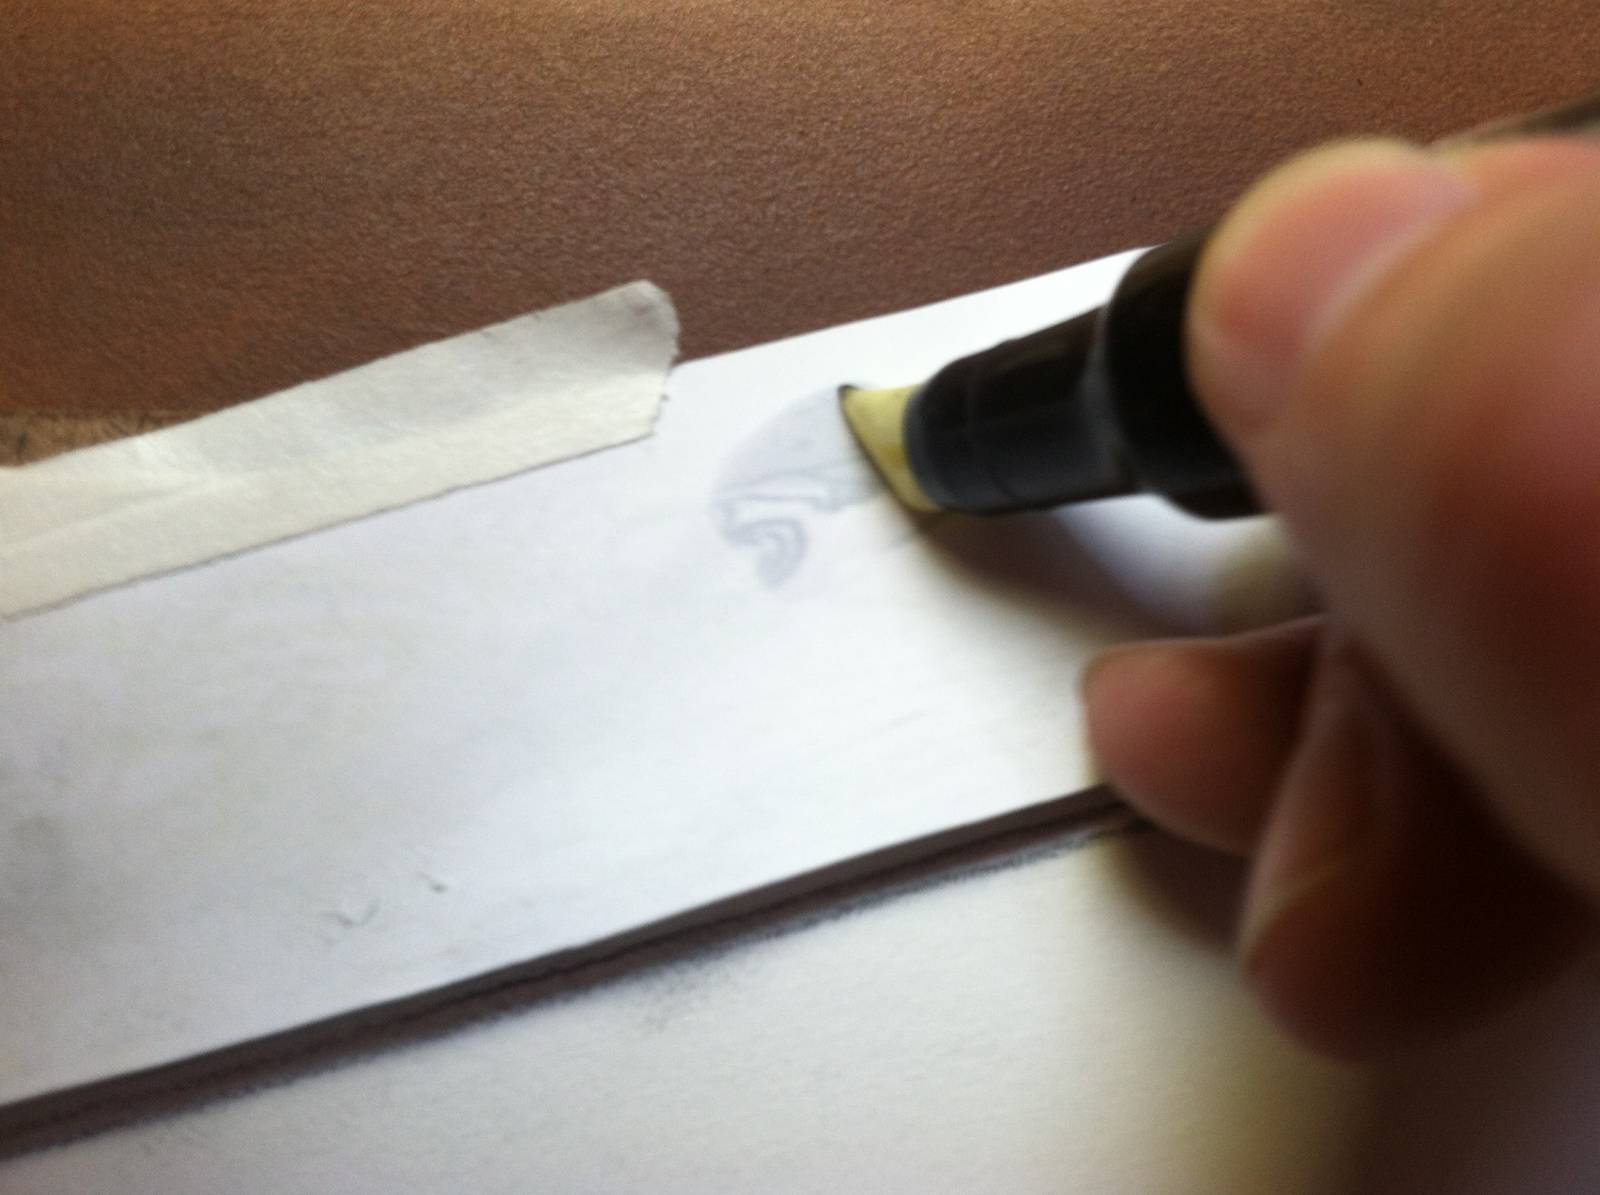
The whole process is fairly easy, but it can go awry if you’re not careful. Because the acetone breaks down the toner, that means if you go over the same spot twice, you will likely re-dissolve the toner that you already transferred. This will result in a blurry, undefined line. So try to be careful and only go over each spot once, making sure to get it good and wet in one pass, press it down hard, and then don’t go in that same spot again.
If you do it properly, when you remove your print out you’ll see that the ink has jumped to the new surface!
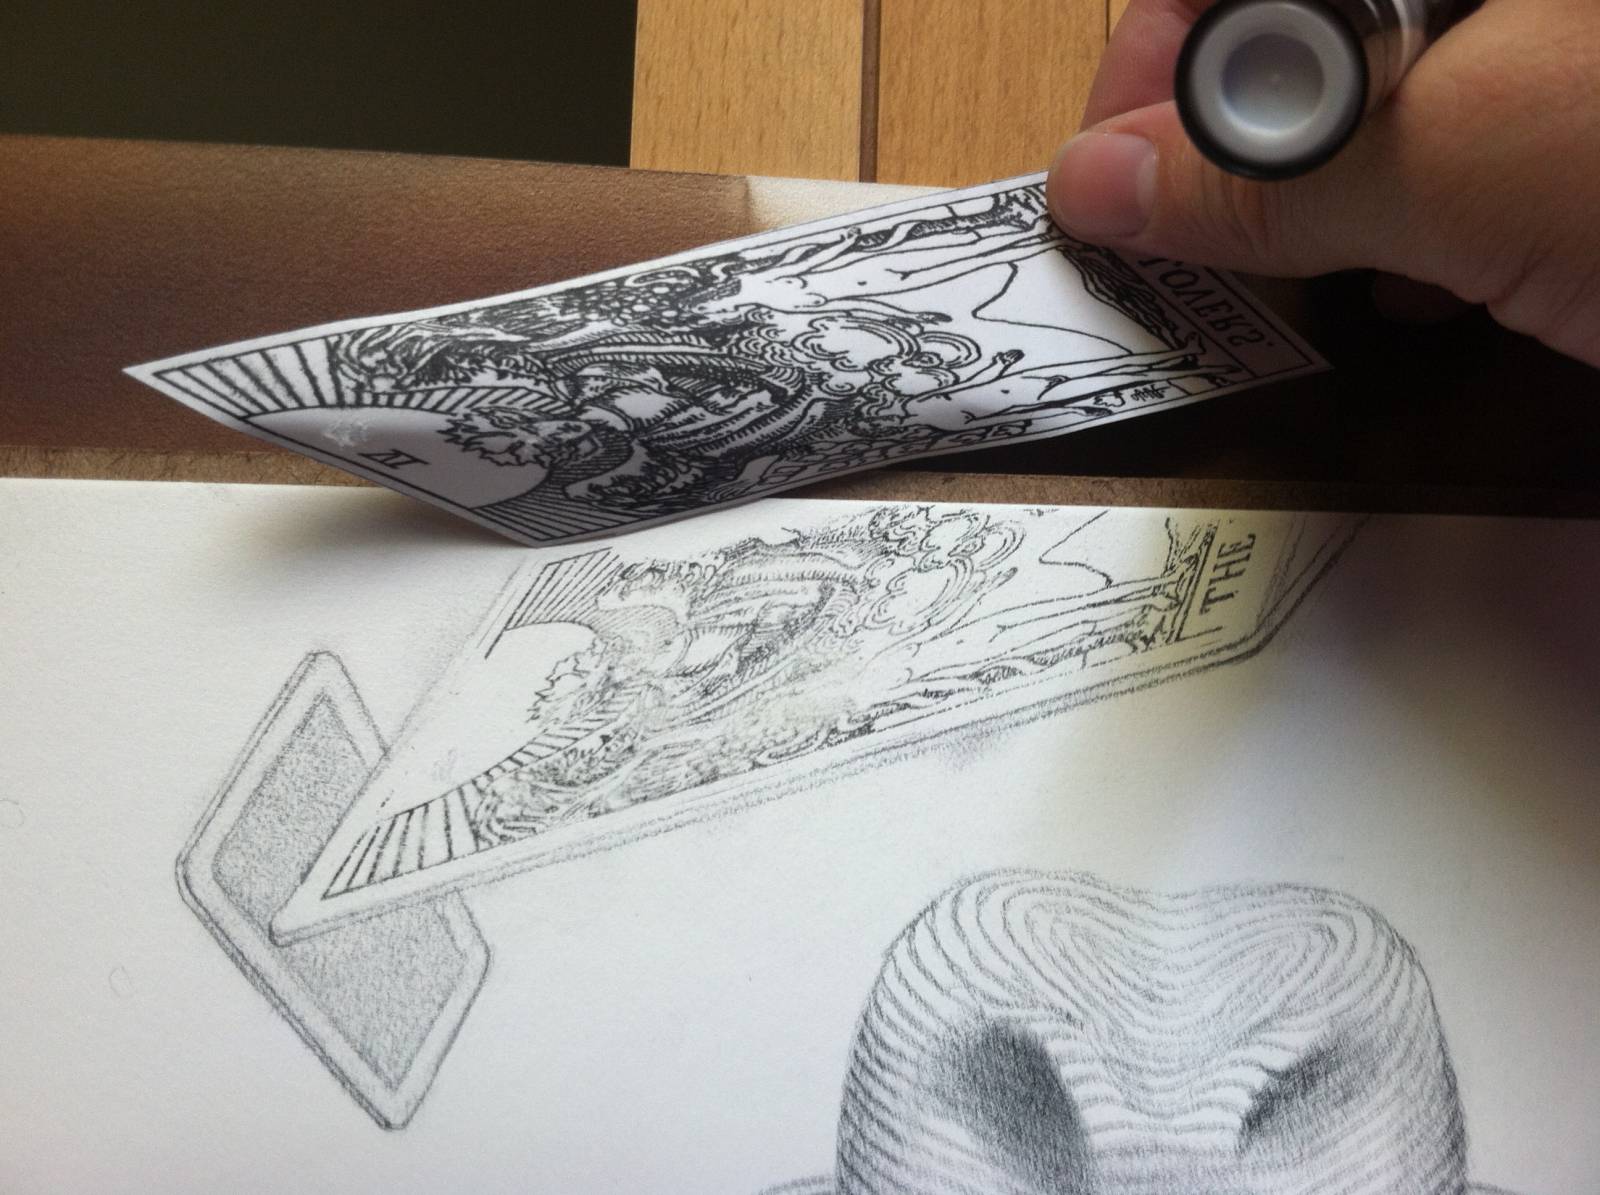
The result is a much finer drawing than I likely would have done by hand. It also saved me a lot of frustrations, as the only thing harder than drawing a tarot card is drawing a tarot card IN PERSPECTIVE!
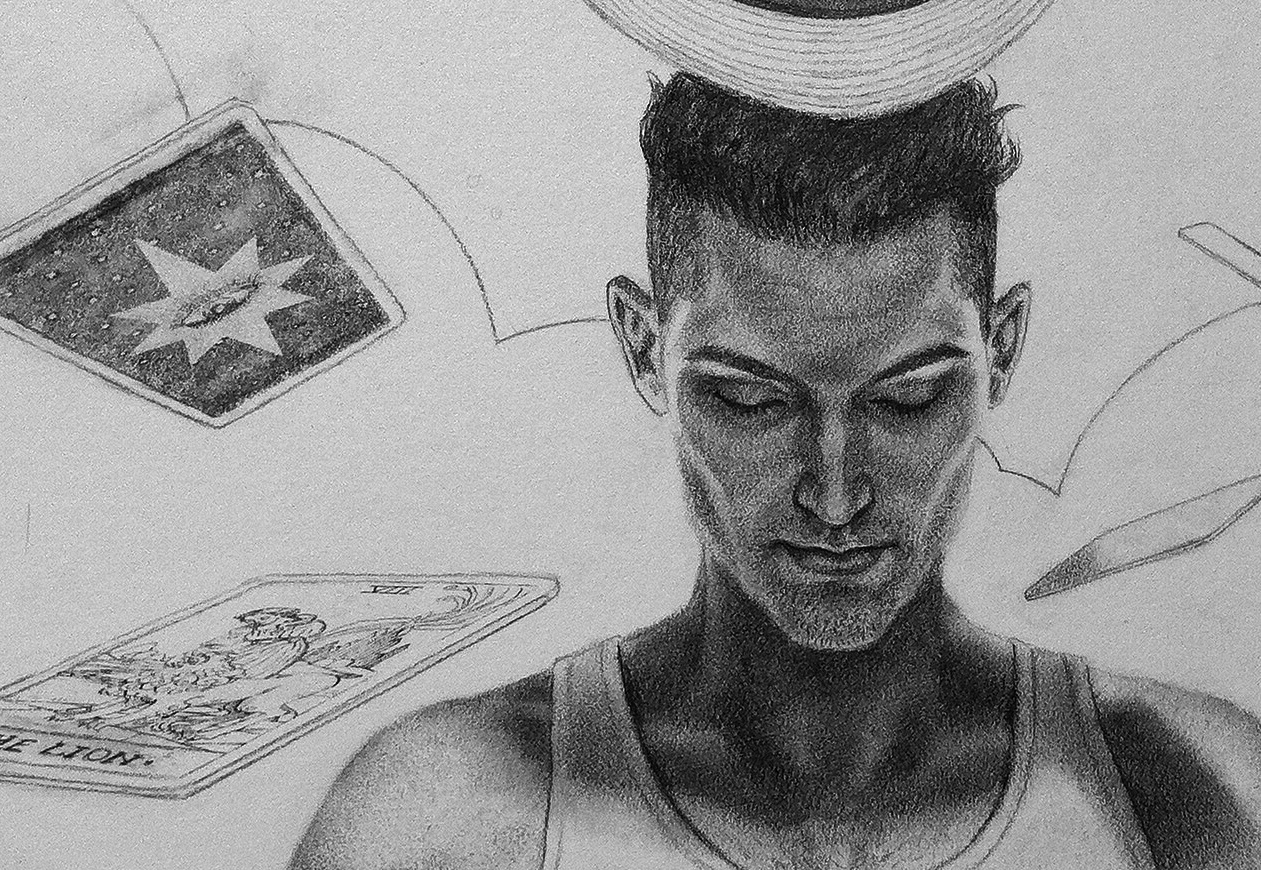
I did this for all the tarot cards, and then colored them in using only transparent pigments, ensuring the drawing would still show through. Now, obviously I could have added these tarot cards in digitally once the painting was completed. But if you’re an artist that sells his/her original paintings, it’s important to have the physical version look it’s best, and match the final product. This is great way to add those digital-esque elements, while still maintaining the traditional aspect of your original painting.
I find that this trick personally works best with linear elements, but technically there’s no limit to what you can transfer… faces, windows on a building, maps, text, tiles in perspective, even your entire preliminary drawing if you wanted! Give it a shot yourself!

Is the transfer waterproof? Do you need to spray it with a fixative? Can you get a head start on your colors by using a color layer print?
It is waterproof, but I wouldn’t go over it with solvents without sealing it. I always hit it with spray fix regardless, just to be safe. Despite being water resistant, too much abrasion can wear anything off a surface, so I play it safe.
Thank you Dan for sharing this awesome tip! Perspective is tricky, however, I feel like this tip will help ease the pain a little.
Nice useful trick Dan. I think a word of warning is warranted however. I would not advise trying this on anything but a paper substrate. Using acetone on oil or acrylic paints might spell disaster!
I hadn’t considered that, even though I’ve used acetone to remove acrylic paint from dura-lar! Thank you for bringing that to attention, Joel.
When I replaced my printer I specifically got a laserjet just so that I would have it open to me as a transfer method. I thought the only way to do it was to print onto a piece of plastic paper and then use an iron to get it to transfer. I’ll have to give both methods a try.
I just recently learned about this transfer method, but the source also mentioned that the toner for newer laser printers has changed and doesn’t work for this method. Since this was published 2 years ago… might I ask… What year is your laser printer?
You’re right, I should have mentioned I always do this BEFORE painting.
Dan, Try using synthetic oil of wintergreen (methyl salicylate) smells like wintergreen lifesavers and is less toxic. It works on paper, wood, fiber, metal, ceramic and those are just the things I’ve tried. I transferred a photo onto tshirts and it lasted through 12 years of washing and wearing before I lost it. I’ve slos usid it on top of acrylic paint, carefully, with no ill effect.
Awesome! I’ll give that a shot. Does the oil leave any residue that would cause an issue with putting acrylic washes over the transfer?
Nope. I do it all the time. Just takes a few minutes longer to dry than acetone or xylene.
Make sure it’s synthetic and not natural.
Wow this just blew my mind!! Thank you!!
Way back in the day (I mean about 1973) I was taught to use lighter fluid on regular magazine pictures to make a transfer. I used colored pencils on the image after that, so I don’t know how it would react with other paints. I image if you seal it, it would be fine. The images are pretty good but loose intensity. I haven’t used the technique since then, but I’m pretty sure it still works. Your tip is great for a more modern application and use of hardware. Thanks for your article.
Something to keep in mind is that not all laser printers use pigments that will transfer with acetone, Your likely to be safe (not 100%) if your using a print shop to make your copies but things get a bit more complicated with home and business laser printers. In the low budget category the monochrome HP and Canon laser printers are the best choice. Brother laser printers seem to use a different type of pigment that acetone won’t dissolve. I’m unsure how other brands stack up. If your looking to buy one for this purpose you should have the store print out a page from each printer your interested in and take home to see how they work for you. The quality also varies from brand to brand as well as the type of cartridge use. My printer is no longer available so I can’t offer a model guaranteed to work. Do your research before going out and wasting a lot of time and money on something that doesn’t work.
I have transfer laser toner image to metal plate or boxwood for hand engraving for many years. The best transfer is finished after application of acetone by pressing it with with a hot iron (no steam). works well for the finest lines.
Please continue this great work and I look forward to more of your awesome blog posts.
great work
Keep posting, great work, we love it.
MB