If your training was anything like my early years before finding good mentors, you probably jumped into a painting class, and just started without much in the way of tool guidance. There was likely no lab class where the materials were explained, no reasoning behind the canvas, linen, or panel you brought in, the paint brush types, the hair types, the ground, sizing, or anything that has to do with pregame preparation.
For some odd reason, most art classes begin with the assumption you understand the tools you hold and jump right into assignments, and when we fail, we blame ourselves. We are set up to fail. Unless you are born into an artistic family where you grow up learning all these little nuances, there is no formal understanding for most of the rest of us trying to make sense of making art.
I have to thank Sebastian Capella again and again for insisting on his students going through really basic steps before starting any painting with him. I was stubborn about it, but years later when I started teaching it, I realized how much I got from him that was never a conversation in any art school prior. One of the basic concepts I rolled my eyes about was mixing color in front of him. It seemed so trivial, and I was thought I was good since I could match colors with some level of accuracy. He slapped me down to the level I was really in need of starting from after just a few seconds of watching me mix.
“You mix colors like a baboon in a food pantry!” His arms are flying all over, jumping on one leg then the other, throwing brushes around the room. He had a comedic way of hitting home the harsh truths we needed to hear and no guilt saying them, and his way of saying I SUCKED at color mixing was unforgettable.
(Aside1) We can all say that there is no right or wrong way to do these extensions of our craft, and in the end maybe that is true, but to those who are first learning or new to the craft, there is a total learning experience that provides answers to “EVERYTHING” you do in art, and it is wise to engage in this information to help you make better informed decisions, and provide you more options with how to do what you do with your personal work. Every nuance of our craft has been carefully described and designed by the old masters. I have said it before, art is a science. Every scientific endeavor is well documented down to a t, 3 dimensional image making included. The more you take in and understand, the more you can bend it to your liking with conviction.
Paint Mixing
A strong word of advice regarding the process of mixing paint: try not to use your brush, especially your prized mark makers. I know this is really tough, but, for the sake of the longevity of your brushes as well as retaining their shape and spring, just don’t use them to mix pigments. When mixing with the brush, paint is forced into the center of the mass of brush hairs where vacuum pressure builds. As we keep stabbing that brush into the piles of paint, we push more paint inward, which eventually forces it upward, into the ferrule where it will dry. When it dries, it hardens, and when this happens, the hairs start to warp, or change their position in the ferrule, pushing into one another until there is no room left to move, where not too much later they start to break off.
(Aside2) Mineral spirits are the other major cause for our brushes falling apart prematurely, chemically stripping the hairs and drying them out, causing the hairs to lose their memory and drift from their organized position.
Paint preparation is similar to the preparatory mixing stages of cooking. There is a need to make sure all the materials are properly mixed into one another, and mixed well to ensure that the ingredients change the properties of how the paint looks, feels, and is spread across the surface. If they are not successfully mixed, the pigments lose any or all of these qualities, or dully perform in the painting.
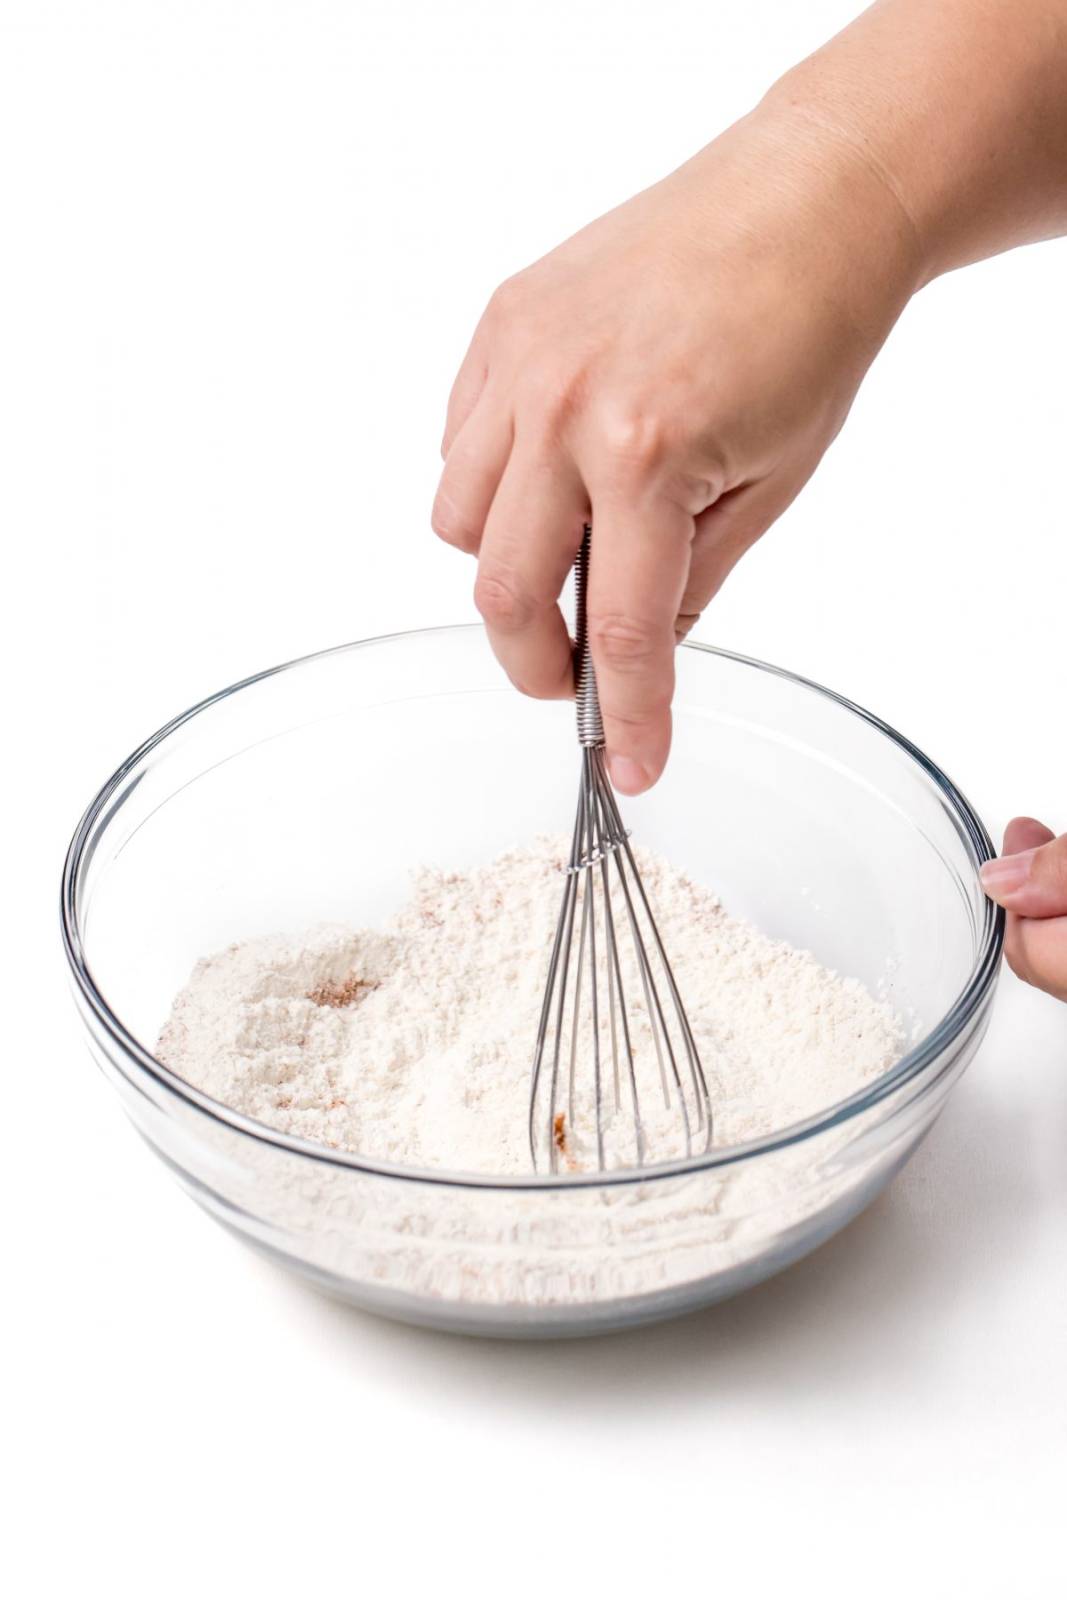
The motion you make with the palette knife should be similar and as vigorous as whisking batter or scrambling eggs.
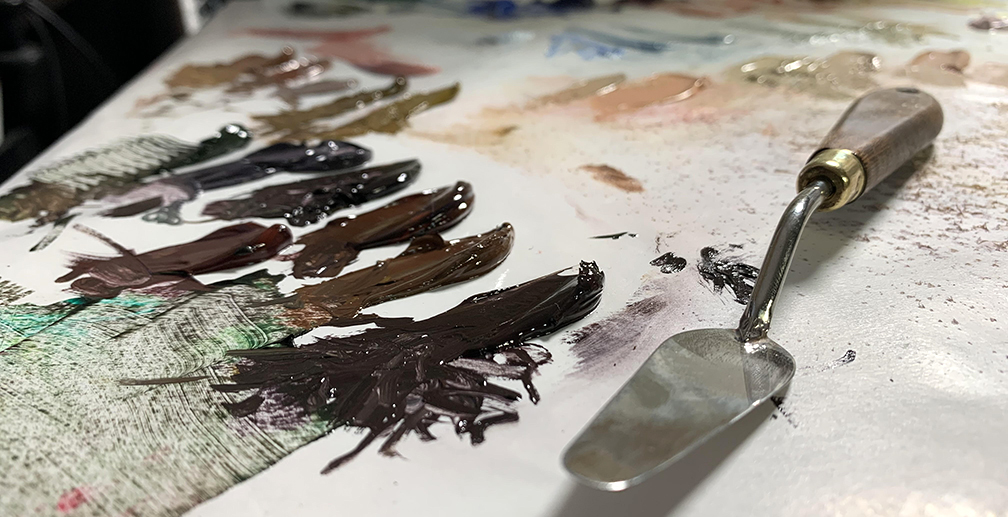
Mixing paint should be done with a palette knife. This is the painters whisk to whip up the paint with. Any of the below shapes work well. They are all soft blades, lots of flexibility which prevents marring the palette and also mixes the pigment with a controlled length of the blade. The rounded tip also prevents from cutting into the palette or palette paper when whipping up the paint.

These are mixing blades. They have a soft end to them (rounded), and they are very flexible to allow for lots of added pressure when mixing pigments together.
The motion is vigorous, in a heavy handed whipping motion, pushing down hard when hitting the surface. If a more timid approach is taken only the exposed paint will have been mixed. When the blade is wiped the other pigment in the mixture will still be there mostly intact on the blade buried under a layer of the newly mixed pigment.
Whipping the paint into its proper mixture value with vigor.
Once the pigments have been mixed together, scoop it all up into a pile, remix, scoop up and pile again, etc. doing this at least 3 times should mix all the pigments together and the adjusted value constant throughout the pile. The loss of a consistent value is also a problem that occurs when the preparation is weakly handled, as the pile is diminishing it is changing in value because not all of the pigment was consistently mixed together throughout the pile.

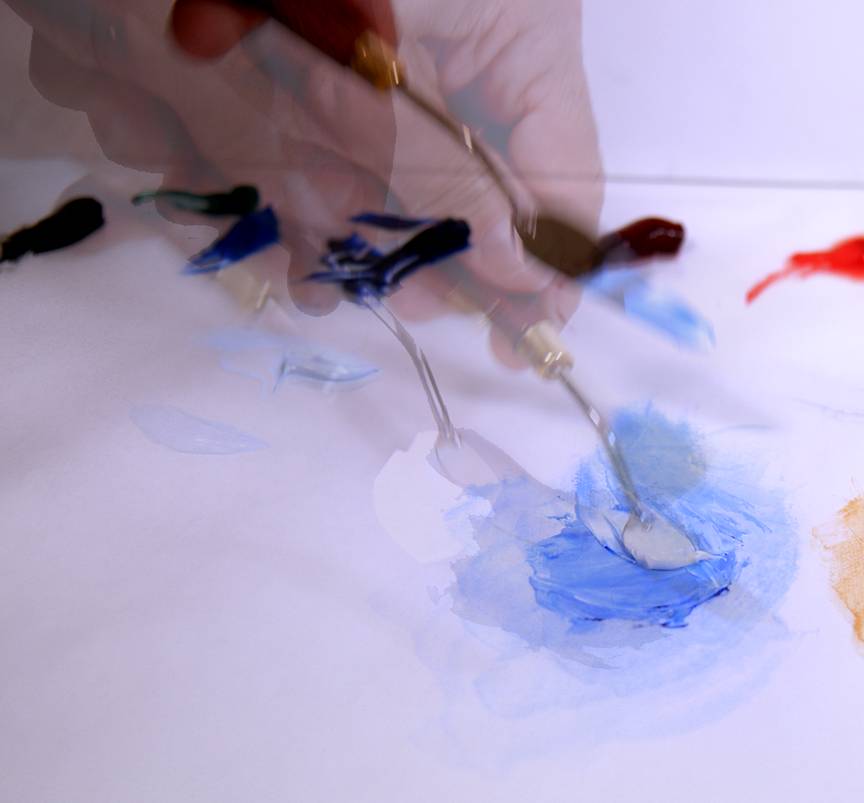
Frame grabs from upcoming color theory videos shows the whipping motion, and scooping up the pigment.
Once the paint has been scooped up, flip it over and whip up the mixture again, scoop, flip, do it again, “on yer good foot!” J. Brown
Each hue used needs to be prepped before mixing them into one another. All hues have their own inherent value/color. Some of these hues out of the tube are darker than others out of the tube are lighter. In the hues we have, more warms are lighter than darker out of the tube. Cooler hues have a tendency to start dark in value. If mixing a lighter hue and a darker hue together, unless the lighter hue is a cadmium, the darker hue will always win in the mixing process, meaning, the darker value always dominates the mixture. Cadmium pigments are a metal that is mostly opaque compared to most of the dark hues that are made from dyes or natural materials. When they are mixed together, the cadmium hues will dominate the overall color appearance.

Alizarin out of the tube is darker than ochre and is now overpowering this mixture both in hue dominance as well as value dominance.
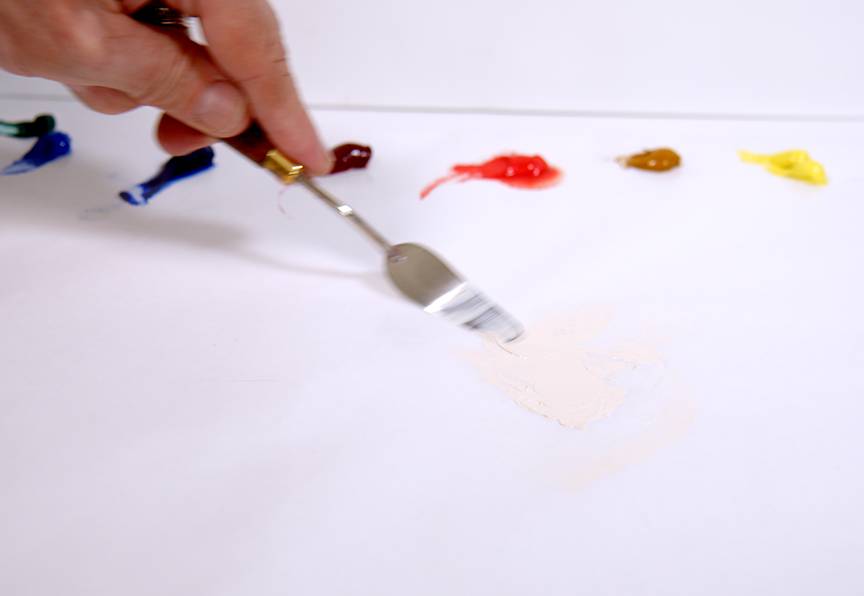
To remedy this issue, both pigments used to make any mixture should be tempered before mixing them into each other. This means tinting the darker pigment up to the value of the lighter pigment, or adjusting both pigments until the hierarchy or equilibrium of value is matched. Tinting is done with titanium white pigment. Titanium is one of the most opaque pigments we have available to us and is perfect for raising the value of a hue.
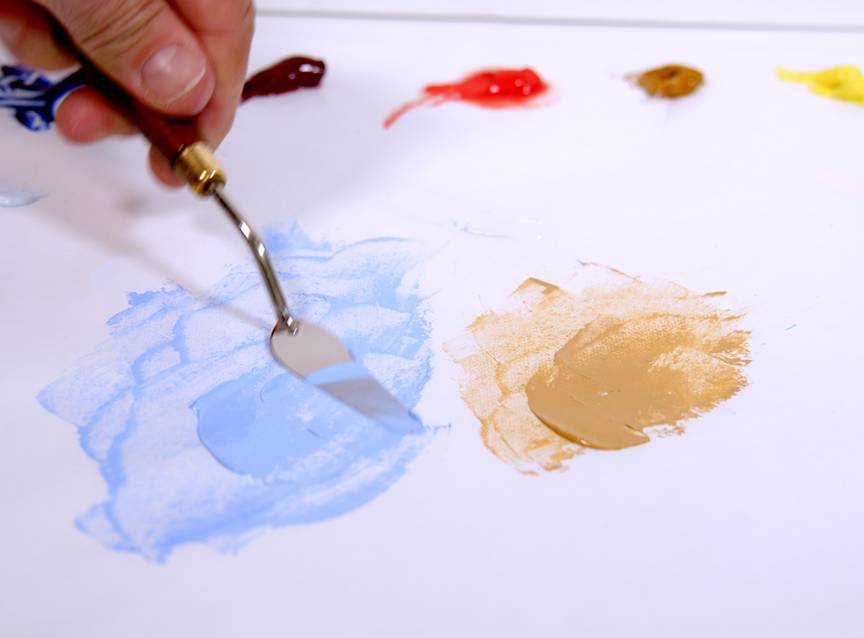
Here both pigments are being raised to a higher value before they are mixed into one another.
Once both pigments are matched, or close enough, then they are brought together to form the final mixture. When a hue needs to be darker, adjust the darker pigment in the mixture until it represents the darker value that is intended. The lighter value will not need to be adjusted for value since we are using a darker one to dominate the value mixture. This can be done with Ivory black used as a toner, or black and white mixed to the appropriate gray value to mix in.
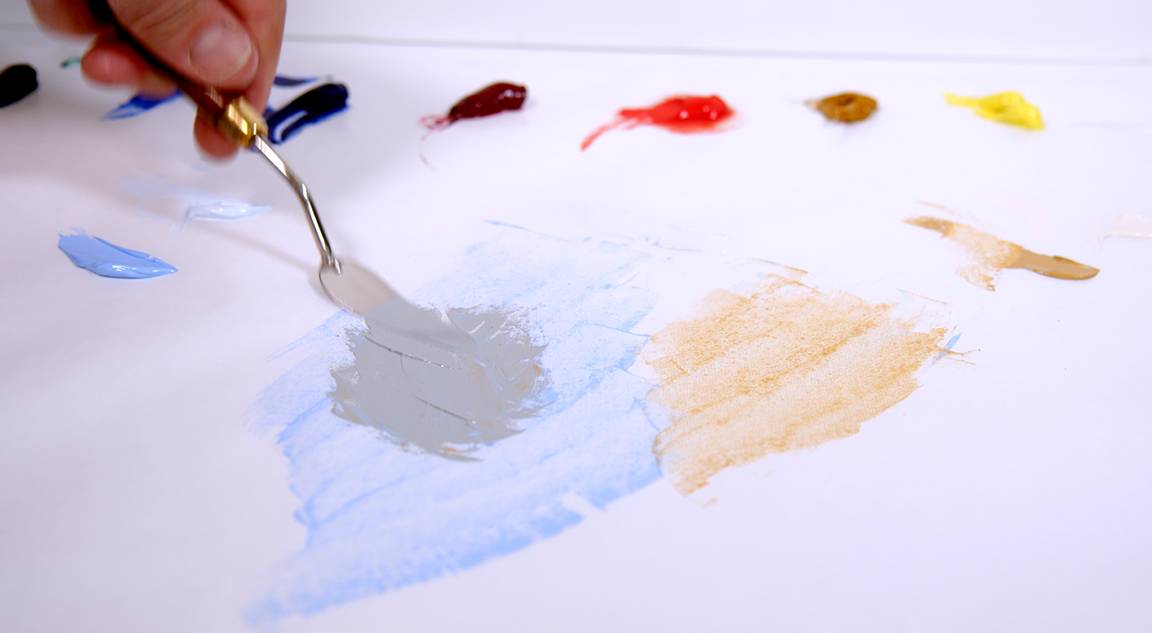
When they are an approximate match, they are then mixed together to make a new hue, this one is a low chroma blue green.
It is good practice to premix the major hues of the painting. This will help with massing in the larger shapes of the starting layer of the painting, the local value/notan stage of the process. It also provides enough paint as a start point for any color/value strings that are going to be premixed in addition to their root hue(s).
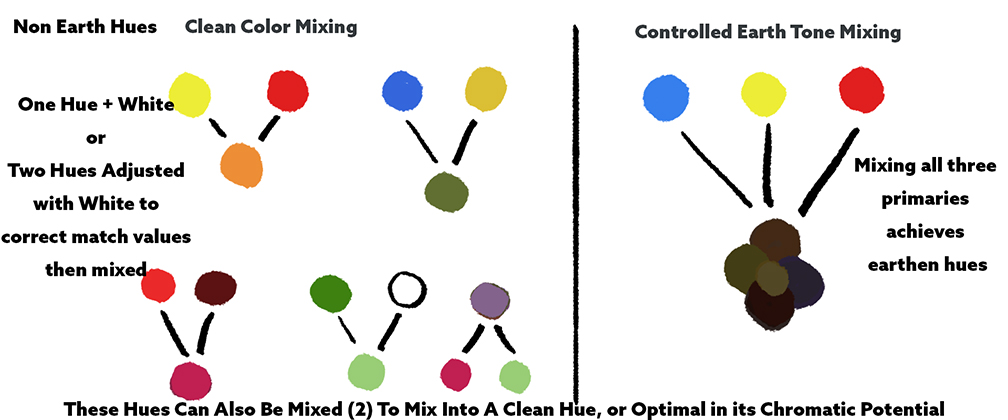
To achieve clean color mixtures, two of the three primaries can be mixed together, or one hue adjusted by tinting, then mixed with another hue of the same value. These mixtures will keep the colors clean and easily adjustable.
Mixing all three primaries together makes an earth tone of whatever of the three hues dominates the mixture. If red dominates, then it’ll appear more sienna like. If yellow is the dominant hue, olive ochres, olive, or orange/olive hues will dominate and so forth. Earth tones, or low chroma colors are a result of all three primaries mixed together. I don’t purchase earth colors because they are so easy to make, as most of the misjudged mixtures quickly become low chroma.
This sample painting I made is different from the other color theory paintings I have pushed so far because this one is so tonal, low chroma, and very high contrast. I limited the number of hues I normally use in the color theory palette to a dual-primary palette, yellow, red, blue in both warm and cool temperatures. I included viridian green in the palette but rarely ended up using it, achieving all the greens needed from the blue/green and yellow/black mixtures.
Why not by earth tones and use them for paintings like this one if the color range is not going to be very chromatic? Earth tone hues out of the tube are already a very low chroma and cannot assist in mixing cleaner primaries, and by making the earth tones from primaries, I have more control over what degree of low chroma, how warm or cool they are, and other various options unachievable by the earth colors. I am not suggesting what to buy or not, merely pointing out the range a full color palette can accomplish.
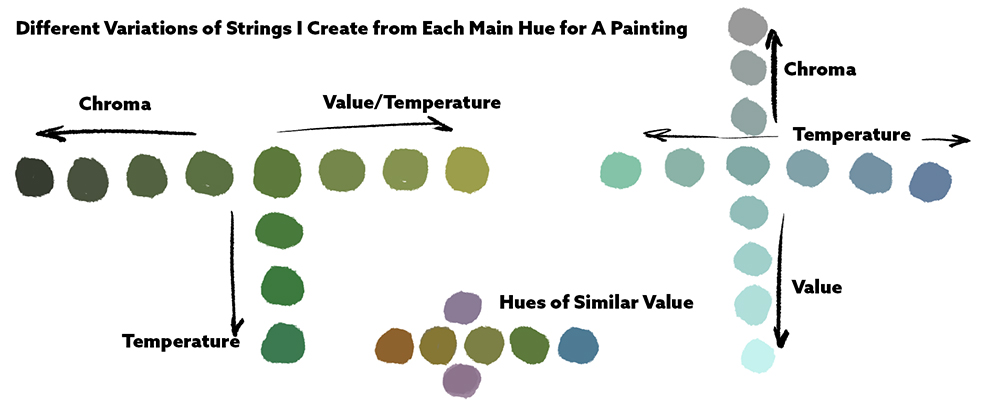
Once each primary hue of the image is made and related to each other by value and chroma, strings are developed from each. I do warm and cool as well as subtle value changes of the hues to help accomplish a more realistic fall off of light on whatever surface the hues represent. Light is not constant, always changing in temp and intensity on any given surface, the other adjusted string values/hues help capture that look and feel.
When first attempting to premix, it feels like hours go by before ever engaging in the canvas. It will speed up as you familiarize yourself with the process and grow comfortable with the palette of colors you work with on a consistent basis.

Here are all the major hues for the image below.

More paint is mixed than is needed so I don’t have to chase any mixtures from beginning to end of this little messy oil sketch.
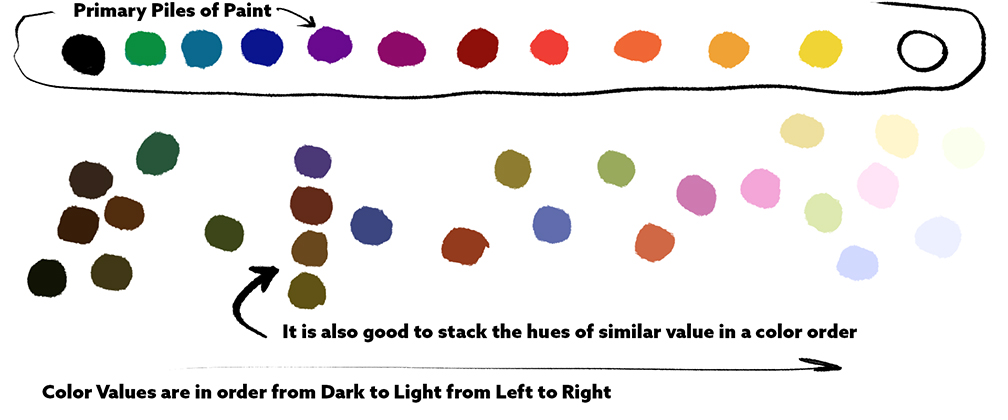
It might not be as recognizable with this particular palette I mixed above, but there is also an order of placing the hues on the palette. A right handed palette has black on the left and white on the right. All the corresponding mixtures should fall in order of value across the mixing surface according to the value order of the primary piles of the palette. Darker value mixtures towards black and light value mixtures near white. All the other color/values fall in order from darkest to lightest. By keeping the hues in an orderly placement, there is less chances of polluting a mixture with a different value, color doesn’t matter as much so long as those values are the same.
(Aside3) A problem with a “mix-as-you-go” process is the chances of forgetting which hues were used and to what percentage to remix a hue that has been used up is very high, and likely to occur in a painting, especially if you are using a new pigments, or range of hues than the normal hues more consistently used. Having an overstock of mixed hues prior to starting safeguards the painter from experiencing this problem.
Earlier when I said not to mix paint with a brush, this is mostly regarding the initial piles of paint that are used to start the painting. These initial piles should be large, comparable to the piles of paint from the tubes. Because there is so much pigment, brushes are abused pushing the stacks into each other and swirling them into a mixture. More mineral spirit is used to clean out the brushes than they should be exposed to, and sooner than not the shape of the brush deforms, and the hairs start to break away.
If you insist on using a brush to mix paint, use a hogs hair bristle, buy them in bulk for cheap, and abuse away. The precious brushes you use to make the immaculate marks should be saved for just those marks. Clean them with linseed oil, then wash them out with soap and water. Hair condition them after washing and leave it in the brush. To keep the flats and filberts in shape, fold hard cardboard over the end and tape it to the brush handle.

These are cheap brushes, under a $1 each, good for workhorse chores that would damage good brushes beyond use.
While we paint, we will likely automatically mix paint with our brush as we are nearing the finish, or looking to make a minor adjustment to a color on the canvas, which is fine since, while working we tend to wipe the brush more than when premixing so there is less likely a chance of overburdening the hairs with a vast amount of pigment. If you do end up mixing with your good brushes, use the same pressure you would use to pick up the paint from the palette so as not to push the paint too far up into the ferrule.
A note about premixing in preparation for the painting ahead, some will maybe think of this as a color by number approach which they would rather avoid. I think I had this attitude when I was first getting dirty with oil painting, or somewhere along the way I read an article or someone famous said this approach was a lame way to paint, or cheating, or something like that. I am glad I let my guard down and learned to embrace strings of color changes and premixing. I now have more choices in the experience I choose to have with my work at the moment, and it is so much fun to only think about painting while painting, instead of disrupting those thoughts with mixing colors and a totally different head space.
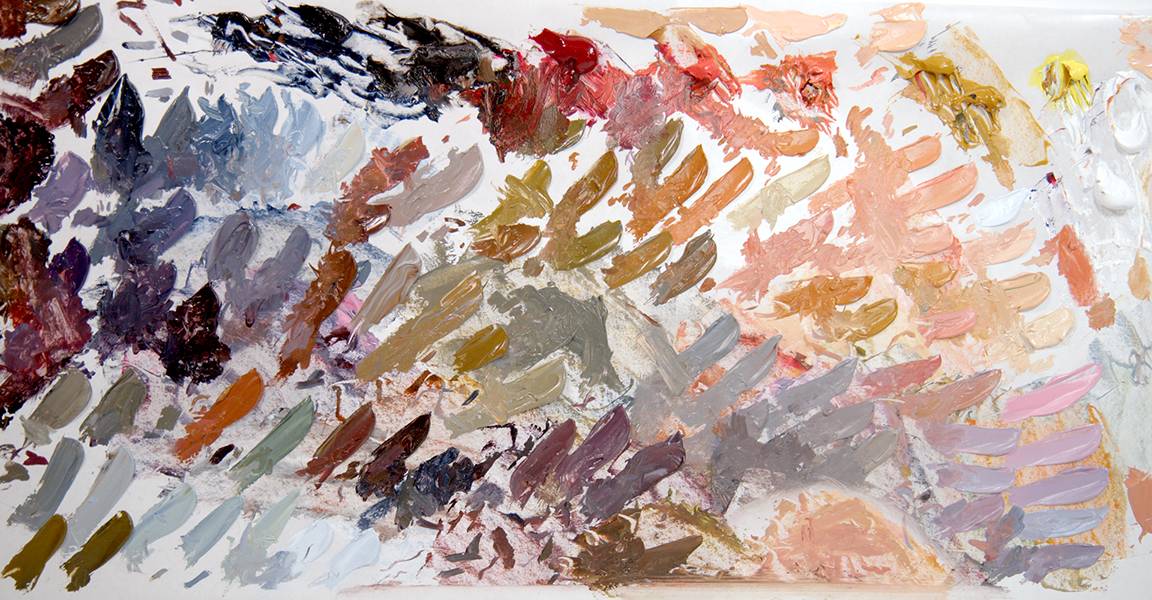
A palette for one of my recent pieces. Note the color and value strings throughout the mixtures. With everything mixed, all I had to do was perform, which is the best place to be once you are in front of the canvas and in your lane!
This may sound strange to some, but mixing paint isn’t to just stockpile the palette and a burden of a step getting in the way of painting the picture . It is a time to get comfortable and familiar with the subject matter and learn a great deal about what you are seeing. The palette is the painting before being executed and help you see that your mixtures relate in vibrancy, colorfulness, have the right amount of value contrast to each other, and look very similar to your subject matter or color study. The process of mixing is a psychological preparation for the journey ahead. We build a certain level of confidence knowing we can see part of the painting finished in the correctness of the colors we premixed on our palette long before they hit the canvas.
When we embrace every stage of painting with the same level of importance none of the steps we do will be looked down upon as a burden, nor will they get in the way of having a good time. Every step teaches us something new about our goal and helps assist in our mission towards a successful finish.

Thank you so much for these articles Ron! I totally relate to how you began too. Not just in color but any irl education I got about art was about painting with feeling or a knitting group. I felt in the middle cause no one irl could teach me anything new and online I wasn’t good enough to get advice, everyone was so advanced that things like this were glossed over. Masters who I’ve asked are often so good they can do it but couldn’t explain any of it.I think a problem is great art takes tons of hidden skills like this that don’t have clear goals without a teacher or a product when you do them. So being self guided, it can look and feel like your doing nothing especially when you have nothing to show for it. All projects need these skills and unless you know they exist,its like playing a slot machine every time I get out a pencil and I physic myself out with every step.
The main problems I have with premixing is, I take so long that all my mental energy is spent and the rest of the session is lost in a mental fog, I try taking a break but when I come back my paints dry out. I may be wrong but it seems like you only make enough paint in those swatches for just 2 or 3 brushstrokes. How do you know your mixing enough?
Zach, great question and thank you for asking.
Think of mixing as a step in the process and do not do it when you want to paint. Paint when you want to paint. Does that make sense? So, I am assuming you are using oils since acrylics and gouache you can premix as long as you have mixing cups and can store them mixtures until before you use them.
Color mixing is a step, so when you do it, all you are doing is it. I can get a fairly complex canvas premixed in about 20-40 minutes depending upon how subtle the strings need to be developed, the more subtle, the more time spent making sure micro mixtures are as accurate as I can make them within limits.
I do all the premixing and when I am finished, I put the paints aside, go do something else to clear the complexity from the head, probably eat since all that brain activity burned calories, psyche myself up to head in and sit for the final performance since that is all that is left in the process. One grand performance, and I can put all my efforts into concentrating on just that one performance without interruption.
Oils don’t dry out very quickly unless you are using earth tones to mix with. Umbers and ochres can dry out within hours. This is again why I use a palette of chromatic hues and mix down to whatever chromatic range I need and know that the colors won’t fail me for at least a few days if I need them to last that long.
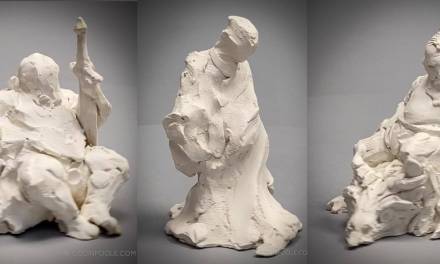
The demonstration images that I did were more for the motion and the mechanics of mixing rather than showing a great deal of mixing. If you refer to images I shot of my palettes, both of those images have piles that are rather large in them, in fact, those are shot after the paintings are finished and all of what you see is leftover paint from the experience. I make sure to mix more than is needed, I think the piles could warrant at least 3 or 4 paintings if I stay within the same level of thickness I used on the Orinthopter demonstration.
Unless you are making a crowd scene or complex cityscape, the usual number of big picture colors we usually mix are around 4-7 since most scenes we paint we control in composition. The average composition should have between 3-4 major values in it, so at least 4 as a baseline for the big picture values, but sometimes we group hues together into value groups and additional hues will need to be mixed to fulfill all the tones. Like the Orinthopter image, that has 4 big tones in it, metal light, metal shadow, Window, ground. The other hues are incidental to each of those areas of focus, sharing hue/value with one of the big 4.
But as mentioned in the article, I mix strings so I have all the variations needed to make a simple image complex looking and as dimensional as possible with the kind of subtle changes we see in real life with our own eyes.
With these big values and their strings, this was about 30+ minutes of mixing. I mixed the night before, and painted the morning after. I usually do my mixing the night before I start since I know my most creative hours are early in the day. This is another topic in itself, knowing yourself and when you are at peak creative time vs. the rest of the day which is more productivity related.
Summary from above: Mix in its own session, save the eagerness of painting your pieces for its own special time so you don’t wear yourself down with all the other stuff that can be isolated into their own stages and time slots.
oops, I thought I shot both after painting, regardless, the demo palette still looks mostly untouched since I did enough mixing for it. That palette looks like I can get about 6 paintings from the amount I mixed. I do feel a little guilt after, but it was mixed for just one canvas so…..
Thanks for a good blog.
Grow your real estate business with powerful digital marketing strategies. Our agency specializes in real estate branding, lead generation, and property promotion through SEO, social media marketing, paid ads, and content creation. From increasing visibility to attracting qualified buyers and sellers, we help real estate professionals achieve measurable results and close more deals with confidence.