 |
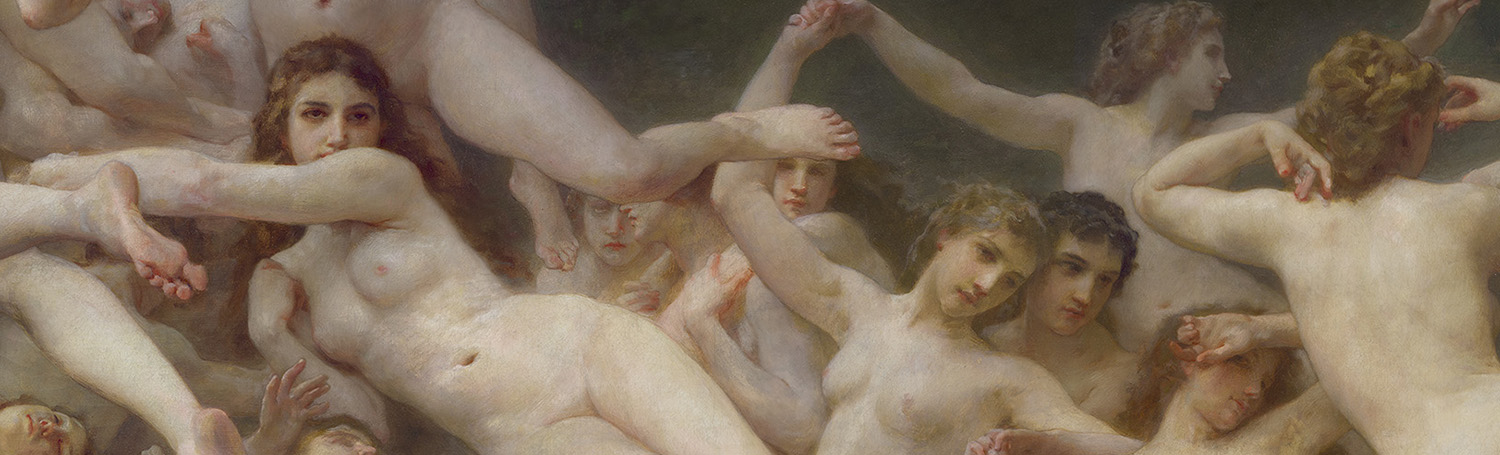
| detail from The Oreads by William Bouguereau |
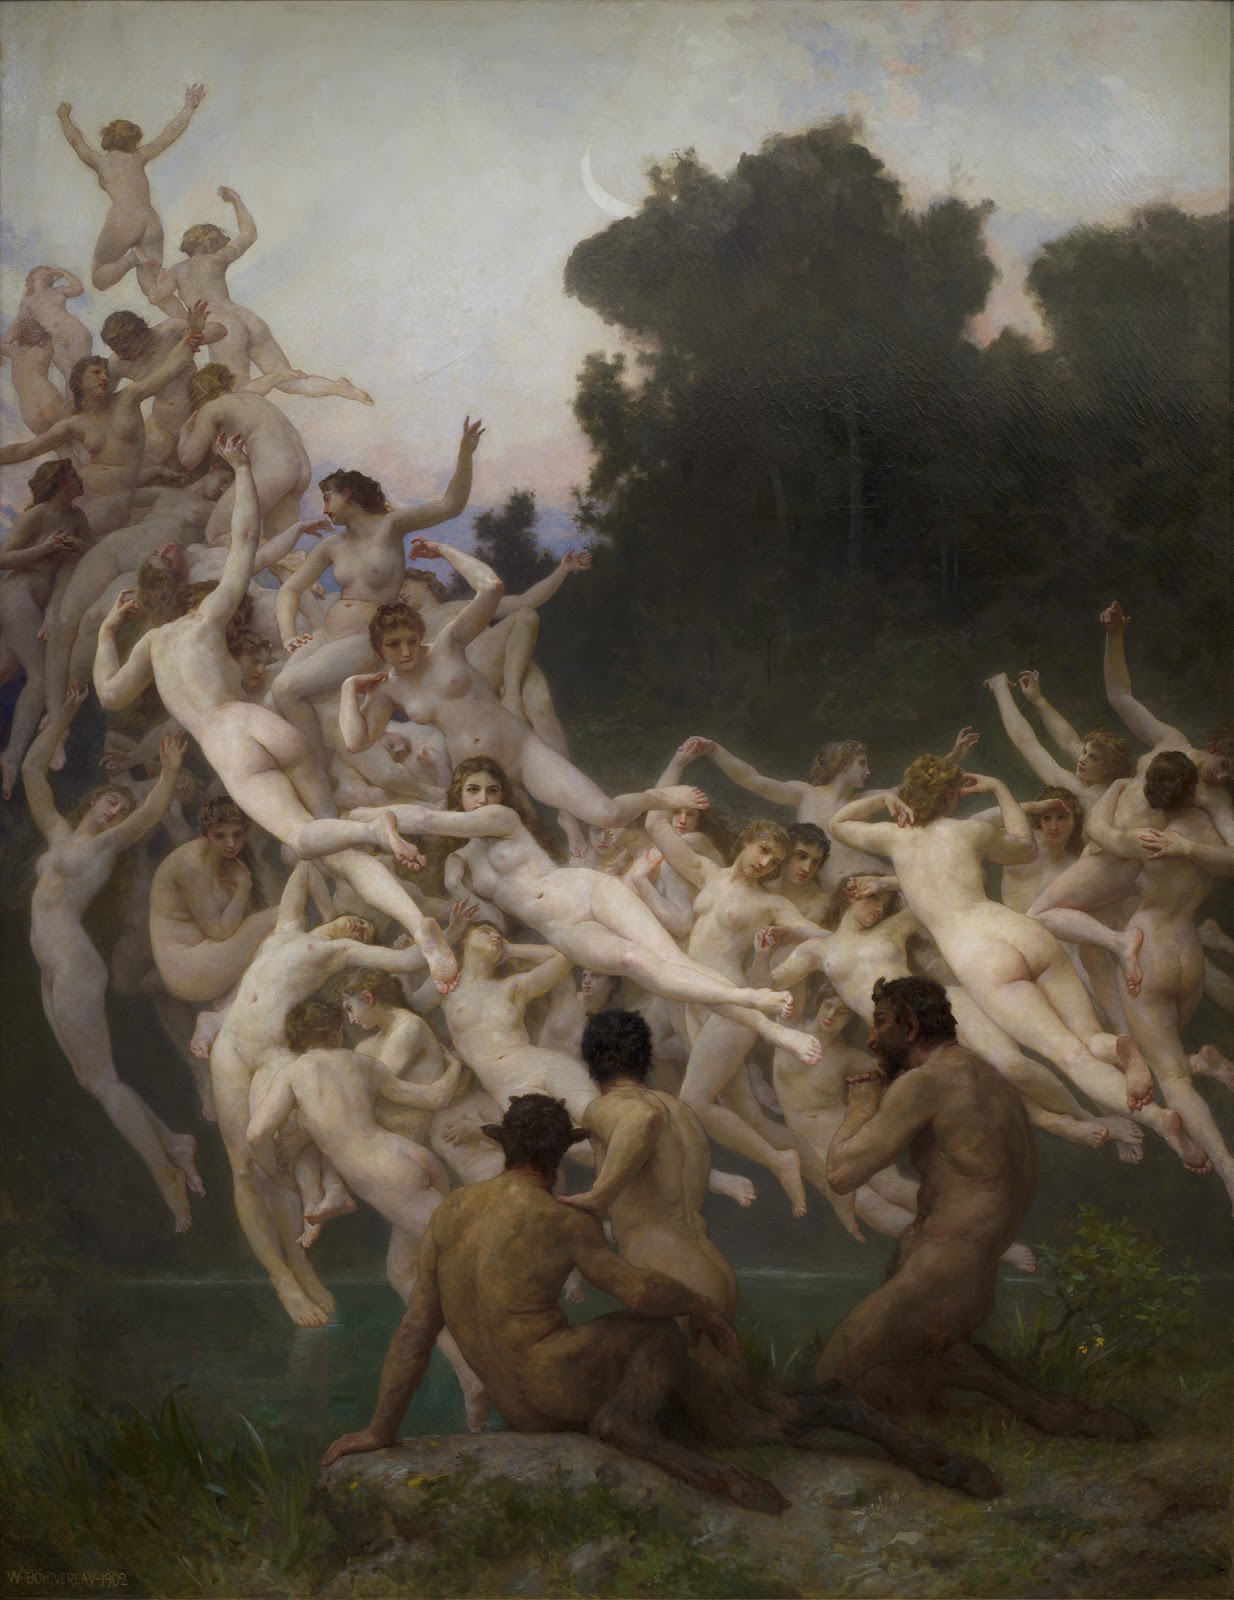
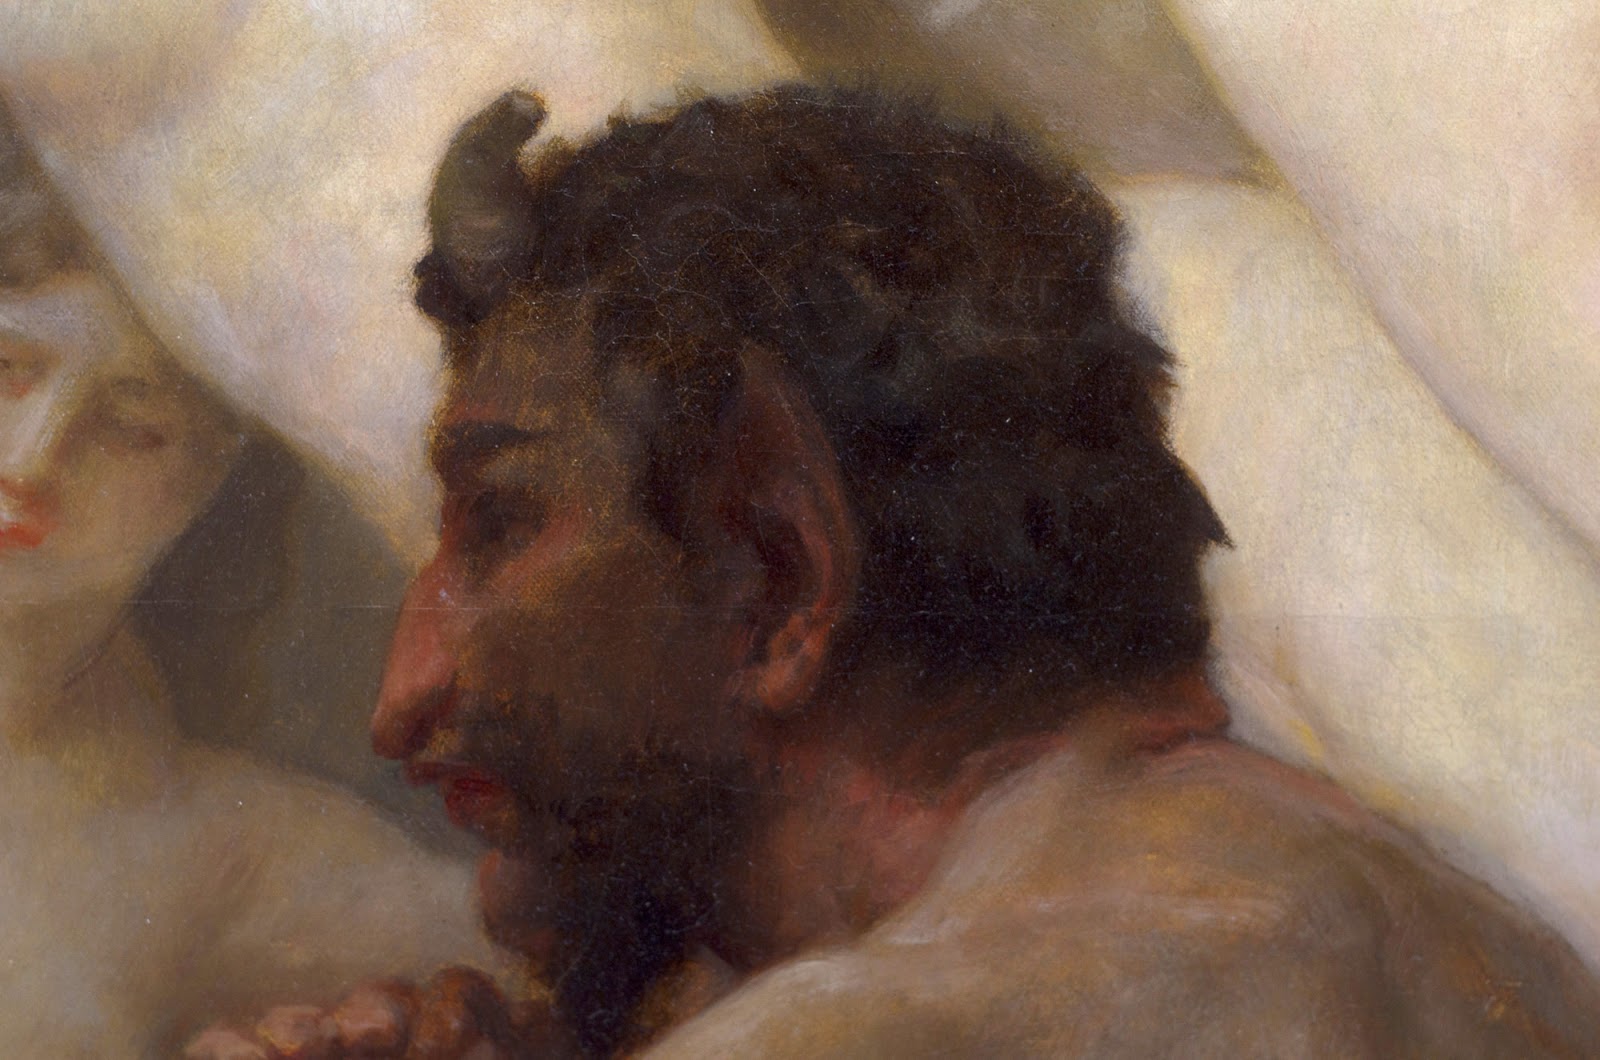
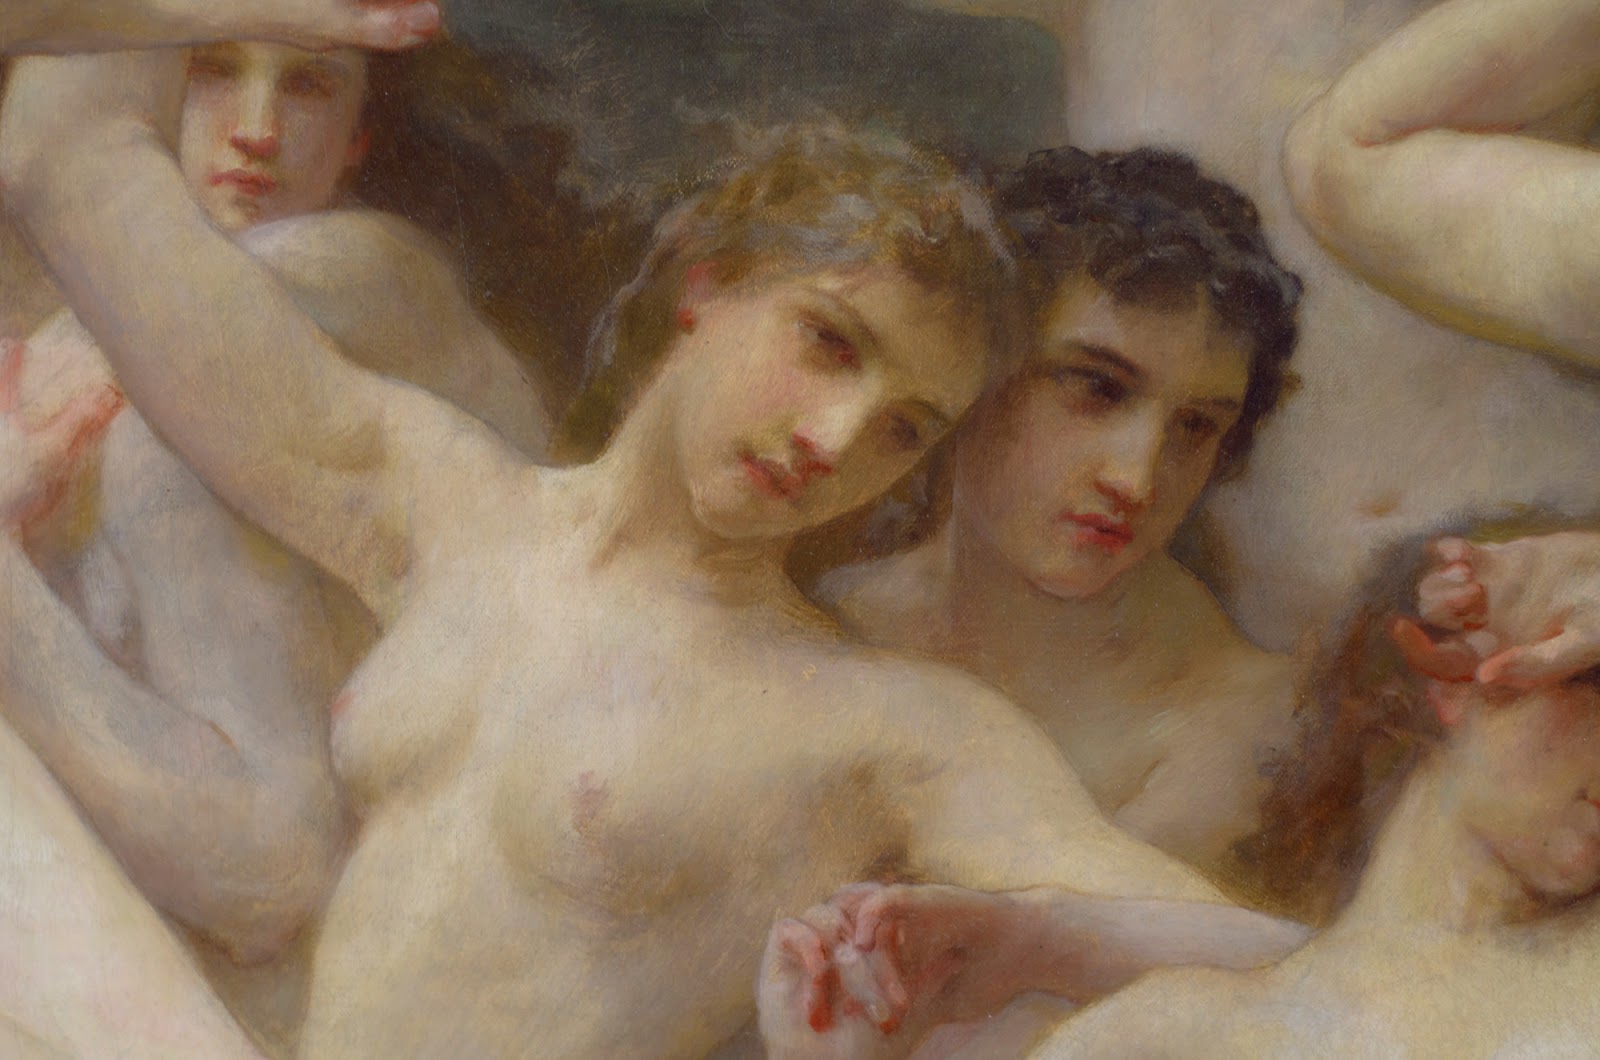
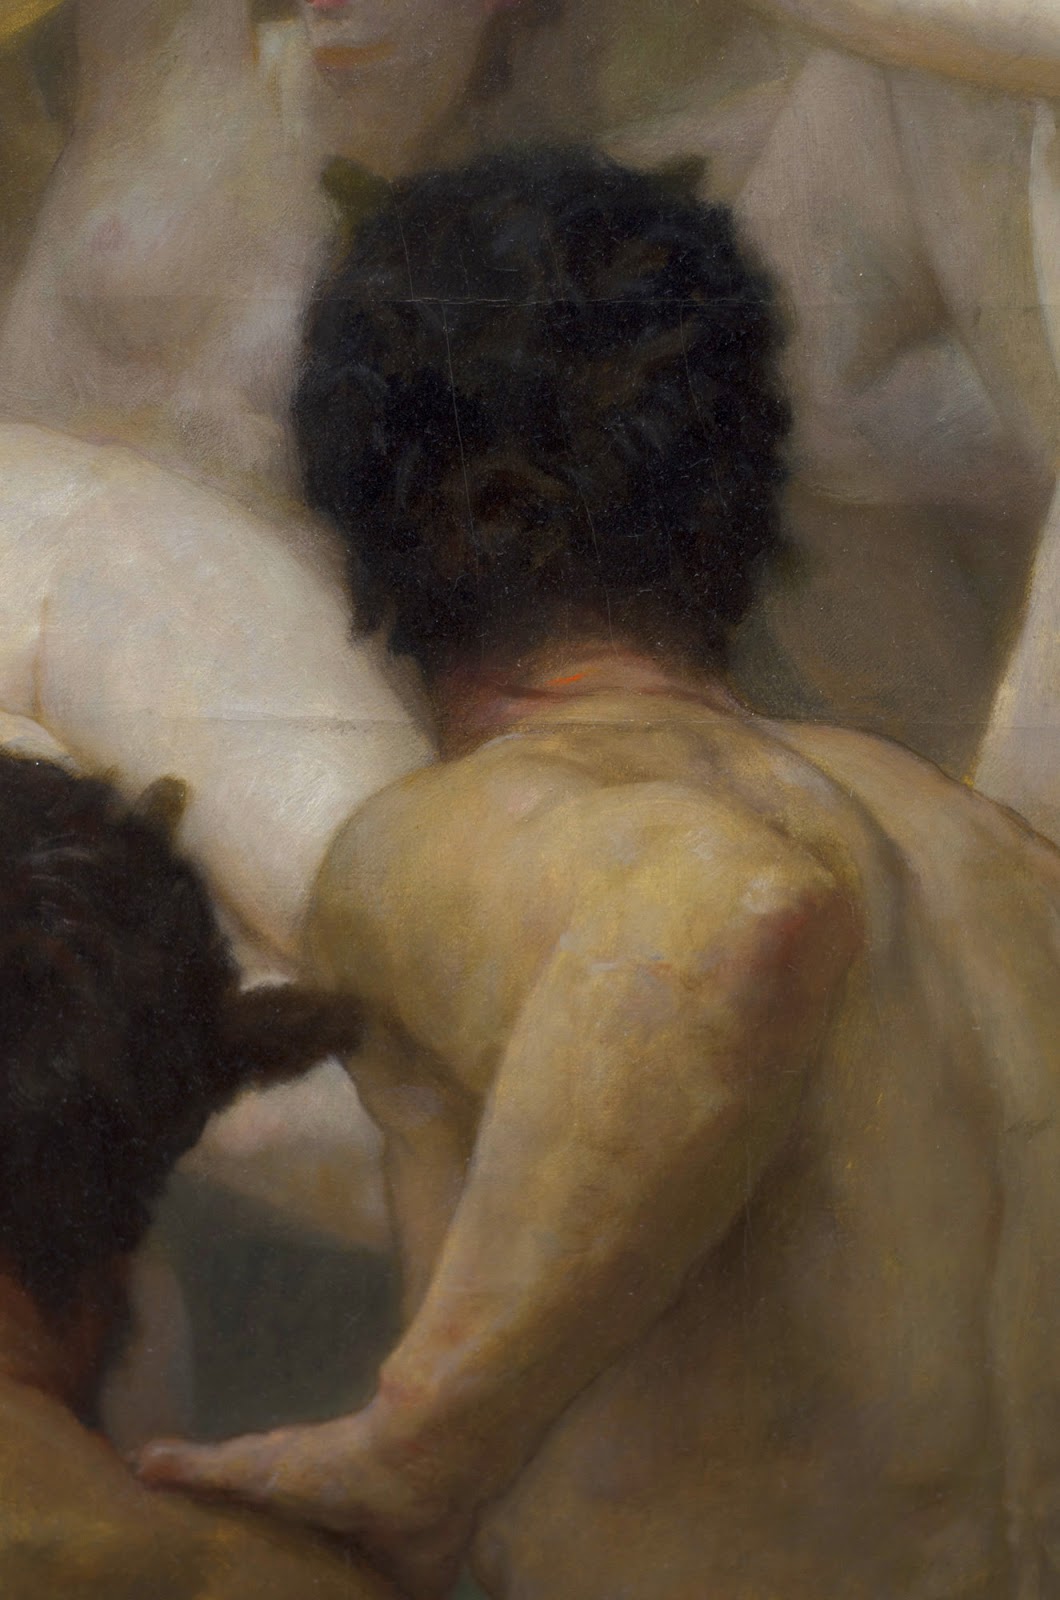
I just returned from France. Had a wonderful time with the whole family and saw some amazing sights. At the top of my list was the Musée d’Orsay. It has risen to the top of my list of favorite museums. Photos of paintings don’t really come close to capturing the experience of seeing an original, but I do find them useful in my study and they are nice to have to remind me of notes or observations I made in person. For instance, check out this little splash of vermillion on the back of one of the satyr’s necks. I missed it in person, but found it in the photo:

Despite the limitations if you are going to take photos in a museum you might as well take the very best photos possible. I don’t claim expertise with photography, but I might be able to share a few tips I have used over the years.
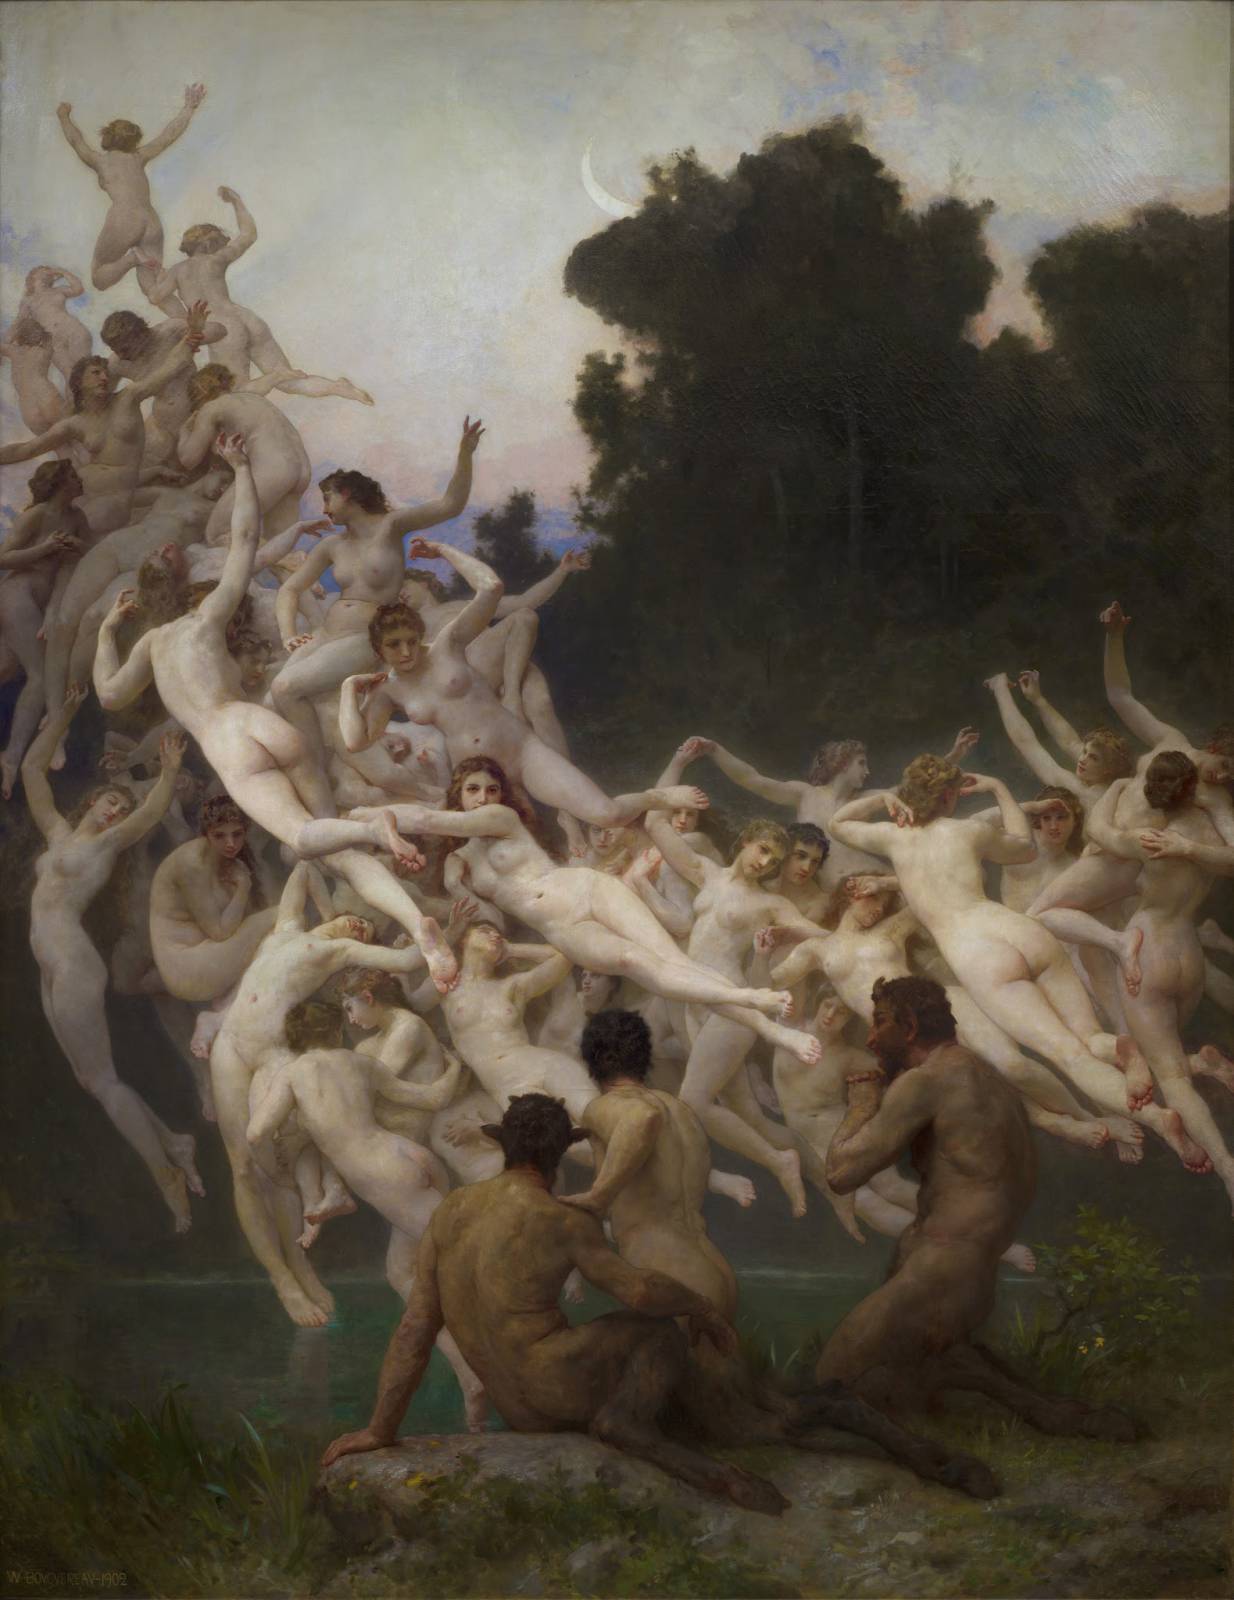
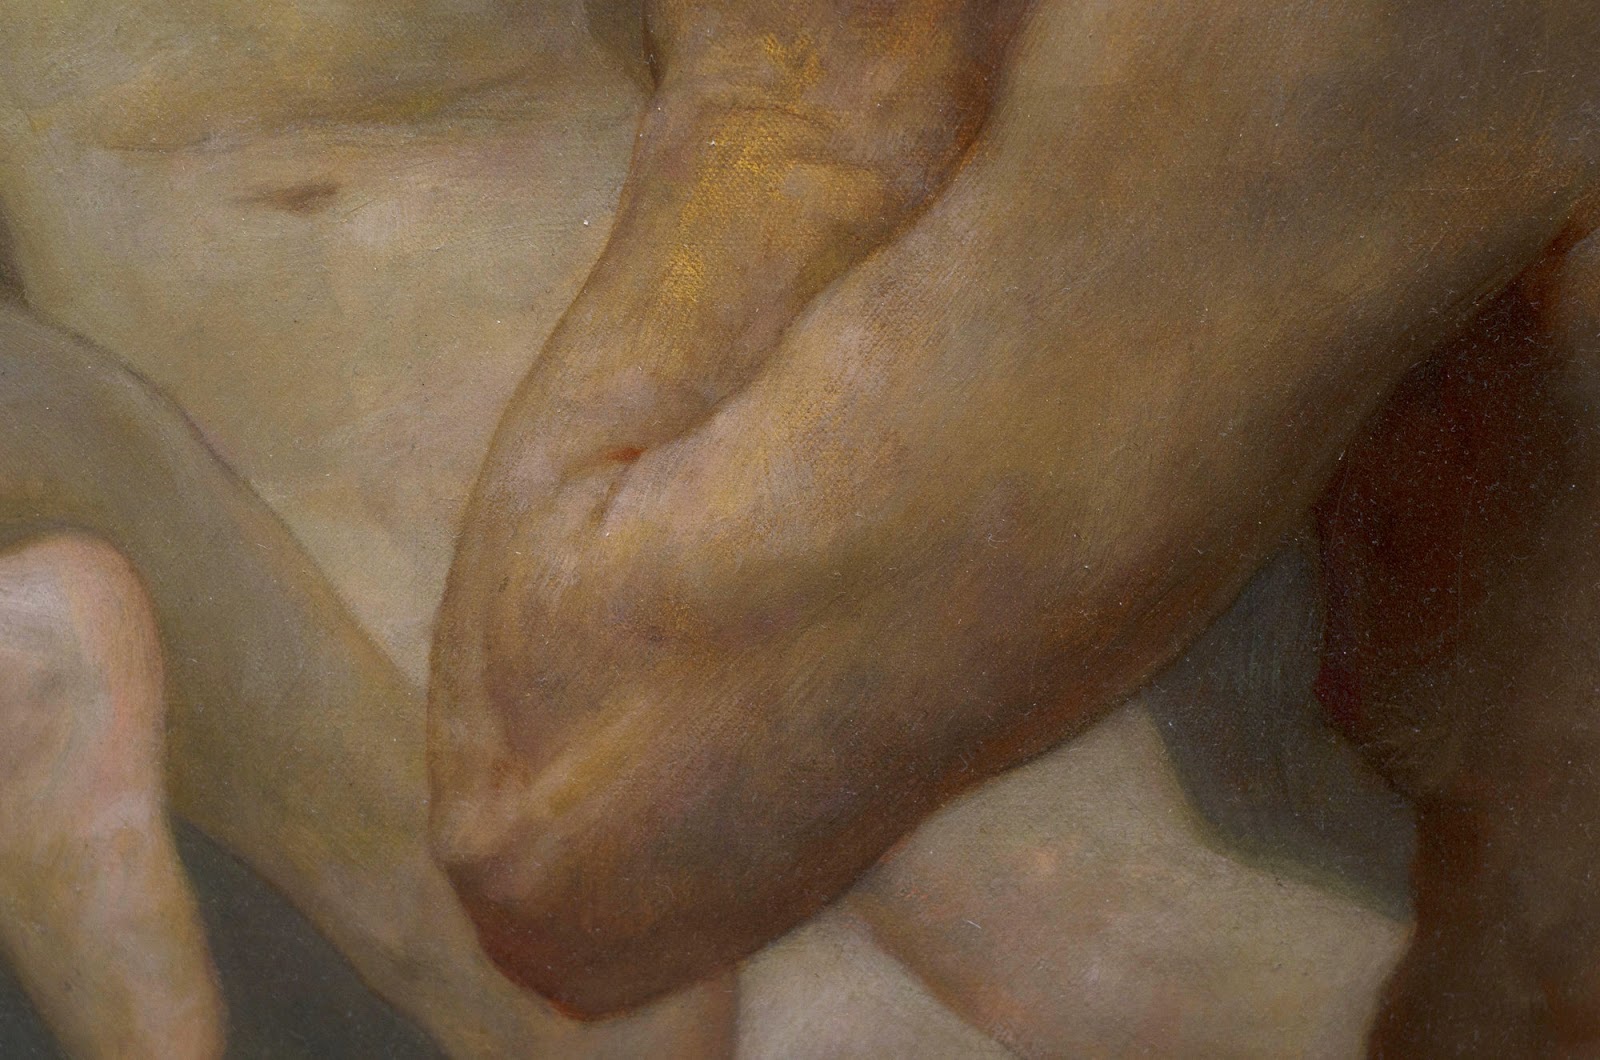
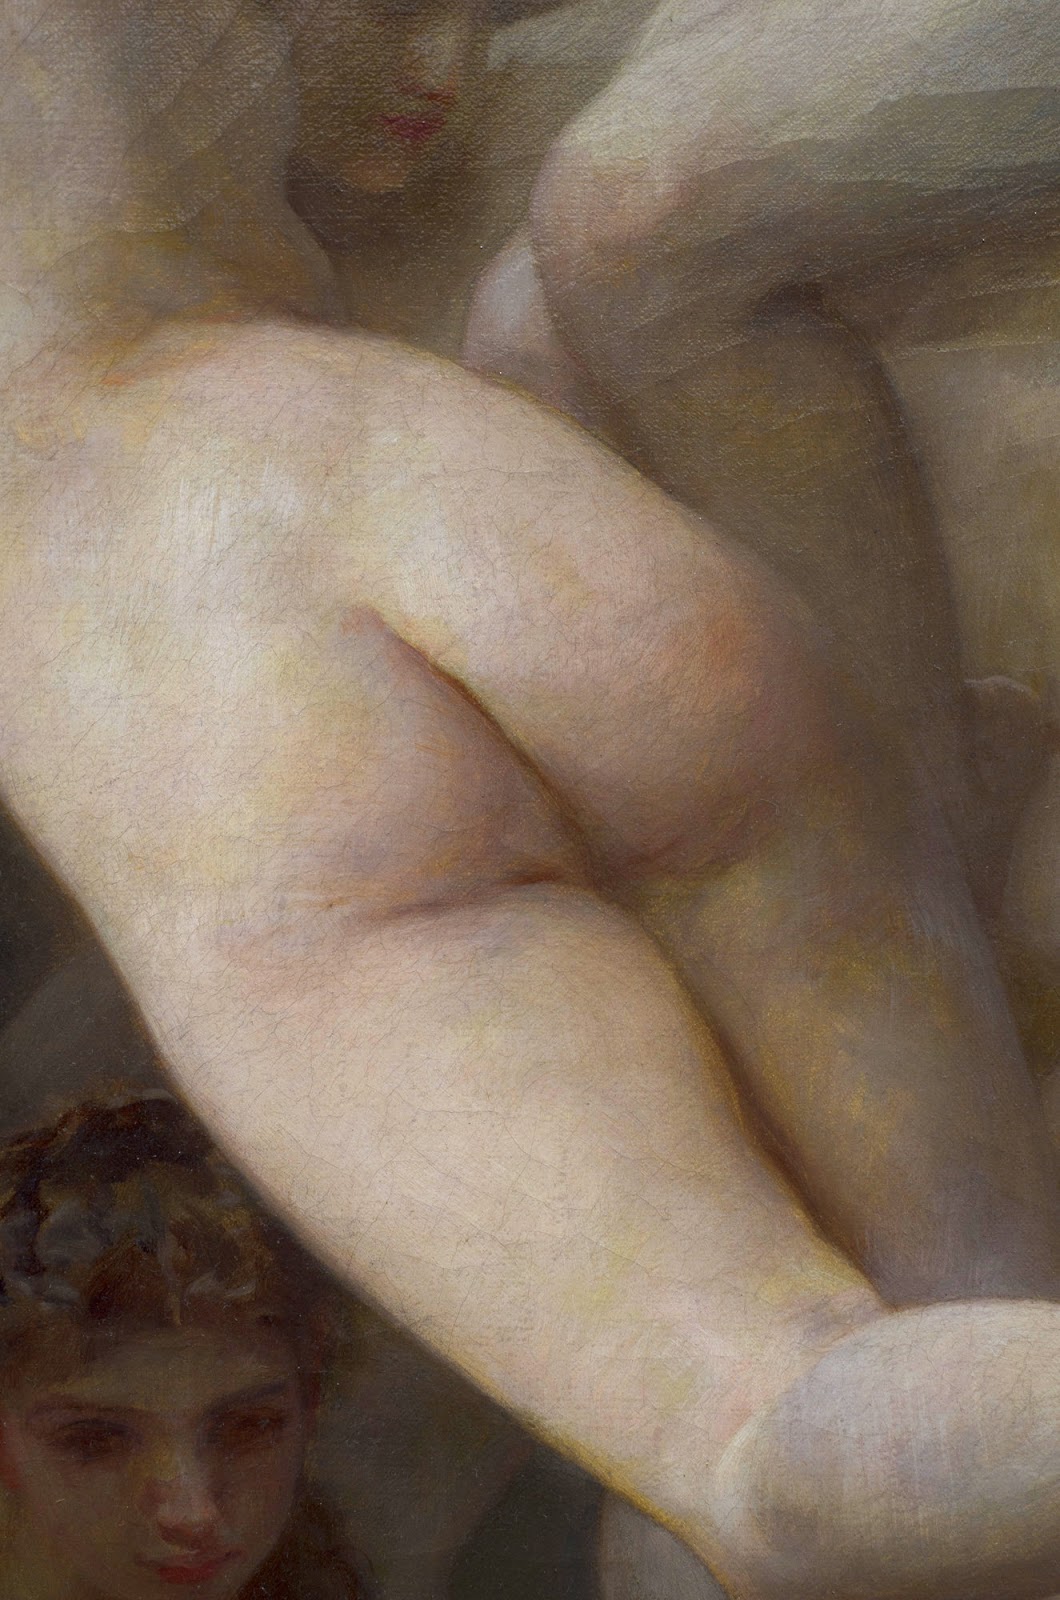
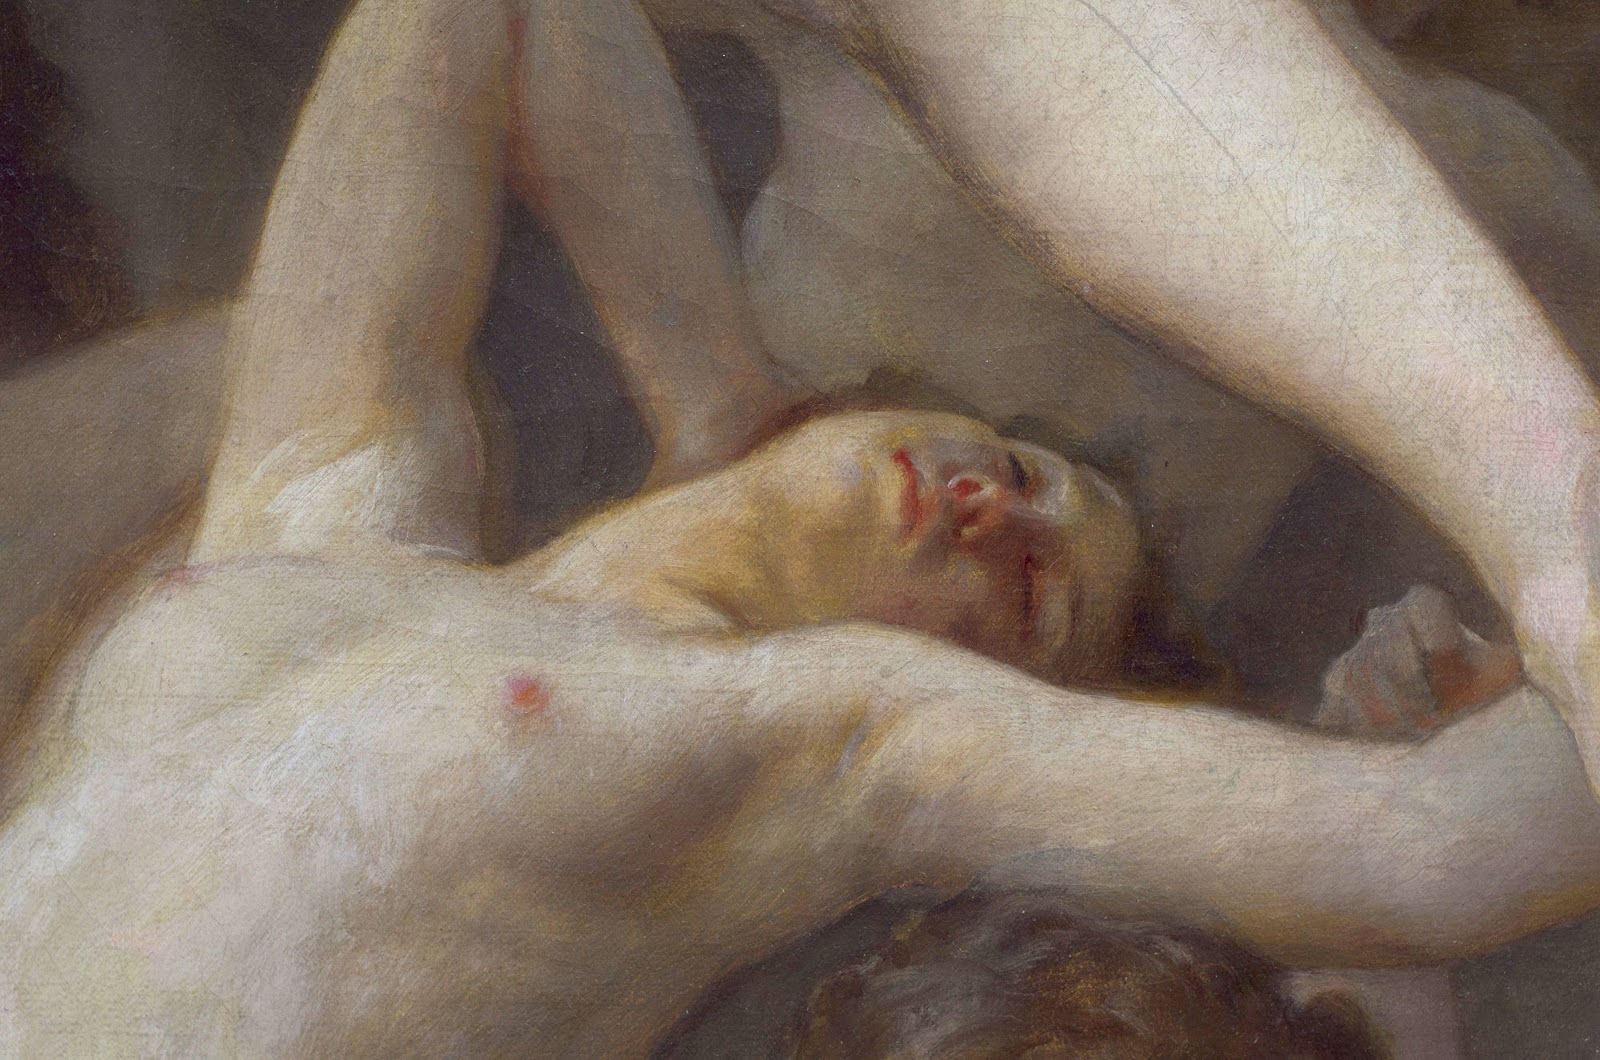
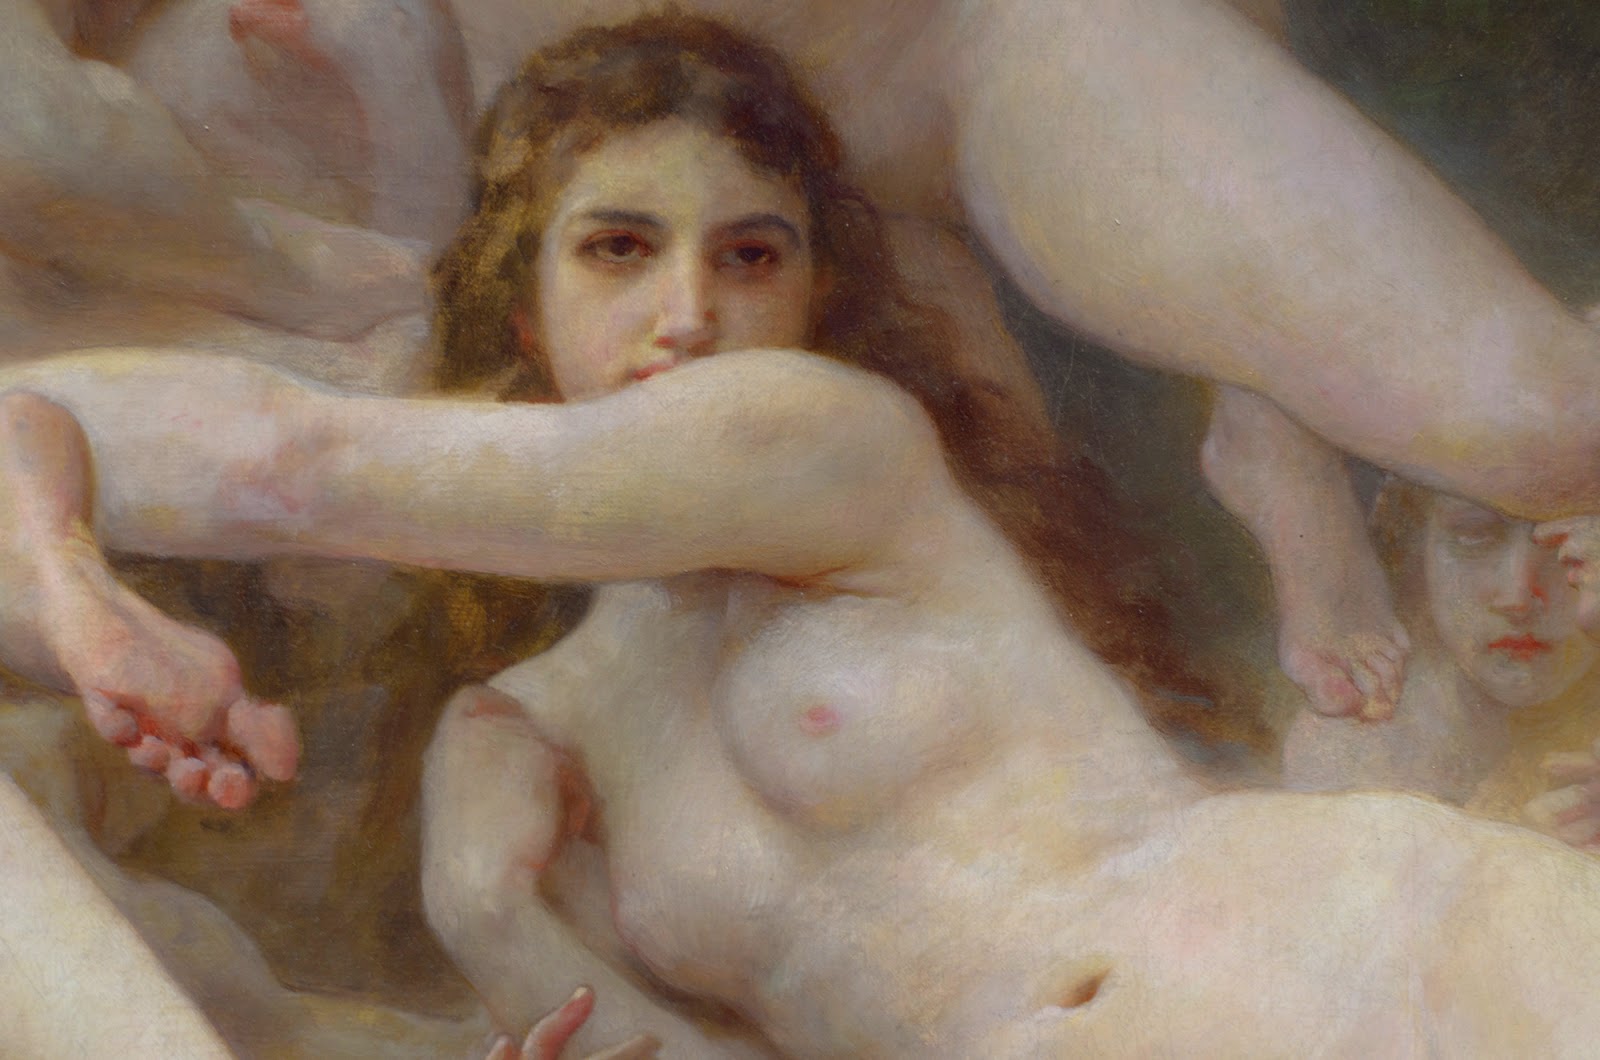
Before we get to that though, one of the standout pieces in the d’Orsay was Bouguereau’s Les Oréades (The Oreads). This was painted in 1902, when Bouguereau was 77 and he was starting to fade a little in drawing accuracy but this painting is still incredible. If nothing else it contains an incredible range of flesh in shadow and light. The palette is beautiful and the composition and size are so ambitious for an artist in his prime, let alone nearing 80!
Another note, be courteous and patient with others in the museum. Let other patrons have their time in front of the paintings and take shots when you can without disrupting their experience. This will keep you on good terms with a any docents or security.
Back to photography. One of the challenges of photographing in museums is that light is usually not all that bright. It is better for the paintings and often better for viewing too. Because of this it can be challenging to get a good exposure. Lower the shutter speed too much and the photos are blurry. Drop the f-stop and you can lose sharpness and increase the ISO too much and you get grainy images. I try to shoot at f/4, 1/40th of a second at the slowest but aim for 1/60th, and keep my ISO below 800 (100 would be ideal but rarely do conditions inside allow this without flash, a no-no in museums). It isn’t always possible though. You will have to experiment with your camera though and see how far you can push things in whatever museum you are in.
Use a prime lens if possible. I used a 50mm on a APS-C camera. I’d use an 85mm on full-frame. Prime lenses (non-zoom) are generally sharper than zoom lenses and the focal lengths mentioned will help keep distortion lower.
Shoot in Manual mode and shoot in RAW (better for editing later). Once you find the right balance of shutter speed, f-stop and ISO take a series of photos that capture the whole image. I tend to underexpose and rely on adjusting the exposure in Photoshop afterwards. Depending on the size of the painting, it might take an array of photos to get the whole painting. The more images in your array, the larger res your final image will be. In this case I took 9 images. Stay in the same spot and shoot with the same settings for all these shots. This will keep your perspective and exposure consistent.

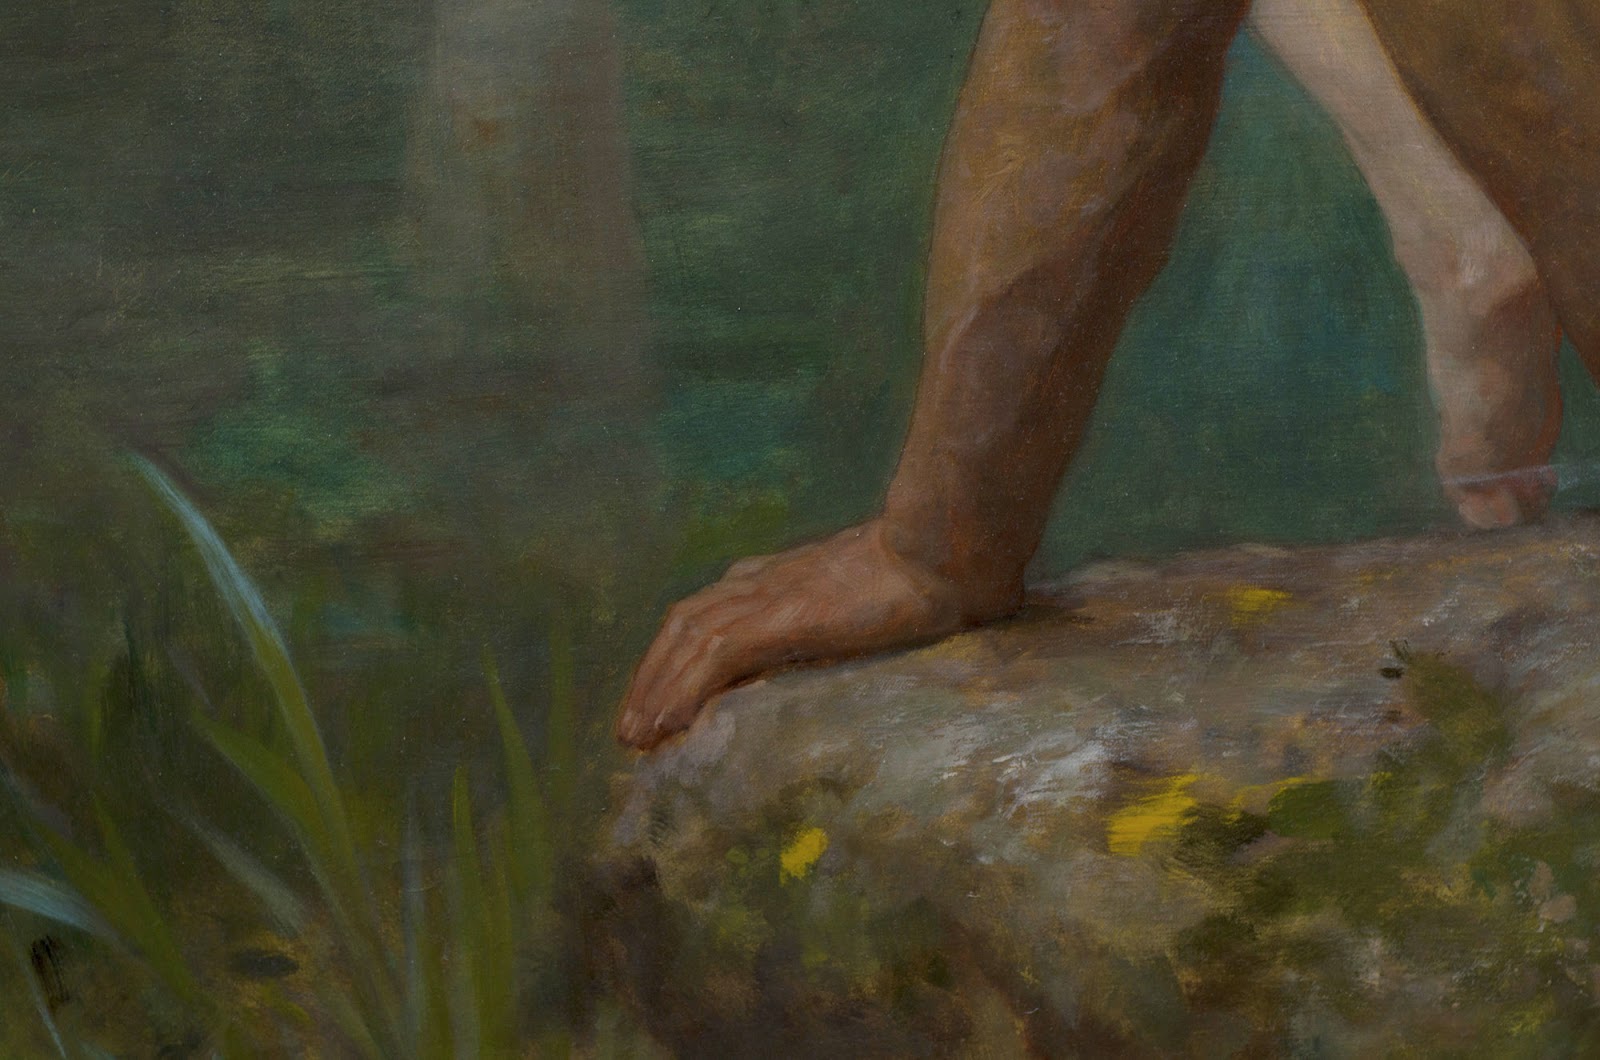
I also take close up detail shots of as much of the painting as I can, especially of areas of interest. More on that later. Once you get back home and can access Photoshop load in your initial files (not the detail shots, just the images to make the composite of the whole painting). Use the File>Automate>Photomerge… function to stitch your images together.
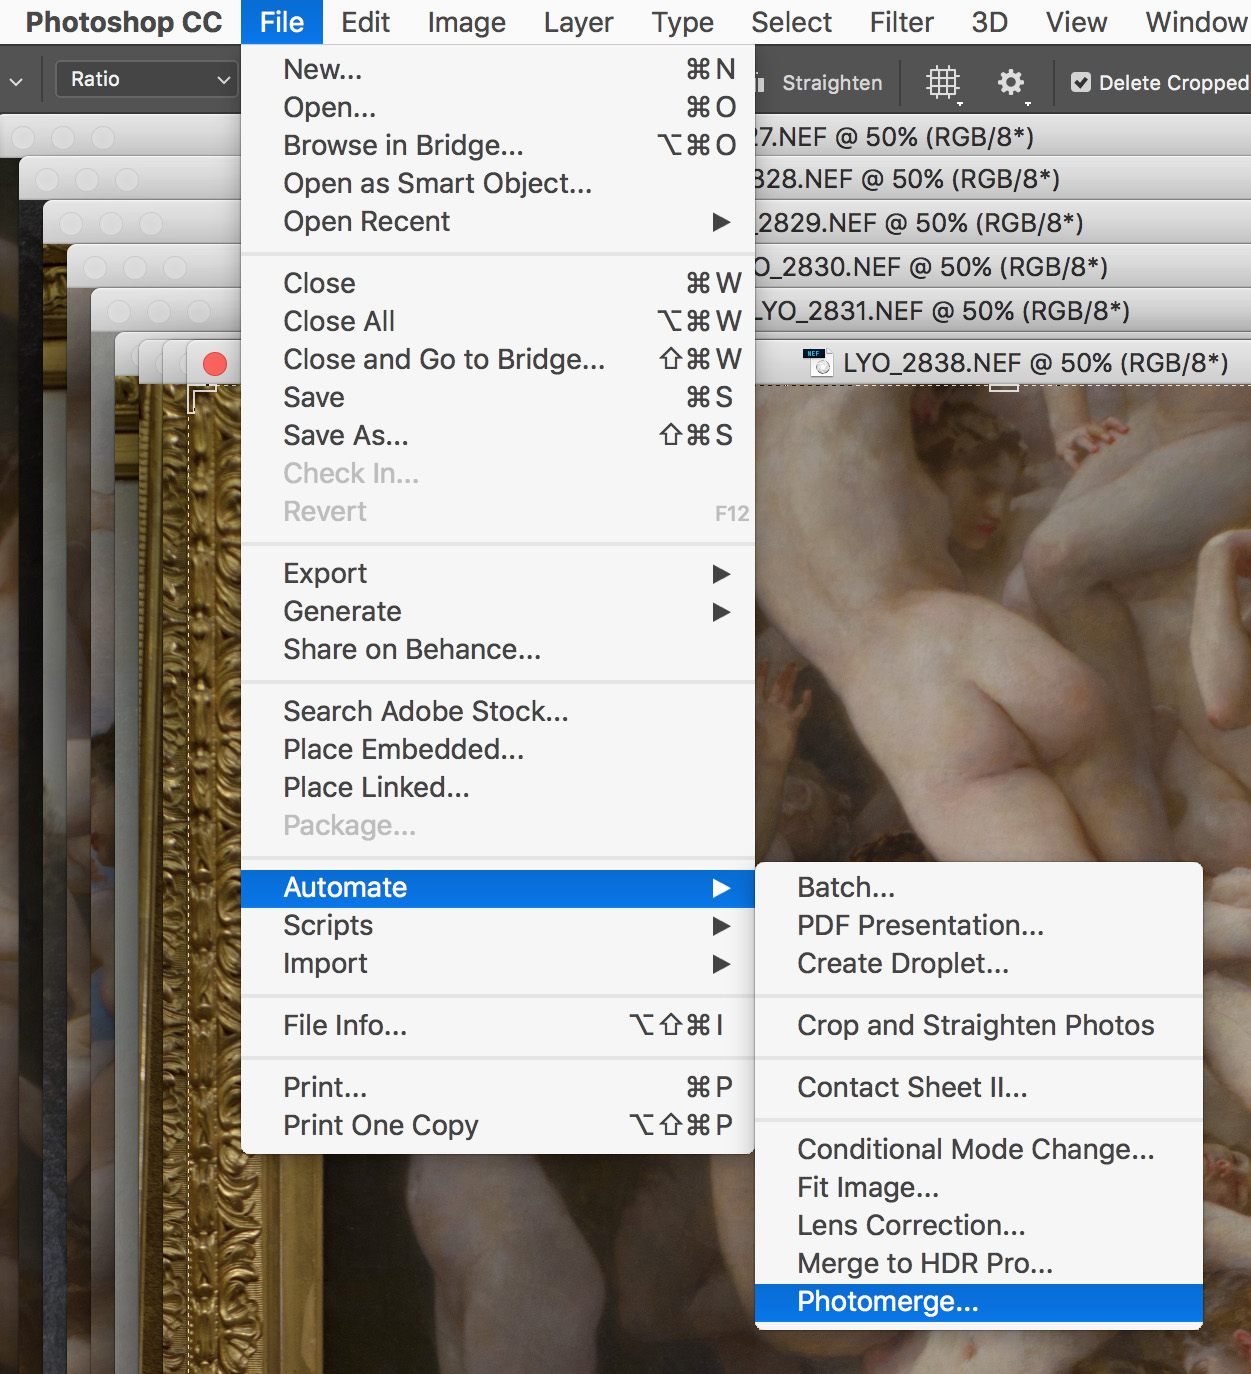
Click the Add Open Files button to start. I stick with the default settings in this case. Select OK and let your computer work some magic.
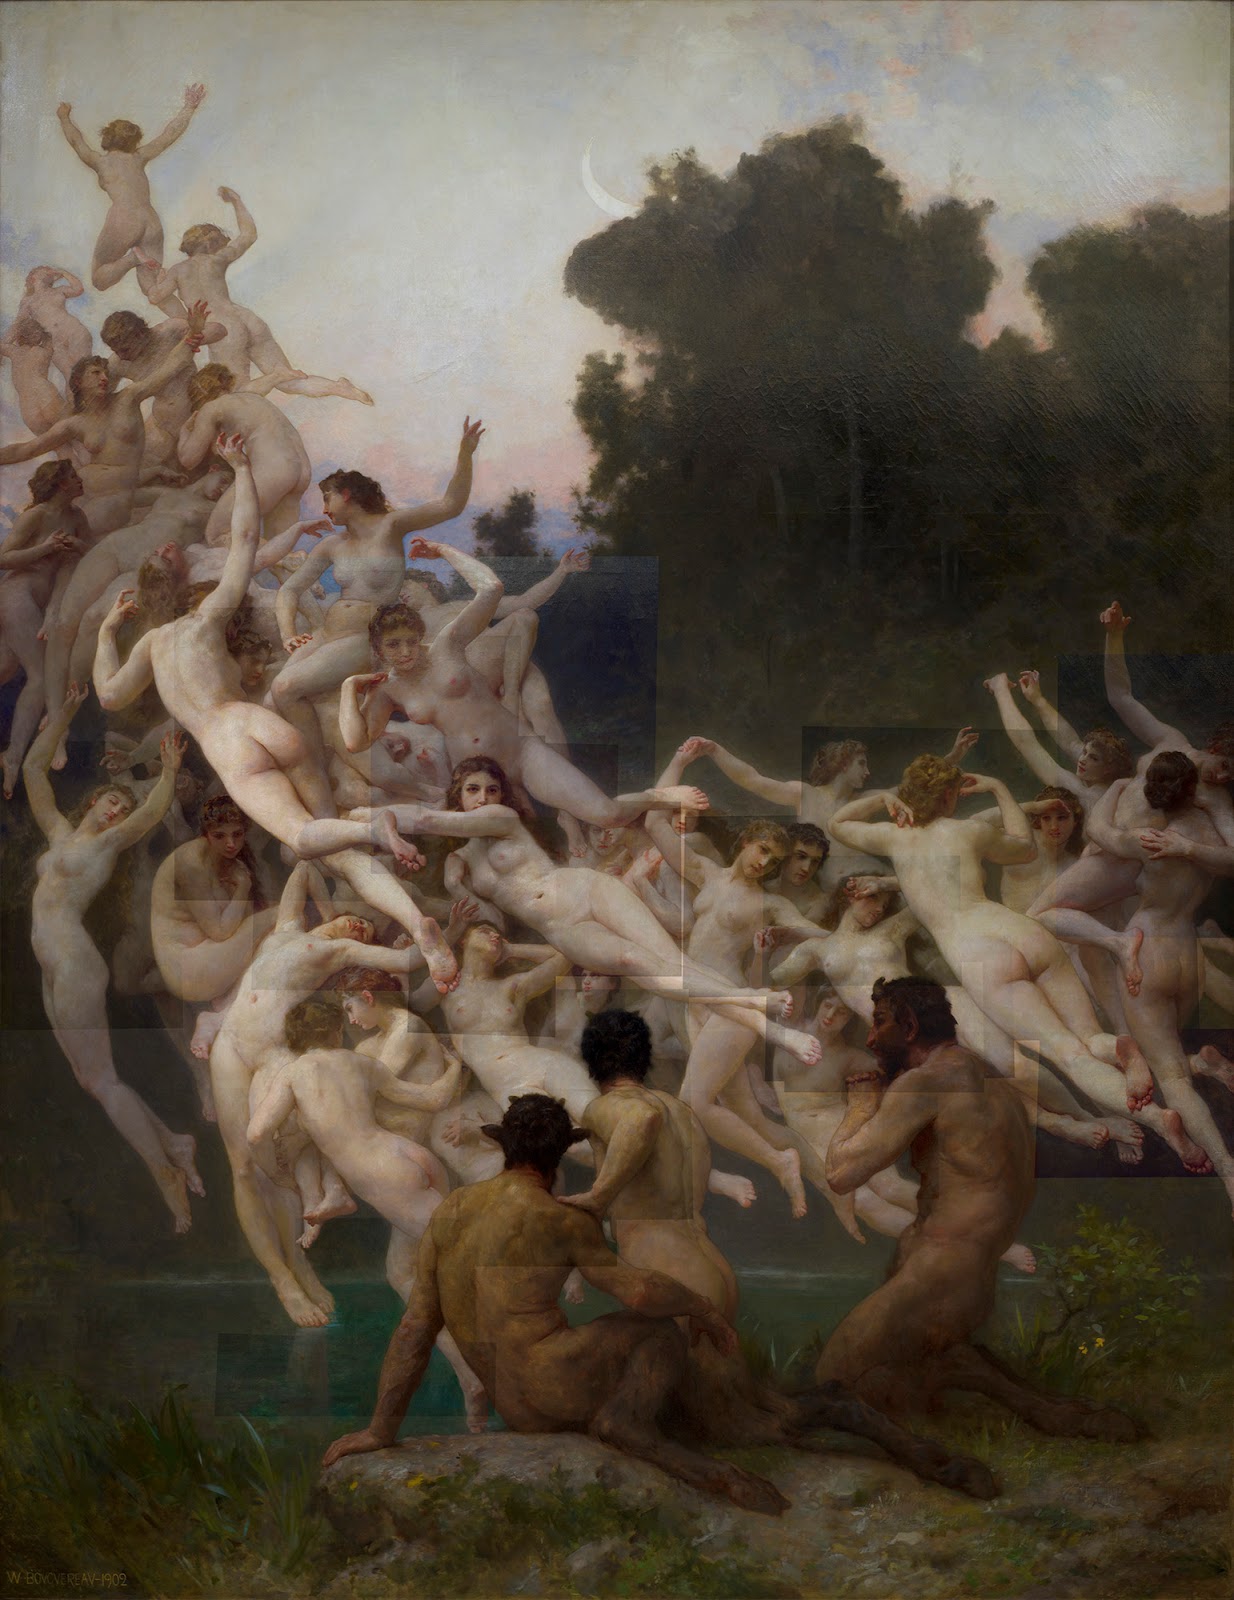
This is what I ended up with, a perfectly blended image. Because of the angle I shot at and the size of the piece, you can see how the perspective from where I shot was reflected in the composite.
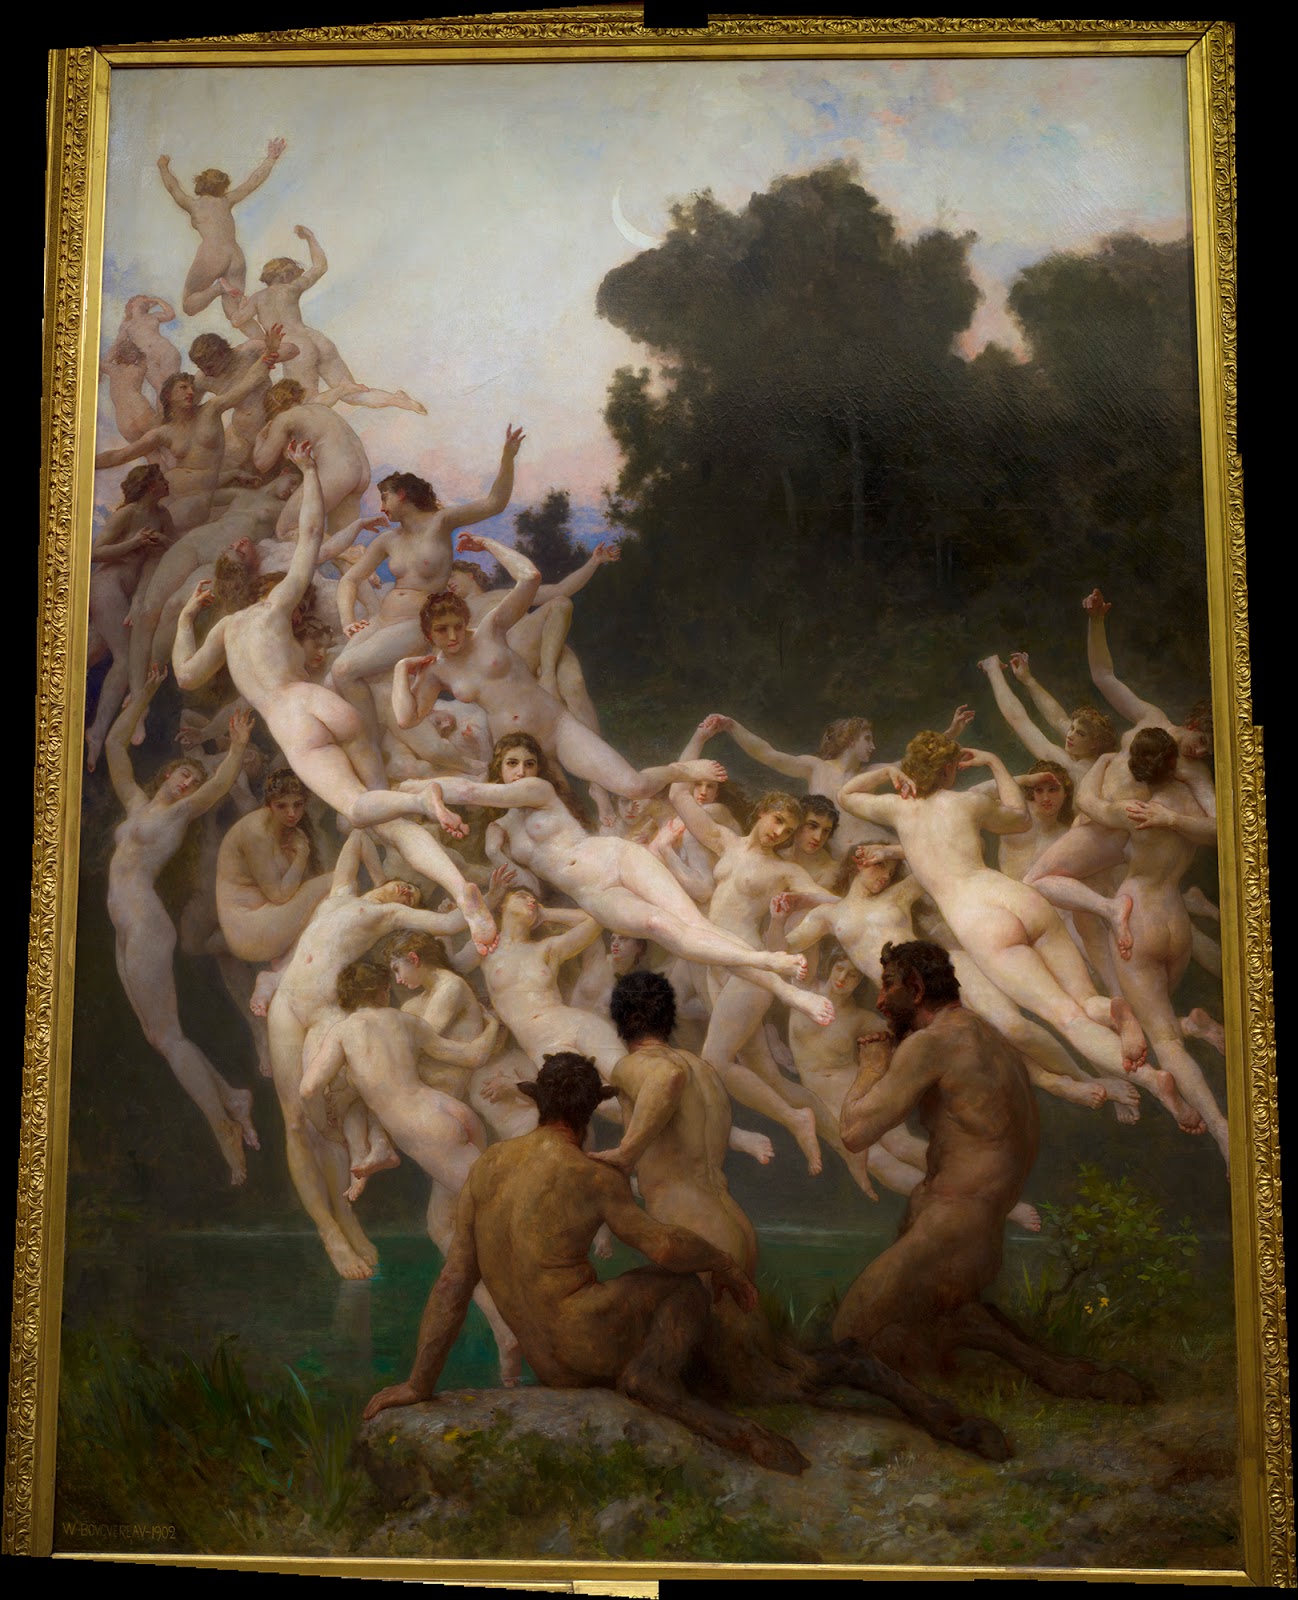
Not too bad so far! Make note or google the size of the original painting and then make a new image in Photoshop that is the same ratio as the original. Then paste the Photomerge composite image into the new image. Use the Transform tool to drag the corners of the painting to the corners of the image. It should now be distortion free and the same ratio as the original painting.
At this point you will have a pretty nice image for reference but if you want to take it further you can. Using Photomerge again you can composite in the detail shots you took. This will create some uneven detail, but your points of interest will be higher quality if your detail shots are shot up close and of good quality.
Flatten your inital composite so that it is all on one layer. Load your detail shots into Photoshop. Run Photomerge. Turn of ‘Blend Images Together’ this time though. This will speed things up a little, but also prevent Photoshop from creating blended masks for each image. Once you have composited in your detail shots in it might look something like the image below.
The more consistent you keep your exposure settings the less adjusting you will do. In this case, my settings shifted a bit so I have some work to do to make things match.
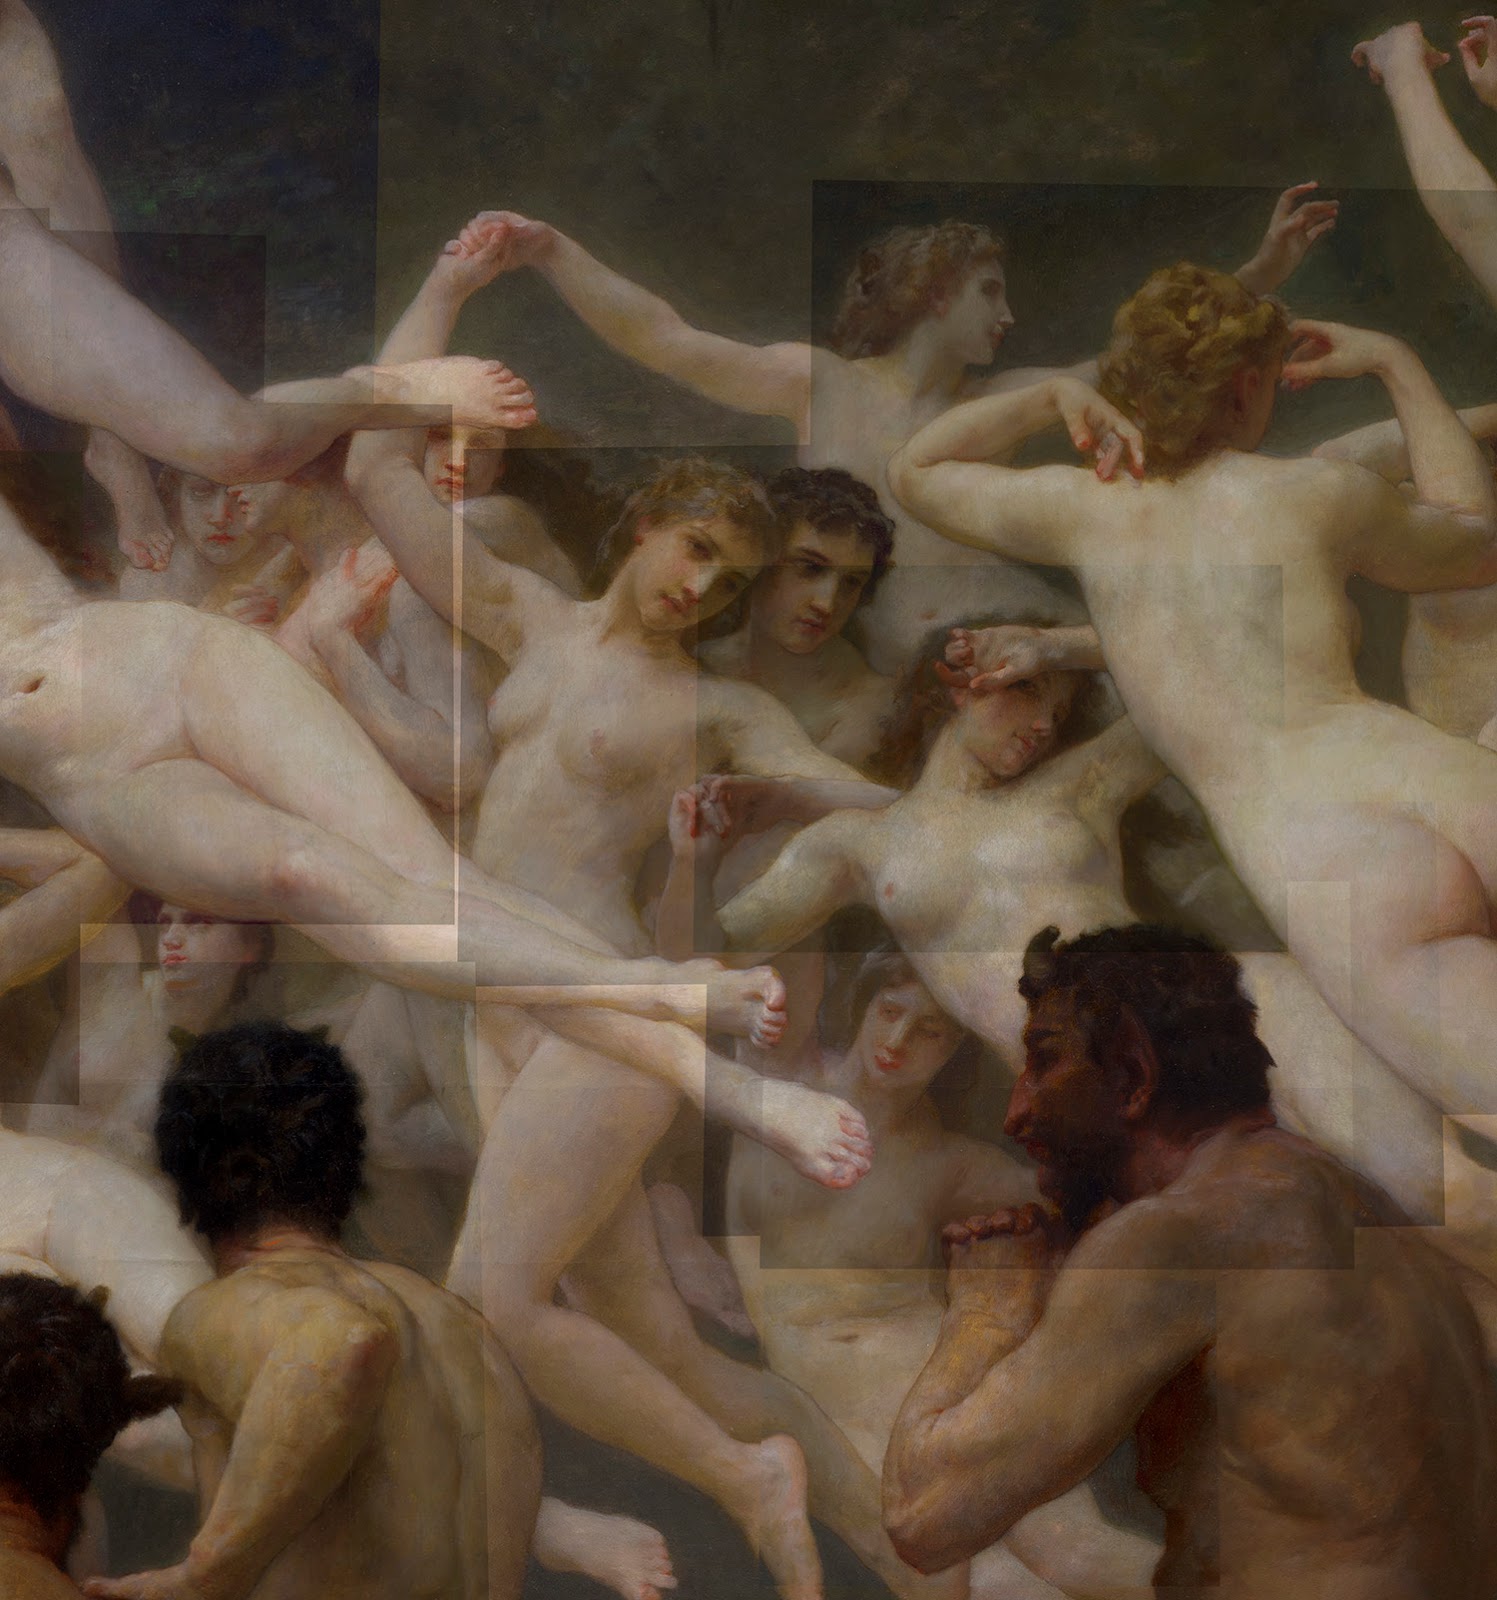
and some of the detail shots:


I hope that you find this useful. If nothing else, there is a nice high res image of an amazing painting. Thanks for giving it a read!
Howard


Awesome, though I can't figure out how to download a 4000 high image. It comes down as 1600h.
Howard, once again you get the nerd prize – and I say that in the most admiring way possible. I have actually started painting – watercolor dry brush – partly because of your influence. I'll show you when I get up to Utah this summer.
Sorry about that. I think blogger must have resized it. I update the post with a Google Drive link. See if this works: https://drive.google.com/open?id=0B7lnifnjDK3meXZtdGhZREUwUVk
Haha! That is awesome Doug. I look forward to seeing your watercolor work and you this summer!
It seems to be an ochre underpainting showing through in most of the flesh and an umber underpainting in the shadow in the face of the satyr. Or perhaps the glaze layer wore away over the years?
What a magnificent painting! Thanks for the photo merge tutorial, it make me want to try that method.
Awesome images and info! I was just taking photos of art at the National Gallery in DC last week and this might have come in handy before my trip. I think I hit on a lot of similar techniques, and I am always stitching things together since I usually only bring a 50 mm lens to save space when traveling. I wasn't sure what to do though, when I ran into glare on larger paintings and the only way to mitigate it was to stand far enough back that I wasn't getting the multiple images and resolution that I wanted.
– Jameson Gardner
I think you first thought is the right one. Bouguereau would often start his paintings with a warm grey, pink or ochre tone on the canvas. You can see it in some of his studies and showing through on many of his finished works.
Let me know how it works for you!
Sometimes if you are getting glare from straight on, or a certain angle, you can shoot from a more oblique angle. You have to be mindful of where you are focused, so switch to spot focus and when you remove the perspective distortion in photoshop you will lose detail, but if you create the whole image from a couple angles, once you have them all stitched together you can then photomerge the sharpest parts of the image. It is a fun challenge. 🙂 Worth it… maybe, but the photo/art geek in me loves to try.
Thanks. That did the trick. It's an amazing piece. Someday, I'd love to see it in person too.
Thanks for the tutorial. I've been dissatisfied with some of the photos of my paintings and will be trying out your process. (I hpoe it works on GIMP (sp?)).
I was also about to comment that this blog post is wonderfully nerdy in the best way!
This is amazing! I’ve been trying to find a photo with really good resolution. I’m using it to make this incredible painting into a bedspread. I was wondering if you could maybe send me one of your insane quality photos? I’m needing about 8000×8000 pixels.
I would be forever in your debt!
What a beautiful morning!
Haha! Doug, it is fantastic. This summer, I’m excited to see you and your watercolours!