It’s oxymoronic as hell, but that’s actually what I’m trying to do. As many of you know I started to play around with gold leaf largely to make special prints and other existing work I have around, mostly specializing film posters etc… this mostly really exploded as an interest for me when I started applying it to my prints from Sony/NaughtyDog/Playstation’s THE LAST of US prints.
I need to let it be know here out of respect to people who actually know wheat they’re doing with gilding, that I an untrained goonberry does not. Like the sumi ink I just got the material and started to see what it could do from a place of utter ignorance. There’s a lot of freedom in untrained mediums like this- sure it breeds failure and error, but there’s something to be said for the lack of knowing how you’re supposed to do a thing, that can help you find news ways to do. This is art leading the way and to anyone who’s invested time and training I salute you and don;t mean to intrude into your territory. Think of me as the monkey with the cellphone, who occasionally just lucked into making a call that connected.

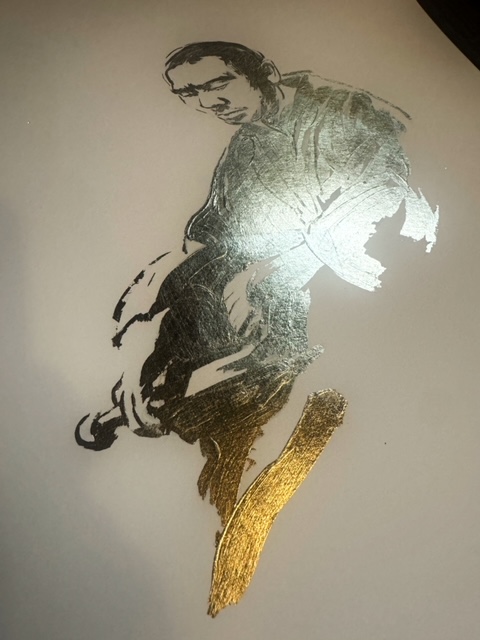
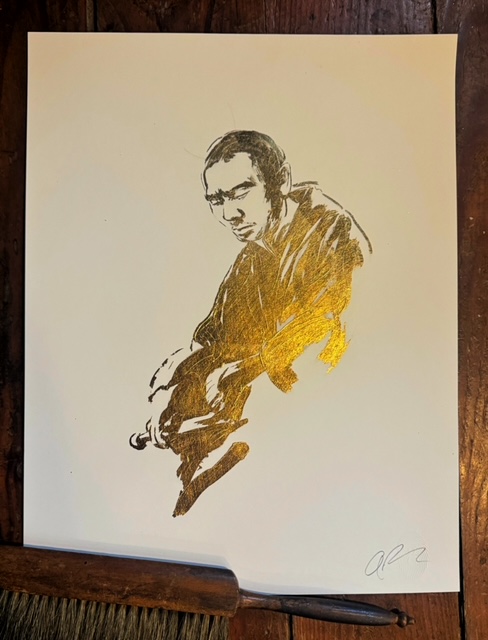
After a few months now of intensive detailed pencil and digital work for film, from Dune Part Two, Anatomy of a Fall and a few others I can’t yet discuss here, work started to become what it always becomes when there’s too much of it- work. So I snatched a few hours in between waiting for editorial news to try something that’s been a curiosity I’ve had for a while now: can I use the glue that affixes gold leaf to a surface as a drawing implement the same way I use sumi ink? Well it’s early days but so far, I think the answer is yes.

While I had used it in many ways like this for some of the gilded Last of Us pieces, this is the first time I’ve tried to sit down with a blank piece of paper and make a brush drawing in glue, and then gild it once it’s dried. Now for those of us for whom the particulars og gold leafing isn’t a known thing, the glue used in the process is unique in my experience in that remains very tacky once it’s essentially “dried”. and can hold that for days as far as I’ve discovered. One of my early errors in leafing was not waiting for this key moment and hopping right to the leafing on wet glue- which caused everything to sort of splorge out as you might expect. I thought I had to be hasty in order to do it right and in fact the truth is, one can apply the glue and let it sit to touch up if needed even days after its initial application.

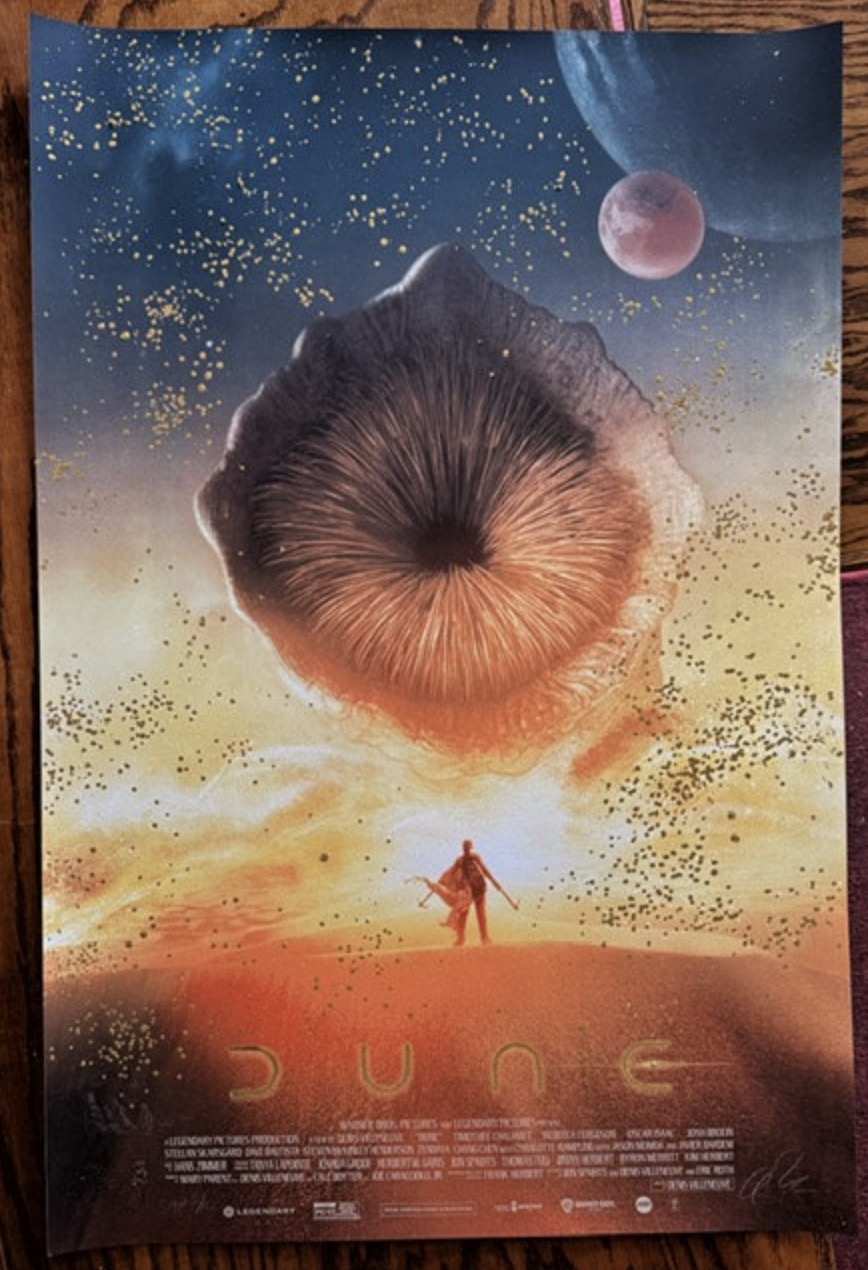
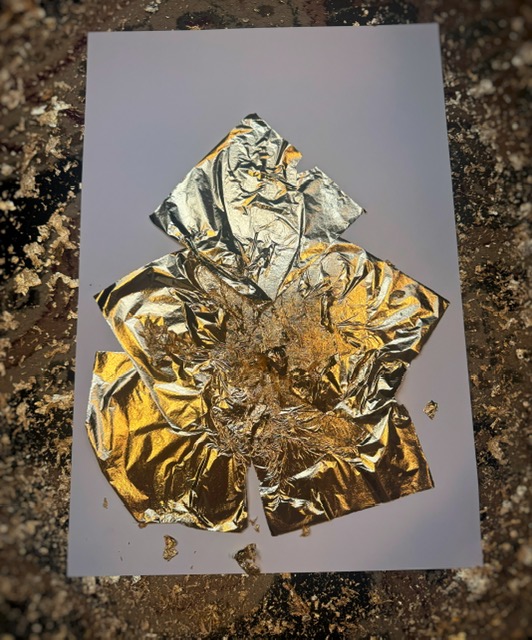
Now actual gold leaf, the kind made with 24k gold is not cheap especially these days. I’d say for the Dune posters I use approximately $30-$40 wirth of gold leaf for each poster to execute. YES, you can find non actual gold leaf that really does look quite nice, but the fake stuff has the unfortunate physical quality to essentially breaking into the tiniest of glitter when brushing it away- microscopically tiny and where normal gold leaf gets everywhere, that stuff, seems to fall in to the space between your atoms and you can never really clean it enough. The real stuff flakes like you’d expect and as a result can be reused, which is good because again, this shit’s expensive. I’ve also found a pairing of the soft makeup style brushes with a little vigorous scrubbing from the typical cheap disposable paint brush can help break apart those connective areas where the gold leaf can get stuck, just be careful not to go too hard.

“Drawing” with gold leaf glue is as you might expect a little tricky in that it’s sort of milky white when wet and dries clear, so it can be hard to see what you’re doing. I found a desk lamp set on a low cross cut angle over the paper helped make the marks I was making with the glue, visible enough to get into. Mostly. There were still missed points but I found I could go back with a finished and fully leafed piece and touch it up and reapply the leaf to sort out anything I felt was missed. This was not the case with the John Lennon and Naz portraits I did by using the glue to create a pixelated dot matrix approach to drawing them, basically using a squeeze bottle dropper to bead the glue up on the paper. That process also put some much moisture on the paper that it sometimes took a couple of days before the paper’s buckling settled back down and the thick beads dried appropriately.

It’s in a lot of ways akin to paint/drawing with the sumi ink, dave for it’s invisibility, but it’s glue so it’s very gooey and thick and dries extremely fast- so the brush I’m using to apply the glue can gum up three or four strokes in, requiring me to thin the glue and wet the brush. I’ve found a little bit thinned out glue can actually help get the super detailed lines more effectively, but really, you never actually know what you’re going to get until you start brushing away all the unafixed leaf. Which is a little harrowing and also a little terrific. Reminds me of my short stint with film photography, and not really being able to see the picture you took until it arrives slowly in the developing bath.
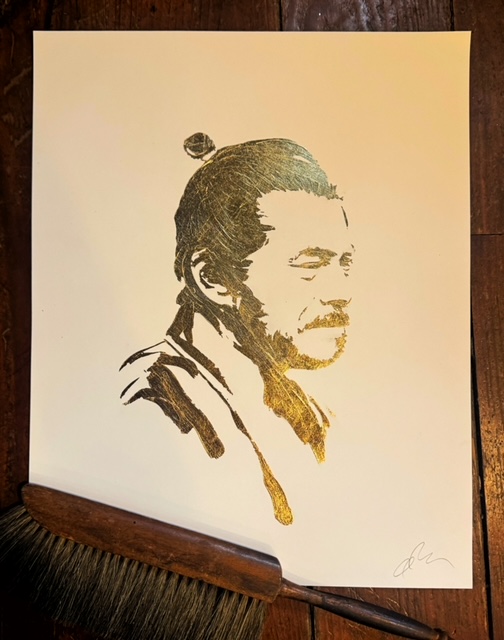
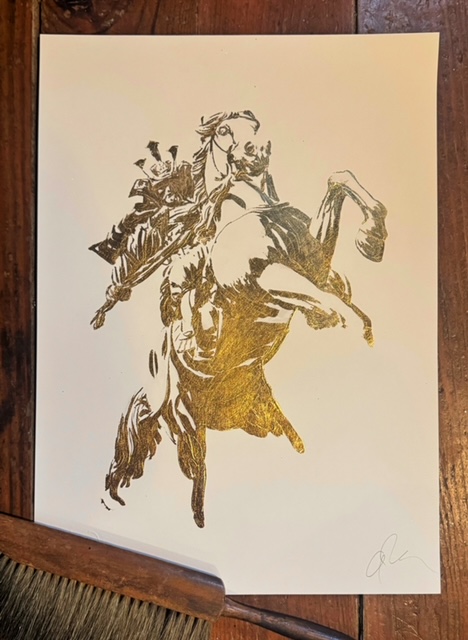
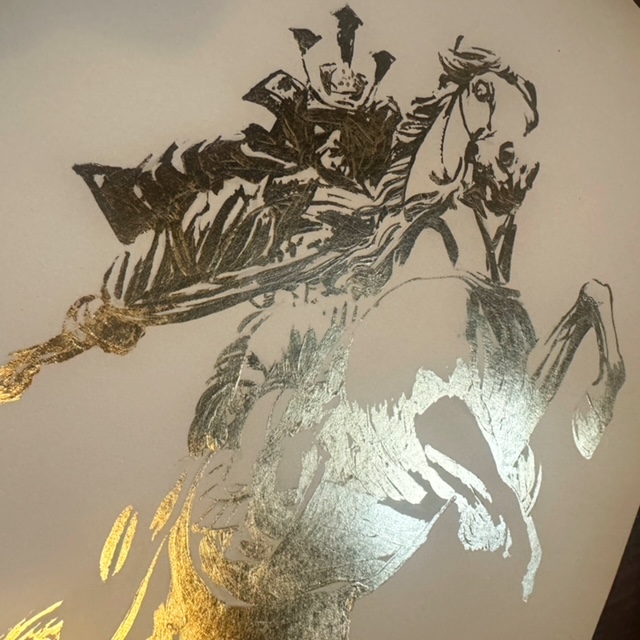
For these five test pieces we’re zeroing in on today, I wanted to try and use my sumi drybrush technique to see if that would translate with the glue on these pieces. Of course thematically the Japanese Samurai world was the place that seemed to fit best. Toshiro Mifune, Zatoichi, the armor from Hara Kiri, and in particular the famous statue of Kusunoki Masashige who rides his stead in the gardens across the way from the Imperial Palace. Just the first of many I hope to explore more fulsomely, but for now this is where we landed in time for this article.
What did I learn?
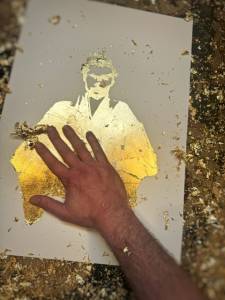
I found it’s a lot slower a process, much more tedious and detail oriented than the sumi ink is as an exercise where I can rip out a dozen drawings in an hour of just letting the brush dance across the paper without consequence. Like the sumi, every place the glue lands is permanently devoted to receiving the leafing, so care is needed not to mess that up. Because it also essentially never dries, I have to make sure my hand is never touching the paper and employed a home rigged maul for this – though I confess the way I hold a sumi brush doesn’t really dance well with a maul. A nice thick 300 gsm paper also goes a long way to take on the moisture of the glue without much buckling, unlike my preferred bookweight thin paper I use for sumi work. The dry brush technique doesn’t quite land with this medium- its very very/not there in a way that makes any kind of gradation difficult if not impossible. I haven’t given up on looking to thin it out a bit more and see what I can manage, but it’s a very graphic medium to work with, so it may be one of its inherent characteristics I can’t defeat. I have found that the thickness of the glue if left on its own can still hold and reveal the marks made by the brush strokes like thick scumbled painting, and am very interested in exploring that further, as well as a curiosity to mis different types of leafing material with and over others in future work. It’s not at all a kindness to brushes both in the glue stage nor the removal times, so I don’t recommend spending too much on brushes- they will swiftly become terrible, so be ready to toss and run as you go.

I’ve no idea where this is going and what it may lead to, and at this stage I don’t really care to predict. That’s the fun of it right now, and fun experiments are what the 52 Weeks Project is all about. SO stay tunes, I’ll be coming back to this more I am certain, how and and when I don’t yet know.
You can find the original one of a kind pieces featured in this article at the gregthings.com shop today at Noon EST, HERE.


Thanks for sharing!!! This is super cool, and I look forward to seeing more! 🙂