-By Dan dos Santos
Here is a step-by-step feature I recently did for Dark Horse Comics. It’s a very general overview of my process, nothing that I haven’t shown here before, but I thought you’d enjoy it anyways. The final image will be used as the cover for ‘Serentity’, to be given away on Free Comic Book Day 2012.
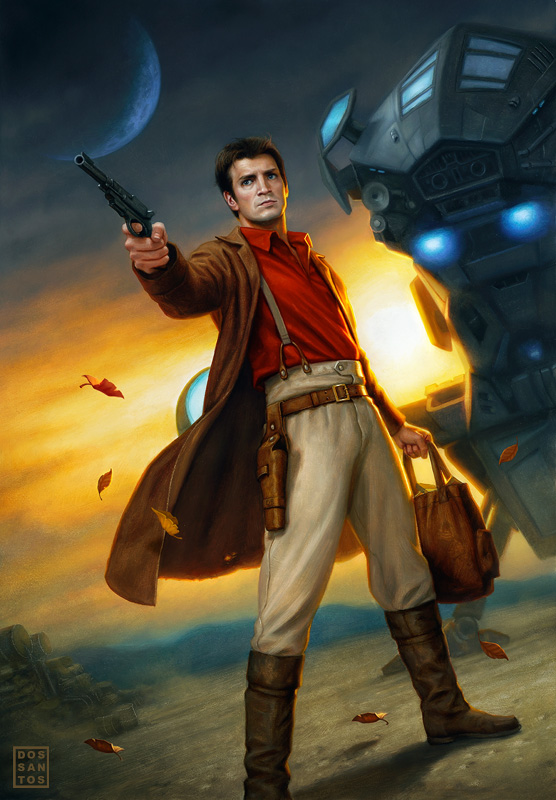
A few months back, Dark Horse Comics Editor Scott Allie and I were having a discussion over dinner, and it came up that I am a -huge- Firefly fan. He asked if I would be interested in doing some art for an upcoming comic featuring Captain Malcolm Reynolds, and I of course jumped at the opportunity.
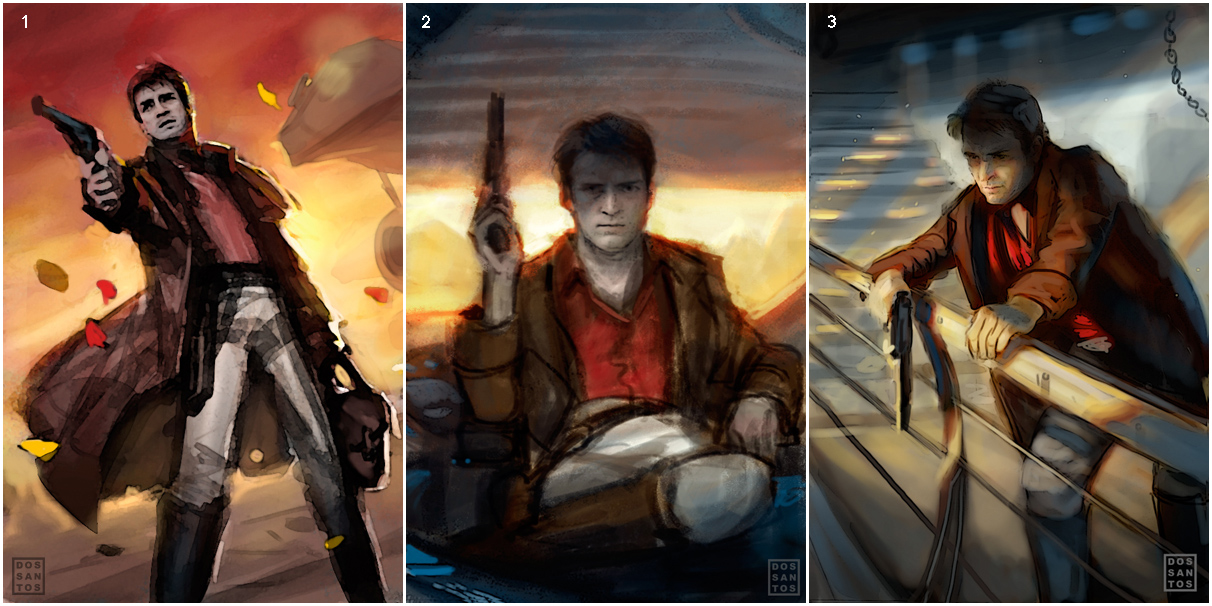
The first step in any commission is developing ideas. These ideas usually start off as really rough scribblings, and eventually develop into loose color sketches which I draw in Photoshop (seen below). When creating these sketches, I am taking special care to consider where the type will go over the image, and am sure to keep these areas relatively simple in design so they do not conflict with the predetermined layout. Because this image was to be used for a cover, as well as an ad, I had multiple type layouts to consider, as well as a specific color palette that I needed to stick to. These restrictions help narrow my options, giving me a good place to start, and a better idea of what compositions will successfully meet the client’s needs. When I felt that I had 3 good options, all depicting Mal in different moods, I presented them to Scott for consideration.
Having decided on Sketch #1, the next step is refining the chosen sketch. To do this, I acquire mass amounts of reference material to aid me in making my image more realistic.
I began by taking a bunch of photos of myself dressed as Mal. Using a variety of random props I had laying around, I came up with decent costume that although is not refined, would give me the information I needed to paint a convincing image. I assumed a variety of poses, in different lighting set-ups, and shot several dozen pictures until I found something that I felt worked well. Since I would obviously be using Nathan Fillion’s face, I was primarily concerned with the body pose.
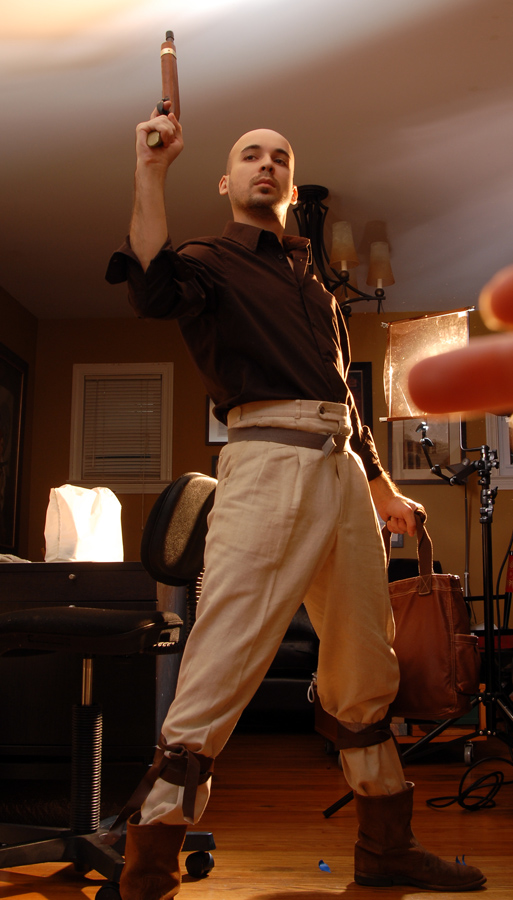 |
| More fun than I should admit. |
The next step was to seek out a good shot of Mal’s face to put onto the body reference. To do this, I watched the entire Firefly series again, as well as Serenity, taking hundreds of screencaps whenever I saw a nice shot of Mal I thought I could use. I then went through all these faces, pasting them on to the body reference I shot with the help of Photoshop. Eventually, I found one that worked well. By combining screen captures, as well as custom reference, I can create a new image of Mal that is convincing, yet original.

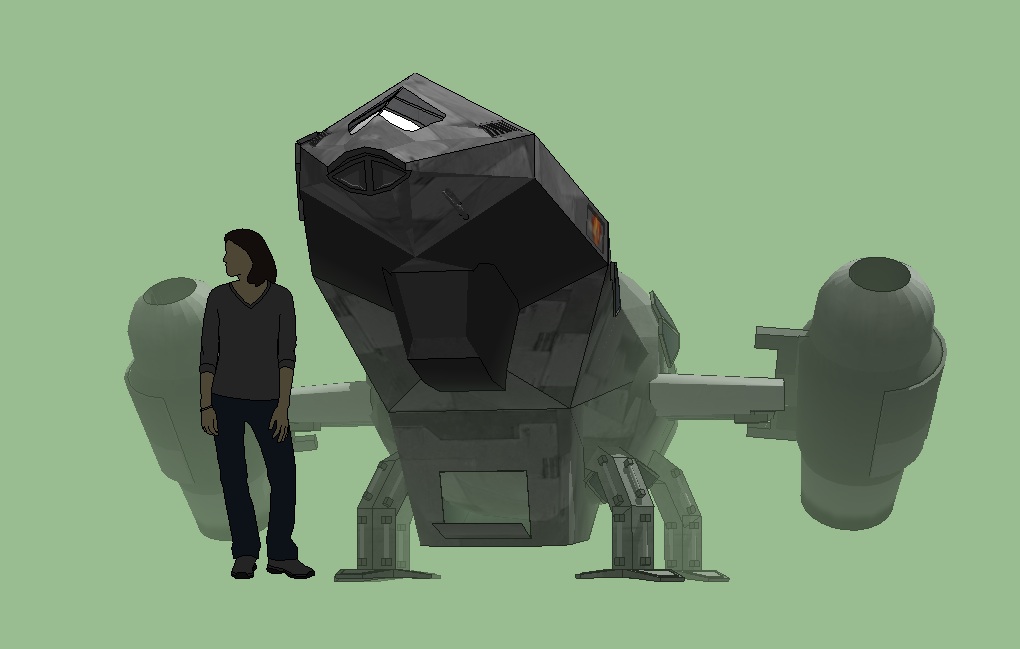
I used a fairly similar method for Serenity herself, combining an amalgam of screencaps and 3D models to create the pose I needed.
With all the reference in place, I can finally begin the actual painting process. I start by redrawing my image directly onto my work surface, in this case, Strathmore 500 series illustration board which I have primed with acrylic gesso. I draw using a mechanical pencil, a kneaded eraser and a blending stub. I don’t bother drawing much detail in areas that I know will be painted loosely or out of focus. Instead, I focus on the important areas, really detailing out the face, hands, and costume of the main character. Once I am confident in my drawing, I spray it with a workable fixative to prevent smudging. (step A)
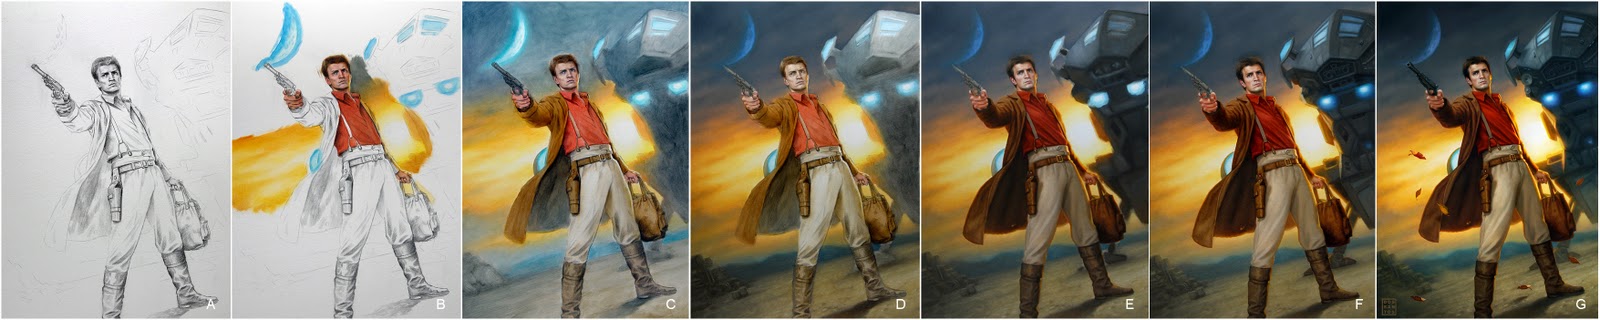
With a secure drawing in place, I can begin painting in oils. I start by toning the surface with a transparent wash of color, carefully preserving the white of the board in the particularly luminous areas. Not only does this give me a good working surface for subsequent coats of paint, but it also allows me to better envision the overall palette of the image, helping me to make more accurate color choices later on. (steps B & C)
Once the initial tone is dry (usually a day later), I begin painting more opaquely. I typically start with the background, since it is usually the messiest element to paint. Soft edges and lots of blending makes it very difficult to paint backgrounds ‘around’ a figure, so it’s much better to start with them. (step D)
I gradually work my way forward, painting one element at a time. Most things get a single coat of paint, except for the face and hands, which sometimes require 2 or 3 passes before I am happy with them. (steps E & F).

After everything is painted, and dry, I do a final pass of transparent paint called ‘glazing’. By diluting my paint with linseed oil, I can create transparent layers of color that modify underlying layers, while not obscuring the details. This is a good way to alter colors and lighten/darken areas as needed until the image takes on a more cohesive appearance. (step G)
Lastly, I give the painting a few days to dry, and then give it a coat of retouch varnish. The varnish adds a nice even sheen to the painting, and allows me to take good photographs of the painting for reproduction purposes.
But the best part of this whole gig, even better than getting to paint your favorite TV character ever?Getting Nathan Fillion to release it publicly via Twitter! So shiny!


Very nice, besides the painting itself which looks highly accurate…its cool to see the general progress shots. Do you go in directly with just the traditional oil/turp medium or do you use something special for that super smooth blending? 😀
wow, great info, thanks! How long do you leave the paint to dry before you glaze? I've had some disasters where the glaze has blended with the paint underneath and destroyed all the details I'd carefully worked on, but I don't want to have to wait weeks before glazing!
This is the best Art blog in existence.
HI Dan
Great post. The likeness of Mal looks even better in paint then in pencil. cool to see how that progressed. i was curious to know what 3d program you used to build the firefly ship for your reference.
Thanks
Matt
INCREDIBLE !
Very informative. Always exciting to see an artists WIP. Keep up the beautiful work.
Didn't even read the title of the post and I said “Firefly!”. Beautiful work as usual. Thanks for the breakdown of the facial painting – it's so helpful to have some idea of how to build color on the face. This is great reinforcement for your video too!
Oh it's MAL! Great job, Dan. There's nothing better than seeing one of your favorite artists teamed up with one of your favorite shows!
Excellent breakdown of your methods and procedures Dan. Muddy Colors has become a staple diet of mine for inspiration and refueling the creative reservoir.
is it just me or does the guy look like richard castle xD
Great light! NICE!!!
…Steve
Most awesome. Thanks for posting your breakdown and in progress shots… super insightful! Great painting.
Awesome work. Shiny!