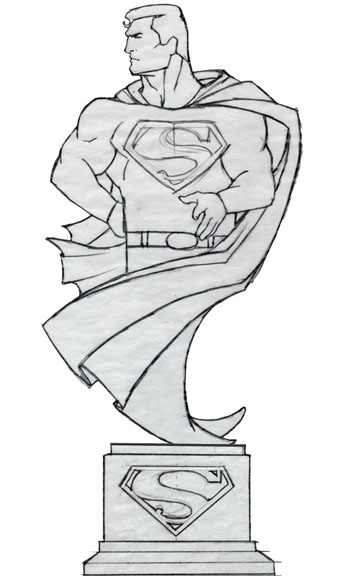
As mentioned in Basics of Bases, I was commissioned by Don Bohm to create a Superman bust. I thought about it for a few days, sketched out a design and sent it to him. He liked it.
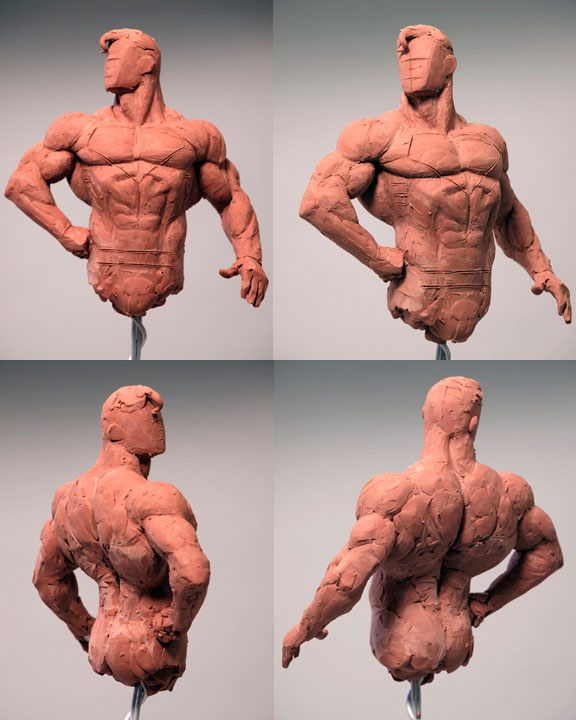
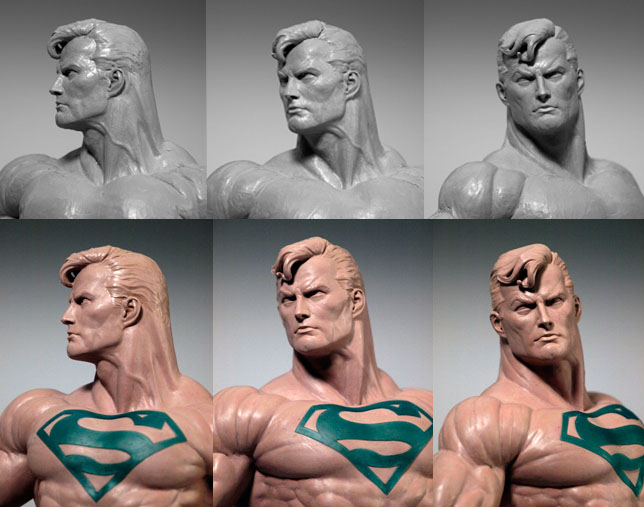
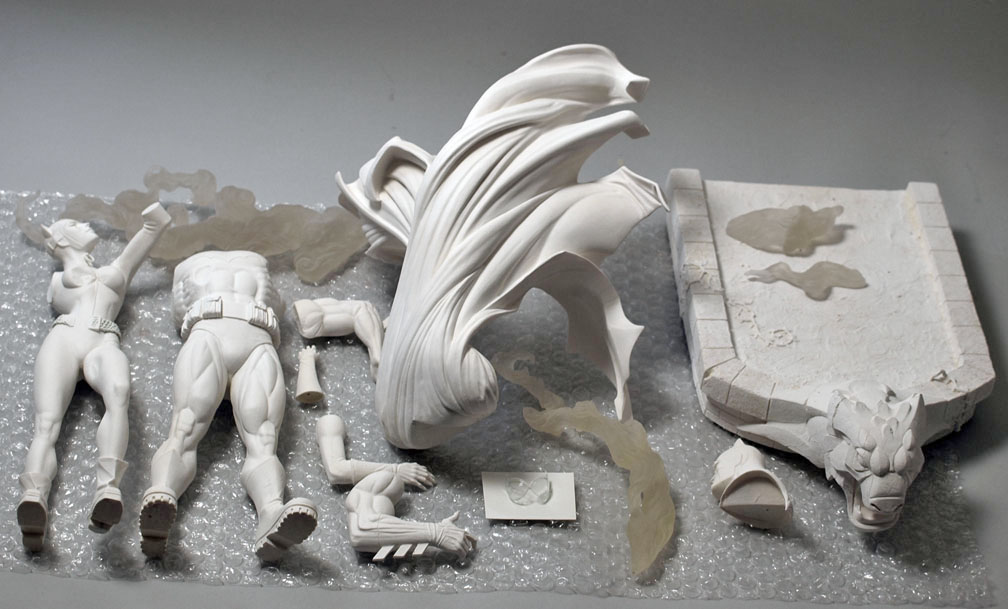
Built the armature and started laying up clay (Chavant NSP Medium). I wanted him to be a massive, strong character, pensive, thoughtful and poised for action. So, a nine heads to body proportion with slightly undersized head and large hands. Don approved the rough clay, so I refined it to make it ready for waste molds. I cut him apart and molded him in four sections; head, arms at the bicep and torso.

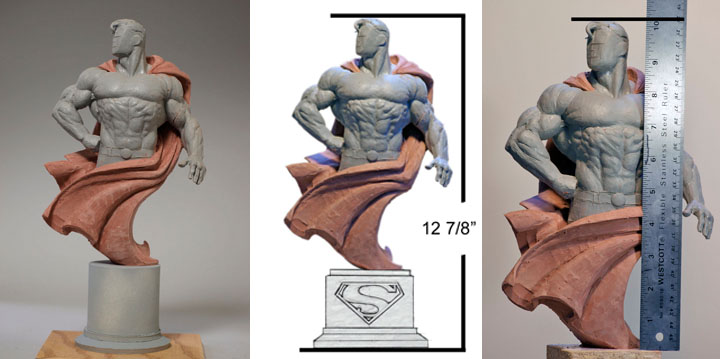
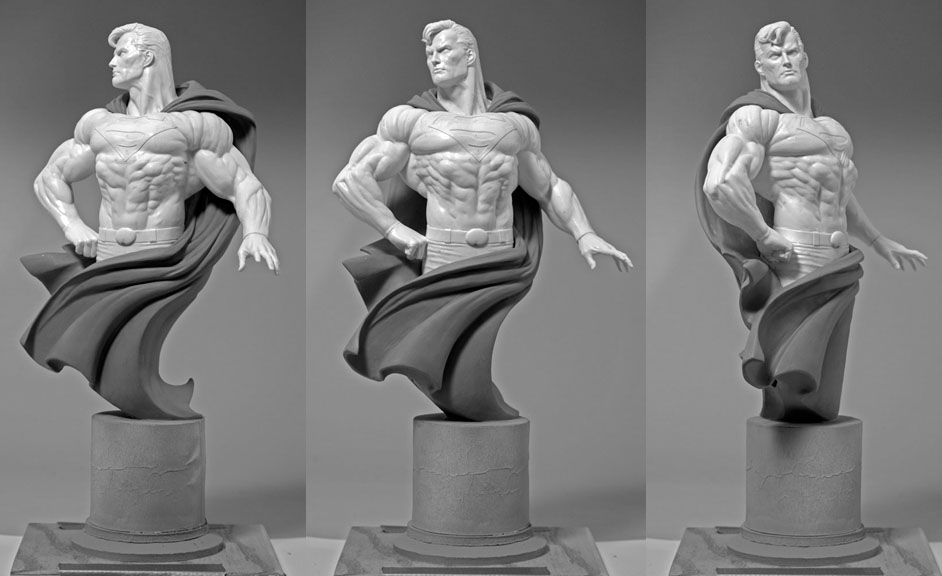
After casting up a set of waxes, I cast up a grey tinted resin to work out the cape issues. The first pass at the clay cape was in line with the design but didn’t flow as well in 3D, so refined the curves of the cape.
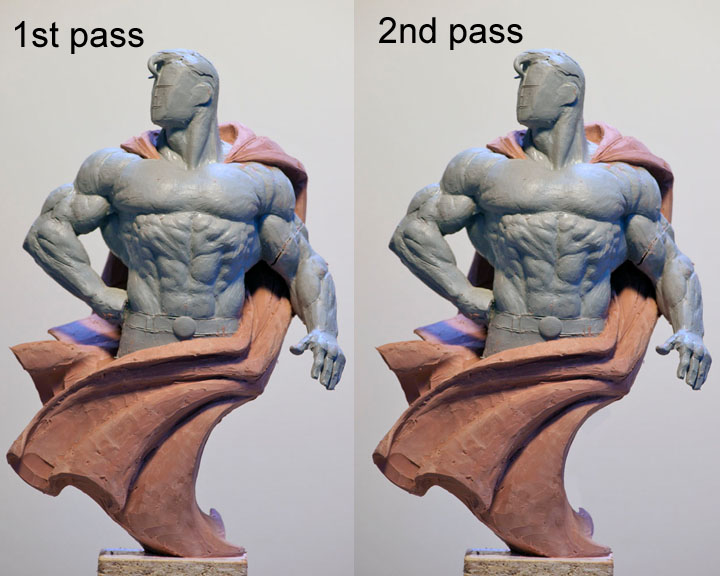
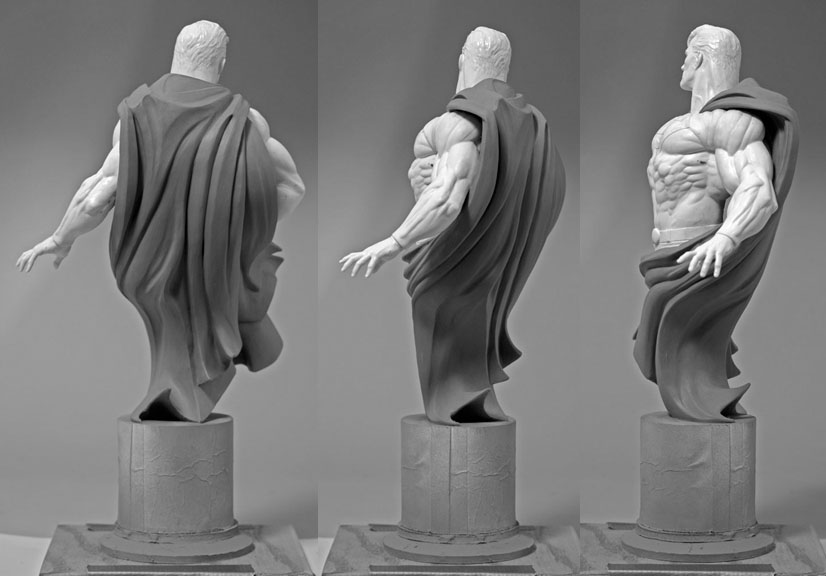
It took some time to work out how the basic shape of the front of the design could work around the sides and back. From the front, the cape does a couple of contradictory things which had to be reconciled. Since the cape was never meant to be a literal interpretation of a cloth cape, I had the freedom to design cape shapes that worked symbolically.
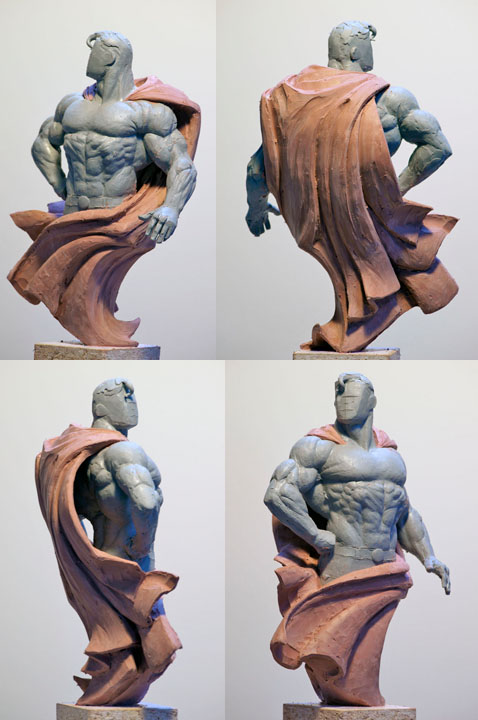
At this stage, I wanted to make sure was Don happy with the overall size of the piece. As it turned out, we gained a couple of inches with the change of the base design, but it’s always good to keep the client in the loop at each developmental stage.
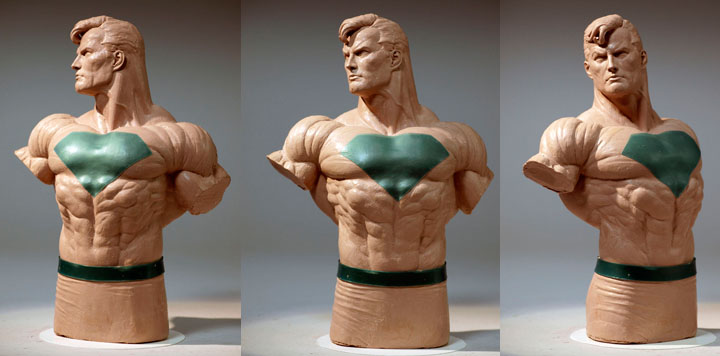
In working the wax, I needed to set the foundation for the level of detail, finish and refined proportions. Working the torso would tell me what I had to do with the arms and hands. The green wax shield and belt are for position and placement only at the stage.
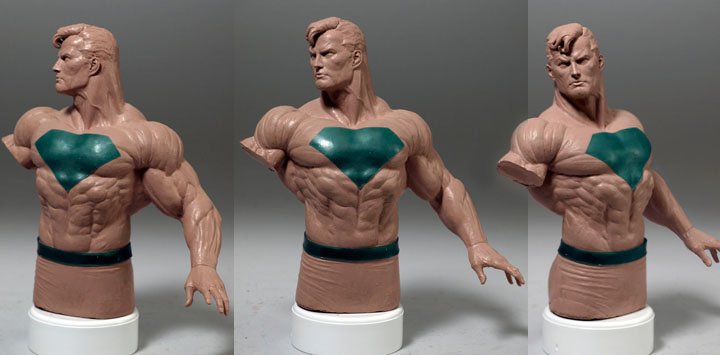
Tighter work on the torso, adding the tool finished arm.
Once I tool finished entire the piece I went back in and gave it a final rub-out finish. Using flag folded strips of cheap paper towel, I moistened the tip with Pure Gum Turpentine and rubbed out all the tool marks. In tight places like eyes, ears, I used a small brush and scrubbed it back and forth over the wax to make it smooth and mark free. The shield, belt and loops are all cut from 22 gauge wax sheet.
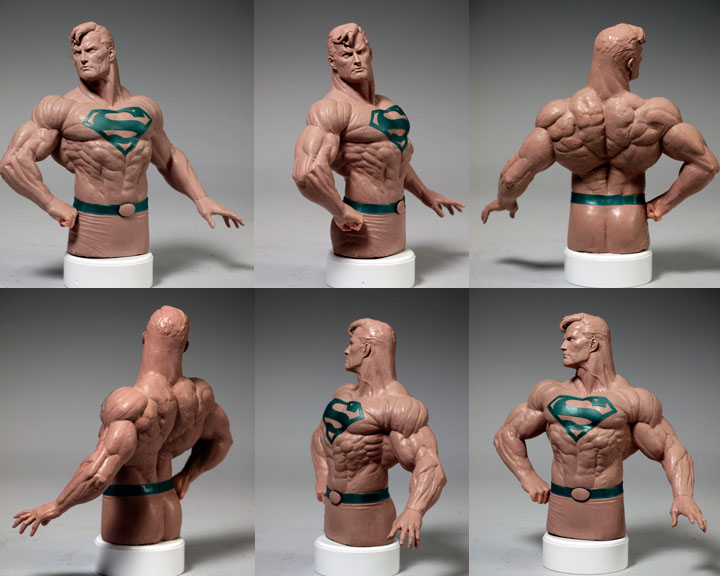
This image shows the tool finished portrait and the final rubbed out portrait. I played a little with his signature S forelock curl. I wanted it to look at if its shape was the result of movement. In certain light, the shadow creates the standard S.
I made master molds of the wax, molding his left hand as a separate piece. With a casting of the master, I worked the cape to finish. Ordinarily, I would have gone waste mold to wax to resin, but with the cape and its larger, abstract shapes I was able to finish it in the clay with a turpentine rub-out.
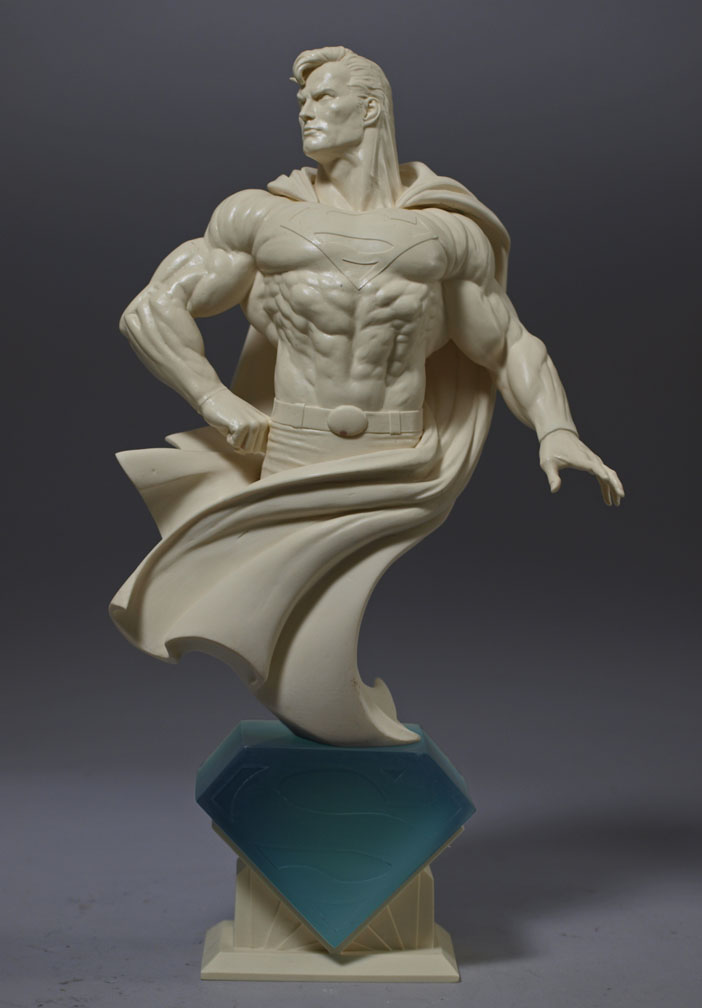
With all the parts molded, I cast up the remaining parts to double check fit and finish. A light coat of Testors white primer and he’s ready for paint.


Incredible work – what form!
Fantastic!! From the shapes in the hair, to the deco period pedestal.. Damn.. =)
Great sculpt! The cape acts as a great transition between the hard surface base and the organic curves of Superman's body.
If you sold anatomy figurines for study they would come and they would buy. Especially if you could figure a way to make them move and retain the correct muscle form. Not too much to ask is it? Really great stuff as usual Tim.
I'd like to see:
–how you construct the armature. What shape is it before the clay is layered on.
–how you attached the wax paper shield. What adhesive is used?
Your work is an inspiration, thanks!
Miguel.
Is this for sail? O.O
Hi There, I just spent a little time reading through your posts,which I found entirely by mistake while researching one of my projects.
I have some relevant information you can review below
men waxing
Thats amazing i am trying to move from chavant to wax but i cant find the type your using the only waxes i can find are very dark in colour i bought some dark green wax and tried to change the colour by melting crayons into it but it didnt work i would like a light grey or brown to make sculpting with it easier where do you get yours?
Thats amazing i am trying to move from chavant to wax but i cant find the type your using the only waxes i can find are very dark in colour i bought some dark green wax and tried to change the colour by melting crayons into it but it didnt work i would like a light grey or brown to make sculpting with it easier where do you get yours?
대전출장마사지로 쉽고 간편하게 집에서 경험해볼 수 있습니다.