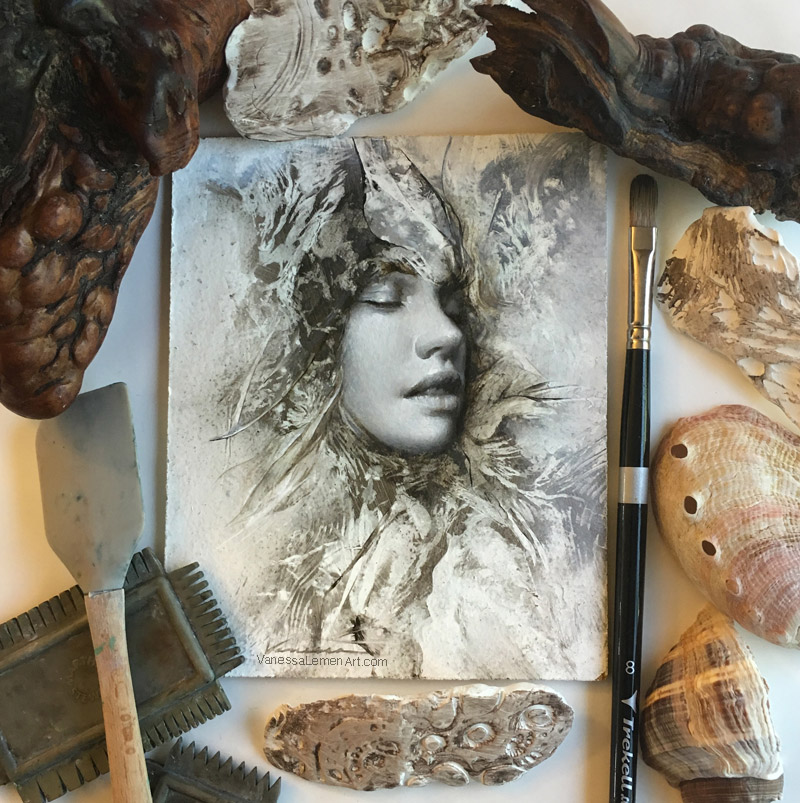

I had a number of people asking how I made the abstract marks in one of my paintings, Avril (shown above with various tools), that I posted recently on Every Day Original, so I decided to do a post here about it. The painting started out as most of my paintings do: by making a bunch of marks, experimenting, turning the surface different directions, making more marks, until I was pleased enough with the abstract composition as a whole to work into it and pull something from it. Here’s an image of the abstract composition that I worked into:
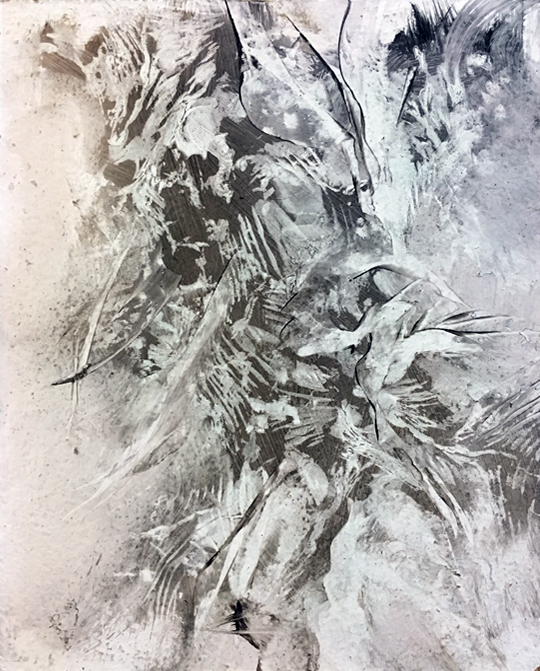 |
| Beginning stage of my painting, Avril – the abstract stage |
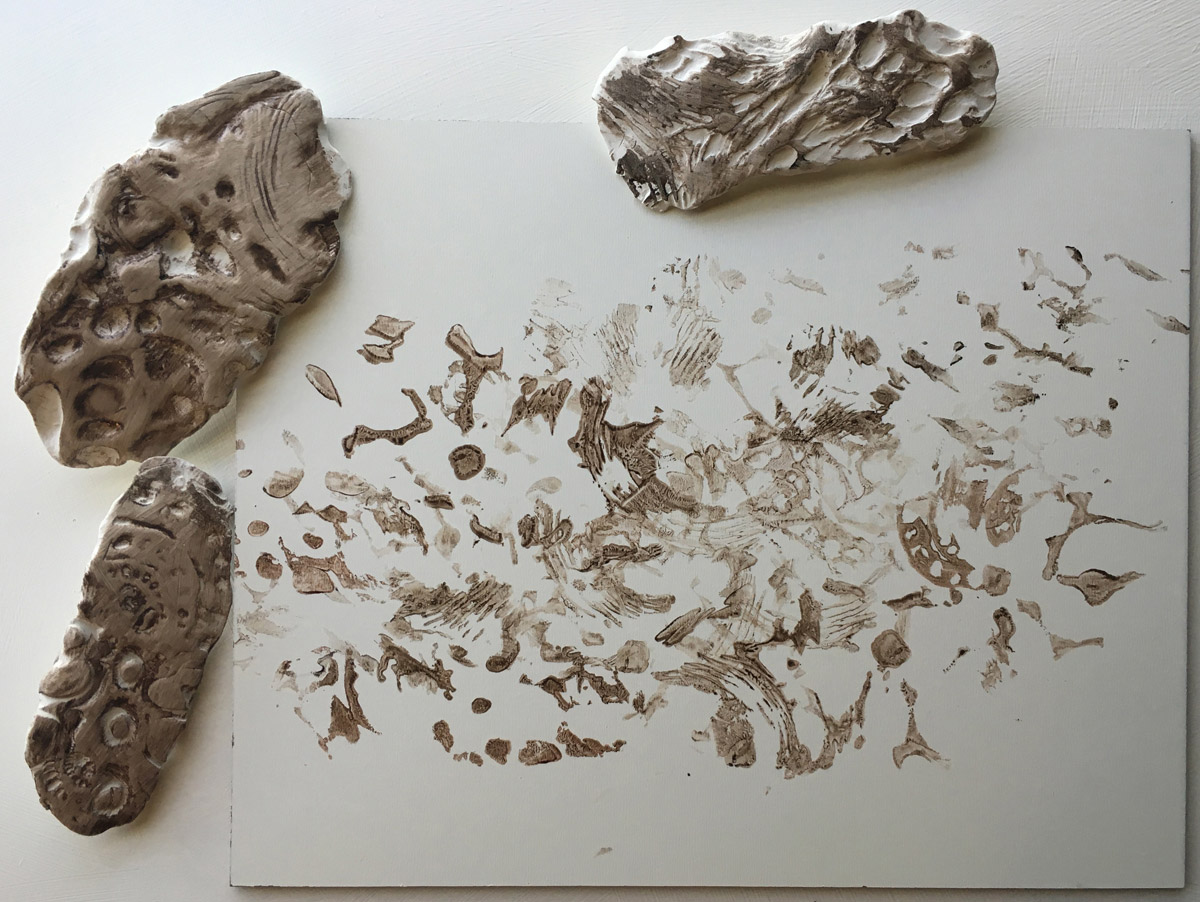
To make most of the marks in this abstract above, I made imprint stamps from burls of wood using Sculpey and kneaded eraser. Basically, just by pressing the Sculpey and/or kneaded eraser onto the surface of the burls, it leaves imprints that create interesting textures to work with when used like stamps. You can use all kinds of different objects and textures to make imprints, and many times the texture you get from the imprint is varied and unexpected, which is great for experimentation and for inventing new marks. Here are just a few examples, including the burls in the bottom left image:
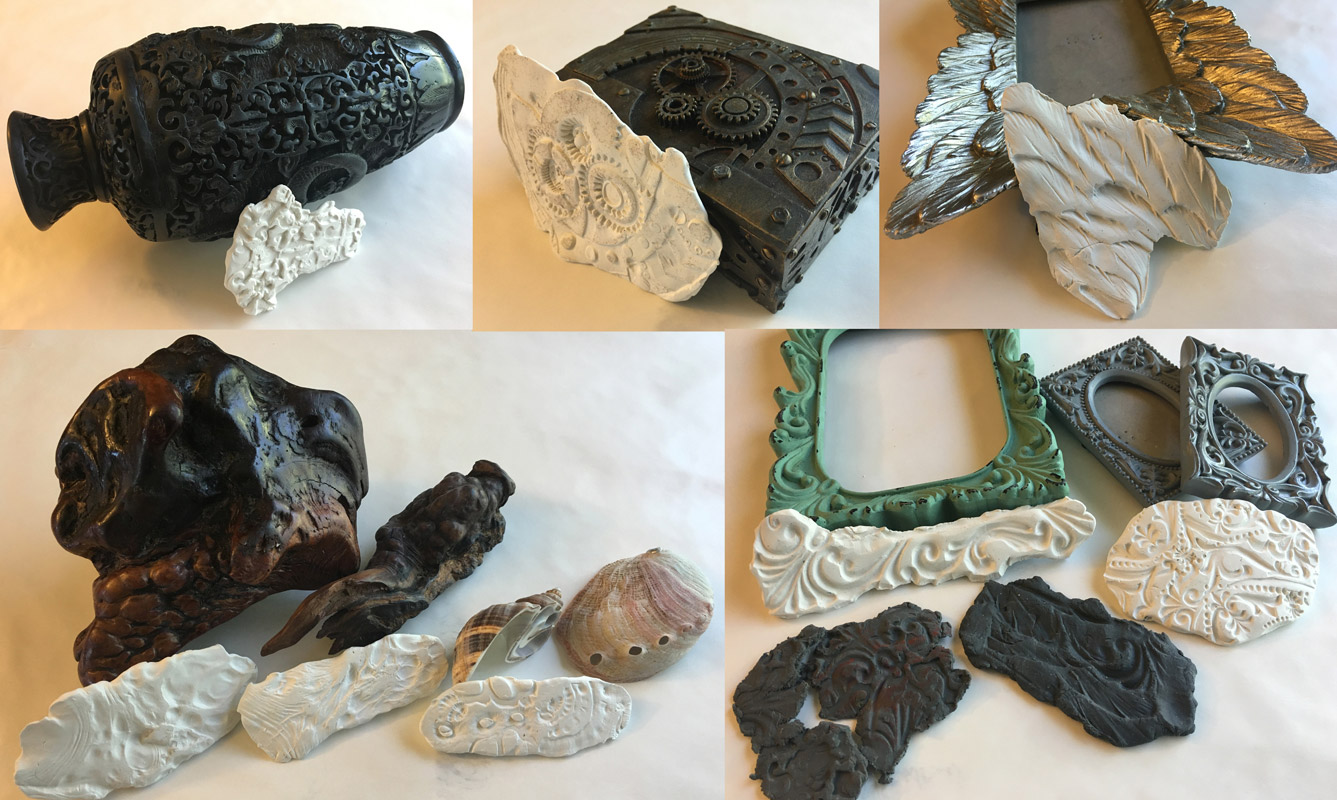 |
| imprints on Sculpey and kneaded eraser made from various textures and objects |
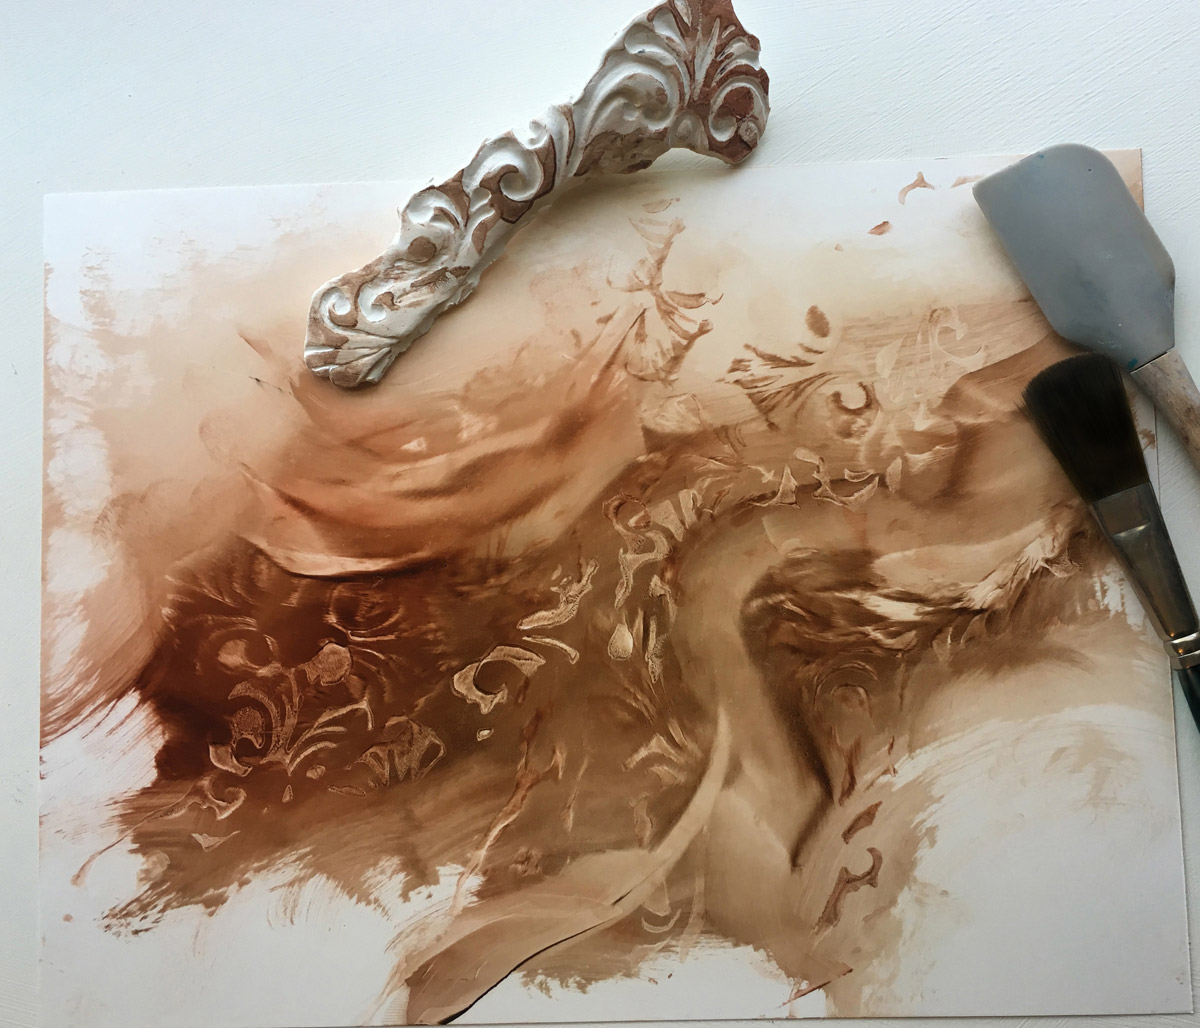
Because I didn’t take pics of the Avril painting prior to this stage, I made a new abstract composition using the same materials as I did to make this, and took pics of the progression as I built it up. I did this to sort of mimic the build-up of the marks, and though it’s not the exact same turn-out, I did this in order to give a good idea of how I got to the abstract composition/start for the Avril painting:
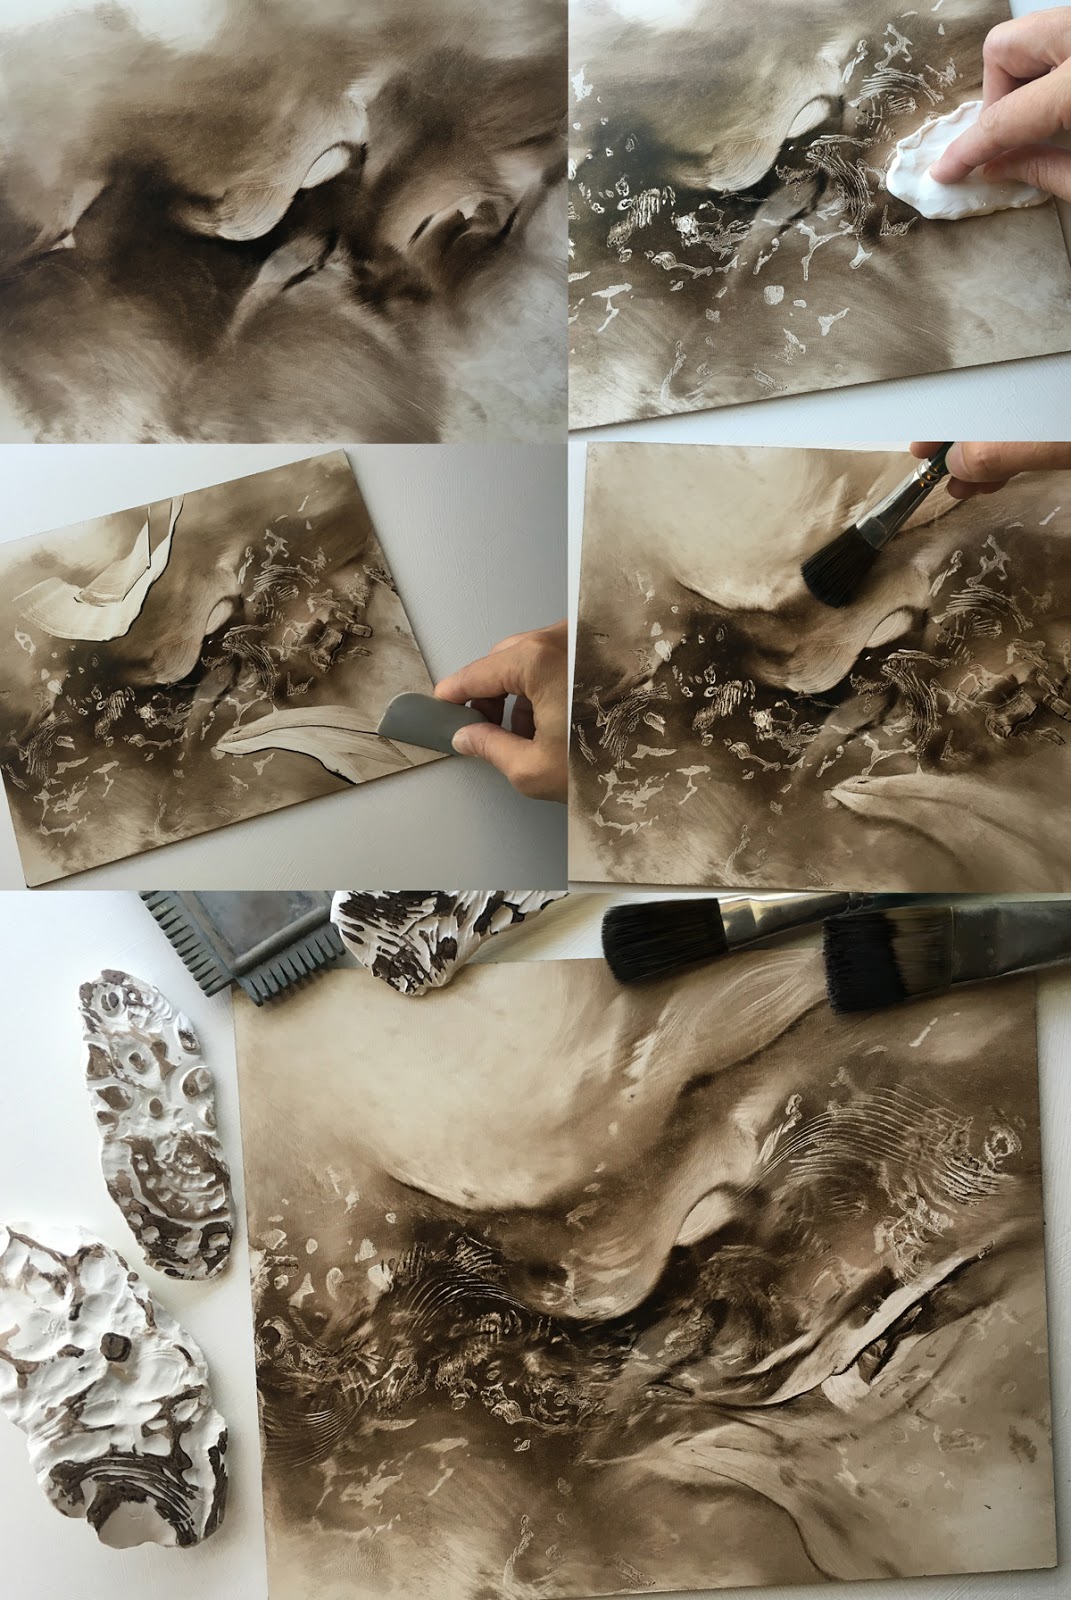
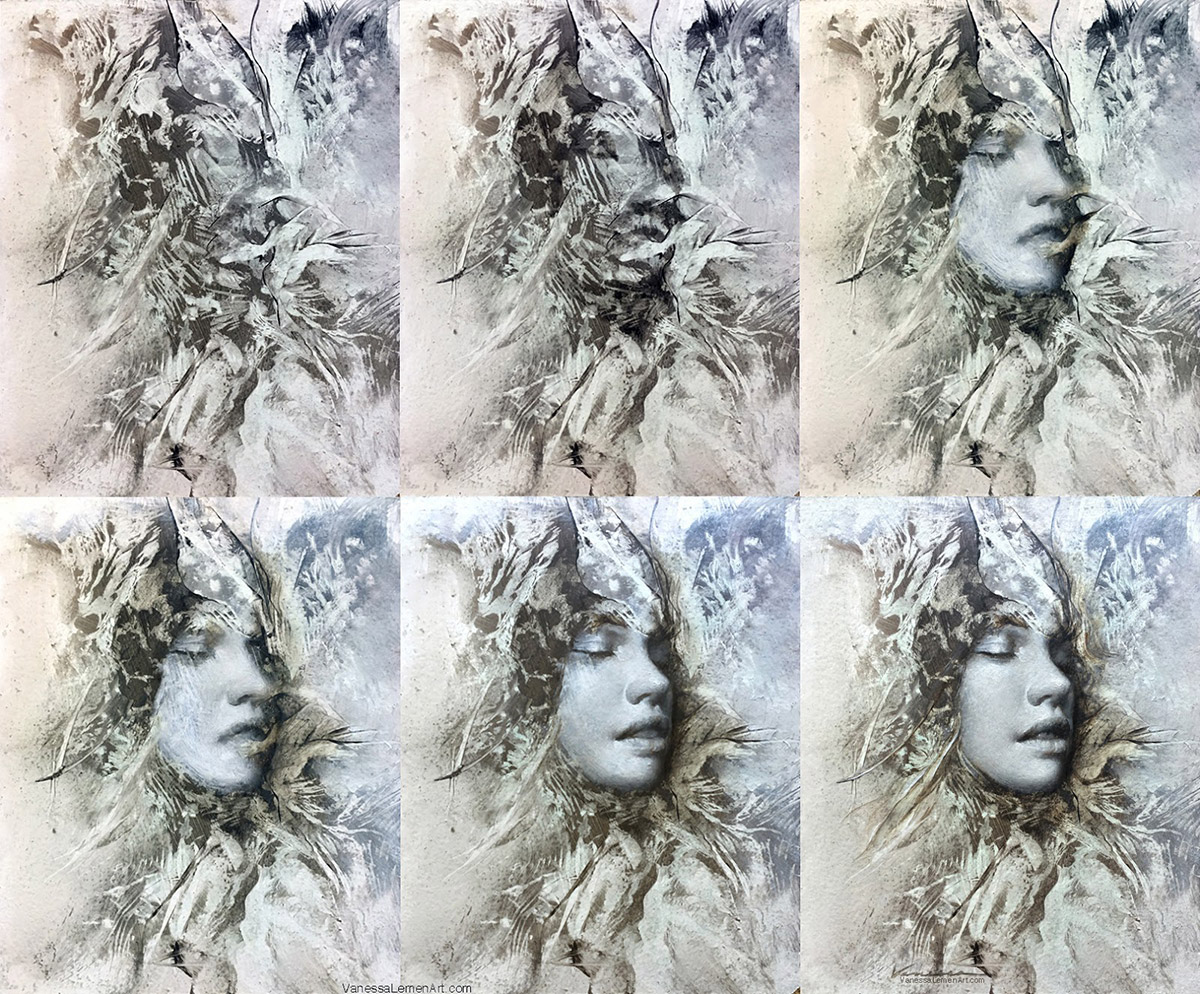
A bit about the progression above:
Stage 1 (top left) shows the initial marks (which I actually liked a lot and considered leaving as is, but for the purposes of this demonstration, I continued on with the momentum I had on this piece). I made the marks by just putting some quick big strokes down on the (somewhat slick) surface (pre-gessoed masonite in this case) with a bit of burnt umber and linseed mixed together, then took a mop (aka a soft puffy brush) to feather out big areas and create some atmosphere in the simple strokes. I carved into the paint a bit with a spatula (a silicon baking spatula), and feathered again with the mop.
Stage 2 (top right) shows me using the stamp I created using the burls, pressing it to the surface to use it as a pick-out tool. The stamps I used here were made with Sculpey and were not baked to be hardened, but are still soft and malleable similar to the consistency and texture of a kneaded eraser, which I think is essential in the pick-out process. If they were baked to be hardened, they would be rigid and not have the same ‘sticky’ kind of quality to the surface. I just place the stamp on the surface, pull it up, turn it different directions, working with the flow of the initial composition. The stamp ends up both picking out and putting down marks.
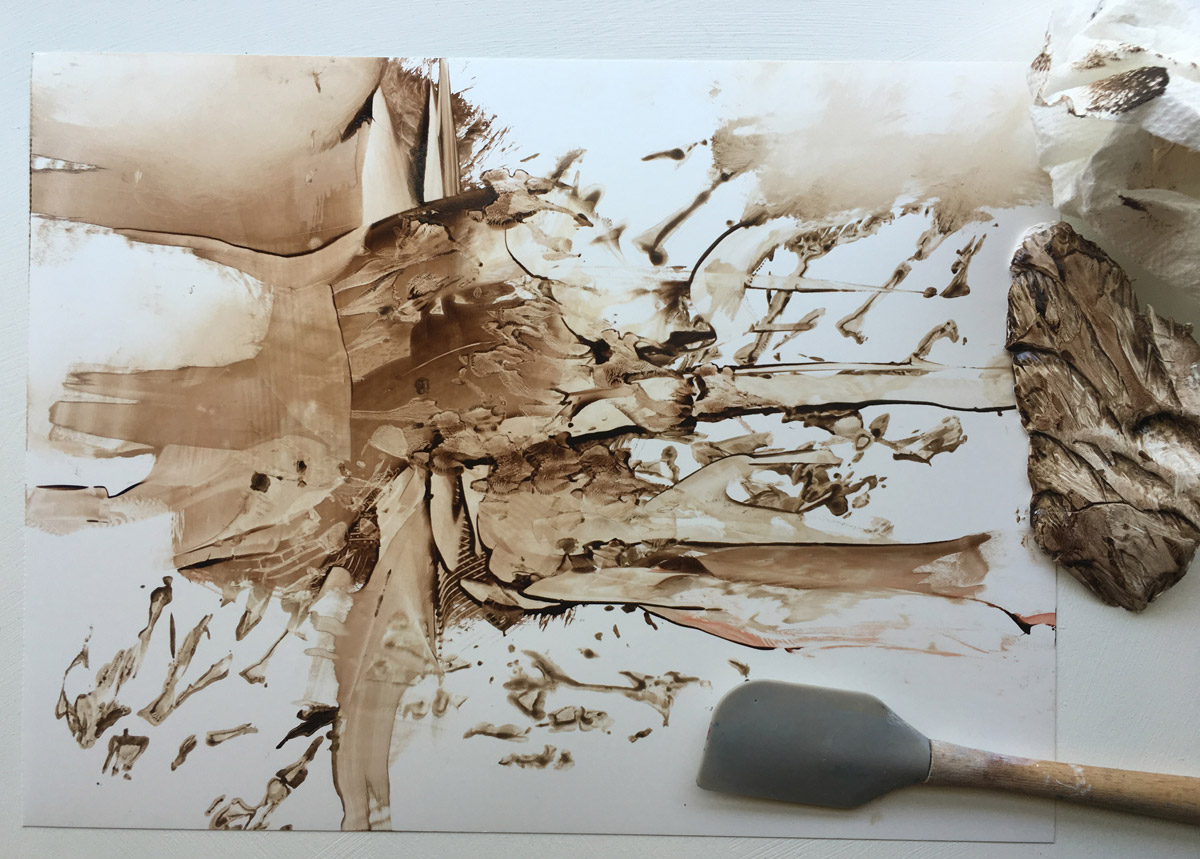
Stage 3 (middle left) shows me using the silicon baking spatula to pull and scrape paint off of the surface and push it around in different directions. This tool works very well with the combination of slick surface and paint mixed with linseed on that surface. (But not too much linseed!) Other tools that work well are tools made of silicon such as squeegees, silicon sculpting tools, and faux finishing combs.
Stage 4 (middle right) shows me using the mop to soften and feather some areas of the painting.
Stage 5 (bottom pic) shows the abstract painting at a good stopping point for this demo. With the Avril painting, I believe I might’ve carved a bit more out to show more of the surface on some of the outer edges, but you get the idea. The tools shown here are: a large sable brush that I used to put down the initial marks, the mop, the Sculpey stamps made from the burls, and a Martha Stewart faux finishing comb (which are my favorite because of their flexibility and the texture of the silicon which makes for a great carving/pick-out quality).
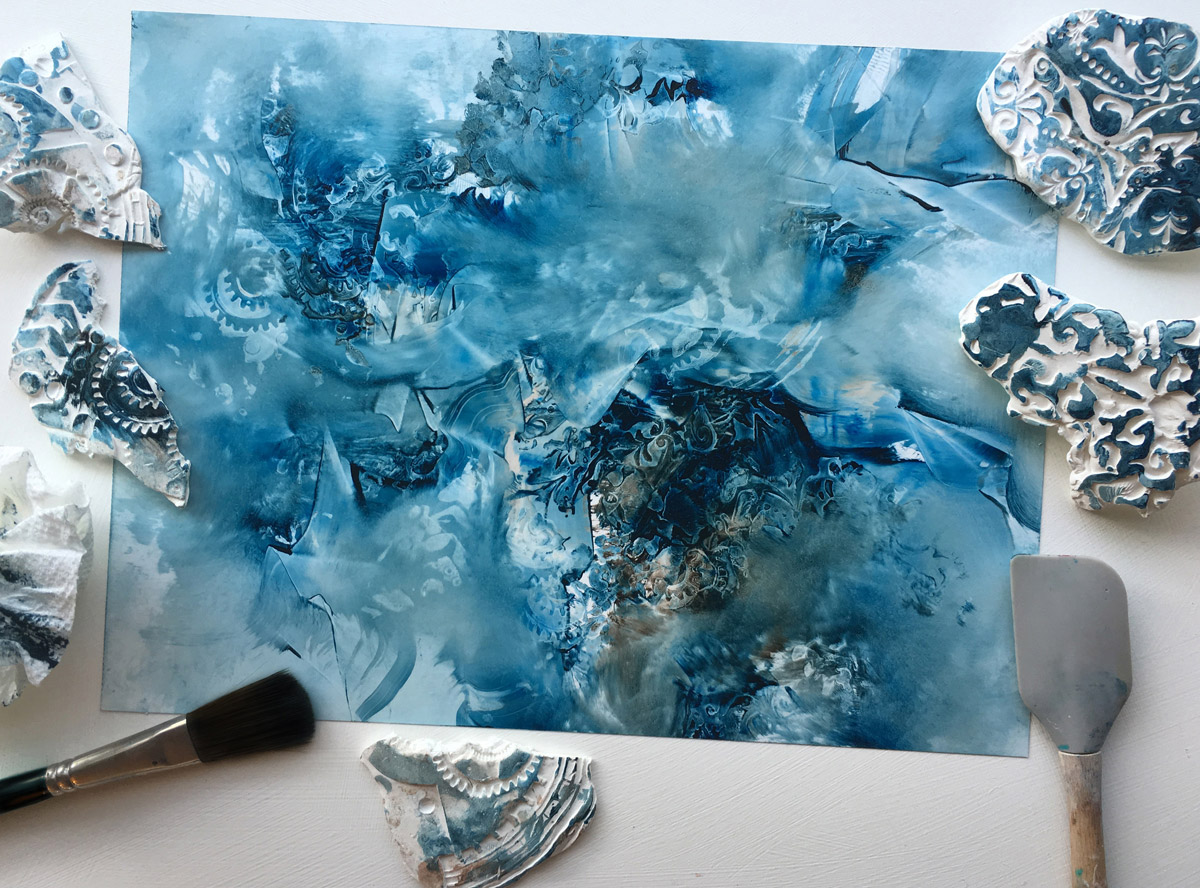
Here are a few more abstract compositions I made while I had these tools out and was experimenting a bit:
 |
| making marks in oil on pre-gessoed masonite using sculpey imprints |
 |
| making marks in oil on yupo paper using a mop, sculpey imprints, and a spatula |
 |
| making marks in oil on yupo paper using a spatula, sculpey imprints and a paper towel |
 |
| making marks in oil on yupo paper using a mop, sculpey imprints, a paper towel, and a spatula |
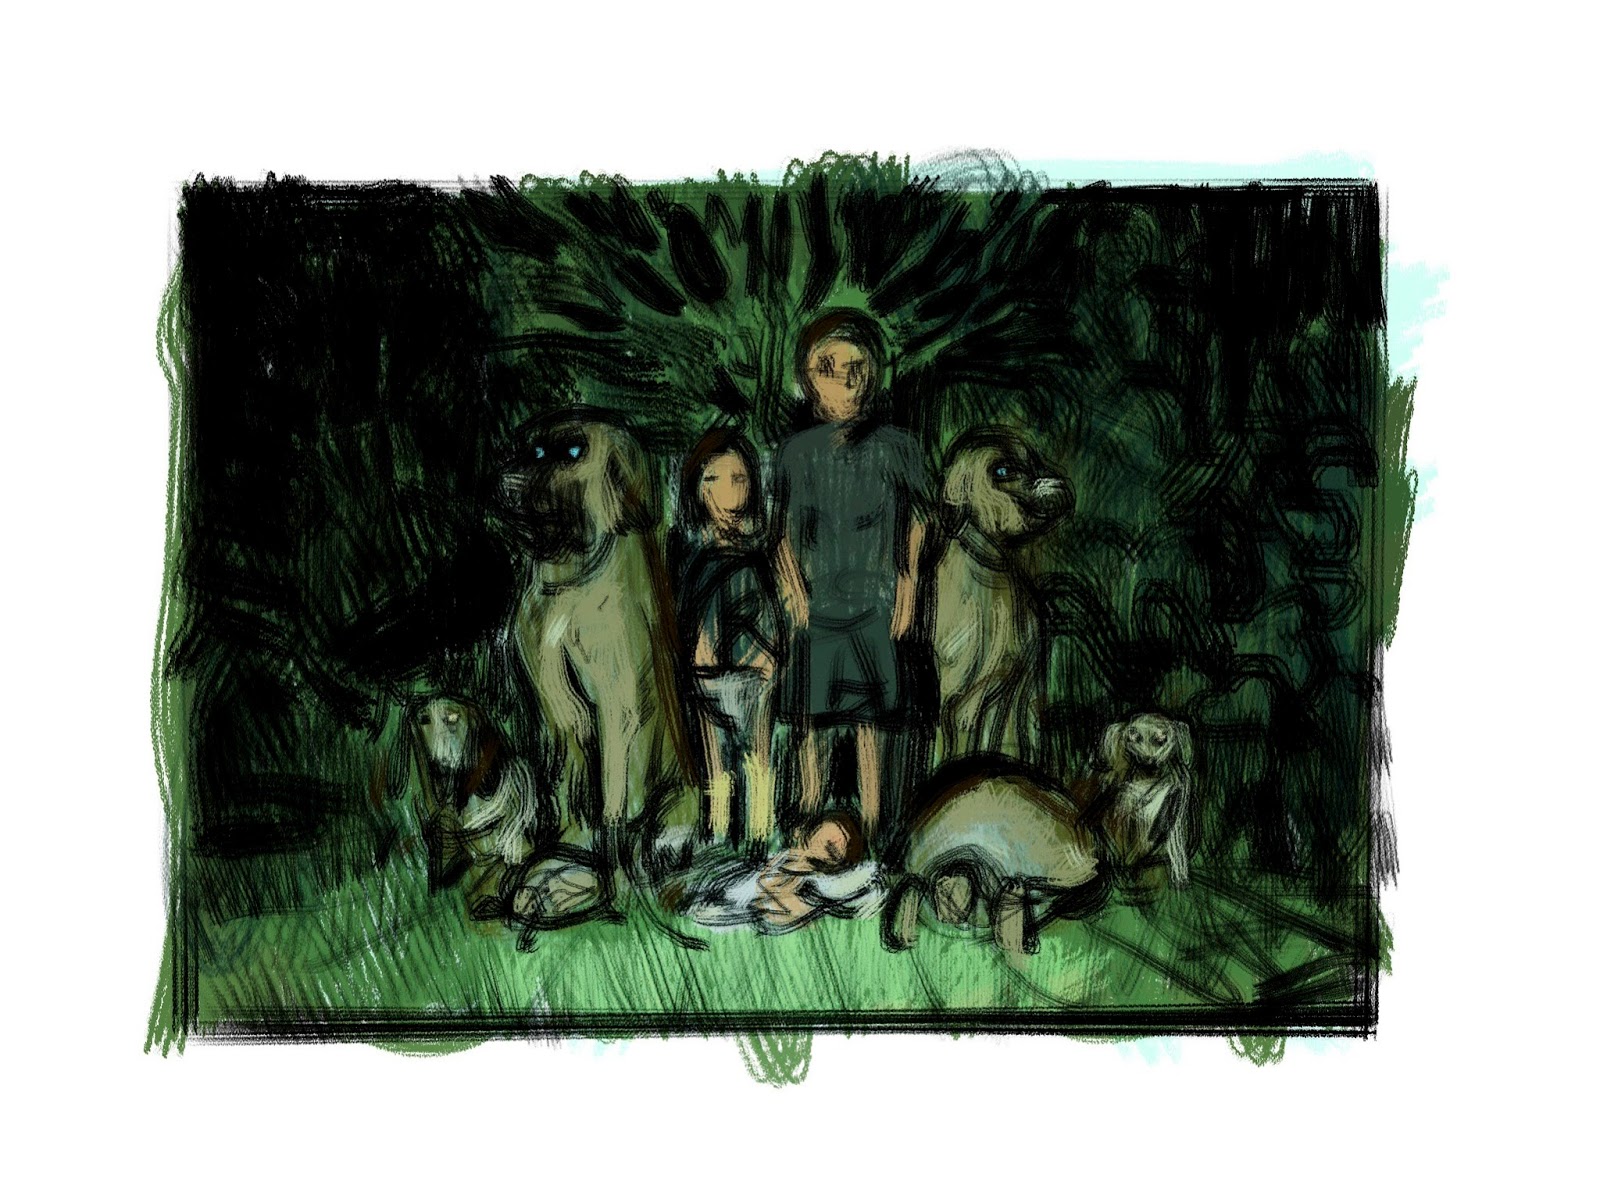
This is generally how I work when it comes to making ‘starts’ for new paintings. Not always with the same tools or making the same marks, but the act of experimenting and generating several abstracts at once. Sometimes, I may just take a day (or several days) and work on abstract compositions, but I usually do a bunch together. Most of the time, I wait for these to dry, and then build up on top of the dry abstracts. I may do more abstract mark-making on several layers in this same manner before starting in with pulling some form from the marks. In the meantime, I usually have a painting on my easel that I’m developing in later stages adding realism to the forms I’ve pulled from the abstracts. (When I say ‘pulled’ I mean built up on top, but that the image was influenced by what I saw in the abstract marks, thus sort of “pulled” forward from the abstract). To give you an example, here are some images of the progression of Avril in all the stages I remembered to take a photo.
A bit about the progression above:
Stage 1 (top left) – This is the abstract as shown above and demonstrated in the other progression above
Stage 2 (top middle) – I added a few dark marks to indicate where I saw a face that I’d decided to paint into (“pull” forward from the abstract marks).
Stage 3 (top right) – I scumbled white across the broad light areas of the face to get the general placement in, and carved out the general forms a bit more on the dark indications that I’d put in initially
Stage 4 (lower left) – I softened some edges in the background or outer areas by scumbling white over the top of the dry marks underneath, and added soft-edged darks as well. The transparency of the scumbled paint helps to retain the abstract marks underneath while softening them in contrast so as not to compete with the focus of the painting. Essentially, what I’m thinking about when losing and/or emphasizing areas in the background or outer edges is what helps to draw the eye to the focus, and creating or carrying out an overall atmosphere or mood.
Stage 5 (lower middle) – I worked on building up the small forms of the face a bit more, as well as some more soft-edged tones in the areas surrounding the face. At this point, it was important to bring the expression up to what I saw/envisioned in the beginning, and wanted to portray and have that come through.
Stage 6 (lower right) – I added the finishing strokes on the forms of the face, and a small bit more to the areas surrounding the face. All things at this stage are basically about maintaining or emphasizing the overall mood/feeling, making sure the focus remains clear, and the expression speaks to the mood/feeling.
For this particular painting, I used some new Trekell brushes I’d just picked up that I ended up really liking a lot. These were their Legion – Synthetic Mongoose brushes. There is one shown in the very first image at the top of this article. I found that they are the perfect balance of soft and springy and sturdy. I was able to feather with them and get the nice soft edges I have in the background, and could also get the type of strokes that retained a harder edge, and they held the paint nicely as well. They have several brushes I’m interested in trying out now that I’ve tried these. Looking forward to experimenting with more and various types. I’m always looking for a really great tiny round or liner for those small details – one that’s soft, but will hold up – and these seem to really do that.. so that’s next on my list. 😀
Let me know in the comments if you have any questions about any part of the process I showed above.
Here is a larger image of the finish:
 |
| Avril, 5.75 x 7″, oil on gessoed board |
Thanks for reading, and I hope you’re able to experiment with some of this and see where it takes you!
Really useful and interesting. Very kind of you to reveal your techniques; thank you.
Thanks. You have inspired me to go through my junque box, find some odd stuff and take a shot at your technique.
Such great textures, Bravo Vanessa! Trekell brushes are really well-made. I use The Kolinsky 7000 series Sables and would say they are on par with my Series 7 Winsor Newtons. Maybe give those a shot? Cheers-
Such great artwork, beautiful! Lots of inspiration from this post, thanks for sharing 🙂
Thanks, John! I'm always up for sharing in my excitement of trying different things. Glad you find it useful. 🙂
Thanks! Glad to hear you're feeling inspired! Have fun! You might find that many of the imprints you make from objects turn out looking different as a mark on paper/canvas from what you might expect, which is really cool!
Thanks, Michael! I'm definitely looking forward to picking up a bunch of new brushes from them. This was my first time using them, and I really liked them a lot. I was looking at the Kolinskys online and will give them a try as well. Thanks for the tip!
Thanks, Nicolay! Glad to hear you found inspiration in the article! 🙂
A comment by James Gurney during a demo that he was ecumenical about brushes led me to try the small synthetics sold by the pack at Michael's. I use them with oils and Galkyd, they're awesome.
I love this technique. I've got to try it soon. Great article!
Avril looks great! I know you’ve posted about your tools before, but this in-depth look is fascinating. I love how innovative these techniques are. Do you remember when you started to incorporate them into your work?