Happy December everyone…looks like this year is almost over…hopefully next year goes a little better? Fingers crossed!
Stumbled on a product recently that I’ve found to be really useful, so I figured I’d take the opportunity to talk about it and in doing so also cover a little how I prime my panels.
I am very particular when it comes to preparing painting supports. It wasn’t always this way, but over the years it became part of the ritual. I’ve found that taking the time and preparing a nice, even surface helps me a lot.
For one, I think there’s a mental element to it. By building this surface, spending time with it, sanding it, repainting and resanding, building up that micro surface that can either be slick or provide the perfect tooth that paint sticks to…You develop a relationship with it. You know the imperfections beneath. You make it important, and when it’s finished, you want to do right by it and paint something that doesn’t suck on it.
More importantly, painting is hard, and not having to fight with your support makes it easier. It’s one less thing to have to deal with, and by having just the right surface it allows me to paint in a variety of ways and build surfaces and textures without fighting what’s underneath. Having a support fail on you can be a crushing experience, and one that can be avoided with a little preparation. The even surface also makes them generally easier to photograph, and you can rest assured it’s a solid surface built from love, that’s completely sealed and will hopefully last many years.
I like painting on birch panels. For smaller and medium sized stuff I usually use 3/4 inch thick birch plywood. I used to go to the art store and get fancy cradled ones, but past few years I go to Home Depot or Lowe’s or whatever and buy the 4×8 foot sheets that I will cut in Into smaller panels. I’ll go through the pile until I find the perfect one with as few imperfections as possible. They probably think I’m crazy but whatever!
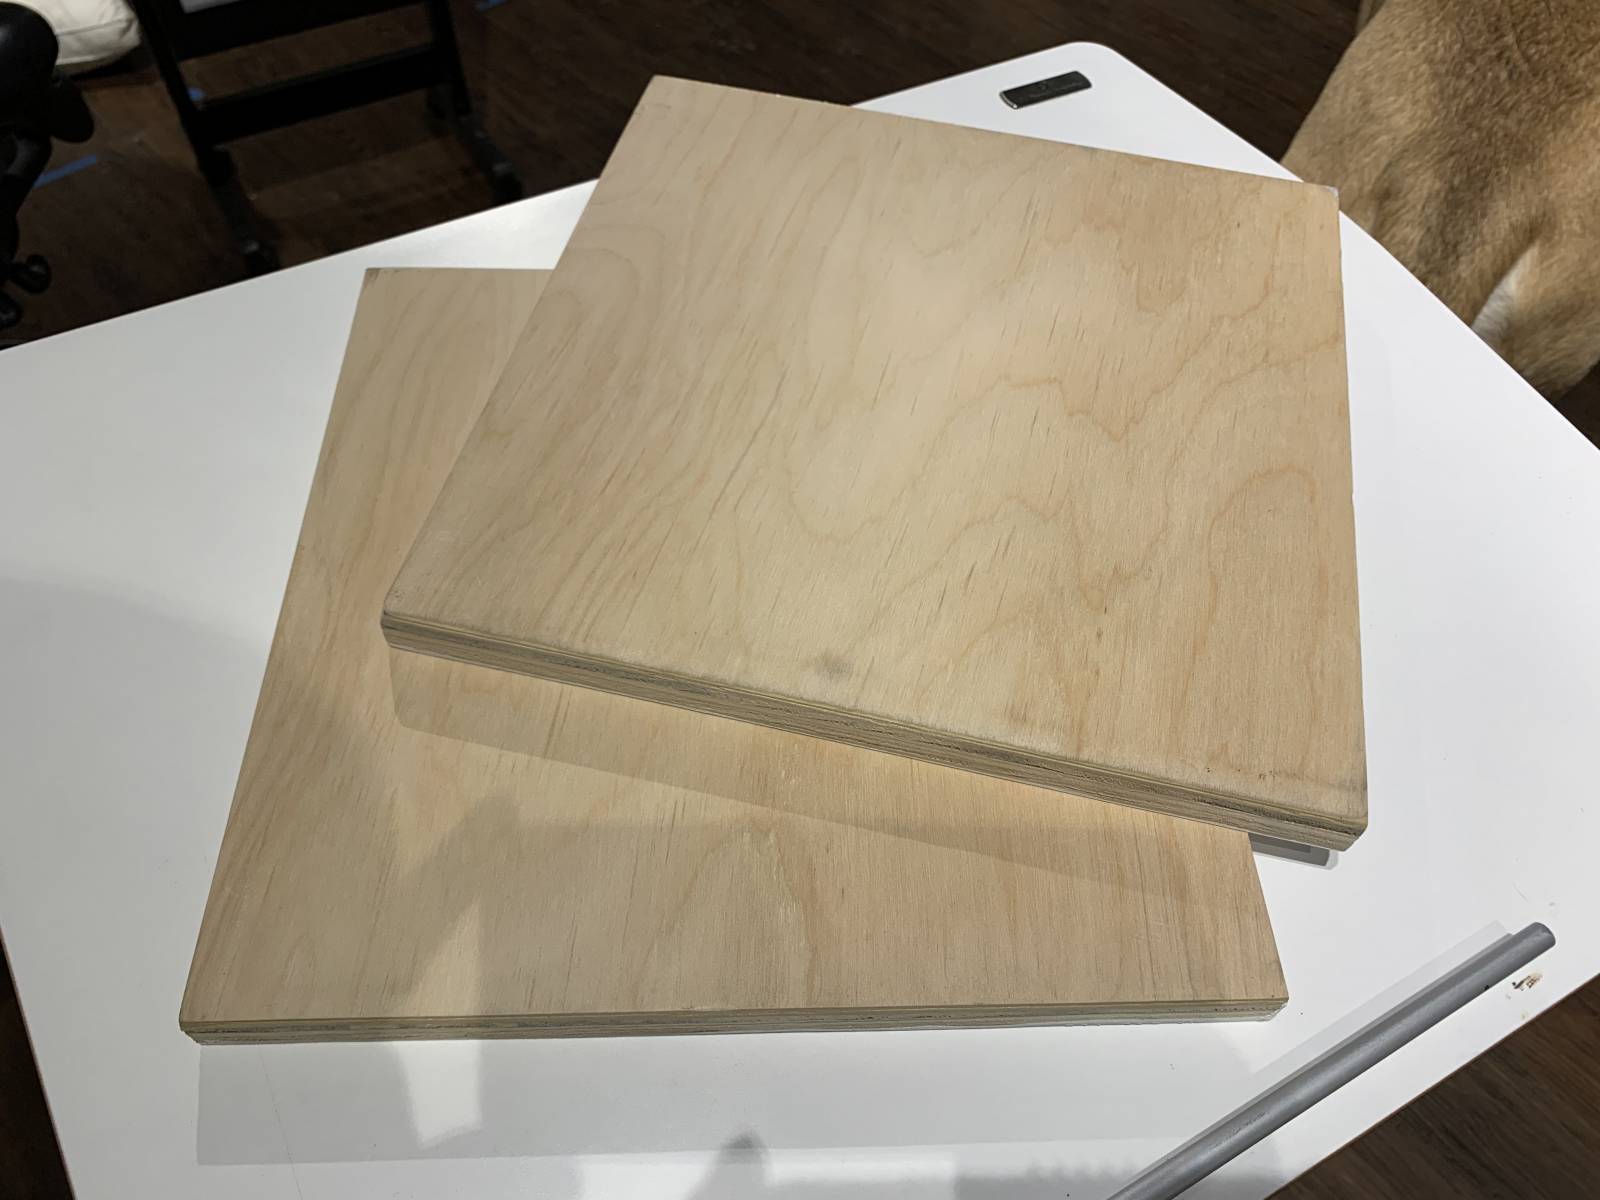
I like the weight of 3/4 inch plywood. It’s also thick enough to where it usually won’t warp much when gesso is applied. It’s a substantial surface that feels important. You want to do right by it.
I’m not super specific about what brand artists gesso I use for the first layers since they’re pretty much all the same from my experience. Ive historically had good experiences with fredrix, but its all pretty much just titanium white latex paint at this point. I usually apply 5-6 thin layers of gesso with a foam roller. I spend time with it and make sure it is a smooth even layer and am careful not to use too much paint. I will often continue to roll it as it’s drying to provide a rough but even surface additional layers will more easily adhere to.

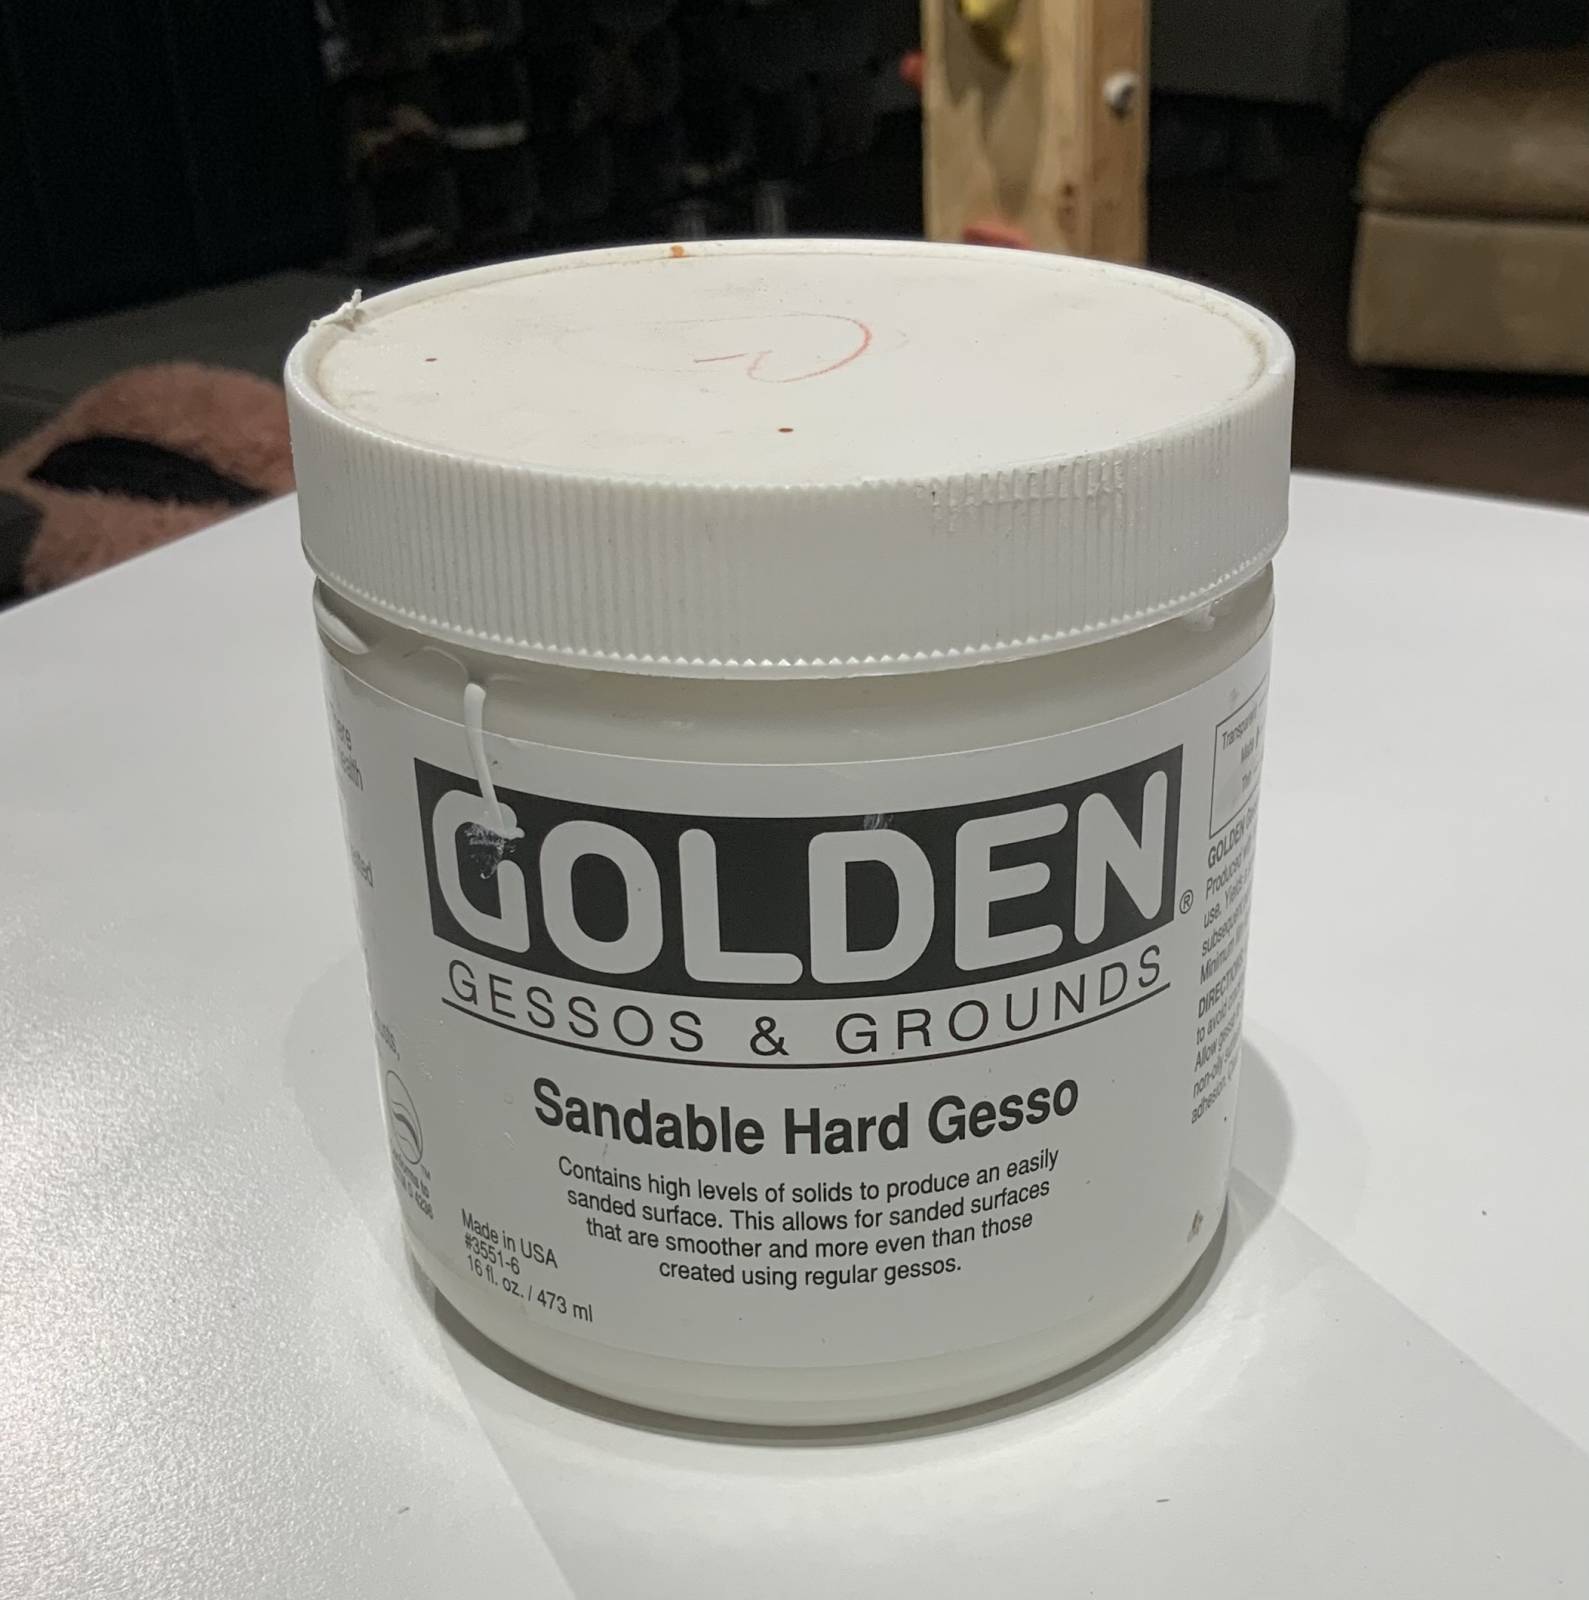
The biggest breakthrough I’ve had this year with priming panels has been the discovery of golden hard sandable gesso. Once I have a good base of artists gesso applied, I will apply an additional 3-4 layers of the sandable stuff. I will go thicker with it than i do the standard artists gesso. It’s okay if there’s a texture that starts to develop because it sands down pretty easily. . Main thing is I just try to keep it even.
Once everything has dried (I try to wait 24 hours if I can, but in a pinch you can do it after a couple of hours) I will sand the surface down flat. I use a this big rectangular sander I bought off my neighbor a few years back. It’s heavy and awesome and holds a half sheet of sandpaper so it covers a lot of area fast.

I use a variety of grains of sandpaper, starting with a super rough 40 grit to knock the texture down, then a 100 grit to refine, a 220 grit to take the scratches down, a 320 to smooth it more, and then sometimes On smaller panels I’ll take it to a 600 grit, which essentially almost buffs the surface. The hard sandable gesso is very workable. It doesn’t take a lot of time or effort to knock it flat.
The sanding does make a huge mess, so I do it outside or in the garage and will wear a respirator mask and goggles, but it’s SO worth it for what you end up with. Sometimes afterward I will rub them with a little bit of oil paint to tone them. I use turps to thin it and rub it with a soft cloth so it doesn’t alter the surface.
And if the painting sucks, I will just sand it off and use it again. I almost enjoy it more painting on a panel that’s been sanded already because its been broken in. Sometimes you get lucky and can incorporate some of the texture from the old painting into the new one.
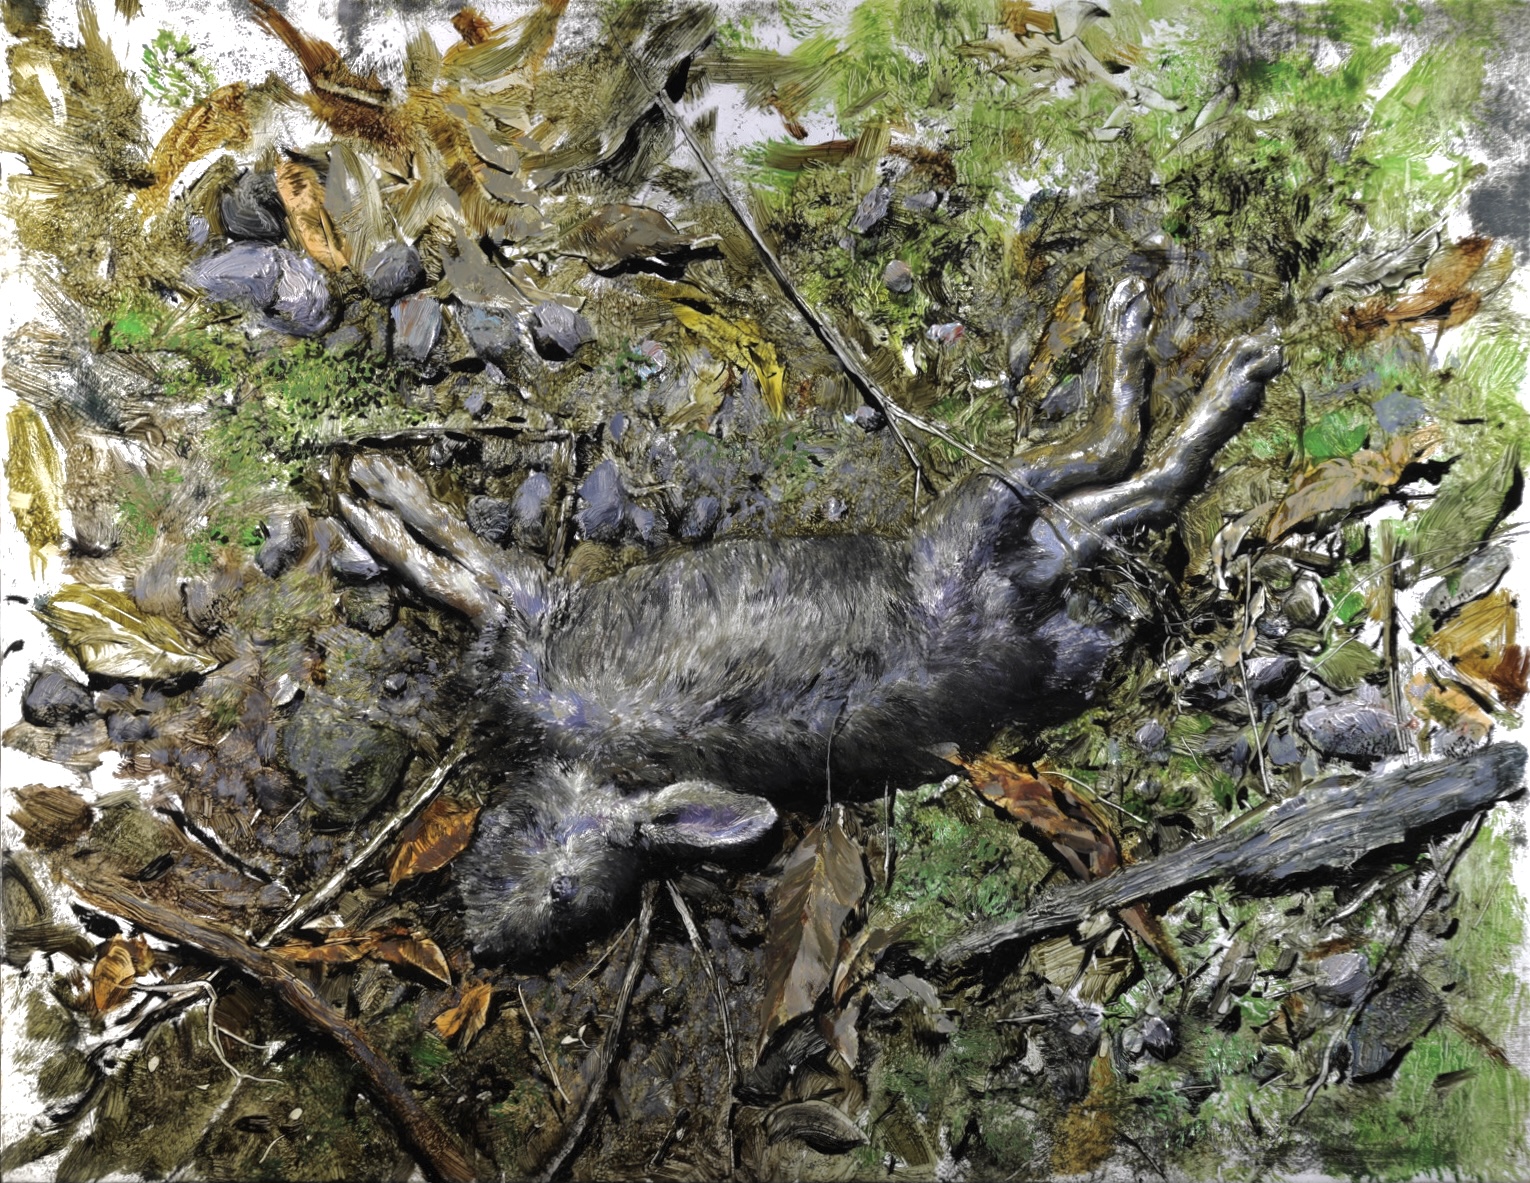
Some of the noise and texture on the dirt and rocks in this painting came from the sanded remnants of a failed painting.
Wishing all of you a happy holiday and all the best for 2021.


Gesso You know……nice dad pun…..thanks for all you share here.
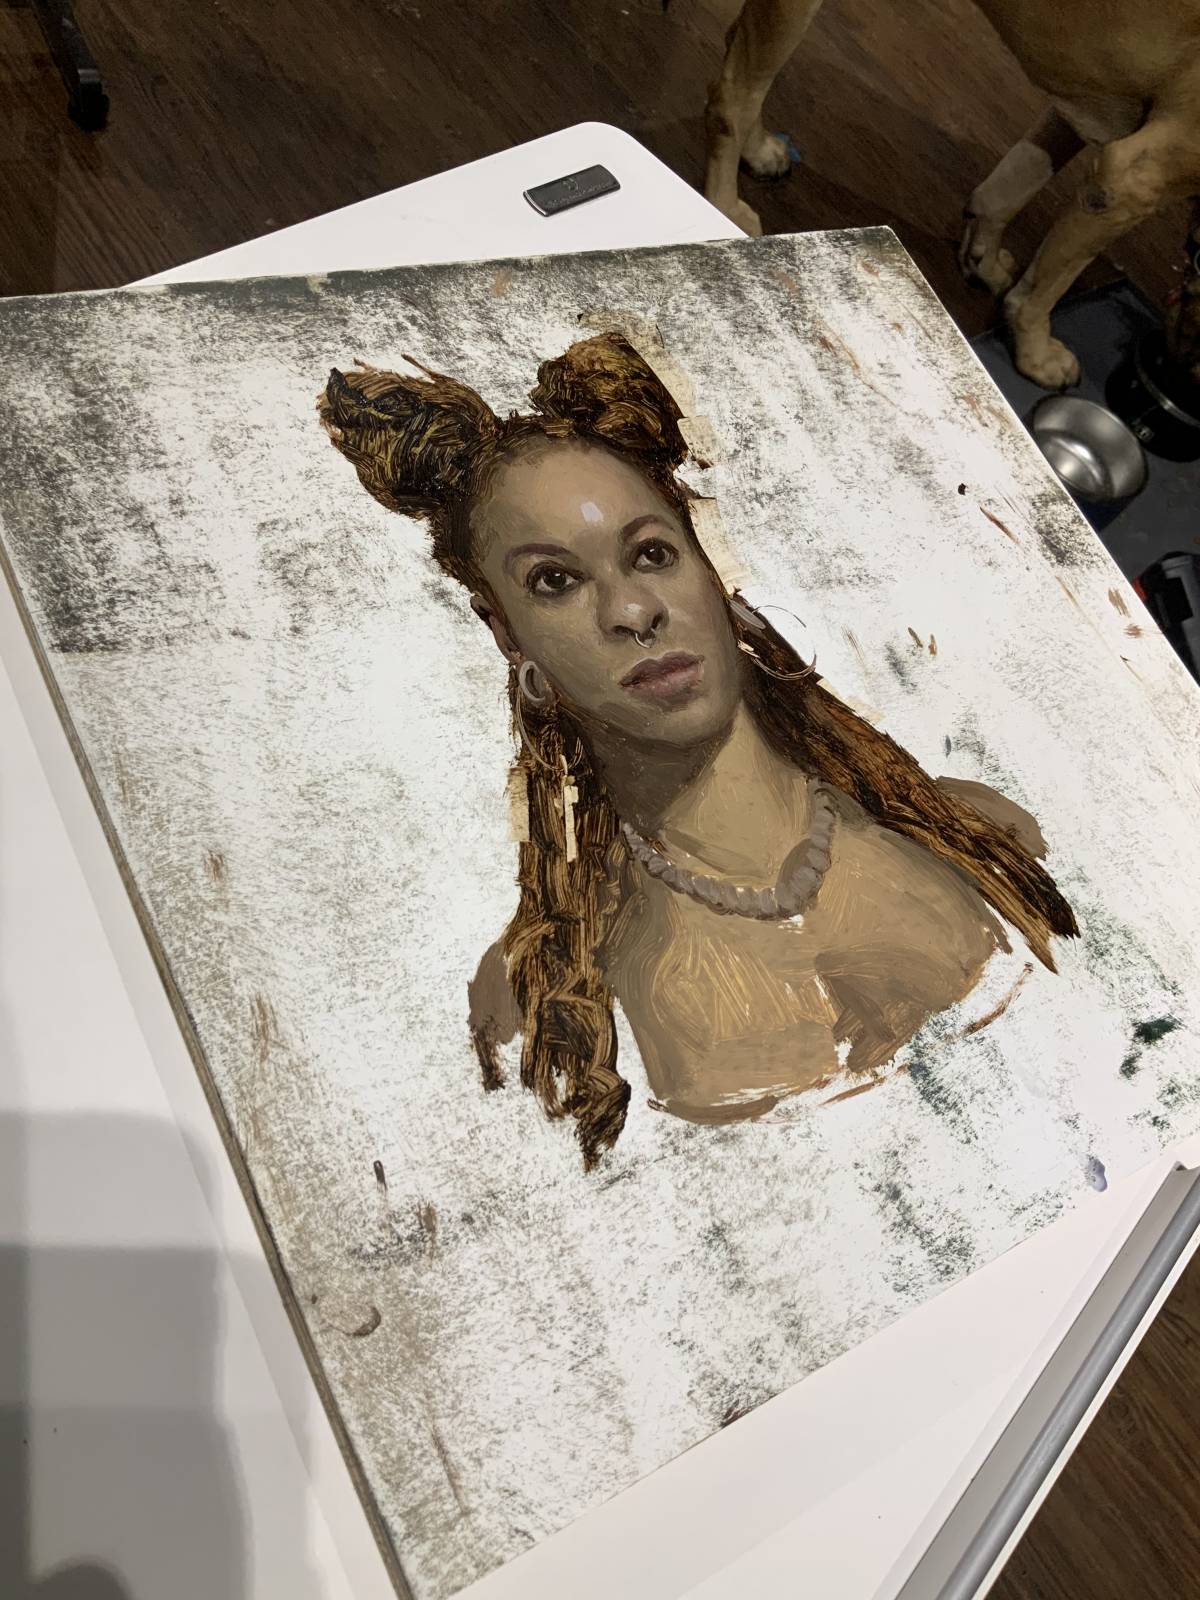
I’ve been trying to experiment with my painting surfaces recently, and I’m finding some tasty textures come from rubbing in paint on a prepped surface. when you say you sand it flat, you remove all the bumps and valleys? that texture on that ladies portrait comes from the oil rub?
love your work and experiments! I’m always eager to read your posts
The feel of a well-prepared gessoed panel is sublime! Thanks for pointing out that Golden product, will have to search for it.
대전출장마사지로 쉽고 간편하게 집에서 경험해볼 수 있습니다.