 |
|
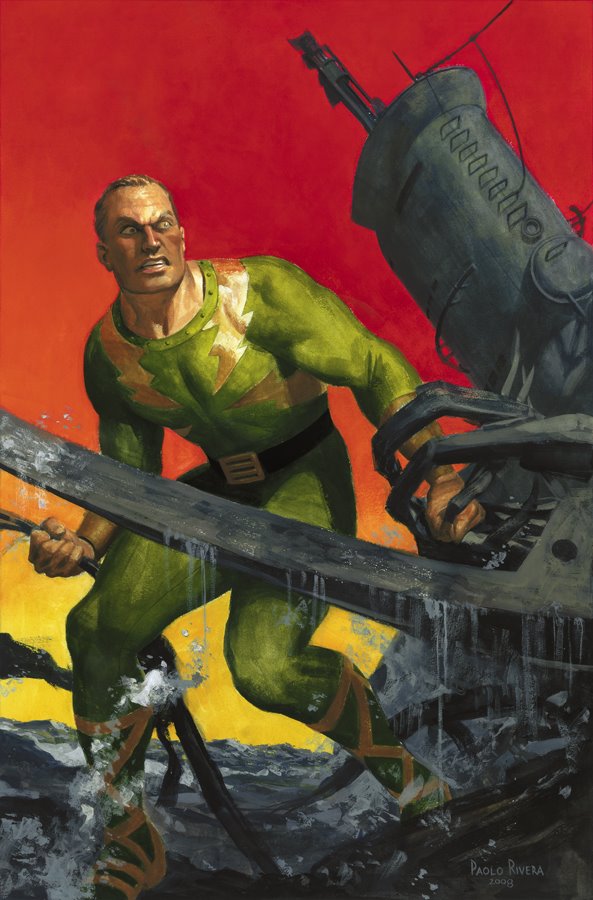
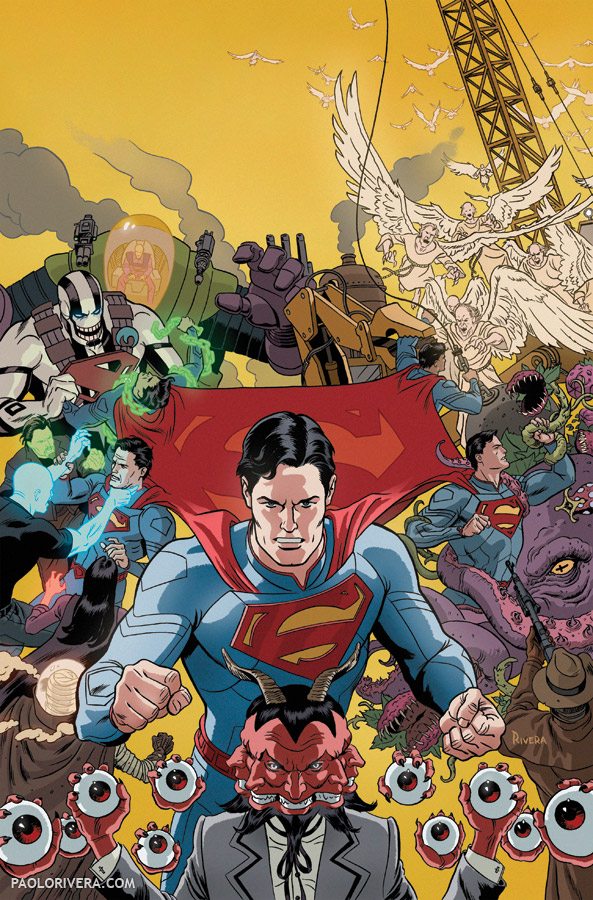
Marvel Mystery Comics. 2009.
Gouache, watercolor, and acrylic on bristol board, 11 × 17″.
|
Part 3: How do we use reference?
— Extracting the the third dimension —
In part 1 of this series, I made the case for researching your subject prior to searching for visual reference. In part 2, I tried to refine that approach by anticipating the resources that are out there and readily available. In this, the final installment, I hope to show how to utilize the reference that you were (hopefully) able to find.
One of the greatest challenges for illustrators is formatting diverse references to match the manufactured reality of their illustration. This is primarily accomplished through the manipulation of 2 qualities, lighting and perspective, but they are merely aspects of the same underlying theme: space. Both serve as cues that our minds employ to construct a 3-dimensional world from just 2 dimensions of information.
If you are taking your own reference, this is not an issue — you have the ability to build a scene in real life and replicate what you see. But barring unlimited time and money, most of us must incorporate disparate elements into a unified whole. In order to do this successfully, we must glean visual information from one source and graft it onto another.
 |
| The Thing. 2007.
Super Sculpey Firm and steel wire, 3 × 1 × 1″.
|
The best example of this is the use of maquettes. Not wanting to construct a life-size dragon attacking a castle, we instead make a small one, a manageable one, and light it according to taste. In turn, we scale that information to our imaginary world and apply accordingly. If you don’t follow James Gurney’s blog (why aren’t you?) he uses this technique extensively.
As for my own practice, I used to sculpt small, hand-held busts whenever I had to draw the same character from multiple angles. These provide perspectival information to help with draftsmanship, as well as lighting interactions and patterns that would be difficult to imagine.
I’ve posted previously about my tools and materials — Super Sculpey Firm, rake, dental pick, etc. — but that has since given way to a single, digital tool that saves time and provides countless options. I use a program called Sculptris, which is the little sister to ZBrush, a massive 3D program that I gather takes months (if not years) to master. I was able to pick up the basics of Sculptris in about 30 minutes. Because of its bilateral symmetry feature, you only have to sculpt one side of everything (that alone saves more than half the time). Another great time-saver is the fact that once you’ve designed a character, you can save a new version of it and alter the proportions and features, as you can see in the video of Punisher “Hulking Out.”
 |
| Although sculpted in Sculptris, these were rendered in Blender. Step by Step |
Once completed, you can light these at will, either in Sculptris, or a dedicated rendering program like Blender (which is also free). What I find interesting about this process is that I now prefer this kind of stripped-down lighting information to actual photos. Photo-realism has never been my goal, and the hyper-reality of computer models provides much more decisive information. Now my paintings and portraits are a sort of “best of” collection of my favorite lighting effects distilled into one scene.
 |
|
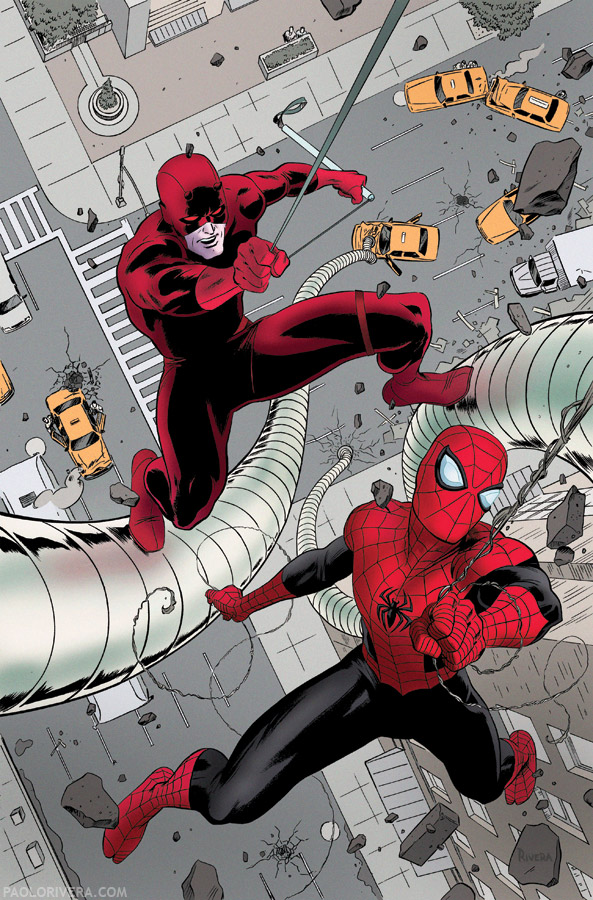
The Twelve #11. 2008. Acryla Gouache on bristol board, 11 × 17″.
Step by Step |
Aside from my own maquettes, I often take advantage of the innumerable 3D models that are shared on-line. Google’s 3D Warehouse is a user-generated collection of Sketchup models that are free to download. Sketchup is easy to learn, but I use it mostly to view existing models.
As with photos, knowing the make and model of a car, plane, or architectural element will connect you to builders who care for the subject and, therefore, make accurate, detailed replicas. Their expertise can then be downloaded and assimilated into your own work. Depending on the degree of verisimilitude that your style requires, supplementing the 3D information with real photos may be necessary. I used the U-Boat below as reference for the above image and the cover at the top.
My one admonition is that if you’re going to simply trace a model (hey, I’ve done it), make sure you understand perspective thoroughly. I’ve seen far too many drawings where the computer-generated elements are painfully conspicuous. This subject is worthy of a post unto itself, but I can give 3 pieces of (very) general advice: 1. Zoom out 2. Use 2-point perspective (this keeps all vertical lines parallel) 3. Use the “match photo” feature, if possible (video tutorial).
 |
|
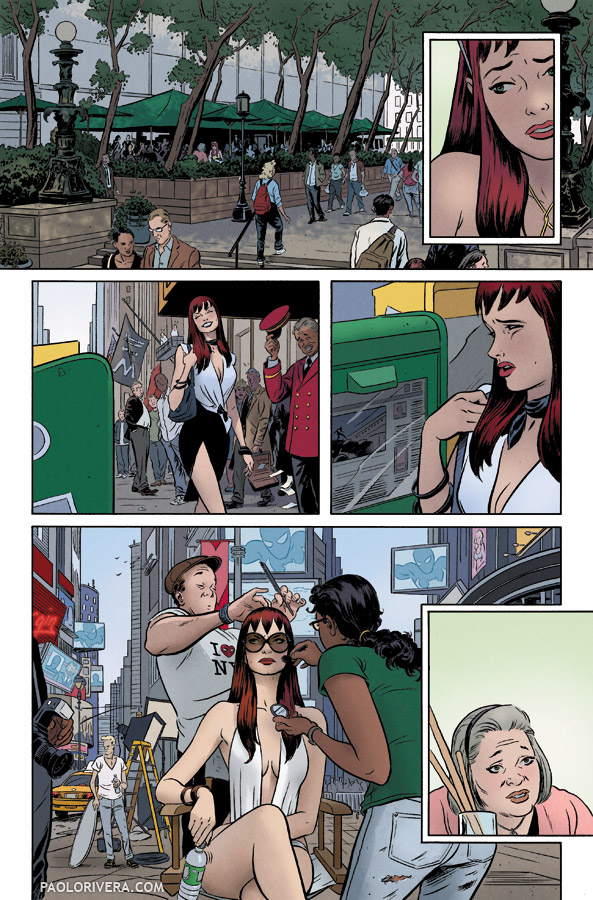
Amazing Spider-Man #639, Page 13. 2010.
Ink on Marvel board, 11 × 17.25″.
|
Beyond simple objects lies the broader realm of environment. Need to know what a bustling city looks like? Why not visit one via Google Street View. Most of the civilized world is quite literally at your fingertips, so you’ve no excuse for not knowing what a bridge in Paris looks like. I’ve mentioned this in previous posts, but this resource also gives you access to candid shots of people in public spaces. It’s limited to a diurnal cast of characters, but it’s more than enough to inspire one’s imagination. It’s also great for flora (not so much fauna), clothing, and contemporary car reference — basically, anything that can be seen from the road (with some exceptions).
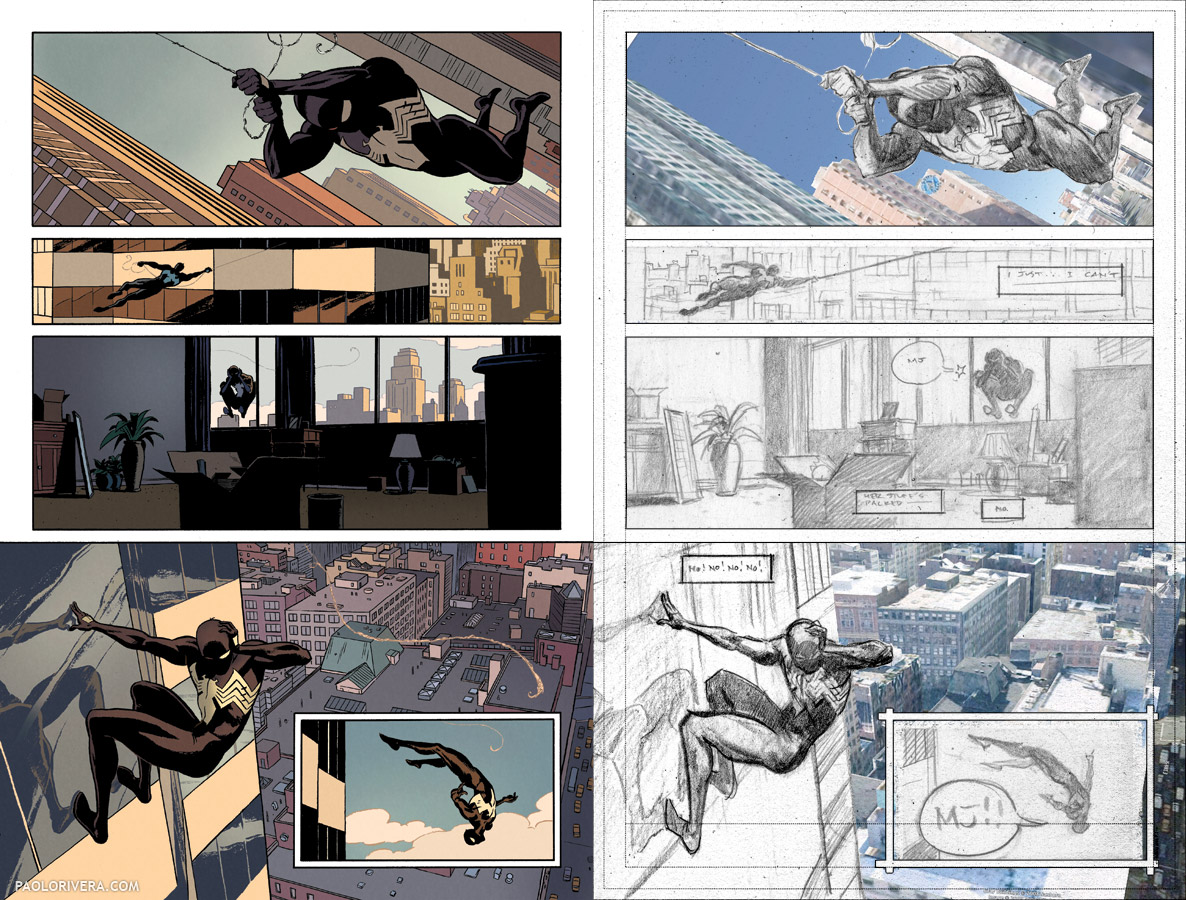
But Google’s treasure trove of information doesn’t stop there. Google Earth contains all the information of its popular Maps feature, but fleshes it out with 3D models of architecture and terrain. While not always the most detailed, it’s perfect for getting that sense of grand scale since you can try out multiple angles with very little effort. It’s been particularly helpful for me since most of Marvel’s stories take place in Manhattan. Below, you can see how the program provided some nice rooftop views.
 |
|
Amazing Spider-Man 639, Page 4.
2010. Ink on Marvel board, 11 × 17.25″. |
The point is, when utilizing reference (especially from sources other than our own), we must glean 3D information from photos and reapply it from another angle in order to make it our own. That process becomes trickier as technology advances, of course: when I use someone else’s 3D model, does that constitute copyright infringement? What if, as is often the case, they were simply copying an existing object?
I won’t attempt an answer, but I’ll leave you with an app that I recently came across, called 123D Catch. Using a series of photos that you capture through the program, it infers the dimensional relationships to produce a 3D model. I had mixed results using my sculpture (based on the Dynamic Anatomy cover), but I think it would be perfect for recording environmental reference.
Although we draw and paint in 2 dimensions, we must imply 3, and that means every image we create must contain the necessary clues for our viewers. Most importantly, those clues must remain consistent throughout the image — light needs to come from a shared source and all objects must be seen from an appropriate angle. Basically, If you’re an illustrator of any kind, you’re a world-builder, and if your world is anything like the one we all share, then it needs to have 3 dimensions and abide by certain rules. If people are to believe in the worlds you illustrate, the first step is to believe it yourself. Finding reference is finding proof.

Great post Paolo! Lots of helpful info there.
Thank you for posting this. It's great!
Namor dumping those soldiers out of the severed submarine never fails to make me grin – so brilliant! It has the lurid, loopy fun of Wallace Wood's work on Mars Attacks…
Paolo: This was a very good post. Thank you very much. I learned a lot and have much to pursue.
Awesome and timely post Paolo -THANKS!! it's going to be digitally “dog eared” by the time I am done w/ it:-)
Wow! what a great post. Between this and your post about using Mac's Photobooth for quick reference photos( I have done it a dozen times or more since reading that one) you have really expanded my use of quality reference materials. Thank you for such useful information!
Thanks for all the information! So many programs and things I didn't know about. I really struggle with translating things into the correct perspective, especially just trying to do it from my head. I can't wait to go home and try some of this out!
Thanks for the kind words, everybody! Nice to hear that the series was helpful!
I HAVE THAT DINOSAUR!
Now I can point to it and prove conclusively that my excuse that it would make a good reference was right.
Totally. Justified.
Hey Paolo, first of all thank you for taking the time to put these up! greatly appreciated and very valuable :).
One remark: Be careful when using 3D models from other artists as reference, theres a big chance you're building up on mistakes the other artists made and put those into your own paintings, its always best to stick with the original. Interpretations from interpretations from interpretations tend to get less and less accurate.
And another tip when searching for images is looking at groups who are interested in those subjects, there's a good chance other people have been doing all the work for you and gathered a nice library of images on your subject. Such groups can be found for example on flickr or deviantart.
Grtz
Sorry for my English I hope the message gets trough 😉
Glad you liked it, Elie! And those are all excellent points. It always helps to have several different reference sources when trying to render accurately.