
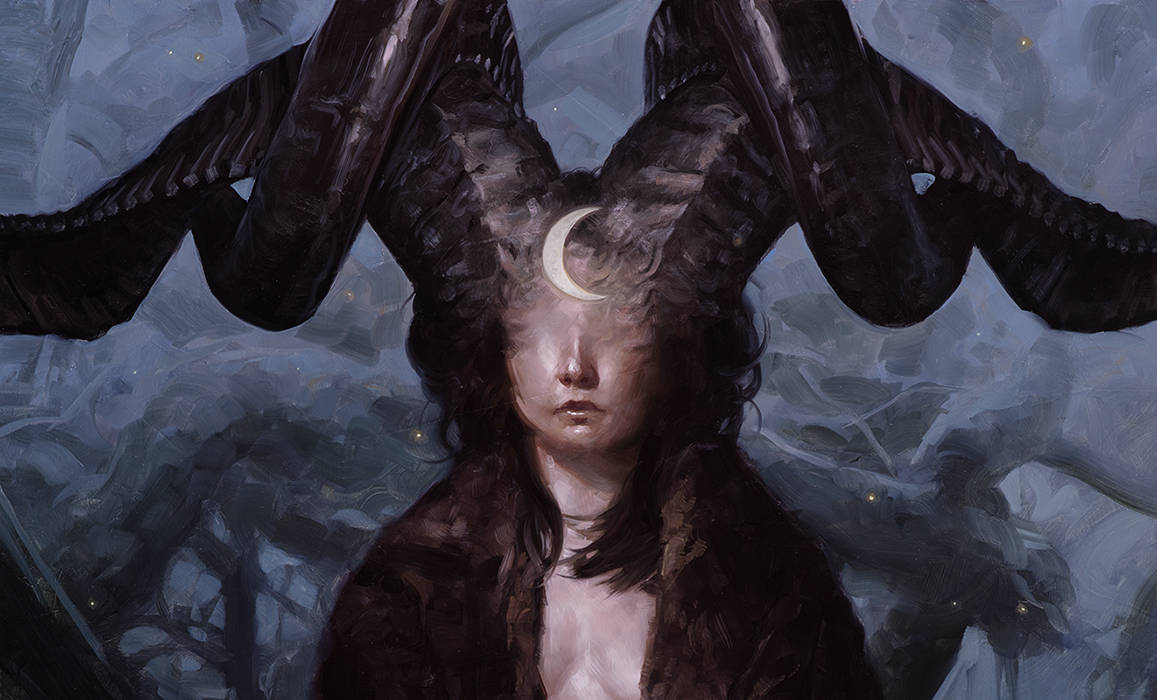
I’m a strong believer that the earliest stages of any creative process are the most crucial because they will shape, limit, and guide everything that follows. Once I have roughed out concept thumbnails, photographed and gathered reference images, and prepared final sketches for a client (for commissioned work), I already have a pretty good idea as to where my painting is going. The more diligent you are in your prep work, the less likely you will run up against unfortunate surprises to slow down the actual execution.
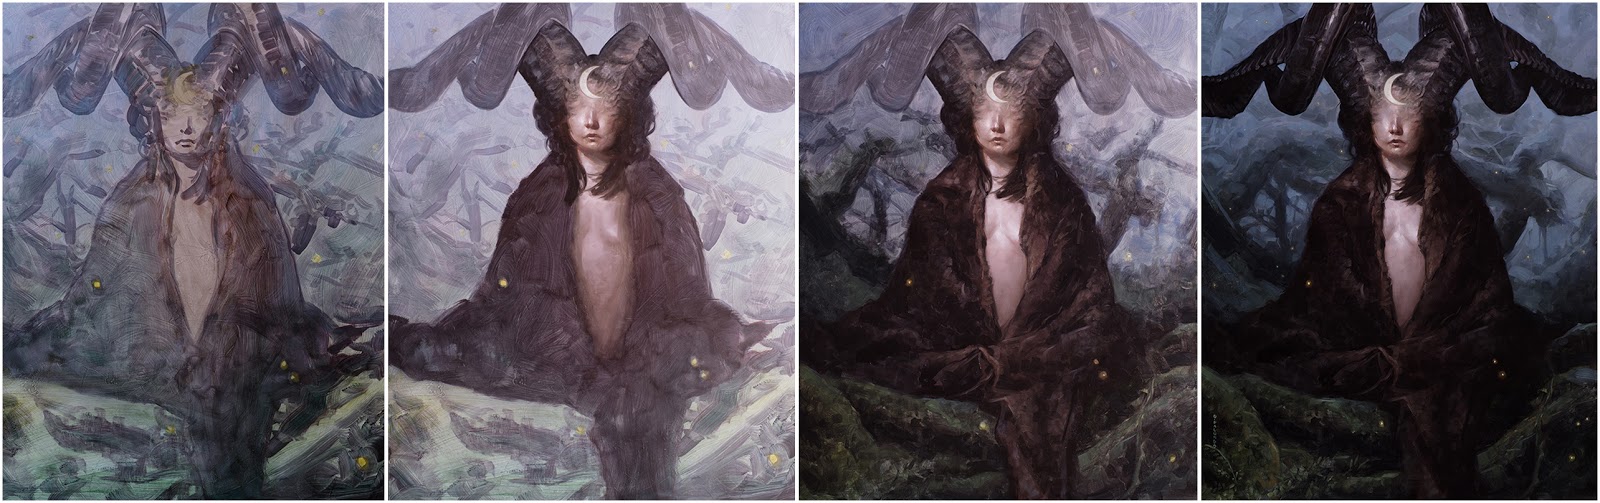
Laying In
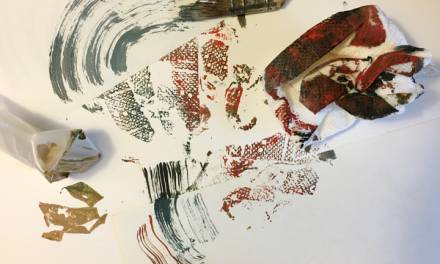
To begin a piece, I carefully lay out a structural under-painting. The surface I most often work on is gessoed Masonite with a midtone wash applied. 99/100 times, my midtone wash is a mixture of Alizarin Crimson and Pthalo Green. This gives a middle value that I can push and pull from. With the ground still fresh, the under-painting is drawn down in the same mixture. I thin only with turp if I need to lighten an area (rarely anymore. I didn’t do any lightening in this lay-in) and never add any white. For very small pieces such as sketches, I might pencil down my shapes first. With full sized works I’ll typically lay shapes in with a projection from my prelim prep, though in some cases I use a grid or no transfer aids.
The important part is that the structure is indicated precisely. I’m not concerned with modeling forms and I actually like simplification in the lay in, just so long as it is accurate. When the lay in is dry to touch, I’ll wash colors over top to set the mood for the piece.
Focal Points Get First Priority
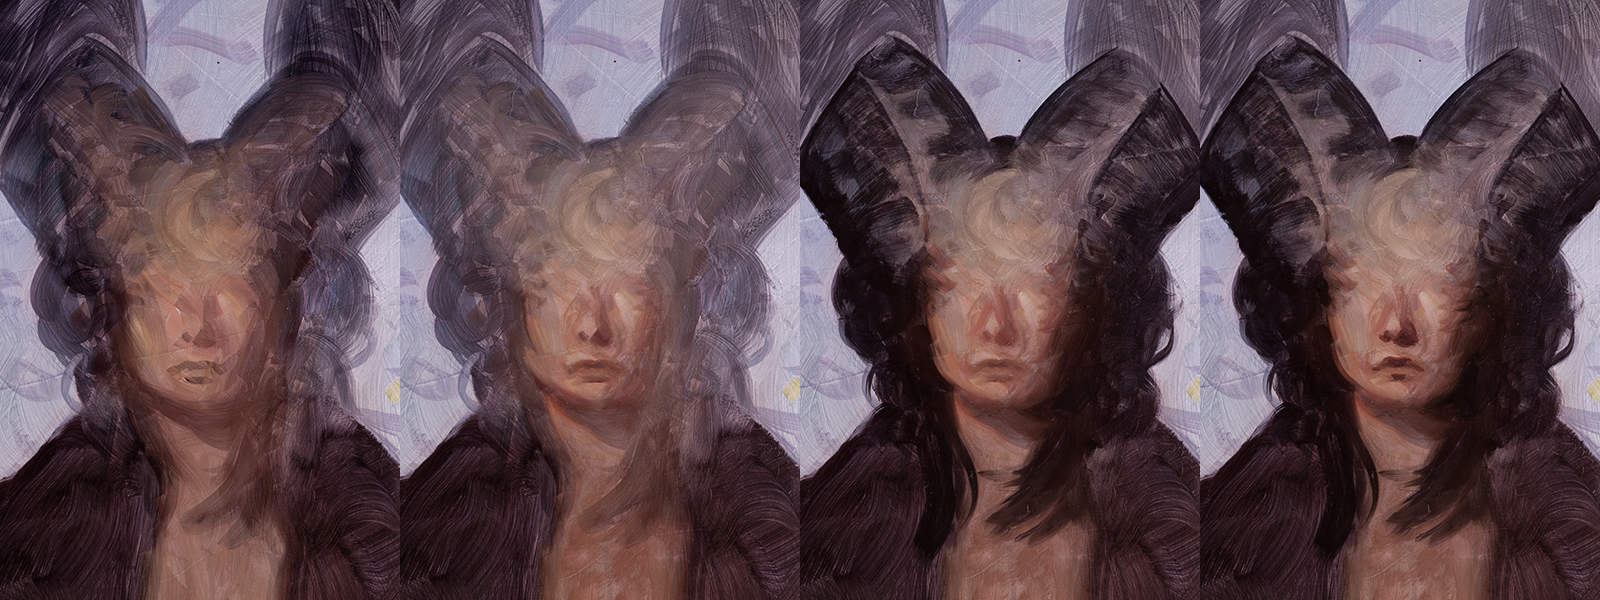
In an effort to avoid overworking areas of lesser importance, I’ve taken to starting with the most important spots and working outward from there. That almost always means the portrait of the primary subject. In a normal portrait the eyes would do the heavy lifting, but since this figure has no eyes the responsibility falls to the next most interesting and clear features: nose and mouth.
I begin with thin color and big brushes, roughly blocking out the midtones and colors of the face. Working wet-on-wet over top of this thin layer, I can push and pull shadow and highlight. All added details will be influenced by the block-in layer color to help give a global color harmony. This also gives me more freedom to think tonally and steer the colors gently as needed. My normal approach establishes midtones first, then shadows, then highlights. I’ll use smaller brushes as needed, but try to always use as large a brush as possible without losing control. Typically I don’t get smaller than a #4 flat except for the very finest of details.
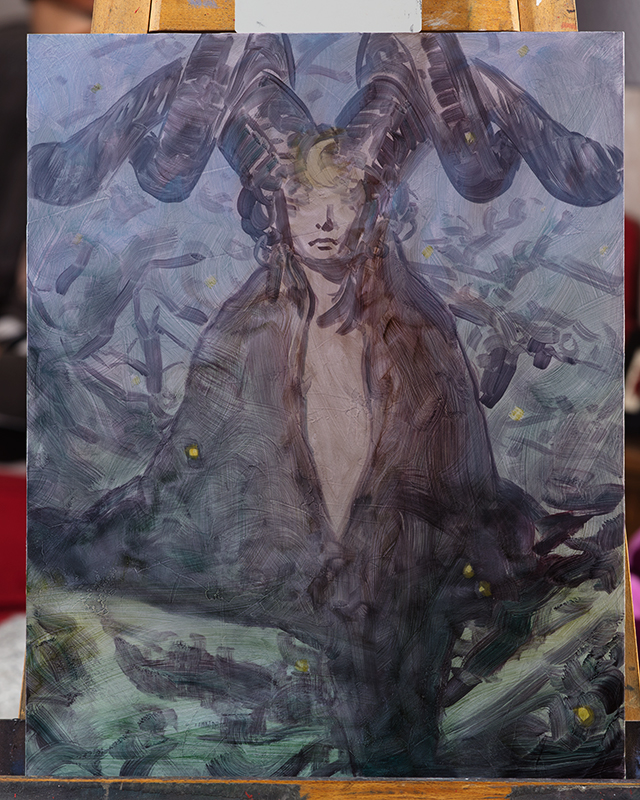
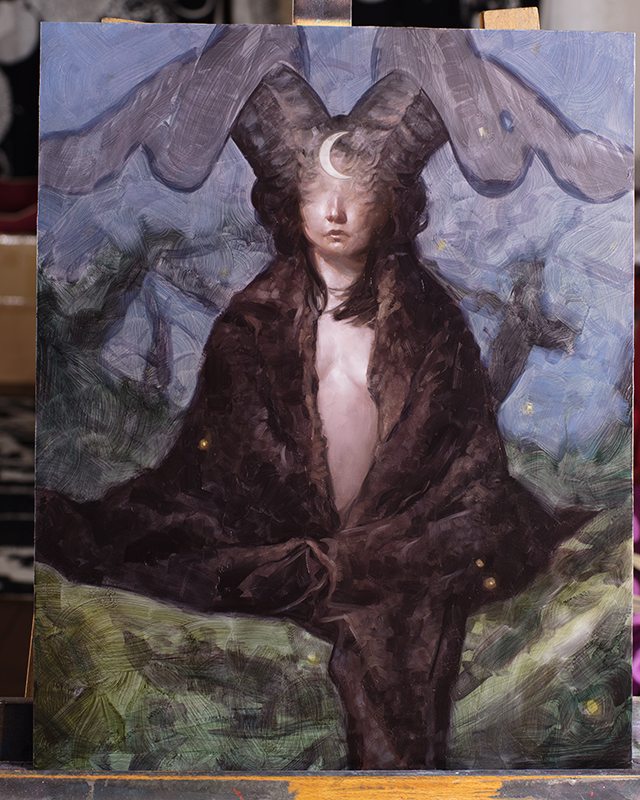
Bleeding Outward
You’ll notice that the background is brighter and faded here. This is just because the thin wash has sunk in which makes the colors and values dull and pale. This isn’t a concern for the time being.
I usually like to move to connecting areas as I go. Even if I need to jump to a secondary focal point, I’ll block in rough tones to make a bridge. In this case, the focus and composition is so central that the progress just radiates outwards. From the portrait, I begin defining the rest of the torso.
As the torso skin tones come together, I add some surrounding tones to balance and adjust. This also Allows me to design my edges as one area moves to the next.
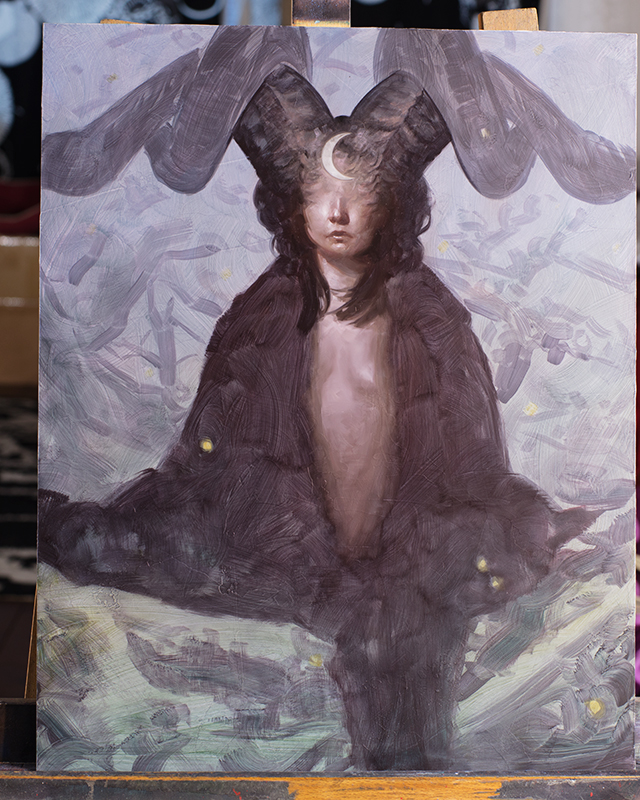
With the portrait and torso well established, I then fill in the large dark shape of the cloak. I’m building shape by shape here. The focal area, the light shape of the torso, the dark shape of the cloak, etc.
With the general established, I build the smaller shapes inside. Adding dark to midtone, and occasional highlights, describes the nuances in the cloak.
It’s now time to revitalize the background with a new, slightly more opaque color block-in similar to the earliest steps in the portrait.
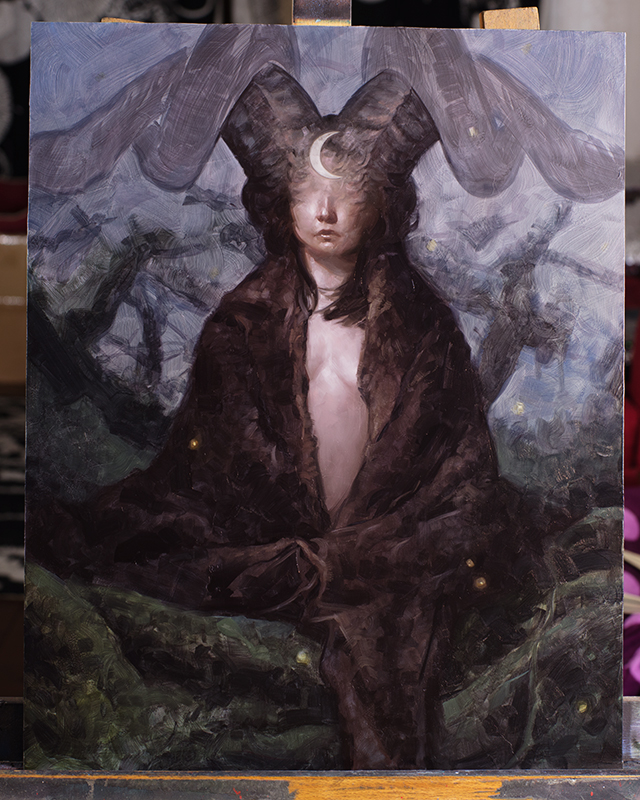
And then adding shadow and establishing shapes and forms.
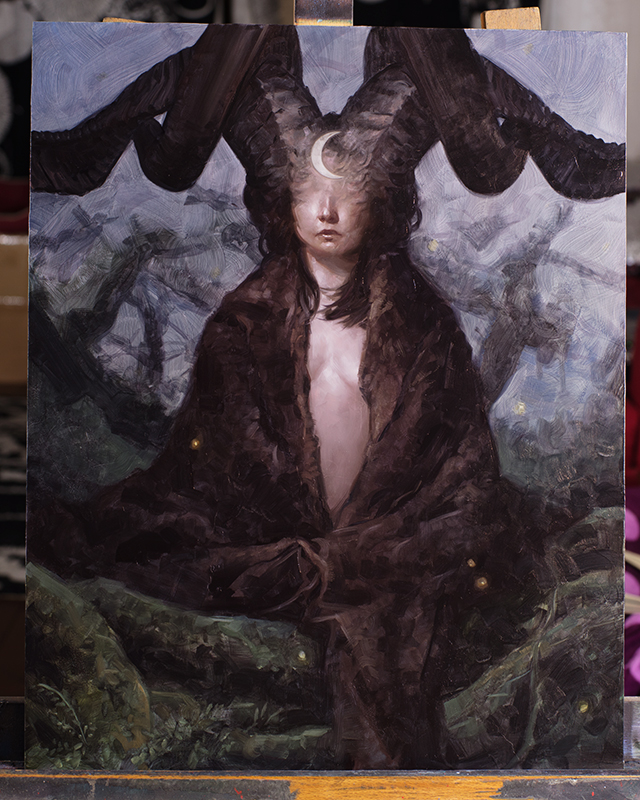
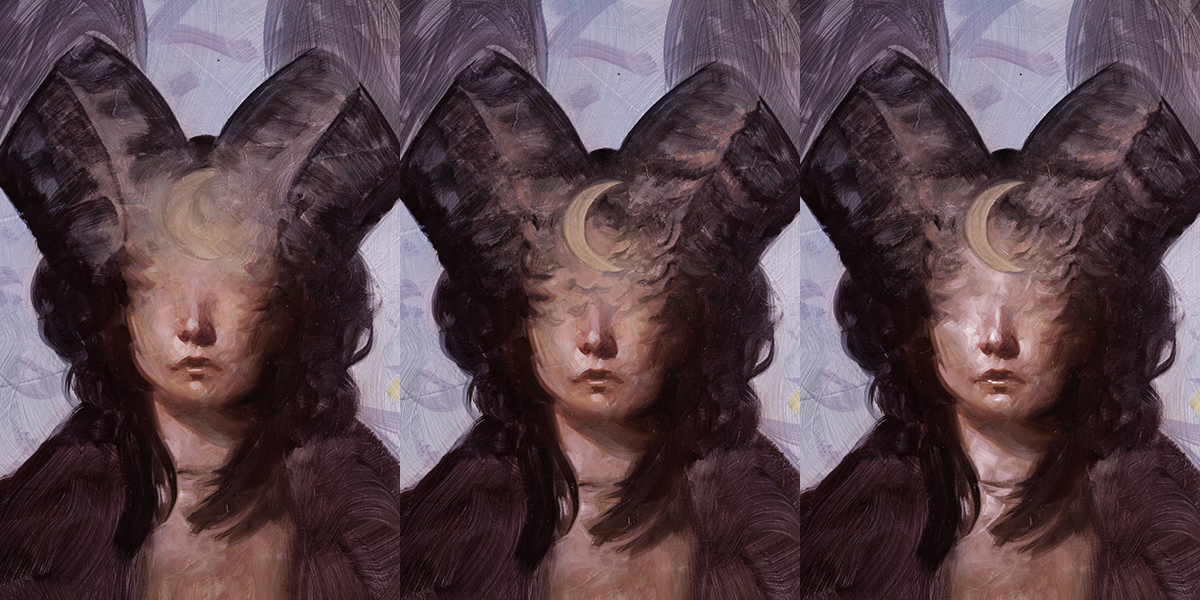
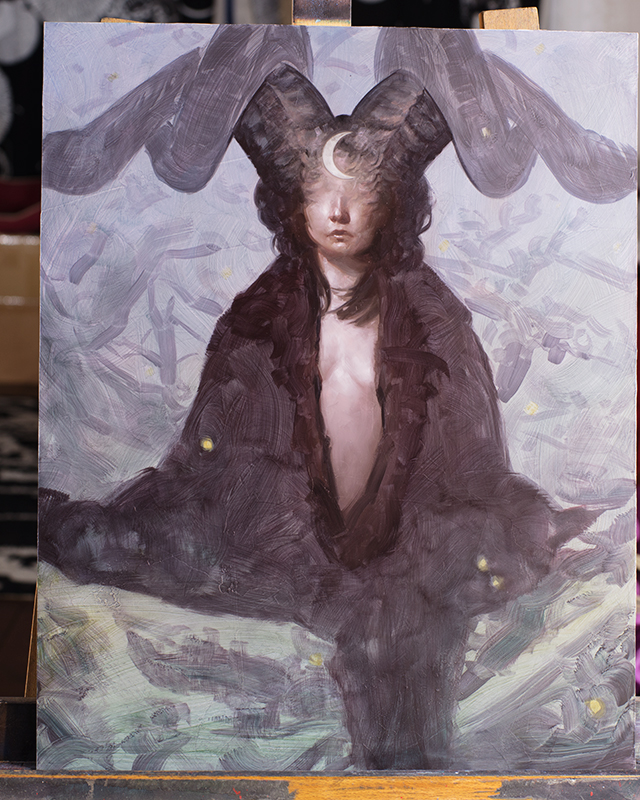
Giving a similar treatment to the horns by starting with the overall dark shapes in a rough fashion. I’m also at this point going back to established areas and making slight adjustments as the more peripheral details add context. Edges are refined and details added in the foreground, and slight modifications are made to the portrait.
The dark block-in of the horns give shape and an underlying textural vibe. Adding highlights gives them volume and a more specific surface texture.
With the horns in place, I now have enough information to go back into the background and find those values, colors, and shapes.
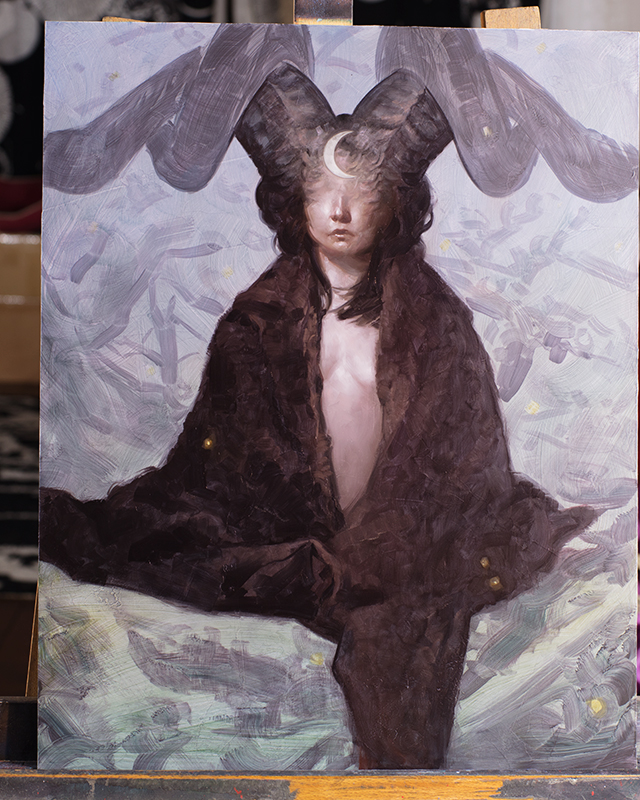
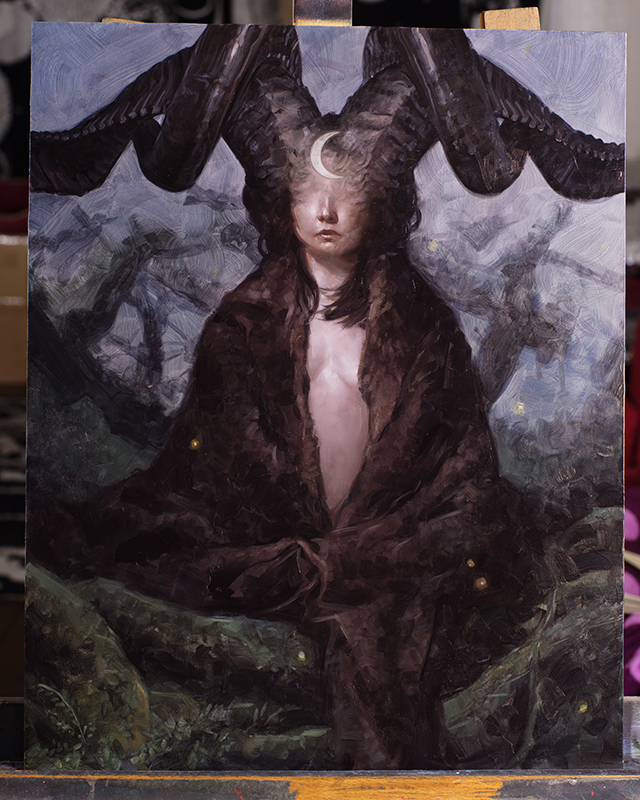
Organic environments are terrific for refining a composition, because they can be easily bent to the needs of the painting. I had a general plan in place for the tangled tree limbs and I don’t need to drift too far from it, but I’m now free to look with an abstract eye and adjust shapes as needed. With the intention of a hazy atmospheric environment, I lay out my colors and tones and then drag into them, muting things down and pulling it together in the process.
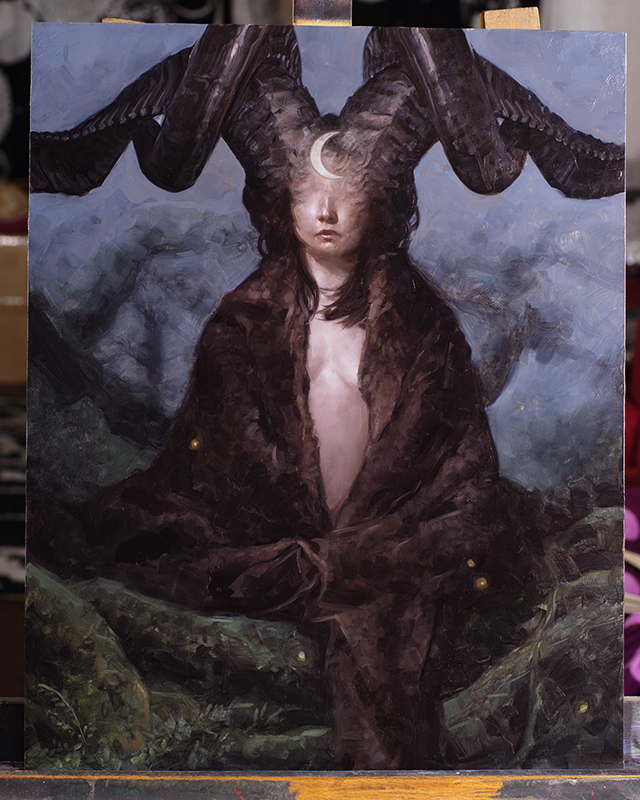
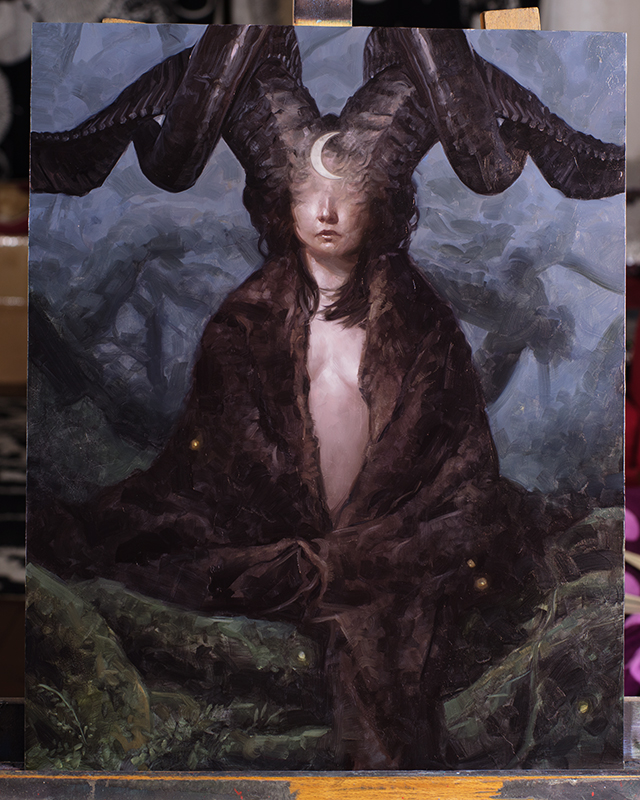
Final Touches
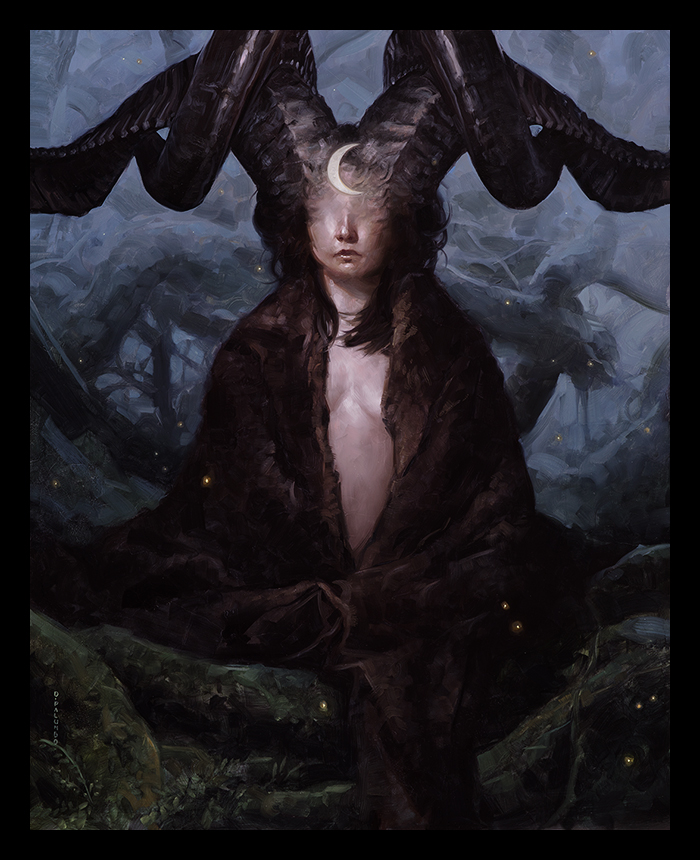
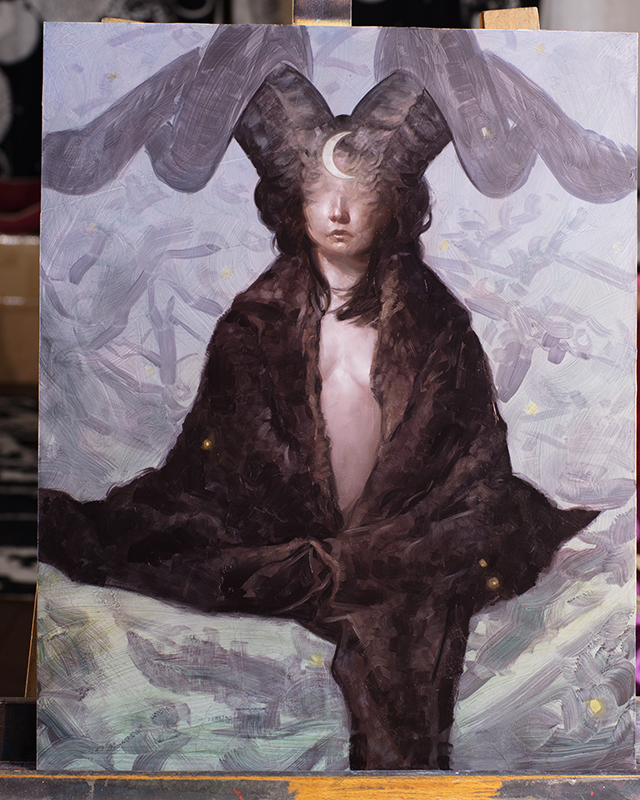
The last little bits are added: Refining edges, final touches on the portrait, and adding or simplifying details on the environment as needed. At the very end, I commit to the final placement of the fireflies.
And lastly, here is a quick recap of the process…

This is such a beautiful work! Thank you for sharing your journey with us!
Thank you Katharina!
That’s really great David, i love the final work and the personnal thoughts and mental process behind the paintjob is really precious.
Thanks for sharing it with us man!
I absolutely love how it still looks so vibrant even though it’s quite a dark painting. Would you have any tips on how you pick your colors as they always come together so beautifully.
Thanks so much! Working over the thin washes helps keep them synched with each other. Starting thin and adding more body as the form comes together also helps prevent muddyness because by the time it’s getting thicker I have it pretty close to right.
Other than that, just figuring out what tends to work through experience. My palette hasn’t changed much in about 10 years and I get to know it better with each painting
Thanks, I appreciate it!