I draw from the figure almost daily. I teach several classes during the week that
allows me to stay close to the subject and the rest of my work time is spent
doing illustrations, character designs and commissions where I am constantly
working with and manipulating characters.
I am constantly reminded of the problems we face when drawing, and
especially when working with the figure.
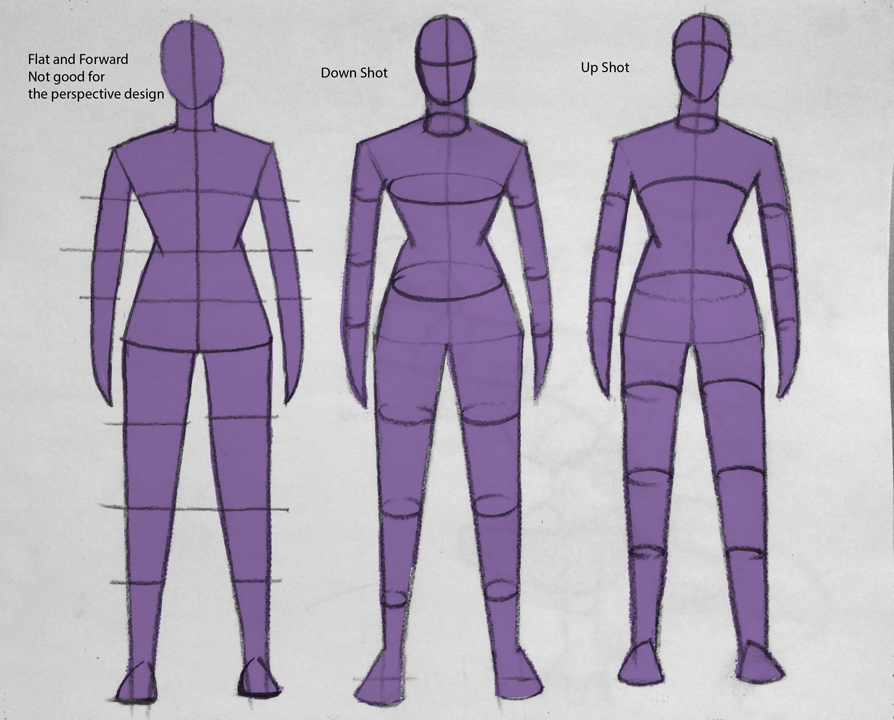
The most universal problem I have found with many artists,
beginners, and intermediates as well as with many seasoned professionals is matching
everything drawn in a scene to the horizon line, especially organic shapes and
of course the figure. Many times the
figure is drawn with a flat forward look to every part of the body. In other words, there is no real elevation
change in the figure from head to toe and/or if there is, it is only emphasized
where it is most obviously recognizable.
There are tools that the artist can use to solve this issue
long before investing time in the rendering.
If we use landmarks, ellipses and overlap shapes using a strong draw
through method, as well as indicate a ground plane and possibly a horizon line,
unless we fall asleep at the drawing wheel theses tools should work well
setting up solid armatures to take to a finish.
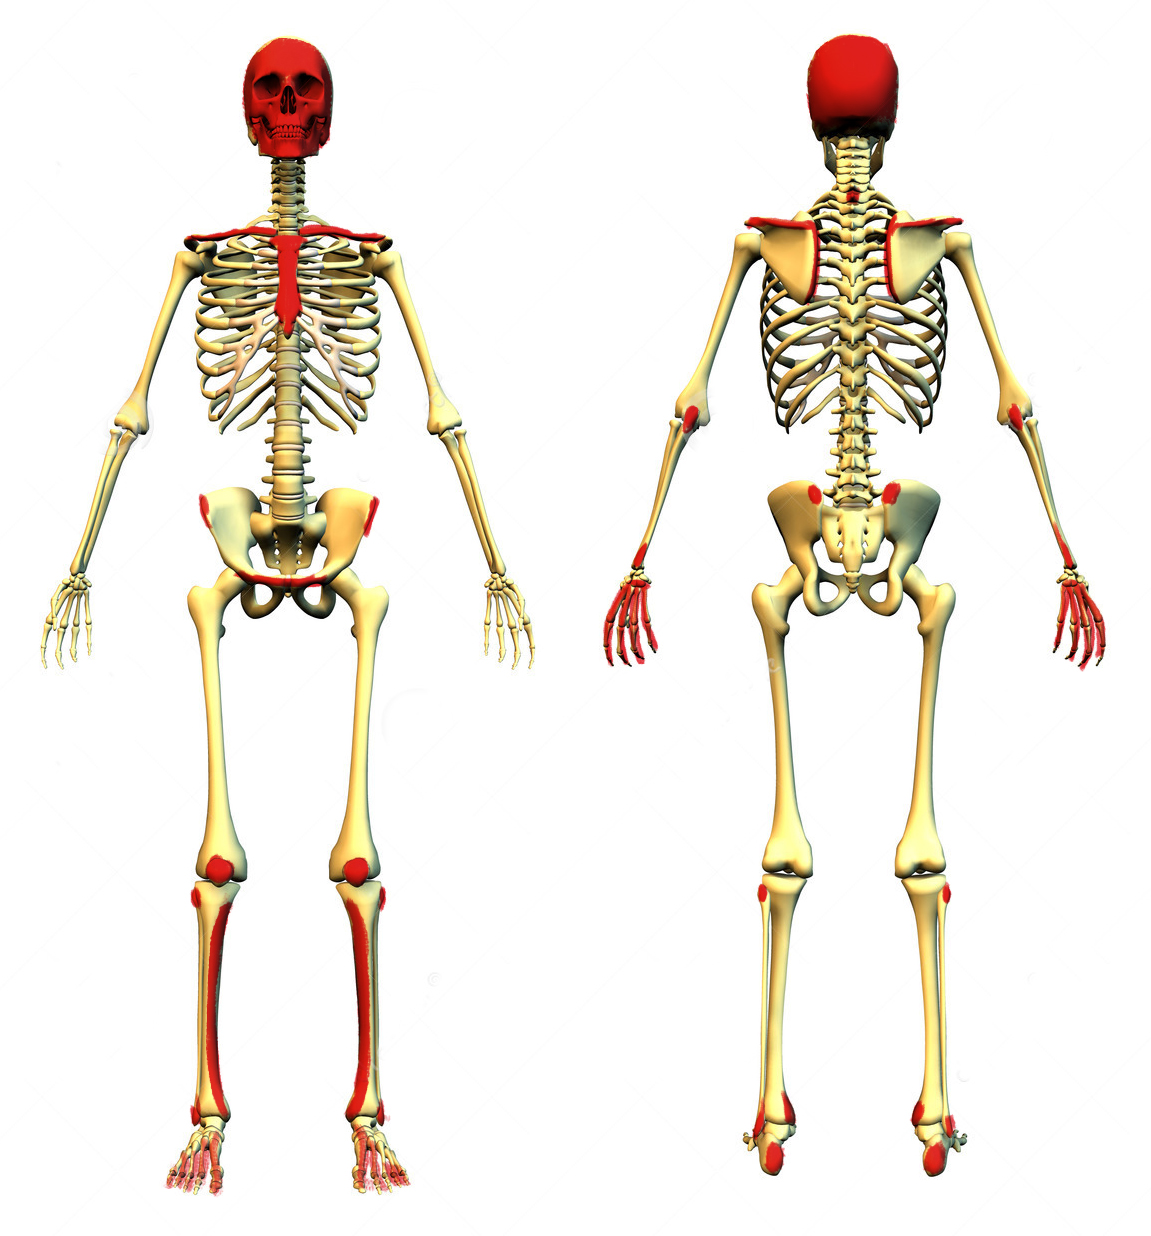
Landmarks, also known as subcutaneous boney surfaces, are
the bones under the skin that influence the surface. The skull for the most part is one large
subcutaneous landmark. With exception to
the cheeks, most of the skull is just below the skin. The clavicles, the sternum, the elbows, the
knees, etc. are landmarks we look for. One
use of the landmarks is to compare the left side of the body to the right side
of the body. Using the centerline as a
gauge for these landmarks, we align the left side with the right side or the
front with the back based upon the landmarks, their elevation and their
distance to one another. The following
skeletons show the landmarks of both the front and the back of the skeleton.
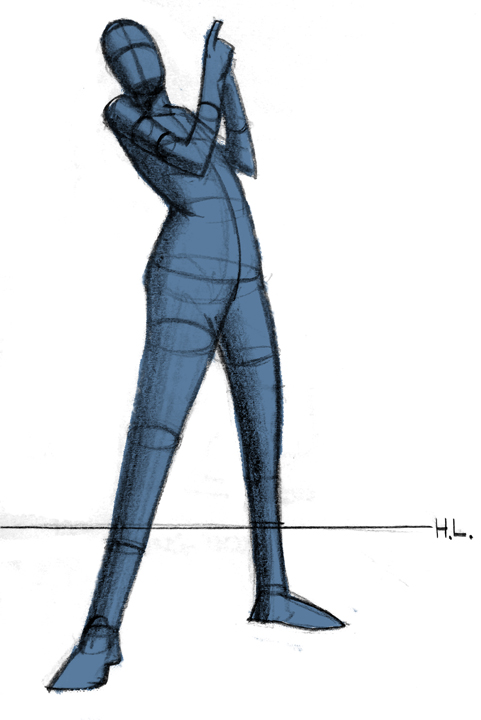
The mannequin is the starting point for the figure, or the
armature that represents the skeletal structure of the pose. The core of the skeleton is called the axial
skeleton while the arms and legs are called the appendicular skeleton. Ellipses should be drawn around the axial
skeleton near the neck, the 10th ribs, the pair of iliac crests and
the base of the pelvis including the greater trochanters. The upper and lower half of each leg and arm
should have ellipses drawn around them dividing each segment of each
appendicular limb into thirds. This
division will come in handy when drawing out the proportions of the muscles and
tendons.
These ellipses drawn help us understand a few things we are
looking at. The first is the
foreshortening of a space. The more
circular you see the elliptical lines the more you are looking straight through
the object. The flatter the ellipses,
nearing a straight line, the more perpendicular we are facing that
ellipse. The other use of the ellipses
is when we draw these ellipses around the cylinder forms we are placing markers
on the body to help us with volume as well as with elevation. If we sit low to the model then we should be
looking up under the ellipses more and if we are above the model we should be
looking down at the ellipses. This
diagram below further illustrates this concept.
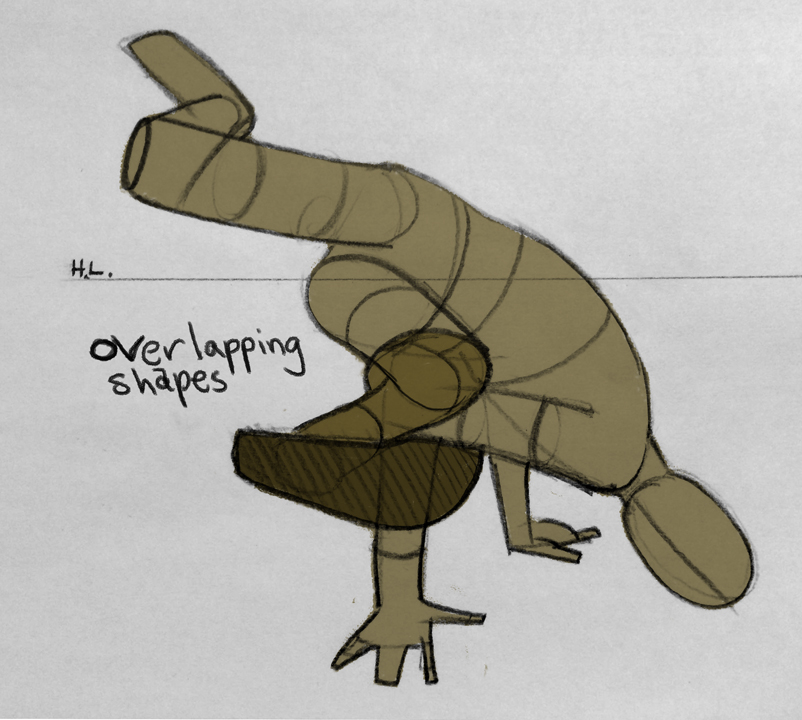
Overlapping lines and shapes also help with identifying the
spatial relationships with the body.
Overlapping shapes can and usually indicate foreshortened sections of
the body. The shapes should be drawn
using the draw through method. With the
draw through method shapes are completed, spaces are totally resolved and more
information than is necessary is found helping the artist fully realize where
all the parts of the body are with any pose.
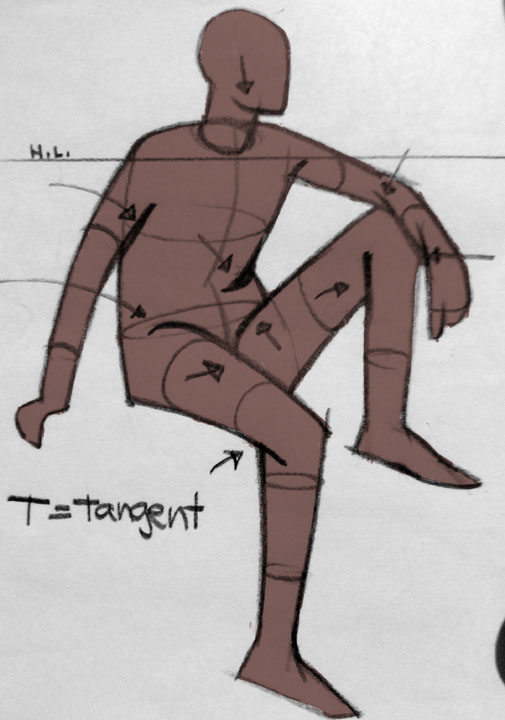
Overlapping lines are very similar and are used in places like the hips
or any bending segment of the body. Of
the converging lines, one ends abruptly called a broken line and the other
becomes the tangent. The tangential line
indicates one volume passing behind another volume indicated with the broken
line.
spatial relationships with the body.
Overlapping shapes can and usually indicate foreshortened sections of
the body. The shapes should be drawn
using the draw through method. With the
draw through method shapes are completed, spaces are totally resolved and more
information than is necessary is found helping the artist fully realize where
all the parts of the body are with any pose.
Overlapping lines are very similar and are used in places like the hips
or any bending segment of the body. Of
the converging lines, one ends abruptly called a broken line and the other
becomes the tangent. The tangential line
indicates one volume passing behind another volume indicated with the broken
line.
Now, when starting the figure drawing elevation is critical
to the delivery of convincing forms in 3D space. When drawing from a photograph it might be
more difficult to indicate where the eye level is. Hint: If
the reference is a full figure from head to toe then look at the feet. The rise of the heels in relationship to the
toes and the reverse is very telling of the perspective of the pose. If the photo is cropped then it will be more
difficult to observe where the proper eye level is to the horizon line. When life drawing or shooting photo reference
for an illustration we have to be fully aware of our position to the model.
Drawing in a ground plane is always helpful and beneficial
to reminding the artist that the figure drawn exists in 3D space. Gridding the floor plane is always smart as
it helps us with measuring up through the figure and determine distances
between feet, knees, etc. It does not
need to be absolutely accurate, it just needs to remind the artist to
constantly measure the figure not just for likeness but also for elevation and
dimension as well.

I would also strongly recommend that for every object,
figure, or anything else that you draw should have a horizon line indicated
relative to your position or the photographer’s position to the reference. This will constantly remind you of elevation
and to remember to exaggerate whatever features are necessary to maintain a
solid elevation in the pictorial space.
There is no need for vanishing points or connecting back to the horizon
line, it is not complicated perspective.
One last tip for drawing the figure in 3D space at the
correct elevation is to create was is called a bounding box around the
reference. By doing this the box will
help the artist remember all sides of the figure as well as dimension and
elevation reference points. In fact,
this method can be taken one step farther by taking the bounding boxes and
rotating, tipping, tilting and turning them in different positions and
redrawing the pose to fit within them. I
will cover this in greater detail in another future article.

Put these concepts to work and practice them as much as
possible. They are simple exercises but
do not rush them. This exercise should
be thoughtful and slowly developed. The
more you practice it the easier and quicker it will be to use. Good luck and enjoy your development.
possible. They are simple exercises but
do not rush them. This exercise should
be thoughtful and slowly developed. The
more you practice it the easier and quicker it will be to use. Good luck and enjoy your development.


Thank you Ron. Can't wait to try it!
Ron Lemen is a genius, and sites like these need more fundamental instruction like this.
Thanks, Ron! Much appreciated reminder.
I took your CGMA class last spring–really helped me with understanding anatomy. I'll look forward to reading your future Muddy Colors posts!
Nice! And does this mean you have a full anatomy book of your own coming out?
Hi Ron,your contents are always great! I find this issue quite boring, I wanted to ask you something. In some of the drawing you posted there are cilinders seen from above even if they are above the horizon line which should coincide with the eye level,can it be that the body parts are related to their ground so that’s why ellipses appear so? Or that’s because the body in coming in our direction so it’s moving forward or otherwise is going backward? Also,because of this confusion I struggle finding the horizon line in a picture which has just the figure in it,any tip for that? Thanks if you can help
Ron Lemen provides valuable insights into the challenges artists face, particularly with perspective and elevation in figure drawing. His experience as someone who draws from the figure daily and teaches art classes adds depth to his observations.