
I started my official “commercial art” training at the age of 13. I’m talking ink wash black and white illustrations of a coffee pot for the Sears catalog. If most of that sounds meaningless to you—you’re lucky. Was it soul crushing? Not really—because I hadn’t yet developed an artistic soul to be crushed! Anyway, for me, making art has almost always meant making art for someone else. I think there are generally three entities we might make art for (and they are not mutually exclusive): ourselves, an audience and a client. With commercial illustration we are generally going for all three. We need to be making the picture for ourselves, or it will suck. It will be lifeless. We need to make it for the client or they will be dissatisfied and, no food, no rent money. And we need to make it for the audience because that is, factually the biggest entity, and imo perhaps the most important. That is the one that will be around forever, long after the artist and client are gone, if we’re lucky and good at what we do.
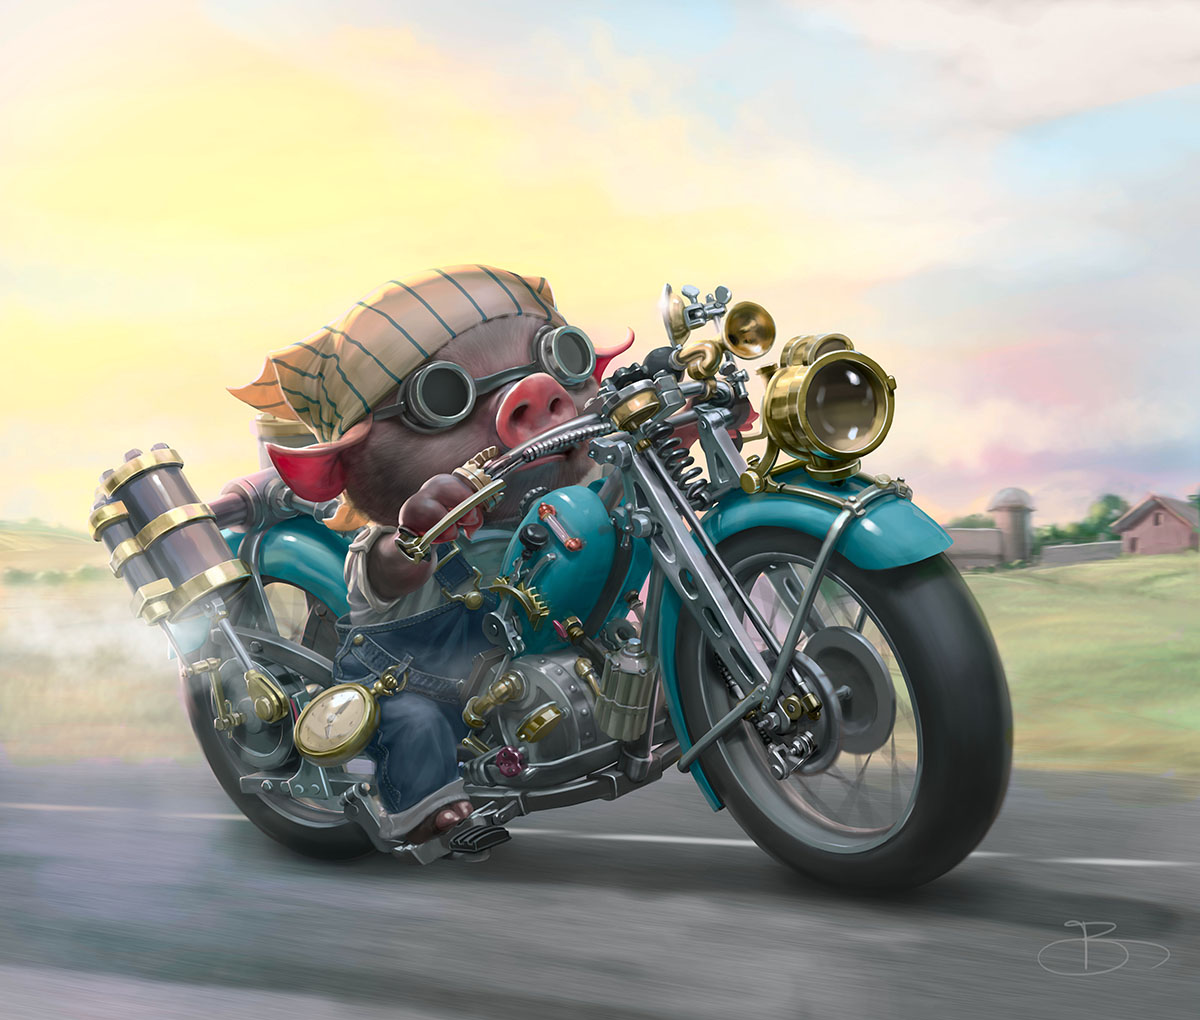
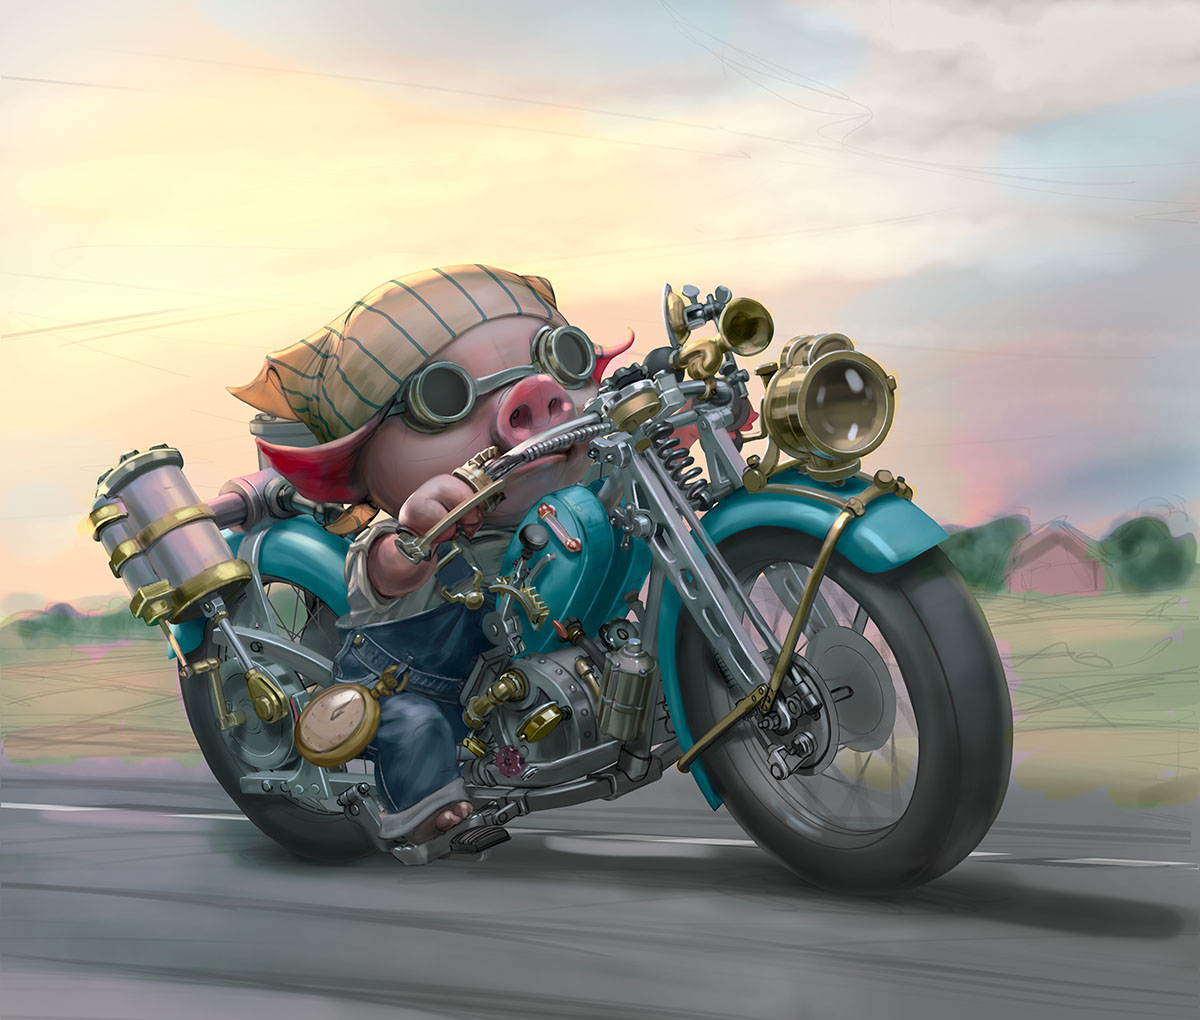
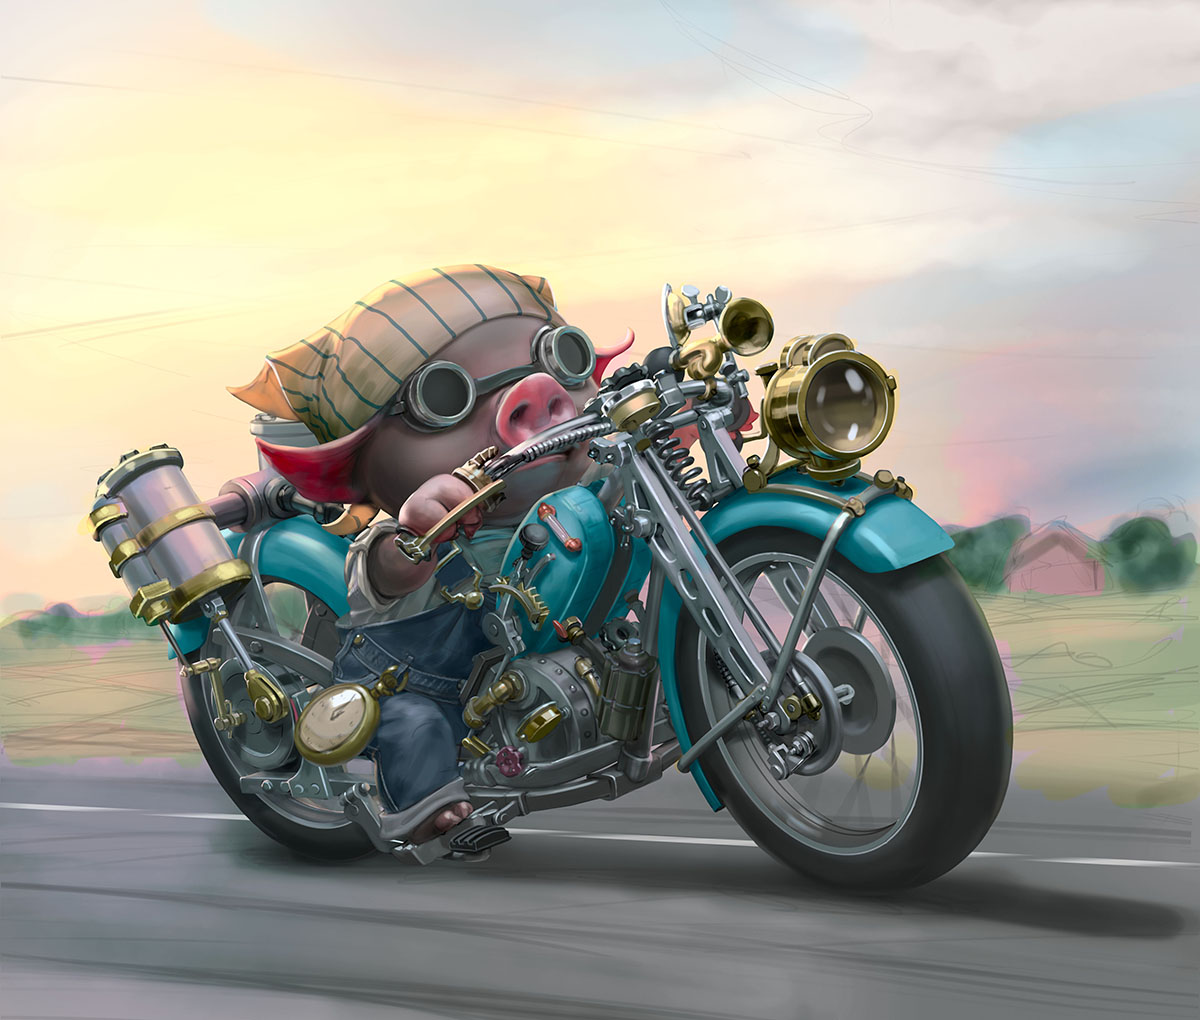
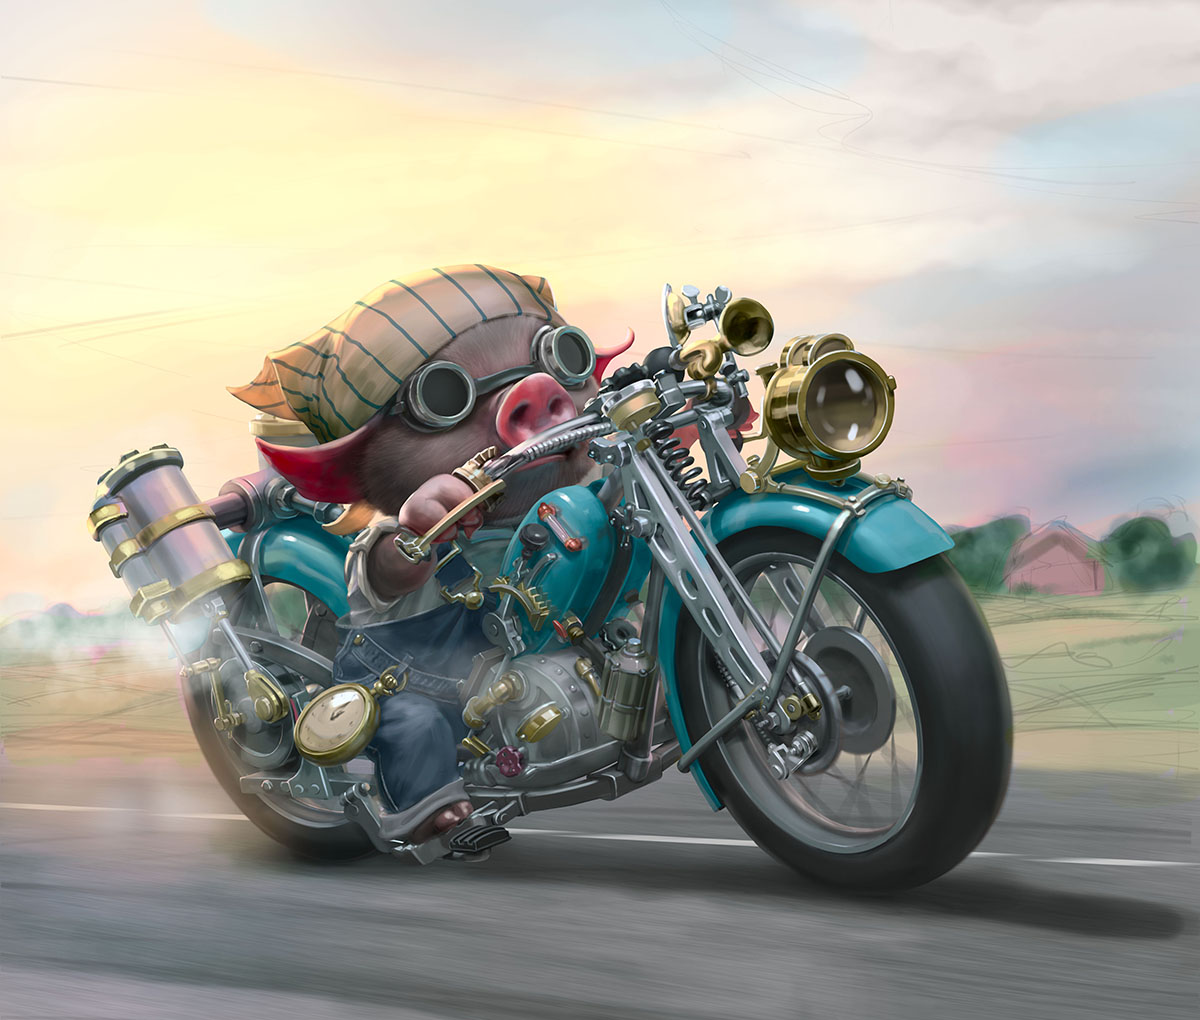
Angie’s motorcycle is her personal piece.
When doing a “personal piece” I’m much less concerned with time—other than making sure I don’t drag it out for so long I get burned out and lose interest. I am just as concerned with quality as for a client piece. But I’m mostly concerned with teasing out my own vision, and hopefully something new, for me and for the viewer, because I believe if I can produce something that is authentically me it will not only have the strongest voice I can speak with, but it will also be new and unique because I (like you) are (am?) unique.
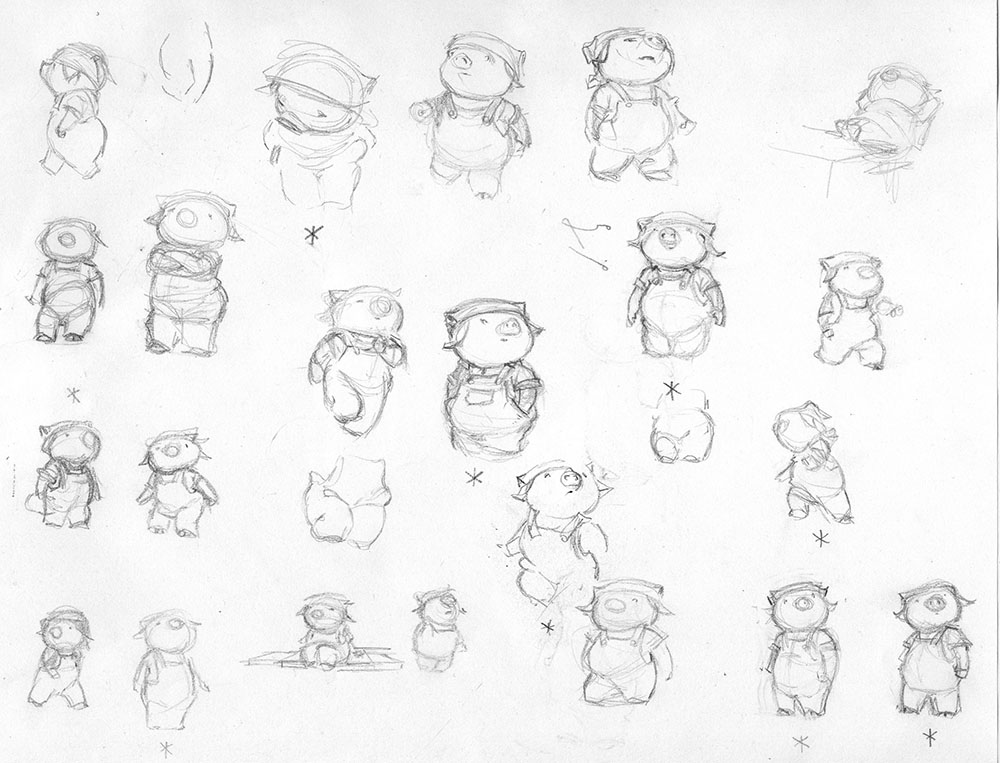
A bunch of drawings of the character
For this reason I actually feel much more pressure when starting a personal piece. Even though I’ve finished hundreds of paintings, I still can get overwhelmed by the prospect of going from blank page to the finish line. The blank page itself isn’t a problem, and the painting isn’t a problem—for me it’s the big middle swath of drawing and prep. I don’t really speak well, artistically, with line, but rather with paint (whether digital or physical). Painting is a different way of making marks and shapes, compared to line, and it’s something that clicks better for me. In fact I have illustrated entire books with no preparatory line drawing at all. But I learned that I needed to use some line work to better plan out and construct my paintings, because though the paint is (for me at least) more direct and expressive, it is also more cumbersome for doing certain things.
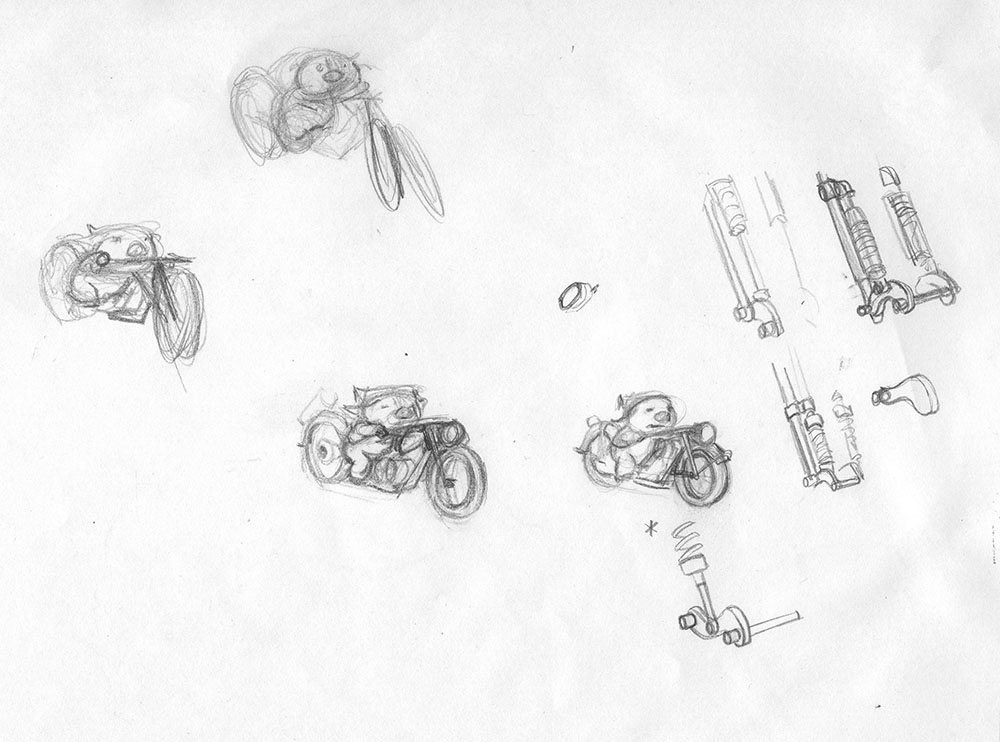
I explored three different stagings for this picture. The character’s (Angie’s) homemade steam-powered motorcycle is emblematic of who she is, so I was going for something that basically showed it as a character as well, like they are best friends, sisters, or whatever. We needed to see enough of both of them, from interesting angles. I’m honestly not sure why I settled on the idea of Angie riding vs. just leaning on the bike. This is one of those things where, since it’s not for commercial work, I don’t need to rationalize why one works better than the other. These are 8.5″ x 11″ printer paper, so the thumbs are about an inch wide.

Thumbnails exploring different staging
The staging I settled on
I spend a lot of time on thumbnails. I tend to keep drawing the same thing over and over, everywhere, until I find that I am repeatedly drawing it the same way, and/or I become very sensitive to seemingly small things. The “posture” of the bike and its rider. How bent are her legs, how far out is the front wheel, etc. I come from a motorcycle family who lived on a motorcycle street. Everyone rode a motorcycle, including me, from a very young age. I had my motorcycle drivers license long before my car license. So I knew exactly what I wanted to feel from the basic design of this bike, which comes down to things like the size and position of the wheels, the position of the seat, handlebars, all that. These few things are the basic forms, the basic statement the bike will make. But for me this is why drawing mechanical things (and architecture) is difficult. Say I want that front wheel to be exactly here for the overall composition–well, I need to connect it to the rest of the bike with a believable suspension system. That adds a lot of time and hampers my creativity.
Once I get a thumb I like well enough, I scan it, enlarge it, and start drawing over it. It’s very unusual for me to go this far without any thought of background, but honestly this was more of a character design / concept piece, and I wasn’t sure if I was even going to include a real background.

The very rough drawing over the scanned and enlarged thumbnail
This is the part I personally hate… or, let’s say I “find it harder to get motivated for.” There are a lot of circular dependencies, like, I can’t draw the engine until I design it but I can’t design the engine without knowing what overall visual appearance I want it to take. This was to be a steam engine, at least somewhat believably functional, so it was not a case of simply looking at motorcycles (even steam motorcycles, which I did of course, but none were really relevant for me). Instead it was a case of learning how steam engines work, and going from there.
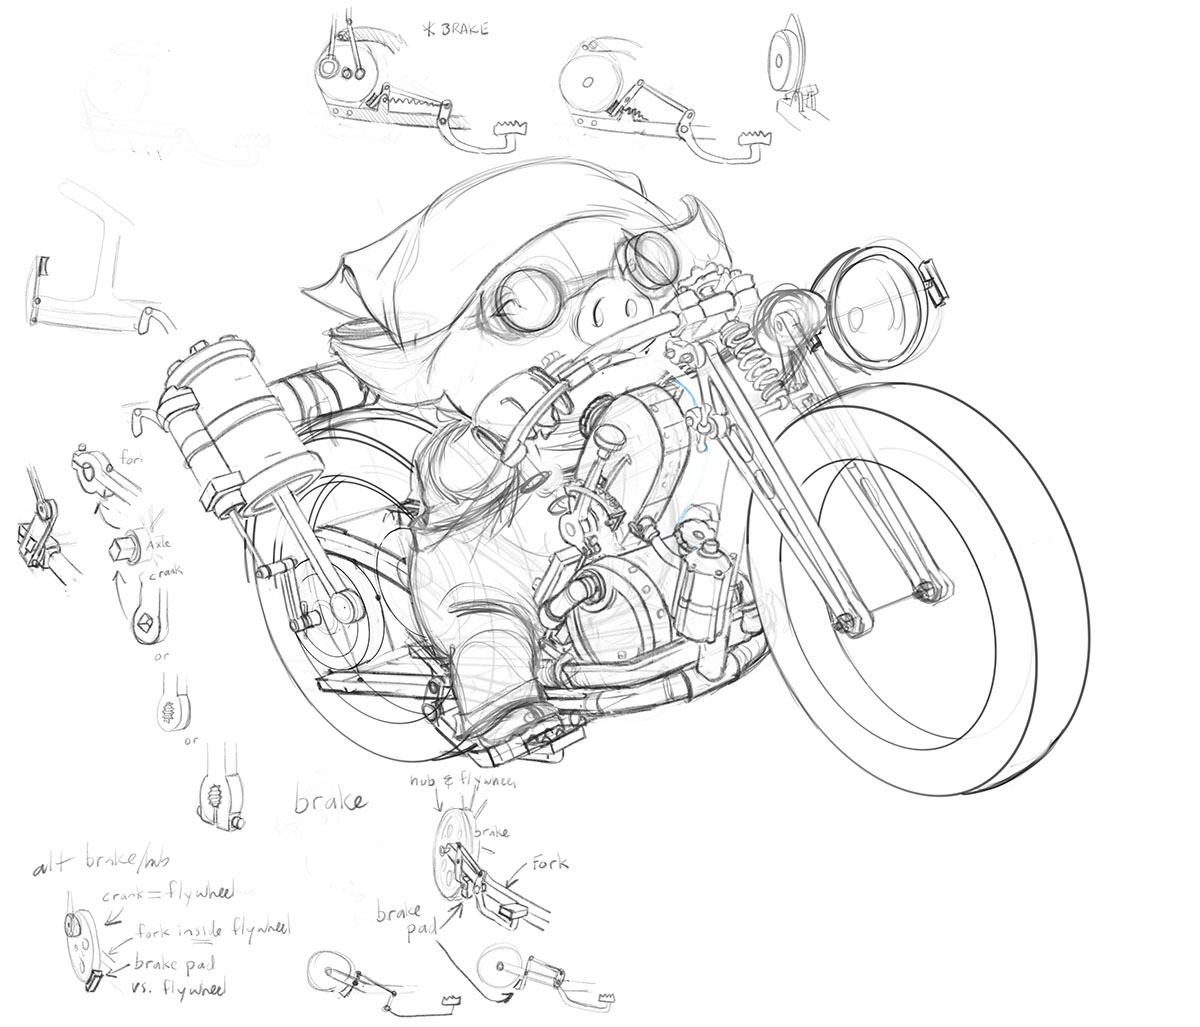
So I make little design doodles (either on and around the actual drawing, or on separate sheets of paper), working through ideas for the basic structures then integrating those choices into the main drawing.
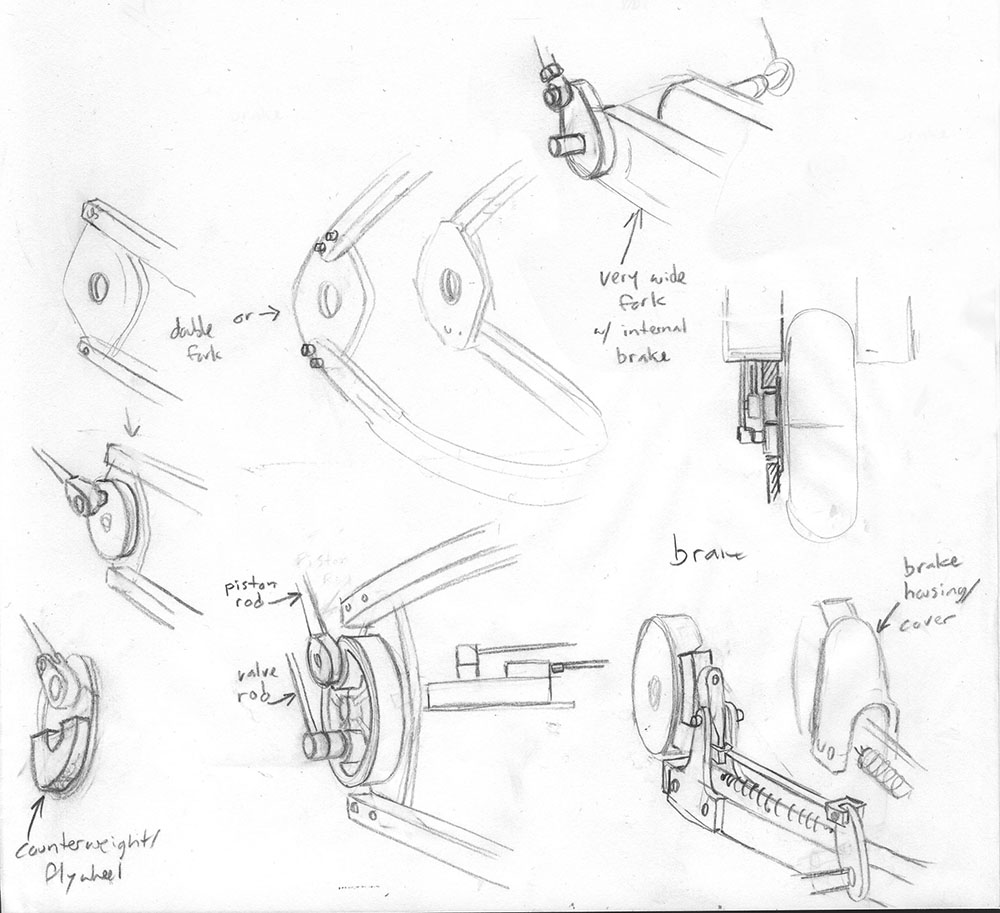
Exploring ideas for the rear hub and brake
I took lots of little visual notes, of how things work, and some completely invented because I’m enough of a mechanical person to be able to design, say, a simple brake system for an industrial-looking bike like this.
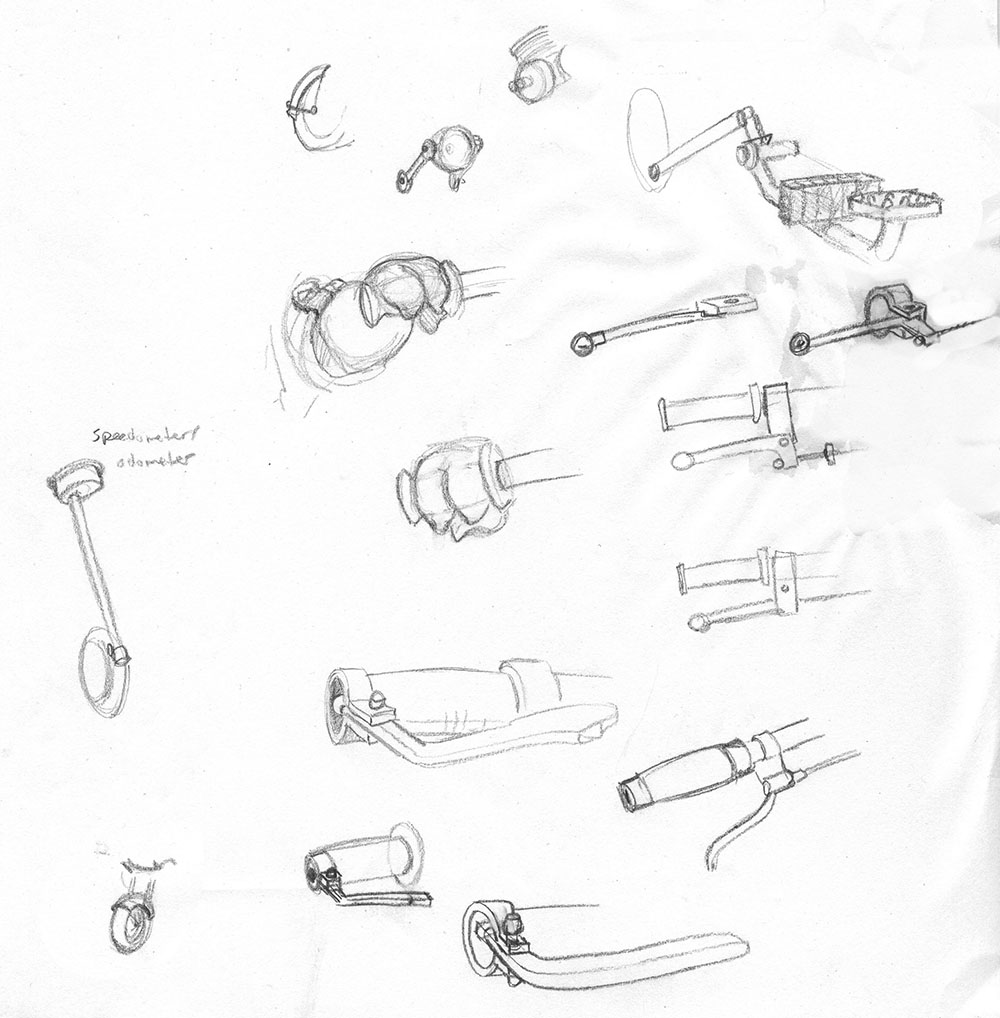
Ideas for the brake and throttle controls
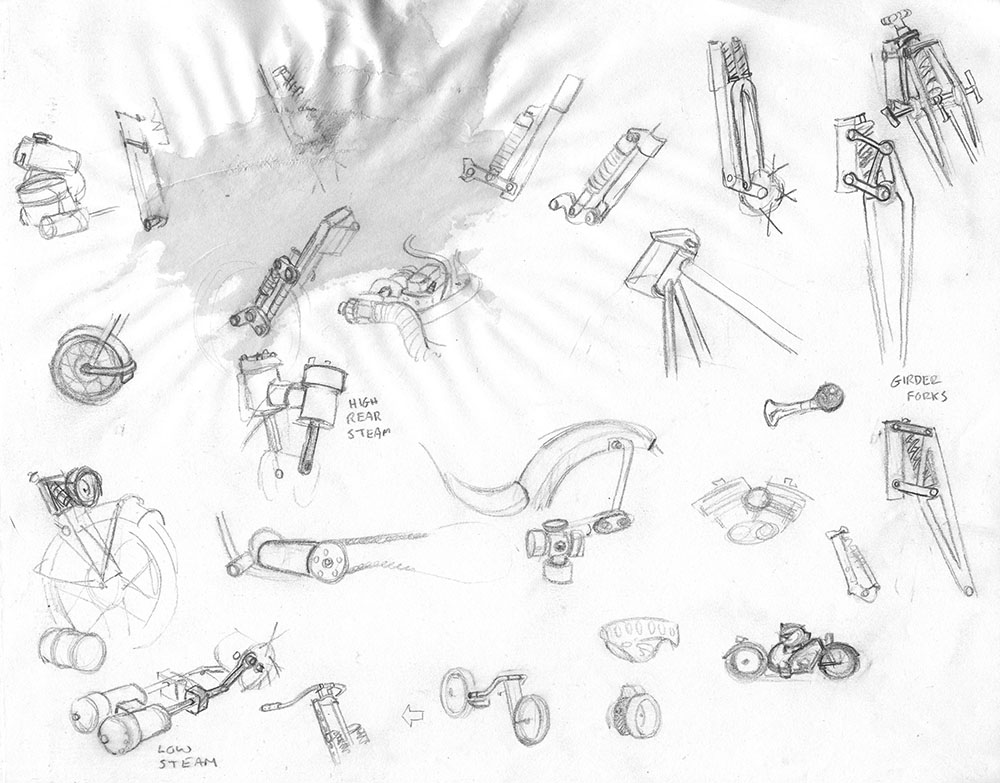
Various designs for the pistons and front forks (pardon the coffee stains)
Finally I arrive at the finished drawing. Despite… or like what I said above, I get anxious during the prep stages and really want to start painting. A lot of artmaking is mood and motivation management. Yes, we have to be professional and do the job when and how it needs to be done, and we usually need to stick to the process we know will work, but the fact is we are generally calling upon some inner resources which are not 100% within our control in order to achieve this, so we need to respect and nurture that creative genie. In this case, I was beginning to lose my momentum, from too much drawing time. In part that is because I, personally, have a short attention span for drawing. So I moved onto the painting even though I felt there were some areas of the drawing that could have been improved or developed more (the ear, the background, etc.)

The (mostly) finished line drawing
To start painting (in Photoshop) I first need to plan the layers. For those who don’t work digitally, this is basically like having a few different paintings on separate sheets of clear plastic, laid on top of one another. For me, primarily, the advantage of this is edge control. I could have the figure and bike on one layer, and the background on another, so just two layers, and that would be a huge help. I can maintain a sharp edge around the figure / bike while painting a soft sky behind it, vs. trying to paint a soft sky right up to that hard edge as I used to do with oil paint. This is basically the same as traditional animation, with a painted background and figures laid over it on a cel (short for celluloid). But with digital I can further constrain all painting on that bike/figure layer to a specific outline or stencil, preventing me from painting on the sky when I’m painting on the figure/bike.
Some digital painters use a lot of layers, so every little thing has its own layer. The tradeoff there is finding and selecting the layer to paint on can become an unwieldy process. So I stick with six to eight layers, for the simple reason that they all fit at once in the layers list, and Photoshop provides seven color codes to assign to them for easy identification (plus “no color” = eight). Here’s what my layer setup looks like:
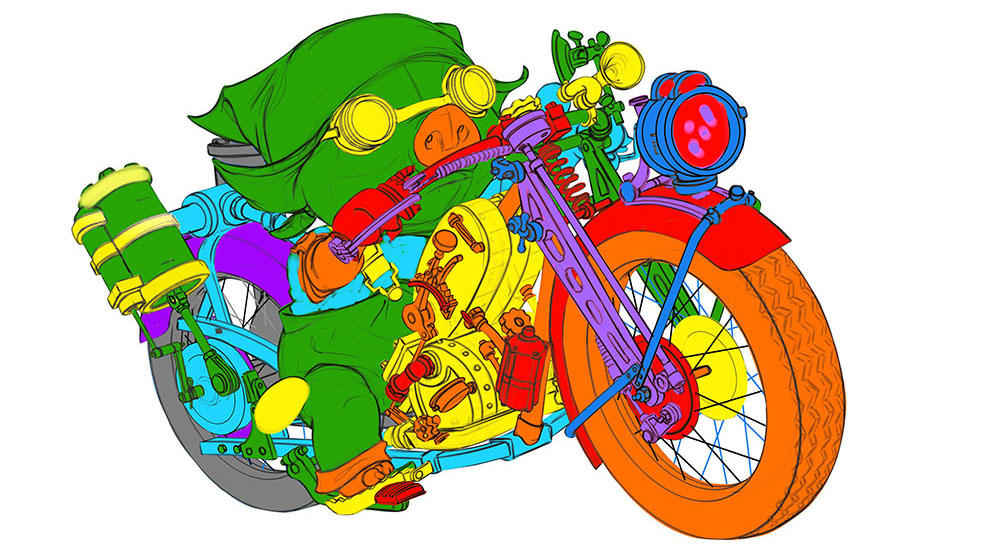
The layer setup
The above shows the layers stacked up, in order from bottom to top (back to front): gray, purple, blue, green, yellow, orange, red… then another purple and another blue, because unfortunately for this piece I just couldn’t restrict it to eight layers.
Note that the layer assignments don’t need to strictly adhere to depth or 3d position. They only matter for overlap. Something way back on the tail (for example, the yellow rings around the pistons on the back wheel) can be on the same layer as something much closer, on the handlebars (e.g. the horn). It takes about a half hour to plan this out and for me it’s well worth it, because once it’s set up I can go on to paint at lightning speed, with a very manageable layers list.
I use the above color-coded version of the image as a guide or quick-reference key for selecting which layer to paint on, by correlating the color of each layer in the layers list to it. Some artists use text labels, so a layer in the list would be called “odometer” or whatever, and they’d select that to paint on the odometer. But with my tight layer setup (with many unrelated elements on each layer), text labels are not much help. Also, for me, color coding is much faster. For me this is crucial, because when I paint I jump all over the place. I see something on the goggles I want to deal with: I glance at the color key, see “yellow” click on the yellow layer, and paint on the goggles.
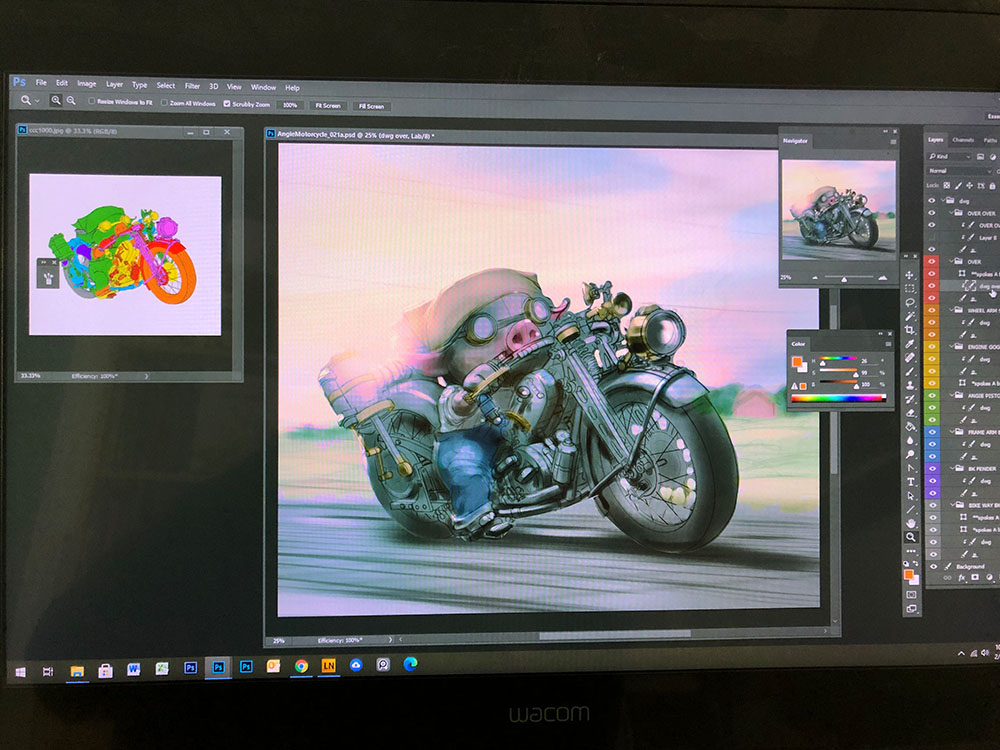
My basic workspace setup: layers color key, image, layers list, thumbnail view.
Once my layers are set up I do the rough painting. However, this is not done on the separate layers, but rather on a single layer under them. All the drawing layers are grouped together, temporarily, and that group set to Multiply, which makes the white transparent, giving me basically a single black ink drawing to paint under. I do this because for this stage of broad brush strokes, big value and color shapes I need maximum speed and spontaneity. This is where I explore different approaches to lighting and color (which, like a dope, I didn’t save for this tutorial), so it has to be fast. I also laid in a simple background.
The rough painting-about fifteen minutes
This entire rough paint takes about fifteen minutes (often less), such is the miracle of digital media. Big, soft brushes, no futzing over precise edges. I’m mostly looking at the thumbnail version in the Navigator as I do this. I want that to feel like a thumbnail for a finished image I might see in a Google search or something, which it will, if all the fundamental value and color relationships are there. Here’s what the rough painting looks like with the line drawing hidden. This is what I am really interested in, especially what this looks like shrunk down.
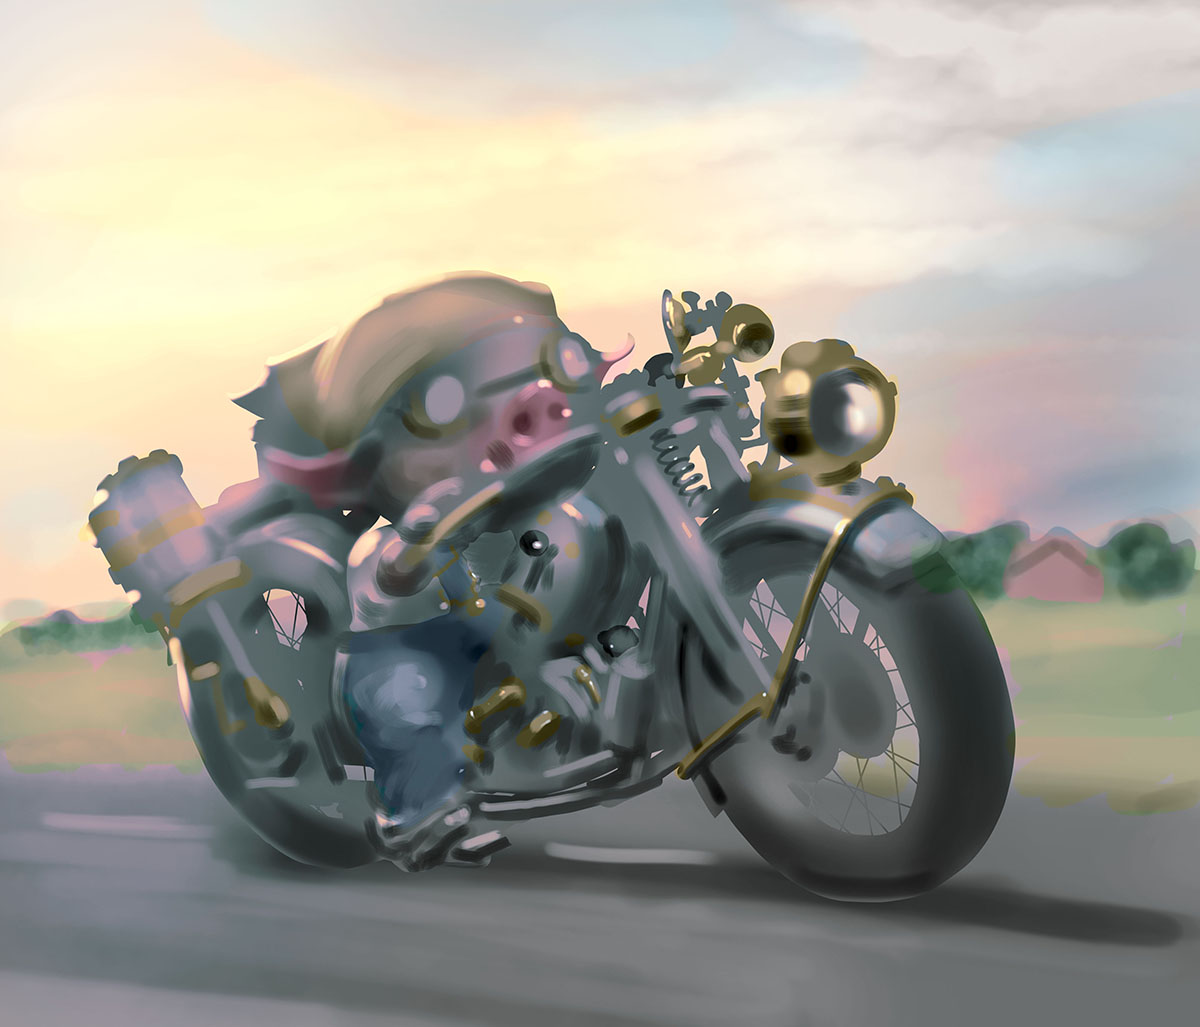
The rough painting with no line
The rough painting, no line, thumbnail size
Now, onto the actual painting. From here on in, for me, is the easy and very fun part. I take the single layer rough painting and duplicate it once for each layer, then clip it to that color-coded shape I made for each that layer. For non-digital painters, this is basically like cutting out each of the nine separate pieces from the rough painting, and stacking them up. But since I set all those layers up in advance it only takes about a minute. Then, above each paint layer, is the line drawing for that layer.
My first goal on the road from drawing + rough painting to finished painting is to get rid of the line drawing, which I do by painting over it (on each layer) until either you can’t see the line anymore, or what little bits you can see work well with the painting (usually they will be occluded areas like deep crevasses and such). Here the line has been painted over in the area of the top of the front fork.
Painting over the line
Here the line is almost gone. This is kind of the inverse of the above, and shows the two different “looks.” A lot of draw-ers can’t make the leap to not having any line in the end. If you want to pursue this approach, you just need to keep going. Yes, when you first hide that line it will look impossible. But just keep going, even on just a small area, like the forks two pictures up.
The line layer(s) nearly gone, from painting over and erasing them
I also added the pocket watch at this point. It’s a fairly important part of the character, which for some reason I’d forgotten.
Once the line is gone entirely the process really picks up speed, because each layer really is just a single (paint) layer. As usual I am using only very simple brushes: round, with varying levels of hardness. For you non-digital, it’s basically sables (small to medium, round, hard) and an airbrush (large, round, soft). No texture, no size variation, but opacity is keyed to pressure. In a few spots I used a flat brush, for the same reason I’d use it with traditional paint. It’s much more appropriate for painting the sides of cylinders in this picture.
The line entirely gone
As I continue to develop the piece I am thinking in terms of smaller and smaller shapes. In a painting, no matter how small a mark is, or how long and narrow it is, or how linear it might feel: every mark is a SHAPE. It’s critical that you be aware of what shapes you are making, as these are the puzzle pieces that create both form and composition, whether working very realistically or not.
Continuing to tighten and tighten with smaller and smaller shapes
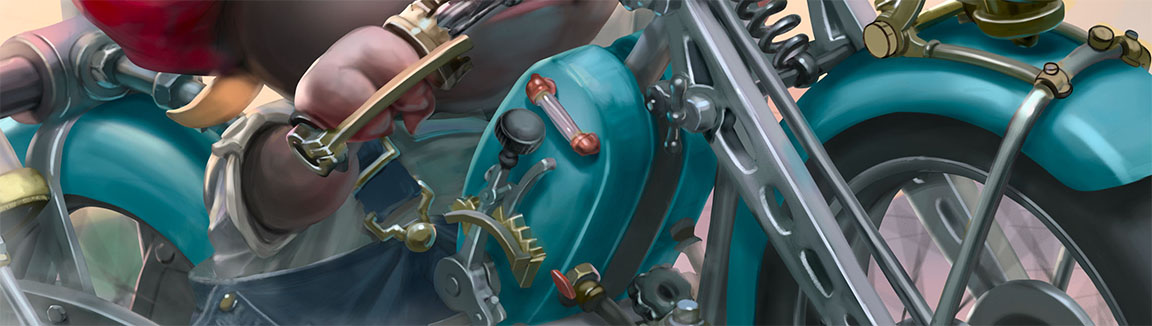
This is where I added some reflections to the painted surfaces (fenders and fuel tank).
Shiny painted surfaces WITHOUT REFLECTIONS
You might not notice them explicitly, but if you compare to the previous version you’ll see these things generally look more convincing, realistic, lighted, whatever you want to call it.
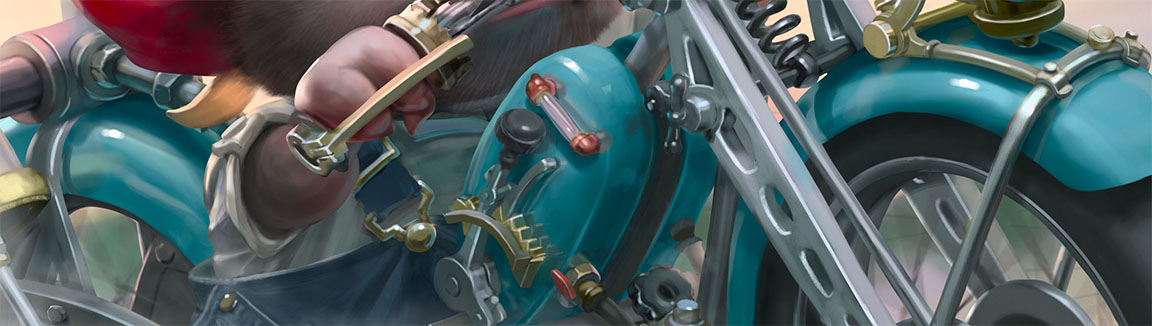
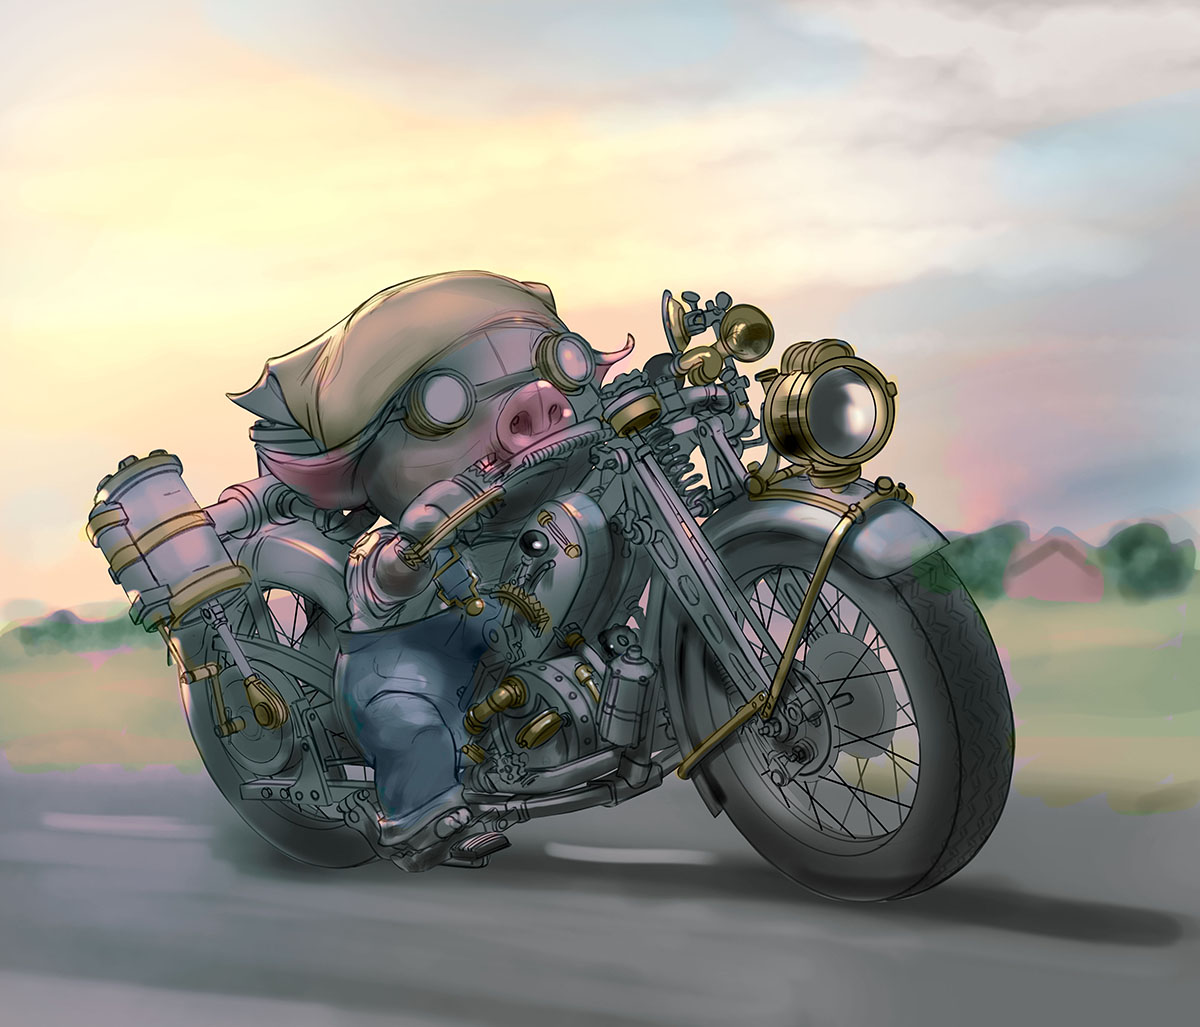
Shiny painted surfaces WITH REFLECTIONS
Note that I’m not going nuts with precise reflections of exactly what would be seen in those surfaces. That is not required. All that is required is some attempt to show things in those surfaces that are not simply “teal paint”, and which conform to the form of that surface (i.e. get narrower toward the edges. That’s it.
Get this: everything you see is a reflection. Whether it’s the sun shining on the grass, or your face in a mirror. It’s all just light reflected into your eyes. The more you can start thinking in those terms, and less in terms of what color a thing “is” the more convincing your rendering will look. You don’t need to be precise or accurate about it, you just need to understand the basic principles in your own way, then make an attempt to incorporate them into the painting.
Personally I don’t do this by looking at ref while I’m painting. I did look at several motorcycles while I was working out on the elliptical, until I understand what makes them look the way they do, in my own way, in my own mind. I analyze and remember, for my own understanding of this phenomenon, which I will recreate out of my head later when I paint. Then I can do it in any painting.
I see a lot of painters who piece together reference photos, which is fine, except when it comes to the connection between the two sources (say, a thing from photo B casting a shadow on or being reflected in a thing from photo A), things fall apart. I strongly push acquiring the ability to render strongly and convincingly from “imagination”, even if you rely heavily on photo ref for your actual work. These reflections are not quite done, but the feel of the tank is really nice for me.
Now that the picture is looking good… that ear is coming back to haunt me. It’s “fine” just not very interesting. Kind of a flat flap of a thing. I think I can say more with it. I did not have the stamina for this little detour earlier, before painting, but, fortunately, one of the greatest things about digital media is you can shake up the order of things very easily. You can start with a rough painting, then do a tight drawing over that, then go back and do a tight painting, for example (as a matter of fact, that’s exactly what I did with the background, see below). That said, this particular type of alteration can be done in physical media too (unless you work in watercolor, you masochist). I also had to rethink how the scarf went over it, maybe pulled up a little by it, leaving that dark little triangular crevasse, etc. To me working this stuff out in my head is very gratifying, like exercising a visualization and physics muscle or something. I can feel the ear pulling the scarf up a little, tightening in front and bunching up in back.

A new ear drawing: stronger gesture, form, interest
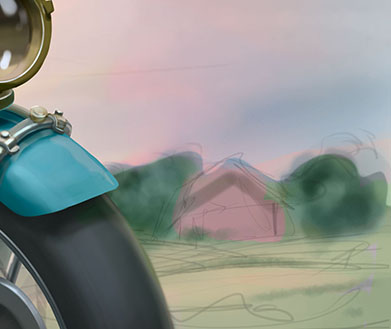
So… now for the background. This is a good example of where I first did barely a scribble, then a loose painting, then a tight drawing, then the final painting. I did it this way because I wasn’t sure if I was going to really blur the background out, or what, and I didn’t want to waste time on it before pulling the rest of the picture together. I just needed something back there while I painted the figure.
The original smoodge of a background
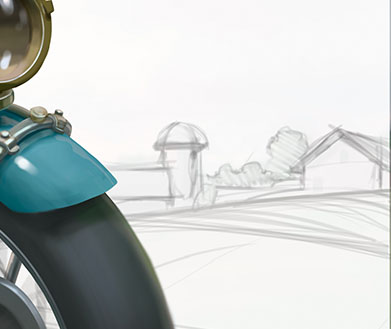
New background drawing
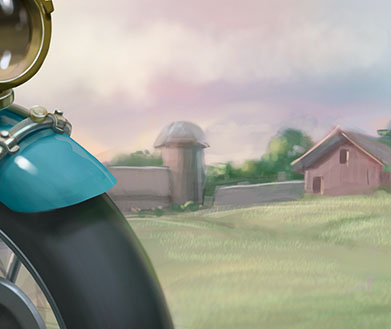
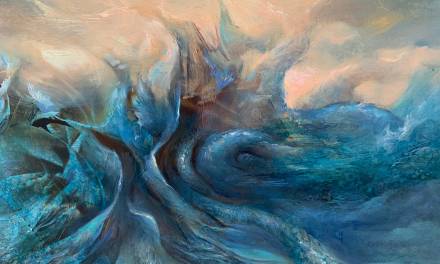
New background painting
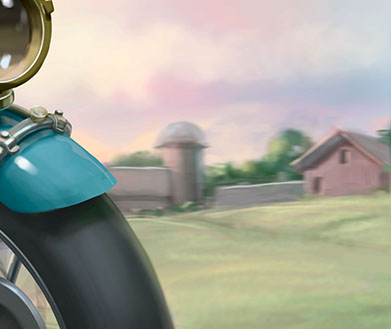
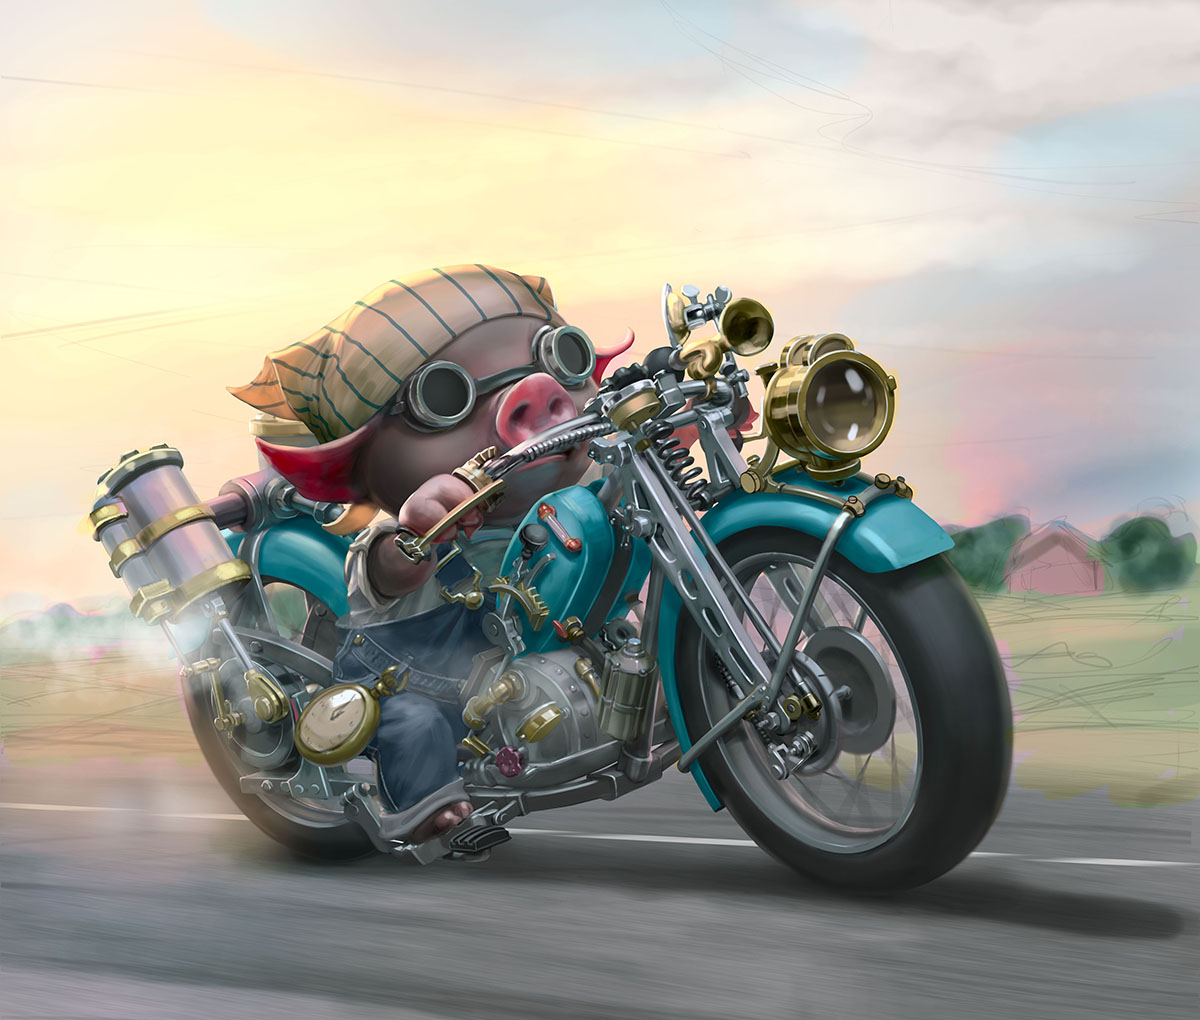
And a bit of blur (which I prefer over oasis)
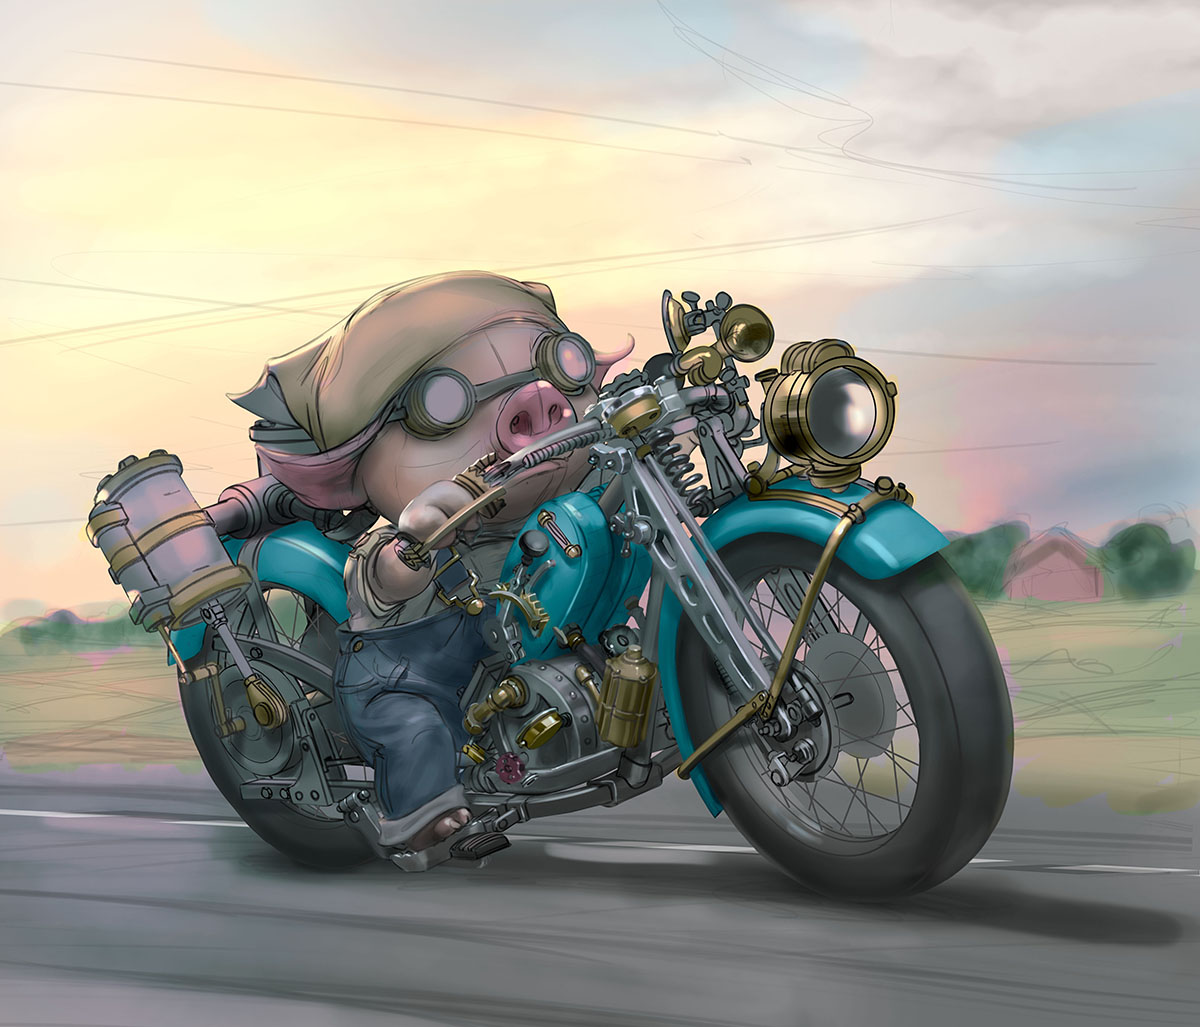
Now it’s just polish and polish, identifying areas that look unfinished. Because I jump around all the time as I paint, this becomes a bit of a scavenger hunt for me. I may find a little part that has not been painted at all, but, with an image like this, with so many details, I didn’t even notice. I have sometimes used the approach of finishing each layer then going over the whole thing which, honestly, is faster in the long run, but for me tends to produce a more disjointed image. Instead I go by whatever is grabbing my attention the most. Sort of a “what looks worst right now?” kind of approach.
And there you have it. A picture which, I hope, is greater than the sum of its parts.
Just wonderful! I’ve started to really look forward to your posts. They are consistently interesting, informative and often inspiring (in the “I’ve got to go paint now!” kind of way). Great work as always, so pleased you’ve joined the Muddy Colors team.
Hey, cool, thanks for commenting.
I enjoy reading about your reasons for becoming an artist(I’d love to hear more on that sears drawing you did when you were 13.). Your posts on your process are beaming with personality and reading what problems you were solving with each drawing was fascinating. I found myself saying “I never thought of it that way before” a few times here. I too struggle with making the final details with the line drawing and making the transition from lines to paint is a real brain bender for me. I can’t seem to get my paintings out of the petrified forest of strokes of color on canvas than a certain texture that was done with paint. I have a few artists I love who somehow keep their goergous draftsmanship and put with it looser brushstrokes but still read as finished. Thank you again for the wonderful read!
Wonderful post, Chris! Thanks so much for sharing. I’ve finally made that jump from thinking in terms of color enclosed by line, to thinking of color and shape and light and my painting work has really started to come together.
One thing that you might find useful in Photoshop with the way you work: If you hold down Cmd (Ctrl for Windows) and click on an element in the canvas, you will jump right to the layer containing whatever you clicked on. It’s so much faster than going over to the Layers palette to activate a layer. I’ve found this works best when my layers aren’t inside a group; otherwise, it just selects the group but not the layer, which doesn’t really speed anything up.